
If you’re a knitter who loves creating unique and beautiful items, you may have considered writing your own knitting pattern. Writing a knitting pattern can be a fun and rewarding experience, but it can also be challenging if you’re new to the process. In this article, we will guide you through the steps of writing a knitting pattern, from choosing a design to formatting the final document.
Step 1: Choose Your Design
The first step in writing a knitting pattern is choosing the design you want to create. This could be anything from a simple scarf to a complex sweater. Consider your skill level and the level of difficulty you want for your pattern. You should also think about the style and aesthetic you want to achieve. Do some research and gather inspiration from other patterns, fashion trends, or your own imagination.
Step 2: Make a Sample
Once you have chosen your design, it’s a good idea to make a sample of the finished item. This will allow you to test the pattern and make any necessary adjustments. Pay attention to the details as you knit the sample, such as gauge, stitch count, and measurements. Take notes and keep track of your progress to help you with the next steps of the pattern writing process.
How to Write a Knitting Pattern
Writing a knitting pattern requires careful attention to detail to ensure that the instructions are clear and easy to follow for other knitters. Here are some tips to help you write a knitting pattern that is accurate and well-written.
1. Start with a clear and concise introduction
The introduction should provide an overview of the pattern, including the type of project, the materials needed, and any special techniques or stitches used. It’s important to be clear and concise in this section, as it sets the tone for the rest of the pattern.
2. Use standard knitting abbreviations and symbols
To make your pattern more accessible to other knitters, it’s important to use standard knitting abbreviations and symbols. This helps to ensure consistency and avoids confusion. Make sure to include a key or legend that explains the meaning of each abbreviation or symbol used.
3. Break down the pattern into easy-to-follow sections
Divide your pattern into sections, such as cast on, main body, increases/decreases, and finishing. Each section should be clearly labeled and include step-by-step instructions. Use bullet points or numbers to break down each step, making it easier for knitters to follow along.
4. Include clear and concise instructions
When writing the instructions, be as clear and concise as possible. Use simple language and avoid unnecessary jargon. Explain each step in detail, including any specific techniques or stitches that may be unfamiliar to some knitters. Consider including helpful tips or notes to further clarify the instructions.
5. Include a stitch count and gauge information
Include a stitch count at the end of each row or round to help knitters keep track of their progress. Additionally, providing gauge information will help knitters ensure that their finished project will match the measurements specified in the pattern. Make sure to include instructions on how to measure gauge accurately.
- Conclusion
By following these tips, you can write a knitting pattern that is clear, concise, and easy to follow. Whether you are creating a pattern for personal use or to share with others, taking the time to write a well-written pattern will greatly enhance the knitting experience for both you and other knitters.
Understand the Basics of Knitting
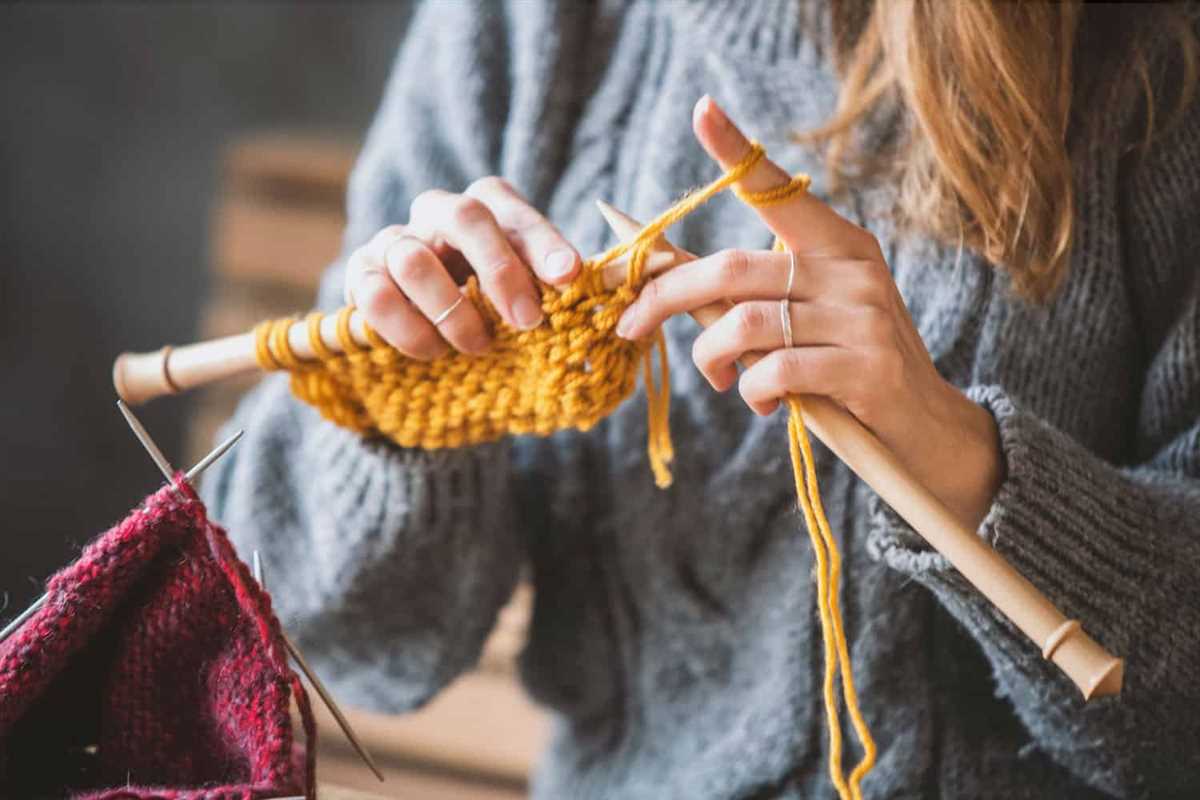
Before you can start writing a knitting pattern, it’s important to have a good understanding of the basics of knitting. Knitting is a popular craft that involves creating fabric by interlocking loops of yarn with two or more needles. This ancient technique can be used to make everything from clothing and accessories to home décor items.
Here are some key concepts to understand:
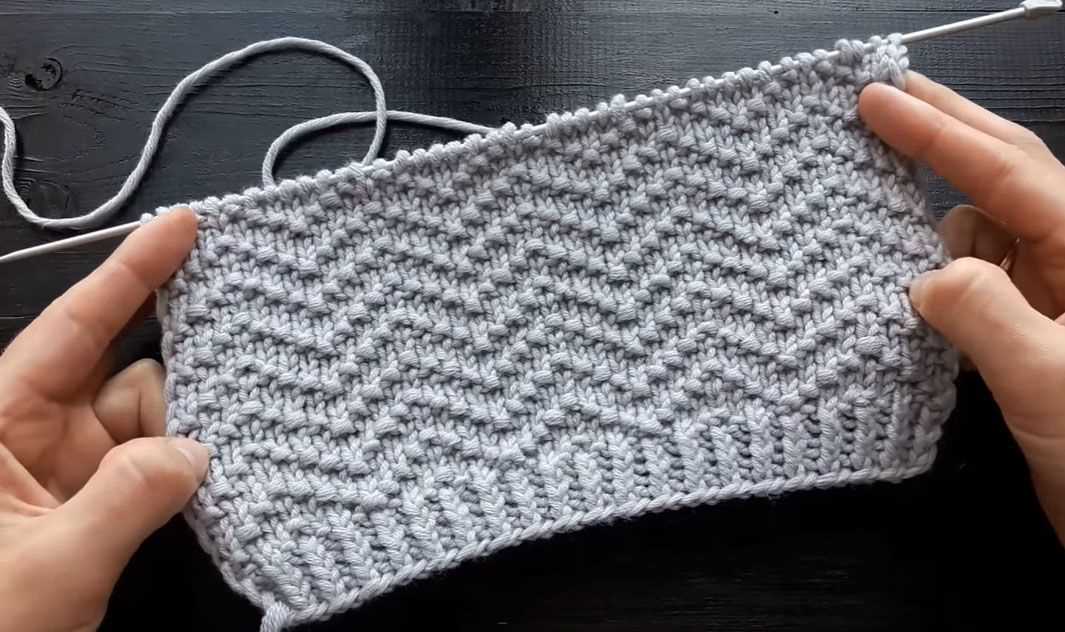
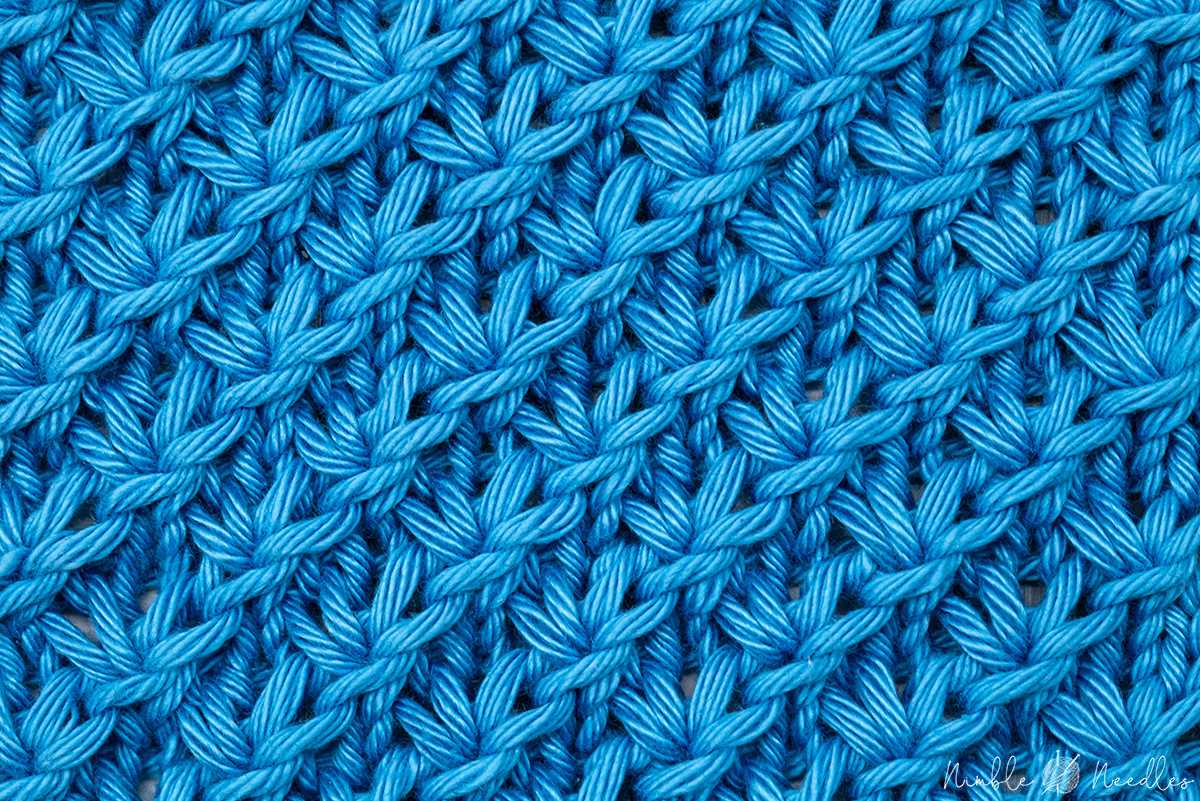
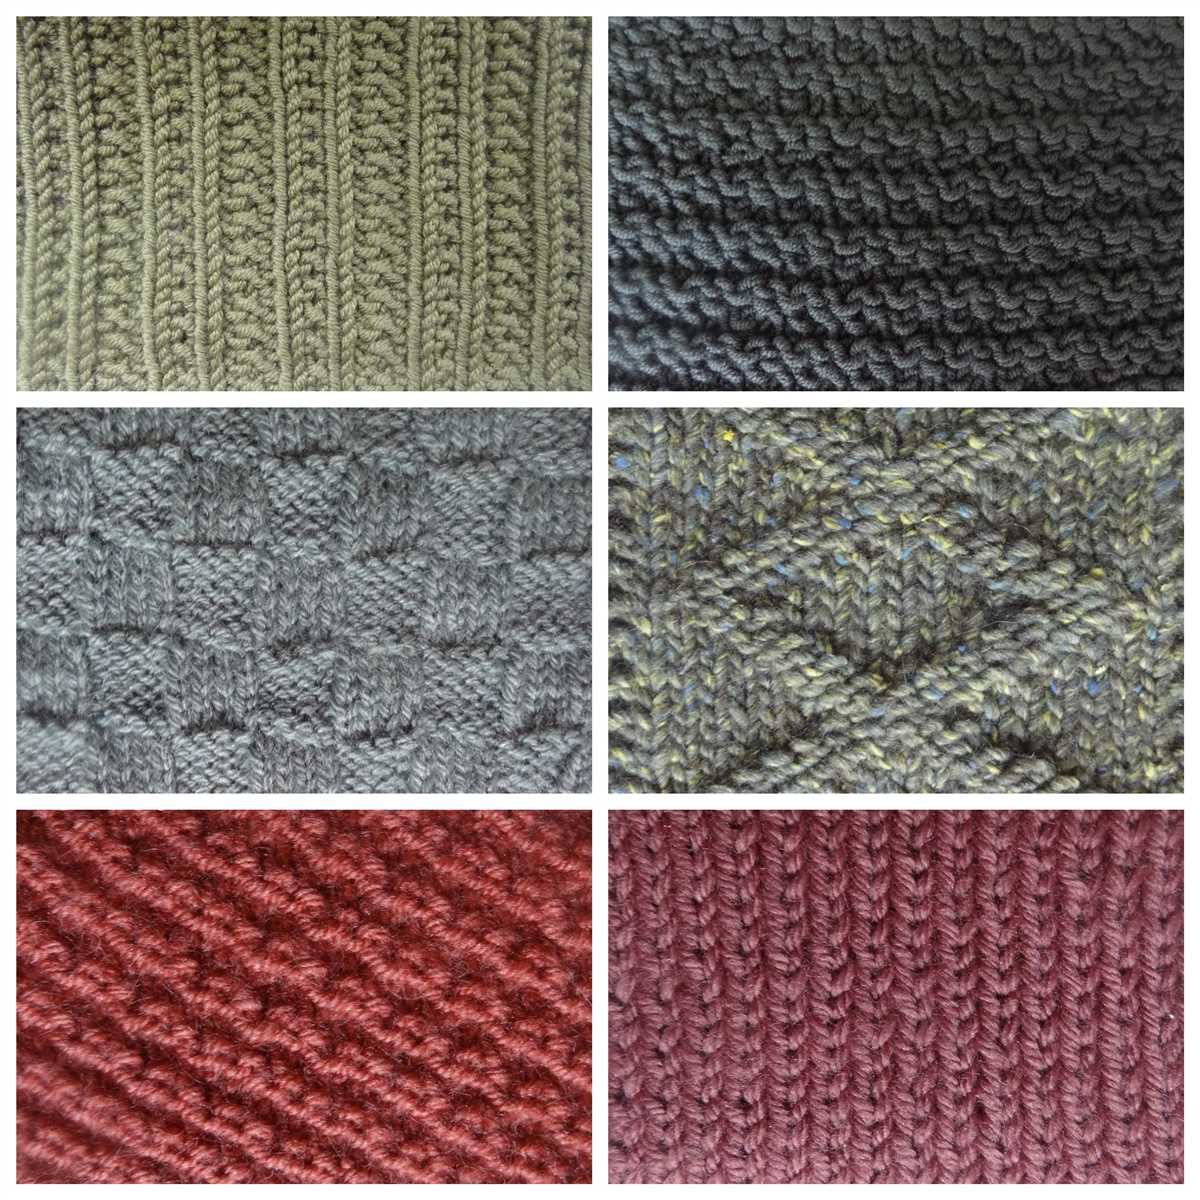
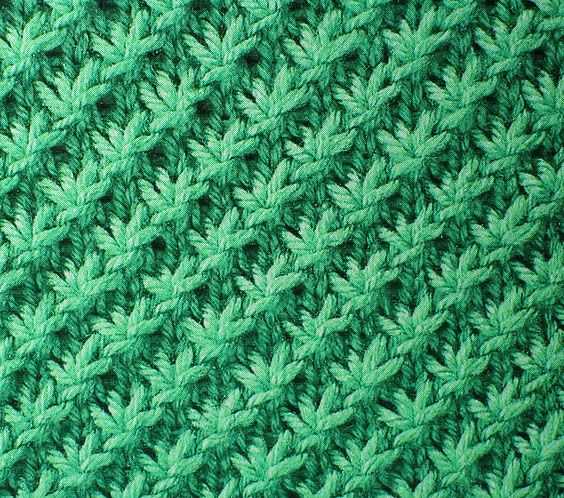
- Stitches: Knitting is made up of different types of stitches, including knit stitches and purl stitches. Understanding how to create and combine these stitches is essential for creating different patterns and textures in your knitting projects.
- Yarn: Yarn is the material you’ll be working with in knitting. It’s important to choose the right yarn for your project based on factors like fiber content, weight, and color. Different yarns will produce different results, so experimenting and swatching is key.
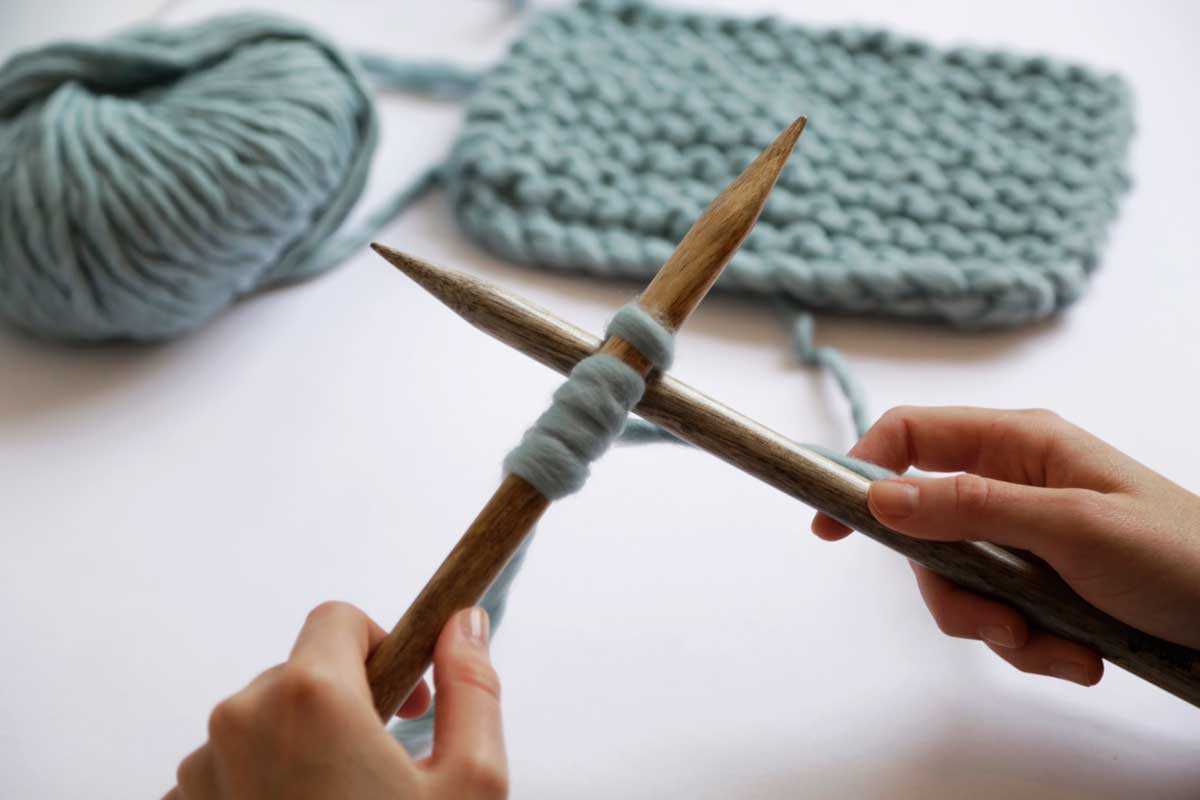
- Needles: Knitting needles come in various sizes and materials, such as bamboo, metal, or plastic. The size of the needles you choose will affect the tension and gauge of your knitting, so it’s important to use the recommended needle size for your pattern.
Once you have a solid understanding of these knitting basics, you’ll be ready to start writing your own knitting patterns. It’s important to remember that knitting patterns are essentially sets of instructions that guide others in recreating your design. Clear and concise instructions, along with accurate measurements and gauge information, are crucial for ensuring that others can successfully complete your pattern.
Choose a Design and Style
When writing a knitting pattern, one of the first steps is to choose a design and style for your project. This will set the foundation for the rest of the pattern and help guide you as you write the instructions.
First, think about the type of project you want to create. Do you want to knit a sweater, a scarf, or maybe a pair of mittens? Consider the season and the intended recipient of the finished item. This will help you narrow down your options and select a design that is suitable.
Once you have decided on the type of project, it’s time to choose a style. Are you looking to create a classic pattern with simple stitches and clean lines? Or maybe you want to experiment with colorwork or lace for a more intricate design? Consider your knitting skills and the level of challenge you are comfortable with, as this will influence the style you choose.
Take some time to browse knitting pattern books, magazines, or online resources for inspiration. Pay attention to the details in the patterns that catch your eye and think about how you can incorporate similar elements into your own design. Keep in mind that it’s important to stay true to your personal style and preferences, as this will make the process more enjoyable and the finished item even more special.
Consider Yarn and Needles
When writing a knitting pattern, it is important to consider the type of yarn and needles that will be used. The choice of yarn will greatly impact the final look and feel of the finished project, so it is important to choose a yarn that is appropriate for the desired outcome. Additionally, the size and type of needles used will also affect the overall appearance and size of the final product.
Yarn: The type of yarn chosen for a knitting pattern will depend on the desired texture, drape, and warmth of the finished project. There are many different types of yarn available, including wool, cotton, acrylic, and blends of various fibers. Each type of yarn has its own unique characteristics, so it is important to consider the intended use of the finished item and choose a yarn that will best suit those needs. For example, a cozy sweater may require a warm, woolen yarn, while a summer shawl may require a lightweight, breathable cotton yarn.
Needles: The size and type of needles used in a knitting pattern will affect the size and gauge of the stitches. Different projects may require different needle sizes, depending on the desired tension and drape of the fabric. The size of the needles will also impact the overall size of the finished project. For example, larger needles will create looser, larger stitches, while smaller needles will create tighter, smaller stitches. Additionally, the type of needles used, such as straight, circular, or double-pointed, will depend on the construction and shape of the project.
When writing a knitting pattern, it is important to specify the recommended yarn and needle sizes to ensure that the knitter can achieve the desired result. Providing this information will help the knitter make informed decisions and successfully recreate the pattern. It is also important to include any special considerations or techniques that may be necessary when working with specific yarn or needle types. By carefully considering yarn and needle choices, a knitting pattern can be written to provide clear and accurate instructions for creating beautiful, well-fitting knitted garments and accessories.
Gauge and Swatching
When writing a knitting pattern, one of the most important aspects to consider is the gauge. Gauge refers to the number of stitches and rows per inch or centimeter, and it ensures that the finished project will turn out as intended. To determine the gauge for a particular pattern, it’s necessary to create a swatch.
Swatching is the process of knitting a small sample of the pattern using the recommended yarn and needle size. This allows the knitter to measure their stitches and rows and determine if they match the pattern’s gauge. It’s important to accurately measure the swatch, as even a slight difference in gauge can significantly affect the final size and fit of the project.
Here are some tips for achieving accurate gauge:
- Use the recommended yarn and needle size specified in the pattern.
- Knit a swatch that is at least 4 inches wide and tall.
- Block the swatch according to the yarn’s care instructions.
- Measure the gauge in the center of the swatch, away from the edges.
- Count the number of stitches and rows in a 4-inch square and compare it to the pattern’s gauge.
By taking the time to properly swatch and measure gauge, you can ensure that your knitting pattern will result in a well-fitting and correctly-sized finished project. It’s often tempting to skip this step, but investing the time at the beginning will save you from potential frustration and disappointment in the end.
Start with Clear Cast-On Instructions
When writing a knitting pattern, it is crucial to begin with clear and concise cast-on instructions. The cast-on is the first step in the knitting process, and providing detailed instructions will help the knitter to start their project correctly and avoid any confusion or mistakes.
Use clear and precise language to describe the cast-on method. Specify the type of cast-on that should be used, whether it is a long-tail cast-on, a provisional cast-on, or any other specific technique. Provide step-by-step instructions, breaking down each action the knitter should take.
It is also important to include the number of stitches that should be cast on, as well as any special instructions or considerations for the cast-on row. For example, if the first row of the pattern starts with a specific stitch pattern or requires any increases or decreases, make sure to mention it in the cast-on instructions.
Additionally, consider including alternative cast-on methods or suggestions for knitters who may prefer different techniques. This can help accommodate different preferences and skill levels. Providing clear and detailed cast-on instructions sets the foundation for a successful knitting project and ensures that the knitter starts off on the right foot.
Provide Step-by-Step Instructions for Each Stitch
When writing a knitting pattern, it is essential to provide step-by-step instructions for each stitch involved in the pattern. This will ensure that knitters, especially beginners, can follow along easily and create the desired finished product.
Start by introducing the stitch you will be explaining, such as the knit stitch. Clearly state the name of the stitch and its abbreviation if applicable. It’s important to use clear and concise language to avoid confusion.
Step 1: Cast On
To begin, cast on the required number of stitches onto your knitting needles. Ensure that you have a firm and even cast on. This will provide a solid foundation for your knitting project.
Step 2: Knit Stitch
Hold the knitting needle with the cast-on stitches in your right hand and the empty needle in your left hand. Insert the left needle through the first stitch on the right needle from left to right. Wrap the working yarn around the right needle counterclockwise, and pull it through the stitch from back to front, creating a new stitch on the right needle. Slide the original stitch off the left needle, and repeat this process for each stitch until you reach the end of the row.
Step 3: Purl Stitch

If your pattern includes a purl stitch, provide clear instructions on how to execute this stitch. Explain how to hold the needles and yarn, and instruct knitters on the specific movements required to create the purl stitch. Include any variations or additional steps if necessary.
Continue this pattern, providing detailed step-by-step instructions for each stitch involved in the knitting pattern. Use clear language, provide visual aids if possible, and break down each step into manageable chunks for easier understanding.
Include Knitting Charts
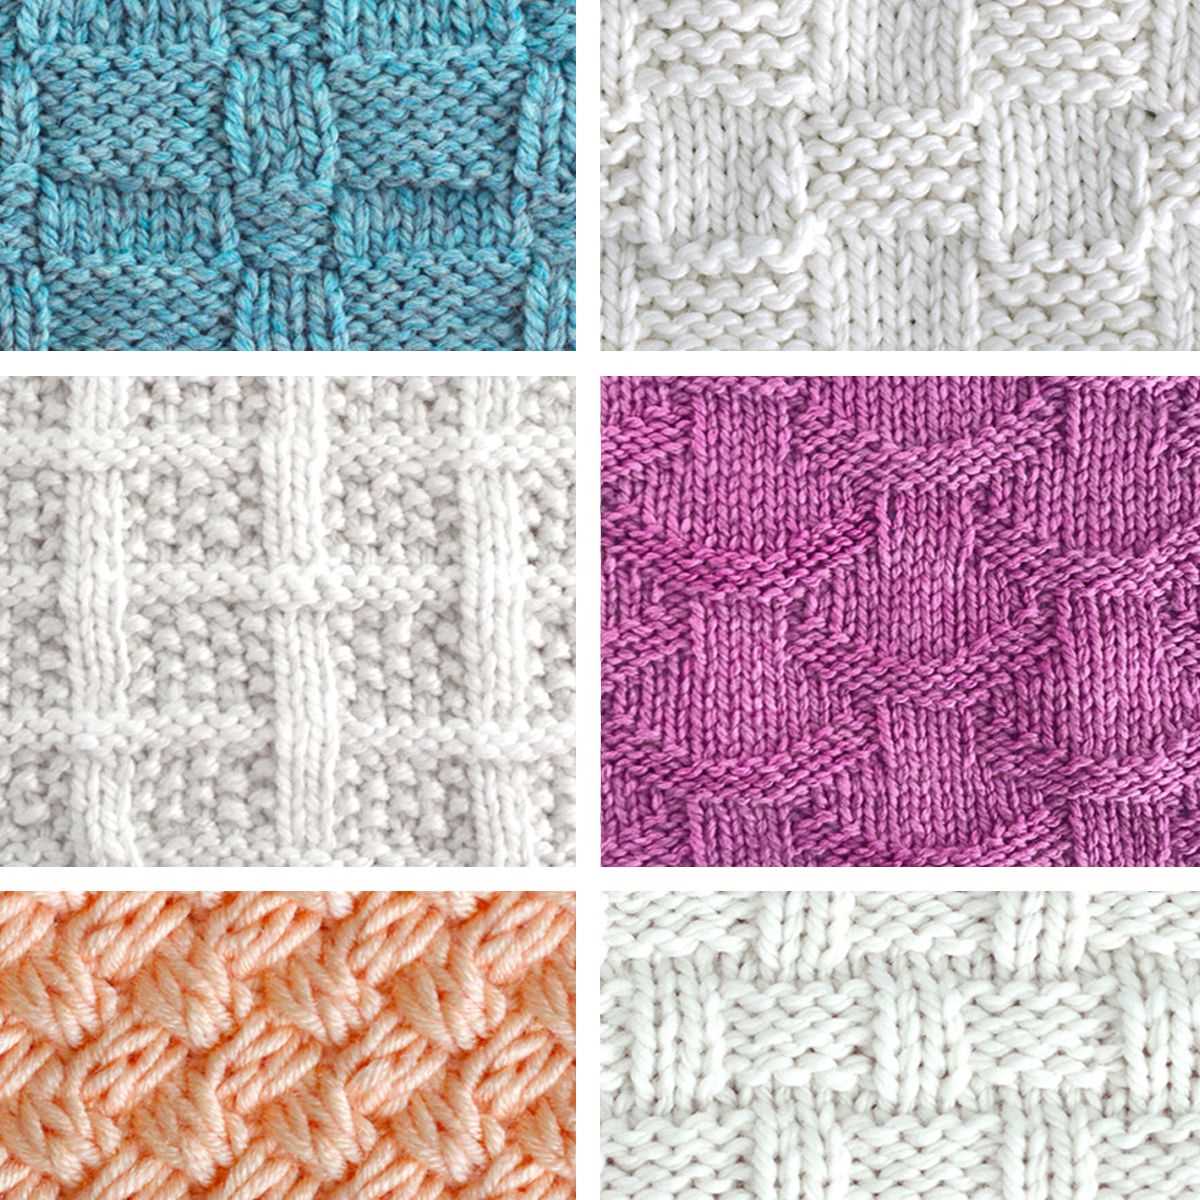
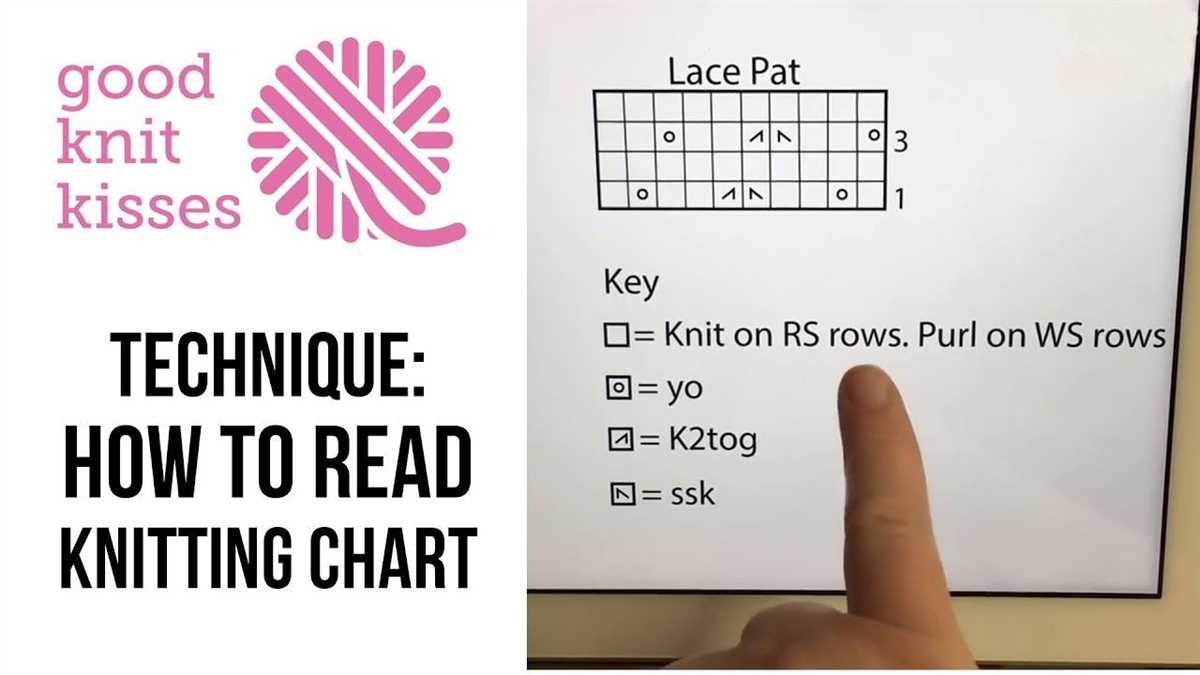
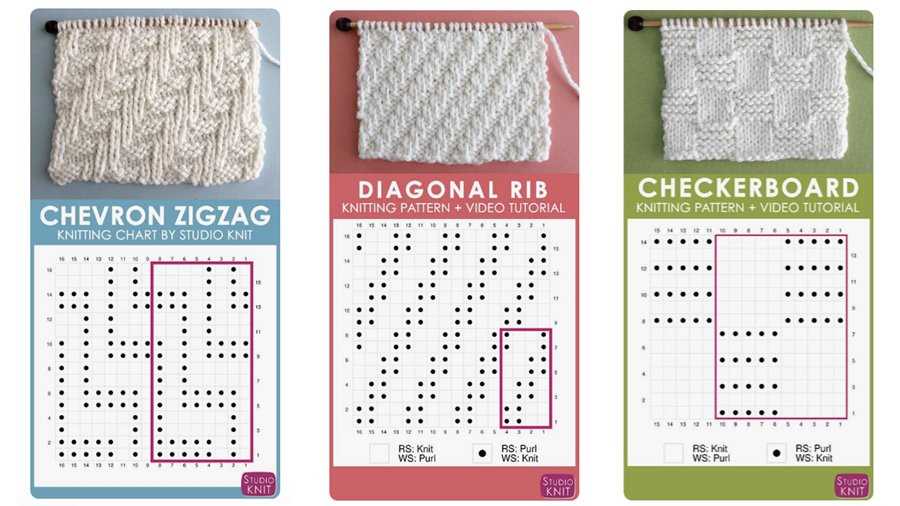
In addition to written instructions, it is important to include knitting charts in your knitting pattern. Knitting charts provide a visual representation of the pattern and can be extremely helpful for knitters to follow along. They are especially useful for complex stitch patterns, colorwork, or lacework.
When creating knitting charts, make sure they are clear and easy to read. Use symbols or colors to represent different stitches or actions, such as knit, purl, yarn over, or decrease. Include a key that explains what each symbol or color represents to avoid any confusion.
Knitting charts can be created using various software or online tools. There are also pre-designed knitting chart templates available that you can customize to fit your specific pattern. Make sure to align the knitting chart with the written instructions so that knitters can easily switch between the two if needed.
It is important to note that not all knitters prefer knitting charts, so it is essential to include both written instructions and charts in your pattern to cater to different preferences. By including knitting charts, you are providing an additional resource for knitters to confidently follow your pattern and achieve the desired results.
Explain Special Techniques and Stitches
When writing a knitting pattern, it is important to clearly explain any special techniques or stitches that are required. This will help ensure that the knitter understands what is expected and can successfully complete the project.
One technique that may need to be explained is the provisional cast-on. This technique is used to create a temporary cast-on edge that can later be undone to reveal live stitches. It is often used in lace or garment construction where stitches need to be joined or stitches need to be picked up along a cast-on edge.
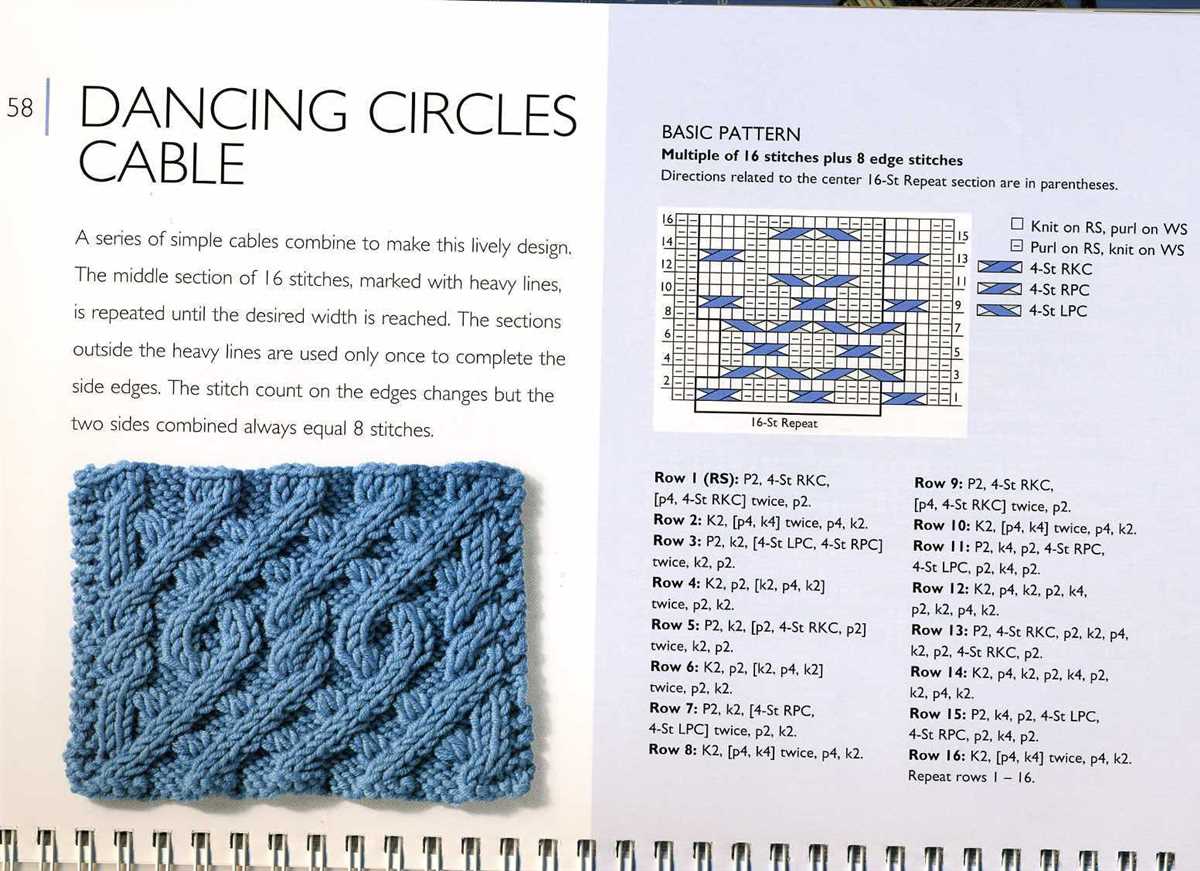
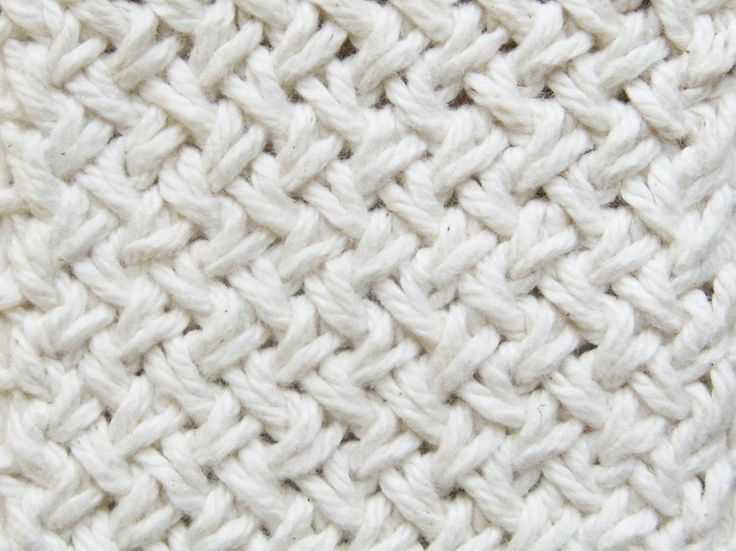
Another special stitch that may be used in a knitting pattern is the cable stitch. This stitch involves crossing stitches over each other to create a twisted or braided effect in the fabric. It adds texture and interest to the finished project. When explaining how to work a cable stitch, it is important to provide written instructions as well as a chart or diagram to help visualize the process.
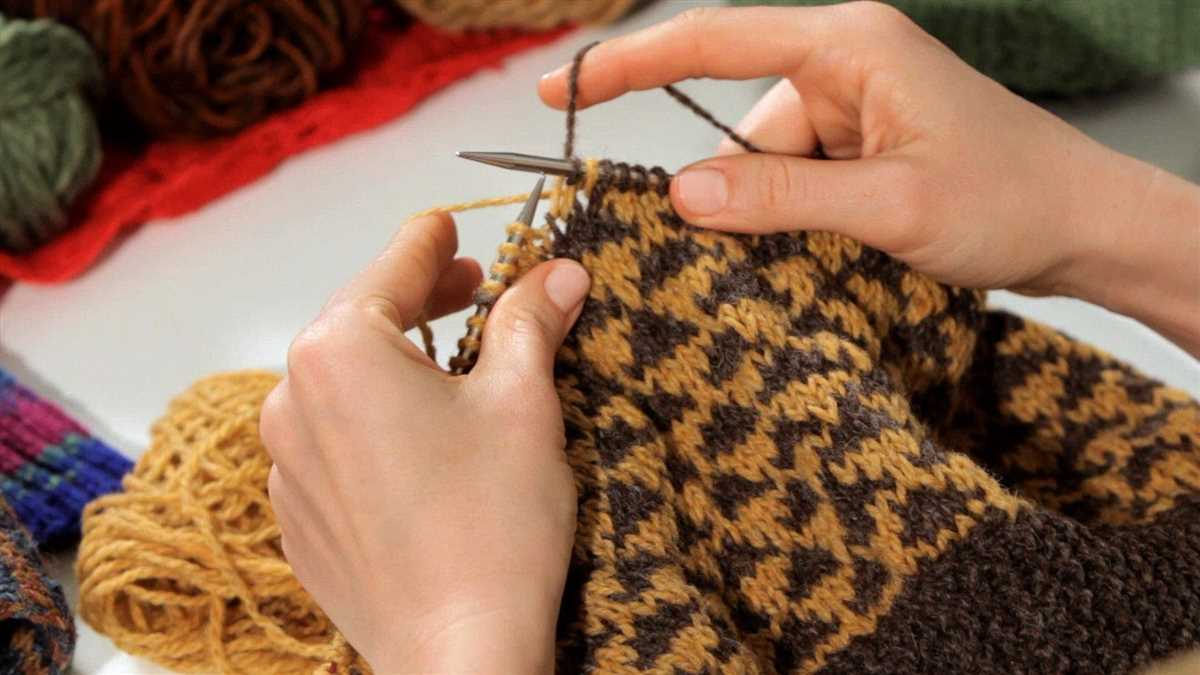
Other special techniques that may need to be explained include intarsia, fair isle, and lace knitting. Intarsia involves using different colors of yarn to create geometric patterns or pictures in the fabric. Fair isle, also known as stranded knitting, involves using multiple colors of yarn in a single row to create intricate colorwork patterns. Lace knitting involves creating patterns with holes and yarn overs to create a delicate and airy fabric.
When explaining these special techniques and stitches, it is helpful to include step-by-step instructions, as well as any abbreviations or symbols that are used in the pattern. Additionally, providing clear and concise explanations with accompanying visuals can help ensure that the knitter understands and can successfully execute these techniques.
Offer Sizing Options and Measurements
When writing a knitting pattern, it is important to provide sizing options for your readers. People come in all shapes and sizes, and it is essential to accommodate their needs. Consider offering multiple sizes such as small, medium, and large, or providing measurements for different parts of the garment. This will ensure that your pattern can be easily customized to fit the individual preferences of your readers.
Include detailed measurements in your pattern to assist knitters in selecting the correct size. Measurements such as bust, waist, and hip circumferences are essential for garments like sweaters or cardigans. Take various body parts into account, like arm length for sleeves or leg length for socks. Providing comprehensive measurements will help knitters achieve a well-fitting finished product.
It is important to note that the sizing options you offer should be consistent with industry standards. Refer to a size chart when determining the measurements for each size. This will ensure that your pattern can be used alongside other commercially available patterns or knitting resources. By sticking to standardized sizing, you can make it easier for knitters to combine your pattern with other components.
Lastly, make sure to clearly indicate the measurements in your pattern and explain how to take them accurately. Include diagrams or illustrations to demonstrate where and how to measure different body parts. This visual aid can greatly assist knitters in obtaining accurate measurements and ultimately create a garment that fits them well.
Add Finishing Touches and Edging Options

Once you have completed the main body of your knitting pattern, it’s time to add the finishing touches and consider the edging options. These final details can really make a difference in the overall look and feel of your project. Here are some tips to help you add those special details:
Blocking and Shaping:
Before adding any finishing touches, it’s important to block and shape your knitted piece. This process helps to even out stitches, relax the fibers, and give your project a more professional finish. You can either wet block or steam block, depending on the fiber content of your yarn. After blocking, gently reshape your piece to the desired dimensions.
Edging Options:
There are various edging options you can choose from to give your knitting pattern that final touch. Some popular choices include:
- Ribbing: Add a ribbed edging to create a stretchy and structured finish. Ribbing is commonly used for necklines, cuffs, and hems.
- Lace: Incorporate lace edging for a delicate and feminine look. Lace patterns can be used for shawls, scarves, and even as decorative accents on garments.
- I-Cord: Attach an I-cord edging for a clean and polished finish. This technique involves knitting a small tube of stitches and attaching it to the edge of your project.
- Garter Stitch: Use garter stitch edging for a simple and classic finish. Garter stitch creates a textured and reversible edge that lays flat.
Consider the style and purpose of your knitting pattern when choosing the right edging option. You can also get creative and combine different edging techniques to achieve a unique and personalized look. The key is to experiment and have fun with the finishing touches, as they can truly elevate your knitting project to the next level.
Include Care Instructions
When writing a knitting pattern, it is important to include care instructions for the finished product. This will ensure that the item stays in good condition and lasts for a long time. Care instructions should be clear and easy to understand, and they should cover all aspects of caring for the knitted item.
1. Washing: Specify whether the item should be hand-washed or machine-washed, and at what temperature. If delicate or special care is required, be sure to mention it. For example, if the item should be washed in cold water or if it should be placed in a laundry bag before washing.
2. Drying: Provide instructions on how the item should be dried. Should it be laid flat to dry or can it be hung? If machine-drying is not recommended, make sure to specify that as well.
3. Ironing: If the knitted item can be ironed, indicate the appropriate ironing temperature and any precautions that should be taken. If ironing is not recommended, state that clearly.
4. Storage: Include tips on how to store the knitted item when it is not being used. For example, it may be recommended to store it in a cool, dry place and to use moth repellents to prevent damage.
5. Additional care instructions: Depending on the type of yarn used or the specific characteristics of the knitted item, there may be additional care instructions to consider. For example, if the yarn is prone to pilling, it may be helpful to include guidance on how to remove pills.
By including clear and comprehensive care instructions in your knitting pattern, you will help your knitters take proper care of their finished items and ensure that they can enjoy them for a long time.
Test Knit the Pattern for Accuracy
Before finalizing your knitting pattern, it is crucial to test knit it to ensure its accuracy and clarity. Test knitting involves following the pattern step by step to identify any mistakes or issues that may arise during the knitting process. By test knitting your pattern, you can catch any errors, ambiguities, or inconsistencies and make necessary adjustments for a smoother knitting experience for others.
To begin test knitting, gather a group of experienced knitters who can offer valuable feedback on your pattern. Provide them with the necessary materials, including the recommended yarn, needles, and any other supplies specific to the pattern, if needed. Give them clear instructions on how to provide feedback, such as documenting any difficulties encountered, highlighting any confusing sections, and suggesting improvements or corrections.
As the test knitting process unfolds, encourage your testers to communicate their experiences and observations freely. Their feedback will help you identify any potential issues, such as unclear instructions, confusing stitch counts, or missing details. Pay close attention to their comments and consider making revisions based on their recommendations.
Make sure to test knit the pattern multiple times with different knitters to ensure that the final version is accurate and user-friendly.
Once your test knitting is complete, carefully review the feedback and make necessary revisions to improve the pattern’s clarity and accuracy. Update any unclear instructions, correct any mistakes or inconsistencies, and provide additional clarification where needed. Use the feedback as an opportunity to refine your pattern and make it as user-friendly as possible.
Remember to thank your test knitters for their time and effort, as their input is invaluable in creating a high-quality knitting pattern.
By test knitting your pattern and incorporating feedback, you can ensure that your knitting pattern is accurate, clear, and enjoyable for other knitters to follow. Taking the time to test knit your pattern demonstrates your commitment to providing a reliable and rewarding knitting experience for others.
Q&A:
What is a knitting pattern?
A knitting pattern is a set of instructions on how to create a knitted item. It outlines the type of yarn, needle size, and specific stitches and techniques to use to create the desired item.
How do I start writing a knitting pattern?
To start writing a knitting pattern, you need to first decide what item you want to create. Then, you should choose the appropriate yarn and needle size and complete a gauge swatch to determine the number of stitches and rows needed for a certain measurement.
What information should I include in a knitting pattern?
A knitting pattern should include the materials needed, gauge information, stitch pattern instructions, shaping instructions, and any additional notes or special techniques required to complete the project.
How do I chart a knitting pattern?
To chart a knitting pattern, you can use specialized knitting software or create your own chart using graph paper. Each square on the chart represents one stitch or row, and you fill in the squares to create the desired pattern.
How can I make my knitting pattern easy to follow?
To make your knitting pattern easy to follow, use clear and concise language, include step-by-step instructions with photos or diagrams if necessary, and provide helpful tips and explanations for any specific techniques or stitches used.