
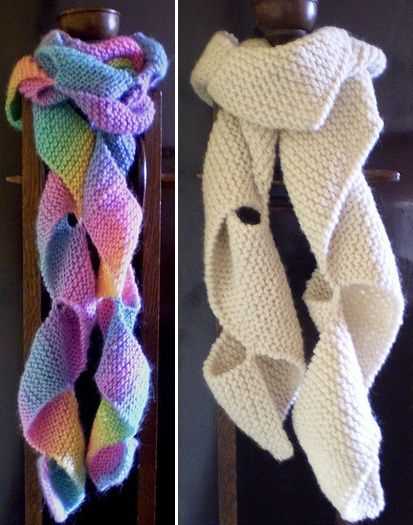
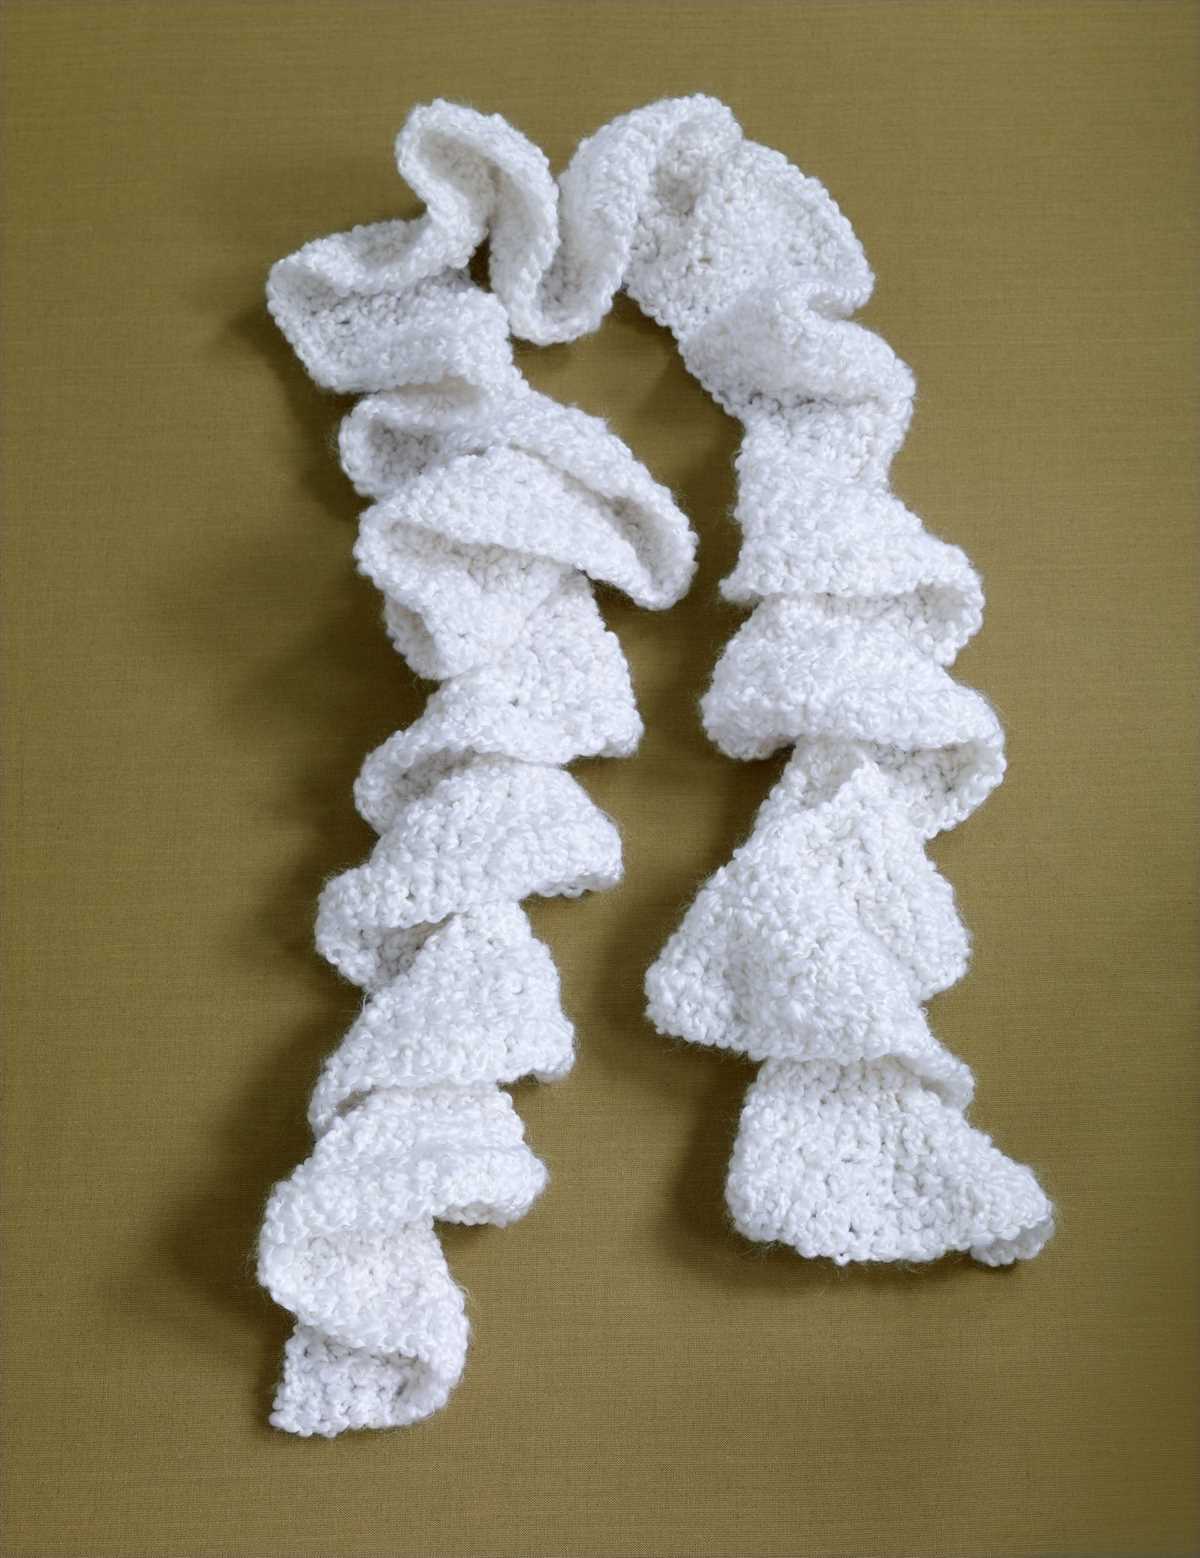
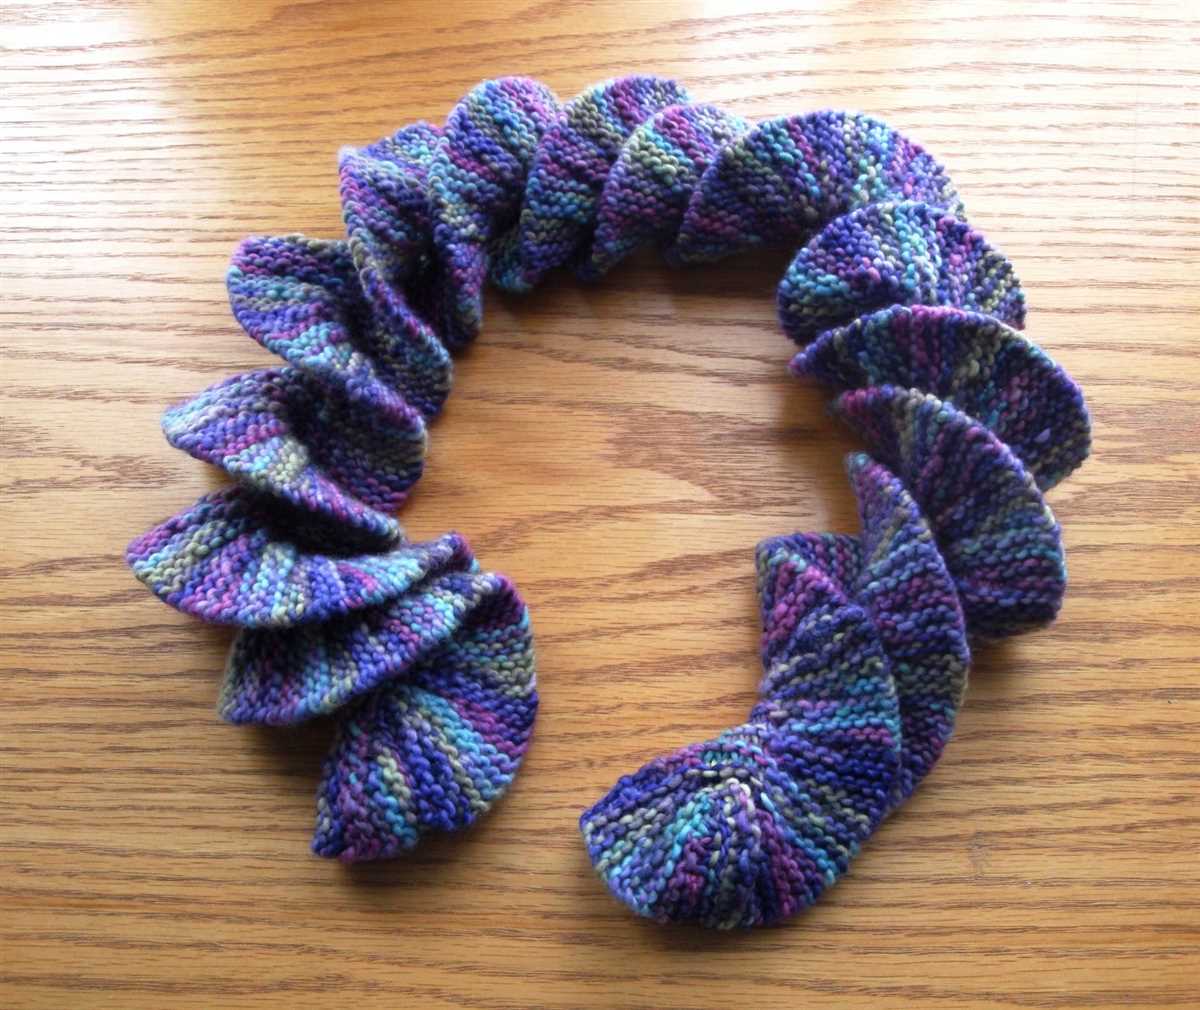
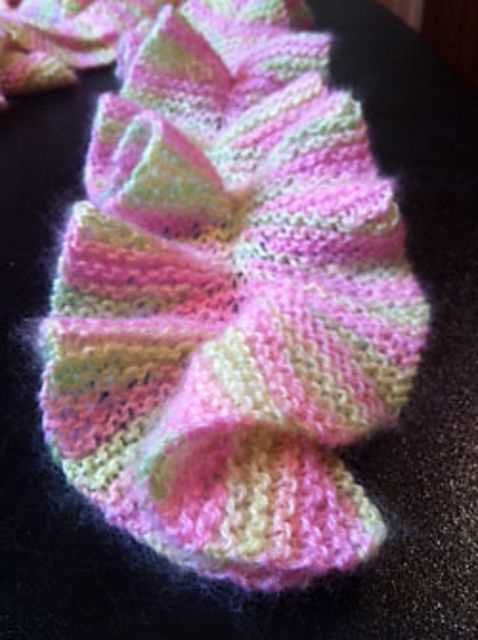
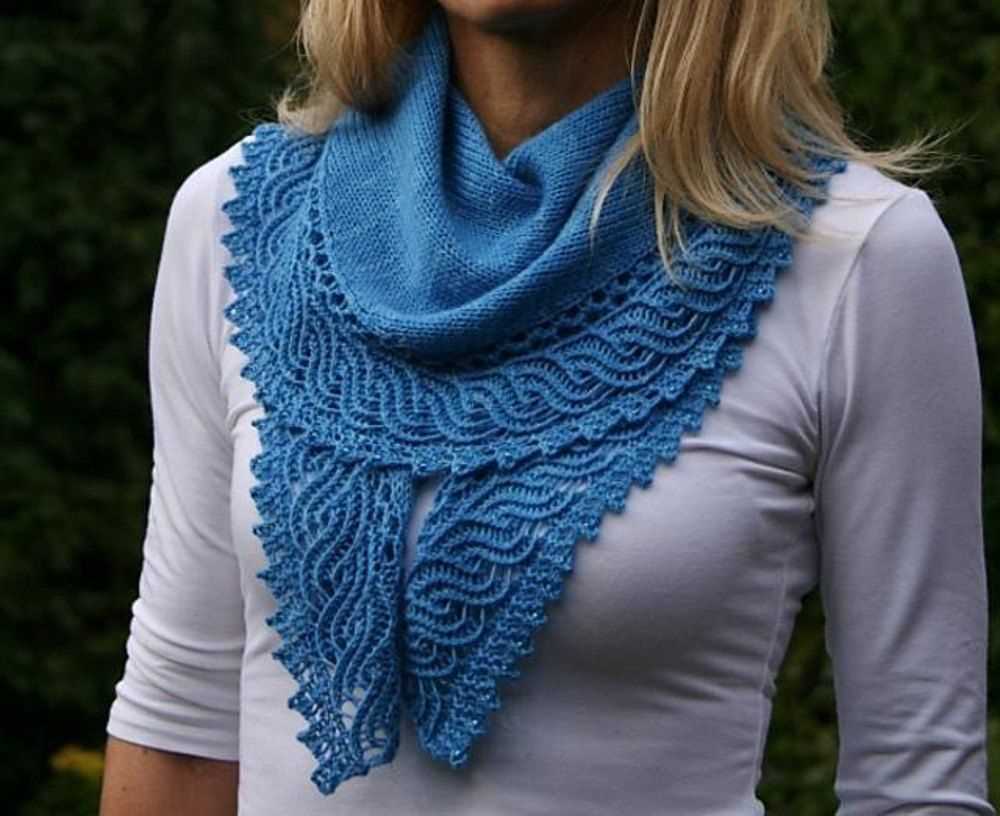
Are you looking for a new and unique knitting project? Look no further than the spiral scarf! This free knitting pattern is not only fun to make, but it also creates a beautifully textured and colorful accessory that you can wear all year round.
The spiral scarf pattern is perfect for knitters of all skill levels, from beginners to advanced. The basic stitch used is simple and repetitive, making it easy to memorize and follow along. Plus, the pattern is customizable, so you can choose your own colors and yarn weights to create a scarf that is truly one-of-a-kind.
One of the best things about this spiral scarf is that it can be made in any length or width, depending on your preference. Whether you want a long and cozy scarf to wrap around your neck multiple times or a shorter and more lightweight version for a touch of style, this pattern has you covered.
If you’re ready to start your next knitting adventure, grab your needles and check out our free spiral scarf knitting pattern below. Happy knitting!
Spiral Scarf Knitting Pattern Free: Create a Unique Accessory
If you are looking to add a touch of style and uniqueness to your wardrobe, consider knitting your own spiral scarf using a free knitting pattern. Not only will you be able to create a personalized accessory, but you will also have the satisfaction of making something by hand.
With a spiral scarf knitting pattern, you can create a one-of-a-kind accessory that is sure to turn heads. The spiral design adds an interesting twist to a traditional scarf, making it a playful and eye-catching piece. Plus, with a wide range of yarn colors available, you can customize your scarf to match your personal style and taste.
Step 1: Gather your materials
Before you can start knitting your spiral scarf, you will need to gather a few materials. You will need a pair of knitting needles, usually in the size recommended by the pattern, and a skein of yarn in your chosen color. Additionally, you may want to have a tape measure and a yarn needle handy for finishing touches.
Step 2: Choose a pattern
There are numerous free knitting patterns available online for spiral scarves. Take some time to browse through different patterns and choose one that you like the best. Pay attention to the level of difficulty and the recommended yarn weight, as well as any specific instructions or techniques that may be involved.
Step 3: Start knitting
Once you have chosen a pattern, it’s time to start knitting! Follow the instructions carefully, casting on the required number of stitches and working the specified stitches and rows. As you work, you will start to see the spiral pattern emerge, adding an interesting texture to your scarf.
Step 4: Finish and block
Once you have completed the required number of rows, it’s time to finish off your scarf. Depending on the pattern, this may involve binding off the stitches or creating a decorative edge. Once you have finished knitting, you may want to block your scarf to give it a more polished look. This can be done by gently wetting the scarf, shaping it into the desired shape, and letting it dry flat.
With a little bit of time and effort, you can create a unique and stylish spiral scarf using a free knitting pattern. Whether you choose to keep it for yourself or give it as a gift, this handmade accessory is sure to be cherished for years to come.
Choose the Right Yarn and Needles for Your Spiral Scarf
When it comes to knitting a spiral scarf, choosing the right yarn and needles is crucial to achieve the desired outcome. The type and weight of the yarn will determine the overall look and feel of the scarf, while the size of the needles will determine the stitch gauge and the drape of the fabric.
Yarn: To create a spiral scarf with a tight, springy texture, opt for a yarn with a high wool or acrylic content. These fibers have excellent bounce and elasticity, which will help the scarf maintain its shape. You can also choose a yarn with a blend of natural fibers like wool and silk for a luxurious feel.
Needles: The choice of needles will depend on the thickness of the yarn and the desired drape of the fabric. If you are using a bulky or chunky yarn, go for larger needles to create an open and airy fabric. On the other hand, if you are using a finer yarn, opt for smaller needles to create a denser and more compact fabric.
When selecting the needles, pay attention to the material as well. Different materials, such as metal, wood, or plastic, have different qualities that can affect your knitting experience. Metal needles are slick and great for speed, while wooden needles have a warmer feel and provide more grip. Plastic needles are lightweight and suitable for beginners.
It’s always a good idea to swatch and test different combinations of yarn and needles before starting your spiral scarf. This will help you determine the ideal stitch gauge and ensure that you are satisfied with the fabric’s drape and texture. Happy knitting!
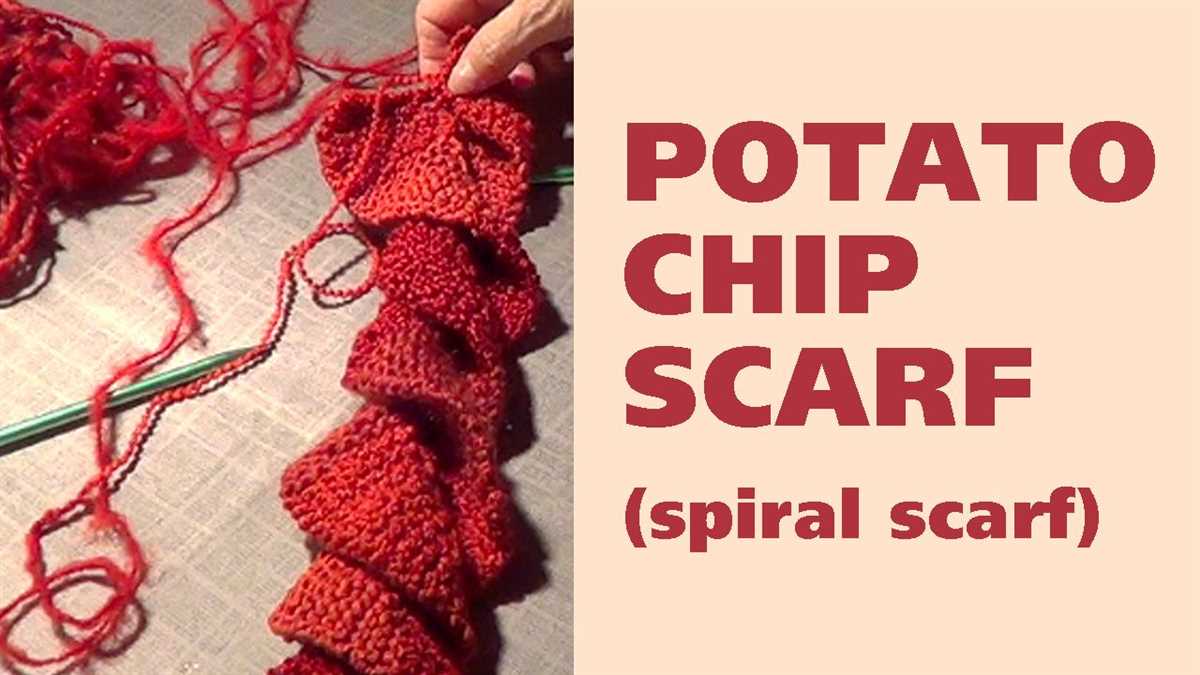
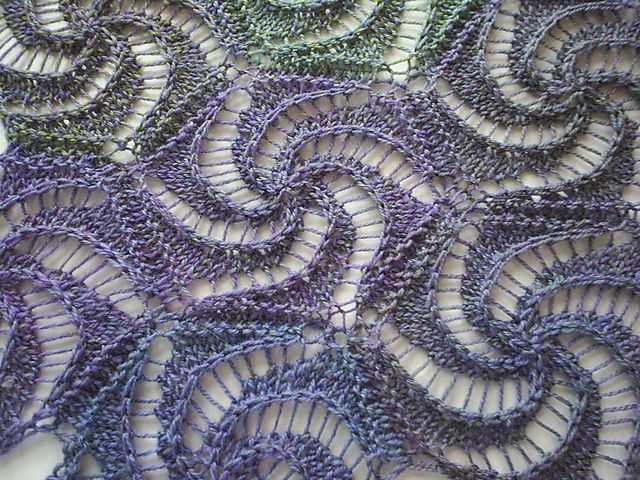
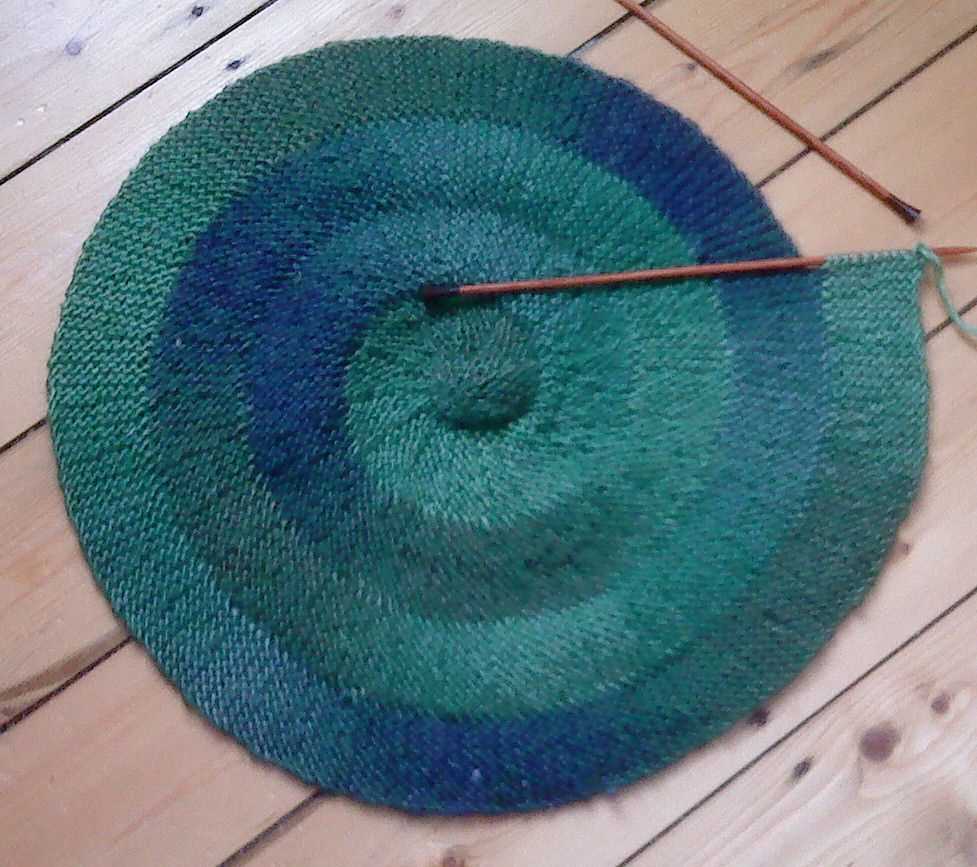
Understanding the Spiral Knitting Technique
In the world of knitting, there are various techniques and patterns that allow for the creation of unique and beautiful garments and accessories. One such technique is the spiral knitting technique, which creates a mesmerizing spiral effect in the finished piece. This technique is often used in the creation of scarves, shawls, and even blankets.
The spiral knitting technique is achieved by working in the round, either using circular needles or double-pointed needles. Unlike traditional knitting where rows are worked back and forth, spiral knitting creates a continuous circular fabric. This technique involves working a set number of stitches in a round, and then increasing or decreasing stitches in subsequent rounds to create the spiral effect.
The key to successfully creating a spiral pattern is to carefully calculate the number of stitches and the rate of increase or decrease. This will ensure that the spiral is evenly spaced and visually appealing. Additionally, using a variegated or self-striping yarn can enhance the spiral effect, as the colors change and shift throughout the piece.
To get started with the spiral knitting technique, it is helpful to have a basic understanding of knitting in the round and how to read patterns. There are many free spiral scarf knitting patterns available online that can serve as a starting point for beginners. These patterns often include step-by-step instructions and stitch counts to guide you through the process.
Once you have mastered the basic technique, you can experiment with different stitch patterns and yarn combinations to create your own unique spiral designs. The possibilities are endless, from simple and subtle spirals to bold and intricate designs. Whether you are a beginner or an experienced knitter, the spiral knitting technique offers an exciting and creative way to elevate your knitting projects.
Cast On and Begin Your Spiral Scarf
Before starting your spiral scarf knitting project, it is important to choose the right yarn and needles. Select a yarn that is soft and warm, preferably in a medium weight (worsted) or bulky weight. This will ensure that your scarf will be cozy and comfortable to wear. As for the needles, use a size that will help you achieve the desired tension and gauge for your project.
Once you have gathered all your materials, it’s time to cast on and begin the spiral pattern. Follow these steps to get started:
- Cast on: Begin by making a slipknot and placing it on your needle. Make sure the tail of the yarn is on your right side. Insert your needle into the slipknot and tighten it slightly. This will be your first stitch. Continue casting on the desired number of stitches for your scarf. If you are unsure about how many stitches to cast on, refer to the pattern instructions.
- Join in the round: Once you have cast on all your stitches, join the first stitch to the last stitch by slipping the first stitch from the left needle onto the right needle. Be careful not to twist your stitches. This will create a continuous loop, allowing you to work in the round.
- Begin the spiral pattern: Now that you have joined in the round, it’s time to start the spiral pattern. Follow the specific pattern instructions for your scarf, which will provide details on the stitch pattern, increase or decrease instructions, and any other special techniques you need to know. Typically, the spiral pattern will involve knitting or purling in a specific pattern sequence for a certain number of rounds.
- Continue knitting: Once you have completed the specified rounds of the spiral pattern, continue knitting in the designated stitch pattern until your scarf reaches the desired length. Take breaks and check your progress regularly to ensure that you are on track.
- Bind off: When you have reached the desired length for your scarf, it’s time to bind off. Follow the pattern instructions for the specific bind off technique recommended for your project. This will ensure a neat and secure edge.
By following these steps, you will be well on your way to creating a beautiful and unique spiral scarf. Remember to enjoy the process and take pride in the finished result!
Knitting the First Few Rows
When starting to knit a spiral scarf, it’s essential to get the first few rows right. These initial rows will set the foundation for the rest of the project.
To begin, cast on the desired number of stitches using your preferred method. This will typically be the width of the scarf. Make sure to cast on loosely, as tight stitches may make it difficult to knit subsequent rows.
When knitting the first row, make sure to pay attention to the pattern instructions. The pattern may require specific stitches or techniques for the first row. Double-check the pattern and make any necessary adjustments before proceeding.
Once the first row is complete, it’s time to move on to the second row. Continue following the pattern instructions, knitting each stitch as indicated. If the pattern specifies any increases or decreases, make sure to execute them correctly. These stitches may be crucial for shaping the scarf and giving it a spiral effect.
As you knit the first few rows, it’s a good idea to double-check your work for any mistakes or errors. This will ensure that the scarf starts off on the right foot and will save you from having to frog your work later. Use stitch markers if necessary to keep track of specific sections or stitches.
Remember to relax and take your time when knitting the first few rows. Knitting can be a meditative and enjoyable process, and by focusing on each stitch, you can create a beautiful spiral scarf that you’ll be proud to wear or give as a gift.
Increase Stitches to Create the Spiral Effect
In order to create the beautiful spiral effect in your knitting, you will need to increase stitches at specific intervals. This will gradually widen the scarf and give it a unique twist. There are several ways to increase stitches, but two common methods are the yarn over increase and the knit front and back increase.
The yarn over increase is a simple technique where you simply wrap the yarn around the needle as if you were making a new stitch. This creates a small hole in the fabric and adds one stitch to your pattern. On the next row, you will need to knit or purl into this yarn over stitch to close the hole and continue the spiral pattern.
Another common method is the knit front and back increase. To do this, you will knit into the front of a stitch as usual, but instead of slipping it off the needle, you will leave it on the needle. Then, without turning your work, you will knit into the back of the same stitch. This will create two stitches from one, and you can continue knitting the next row to maintain the spiral effect.
By strategically placing these increase stitches in your pattern, you can create a stunning spiral effect that adds depth and interest to your finished scarf. Experiment with different placement and frequency of increases to achieve the desired effect. Happy knitting!
Continue Knitting in the Spiral Pattern
Once you have completed the first section of your spiral scarf knitting pattern, it’s time to continue in the spiral pattern. To do this, simply follow the same stitch pattern that you used in the first section.
Begin by joining your new yarn at the end of the first section. Make sure to leave a long enough tail to weave in later. From here, you will continue knitting in the spiral pattern by working the same row stitches as before.
If you are using a stitch pattern that involves a repeat, make sure to continue that repeat throughout the entire section. If you are using a simple stitch pattern, such as garter stitch or stockinette stitch, simply continue knitting every row.
As you knit in the spiral pattern, you may notice that the stitches start to twist in a spiral formation. This is completely normal and is exactly what you want to achieve with a spiral scarf. This twisting effect will create the beautiful spiral shape of your finished scarf.
Continue knitting in the spiral pattern until you have reached your desired length or until you have used up all of your yarn. Remember to periodically measure your scarf to ensure that it is the length you want. Once you are satisfied with the length, you can move on to the next section of your knitting pattern.
When you have completed the entire scarf, don’t forget to weave in any loose ends and block the scarf to give it a polished look. Now you can enjoy your beautiful spiral scarf or give it as a thoughtful handmade gift to someone special.
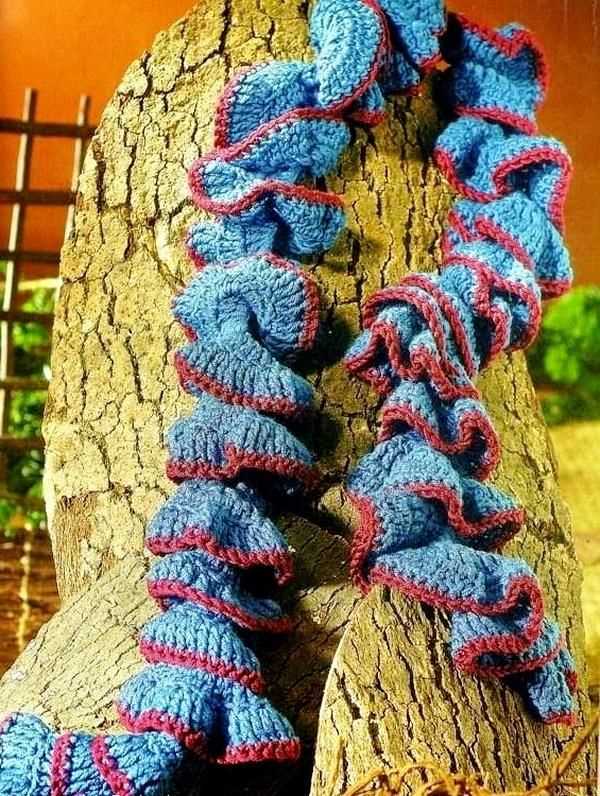
Adding Color to Your Spiral Scarf
Knitting a spiral scarf can be a fun and creative project, and adding color to it can make it even more exciting. With the right color choices and knitting techniques, you can create a stunning, eye-catching accessory that will brighten up any outfit.
Choosing Colors: When selecting colors for your spiral scarf, consider your personal style and the overall look you want to achieve. You can go for a bold and vibrant color combination, or opt for more subtle shades for a sophisticated look. Look for colors that complement each other and create a harmonious blend when worn together.
- Gradient Effect: One popular technique for adding color to a spiral scarf is to create a gradient effect. Start with a light shade at one end of the scarf, gradually transitioning to a darker shade at the other end. This can be achieved by selecting yarns in different hues of the same color or by using a variegated yarn that transitions from light to dark.
- Color Blocking: If you prefer a bolder look, you can use color blocking to create distinct sections of different colors in your spiral scarf. This can be done by simply switching yarns in different colors at specific intervals or by knitting separate sections of different colors and joining them together.
- Contrasting Colors: For a striking contrast, choose colors that are on opposite sides of the color wheel. This will create a visually dynamic effect and make your spiral scarf stand out. For example, pair a warm, orange-toned yarn with a cool, blue-toned yarn.
Knitting Techniques: To add color to your spiral scarf, you can use various knitting techniques, such as stranded knitting or intarsia. Stranded knitting involves carrying multiple colors of yarn along the back of your work. This technique works well for smaller colorwork motifs or stripes. Intarsia, on the other hand, allows you to knit different colors in separate blocks, without carrying the yarn across the entire row. This technique is ideal for larger color blocks or geometric designs.
Remember to plan your color changes in advance and weave in any loose ends as you go to ensure a neat and professional finish. Experiment with different color combinations and techniques to create a spiral scarf that is uniquely yours.
Finishing Your Spiral Scarf

After completing your spiral scarf knitting pattern, it’s time to finish off your project and give it the final touches. There are a few steps you can follow to ensure that your scarf looks polished and ready to wear.
Binding off: To secure the last row of stitches, you’ll need to bind off. You can do this by knitting the first two stitches as normal, then passing the first stitch over the second stitch and off the needle. Continue this process until you have one stitch left on the right needle. Cut the yarn, leaving a tail about six inches long, and pull it through the remaining stitch to secure it.
Blocking: Blocking is an important step that can help even out the stitches and give your scarf a more professional look. To block your scarf, you’ll need to gently wash it in lukewarm water using a mild detergent. Rinse it thoroughly and squeeze out the excess water. Lay the scarf flat on a clean towel and gently shape it to the desired dimensions. Leave it to dry completely before wearing or storing.
Adding fringe: If you want to add some extra flair to your spiral scarf, you can attach fringe to the ends. Cut several strands of yarn, each about twice the desired length of the fringe. Fold each strand in half and use a crochet hook or your fingers to pull the folded loop through one of the end stitches of your scarf. Pull the loose ends through the folded loop and gently tighten to secure the fringe. Repeat this process until you have fringe along both ends of the scarf.
Final touches: Once your scarf is blocked and any fringe is added, take a moment to inspect your work and make any necessary adjustments. Trim any loose threads or uneven edges. You can also use a steam iron on a low setting to gently smooth out any wrinkles or creases. Finally, try on your finished spiral scarf and enjoy the cozy and stylish accessory you’ve created!
Blocking Your Spiral Scarf for a Professional Look
Blocking is an important final step in the knitting process that can take your spiral scarf from looking homemade to professional. It involves wetting the scarf, shaping it, and allowing it to dry in the desired shape to achieve a polished and finished appearance.
Before you begin blocking your spiral scarf, you will need to gather a few supplies. These include a clean towel, rust-proof pins or blocking wires, a spray bottle filled with water, and a flat surface such as a blocking board or mattress.
Start by filling a sink or basin with tepid water. Gently submerge your scarf in the water, making sure it is completely saturated. Adding a small amount of mild soap or a specialized wool wash can help remove any residual oils or dirt.
After soaking the scarf for a few minutes, carefully lift it out of the water and squeeze out the excess moisture. Avoid twisting or wringing the scarf, as this can cause it to lose its shape or stretch. Lay the scarf flat on a clean towel and roll it up, pressing gently to remove more moisture.
Next, place the towel-wrapped scarf on your blocking surface and start shaping it to achieve the desired look. If you want a straight edge, use rust-proof pins or blocking wires to secure the edges in place. For a more wavy or organic shape, gently stretch and shape the scarf with your hands.
Once the scarf is in the desired shape, mist it lightly with water using the spray bottle. This will help the fibers relax and set in place. Allow the scarf to dry completely before removing the pins or blocking wires.
Blocking your spiral scarf not only improves the overall appearance but also helps to even out any uneven stitches and enhances the drape and drape of the finished piece. It is worth taking the time to block your scarf to achieve that professional look.
Wearing and Styling Your Spiral Scarf
The spiral scarf is a versatile accessory that can be worn in various ways to enhance your style. Here are some tips on how to wear and style your spiral scarf:
- Loop it around your neck: This is the most common and classic way to wear a scarf. Simply wrap the spiral scarf around your neck to create a loop. You can leave it loose for a casual and relaxed look, or tighten it up for extra warmth.
- Make it a statement piece: The spiral design of the scarf adds a unique touch to any outfit. Use it as a statement piece by pairing it with neutral-colored clothing to let the scarf stand out.
- Wear it as a headband: Wrap the spiral scarf around your head and tie it at the back to create a stylish headband. This is a great way to add a pop of color to your hairstyle and keep your hair away from your face.
- Accessorize your bag: The spiral scarf can also be used as an accessory for your bag. Simply tie it around the handle or strap of your bag to add a touch of color and sophistication.
- Experiment with different lengths: The length of the spiral scarf can be adjusted to suit your personal style and preference. You can wear it long and flowing, or wrap it multiple times for a layered look.
In conclusion, the spiral scarf is not only a practical item for keeping warm, but also a fashionable accessory that can elevate your style. Whether you choose to wear it around your neck, as a headband, or as an accessory for your bag, the spiral scarf is sure to add a unique and stylish touch to any outfit.