
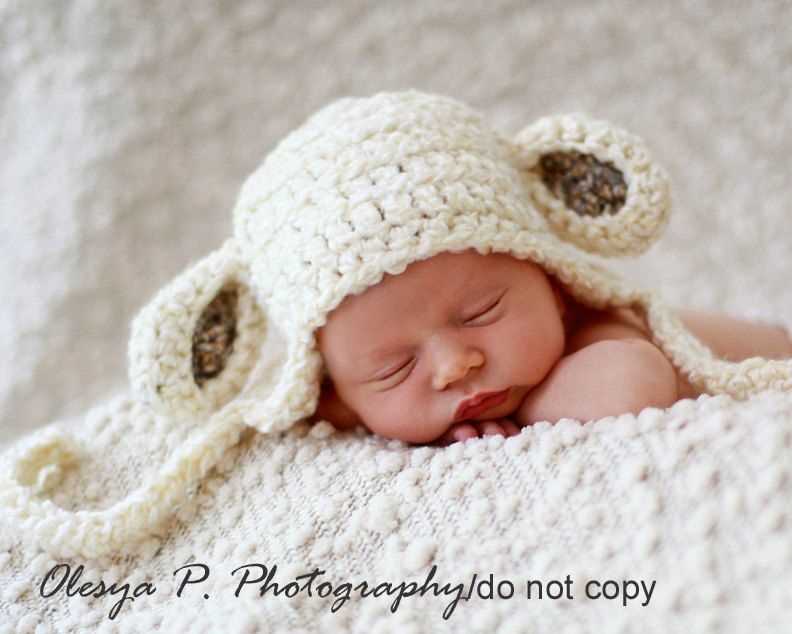
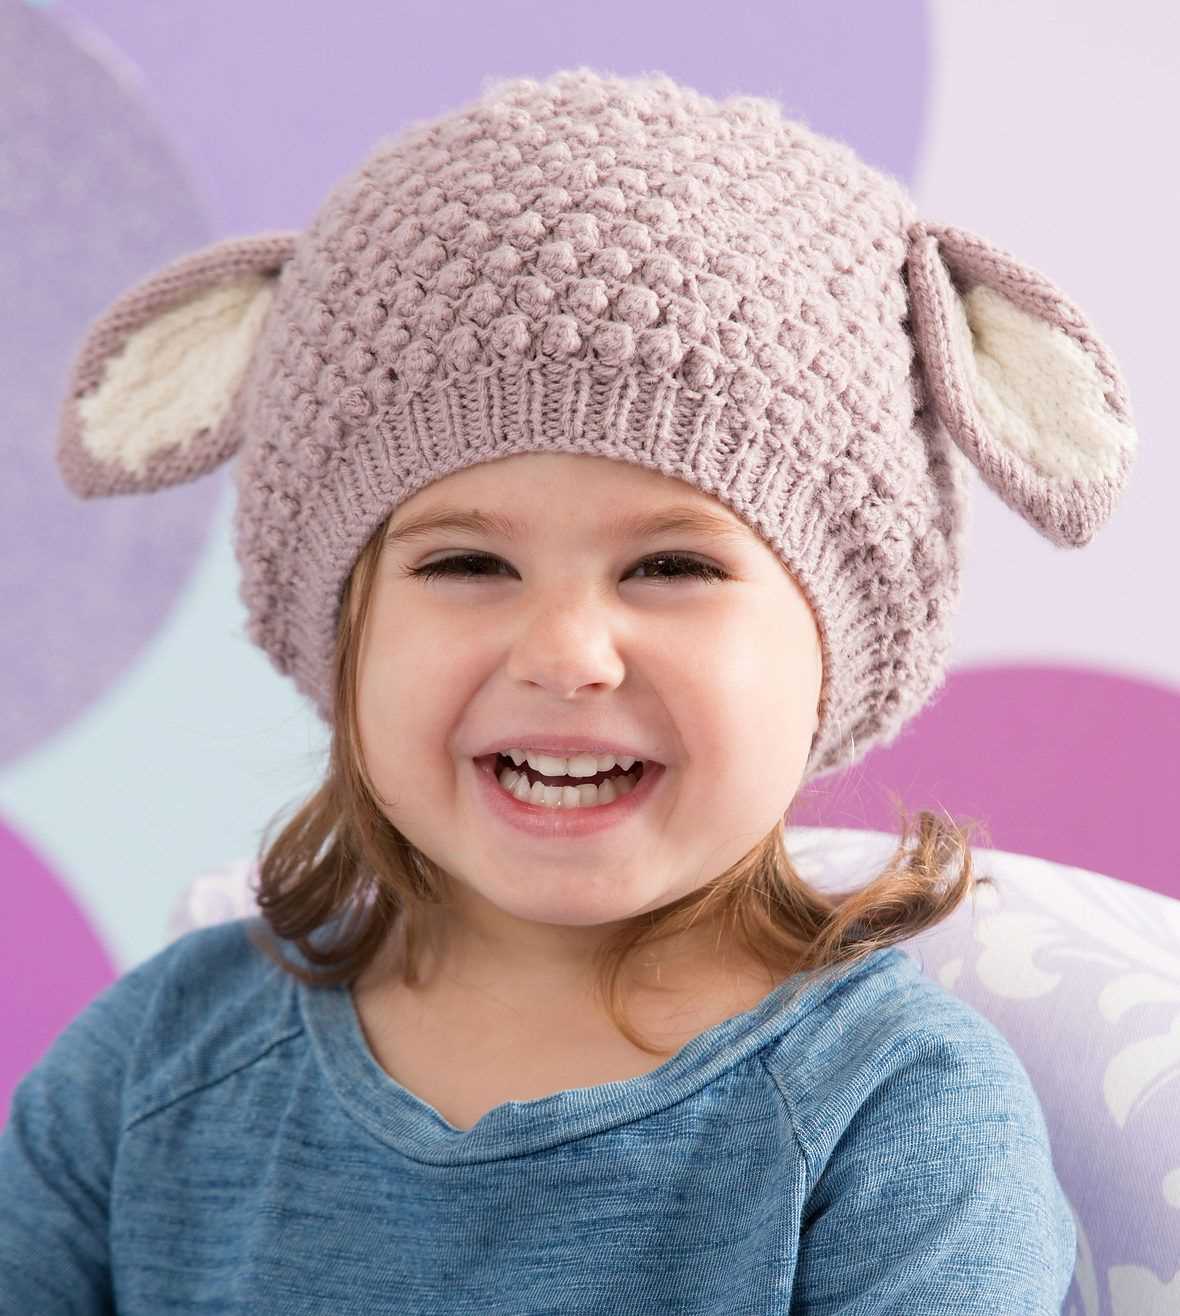
If you’re a knitter looking for an adorable and fun project, look no further than a lamb hat knitting pattern. This cute and cozy accessory is perfect for keeping little ones warm during the colder months, while also adding a touch of whimsy to their outfits.
Whether you’re a beginner or an experienced knitter, this lamb hat pattern is a great option. With simple stitches and easy-to-follow instructions, you’ll have this hat knitted up in no time. Plus, the pattern can easily be adjusted to fit different sizes, making it a versatile choice for knitters of all skill levels.
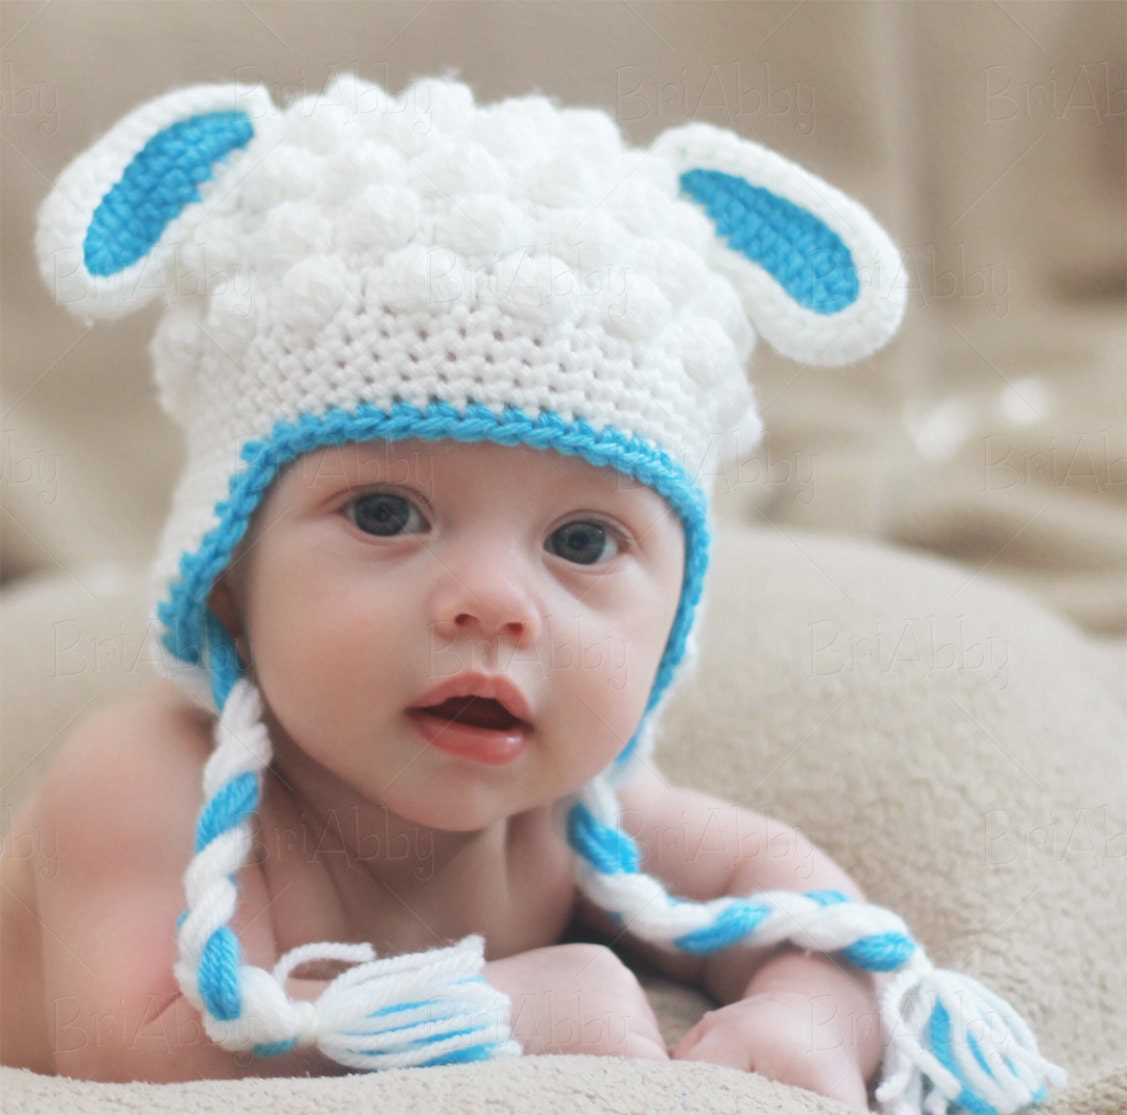
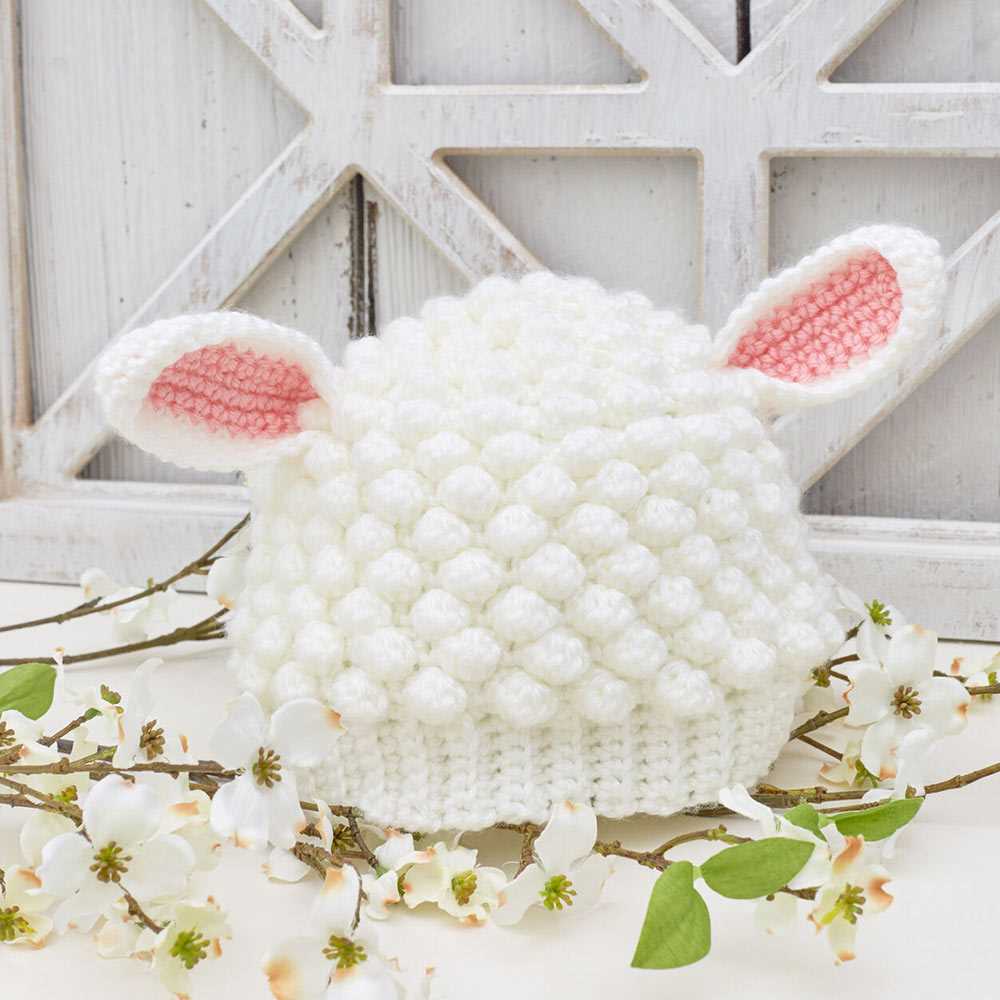
Not only is this lamb hat pattern cute and practical, but it also makes for a thoughtful and unique gift. Whether you’re knitting it for your own child or giving it to a friend or family member, this hat is sure to be a hit. The soft and cozy yarn used in the pattern will keep little ones warm, and the adorable ears and facial features will bring a smile to everyone’s face.
Lamb Hat Knitting Pattern
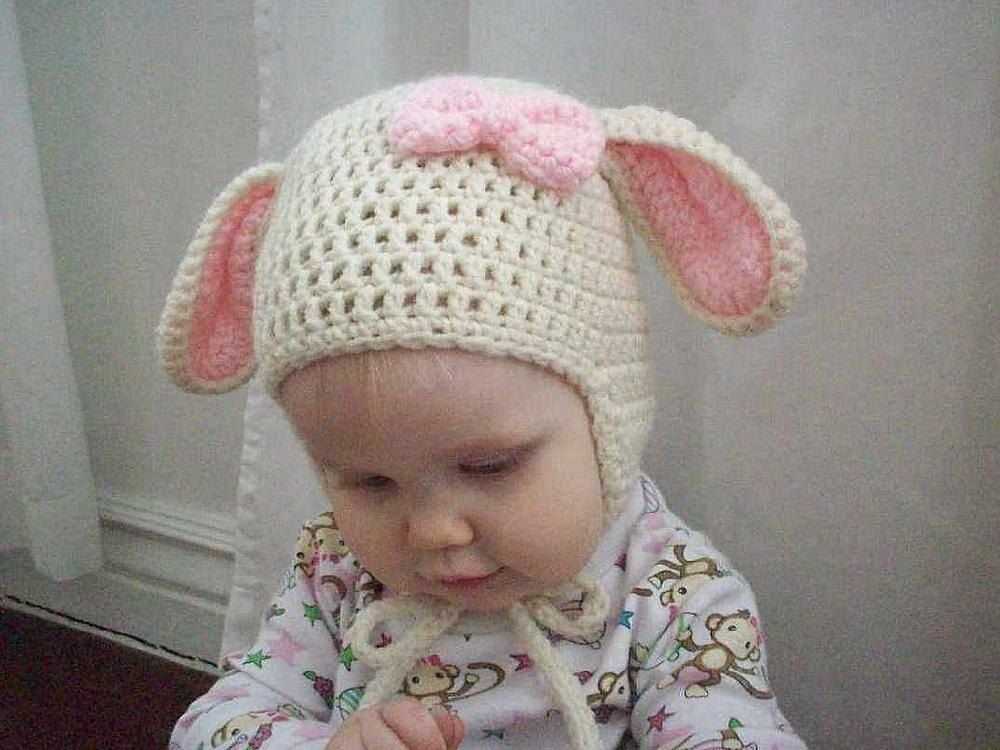
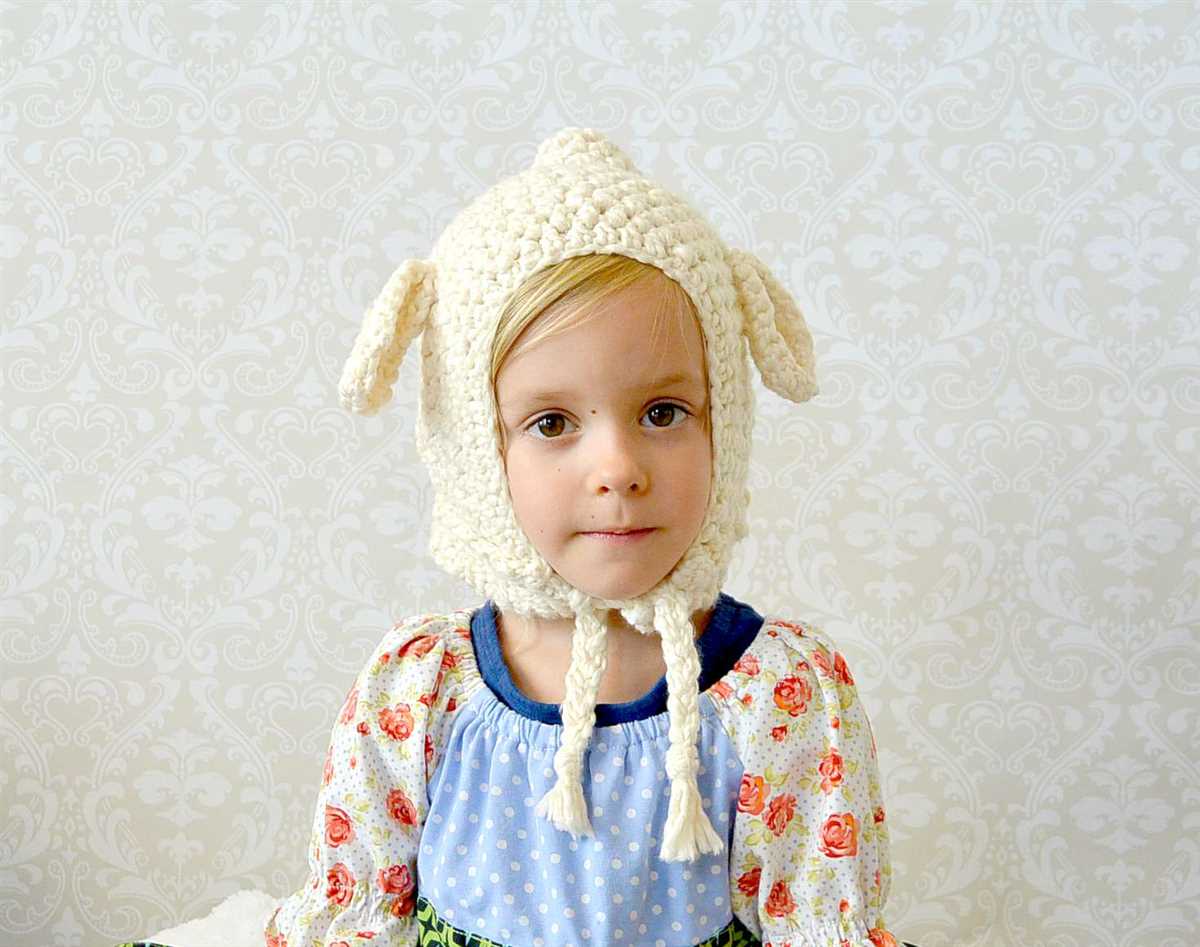
If you’re looking to add a cute and cozy accessory to your little one’s wardrobe, a lamb hat is a perfect choice. This knitting pattern will guide you through the steps to create an adorable hat that resembles a lamb’s face. Whether it’s for a costume, a photo shoot, or just everyday wear, this lamb hat will surely bring smiles to everyone’s faces.
To start knitting the lamb hat, you will need some basic knitting skills and supplies. You’ll need to know how to knit, purl, decrease, and increase stitches. You’ll also need a set of double-pointed knitting needles, a stitch marker, and some soft and fluffy yarn in white and black colors.
Materials:
- Soft yarn in white color
- Soft yarn in black color
- Set of double-pointed knitting needles, size US 8 (5mm)
- Stitch marker
- Yarn needle
Instructions:
- Begin by casting on 80 stitches using the white yarn.
- Join in the round and place a stitch marker to mark the beginning of the round.
- Knit in a rib stitch pattern (knit 2, purl 2) for 1 inch.
- Switch to stockinette stitch and knit every round until the hat measures approximately 5 inches from the cast-on edge.
- Decrease rounds:
- Switch to double-pointed needles when necessary.
- Round 1: *Knit 8, k2tog* repeat to the end of the round (72 stitches).
- Round 2: Knit all stitches.
- Round 3: *Knit 7, k2tog* repeat to the end of the round (64 stitches).
- Round 4: Knit all stitches.
- Continue decreasing in this manner, knitting one fewer stitch before each k2tog, until there are 8 stitches remaining.
- Cut the yarn, leaving a long tail. Thread the tail through a yarn needle, slip the stitches off the needles, and pull the tail tight to close the top of the hat.
- Add the lamb’s face by embroidering two eyes and a nose using the black yarn. You can also attach two small white pom-poms as ears on either side of the hat.
- Weave in any loose ends and your lamb hat is complete! It’s ready to keep your little one warm and cute.
With this lamb hat knitting pattern, you can create a sweet and unique accessory for your child or as a gift for someone special. Have fun knitting and enjoy the adorable end result!
Lamb Hat Knitting Pattern: Materials
Before you start knitting your lamb hat, make sure you have all the necessary materials. Here is a list of items you will need:
- Yarn: Choose a soft and fluffy yarn in white or off-white color to resemble the wool on a lamb. Acrylic or wool blend yarns will work well for this project.
- Knitting Needles: Use appropriate knitting needles for the chosen yarn weight. Circular needles may be more comfortable to use than straight needles.
- Tapestry Needle: This needle will be used for sewing and weaving in loose ends.
- Stitch Markers: These markers will help you keep track of specific stitches or sections in the pattern.
- Scissors: A pair of sharp scissors will be useful for cutting the yarn and trimming any excess.
- Buttons or Embroidery Floss: You can choose to add eyes and a nose to your lamb hat using buttons or embroidery floss.
- Pom Pom Maker: If you want to add a pom pom to the top of the hat, a pom pom maker will make the process easier and quicker.
Make sure you have all these materials ready before you start knitting your lamb hat. Having everything prepared will make the knitting process smoother and more enjoyable.
Gauge
When it comes to knitting, gauge is an important factor to consider. The gauge refers to the number of stitches and rows per inch in a knitted fabric, and it can greatly affect the final size and fit of your project. By getting the correct gauge, you can ensure that your finished piece will match the measurements specified in the knitting pattern.
To determine the gauge, it is recommended to knit a swatch using the recommended yarn and needle size in the pattern. The swatch should be large enough to measure accurately, usually around 4 inches square. Once the swatch is complete, it should be washed and blocked according to the yarn’s care instructions. Then, using a ruler or tape measure, count the number of stitches and rows within the 4-inch area of the swatch.
It is important to match both the stitch and row gauge to achieve the desired dimensions. If your gauge is too loose, meaning you have fewer stitches and rows per inch than specified, your finished piece will be larger than anticipated. On the other hand, if your gauge is too tight, with more stitches and rows per inch than specified, your finished piece will be smaller. Adjusting your needle size can help you achieve the correct gauge, but it may also affect the drape and texture of your fabric.
The gauge also plays a crucial role in determining the amount of yarn you will need for your project. If your gauge differs significantly from the pattern, you may need more or less yarn to complete your project. Therefore, it is essential to take the time to knit a gauge swatch before starting your project to ensure accurate measurements and a successful outcome.
Cast On
When knitting a lamb hat, the first step is to cast on. This is the process of creating the first row of stitches on the knitting needle. There are several different methods of casting on, but for this pattern, we will be using the long tail cast on method.
To begin the long tail cast on, you will need to estimate how much yarn you will need. Leave a long enough tail, about three times the desired length of your cast on, and make a slip knot. Slip the knot onto the knitting needle, making sure it is loose enough to easily slide up and down the needle.
Hold the knitting needle with the slip knot in your right hand and the tail of the yarn in your left hand. With your right hand, insert the needle into the slip knot from front to back, making sure the working yarn is behind the needle. With your left hand, grab the working yarn and pull it through the slip knot, creating a new stitch on the needle.
Continue to repeat this process, inserting the needle into the stitch from front to back and pulling the working yarn through, until you have cast on the desired number of stitches for your lamb hat. Make sure to keep the tension even as you go, neither too loose nor too tight. Once all the stitches are cast on, you are ready to begin knitting the hat!
Ribbing

Ribbing is a technique commonly used in knitting to create a stretchy and flexible fabric. It is often used for cuffs, collars, and waistbands, as it helps the garment retain its shape and provide a snug fit. The ribbing pattern is created by alternating knit and purl stitches in a regular sequence.
In the context of a lamb hat knitting pattern, ribbing can be used to create the brim of the hat. Knitting the brim with a ribbing pattern will ensure that it stays in place and provides a comfortable fit for the wearer. The ribbing can also add an element of style and texture to the hat, making it more visually interesting.
To create a ribbing pattern, you will typically need to cast on an even number of stitches. The most common ribbing patterns include 1×1 ribbing (alternating one knit stitch with one purl stitch) and 2×2 ribbing (alternating two knit stitches with two purl stitches). The choice of ribbing pattern will depend on the desired look and stretchiness of the fabric.
In a lamb hat knitting pattern, you may come across instructions such as “work 1×1 ribbing for 2 inches” or “continue in 2×2 ribbing until the desired length”. These instructions indicate that you should follow the specified ribbing pattern for the given number of rows or inches. It is important to pay attention to the pattern instructions and follow them accurately to achieve the desired outcome.
Body
The body of the lamb hat is knitted in a combination of garter stitch and stockinette stitch, creating a textured and cozy fabric. The garter stitch sections are worked by knitting every row, resulting in a bumpy texture that adds dimension to the hat. The stockinette stitch sections are created by knitting one row and purling the next, resulting in smooth, V-shaped ridges on the right side of the fabric.
To begin the body of the hat, cast on the required number of stitches onto your knitting needles. Then, work the first few rows in garter stitch to create the ribbed brim. This brim will help to keep the hat in place and provide a snug fit. Once the brim is complete, switch to stockinette stitch for the body of the hat.
Continue working in stockinette stitch until the desired length of the hat is reached. This can vary depending on the size of the hat and the desired fit. To add extra warmth and texture, you can also incorporate additional garter stitch sections throughout the body of the hat.
Once the body of the hat is complete, you can proceed to the next step, which is usually shaping the crown. This involves decreasing stitches in a specific pattern in order to create a fitted top for the hat. The exact shaping instructions will depend on the specific lamb hat knitting pattern you are following.
Overall, the body of the lamb hat is where you will spend the majority of your knitting time. It’s important to maintain an even tension and count your stitches carefully to ensure that the hat turns out the correct size. Following the pattern instructions and using the specified yarn will help you achieve the desired results.
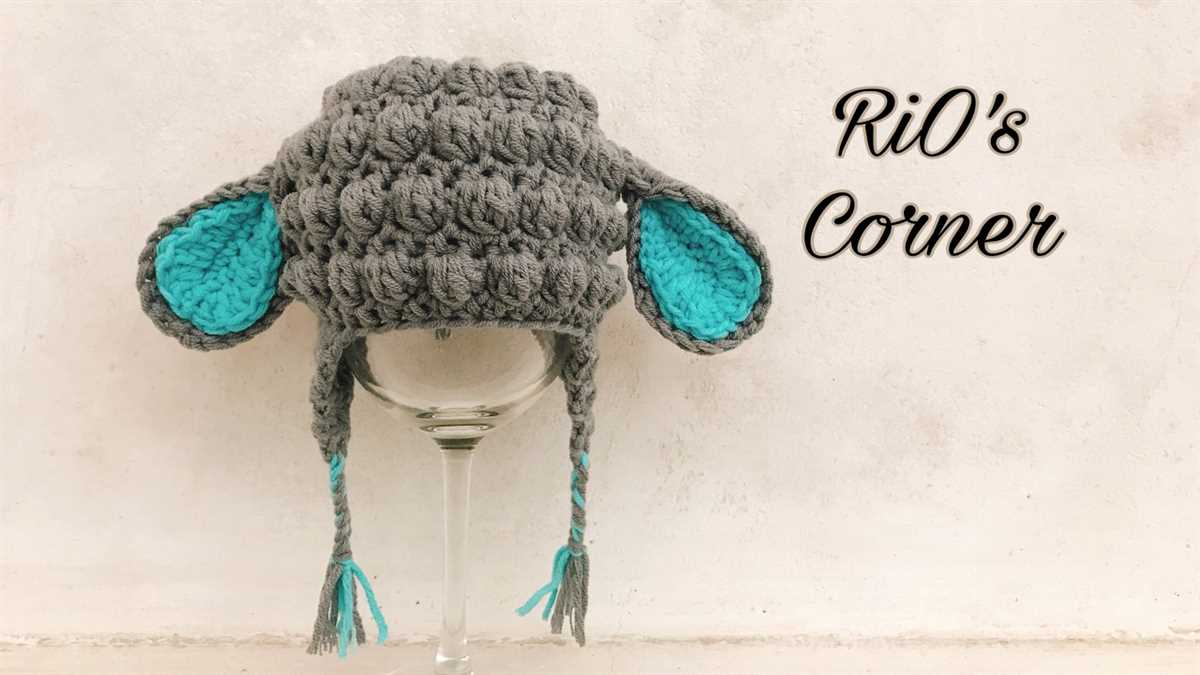
Shaping the Ears
When knitting a lamb hat, shaping the ears is an important step to achieve the adorable look. To start, you will need to have reached the appropriate length for the hat. Once you are ready, you can begin working on the ears.
First, you will need to divide the stitches on your knitting needle. Take the number of stitches specified in the pattern for one ear and place them onto a separate needle or stitch holder. Repeat this process for the second ear. By separating the stitches, you will be able to work on each ear individually for a more precise shape.
Shaping the first ear:

- Knit a few rows according to the pattern to create a base for the ears. This will help provide structure.
- Next, you will begin decreasing stitches to taper the ear. Follow the pattern instructions for the specific decrease method and rate.
- Continue decreasing until the desired ear shape is achieved. This may involve knitting a few rows even if no decreases are required.
Shaping the second ear:
- Repeat the same steps as for shaping the first ear, following the pattern instructions carefully.
- Ensure the number of decreases and rows match the first ear for a symmetrical look.
Once both ears are shaped and completed, you can continue knitting the remaining rows according to the pattern instructions. Remember to always refer back to the pattern for any specific techniques or stitches required to achieve the desired lamb hat look.
Face and Eyes
When knitting a lamb hat, the face and eyes are important details that bring the hat to life. To create the face, you can use different knitting techniques and materials to achieve the desired effect.
Eyes: For the eyes, you can use small black buttons, beads, or embroider them with black yarn. Sew the eyes onto the hat using a matching thread or yarn. Make sure to position the eyes symmetrically and at the appropriate height to give the lamb a cute and friendly look.
Nose: The nose can be knitted or crocheted separately and then sewn onto the hat’s face. It can be made using a contrasting color to make it stand out or using the same yarn as the rest of the hat for a more subtle look. Placing the nose just below the eyes will give the lamb a sweet and adorable appearance.
Mouth: To create the mouth, you can embroider it using a black or contrasting-colored yarn. Alternatively, you can sew on a small piece of black felt cut into a smile shape. The mouth placement will depend on the desired expression of the lamb, whether it is smiling or serious.
Other Facial Details: Depending on the pattern, you may also have the option to add other facial details such as eyebrows, eyelashes, or blush to give the lamb more character. These can be embroidered or sewn onto the hat using different colors of yarn or thread.
Overall, the face and eyes of a lamb hat are essential for creating an adorable and whimsical look. Putting thought and care into these details will make the hat stand out and bring a smile to anyone who wears or sees it.
Finishing
After you have completed knitting the lamb hat, it’s time to finish off the project to give it a polished and professional look. Here are some steps to follow for finishing:
1. Weave in ends: Use a tapestry needle to weave in any loose yarn ends from changing colors or joining new yarn. This will give your hat a neater appearance and prevent any loose ends from unraveling.
2. Block the hat: Blocking is an important step in knitting to shape and make the stitches even. Wet the hat gently and squeeze out any excess water. Place it on a towel and shape it to the desired size, gently stretching or pinning it into place. Allow it to dry completely before removing the pins or stretching it off the towel.
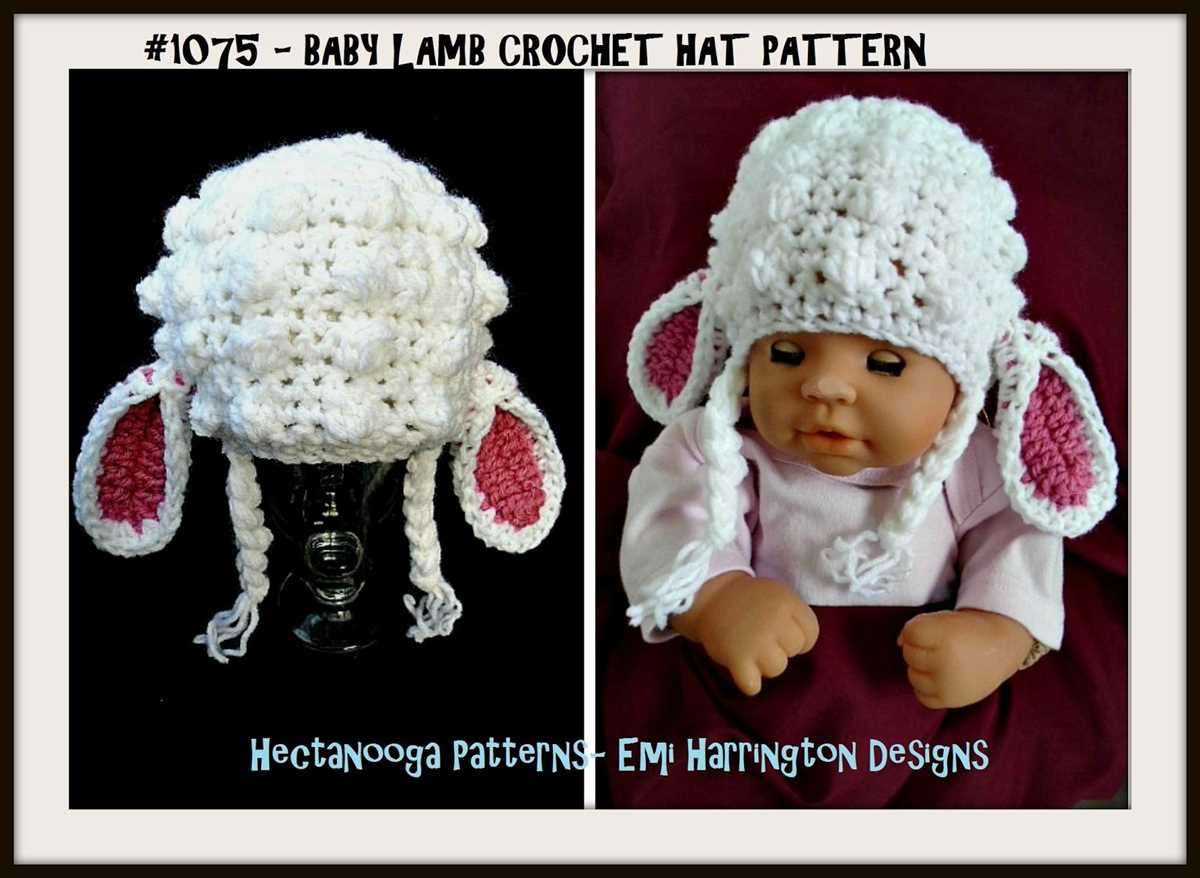
3. Add the lamb ears: Using the leftover yarn from the hat, knit two small ear shapes following the pattern instructions. Sew the ears onto the sides of the hat, positioning them slightly towards the front for a cute lamb-like appearance.
4. Sew on the eyes and nose: Using black yarn or small black buttons, sew on two eyes and a nose onto the front of the hat to give it the lamb’s characteristic facial features. Make sure to securely attach them so they don’t come loose during wear.
5. Add finishing touches: If desired, you can add additional embellishments to the hat, such as bows, flowers, pom-poms, or any other decorative element. This is your chance to make the hat unique and personalized.
By following these finishing steps, your lamb hat will be ready to keep you warm and stylish throughout the colder months. Enjoy your adorable creation!
Optional Embellishments
If you’re looking to add a little extra flair to your lamb hat, there are several optional embellishments you can incorporate into your design. These embellishments are not necessary for the functionality of the hat, but they can add a fun and unique touch to the finished product.
1. Embroidered details: One simple way to enhance the look of your lamb hat is to add embroidered details. You can stitch on eyes, a nose, or even a smile to give your lamb a playful expression. Embroidery can also be used to add additional texture or patterns to the hat, such as a floral design or geometric shapes.
2. Pom-poms: Pom-poms are a classic addition to many knitted hats, and they can be a cute and whimsical addition to your lamb hat as well. You can use white yarn to create a fluffy pom-pom to represent the lamb’s tail, or you can create smaller pom-poms to attach to the ears for added texture and dimension.
3. Ribbon or bows: For a more feminine touch, you can add a ribbon or bow to your lamb hat. This can be tied around the lamb’s neck or used to secure the hat under the chin. You can choose a ribbon that matches the color of the hat or opt for a contrasting color for a pop of visual interest.
4. Buttons: Buttons can be a fun and playful addition to your lamb hat. You can sew on buttons to represent the lamb’s eyes or use them as decorative accents throughout the hat. Just be sure to choose buttons that are securely attached and cannot be easily removed, especially if the hat is intended for a small child.
Tips and Troubleshooting

Before you begin knitting the lamb hat, it’s helpful to keep these tips and troubleshooting suggestions in mind:
Tips:
- Read through the entire pattern before starting to ensure you understand the steps involved.
- Take your time when following the instructions to avoid any mistakes.
- Use stitch markers to help keep track of your stitches.
- If you’re a beginner, consider using a thicker yarn to make the knitting process easier.
- Don’t be afraid to ask for help if you’re unsure about any part of the pattern.
Troubleshooting:
- If your hat is turning out too small, try using larger knitting needles or a bulkier yarn to achieve the desired size.
- If your hat is turning out too big, try using smaller knitting needles or a lighter weight yarn to adjust the size.
- If you come across any errors in the pattern, double-check your work and compare it to the instructions to identify any mistakes.
- If you’re having difficulty with a particular stitch or technique, search for online tutorials or videos that provide step-by-step instructions.
- If you’re experiencing tension issues, practice knitting with consistent tension and consider blocking your finished hat to even out any uneven stitches.
Remember, knitting requires practice and patience. Don’t get discouraged if you encounter any challenges along the way. With perseverance, you’ll be able to create a beautiful and cozy lamb hat that you can be proud of!