
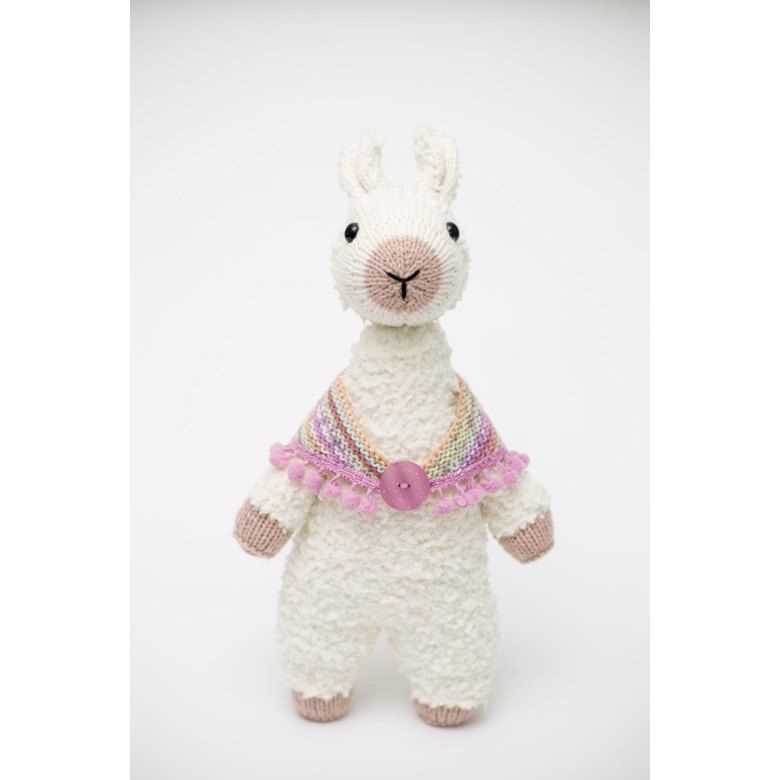
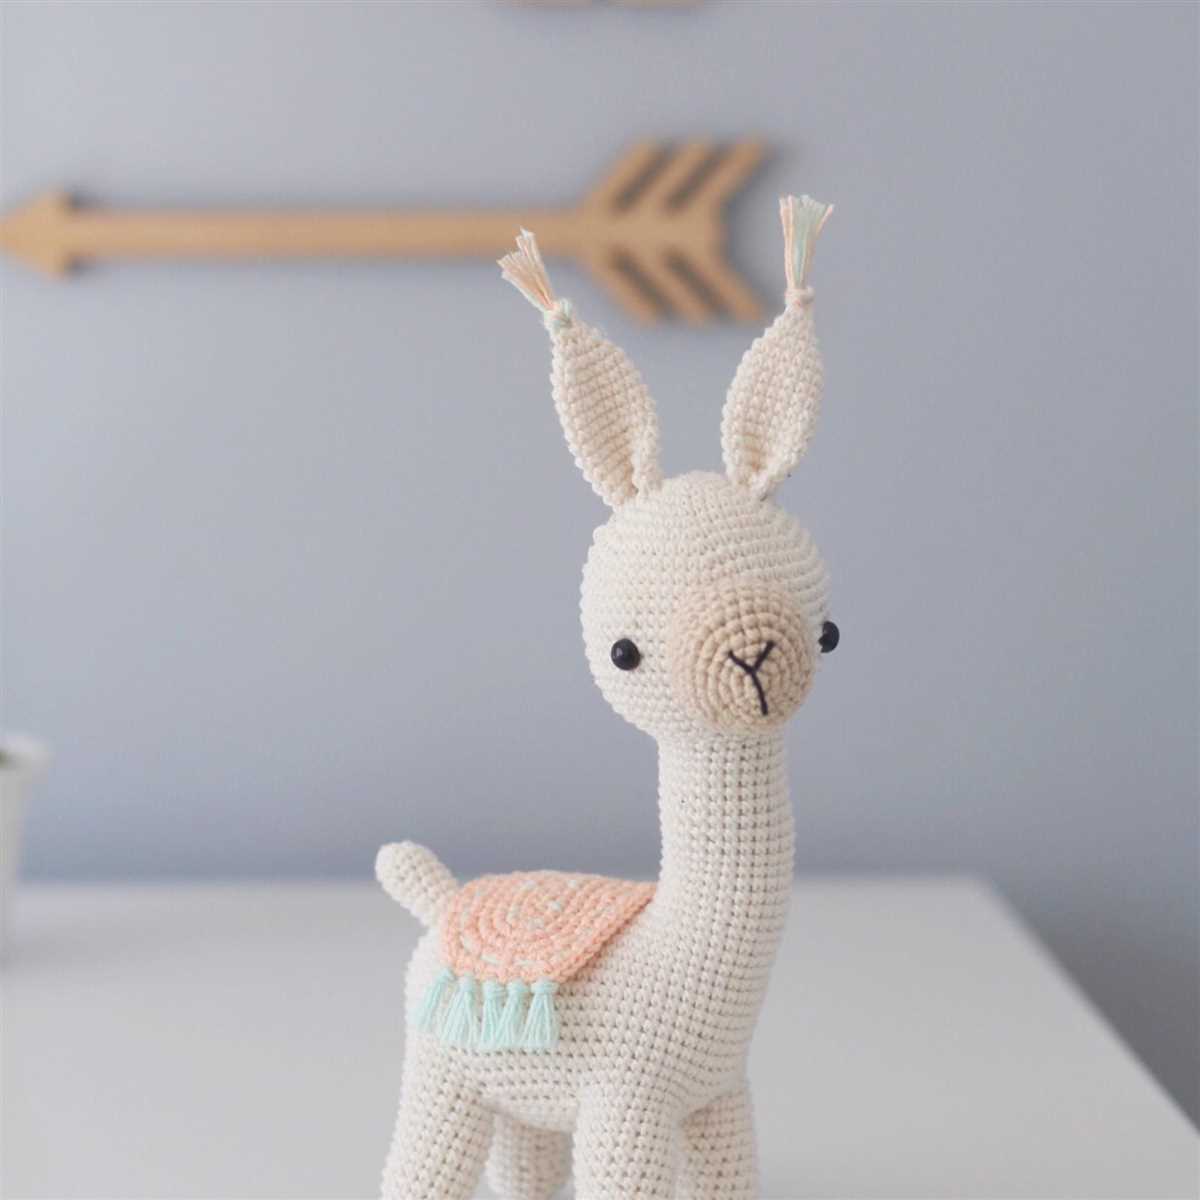
Do you enjoy knitting? Are you looking for a new project? Look no further than this adorable knitted llama toy pattern! Llamas have become quite popular recently and what better way to join in on the fun than by knitting your own llama toy? This pattern is perfect for beginners and experienced knitters alike.
With this pattern, you’ll be able to create a cute and cuddly llama that will make the perfect gift for kids or llama enthusiasts. The pattern includes clear instructions and step-by-step photos to guide you through the knitting process. Whether you’re new to knitting or a pro, this pattern is sure to bring you hours of joy and relaxation.
Not only is knitting a great way to relax and unwind, but it also allows you to create unique and personalized items. By knitting your own llama toy, you’ll be able to add your own personal touches and customize it to your liking. Choose your favorite colors or experiment with unique patterns and stitches to make your llama truly one-of-a-kind.
Why Knitted Toys are Popular
Knitted toys have become increasingly popular in recent years, and for good reason. These charming and unique creations offer a range of benefits that make them highly sought after by both children and adults alike.
1. Handmade charm: One of the main reasons why knitted toys are so popular is their undeniable charm. Each toy is carefully crafted by hand, giving it a personal touch that cannot be replicated by mass-produced toys. Whether it’s a cute llama or a cuddly bear, knitted toys have a certain warmth and character that make them truly special.
2. Versatility: Another reason why knitted toys are popular is their versatility. Knitting allows for endless possibilities in design and color, making it possible to create toys that are unique and customized to suit different tastes and preferences. From vibrant rainbow unicorns to sophisticated woodland animals, there is a knitted toy for everyone.
3. Durability: Knitted toys are known for their durability. Unlike many mass-produced toys that can easily break or wear out, knitted toys are made with high-quality yarn that can withstand vigorous play. This longevity makes them a great investment, as they can be enjoyed for years to come.
4. Educational value: Knitted toys also offer educational value. Children can learn about different animal species, colors, shapes, and textures through playing with knitted toys. They can also develop fine motor skills and problem-solving abilities as they interact with these tactile and interactive toys.
5. Sustainable choice: In an era where sustainability is a growing concern, knitted toys offer a more eco-friendly alternative to mass-produced plastic toys. They are made with natural materials and can be easily recycled or repurposed, reducing waste and environmental impact.
In summary, knitted toys are popular for their handmade charm, versatility, durability, educational value, and sustainability. These whimsical creations bring joy and imagination into the lives of both children and adults, making them a beloved choice for playtime and decoration.
Materials and Tools for Knitting a Llama Toy
When it comes to knitting a llama toy, you’ll need a few materials and tools to get started. Here’s a list of the essentials:
1. Yarn:
Choose a soft and durable yarn in your desired color for the body of the llama. It’s recommended to use a worsted weight or bulky yarn to achieve the desired thickness and texture.
2. Knitting Needles:
You’ll need a pair of knitting needles to work with the chosen yarn. The size of the knitting needles will depend on the thickness of your yarn and your personal knitting tension. It’s best to use a size that allows you to achieve the correct gauge for the pattern.
3. Stitch Markers:
Stitch markers are useful for keeping track of specific stitches or sections in your knitting pattern. They come in various forms and are commonly used to mark the beginning or end of a round or a specific stitch repeat.
4. Stuffing:
To give your knitted llama toy its shape and form, you’ll need some stuffing material. Polyester fiberfill is a popular choice as it is soft, lightweight, and hypoallergenic. You can also reuse old pillows or stuffed toys by unraveling them and repurposing the stuffing.
5. Tapestry Needle:
A tapestry needle, or yarn needle, is essential for sewing up any seams and weaving in loose ends. Make sure to choose a needle with a large enough eye to accommodate your chosen yarn.
6. Scissors:
A sharp pair of scissors is necessary for cutting the yarn and trimming any excess material. Make sure to have a dedicated pair of scissors for your knitting projects to avoid dulling the blades.
These are the basic materials and tools needed to knit a llama toy. Make sure to gather everything you need before starting your project for a smooth and enjoyable knitting experience.
Yarn Options for Llama Toy
When it comes to knitting a llama toy, choosing the right yarn is crucial to achieve the desired outcome. The texture, color, and durability of the yarn can make a significant difference in the final product. Here are several yarn options to consider:
Cotton yarn:
Cotton yarn is a popular choice for knitting toys due to its softness and hypoallergenic properties. It is also easy to work with and comes in a wide range of colors. Additionally, cotton yarn is machine washable, making it ideal for toys that may need frequent washing.
Acrylic yarn:
Acrylic yarn is another excellent option for knitting a llama toy. It is affordable, lightweight, and comes in various colors and textures. Acrylic yarn is also machine washable and has good durability, making it suitable for toys that will be handled and played with often.
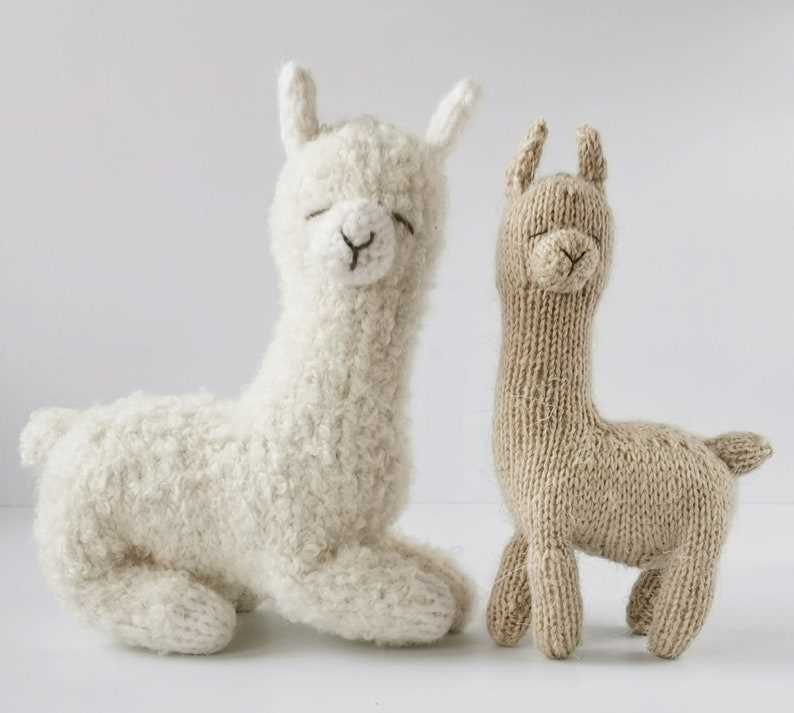
Alpaca yarn:
If you want your llama toy to have a more authentic feel and look, consider using alpaca yarn. Alpaca yarn is known for its softness, warmth, and luxurious texture. It comes in a range of natural colors and blends well with other fibers. However, keep in mind that alpaca yarn may require delicate care and handwashing.
Wool yarn:

Wool yarn is a classic choice for knitting toys due to its elasticity and warmth. It is available in various types, such as merino, which is known for its softness and fine texture. Wool yarn is a good option if you want your llama toy to have a fluffy appearance and provide a cozy feel. However, some types of wool may require special care, such as handwashing and blocking.
Blend of yarn:
Another option to consider is using a blend of yarn, which combines different fibers to create unique characteristics. For example, a blend of cotton and acrylic can provide softness and durability, while a blend of wool and alpaca can offer warmth and texture. Experimenting with different yarn blends can add depth and dimension to your llama toy.
Ultimately, the choice of yarn for your llama toy will depend on your personal preferences and the desired characteristics of the finished toy. Consider factors such as softness, durability, washability, and the overall aesthetic you want to achieve. By selecting the right yarn, you can create a knitted llama toy that is both visually appealing and enjoyable to touch.
Knitting Techniques Used in Llama Toy Pattern
If you are a knitting enthusiast and looking for a fun project to work on, the knitted llama toy pattern is a great choice. This pattern incorporates various knitting techniques to bring the adorable llama toy to life. Whether you are a beginner or an experienced knitter, this pattern allows you to practice and refine your knitting skills while creating a charming toy.
Casting On: The pattern starts with casting on stitches to create the llama’s body. This is typically done using the long-tail cast-on method, which provides a neat and flexible edge. It is important to cast on an appropriate number of stitches to achieve the desired size and shape of the toy.
Knit and Purl Stitches: The majority of the pattern is worked in basic knit and purl stitches. These two fundamental stitches create the texture and structure of the llama toy. Knitting stockinette stitch, which alternates between rows of knit and purl stitches, gives the toy a smooth and even appearance.
Increasing and Decreasing: To shape the llama’s body and head, the pattern uses increases and decreases. Increasing stitches, such as knit front and back (kfb) or make one (M1), adds stitches and creates a wider shape. Decreasing stitches, such as knit two stitches together (k2tog) or slip slip knit (ssk), remove stitches and create a narrower shape.
Color Changes: The llama toy pattern often incorporates color changes to create different sections of the toy’s body. This can be done through intarsia or fair isle techniques. Intarsia allows you to knit separate sections of different colors, while fair isle involves carrying multiple colors across the row to create small patterns or motifs.
Finishing Techniques: Once the knitting is complete, the pattern guides you through finishing techniques to assemble the llama toy. This may involve sewing different pieces together, stuffing the toy for a plush feel, and adding any additional details such as eyes or a mane. Proper finishing techniques ensure that the toy looks polished and secure.
Overall, the knitted llama toy pattern offers a wonderful opportunity to practice various knitting techniques. It combines the basics of casting on, knit and purl stitches, increasing and decreasing, color changes, and finishing techniques. By following this pattern, you can create an adorable and huggable llama toy while improving your knitting skills.
Basic Knitting Stitches
When starting out with knitting, it is important to learn the basic stitches. These stitches form the foundation for more complex patterns and designs. Here are some of the most common basic knitting stitches:
1. Knit Stitch
The knit stitch is the most basic and commonly used stitch in knitting. It creates a smooth and neat fabric. To knit, insert the right-hand needle into the front of the first stitch on the left-hand needle and wrap the yarn around the right-hand needle. Pull the loop through the stitch and slide the stitch off the left-hand needle. Repeat this process for each stitch.
2. Purl Stitch
The purl stitch is another fundamental stitch in knitting. It creates a bumpy texture on the fabric, often used for ribbing or adding contrast to the knit stitches. To purl, insert the right-hand needle into the front of the first stitch on the left-hand needle from right to left, and wrap the yarn around the right-hand needle. Pull the loop through the stitch and slide the stitch off the left-hand needle. Repeat this process for each stitch.
3. Stockinette Stitch
The stockinette stitch is created by alternating rows of knit stitches and purl stitches. This stitch pattern creates a smooth side (knit side) and a bumpy side (purl side). To achieve the stockinette stitch, knit one row and purl the next row. Repeat these two rows for the desired length.
4. Garter Stitch
The garter stitch is created by knitting every row. This stitch pattern creates rows of bumps on both sides, making it reversible. To achieve the garter stitch, knit every stitch on every row.
5. Seed Stitch
The seed stitch is created by alternating knit and purl stitches within the same row. This stitch pattern creates a textured fabric with small, raised bumps. To achieve the seed stitch, alternate between knitting and purling each stitch within the row.
By mastering these basic knitting stitches, you will be able to create a variety of patterns and designs. Practice and experimentation will help you develop your knitting skills and create unique and beautiful knitted items.
Step-by-Step Instructions for Knitting the Llama Toy

If you’re looking for a fun and cute knitting project, why not try making a llama toy? With this step-by-step guide, you’ll be able to create your very own adorable llama companion.
Materials Needed:
- Yarn in your desired colors
- Knitting needles
- Stuffing
- Tapestry needle
- Scissors
- Stitch markers
Step 1: Cast On
Begin by casting on the required number of stitches for the llama’s body. This will vary depending on the size of your toy and the gauge of your yarn. Use the knitting needles and the yarn of your choice, making sure to leave a long tail for later sewing.
Step 2: Knit the Body
Continue knitting the body in the desired stitch pattern until you reach the desired length. You can use basic knit or purl stitches, or get creative with different stitch patterns to add texture to your llama toy.
Step 3: Shape the Neck and Legs
To create the llama’s neck and legs, you will need to decrease stitches. Follow the pattern instructions to shape these areas and create a realistic form for your toy. Use stitch markers to help keep track of where to decrease.
Step 4: Knit the Head
Separate the stitches for the head from the body and start knitting the head separately. You can add facial features such as eyes, nose, and ears using different colors of yarn or by embroidering them onto the knitted fabric later.
Step 5: Stuff and Assemble
Once all the knitted pieces are complete, it’s time to stuff them with the stuffing material. Make sure to stuff the body, neck, legs, and head firmly to give your llama toy a plush and cuddly feel. Use a tapestry needle to sew the pieces together, starting with the head and working your way down to the body.
Step 6: Finish and Embellish
After assembling the llama toy, weave in any loose ends and trim excess yarn. You can also add additional embellishments like a colorful blanket or a pom-pom tail to make your llama toy uniquely yours.
And there you have it – your very own knitted llama toy! This pattern is a fun and rewarding project for knitters of all skill levels. Whether you’re a beginner or an experienced knitter, you’ll enjoy creating this adorable llama companion.
Casting On and Starting the Body
Before you can start knitting the body of your adorable llama toy, you need to cast on the required number of stitches. To do this, you can use the long tail cast on method. This method is great for creating a neat and sturdy edge.
To begin, measure a tail of yarn that is approximately three times the width of your knitting project. Insert your knitting needle into the loop at the end of the yarn, and create a slip knot. Slide the slip knot onto your needle and pull the tail snugly to secure it.
Hold the needle with the slip knot in your right hand, and with your left hand, use your thumb and index finger to hold the yarn that is connected to the ball. Now you are ready to make your first stitch.
Hold the needle with the slip knot in your right hand and insert the tip of the left needle into the first loop on the right needle. With your right hand, wrap the yarn coming from the ball around the right needle counterclockwise. Take the right needle and pull it through the loop from left to right, creating a new loop on the right needle.
Repeat this process until you have cast on the desired number of stitches. It’s important to keep the tension consistent throughout the process to ensure an even edge. Once you have cast on all your stitches, you are ready to start knitting the body of your adorable llama toy!
Adding Details to the Llama Toy
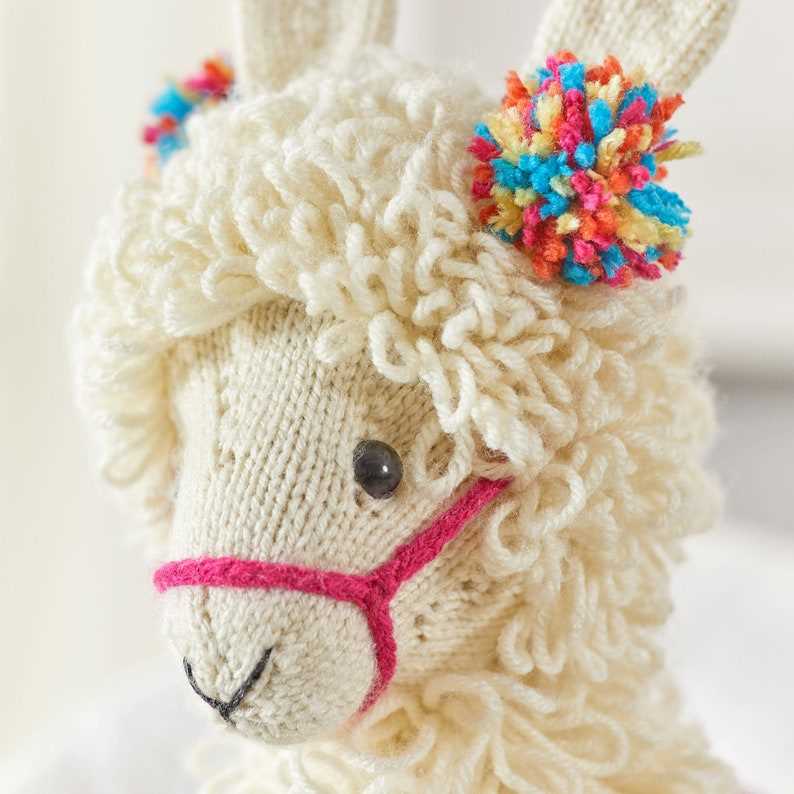
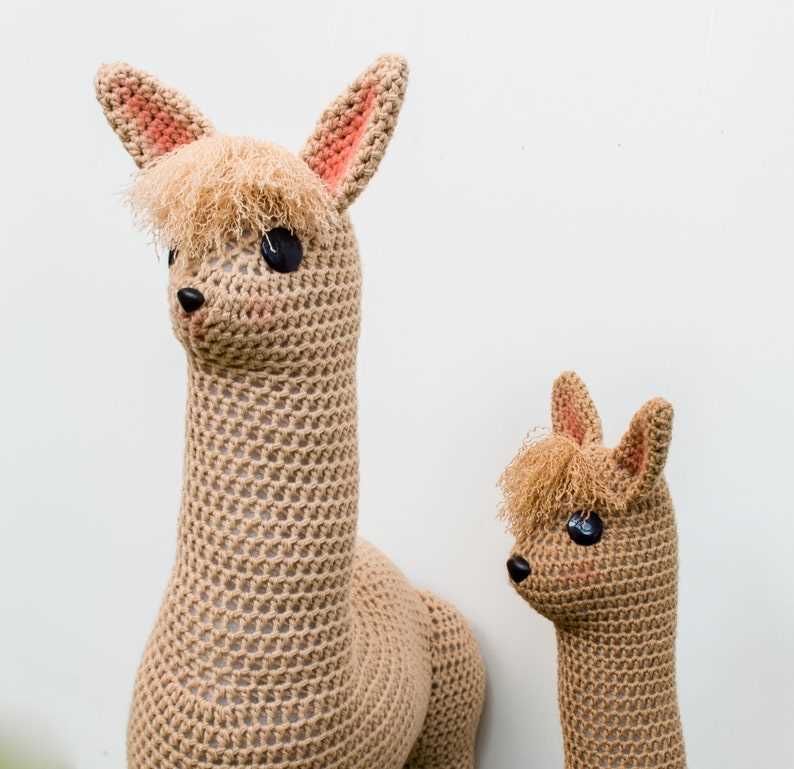
When creating a knitted llama toy, adding details is what brings the toy to life. A well-crafted toy with carefully placed details can bring joy and excitement to both children and adults alike. These details can include features such as the llama’s face, the texture of its fur, and any accessories or embellishments.
1. Face: The face of the llama toy is an important detail to focus on. Embroidering or sewing on small felt pieces for the eyes and nostrils can bring a realistic and expressive look to the toy. Adding a small smile or dimples can also enhance its charm and personality.
2. Fur Texture: To give the llama toy a realistic touch, consider adding texture to its fur. This can be achieved by using different knitting stitches or incorporating additional materials such as fuzzy yarn or miniature pompoms. Adding these details will make the toy more visually appealing and enjoyable to touch.
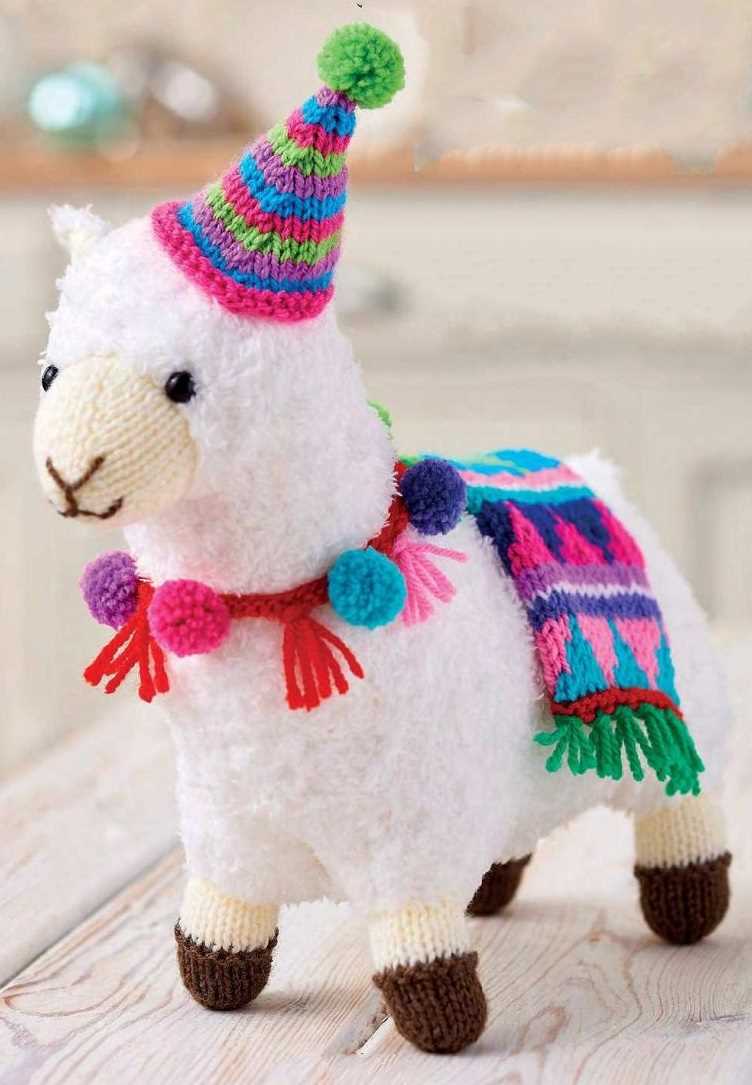
3. Accessories: To make the llama toy even more fun and unique, consider adding accessories such as a tiny scarf, a hat, or a flower crown. These accessories can be knitted separately and then sewn onto the toy. You can use contrasting colors or different yarn textures to make the accessories stand out.
- Face: Embroider or sew on small felt pieces for eyes, nostrils, and a smiling mouth.
- Fur Texture: Use different knitting stitches or incorporate additional materials like fuzzy yarn or miniature pompoms for a more realistic texture.
- Accessories: Knit separate accessories like scarves, hats, or flower crowns and sew them onto the llama toy.
By paying attention to these details, you can transform a simple knitted llama toy into a cherished and unique creation that will be cherished for years to come.
Creating the Llama’s Face
When it comes to creating the face of your knitted llama toy, attention to detail is key. The face is what gives the toy its personality and charm, so take your time and make sure you get it just right.
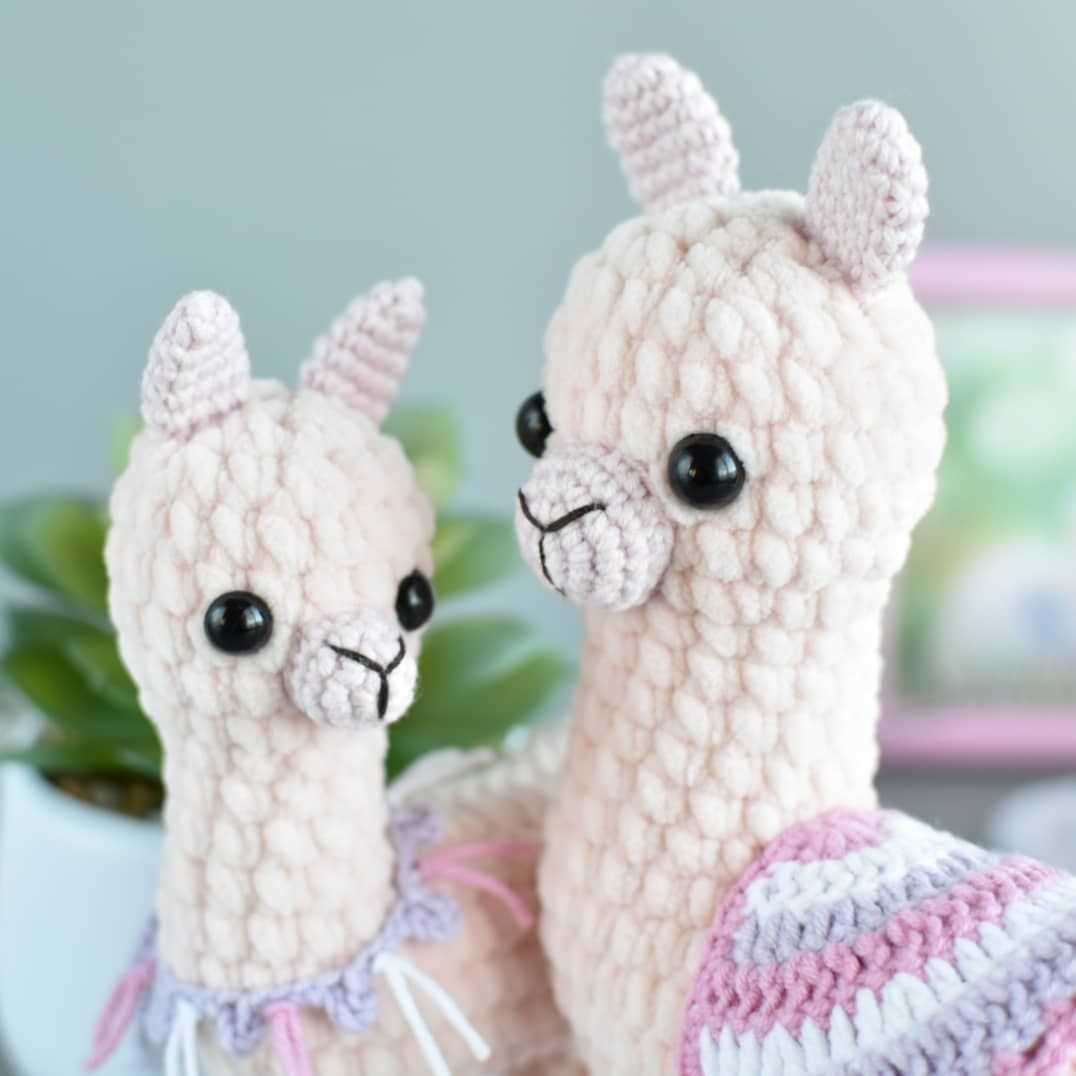
Eyes: Start by embroidering the eyes onto the llama’s face. You can use black yarn or thread to create small, circular eyes that give the toy a cute and innocent look. Place the eyes slightly above the middle of the face to give the llama a friendly expression.
Nose: The nose is an important feature that adds character to the knitted llama toy. Use a contrasting color of yarn or thread to stitch a small triangle shape at the center of the face, just below the eyes. This will give the llama a playful and curious expression.
- Mouth: The mouth can be created using a small piece of pink yarn or thread. Stitch a simple smile in the center of the face, just below the nose. This will give the llama a cheerful and friendly look.
- Eyebrows: Adding eyebrows can instantly change the expression of the llama’s face. Use a lighter shade of yarn or thread to create small, curved lines slightly above the eyes. Experiment with different shapes and angles to give your llama toy a unique and expressive face.
Remember, creating the face of your knitted llama toy is all about adding personal touches and bringing the toy to life. Have fun with it and let your creativity shine!
Finishing Touches for the Knitted Llama Toy
Once you finish knitting your adorable llama toy, it’s time to add the finishing touches to bring it to life. These small details make a big difference in the overall look and feel of the toy. Here are some essential steps to complete your knitted llama:
1. Embroider the Eyes and Nose
Using a small amount of black yarn and a tapestry needle, carefully embroider the eyes and nose onto the llama’s face. You can use a simple stitch to create the eyes and a triangular shape for the nose. Make sure to position them evenly and symmetrically for a cute and expressive face.
2. Attach the Ears
Position the ears on the sides of the llama’s head, slightly towards the front. Using the same color yarn as the llama’s main body, sew the bottom part of each ear to the head. Make sure they are securely fastened and positioned symmetrically.
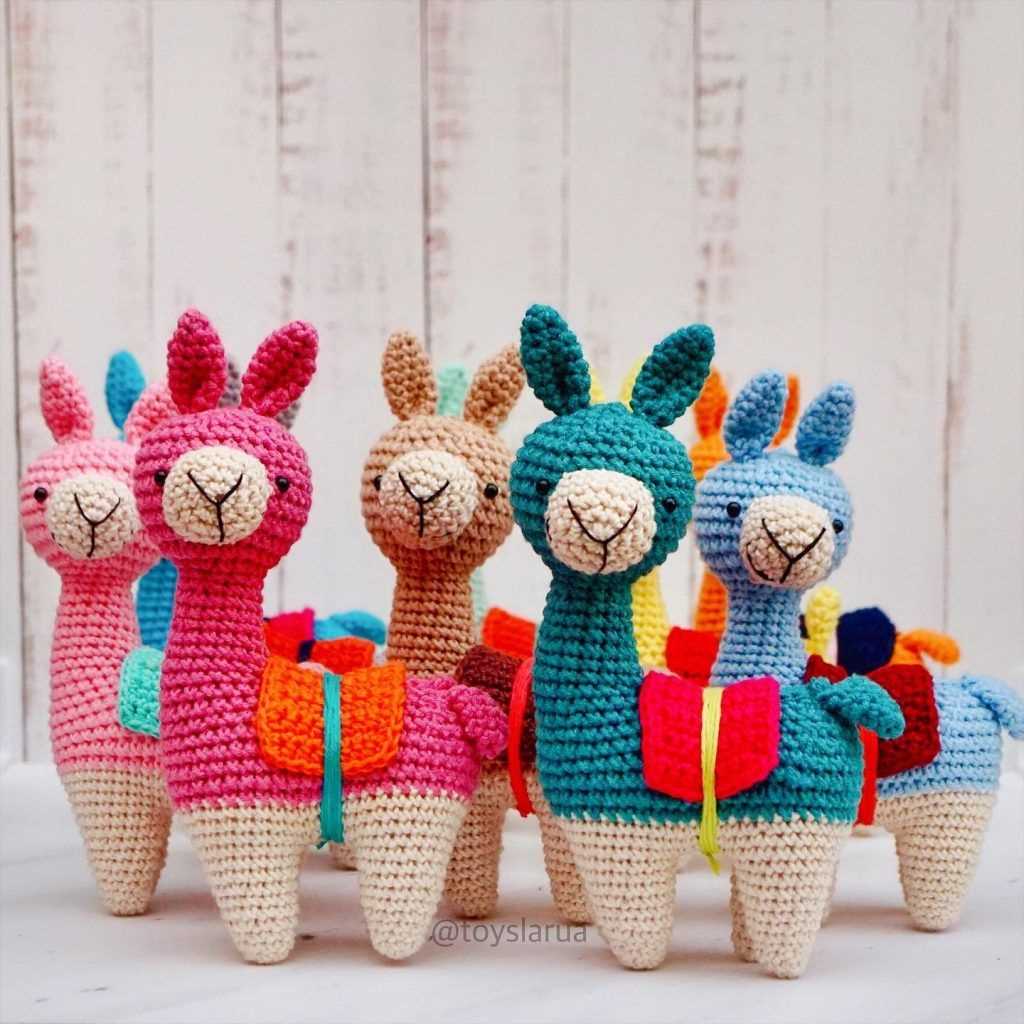
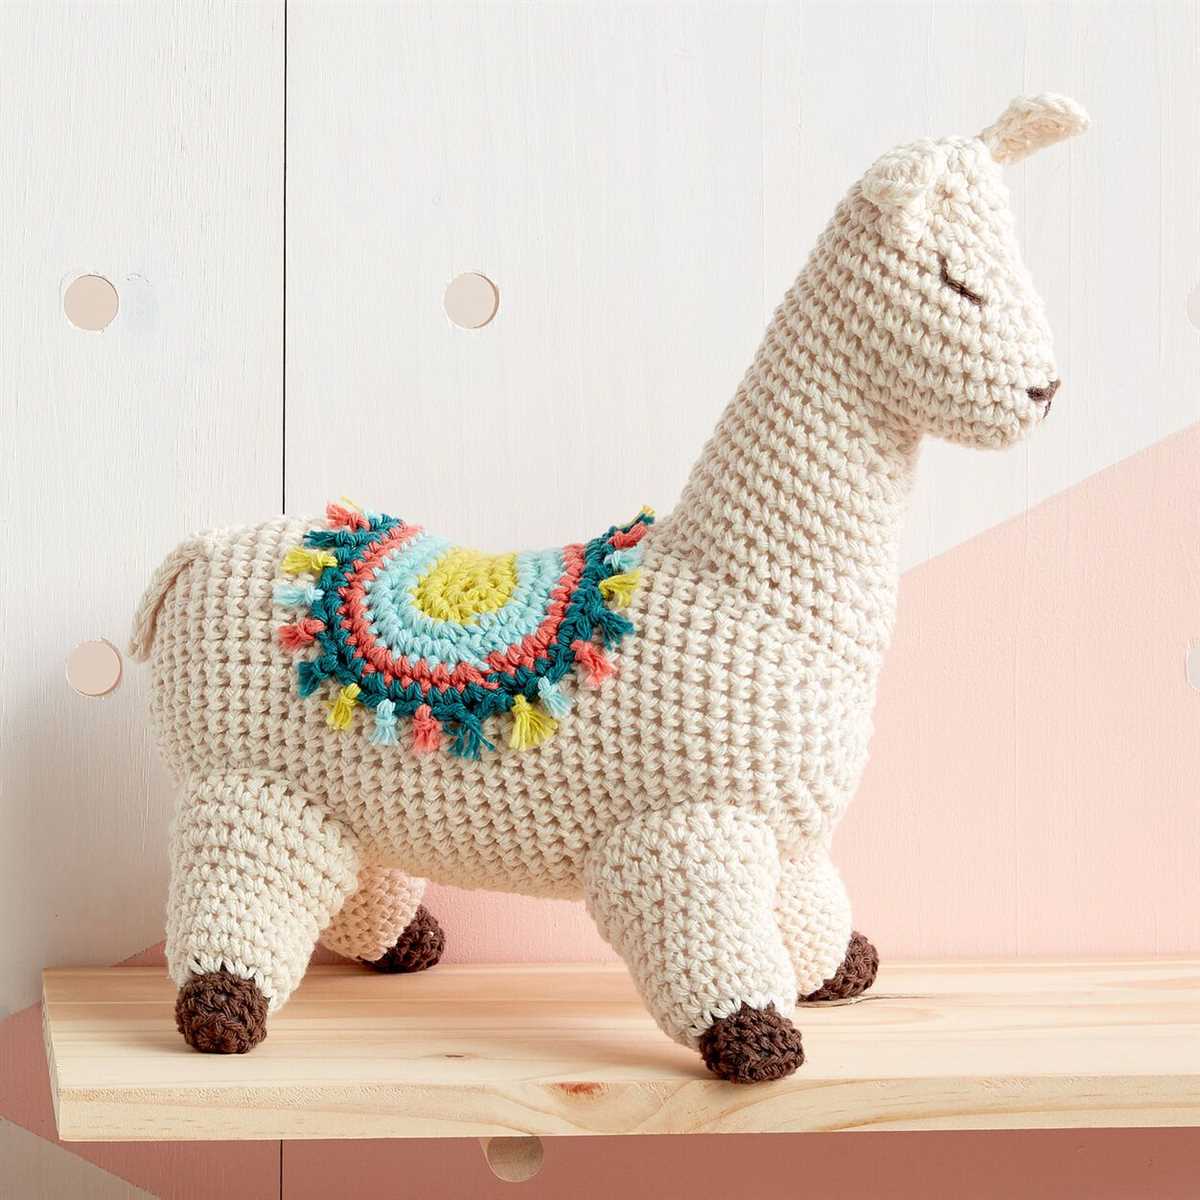
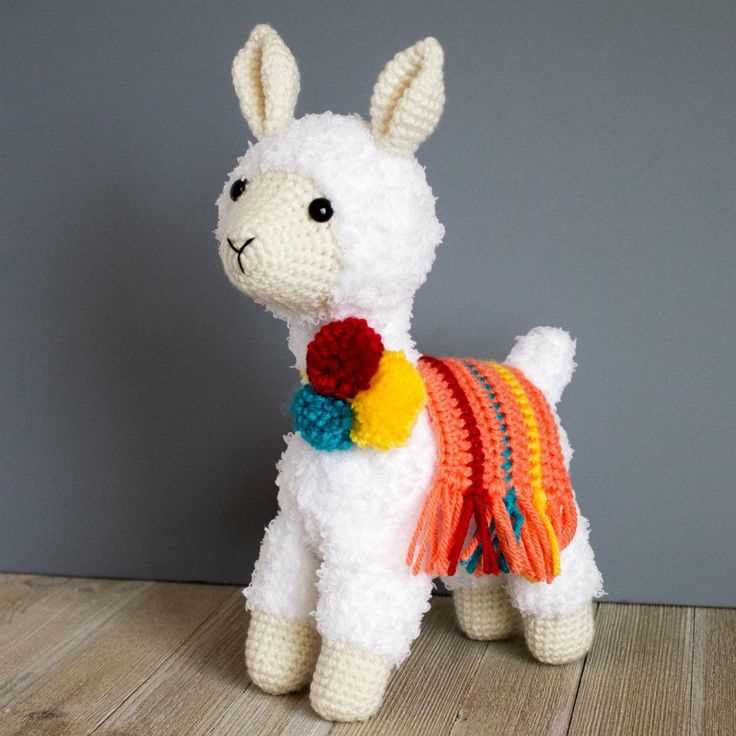
3. Decorate with a Colorful Blanket
Add a pop of color to your knitted llama by knitting or crocheting a small blanket to drape over its back. Choose bright colors or patterns to make it stand out. You can also attach a tassel or pom-pom to each corner of the blanket for an extra playful touch.
4. Finish with Tassels and Bells
For a fun and decorative touch, attach small tassels or jingle bells to the llama’s harness or neck. This adds a festive and whimsical element to the toy. Make sure to securely fasten the tassels or bells, so they don’t come off during play.
By following these steps, you’ll complete your knitted llama toy with all the perfect finishing touches. The embroidered face, attached ears, colorful blanket, and added decorations will make your llama toy truly special and ready for snuggles and playtime.
Sewing the Limbs onto the Body
Once you have completed knitting the limbs for your llama toy, it’s time to sew them onto the body. This step is crucial in bringing your toy to life and giving it a realistic appearance. Here are the steps to follow:
1. Position the limbs: Start by deciding where you want to attach each limb. Use pins to temporarily hold them in place, making sure they are symmetrical and aligned properly.
2. Thread your needle: Choose a thread that matches the color of your llama’s body, and thread your needle with a double strand. This will make the stitching more secure.
3. Secure the limb: With your needle and thread, begin sewing the limb onto the body. Use small, neat stitches to ensure a strong attachment. Start at the top of the limb and sew down, gradually stitching around the edges until the limb feels securely attached.
4. Repeat for all limbs: Repeat the process for each limb, taking care to position them correctly and sew them on securely. Pay attention to the alignment and symmetry to create a balanced appearance.
5. Knot and hide the thread: Once all the limbs are attached, thread the needle through the body and secure the thread with a knot on the inside. Trim any excess thread and hide the knot inside the toy to give it a clean finish.
By following these steps, you’ll be able to sew the limbs onto the body of your knitted llama toy with ease. Take your time and ensure each limb is securely attached for a durable and long-lasting toy.
Tips for Personalizing Your Knitted Llama Toy
Creating your own knitted llama toy can be a fun and rewarding project. Not only can you enjoy the process of knitting, but you can also infuse some personal touches to make your llama toy truly unique. Here are some tips to help you personalize your knitted llama toy:
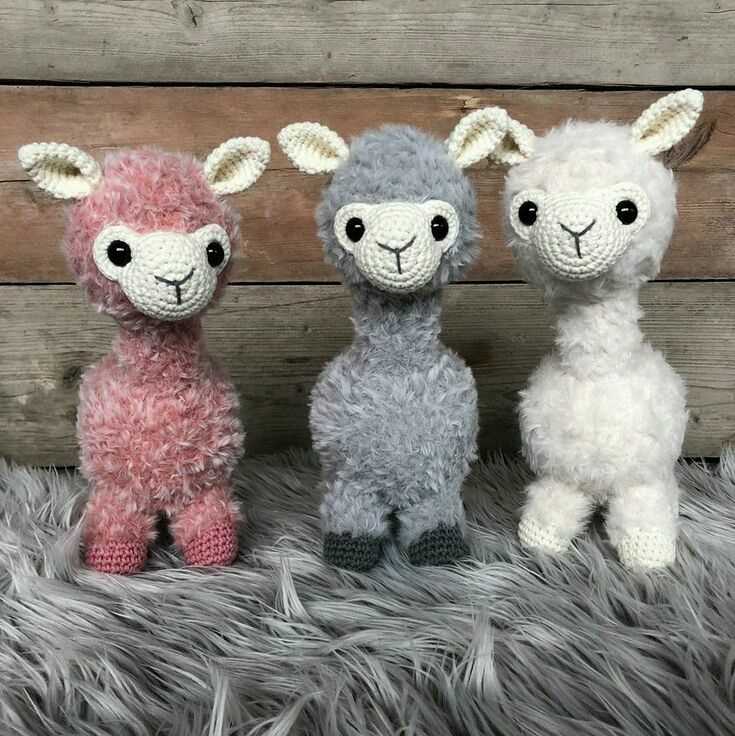
Choose Your Colors
One of the easiest ways to personalize your knitted llama toy is by choosing your own colors. While traditional llamas are usually seen in shades of brown and white, you can mix things up and use any colors that speak to you. Consider using your favorite colors, or incorporating colors that match your home decor.
Add Accessories
To give your knitted llama toy some extra personality, consider adding accessories. You can knit a little scarf or hat to keep your llama toy cozy, or even create miniature versions of things you love, like a tiny knitted book or a tiny knitted basket. These accessories can help showcase your creativity and add a unique touch to your llama toy.
Add Embellishments
If you want to take your personalization to the next level, consider adding embellishments to your knitted llama toy. You can sew on beads or buttons to represent the llama’s eyes, or use embroidery thread to create intricate patterns on its body. These embellishments can add texture and visual interest to your toy, making it even more special.
Write a Personalized Message
To make your knitted llama toy extra special, consider writing a personalized message or name tag. You can knit a small piece of fabric and embroider your message or the toy’s name on it, then attach it to the llama’s body. This adds a personal touch and makes it clear that the toy was made with love and care.
By following these tips, you can create a knitted llama toy that truly reflects your style and personality. Whether you choose unique colors, add accessories, incorporate embellishments, or write a personalized message, your llama toy will be a one-of-a-kind creation that you can cherish for years to come.
Embellishments and Accessories
Adding embellishments and accessories to your knitted llama toy can give it a personal touch and make it even more adorable. Here are some ideas to consider:
1. Embroidery
Embroidery is a great way to add details to your llama toy. You can use colorful embroidery floss to create patterns on the body, face, and ears. Consider adding some flowers, hearts, or other cute motifs to make your llama toy stand out.
2. Beads and Buttons
Adding beads or buttons to your llama toy can create interesting textures and accents. Sew tiny beads or buttons to the body or use larger ones as eyes. Be creative and experiment with different shapes and colors to achieve the desired effect.
3. Ribbons and Bows
A cute ribbon or bow around your llama toy’s neck can add a touch of charm. Use satin or grosgrain ribbons in a color that complements your llama’s fur. You can also tie a small bell to the ribbon for a little jingle when the toy is moved.
4. Scarves and Accessories
Give your llama toy some extra warmth and style by knitting or crocheting a tiny scarf. You can use a different color yarn to make it stand out or match it to the toy’s fur for a coordinated look. You can also consider adding a hat or other accessories like flowers or a tiny backpack.
With these embellishments and accessories, you can make your knitted llama toy truly one-of-a-kind. Let your creativity shine and have fun customizing your new favorite toy!