
Knitting is a beloved craft that allows for endless creativity and self-expression. From sweaters to scarves, there are countless patterns available for knitters of all skill levels. If you’re in the market for a new knitting project and have a set of size 13 knitting needles on hand, look no further than this hat pattern. Whether you’re a beginner or an experienced knitter, this pattern is a great way to showcase your skills and create a cozy accessory for yourself or a loved one.
Made with size 13 knitting needles and a bulky weight yarn, this hat pattern is quick and easy to knit up. The large needle size creates a loose, airy fabric that is perfect for winter wear. The hat features a simple ribbed brim that provides a comfortable and snug fit, while the body of the hat is worked in stockinette stitch for a classic and timeless look. The pattern can be easily customized to fit any head size, making it a versatile option for knitters of all ages and skill levels.
With this size 13 knitting needles hat pattern, you can create a stylish and warm accessory for yourself or a loved one in no time. Whether you’re a beginner or an experienced knitter, this pattern is a great way to experiment with larger needles and bulky weight yarn. So grab your knitting needles and get ready to create a cozy and fashionable hat that will keep you warm all season long!
Why Use Size 13 Knitting Needles for Hats
Knitting hats can be a fun and rewarding project for knitters of all skill levels. When it comes to choosing the right knitting needles for your hat project, size 13 needles are a popular option. These larger needles have a diameter of 9 mm, making them ideal for creating chunky and cozy hats. Here are a few reasons why you might want to consider using size 13 knitting needles for your next hat project.
1. Quick and Easy
Using size 13 knitting needles can help you create hats quickly and easily. The larger needle size allows for thicker yarns to be used, which means you can complete your project in less time. The stitches also tend to be larger, making it easier to see and work with, especially for beginners or those with visual impairments.
2. Chunky and Cozy
If you’re looking to create a hat that is warm and cozy, size 13 knitting needles are a great choice. The larger needle size creates a looser tension, resulting in a chunky and textured fabric. This means that your hat will be extra warm and perfect for keeping you snug during the cold winter months.
3. Versatile Design Options
Size 13 knitting needles open up a world of design possibilities for your hat projects. With the larger gauge, you can experiment with different stitch patterns and textures, such as cables or ribbing, to add interest and style to your hats. You can also easily incorporate different yarn weights and colors to create unique and personalized designs.
4. Great for Charity Knitting
If you’re interested in knitting hats for charity or donation purposes, using size 13 needles can be a great choice. The larger needles allow for faster production, which means you can make more hats in a shorter amount of time. Additionally, the chunky and cozy fabric created by these needles is perfect for providing warmth to those in need.
In conclusion, using size 13 knitting needles for hats offers several advantages. They make the knitting process quicker and easier, allow for the creation of chunky and cozy hats, provide design versatility, and are great for charitable knitting. So next time you’re planning a hat project, consider giving size 13 needles a try!
Benefits of Size 13 Knitting Needles
Size 13 knitting needles are an essential tool for any knitter looking to create chunky and cozy projects. These large-sized needles offer several benefits that make them a popular choice among knitters of all levels.
1. Faster Knitting: One of the main advantages of size 13 knitting needles is that they allow for quicker knitting. Due to their larger size, these needles can hold more stitches, allowing you to complete your project faster.
2. Versatility: Size 13 knitting needles are versatile and can be used for a wide range of projects. Whether you want to knit hats, scarves, blankets, or even sweaters, these needles can accommodate various yarn weights and create beautiful, textured stitches.
3. Chunky and Cozy Results: If you’re looking to create warm and cozy items, size 13 knitting needles are perfect. The larger needles produce a looser and more open stitch, resulting in chunky and cozy garments that are perfect for colder weather.
4. Beginner-Friendly: Size 13 knitting needles can be great for beginners who are just starting their knitting journey. The larger size makes it easier to see and handle the stitches, and the chunky yarn used with these needles can hide any imperfections, making it less intimidating for beginners.
5. Knitting with Bulky Yarn: Size 13 needles are ideal for knitting with bulky or super bulky-weight yarns. These thicker yarns work well with the large needles, creating a soft and plush fabric that is both warm and luxurious.
Overall, size 13 knitting needles are a must-have for any knitter looking to create cozy, chunky projects. Their versatility, speed, and ability to produce warm and stylish garments make them an excellent addition to any knitting toolkit.
Overview of Hat Pattern
The Size 13 knitting needles hat pattern is a simple and stylish way to create a cozy hat for the winter season. This pattern is ideal for knitters with intermediate to advanced skills, as it involves both knitting and purling techniques to create a textured design. The hat is knitted in the round using circular needles and double-pointed needles, allowing for seamless construction and a comfortable fit.
To begin the pattern, cast on the required number of stitches onto the circular needles, making sure to distribute them evenly. The hat is then worked in a ribbed brim pattern, alternating between knit and purl stitches. This creates a stretchy and snug fit around the head.
Once the ribbed brim is complete, the pattern transitions to the main body of the hat. This section is worked in a combination of knit and purl stitches to create a textured design, such as a cable or seed stitch pattern. The pattern will specify the exact stitch pattern to be used, along with any necessary repeats or variations.
As the hat is worked in the round, it is important to continually check your gauge to ensure an accurate fit. Adjustments may need to be made in the number of stitches or needle size to achieve the desired size and gauge.
Finally, the pattern will guide you through the decreasing rounds, where the number of stitches is gradually reduced to shape the top of the hat. This is typically done using double-pointed needles, as the number of stitches becomes too small for circular needles.
Once all the decreasing rounds are complete, the remaining stitches are gathered tightly and secured to close the top of the hat. A pom-pom or other decorative embellishments can be added if desired.
The Size 13 knitting needles hat pattern offers both warmth and style, making it a versatile accessory for the winter months. Whether you’re an experienced knitter looking for a quick project or a beginner wanting to expand your skills, this pattern is sure to provide a satisfying result.
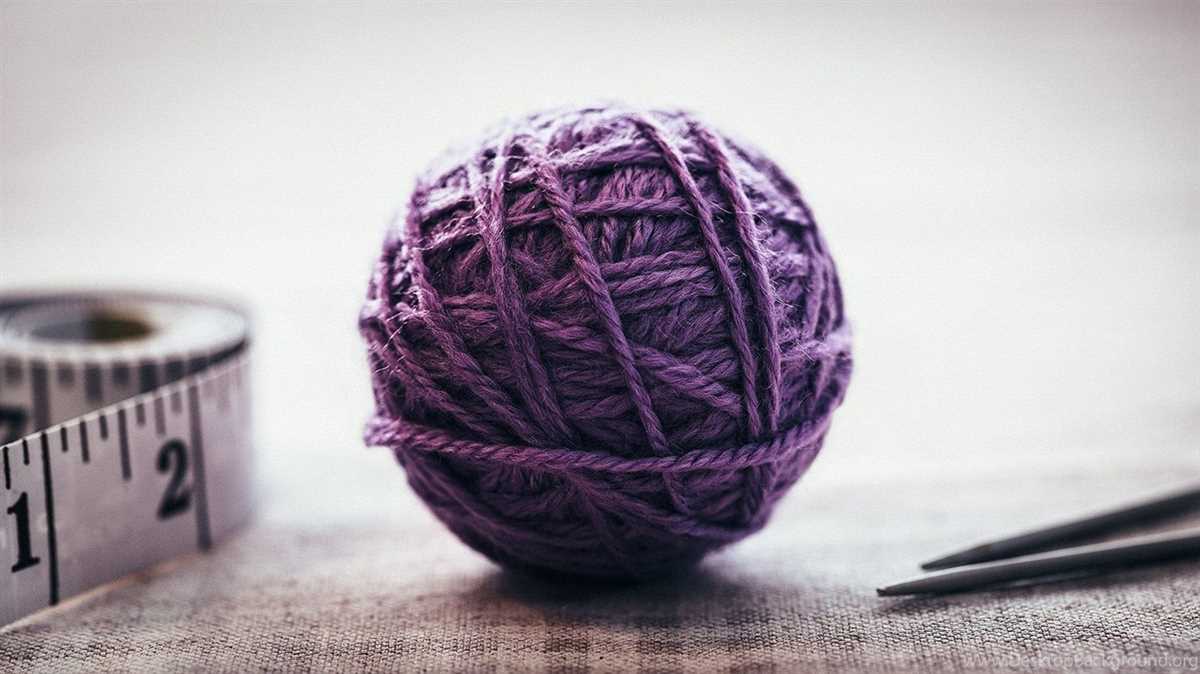
Choosing the Right Yarn
When it comes to knitting, choosing the right yarn is essential. The type of yarn you use can determine the texture, drape, and overall look of your finished project. Therefore, it is important to consider a few key factors before making a decision.
Fiber Content:
One of the first things to consider is the fiber content of the yarn. Different fibers have different characteristics, so it’s important to choose one that suits your project’s requirements. For example, if you’re knitting a warm winter hat, you might opt for a wool or alpaca yarn for its excellent insulation properties. On the other hand, if you’re knitting a lightweight summer top, you may prefer a cotton or linen blend for its breathability.
Weight:
The weight of the yarn refers to its thickness or gauge. Yarns are typically categorized into different weights, such as lace, fingering, sport, DK, worsted, and bulky. Thinner yarns are usually used for delicate projects, while thicker yarns are ideal for cozy sweaters or blankets. When choosing a yarn, make sure to check the recommended gauge on your knitting pattern and choose a yarn that matches it closely for the best results.
Color and Texture:
Another important factor to consider is the color and texture of the yarn. Yarns come in a wide range of colors, from solids to variegated or self-striping options. Consider the color palette you want for your project and choose a yarn that complements it. Similarly, the texture of the yarn can also add interest and dimension to your knitting. Think about the desired outcome of your project and choose a yarn with a texture that aligns with it.
Price and Availability:
Lastly, you should also consider the price and availability of the yarn. Some yarns may be more expensive than others, depending on the fiber content and brand. It’s important to set a budget for your project and choose a yarn that fits within it. Additionally, consider the availability of the yarn. It can be frustrating to start a project and realize that you need more yarn but it’s no longer in stock. If possible, buy a little extra yarn to ensure you have enough to complete your project.
Overall, choosing the right yarn is an important decision that can greatly impact the outcome of your knitting project. By considering factors such as fiber content, weight, color and texture, as well as price and availability, you can make an informed choice that will enhance your knitting experience.
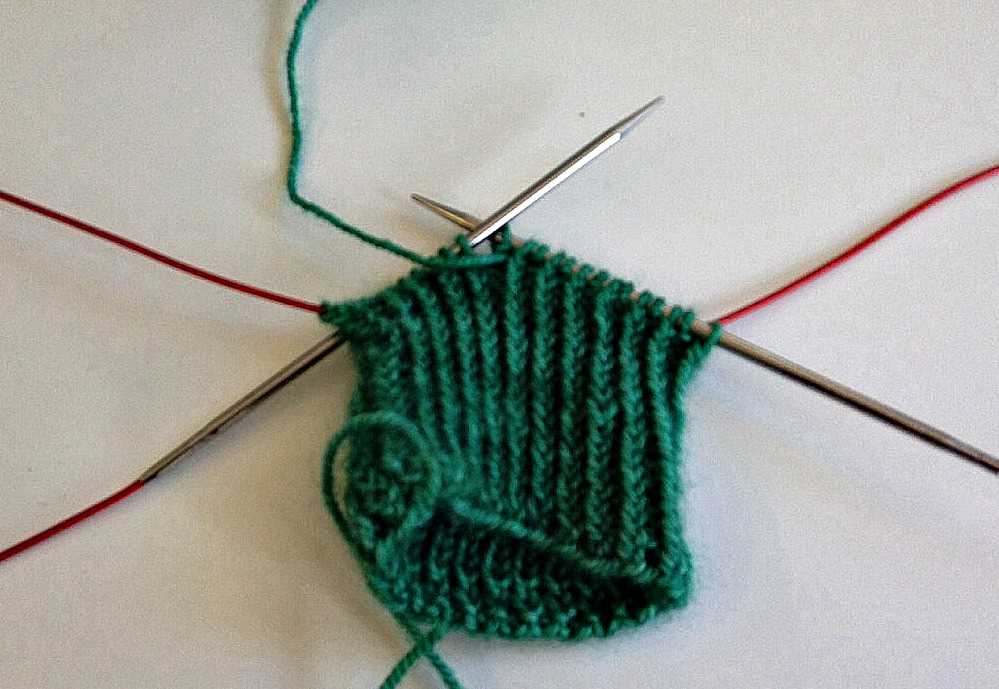
Casting On and Creating Ribbing
Before you can start knitting your hat using size 13 knitting needles, you need to first cast on your stitches. Casting on is the process of creating the foundation row of stitches on your needle. To do this, you will need to make a slipknot with your yarn and place it on one of your knitting needles. Then, using your other knitting needle, insert it into the slipknot and wrap the yarn around the needle.
Once you have cast on the desired number of stitches, you can begin creating ribbing. Ribbing is the band of alternating knit and purl stitches that is typically found at the bottom of hats, sweaters, and other garments. It helps to create elasticity and a snug fit.
To create ribbing, you will need to alternate between knitting and purling stitches for a certain number of rows. For example, you can start by knitting two stitches, then purling two stitches, and continue this pattern until you reach the desired length of ribbing. Remember to always keep your yarn at the back of your work when knitting, and at the front when purling.
As you work on your ribbing, it is important to maintain an even tension and avoid knitting too tightly or too loosely. It may take some practice to get the hang of it, but with time and patience, you will be able to create a beautifully ribbed hat using your size 13 knitting needles.
Transitioning to Main Stitch Pattern
Now that you have cast on your stitches and worked a few rows of the ribbing, it’s time to transition to the main stitch pattern for your hat. The main stitch pattern will create the body of the hat and give it its unique design.
To transition to the main stitch pattern, you will need to follow the instructions provided in the pattern. This may include changing needle size, changing stitch counts, or introducing new stitch patterns. Make sure to read through the instructions carefully and understand any abbreviations or special stitches that may be used.
Step 1: Once you have finished the ribbing, check the pattern to see what stitch pattern is next. This could be a simple stockinette stitch, a cable stitch, or a combination of different stitches.
For example: If the pattern calls for a stockinette stitch, you will need to alternate between knitting one row and purling one row until you reach the desired length for your hat. Follow the pattern instructions for the specific number of rows and stitches.
Step 2: As you transition to the main stitch pattern, make sure to keep track of your rows and stitch counts. You may find it helpful to use stitch markers to indicate different sections of the hat or a row counter to keep track of your progress.
Step 3: Continue working the main stitch pattern according to the pattern instructions until you reach the desired length for your hat. Remember to check your gauge periodically to ensure that your hat is coming out to the correct size.
By following these steps, you will be able to smoothly transition from the ribbing to the main stitch pattern and create a beautiful hat using your size 13 knitting needles. Have fun with your project and enjoy the process of bringing your hat to life!
Shaping the Crown
When knitting a hat with size 13 knitting needles, shaping the crown is an important step in creating the desired fit and style. To achieve a well-fitting crown, several decreases are typically worked in a strategic manner.
One common method for shaping the crown is to begin by working a set number of decrease rounds. These rounds are typically spaced evenly throughout the crown of the hat and involve knitting or purling two stitches together to decrease the total number of stitches. This creates a gradual tapering effect towards the top of the hat.
The number of decrease rounds and the frequency of decreases within each round can be adjusted depending on the desired shape and fit of the hat. For a more slouchy style, fewer decrease rounds and a slower decrease rate may be used. For a more structured and fitted style, more decrease rounds and a faster decrease rate may be employed.
It is important to keep track of the number of stitches remaining after each decrease round to ensure that the crown is shaping correctly. A stitch marker can be placed at the beginning of the round to help keep track of the rounds and make it easier to count stitches.
Once the desired number of decrease rounds has been worked, the remaining stitches are usually gathered and cinched together using a yarn needle. This creates a closed top for the hat and finishes the crown shaping process.
By carefully shaping the crown of a hat with size 13 knitting needles, you can create a stylish and well-fitted accessory. Whether you prefer a slouchy or structured style, understanding the techniques and strategies for shaping the crown will help you achieve the desired result.
Adding Pom-Pom or Other Embellishments
Adding a pom-pom or other embellishments to your hat can add a fun and playful touch to your knitting project. There are various ways you can go about adding these embellishments, depending on your personal preference and style.
One option is to use a pom-pom maker to create a fluffy and perfectly shaped pom-pom. These tools typically come in different sizes, so choose one that matches the desired size of your pom-pom. Simply wrap your yarn around the pom-pom maker, following the instructions provided, then cut and tie off the yarn. Fluff up the pom-pom and attach it securely to the top of your hat using a yarn needle and the remaining strands of yarn.
If you prefer a different type of embellishment, you can also consider adding buttons, beads, or even embroidered designs to your hat. Sew on buttons in a pattern or arrange beads to create a unique design. For embroidery, you can use a contrasting color of yarn to create small flowers, stars, or other motifs. This allows for endless customization possibilities and gives your hat a personalized touch.
Here are some steps to consider when adding embellishments:
- Decide on the type of embellishment you want to add.
- Gather the necessary materials, such as yarn, pom-pom maker, buttons, beads, or embroidery floss.
- If adding a pom-pom, use a pom-pom maker to create the pom-pom.
- If adding buttons or beads, decide on the placement and sew them securely onto the hat.
- If adding embroidery, plan out the design and use a contrasting color of yarn to stitch it onto the hat.
- Make sure all embellishments are securely attached to the hat.
By adding pom-poms or other embellishments to your knitting project, you can take a simple hat pattern and make it truly unique and eye-catching. Have fun experimenting with different options and let your creativity shine!
Blocking and Finishing
Blocking is an important step in finishing your knitted hat. It helps to shape and smooth out the stitches, giving your hat a polished and professional look. To block your hat, you will need to soak it in lukewarm water, then gently squeeze out any excess water.
Next, lay your hat flat on a clean towel, and using your hands, gently stretch and shape the hat to the desired size and shape. You can use pins to hold the hat in place if needed. Leave the hat to dry completely before removing the pins.
Blocking tools such as blocking wires and mats can also be used to help shape your hat. These tools allow you to achieve a more precise and even shape, making your hat look even more professional. Simply follow the instructions provided with the blocking tools to use them effectively.
Finishing touches can also be added to your knitted hat to give it a unique and personal touch. You can add a pom-pom to the top of the hat using a pom-pom maker or by hand. Alternatively, you can attach a decorative button or brooch to the front or side of the hat. These small additions can make a big difference in the overall look of your finished hat. Experiment with different embellishments to find the perfect finishing touch for your hat.
Always remember to wash and block your hat before adding any finishing touches. This will ensure that the stitches are even and the hat is in its final shape. Once your hat is completely dry, you can proudly wear or gift your finished knitted hat.
Tips for Success
When working with size 13 knitting needles to create a hat, there are several tips that can help ensure your success. These tips can make the process easier and result in a well-fitting and stylish hat.
1. Choose the right yarn:
When knitting a hat with size 13 needles, it’s important to choose a yarn that will work well with this needle size. Look for yarns that are recommended for size 13 or larger needles, as they will have the appropriate thickness and tension to create a good fabric with these needles.
2. Check your gauge:
Take the time to check your gauge before starting your hat. Use your size 13 needles and the yarn you have chosen, and create a swatch of knit stitches. Measure the number of stitches and rows per inch, and compare it to the gauge recommended in the pattern you are using. Adjust your needle size if necessary to match the gauge, as this will ensure that your hat comes out the correct size.
3. Use a circular needle:
Consider using a circular needle instead of straight needles when knitting your hat. The circular needle can accommodate the large number of stitches required for a hat, and it can also make it easier to work the decreases at the crown of the hat. You can still knit flat on a circular needle by simply turning the work at the end of each row.
4. Pay attention to stitch markers:
Use stitch markers to help keep track of important points in your hat, such as the beginning of the round or the placement of decreases. This can prevent mistakes and make it easier to follow the pattern accurately.
5. Take breaks:
Knitting a hat with size 13 needles can be physically demanding, especially if you are using a heavy or thick yarn. Take breaks regularly to rest your hands and avoid strain or fatigue. This will help you maintain a consistent tension and improve the overall quality of your finished hat.
6. Try different techniques:
Explore different knitting techniques to enhance the style and texture of your hat. Consider incorporating cables, lace patterns, or colorwork to add visual interest to your project. Don’t be afraid to experiment and push your knitting skills further.
By following these tips, you can increase your chances of success when knitting a hat with size 13 needles. Remember to choose the right yarn and check your gauge, use a circular needle for convenience, utilize stitch markers, take breaks, and try different techniques to create a hat that is both functional and fashionable.
Common Mistakes to Avoid
Knitting with size 13 needles can be a fun and rewarding project, but it’s important to be aware of common mistakes that can occur. By avoiding these mistakes, you can ensure that your hat comes out beautifully and fits properly.
1. Incorrect tension:
One common mistake is knitting with incorrect tension. Tension refers to how tightly or loosely you pull your yarn while knitting. If your tension is too tight, your hat may end up too small and difficult to stretch. On the other hand, if your tension is too loose, your hat may be too large and floppy. Be sure to practice maintaining a consistent tension throughout your project.
2. Not checking gauge:
Gauge is the number of stitches and rows per inch in your knitting. It’s important to check your gauge before starting your hat pattern, as using the wrong gauge can result in a hat that doesn’t fit properly. Make a swatch with your size 13 needles and check the number of stitches and rows over a 4-inch square. Adjust your needle size if needed to achieve the correct gauge.
3. Lack of attention to pattern instructions:
When knitting a hat pattern, it’s important to pay close attention to the instructions. Skipping or misinterpreting a step can lead to a hat that doesn’t turn out as expected. Take the time to read through the pattern before starting and make sure you understand each step before proceeding.
4. Using the wrong yarn weight:
Using the wrong yarn weight can result in a hat that is too thick or too thin. The pattern you’re working with will specify the recommended yarn weight, so be sure to choose a yarn that matches the recommended weight. This will ensure that your hat has the appropriate drape and warmth.
Avoiding these common mistakes will help you create a beautiful hat using size 13 knitting needles. Remember to pay attention to your tension, check your gauge, follow the pattern instructions, and choose the correct yarn weight. Happy knitting!
Using Size 13 Knitting Needles for Other Projects
If you have a pair of size 13 knitting needles and are looking for other projects to work on, don’t worry! There are plenty of options out there that will allow you to put those needles to good use. Whether you’re a beginner or an experienced knitter, these projects will provide you with a fun and rewarding knitting experience.
Hats: Size 13 knitting needles are perfect for knitting hats. They allow for a loose and comfortable gauge, creating a cozy and warm hat. You can experiment with different stitch patterns and yarns to create hats that suit your style. Plus, hats are quick and satisfying projects that make great gifts.
Scarves: Another great project for size 13 knitting needles is scarves. The larger needles create a loose and airy fabric, making the scarf soft and drapy. You can use a simple stitch pattern or get creative with different textures and colors. Scarves are versatile and can be worn year-round, making them a practical and stylish project.
Blankets: Size 13 knitting needles are also great for knitting blankets. The large needles create a cozy and chunky fabric, perfect for snuggling up on the couch. You can choose a simple garter stitch pattern or get more intricate with cables or lace. Knitting a blanket can be a long-term project, but the end result is definitely worth it.
Sweaters: If you’re up for a challenge, you can use size 13 knitting needles to knit a sweater. The larger needles create a loose and drapey fabric, perfect for oversized and comfy sweaters. You can choose a simple stockinette stitch pattern or get creative with different stitch patterns. Sweaters are more time-consuming projects, but they are incredibly rewarding.
Conclusion:
Size 13 knitting needles are versatile tools that can be used for a variety of knitting projects. Whether you’re knitting hats, scarves, blankets, or sweaters, these needles will provide you with a fun and enjoyable knitting experience. So go ahead and get creative with your size 13 knitting needles- the possibilities are endless!