
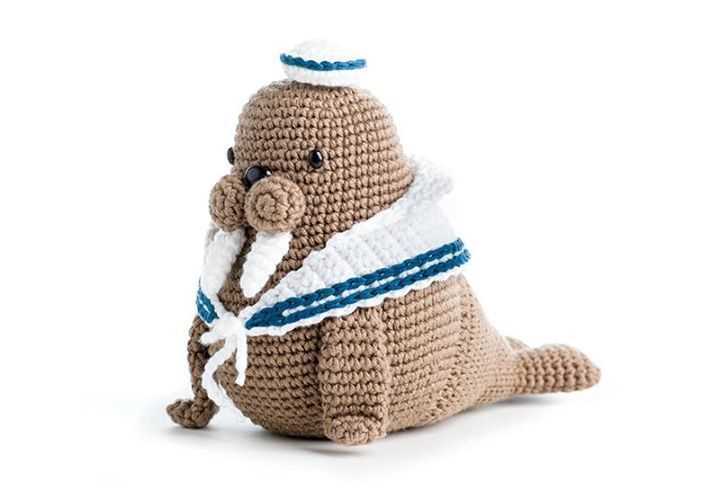
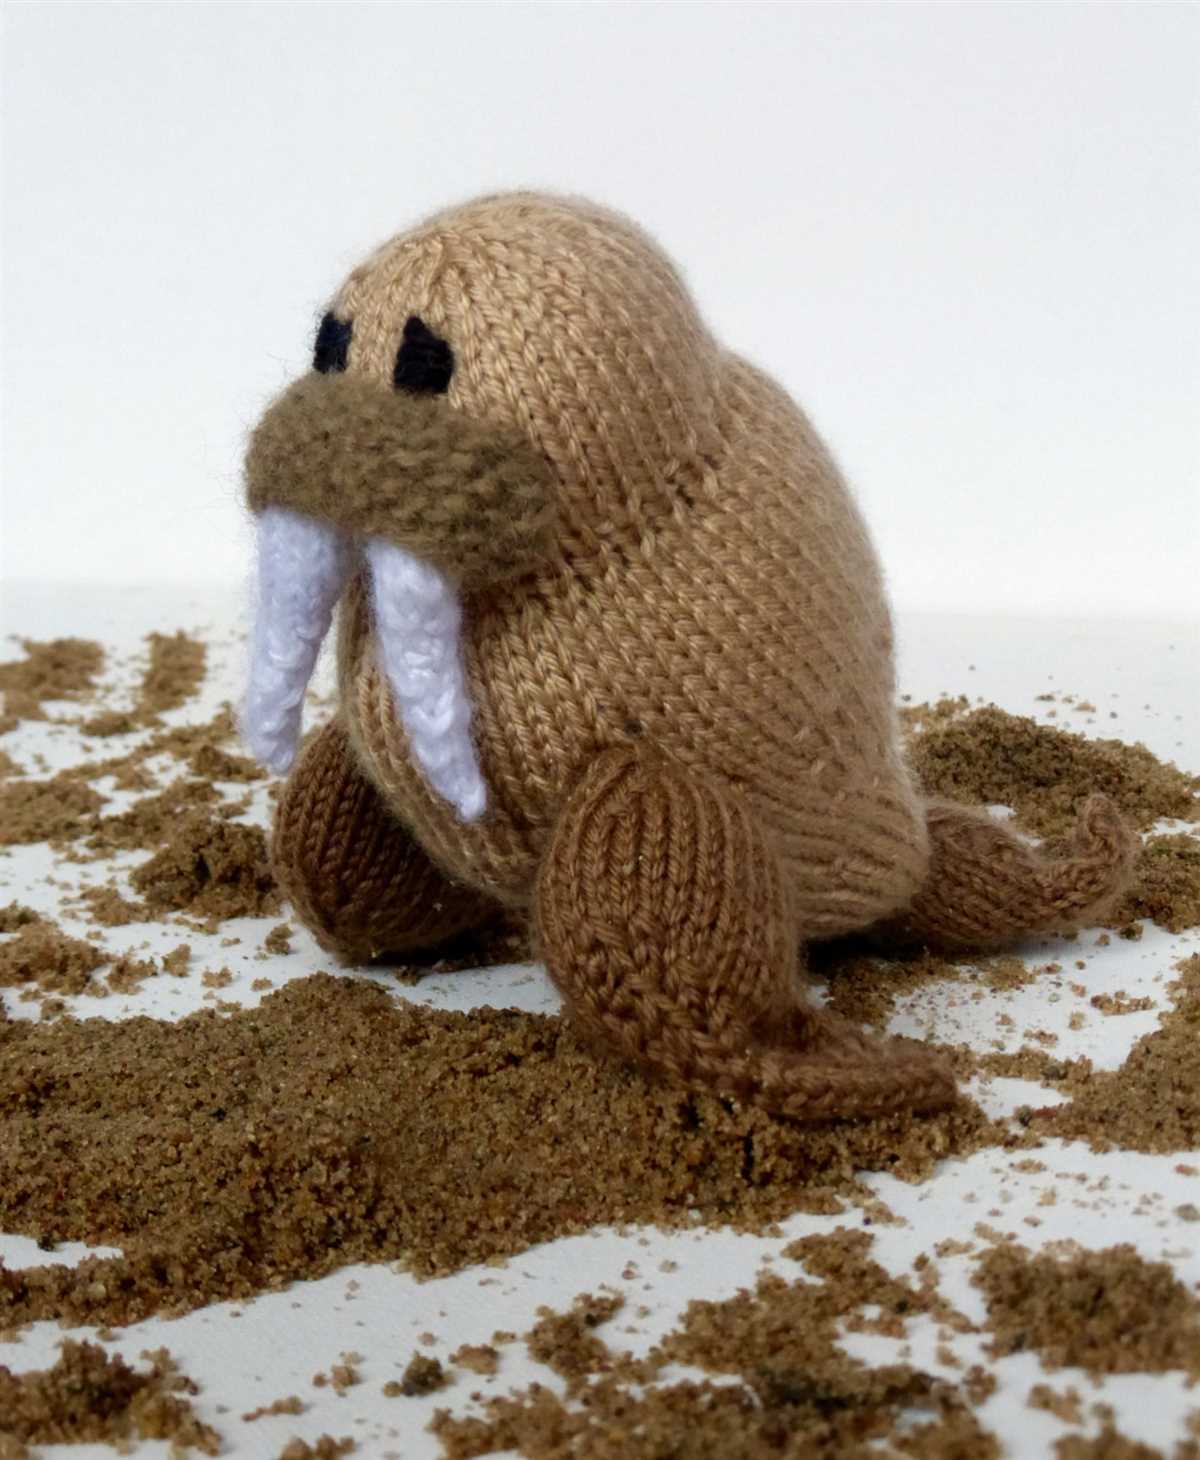
If you’re a knitter looking for a new project, why not try your hand at making a walrus? These adorable creatures are not only fun to knit, but they also make great companions or gifts for friends and family. With their big tusks and floppy flippers, walruses are a unique and charming addition to any collection of knitted animals.
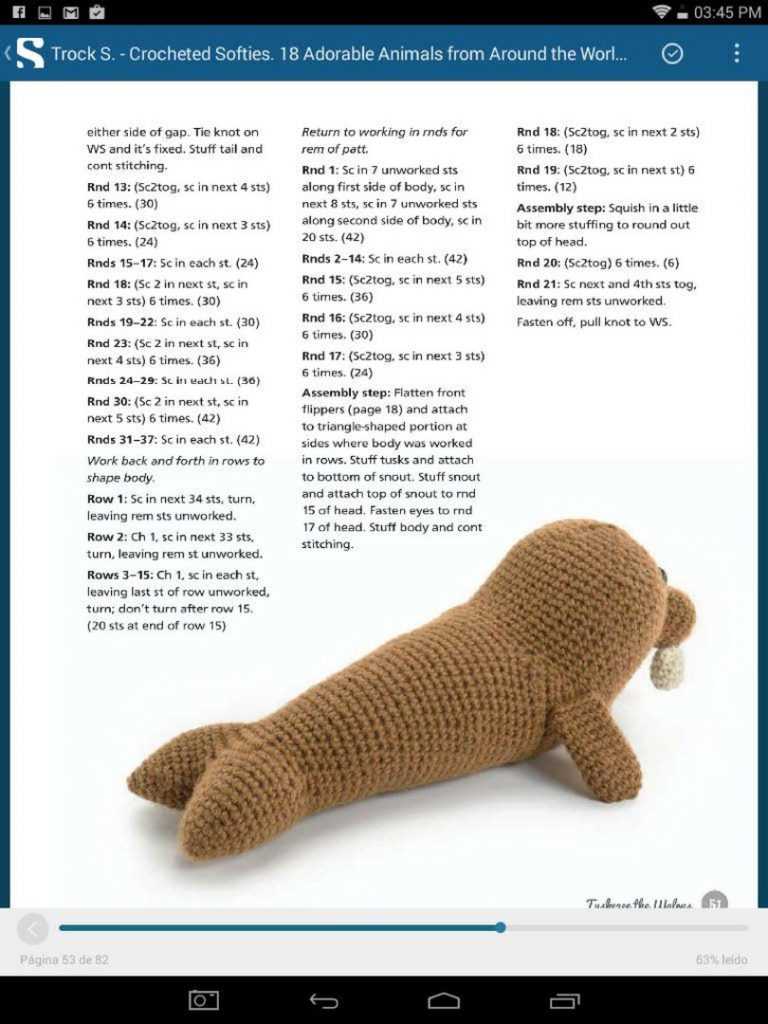
Fortunately, there are many walrus knitting patterns available online that can guide you through the process. Whether you’re a beginner or an experienced knitter, there’s a pattern out there that’s perfect for you. Some patterns include step-by-step instructions with detailed photos, while others offer more advanced techniques for those who are looking for a challenge.
To get started, you’ll need some basic knitting supplies. This includes yarn in the color of your choice, knitting needles, stuffing, and safety eyes. You may also want to invest in some stitch markers and a tapestry needle to help with the finishing touches. Once you have all your supplies, it’s time to cast on and start knitting!
Remember, knitting should be a fun and relaxing hobby, so don’t worry if your first attempt isn’t perfect. With practice, you’ll soon be creating walruses that are so cute, you won’t be able to resist giving them as gifts to everyone you know!
Why Knitting a Walrus is a Unique and Fun Project
Knitting is a beloved hobby that allows individuals to express their creativity and create beautiful handmade items. And if you’re looking for a unique and fun project to work on, knitting a walrus can be a great choice. Not only is it an adorable and charming animal to knit, but it also provides several exciting challenges and opportunities for creativity.
1. Uniqueness: Knitting a walrus is not something you see every day. While there are numerous patterns available for popular animals like cats or dogs, finding a pattern for a walrus can be a novelty. This uniqueness adds charm and excitement to your knitting project, making it a standout piece that will surely catch everyone’s attention.
2. Challenging Techniques: Knitting a walrus requires mastering various knitting techniques, such as working with multiple colors, creating textured stitches, and shaping intricate details. The process of knitting a walrus will help you expand your knitting skills and knowledge, as you navigate through different stitch patterns and techniques to recreate the unique features of this lovable animal.
3. Creativity in Design: While there are existing walrus knitting patterns available, you can also unleash your creativity and make modifications to suit your preferences. You can experiment with different colors, textures, and embellishments to add your personal touch to the walrus design. This allows you to customize the project and make it truly unique, showcasing your artistic flair.
4. Endearing Result: Once you complete the knitting process and see the final result, you’ll be rewarded with an adorable and cuddly walrus. This handmade creation can serve as a delightful decorative item, a charming gift for a loved one, or a cherished keepsake. The satisfaction of creating something so charming with your own hands is truly special and makes knitting a walrus a worthwhile and enjoyable project.
In conclusion, knitting a walrus is a unique and fun project that offers a combination of creativity, challenges, and a delightful end result. Whether you’re an experienced knitter or a beginner looking to expand your skills, knitting a walrus can provide a rewarding and enjoyable experience that will leave you with a tangible and lovable keepsake.
Choosing the Right Yarn
When it comes to knitting, choosing the right yarn is crucial for a successful project. The type of yarn you choose will determine the look, feel, and durability of your finished piece. There are several factors to consider when selecting a yarn, including fiber content, weight, and color.
Fiber Content: The fiber content of the yarn will greatly affect the characteristics of your knitted item. Common yarn fibers include wool, cotton, acrylic, and blends of these materials. Wool is known for its warmth and elasticity, making it a popular choice for winter garments. Cotton, on the other hand, is breathable and lightweight, making it ideal for summer knits. Acrylic yarn is affordable and easy to care for, making it suitable for everyday wear. Blends of different fibers can combine the best qualities of each material.
Weight: Yarn weight refers to the thickness or density of the yarn. It is important to choose a yarn weight that matches your pattern’s requirements to ensure the proper gauge and finished size. Common yarn weights include lace, fingering, sport, worsted, and bulky. Lace and fingering weight yarns are thin and delicate, while bulky weight yarns are thick and cozy. The weight of the yarn will also determine the needle size and the drape of your finished project.
Color: The color of your yarn is a personal preference and can greatly impact the overall look of your knitted item. Whether you prefer bold and vibrant hues or soft pastels, there is a wide range of color options available. When choosing a color, consider the intended use of your knitted item and the recipient’s preferences. Some patterns may also require specific color choices to achieve the desired effect.
In conclusion, choosing the right yarn is essential for a successful knitting project. Take into account the fiber content, weight, and color to ensure your finished piece meets your expectations. With a wide variety of yarn options available, you can find the perfect yarn to bring your knitting vision to life.
Selecting the Perfect Knitting Needles
When it comes to knitting, selecting the right needles is crucial for achieving the desired results. The type and size of needles you choose can greatly impact the finished project, as well as the ease and comfort of the knitting process. With so many options available, it can be overwhelming to choose the perfect set. Here are some factors to consider when selecting knitting needles:
Material
The material of the knitting needles can vary, and each material has its own unique characteristics. Common materials include wood, bamboo, metal, and plastic. Wood and bamboo needles are known for their warmth, light weight, and smoothness, making them a popular choice for many knitters. Metal needles, on the other hand, are durable and provide slick surfaces for fast knitting. Plastic needles are often inexpensive and lightweight, but they may lack the smoothness of other materials.
Size
The size of knitting needles is typically measured in millimeters or US sizes. The size of the needles will depend on the thickness of the yarn you are using and the desired tension. Thicker yarns generally require larger needles, while finer yarns call for smaller needles. It is important to choose the appropriate size to ensure that your stitches are neither too loose nor too tight.
Type
There are different types of knitting needles, such as straight needles, circular needles, and double-pointed needles. Straight needles are commonly used for flat knitting projects, while circular needles are versatile and can be used for both flat and circular knitting. Double-pointed needles are ideal for knitting in the round or working on small, intricate projects. Consider the type of project you will be working on when choosing the right needle type.
Gauge
Another important factor to consider is the gauge of the knitting needles. Gauge refers to the number of stitches and rows per inch, and it determines the size of the finished project. The gauge can vary depending on the material and size of the needles, as well as the tension of the knitter. It is recommended to check the gauge before starting a project to ensure that it matches the pattern instructions.
Comfort
Last but not least, the comfort of the knitting needles should not be overlooked. Knitting projects can take a long time to complete, so it is important to choose needles that feel comfortable in your hands. Some knitters prefer lightweight needles, while others prefer heavier ones. It is a personal preference, and you may need to try different types of needles to find the ones that are most comfortable for you.
By considering these factors, you can find the perfect knitting needles that will enhance your knitting experience and help you create beautiful, well-executed projects. Take your time to explore different options and experiment with different materials, sizes, and types of needles until you find your favorites. Happy knitting!
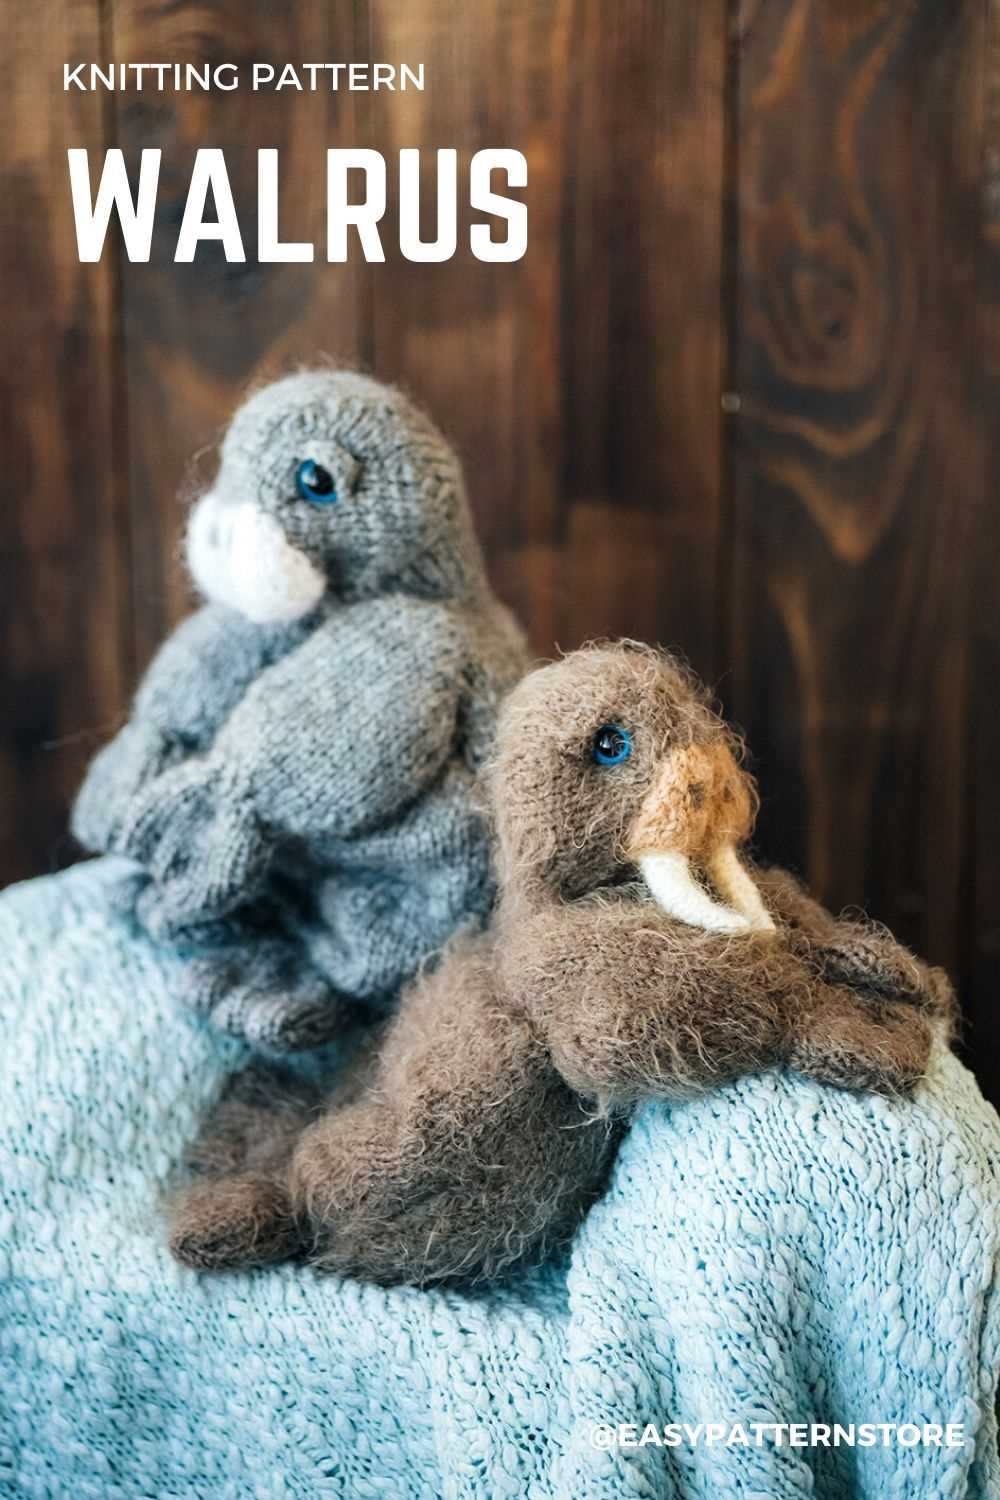
Understanding the Walrus Pattern Design
The Walrus knitting pattern design is a popular choice among knitting enthusiasts who want to create a cute and cuddly stuffed animal. This pattern typically follows a detailed set of instructions that guide the knitter through each step of the process, from selecting the right yarn and needles to shaping the body and adding the finishing touches. Understanding the walrus pattern design requires a basic understanding of knitting techniques, as well as a willingness to follow the instructions closely.
Materials:
- Yarn: The pattern usually recommends using a medium-weight yarn in shades of grey and white to achieve a realistic walrus color.
- Needles: Circular or double-pointed needles in the appropriate size for your chosen yarn.
- Stuffing: A soft and durable stuffing material to give the walrus its shape.
- Other Accessories: Safety eyes, yarn for embroidery, and a tapestry needle for sewing and adding details.
Instructions:
- Start by casting on the required number of stitches and joining them in the round, if working with circular needles.
- Follow the pattern’s instructions for knitting the body, which often involve shaping the front and back pieces separately and then joining them.
- Continue knitting the body until you reach the desired length, following any specific instructions for adding the walrus’s features such as the flippers, muzzle, and tusks.
- Once the body is complete, stuff it firmly with the stuffing material, making sure to evenly distribute it for a smooth and plump appearance.
- When the body is stuffed, it’s time to sew up any remaining openings and attach any additional details, such as the eyes, using the tapestry needle and yarn for embroidery.
- Finally, give your walrus a finishing touch by adding any desired embellishments, such as a scarf or a little knitted fish.
The walrus pattern design provides a fun and challenging project for knitters of all skill levels. Whether you’re a beginner or an experienced knitter, following the pattern’s instructions and paying attention to detail will result in a delightful knitted walrus that will bring joy to anyone who receives it.
Getting Started with the Body
Once you have completed knitting the head and fins of your walrus, it’s time to move on to the body. The body is made up of several sections that will be seamed together to create the final shape. Here are the steps to get started:
1. Knitting the Main Body
To begin the body, you will need to cast on a certain number of stitches, depending on the desired size of your walrus. You can refer to the knitting pattern for the specific cast on instructions.
Once you have cast on, you will work in the specified stitch pattern to create the body. This may involve knitting in the round or knitting flat, depending on the pattern. Be sure to read the instructions carefully and follow any shaping instructions as needed.
2. Shaping the Body
As you work on the body, there may be instructions for shaping the walrus’s belly or creating a taper towards the tail. These shaping instructions are usually achieved through decreases or increases in stitches. Again, carefully follow the pattern instructions to ensure correct shaping.
Keep in mind that the body may also include color changes or stitch patterns to add texture and detail to your walrus. Take your time and enjoy the process of creating a unique and adorable cuddly companion.
- Cast on the required number of stitches
- Follow the stitch pattern specified in the pattern
- Pay attention to any shaping instructions
- Enjoy the process and have fun creating!
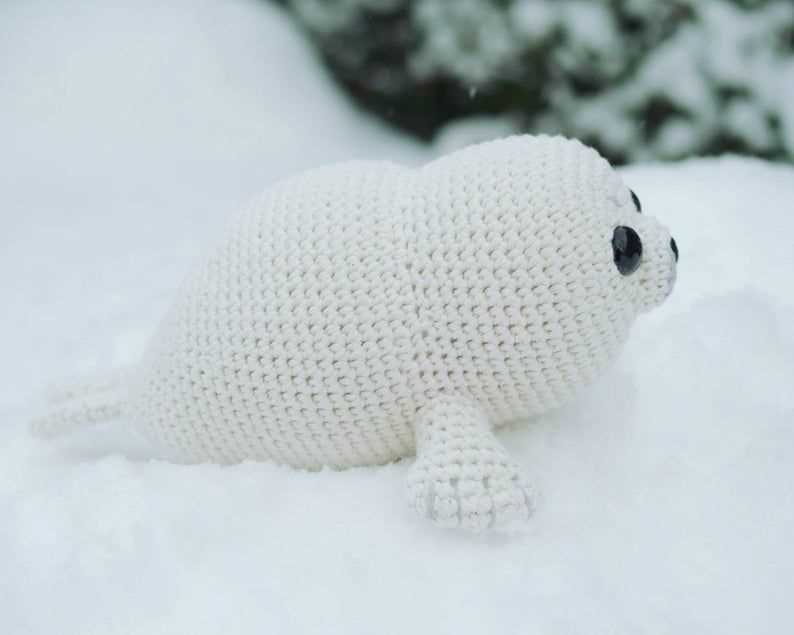
Creating the Face and Facial Features
When knitting a walrus, one of the most important aspects is creating the face and facial features to give the finished toy character and personality. There are several key elements to consider when working on this part of the project.
Eyes: The eyes of the walrus can be made using small black buttons, safety eyes, or by embroidering them with black yarn. Placing the eyes is crucial to convey the expression of the walrus. They should be placed evenly and symmetrically on the face, giving the walrus a friendly or mischievous look depending on their position.
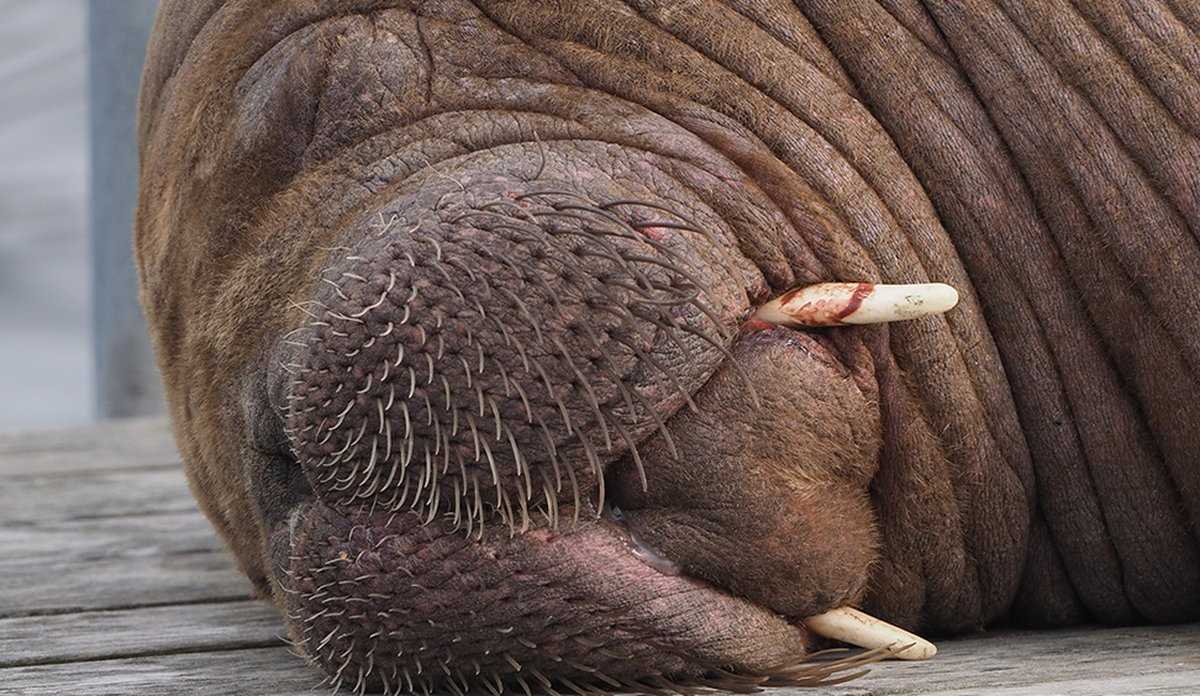
Nose: The nose is a defining feature of a walrus. It can be knitted separately and sewn onto the face, or it can be formed by stitching together the muzzle part of the head. The nose should be shaped like a small trapezoid and positioned slightly above the center of the face.
Mouth: The mouth can be added by stitching a simple smiling curve below the nose using black yarn. This will give the walrus a cheerful appearance. For a more serious or neutral expression, a straight line or a slightly downturned mouth can be stitched.
Whiskers: Whiskers are a characteristic feature of walruses. They can be created by attaching small pieces of white yarn to the sides of the muzzle. Make sure to position them symmetrically and evenly on both sides.
Eyebrows: Adding eyebrows can give your walrus a unique and expressive look. Eyebrows can be knitted separately and attached above the eyes using short strands of matching yarn. The position and angle of the eyebrows can be adjusted to match the desired expression.
By paying attention to these details and taking the time to carefully craft the face and facial features of the walrus, you can bring your knitting project to life and create a toy that is full of charm and personality.
Adding Details with Embroidery Techniques
When creating a walrus knitting pattern, adding details with embroidery techniques can make a significant difference in the final result. Embroidery allows you to bring your walrus to life by adding texture, depth, and intricate designs. Whether you are a beginner or an experienced knitter, embroidery can take your project to the next level.
1. French Knots: One of the most versatile embroidery techniques for adding details to your walrus knitting pattern is using French knots. These small, raised knots can be used to create eyes, buttons, or any other small embellishment. By varying the size and color of the French knots, you can add dimension and personality to your walrus.
2. Satin Stitch: Another technique that works well for creating a realistic walrus is the satin stitch. This embroidery stitch is used to fill in larger areas of the pattern with smooth, solid lines. By using varying shades of gray or brown thread, you can achieve a lifelike fur texture on your walrus.
- Tip: To create more texture with the satin stitch, you can experiment with different stitch lengths or combine it with other stitches, such as the long and short stitch, to mimic the unevenness of fur.
3. Running Stitch: The running stitch is a simple yet effective way to add decorative details to your walrus’s body, such as stripes or accent lines. You can use a contrasting color thread to make these details stand out, or match the thread color with the knitted fabric for a more subtle effect.
By incorporating these and other embroidery techniques into your walrus knitting pattern, you can elevate your project from a simple toy to a work of art. Experiment with different stitches, colors, and embellishments to create a unique and personalized walrus that will be cherished for years to come.
Finishing Touches: Fins, Flippers, and Tail
Completing a knitted walrus requires attention to detail, especially when it comes to adding the finishing touches to its fins, flippers, and tail. These elements give the walrus its distinctive look and bring the whole project to life.
Fins:
The walrus has two front fins that are essential for swimming and maneuvering in water. Knitting these fins involves creating a small, curved shape that resembles the silhouette of a real walrus fin. To achieve this, use a combination of knit and purl stitches to create ribbing that mimics the texture of a fin. Pay attention to the direction of the stitches to ensure the fins curve in the right way.
Flippers:
In addition to the front fins, the walrus also has two flippers on its sides. These flippers are shorter and wider than the fins, giving the walrus stability in the water. Knitting the flippers involves shaping them into a paddle-like form. You can achieve this by increasing and decreasing stitches strategically to create the desired shape. Consider using a different stitch pattern, such as seed stitch, to add texture and interest to the flippers.
Tail:
The final touch to a knitted walrus is its tail. The tail adds a playful element to the overall design and helps balance the walrus when it’s sitting upright. To create the tail, start with a long strip of knitting and gradually decrease the number of stitches as you work towards the tip. This will create a tapered shape that resembles the shape of a walrus tail. Consider adding some texture to the tail by incorporating a simple cable stitch or a small pattern.
With the fins, flippers, and tail completed, your knitted walrus will have all the details it needs to make a charming addition to your collection. Pay attention to the size and proportion of these elements, as they can greatly impact the overall appearance of the walrus. Take the time to carefully sew the fins, flippers, and tail to the body, ensuring they are securely attached and in the correct positions. These finishing touches will truly bring your knitted walrus to life.
Assembling the Walrus: Sewing and Stuffing
Once you have completed knitting all the necessary parts for your walrus, it’s time to assemble them together. Begin by neatly sewing the different pieces using a yarn needle and the same color yarn you used for knitting. Make sure to align the edges properly and sew them securely. Start with the body pieces, then attach the head, legs, and flippers.
After sewing all the parts together, it’s time to stuff your walrus. Use polyester fiberfill or any other suitable material for stuffing. Begin by inserting small amounts of stuffing into the limbs, head, and body, ensuring that it’s evenly distributed. Stuff firmly, but be careful not to overstuff and distort the shape of your walrus.
When you’re satisfied with the amount of stuffing, continue sewing the remaining opening closed. Make sure to hide any knots or loose yarn ends inside the body so they are not visible. You can use a whipstitch or mattress stitch to achieve a neat and secure seam.
Once your walrus is fully assembled and stuffed, it’s time to add some personality to it. Use embroidery thread or yarn to sew on the eyes, nose, and any other desired details. You can also add some additional embellishments, such as a scarf or bowtie, to give your walrus a unique touch. Be creative and have fun!
Now that you’ve completed the assembly and stuffing process, your knitted walrus is ready to be displayed or gifted. It’s a charming and cuddly creation that will surely bring joy to anyone who sees it!
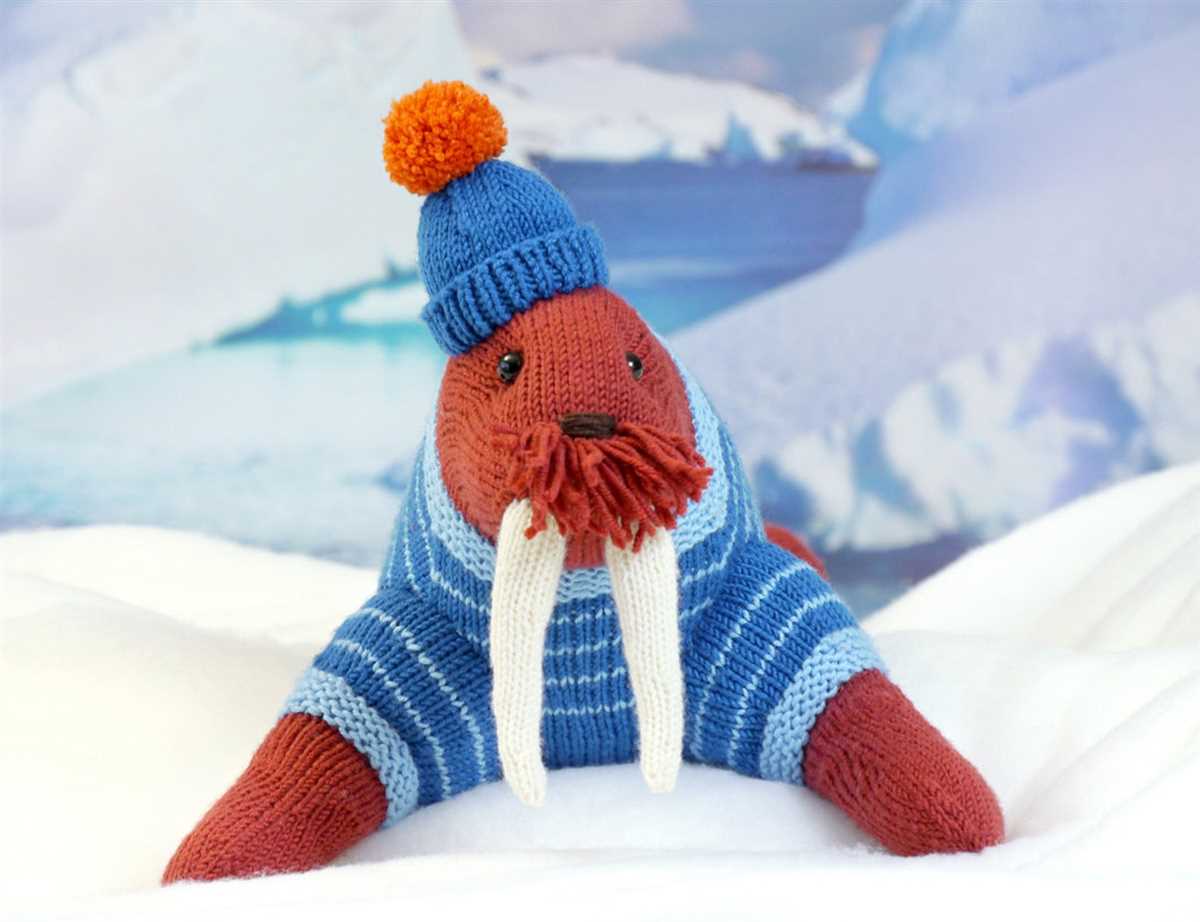
Personalizing Your Walrus with Unique Accessories

When it comes to knitting your own walrus, one of the best parts is being able to personalize it with unique accessories. Whether you’re making it for yourself or as a gift, adding accessories can make your walrus truly one-of-a-kind.
Scarves: A scarf is a classic accessory that can add both style and warmth to your walrus. Knit a long scarf in a coordinating or contrasting color to drape around its neck. You can even experiment with different stitch patterns or yarn textures to create a unique look.
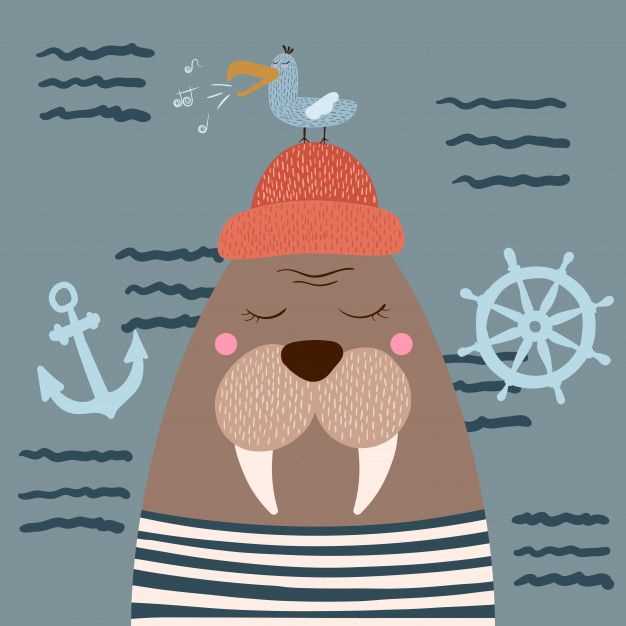
Hats: Give your walrus a touch of whimsy by knitting it a hat. From beanies to top hats, the possibilities are endless. Use different colors and patterns to create a hat that matches your walrus’ personality. Don’t forget to finish it off with a cute pom-pom!
Bow ties: For a dapper look, consider knitting a bow tie for your walrus. Use a small amount of yarn in a bold color to create a fun and playful accessory. Attach it to the front of your walrus’ neck for a charming and sophisticated look.
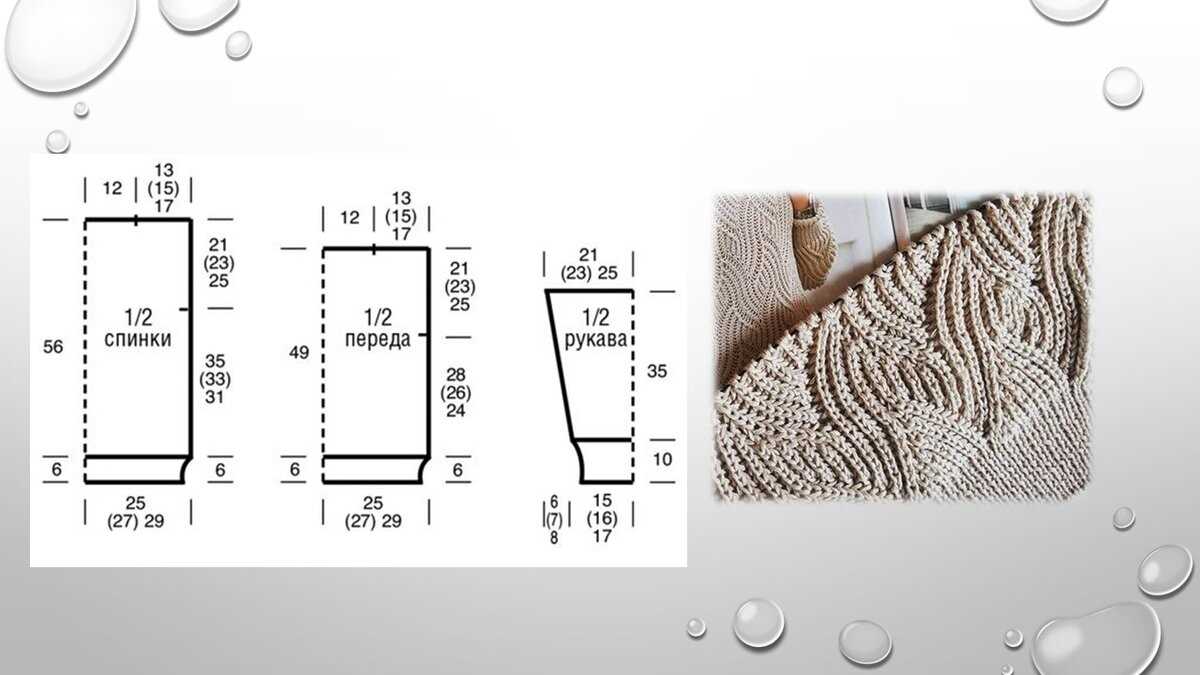
Sweaters: Keep your walrus cozy with a knitted sweater. Experiment with different patterns, colors, and textures to create a unique design. Whether it’s a chunky cable knit or a delicate lace pattern, a sweater will add extra charm to your walrus.
Glasses: If you want to give your walrus a studious or intellectual look, knit it a pair of glasses. Use small needles and thin yarn to create delicate frames. You can even add tiny beads or embroidery for added detail. Your walrus will look extra cute with its new glasses!
Accessories can truly bring your knitted walrus to life. Whether you choose to add a scarf, hat, bow tie, sweater, or glasses, these unique touches will make your creation stand out. Get creative and have fun with your walrus’s accessories!
Tips and Tricks for a Flawless Walrus Knitting Project
Knitting a walrus can be a unique and exciting project for any knitting enthusiast. However, it can also present some challenges due to the intricate details and shaping involved. To ensure your walrus knitting project turns out flawlessly, here are some tips and tricks to keep in mind.
Choose the Right Yarn
When knitting a walrus, it’s important to select the right yarn that will give your project the desired texture and appearance. Opt for a medium to heavy worsted weight yarn in a color that resembles a walrus’s fur, such as shades of grey or brown. This will help capture the essence of the walrus and make your finished project look more authentic.
Use Circular Needles
Circular needles are highly recommended for knitting a walrus, as they allow you to comfortably manage the large number of stitches required for the body. Additionally, circular needles enable you to knit in the round, creating a seamless and smooth finished product. Be sure to choose a needle size that matches the recommended gauge for your chosen yarn.
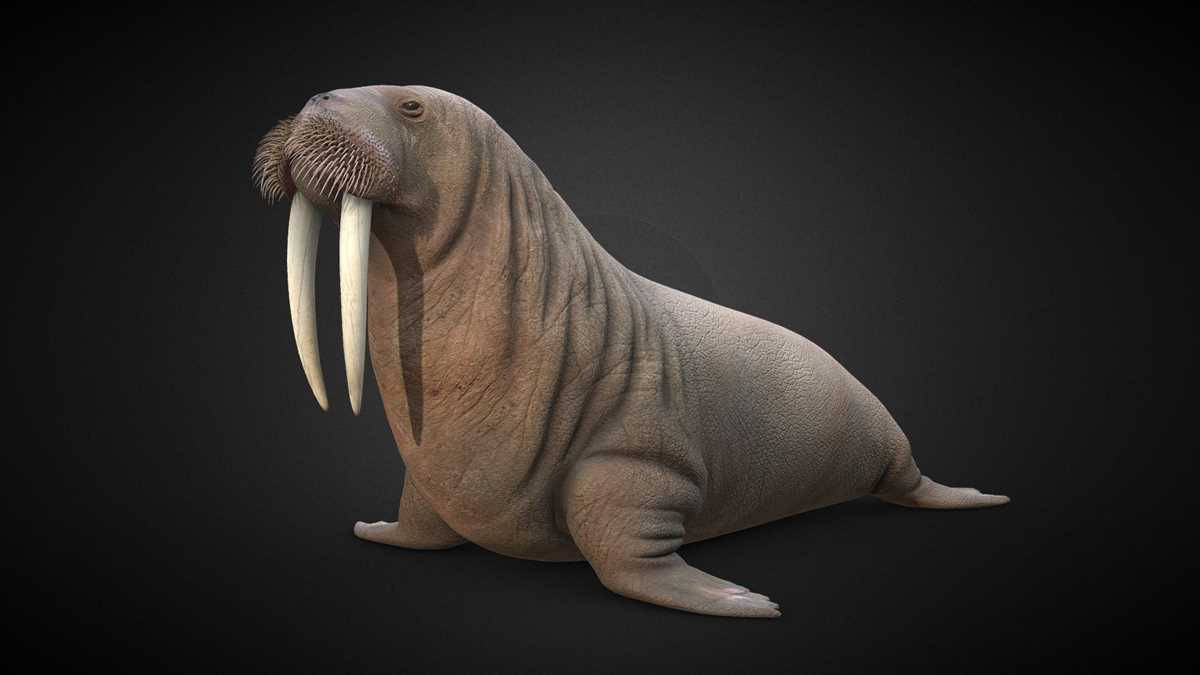
Paying Attention to Shaping
Walruses have a distinct body shape with a large head, prominent tusks, and a bulky body. To accurately capture these features, it’s crucial to pay attention to shaping techniques as you knit. Incorporate increases and decreases strategically to achieve the desired shape and proportions. Using stitch markers can help keep track of key points for shaping, such as the placement of the tusks.
Adding Details
To bring your knitted walrus to life, focus on adding details that make it unique and realistic. Consider using embroidery techniques to create the eyes, nose, and mouth of the walrus. Additionally, adding small touches like flippers, whiskers, and even texture details on the body can enhance the overall look and make your walrus truly stand out.
By following these tips and tricks, you’ll be well on your way to knitting a flawless walrus. Remember to take your time, enjoy the process, and let your creativity shine through in adding personal touches to make your walrus truly one-of-a-kind.
Showcasing Your Finished Walrus Masterpiece
After spending hours knitting and crafting your beautiful walrus, it’s time to show off your hard work and artistic talent. Whether you plan on gifting it to a loved one or displaying it proudly in your home, there are several ways to showcase your finished walrus masterpiece.
1. Display it on a shelf or mantel: Find a prominent spot in your home to showcase your walrus. Place it on a shelf or mantel where it can be easily seen and admired by guests. Consider adding some decorative elements around it to enhance its overall look.
2. Incorporate it into your home decor: Get creative with how you incorporate your walrus into your home decor. Use it as a centerpiece for a coffee table or side table, or even hang it on a wall as a unique art piece. The possibilities are endless, so let your imagination run wild!
3. Gift it to a loved one: If you’re proud of your knitting skills and want to share your masterpiece with someone special, consider giving your handmade walrus as a gift. Not only will it be a thoughtful and unique present, but it will also showcase the time and effort you put into creating it.
4. Take photos and share them online: Capture the beauty of your finished walrus by taking high-quality photos of it. Share your photos on social media or craft forums, where other knitting enthusiasts can appreciate your hard work. Don’t forget to use relevant hashtags to reach a wider audience.
5. Enter it into a knitting contest or exhibition: If you’re feeling particularly confident in your knitting skills, consider entering your walrus masterpiece into a knitting contest or exhibition. This will not only give you a chance to showcase your work on a larger scale, but it can also open up opportunities for recognition and feedback from experts in the field.
Remember, showcasing your finished walrus doesn’t have to be limited to just one option. Feel free to combine different ideas and get creative with how you display and share your masterpiece. The most important thing is to enjoy and be proud of your hard work!
Q&A:
What is a walrus knitting pattern?
A walrus knitting pattern is a set of instructions that allows you to create a knitted toy or decoration in the shape of a walrus.
Where can I find a walrus knitting pattern?
There are many places where you can find a walrus knitting pattern. You can try searching on knitting websites, online marketplaces, or in knitting books and magazines.
What materials do I need for a walrus knitting pattern?
The materials needed for a walrus knitting pattern usually include yarn in various colors, knitting needles, stuffing, and basic knitting tools like scissors and a tapestry needle.
Is it difficult to knit a walrus using a knitting pattern?
The difficulty level of knitting a walrus using a pattern can vary depending on your skill level and the complexity of the pattern. Some patterns may be more challenging than others, but with practice and patience, you can create a beautiful knitted walrus.
Can I modify a walrus knitting pattern?
Yes, you can modify a walrus knitting pattern to suit your preferences. You can change the colors, add extra details, or adjust the size of the finished walrus according to your liking.
Where can I find a walrus knitting pattern?
You can find a walrus knitting pattern online on various knitting websites, such as Ravelry and Etsy. You can also try searching for walrus knitting patterns in knitting books or magazines.