
Knitting your own accessories can be a fun and rewarding way to express your creativity and stay cozy during the colder months. If you’re looking for a project that combines both style and practicality, why not try knitting a hood and scarf set? This versatile pattern is perfect for keeping warm while adding a touch of flair to any outfit.
This hood and scarf set is suitable for knitters of all skill levels. Whether you’re a beginner looking to undertake your first knitting project or an experienced knitter looking for a new challenge, this pattern is the ideal choice. With its detailed instructions and helpful diagrams, you’ll be able to create a beautiful and functional accessory set in no time.
One of the great things about this knitting pattern is the endless customization possibilities. You can choose from a variety of yarns to create the perfect texture and color combination to match your personal style. Whether you prefer a cozy wool blend or a soft acrylic yarn, the choice is yours. Additionally, you can also experiment with different stitch patterns and embellishments to make your hood and scarf truly unique.
Hood and Scarf Knitting Pattern: Stay Warm and Stylish!
Winter is the perfect time to showcase your knitting skills and stay warm at the same time. With a hood and scarf knitting pattern, you can create a cozy and stylish accessory that will keep you protected from the cold weather elements. Whether you’re a beginner or an experienced knitter, this pattern is sure to challenge and delight you.
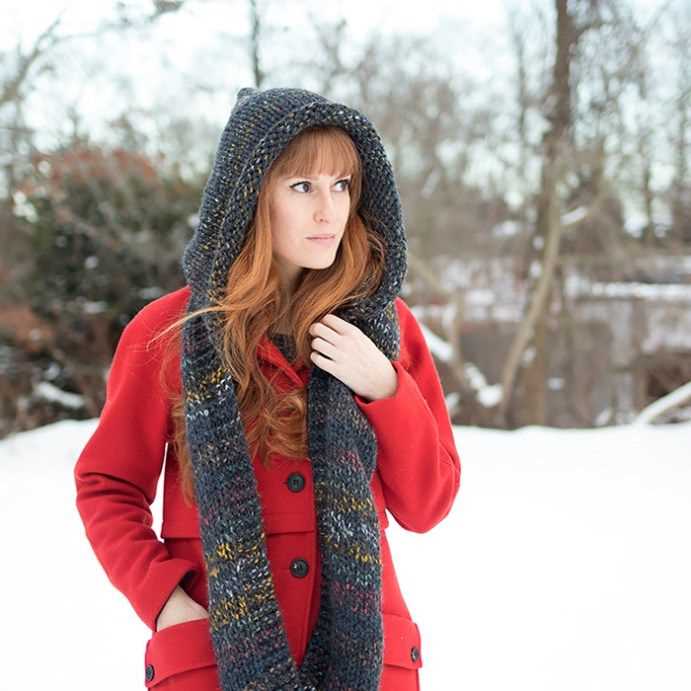
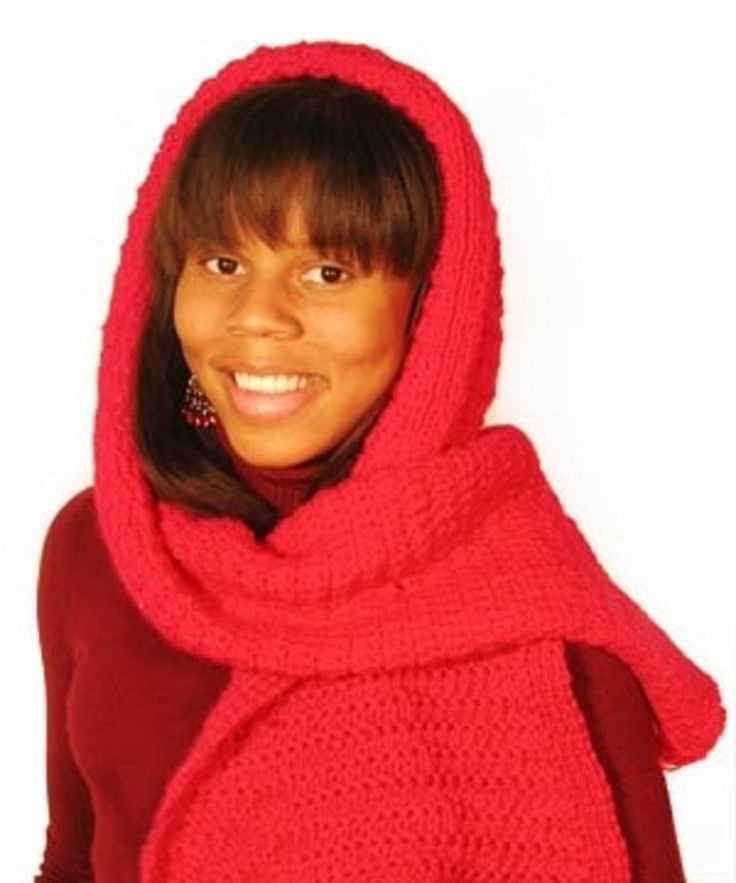
The hood and scarf knitting pattern offers versatility and functionality. You can choose your preferred yarn and colors to match your personal style, and the finished product will not only keep you warm but also add a touch of elegance to your winter outfits. The hood provides extra protection for your head and ears, while the scarf wraps around your neck, keeping you snug and comfortable.
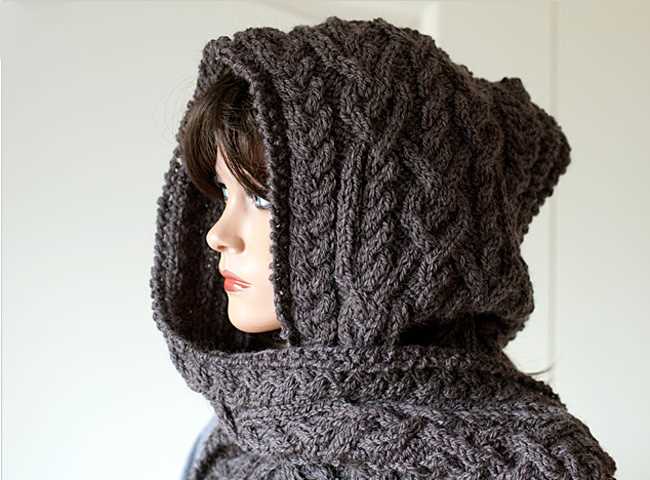
This knitting pattern is great for both men and women, and it makes for a lovely handmade gift for loved ones. The intricate stitch patterns and cable details add visual interest and depth to the design, making it a standout accessory. The hood and scarf can be worn together or separately, allowing for multiple styling options.
Materials Needed:
- 4 skeins of worsted weight yarn
- Size 8 knitting needles
- Cable needle
- Stitch markers
- Tapestry needle
Instructions:
- Start by casting on an even number of stitches.
- Work the first few rows in a rib stitch pattern, alternating between knit and purl stitches.
- Begin the cable pattern by following the provided chart or written instructions.
- Continue working in the cable pattern until the desired length is reached for the hood or scarf.
- Finish off by binding off all stitches and weaving in any loose ends.
Remember to take your time and enjoy the process of knitting your hood and scarf. The end result will be a beautiful and functional accessory that will keep you warm and stylish throughout the winter season.
Gather Your Materials
Before you start knitting your hood and scarf, it’s important to gather all the materials you will need. Having everything prepared ahead of time will make the knitting process much smoother and more enjoyable.
Here is a list of the materials you will need:
- Yarn: Choose a yarn that is suitable for the hood and scarf project. Consider the weight and color of the yarn based on your preferences.
- Knitting needles: Select the right size of knitting needles for your yarn and the desired gauge for the project.
- Tapestry needles: These needles will be used for weaving in the loose ends of yarn.
- Stitch markers: These will be helpful for marking important points in your knitting.
- Scissors: You will need scissors to cut the yarn and trim any excess.
- Row counter: This tool will help you keep track of your rows and stitches.
- Measuring tape: A measuring tape is essential for checking the size and length of your knitting.
Once you have gathered all your materials, you will be ready to start knitting your hood and scarf. Make sure to have a comfortable and well-lit space where you can work on your project.
Choosing the Right Yarn for Your Hood and Scarf Knitting Pattern
When it comes to knitting a hood and scarf, choosing the right yarn is crucial to ensure that the final product not only looks great but also feels comfortable to wear. There are several factors to consider when selecting yarn for your project, including fiber content, weight, and texture.
Fiber Content: The first thing to consider is the fiber content of the yarn. This will determine the warmth, durability, and overall feel of the finished hood and scarf. Natural fibers, such as wool or alpaca, are excellent choices for cold weather accessories as they provide excellent insulation and are breathable. Alternatively, acrylic or blended yarns can be great options for those with sensitivities to natural fibers or for those seeking more affordable options.
Weight: The weight of the yarn refers to its thickness or gauge. For a hood and scarf, you’ll want to choose a yarn that is not too bulky or heavy, as this can make the finished pieces too thick or uncomfortable to wear. Look for a yarn labeled as “worsted weight” or “DK weight,” as these are often ideal for winter accessories. However, you can also experiment with lighter weight yarns such as “sport weight” or “fingering weight” for a more delicate and lightweight finished product.
Texture: The texture of the yarn can add visual interest and dimension to your hood and scarf. Smooth yarns, such as those with a plied construction, create a clean and polished look, while yarns with a halo or fuzziness can add a cozy and luxurious feel. Consider the overall style and look you want to achieve with your project when selecting the yarn texture.
Color: Lastly, don’t forget to consider the color of the yarn. You can choose a solid color for a classic and versatile look, or opt for variegated or self-striping yarns to add visual interest and depth to your hood and scarf. Consider the wearer’s preferences and the overall style of the outfit these accessories will be paired with when selecting the color.
In conclusion, choosing the right yarn for your hood and scarf knitting pattern is essential for creating a beautiful and comfortable finished product. Consider the fiber content, weight, texture, and color of the yarn to ensure that it meets your project requirements and personal preferences. Happy knitting!
Understanding Knitting Gauge
One of the most important aspects of knitting is understanding the knitting gauge. The gauge refers to the number of stitches and rows per inch in a knitted fabric and is essential for achieving the correct size and fit of a knitted project.
Why is knitting gauge important?
When knitting a project, the pattern usually provides a gauge measurement, which indicates the number of stitches and rows needed to create a certain size and design. By matching the gauge provided in the pattern, you can ensure that your finished project will match the intended size and fit.
How to measure knitting gauge?
To measure knitting gauge, you will need a ruler or tape measure and the specified yarn and needles recommended in the pattern. Start by knitting a swatch, a small square of fabric using the recommended stitch pattern. After you have finished the swatch, lay it flat and measure the number of stitches and rows within a 4-inch square. If the number of stitches and rows matches the gauge provided in the pattern, you have achieved the correct knitting gauge.
What if my gauge doesn’t match?
If your gauge doesn’t match the recommended gauge in the pattern, it means that your tension or the size of your stitches is different than what is expected. If your gauge is too small, try using larger needles to create larger stitches. If your gauge is too large, switch to smaller needles to create smaller stitches. It’s important to make a swatch and adjust your needle size until you achieve the correct gauge, as this will ensure your finished project has the right size and fit.
Why does knitting gauge vary?
There are several factors that can affect the knitting gauge, including the type of yarn, needle size, and individual knitting tension. Different yarns have different textures and qualities, which can affect how the stitches are formed. The needle size used also plays a role in the size of the stitches. Additionally, each knitter has their own level of tension, which can result in variations in stitch size. Paying attention to these factors and making adjustments as needed will help you achieve the correct knitting gauge.
In conclusion, understanding knitting gauge is essential for creating well-fitting and properly sized knitted projects. By measuring and adjusting your gauge as needed, you can ensure that your finished project matches the intended size and fit outlined in the pattern.
Casting On
To begin your hood and scarf knitting project, you will need to start by casting on. This is the process of creating the first row of stitches on your knitting needles. There are several methods you can use to cast on, but the long-tail cast-on is a popular choice for many knitters.
To do the long-tail cast-on, you will need to estimate how much yarn you will need for your desired number of stitches. Make a slipknot at the end of the yarn, leaving a long tail. Insert one needle into the slipknot and hold it in your right hand, while holding the other needle in your left hand.
Step 1: Hold the working yarn (the yarn connected to the ball) and the tail yarn (the long tail) in your left hand, with the tail yarn over your index finger and the working yarn over your thumb.
Step 2: With your right hand needle, insert it under the yarn that is over your thumb and bring it over the yarn that is over your index finger. Then, insert the needle through the slipknot on your left hand needle.
Step 3: Pull the working yarn to tighten the stitch on the right hand needle, while keeping the tail yarn loose. This will create your first cast-on stitch.
Note: If you prefer a different cast-on method, such as the knitted cast-on or the cable cast-on, you can find instructions and tutorials online or in knitting books.
- Tip: It is important to cast on the correct number of stitches for your pattern. Double-check your stitch count before moving on to the next step.
- Tip: If you are a beginner knitter, it may be helpful to practice casting on a few times before starting your actual project.
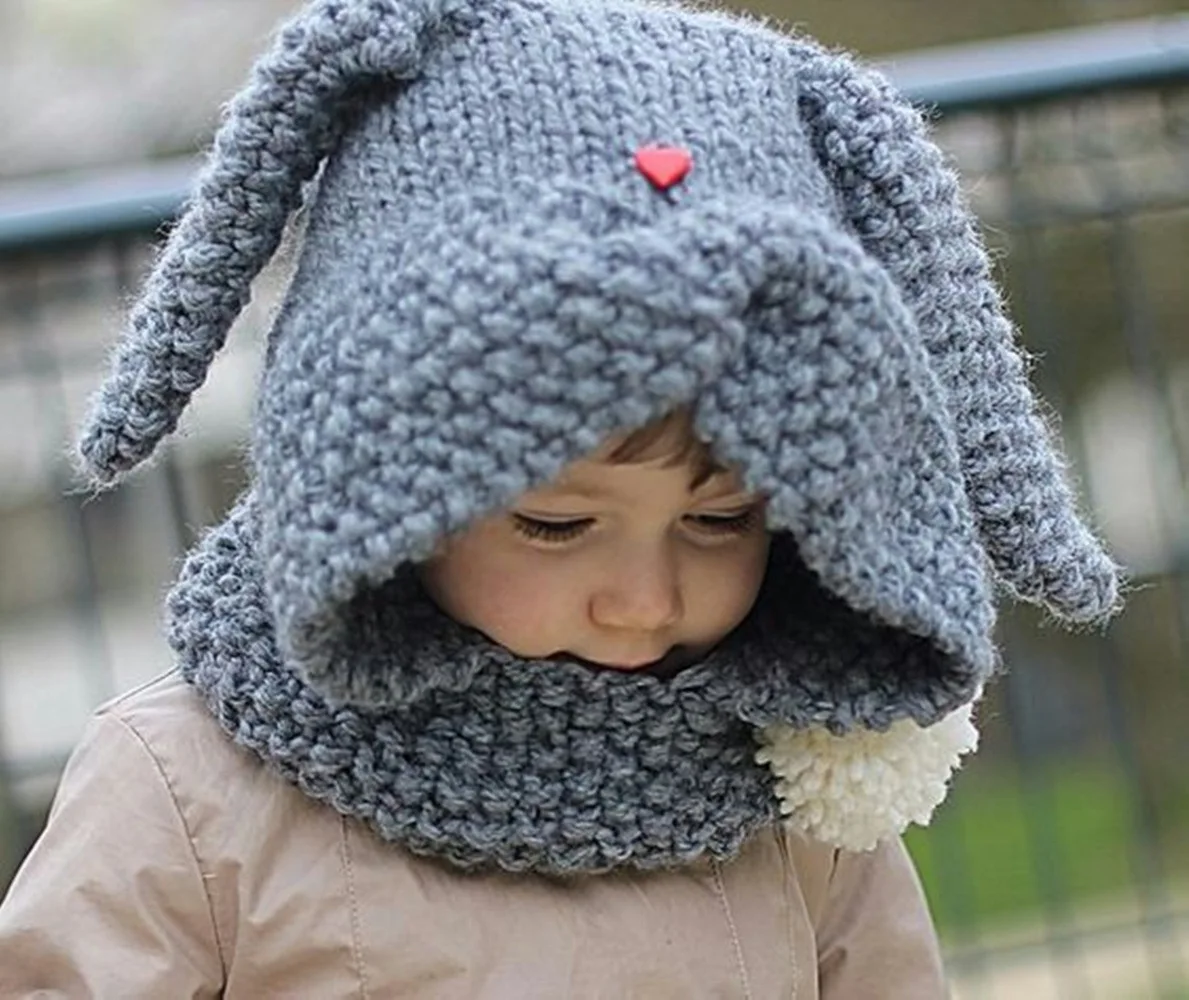
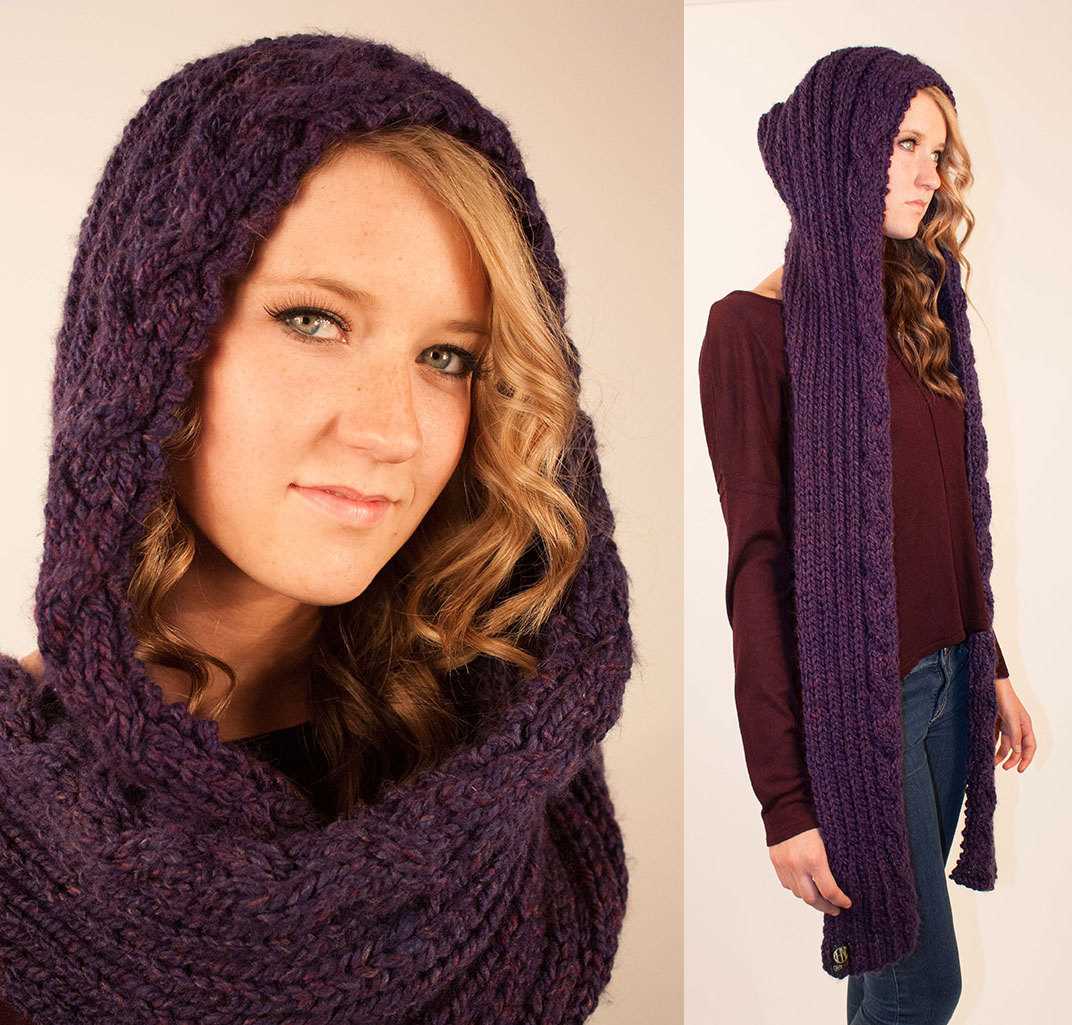
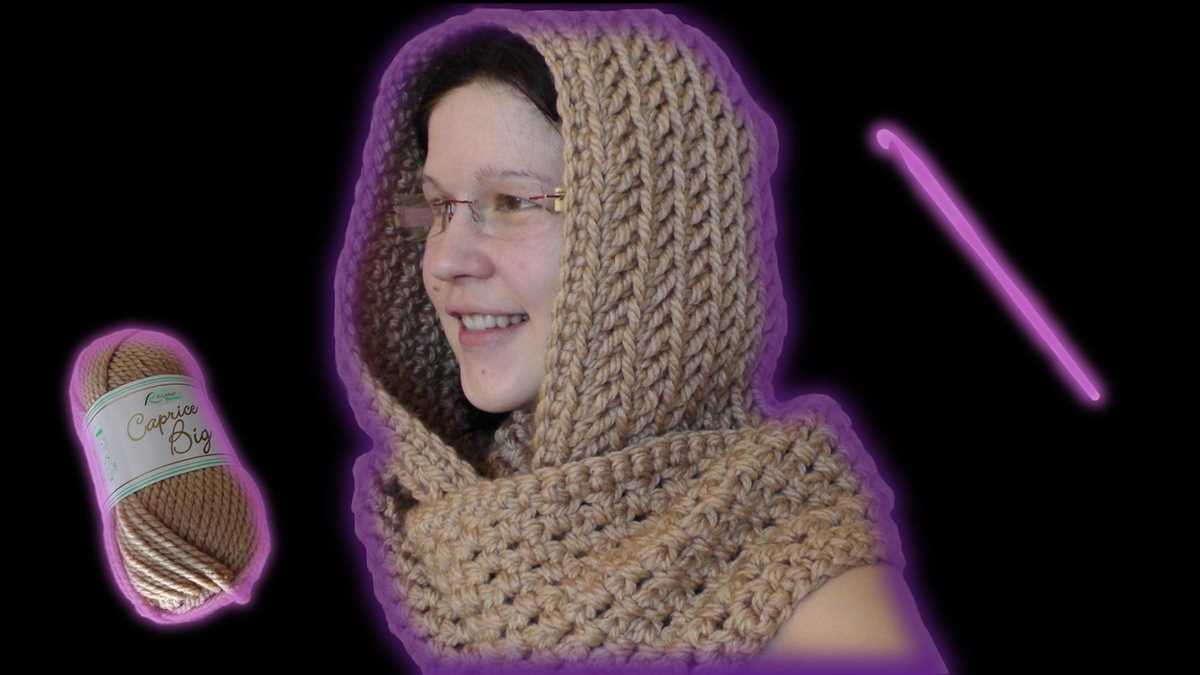
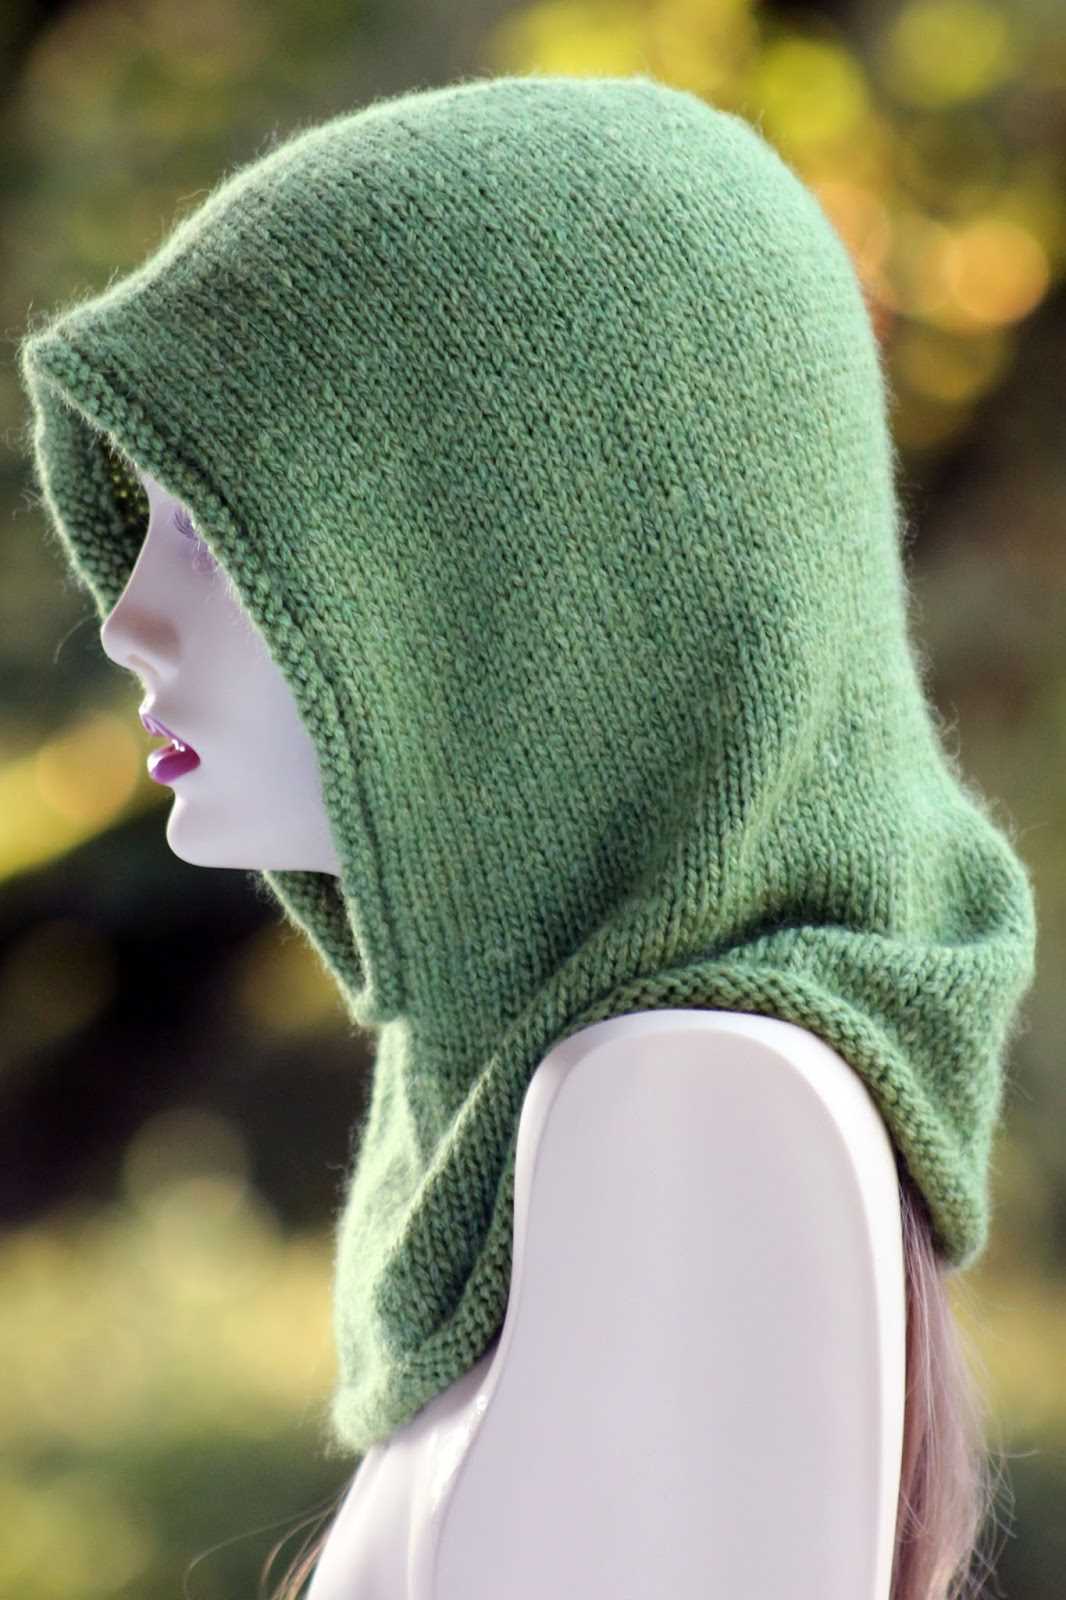
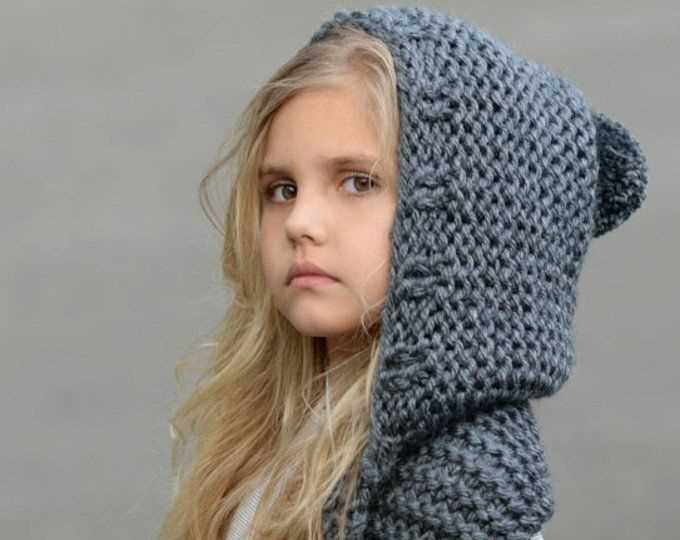
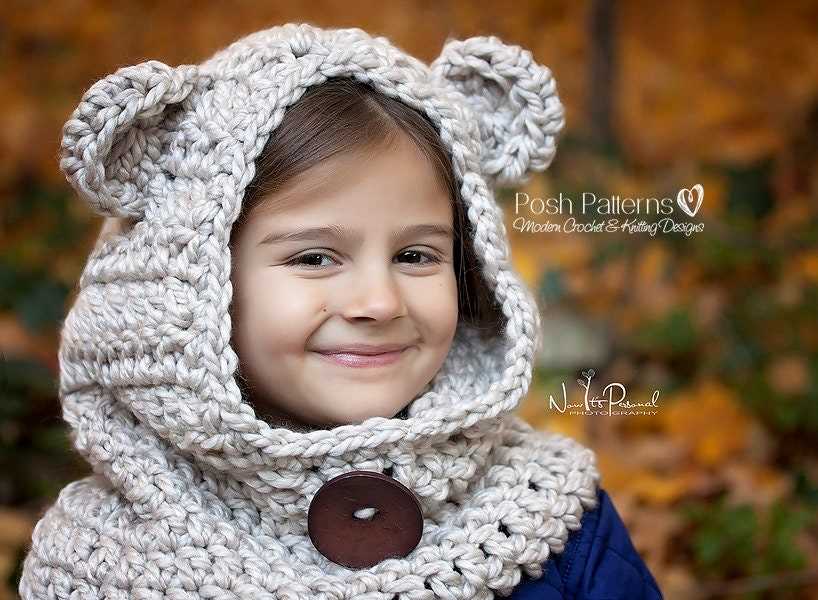
Creating the Hood
Once you have finished knitting the body of the scarf, it’s time to start creating the hood. The hood is an essential part of the pattern as it provides warmth and protection to the wearer. To create the hood, you will need to pick up stitches along the edge of the scarf and work in a specific pattern.
To begin, find the center of the scarf and mark it with a stitch marker. This will help you align the center of the hood with the center of the scarf. Starting from the center, pick up stitches along one edge of the scarf using a knitting needle. The number of stitches you pick up will depend on the size and shape of the hood you want to create.
Note: It’s important to pick up an even number of stitches to maintain symmetry in the hood.
Once you have picked up the stitches, join the round by knitting the first and last stitch together. This will create a seamless transition between the hood and the scarf. Next, you will begin working in the desired pattern for the hood, which could be ribbing, cables, or any other stitch pattern you prefer. Follow the pattern instructions to complete the hood, making sure to shape it gradually or add any necessary decreases or increases to achieve the desired shape and fit.
Tip: If you want to add a drawstring closure to the hood, you can create eyelets by periodically knitting two stitches together and then yarn over. This will create small holes where you can thread the drawstring through.
Shaping the Scarf
When knitting a hood and scarf set, it is important to shape the scarf properly to ensure a comfortable and stylish fit. There are several techniques that can be used to achieve the desired shape and size.
1. Increasing and decreasing stitches: To shape the scarf, you can increase or decrease stitches at certain intervals. This can be done by knitting or purling two stitches together to decrease or by making a yarn over to increase. By adding or subtracting stitches, you can create a tapered or triangular shape.
2. Adding garter stitch borders: Another way to shape the scarf is by adding garter stitch borders. Knitting a few rows of garter stitch at the beginning and end of the scarf can help prevent curling and give it a clean, finished look.
3. Blocking: Once the scarf is finished, blocking it can help shape it even further. Blocking involves wetting the scarf and laying it flat to dry, pinning it into shape if necessary. This can help smooth out any uneven stitches and give the scarf a more polished appearance.
4. Using stitch patterns: Choosing a stitch pattern that naturally creates a desired shape can also be an effective way to shape the scarf. For example, a chevron or feather and fan pattern can create a beautiful wave-like shape that adds visual interest to the scarf.
By using these techniques, you can carefully shape your scarf to achieve the desired look and fit. Whether you prefer a tapered shape, a symmetrical design, or a unique stitch pattern, shaping the scarf is an important step in creating a finished piece that you’ll be proud to wear.
Adding Patterns and Designs
When knitting a hood and scarf, adding patterns and designs can elevate the overall look and make your creation unique. There are various ways to incorporate patterns and designs into your knitting project, allowing you to showcase your creativity and personal style.
1. Colourwork: One popular way to add patterns is by using colourwork techniques such as fair isle or intarsia. Fair isle knitting involves knitting with multiple colours in a single row, creating beautiful patterns and motifs. Intarsia, on the other hand, involves using different colours of yarn to create separate blocks of colour.
2. Lacework: Lace knitting is another technique that can add a delicate and intricate design to your hood and scarf. Lace patterns often consist of yarn overs and decreases, forming decorative motifs and creating an airy fabric. This technique can be a bit more challenging, but the end result is worth the effort.
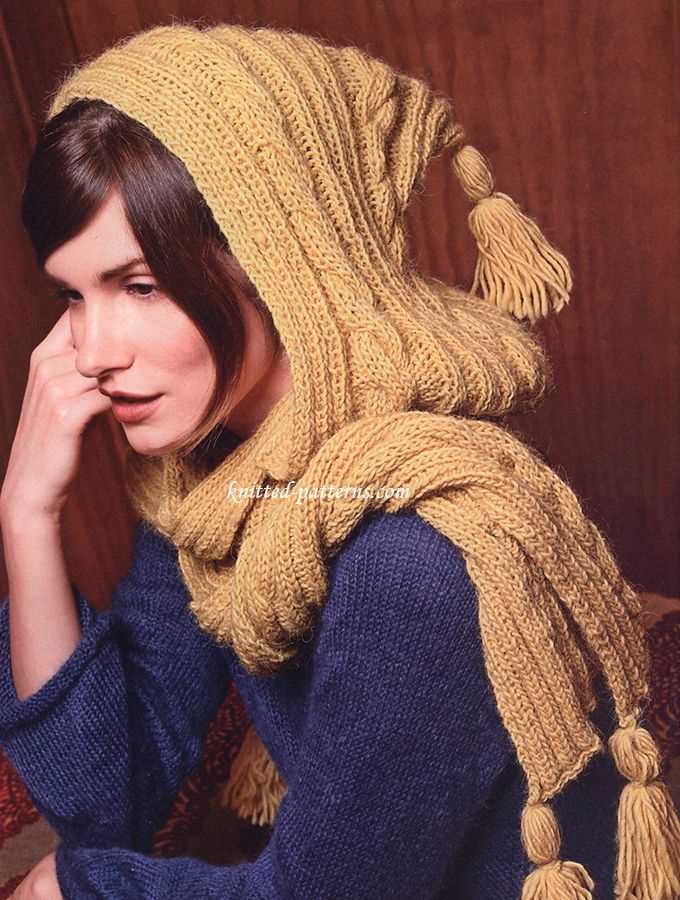
3. Cables: Cables are a classic design element in knitting that can add texture and depth to your hood and scarf. With cable knitting, stitches are crossed over each other, creating twists and braids. This technique is ideal for creating a cozy and chunky look.
4. Embroidery or Appliqué: If you prefer to add designs after knitting the hood and scarf, you can incorporate embroidery or appliqué techniques. Embroidery involves stitching decorative patterns onto the knitted fabric, while appliqué involves attaching small pieces of fabric or yarn onto the surface. These techniques allow for a wide range of design possibilities.
5. Combination of Techniques: Don’t be afraid to mix and match different techniques to create a unique design. For example, you can combine colourwork and cables, or lacework and embroidery, to add complexity and visual interest to your knitting project. The possibilities are endless!
By adding patterns and designs, you can transform a simple hood and scarf into a stylish and eye-catching accessory. Whether you choose to incorporate colourwork, lacework, cables, or a combination of techniques, your knitted creation is sure to stand out and showcase your knitting skills.
Joining the Hood and Scarf
After completing the knitting of both the hood and the scarf, it’s time to join them together to create a cozy and stylish accessory. The joining process can be done using various techniques, depending on the desired outcome and the knitter’s preferences.
One common way to join the hood and scarf is by sewing them together using a tapestry needle. This method allows for a seamless and secure attachment. Start by laying the hood and scarf flat, aligning the edges that need to be joined. Thread the tapestry needle with yarn that matches the color of the knitting, ensuring it is long enough to complete the entire seam. Beginning at one end, insert the needle through both layers of fabric, making small, even stitches along the edge. Continue sewing until reaching the other end, making sure to secure the yarn tightly at the beginning and end.
Another option for joining the hood and scarf is using a crochet hook and slip stitch. This technique creates a visible seam, which can add a decorative element to the finished piece. To join with slip stitches, hold the hood and scarf edges together, with the right sides facing each other. Insert the crochet hook through both layers, yarn over, and pull the yarn through both layers to create a slip stitch. Repeat this process along the edges, keeping the stitches evenly spaced. Once the entire seam is complete, weave in any loose ends to ensure a clean finish.
Alternatively, if the hood and scarf are knit using a reversible stitch pattern, they can be joined using the three-needle bind-off technique. This method creates a strong and durable seam that remains flexible and comfortable to wear. Begin by holding the hood and scarf edges together, with the wrong sides facing each other. Insert a third knitting needle into the first stitch of each row on both pieces, forming a triangle. Then, knit the stitches from both needles together, passing one stitch over the other to bind off. Continue this process until all stitches are bound off, securing the seam. Finally, weave in any loose ends to complete the joining process.
Regardless of the chosen technique, joining the hood and scarf is the final step in completing the knitting project. Once the knitting pieces are securely attached, the hood and scarf can be worn together, keeping you warm and stylish throughout the colder months.
Creating Buttonholes
When knitting a hood or scarf, it is often necessary to create buttonholes. Buttonholes provide a way to secure the garment when wearing it, allowing for easy fastening and adjusting. Buttonholes can be created in various ways, depending on the desired look and functionality. Here are a few methods to consider when creating buttonholes for your knitting project.
1. Yarnover Buttonholes: One common technique for creating buttonholes is using yarnovers. To create a yarnover buttonhole, simply wrap the yarn around the needle as if to create a new stitch, but without knitting or purling. This creates an eyelet that can accommodate the button. To make the buttonhole larger, you can add additional yarnovers in the same row.
2. Eyelet Buttonholes: Another method for creating buttonholes is through eyelets. Eyelet buttonholes are similar to yarnover buttonholes, but they are worked by knitting together two stitches and then creating a yarnover. This creates a larger hole that can accommodate larger buttons.
3. Ribbed Buttonholes: If you want your buttonholes to blend in seamlessly with the ribbing of your knitting project, ribbed buttonholes are a good choice. To create ribbed buttonholes, you can work a series of decreases and then increases within the ribbing pattern. This creates a buttonhole that matches the texture of the surrounding fabric.
4. Garter Stitch Buttonholes: Garter stitch buttonholes are simple and easy to create. To make a garter stitch buttonhole, you can work a series of increases and then decreases in a garter stitch pattern. This creates a sturdy and functional buttonhole that is perfect for heavier garments.
When creating buttonholes, it is important to consider the size and thickness of the buttons you will be using. You want the buttonhole to be just the right size to accommodate the button, but not too loose that it will easily slip out. Additionally, it is a good idea to reinforce the buttonholes with a few extra stitches or a reinforcing thread to prevent stretching or unraveling over time.
Experiment with different buttonhole techniques and find the one that suits your knitting project best. Remember, practice makes perfect, so don’t be afraid to try different methods and make adjustments as needed. With a bit of practice, you’ll be creating beautifully functional buttonholes for your hoods and scarves in no time!
Finishing Touches
Once you have finished knitting your hood and scarf, it’s time to add the finishing touches to complete the project. These final steps will enhance the overall look and functionality of your knitted items.
Blocking: Before proceeding with any finishing touches, it is recommended to block your hood and scarf. Blocking helps to even out the stitches, relax the fibers, and shape the pieces to their desired dimensions. To block, soak your knitted items in lukewarm water with a gentle detergent, then carefully squeeze out the excess water. Lay the items flat on a towel and gently stretch and shape them, using pins if necessary. Allow them to dry completely before moving on to the next step.
Adding a Pom Pom:
One way to add a playful and stylish element to your knitted hood is by attaching a pom pom. Pom poms can be made using yarn in a contrasting color or the same color as your hood. Simply wrap yarn around a pom pom maker or a piece of cardboard, tie off tightly in the center, and cut through the loops. Trim the pom pom to your desired size and then sew it securely to the top of the hood. This finishing touch will give your hood a fun and trendy look.
Attaching Tassels:
To add a decorative touch to the ends of your knitted scarf, you can attach tassels. Cut several strands of yarn in your desired length, fold them in half, and loop them through the end stitches of the scarf. Pull the loose ends through the loop created and tighten. Repeat this process along the edge of the scarf, spacing the tassels evenly. You can trim the ends of the tassels to create a neat and uniform look.
Adding Buttons or Toggle Closures:
If you want to add a functional and stylish element to your hood, consider attaching buttons or toggle closures. Sew the buttons or closures onto the front edges of the hood, ensuring that they align properly when the hood is worn. This finishing touch not only adds a touch of elegance but also allows for a secure closure to keep the hood in place.
- Labeling: To personalize your knitted items, you can sew in a label with your name or a special message. This adds a unique and thoughtful touch to the final product.
- Seaming: If your hood or scarf has seams, make sure to neatly sew them together using the invisible seam or mattress stitch. This technique ensures a clean and professional finish.
By adding these finishing touches to your hood and scarf knitting project, you can elevate the overall appearance and functionality, making them ready to wear or gift to someone special.
Styling Your New Hood and Scarf
If you’ve just finished knitting your new hood and scarf, congratulations! You now have a cozy and stylish set to keep you warm during the colder months. But how do you style your new accessories?
1. Pair them with a coat
One of the easiest ways to style your hood and scarf is to pair them with a coat. Whether you opt for a long wool coat or a shorter puffer jacket, the hood and scarf will add an extra layer of warmth and style to your outfit. For a cohesive look, choose a coat in a color that complements or matches your hood and scarf.
2. Mix and match colors
If you’re feeling adventurous, try mixing and matching different colors with your hood and scarf. For example, if you have a gray hood, pair it with a vibrant red scarf for a pop of color. Experimenting with different color combinations can add visual interest to your outfit and help you stand out from the crowd.
3. Wear them with a sweater or cardigan
For a more casual look, wear your hood and scarf with a cozy sweater or cardigan. The combination of knitted textures will create a warm and relaxed vibe. If you want to add a touch of elegance, opt for a cashmere or merino wool sweater.
4. Add a hat
If you want to keep your head extra warm, consider adding a hat to your hood and scarf ensemble. A beanie or a beret can add a trendy touch to your outfit while providing an extra layer of insulation. Try to choose a hat that complements the color and style of your hood and scarf.
With these styling tips, you can make the most of your new hood and scarf and create fashionable and cozy looks for the winter season.
Troubleshooting Common Knitting Issues
Knitting can be a relaxing and rewarding hobby, but it’s not without its challenges. Whether you’re a beginner or an experienced knitter, it’s not uncommon to run into some common knitting issues along the way. Here are some troubleshooting tips to help you overcome these challenges and enjoy your knitting projects to the fullest.
1. Tension Problems
Tension problems can occur when your stitches are too tight or too loose, resulting in uneven knitting. To fix this issue, make sure you’re holding your yarn consistently and not pulling it too tight or letting it hang too loose. Practice maintaining a consistent tension by knitting swatches before starting a larger project. If you’re still having trouble, try using a different needle size or adjusting your knitting technique.
2. Dropped Stitches
Dropped stitches can be frustrating, especially if you don’t notice them until after you’ve completed several rows. To fix this issue, use a crochet hook or a smaller knitting needle to pick up the dropped stitch and work it back into your knitting. If you catch the dropped stitch right away, you can simply ladder it back up to the correct row.
3. Twisted Stitches
Twisted stitches can happen when you accidentally twist your stitches while knitting. This can result in a twisted or uneven fabric. To fix this issue, make sure you’re inserting your needle into the stitch correctly and knitting through the front of the loop. If you notice twisted stitches, you can also try blocking your finished project to help even out the fabric.
4. Uneven Increases or Decreases
Uneven increases or decreases can make your knitting project look unbalanced. To fix this issue, pay close attention to your increases and decreases and double-check that you’re doing them correctly. If you’re following a pattern, make sure you’re reading the instructions carefully and counting your stitches after each increase or decrease. Making a swatch before starting the project can also help you identify any potential issues with your increases or decreases.
5. Yarn Tangles or Knots
Yarn tangles or knots can slow down your knitting progress and be a real headache. To prevent this issue, make sure you’re working with a center-pull ball or cake of yarn, which helps prevent tangles. If you do encounter tangles or knots, take your time to carefully untangle or remove them. If the knot is too tight to untie, you may need to cut the yarn and start again.
By being aware of these common knitting issues and knowing how to troubleshoot them, you can save yourself time and frustration and enjoy your knitting projects with confidence. Remember, practice makes perfect, so don’t be discouraged if you run into some challenges along the way. Keep knitting and experimenting, and you’ll continue to improve your skills and create beautiful knitted items.