
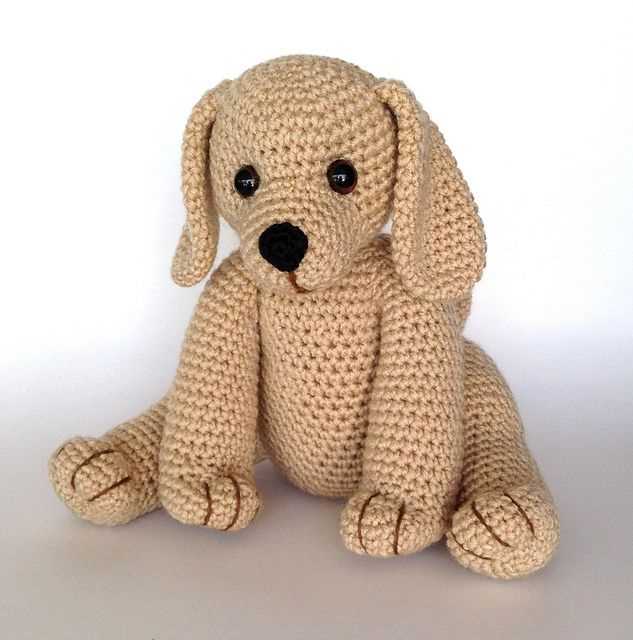
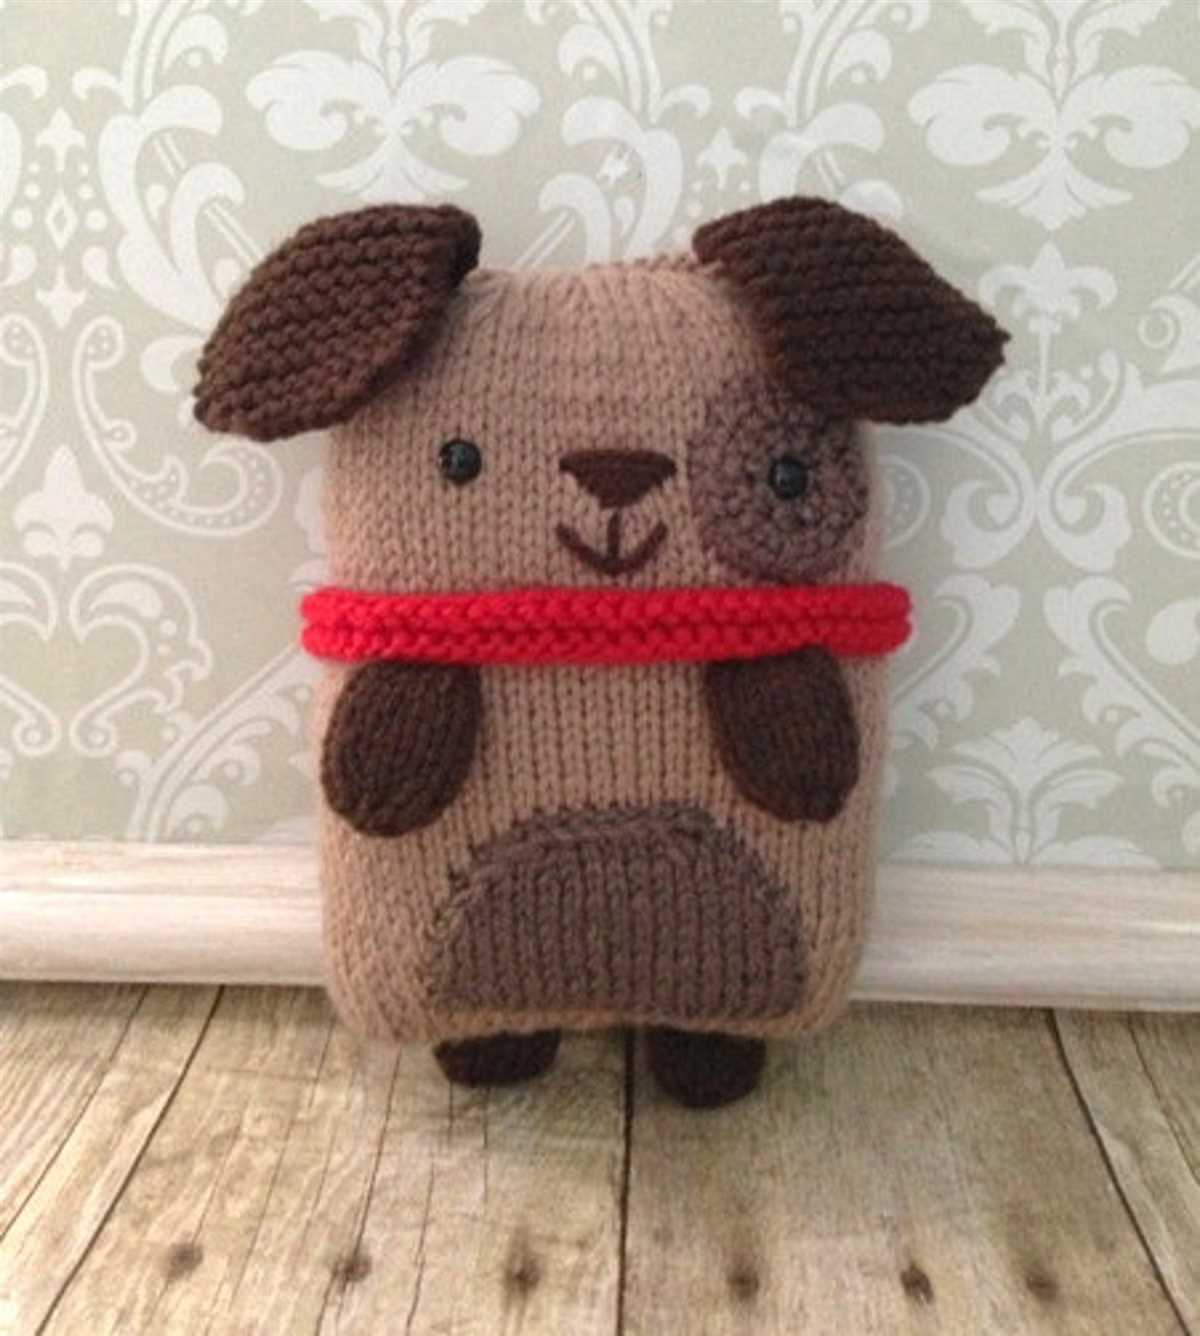
Knitting is not only a popular pastime but also a great way to create personalized toys and gifts. One of the most adorable and versatile knitted toys is a puppy. With a knitted puppy pattern, you can create a soft and cuddly toy for yourself or a loved one.
Knitted puppies come in various sizes and designs, allowing you to customize the toy to your liking. Whether you prefer a small pocket-sized puppy or a larger one to snuggle with, there is a pattern out there for you. Plus, with different colors and textures of yarn, you can make each puppy unique and full of personality.
The knitted puppy pattern usually includes step-by-step instructions, including the types of stitches to use and the size of needles. Even if you are a beginner, there are patterns available for all skill levels. So, don’t be intimidated by the idea of knitting a puppy – it’s a fun and rewarding project that anyone can enjoy.
Knitted Puppy Pattern: Create Your Own Adorable Pet
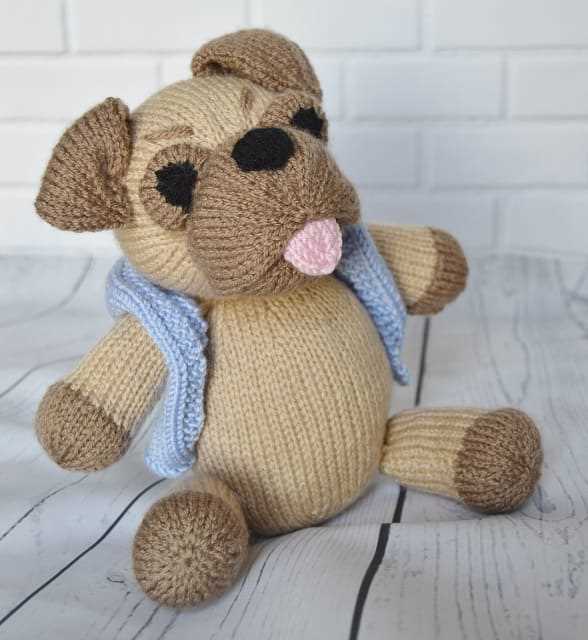
Are you a knitting enthusiast looking for a new project? Why not try your hand at creating a knitted puppy? This adorable knitted toy can be a fun and rewarding project that allows you to showcase your knitting skills while also creating a cuddly friend for yourself or a loved one.
Materials:
- Yarn: Choose a soft and durable yarn in your desired color for the body and smaller amounts for the details.
- Knitting Needles: Use a pair of knitting needles that are suitable for your chosen yarn.
- Stuffing: You will need stuffing to give your knitted puppy its shape and make it nice and huggable.
- Embroidery Floss: This will be used to create the facial features and other small details.
- Scissors: Make sure to have a pair of scissors handy for cutting the yarn and embroidery floss.
- Yarn Needle: A yarn needle is essential for sewing the various pieces of the puppy together.
Instructions:
- Start by knitting the body of the puppy. Follow a simple knitted square or rectangular pattern, adjusting the size to your preference.
- Next, knit the legs, ears, and tail separately. You can use different-colored yarn to make these pieces stand out.
- Once all the knitted pieces are complete, stuff them firmly with the stuffing material. Make sure to stuff the legs, ears, and tail carefully to give them a realistic shape.
- Using the yarn needle, sew the legs, ears, and tail onto the body of the puppy. Be mindful of the placement to create a balanced and cute appearance.
- Now it’s time to add the facial features. Use the embroidery floss to embroider the eyes, nose, and mouth onto the puppy’s face. You can customize the expressions to give your knitted puppy its own personality.
- Finally, give your knitted puppy a good fluffing and shaping to make it look even more lifelike. Trim any excess yarn or floss as needed.
With these simple steps, you can create your very own knitted puppy that is sure to bring joy and warmth to anyone who receives it. Whether you keep it for yourself or give it as a gift, this knitted toy will be cherished for years to come.
Choosing the Right Yarn and Needles
When it comes to knitting a puppy, choosing the right yarn and needles is essential for achieving the desired result. The type and weight of the yarn will affect the size and texture of the knitted toy, while the size of the needles will determine the tightness or looseness of the stitches.
Yarn: There are various types of yarn available, such as acrylic, wool, and cotton. Each type has its own characteristics and advantages. Acrylic yarn is commonly used for toys as it is durable and easy to care for. Wool yarn provides a soft and warm texture, making it a popular choice for knitted animals. Cotton yarn, on the other hand, offers a smooth and lightweight finish. It is important to consider the intended use and desired texture of the knitted puppy when selecting the yarn.
Weight: Yarn weight determines the thickness of the yarn and the size of the stitches. Common weights for knitting toys are fingering or sport weight, which produce smaller and more delicate stitches. Worsted weight yarn is a popular choice for larger toys as it creates more substantial stitches. It is essential to choose a yarn weight that matches the desired size and look of the knitted puppy.
Needles: The size of the needles used can greatly impact the outcome of the knitted toy. Smaller needles will result in tighter stitches, while larger needles will create looser stitches. It is important to follow the pattern’s recommendations regarding needle size to ensure the correct gauge and size of the finished puppy. Double-pointed needles or circular needles may be required for certain parts of the toy, such as the limbs or body.
In conclusion, selecting the right yarn and needles is crucial when knitting a puppy. Considering the type and weight of the yarn, as well as the size of the needles, will help achieve the desired texture, size, and overall appearance of the knitted toy. By carefully choosing these materials, you can create a beautifully crafted knitted puppy that will bring joy to anyone who receives it.
Understanding the Gauge and Measurements
When making a knitted puppy, it is important to understand the concept of gauge and measurements. Gauge refers to the number of stitches and rows per inch that are achieved with a particular yarn and needle size. It is crucial to match the gauge specified in the pattern to ensure that the finished puppy turns out to be the correct size.
Before starting the project, it is recommended to make a gauge swatch using the same yarn and needles that will be used for the puppy. This swatch helps to determine if the knitter’s tension matches the pattern’s gauge. If the gauge is too loose, the puppy will turn out larger than intended, while a tighter gauge will result in a smaller puppy. Adjustments can be made by changing the needle size until the correct gauge is achieved.
Measuring the puppy:
When the puppy is complete, it is important to measure it to ensure it meets the desired dimensions. The most common measurements for a knitted puppy include the height from the head to the feet, the length from the nose to the tail, and the width of the body. Measuring tape or a ruler can be used to accurately measure these dimensions.
Common abbreviations:
When following a knitting pattern, there may be various abbreviations used. It is important to familiarize oneself with these abbreviations to understand the instructions. Some common abbreviations include:
- K: Knit
- P: Purl
- Inc: Increase
- Dec: Decrease
- St(s): Stitch(es)
- Rnd: Round
- K2tog: Knit two stitches together
- P2tog: Purl two stitches together
Additional resources:
If there is any confusion about the gauge or measurements, there are various resources available to help. Online forums and knitting communities often have experienced knitters who are willing to offer guidance. Additionally, there are books and tutorials that provide detailed explanations of gauge and measurements for knitting projects. These resources can be valuable in ensuring successful completion of the knitted puppy.
Casting On and Creating the Foundation
Before you can begin knitting your adorable puppy, you will need to cast on and create the foundation for your project. This process involves creating a row of stitches on your knitting needles to provide a base for your work.
To cast on, start by making a slipknot and placing it on one of your needles. Hold the needle with the slipknot in your right hand, and insert your left needle into the loop of the slipknot. Pull the yarn through the loop, creating a new stitch on your left needle. Repeat this process until you have cast on the desired number of stitches for your pattern.
Once you have cast on your stitches, you can begin creating the foundation for your knitted puppy. Follow the pattern instructions for your chosen design, which will typically involve a combination of knit and purl stitches to create the desired texture and shape. Remember to read the pattern carefully and count your stitches to ensure accuracy.
As you knit your rows, make sure to keep your tension consistent to create an even fabric. If your stitches are too loose or too tight, adjust your tension accordingly. Pay attention to any shaping or increases/decreases that may be required in the pattern instructions to ensure your puppy takes shape properly.
Pro tip: If you’re new to knitting or need a refresher, consider watching video tutorials or consulting a knitting reference book for additional guidance on casting on and creating the foundation for your project.
Working the Body and Tail
Once you have finished knitting the head of your knitted puppy, it’s time to move on to the body and tail. The body of the puppy is worked in a similar manner to the head, using the same basic knitting stitches. Begin by casting on the required number of stitches for the body, as indicated in the pattern.
Continue knitting in the desired stitch pattern until the body reaches the desired length. This could be a simple stockinette stitch, or you could incorporate other stitch patterns for added texture. Make sure to follow the pattern instructions closely, as they may specify any stitch changes or shaping required for the body.
The tail of the knitted puppy can be worked separately and sewn onto the body, or it can be worked as an extension of the body itself. If working the tail separately, cast on the required number of stitches and knit in the desired stitch pattern until it reaches the desired length. Then, sew the tail onto the back of the puppy’s body, following the pattern instructions for placement.
If you’re working the tail as an extension of the body, simply continue knitting the body stitches until you reach the desired length for the tail. This method creates a seamless transition from body to tail, but keep in mind that it may require some additional shaping or decreases to achieve the desired tail shape.
Creating the Legs and Paws
When knitting a puppy toy, one important step is creating the legs and paws of the toy. These components give the toy its characteristic shape and add to its overall cuteness. Here is a step-by-step guide on how to knit the legs and paws for your knitted puppy.
Step 1: Cast on Stitches
To start, cast on the required number of stitches onto your knitting needle. The number of stitches will depend on the size of the toy and the pattern you are following. Make sure to leave a long tail of yarn for sewing the legs and paws onto the body later.
Step 2: Knit the Legs
Once you have cast on the required number of stitches, proceed to knit the legs. You can follow the pattern instructions for the specific leg design, such as knitting in stockinette stitch or using a ribbing pattern. Continue knitting until you reach the desired length for the legs.
Step 3: Shape the Paws
To shape the paws, you will need to decrease the number of stitches gradually. This can be done by knitting two stitches together or using other decrease stitches specified in the pattern. Follow the pattern instructions to shape the paws and create the desired look.
Step 4: Bind Off
Once the legs and paws are knitted, it’s time to bind off the stitches. Bind off the stitches using a suitable method, such as a basic bind off or an elastic bind off. Make sure not to bind off too tightly to ensure the toy’s legs and paws have the desired flexibility.
Following these steps will help you create the perfect legs and paws for your knitted puppy toy. Remember to check the pattern instructions for any specific details or variations in the design. With the legs and paws complete, you are one step closer to finishing your adorable knitted puppy toy!
Knitting the Head and Ears
When knitting a puppy, the head is an important part of the pattern. It is usually knitted separately and then attached to the body. To create the head, start by casting on the required number of stitches using the chosen yarn and needle size. Follow the instructions on the pattern to create the desired shape and size of the head. This may involve increasing and decreasing stitches to achieve the desired shape.
Once the head is complete, it is time to move on to the ears. The ears can be knitted separately and then sewn onto the head, or they can be knitted directly onto the head using the same yarn and needles. The pattern will provide instructions on how to knit the ears, including the number of stitches to cast on and the required shaping.
Knitting the Ears:
- Cast on the required number of stitches.
- Follow the pattern instructions to shape the ears.
- This may involve increasing or decreasing stitches.
- Continue knitting until the desired length is reached.
- Bind off the stitches to secure the shape of the ears.
Attaching the Head to the Body:
Once the head and ears are complete, it is time to attach the head to the body of the knitted puppy. This can be done using a yarn needle and the same yarn that was used to knit the head and body. Follow the pattern instructions to determine the correct placement of the head on the body.
Use the yarn needle to sew the head onto the body, making sure to secure it firmly in place. This will give the puppy its characteristic shape and make it look more like a real puppy. Take care to sew the head on evenly and securely, ensuring that it is firmly attached to the body and won’t come loose with play or handling.
By following the pattern instructions and using the correct techniques, knitting the head and ears of a knitted puppy can be a fun and rewarding experience. The head and ears play a crucial role in bringing the puppy to life and giving it its unique personality.
Adding Facial Features and Personality
Once you have completed knitting the body and limbs of your puppy, it’s time to add the facial features and give your creation some personality. This is where the adorable details come into play, bringing your knitted puppy to life.
Eyes: Start by sewing on the eyes. Using black yarn or embroidery thread, create two small, evenly spaced stitches for each eye. The placement of the eyes will greatly affect the expression of your puppy, so take your time to position them just right. You can choose to sew the eyes slightly tilted for a playful or mischievous look, or straight for a more innocent and friendly expression.
Nose: The nose is another important feature that adds character to your puppy. Using a contrasting color of yarn, shape a small triangle or oval and sew it onto the face, just above the center of the mouth. The size and shape of the nose can vary depending on the look you want to achieve. A larger, rounder nose might give your puppy a more friendly and approachable appearance, while a smaller, pointed nose can make it look more mischievous or curious.
Mouth: The mouth can be a simple line or a small smiling shape. Using thread or yarn of a similar color to the nose, sew a gentle curve or a short line in the center of the face, just below the nose. A smiling mouth can make your puppy look cheerful and friendly, while a straight line might give it a more serious or neutral expression.
Ears: The shape and position of the ears can greatly contribute to your puppy’s personality. Knit or crochet a pair of ears, and then sew them onto each side of the head. The placement can be slightly tilted forward for an alert and attentive look, or drooping slightly for a more relaxed and laid-back appearance. Play around with different shapes and sizes to find the perfect ears for your knitted puppy.
Adding these facial features will allow you to bring out the personality of your knitted puppy. Experiment with different stitch techniques, colors, and shapes to create a truly unique and lovable toy.
Assembly and Finishing Touches

Once you have completed all the individual knitted pieces for your puppy, it’s time to assemble them together. Start by sewing the body pieces together, making sure to leave an opening for stuffing. Use a whip stitch or mattress stitch to join the pieces, taking care to align the edges neatly.
Next, sew the legs and tail to the body. Position them where desired and sew them securely in place. You can use the same stitch as before, or a ladder stitch for a more invisible seam if you prefer.
Now it’s time to stuff your puppy! Use polyester fiberfill or another suitable stuffing material to fill the body, legs, and tail. Make sure to stuff firmly but not too tightly, allowing the puppy to keep its shape. Use small amounts of stuffing at a time and distribute it evenly for a smooth finish.
Once your puppy is stuffed, close the opening in the body with a whip stitch or ladder stitch. Make sure the stitches are secure and tight so the stuffing doesn’t come out. Trim any excess yarn if necessary.
Finally, add the finishing touches to your knitted puppy. Embroider or attach eyes and a nose using black yarn or safety eyes. You can also embroider a mouth or tongue if desired. Use yarn or embroidery floss in a coordinating color to sew on any additional details like spots, patches, or a collar.
Your knitted puppy is now complete and ready to be cherished or given as a gift. Have fun displaying it or playing with it, knowing that you brought it to life with your own knitting skills!
Additional Tips and Tricks
When knitting the puppy pattern, there are a few additional tips and tricks that can help you achieve the best results. Here are some helpful suggestions:
Gauge Swatch
Before you begin knitting the puppy, it is important to knit a gauge swatch to ensure that your finished project will have the correct size and proportions. Follow the instructions for the gauge provided in the pattern and adjust your needle size if necessary. This step will help you avoid any surprises and ensure that your puppy turns out perfectly.
Seaming Techniques
When it comes to seaming the different pieces of the knitted puppy together, consider using a mattress stitch or a whip stitch for seamless and invisible seaming. These techniques will give your finished puppy a polished and professional look. Take your time when seaming and make sure to secure all loose ends and yarn tails.
Embroidery Details
Adding embroidery details to your knitted puppy can bring it to life and give it a unique personality. Use a contrasting color of yarn to stitch on eyes, nose, and mouth. Experiment with different embroidery techniques, such as satin stitch or French knots, to create different textures and effects. Be patient and take your time to achieve the desired result.
Stuffing and Shaping
Proper stuffing and shaping are crucial for creating a well-defined and adorable knitted puppy. Use a polyester fiberfill or stuffing material of your choice to stuff the body and limbs firmly, but not too tightly. Pay extra attention to shaping the head, ears, and tail to give your puppy a cute and realistic appearance. You can also strategically place additional stuffing in certain areas to create more definition and dimension.
By following these additional tips and tricks, you can take your knitted puppy to the next level and create a truly special and cherished handmade toy.
Advanced Techniques for Customization
When it comes to creating a customized knitted puppy, there are several advanced techniques that can be used. These techniques allow you to add your own personal touch and make your puppy truly unique. Whether you want to change the color, add new features, or modify the size, the possibilities are endless.
Color Modification
One of the easiest ways to customize your knitted puppy is by changing the color. You can use different colored yarns to create a pattern or choose a solid color for a more classic look. To achieve a unique effect, you can also experiment with different dyeing techniques, such as hand-painting or dip-dyeing. This will give your puppy a one-of-a-kind appearance that reflects your personal style.
Adding New Features
If you want to take your customization to the next level, you can consider adding new features to your knitted puppy. This could include creating a different facial expression, adding ears or a tail, or even giving your puppy a special accessory like a scarf or a hat. By using advanced knitting techniques, such as embroidery or felting, you can easily incorporate these new features and make your puppy stand out from the crowd.
Modifying the Size
If you prefer a larger or smaller knitted puppy, you have the option to modify the size. By adjusting the number of stitches and rows in the pattern, you can easily scale up or down the size of your puppy. This allows you to create a mini version for a keychain or a larger version as a decorative item. Just be sure to make the necessary calculations and adjustments to ensure a proportionate and well-balanced final result.
In conclusion, the advanced techniques mentioned above give you the freedom to customize your knitted puppy according to your own preferences and creativity. Whether you choose to modify the color, add new features, or change the size, the key is to have fun and let your imagination guide you. With a little bit of practice and experimentation, you can create a truly unique and personalized knitted puppy that will bring joy and warmth to your heart.
Showcasing Your Knitted Puppy Creation
After spending time and effort knitting your adorable puppy, it’s time to showcase your creation to the world. Whether you plan on selling your knitted puppies, gifting them to loved ones, or simply displaying them in your own home, there are a few ways to effectively showcase your work.
First and foremost, it’s important to capture high-quality photographs of your knitted puppy. Natural lighting is key to ensure accurate colors and details. Consider using a simple backdrop or props that complement the theme of your puppy. Experiment with different angles and close-up shots to capture the intricate stitches and unique features of your creation.
Online platforms
Consider creating an online presence for your knitted puppies. You can start by showcasing your work on popular craft marketplaces such as Etsy or eBay. Create a visually appealing listing with detailed descriptions and multiple images to attract potential buyers. Don’t forget to include information about the materials used and any care instructions.
If you’re passionate about knitting and want to share your patterns with others, consider starting a blog or website. Here, you can showcase your knitted puppies, offer free or paid patterns, and connect with a community of fellow knitters. Share your knitting journey, provide tips and tricks, and encourage others to showcase their creations as well.
Local craft fairs and exhibitions
Participating in local craft fairs and exhibitions is a great way to showcase your knitted puppies and connect with the community. These events provide an opportunity to interact with potential buyers, receive feedback, and network with other crafters. Be sure to have a well-organized display that highlights the unique features of your knitted puppies.
Social media
Social media platforms such as Instagram, Facebook, and Pinterest are powerful tools to showcase your knitted puppies. Create dedicated accounts for your creations and regularly post high-quality images. Use relevant hashtags to increase visibility and engage with other knitters and potential buyers. Consider collaborating with influencers or hosting giveaways to reach a larger audience.
Remember, showcasing your knitted puppy creation requires time and effort beyond knitting itself. Take pride in your work, experiment with different platforms, and enjoy the process of sharing your creativity with the world. Happy knitting!