
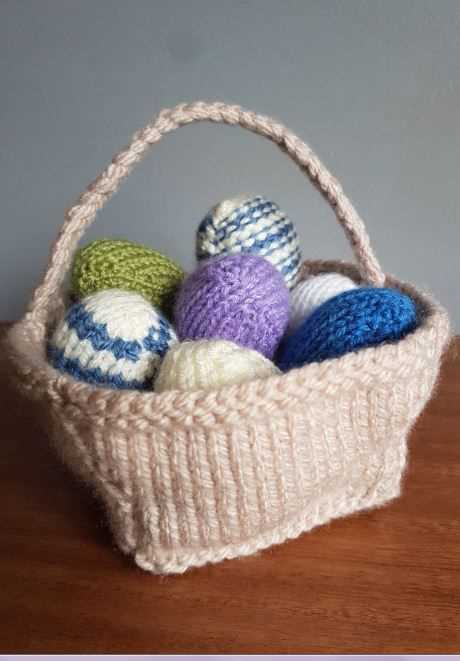
A knitted Easter basket is a perfect addition to your holiday decorations or a lovely gift for someone special. Whether you’re an experienced knitter or just starting out, this Easter basket knitting pattern is both fun and easy to follow.
With this pattern, you can create a beautiful basket that will hold all your Easter eggs and treats. The pattern includes step-by-step instructions and detailed photos to guide you through the process. You’ll need basic knitting skills and some yarn in your favorite colors to get started.
Knitting a basket is a great way to use up leftover yarn and try out different stitch patterns. You can customize the size and shape of your basket by adjusting the number of stitches and rows. This pattern is versatile and can be easily modified to fit your preferences.
Easter Basket Knitting Pattern
Easter is a time for celebrating new life and the arrival of spring. One of the popular traditions during this festive season is giving and receiving Easter baskets filled with goodies. If you are looking for a unique and personalized Easter basket, why not try knitting one yourself? With a simple knitting pattern, you can create a beautiful and functional Easter basket that will be cherished for years to come.
To start your Easter basket knitting project, you will need the following materials: knitting needles, yarn of your choice, scissors, and a tapestry needle for finishing touches. Choose yarn colors that reflect the vibrant hues of spring, such as pastel shades or bright, cheerful colors. The size of your knitting needles will depend on the yarn weight you choose.
The knitting pattern for the Easter basket begins with a circular base. Cast on the desired number of stitches and join them in the round. Knit the base using a simple stockinette stitch or experiment with different textured stitches for added interest. Once the base is complete, you can start working on the sides of the basket. You can choose to knit the sides using the same stitch pattern as the base or switch to a different stitch for a contrasting effect.
As you work on the sides of the Easter basket, you can also incorporate decorative elements like lace patterns, cables, or colorwork to make your basket truly unique. Consider adding a handle to the basket for easy carrying or attaching a pretty bow or ribbon for a festive touch. Once you have finished knitting the sides, bind off the stitches and weave in any loose ends.
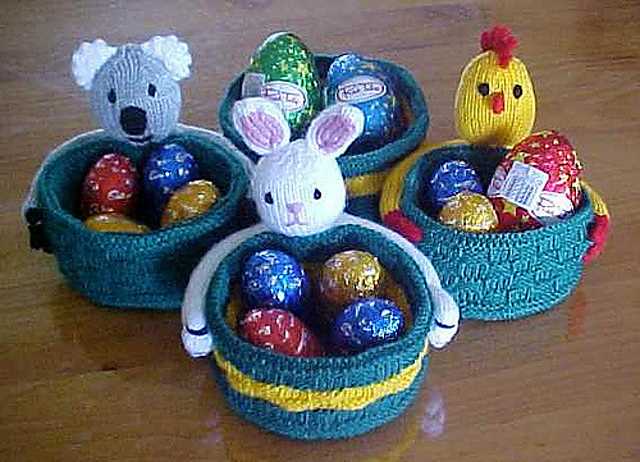
With your Easter basket knitting project complete, it’s time to fill it with goodies! You can fill your handmade basket with traditional Easter treats like chocolate eggs, marshmallow chicks, and jelly beans. You can also personalize your basket by including small gifts or toys that are meaningful to the recipient. Whether you keep the Easter basket for yourself or give it as a thoughtful gift, it will surely bring joy and delight to the Easter celebrations.
Materials Needed
Before you start knitting your Easter basket, make sure you have all the necessary materials. Here are the items you will need:
- Yarn: Choose a soft, medium-weight yarn in the color of your choice. Pastel colors are popular for Easter baskets, but feel free to get creative and use any color you like.
- Knitting Needles: You will need a pair of knitting needles in the appropriate size for your yarn. Check the yarn label for the recommended needle size.
- Tapestry Needle: This needle will be used for weaving in ends and sewing any seams that may be required.
- Scissors: A pair of sharp scissors will be needed to cut the yarn.
- Stitch Marker: A stitch marker can be helpful for keeping track of your stitches and marking any important points in the pattern.
- Measuring Tape: You may need a measuring tape to ensure your basket is the desired size.
- Embroidery Thread or Yarn: If you plan to add any embellishments or embroidery to your Easter basket, you will need embroidery thread or yarn in the desired colors.
- Optional: Buttons, ribbons, or other decorative items can be used to personalize your Easter basket.
Gather all these materials before you start knitting to ensure a smooth and enjoyable knitting experience. Once you have everything ready, you can begin creating your beautiful Easter basket.
Basic Knitting Techniques
Knitting is a creative and rewarding hobby that allows you to create beautiful and functional items. Whether you’re a beginner or an experienced knitter, it’s important to have a good grasp of the basic knitting techniques. These foundational skills will serve as the building blocks for more complex and intricate patterns.
Casting On: The first step in any knitting project is to cast on, which is the process of creating the first row of stitches on your knitting needle. There are several methods for casting on, including the long tail cast on and the knit cast on. The method you choose will depend on the pattern you’re working on and personal preference.
Knit Stitch: The knit stitch is the most basic stitch in knitting. In this stitch, you insert the right needle into the first stitch on the left needle, pass the yarn over the right needle from back to front, and then pull the loop through to form a new stitch. Repeat this process for each stitch on the left needle until all the stitches have been transferred to the right needle.
Purl Stitch: The purl stitch is the opposite of the knit stitch and creates a different texture on your knitting fabric. To purl, you insert the right needle into the first stitch on the left needle from right to left, pass the yarn under the right needle from front to back, and then pull the loop through to form a new stitch. Repeat this process for each stitch on the left needle.
Increasing: Increasing is the process of adding stitches to your knitting. There are several ways to increase, such as the knit front and back (KFB) or the yarn over (YO) method. The method you choose will depend on the pattern and the desired effect.
Decreasing: Decreasing is the process of removing stitches from your knitting. This is often done to shape the fabric or create specific designs. Common decrease methods include knitting two stitches together (K2tog) or slipping a stitch, knitting the next stitch, and then passing the slipped stitch over the knit stitch.
Binding Off: Binding off is the final step in knitting, where you secure the stitches and create a finished edge. To bind off, knit the first two stitches, then lift the first stitch over the second stitch and off the needle. Repeat this process until you have one stitch remaining, and then cut the yarn, leaving a tail to weave in.
By mastering these basic knitting techniques, you’ll be well-equipped to tackle a wide range of knitting projects and explore more intricate patterns and designs. Practice and patience are key, so don’t be discouraged if it takes time to perfect these techniques. With each new project, you’ll continue to refine your skills and create beautiful handmade items.
Choosing Yarn and Needles
When it comes to choosing yarn for your Easter basket knitting project, there are a few factors to consider. First, think about the desired texture and appearance of the finished product. For a more traditional and classic look, opt for a medium-weight yarn in pastel colors. If you prefer a modern twist, you can choose bold and vibrant colors or even experiment with variegated yarns. Additionally, consider the practicality of the yarn. Wool blends are a good choice for their durability and ability to hold their shape. However, if you want a softer and more lightweight basket, cotton or acrylic yarn can be ideal.
Next, select the appropriate needles for your knitting project. The size of the needles will depend on the thickness of your chosen yarn and the desired tension of your stitches. For medium-weight yarn, a pair of US size 7 or 8 knitting needles should work well. However, always refer to the recommended needle size on the yarn label to ensure a proper fit. If you prefer a tighter or looser stitch, you can adjust the needle size accordingly. Additionally, consider the type of needles that you are most comfortable using. Straight needles are commonly used for flat knitting, while circular needles can be more versatile and suitable for knitting in the round.
When choosing yarn and needles for your Easter basket project, don’t be afraid to experiment and have fun with different combinations. The possibilities are endless, and you can customize your basket to suit your personal style and preferences. Just remember to keep in mind the desired texture, appearance, and practicality of the materials, as well as selecting the appropriate needle size for the ultimate knitting success.
Gauge Swatch
Before you start knitting your Easter basket, it’s important to work up a gauge swatch to ensure that your finished project will be the correct size. The gauge swatch allows you to test the tension of your knitting and make any necessary adjustments to achieve the desired measurements.
To create a gauge swatch, first choose the yarn and knitting needles that you plan to use for your Easter basket. Follow the instructions provided with the knitting pattern to determine the recommended needle size. Using these needles, cast on a number of stitches that is specified in the pattern.
Next, work in the specified stitch pattern for a few inches, making sure to keep the tension consistent throughout. This means that you should knit or purl with the same amount of force for each stitch. After you have completed the swatch, bind off your stitches and lay the piece flat.
Measure the width and height of your swatch and compare them to the gauge listed in the pattern. If your swatch matches the gauge, congratulations! You can proceed with confidence, knowing that your finished Easter basket will be the correct size. If the gauge is off, you may need to try using larger or smaller needles to achieve the correct tension.
Remember, taking the time to knit a gauge swatch is well worth the effort. It can save you from the frustration of knitting an incorrectly sized project and ensure that your Easter basket turns out just right.
Bottom of the Basket
Easter baskets are not only adorable, but they are also functional and versatile. One important part of an Easter basket is the bottom. The bottom of the basket provides support and stability, ensuring that the basket can hold all the treats and goodies without collapsing. To create a sturdy bottom, it is essential to choose a durable material and use a tight knitting pattern.
Materials:
- Thick yarn in a color of your choice
- Knitting needles suitable for the yarn thickness
- Tape measure
- Scissors
- Yarn needle
Instructions:
- Start by casting on a number of stitches that is a multiple of four. This will allow for an even pattern.
- Next, knit in the round using a knitting pattern of your choice. One popular choice is the seed stitch, which creates a textured pattern.
- Continue knitting until the bottom of the basket reaches the desired size. Keep in mind that the bottom should be slightly smaller than the top to create the traditional basket shape.
- Once you have reached the desired size, bind off the stitches and cut the yarn, leaving a tail.
- Thread the tail of the yarn onto a yarn needle and sew the bottom of the basket closed. This will ensure that the treats and goodies stay securely inside the basket.
- Trim any excess yarn and weave in the ends.
By following these instructions and using a durable material, you can create a strong and sturdy bottom for your Easter basket. This will ensure that your basket can withstand the weight of all the delicious treats and surprises that Easter has to offer!
Knitting the Sides
Once you have finished knitting the base of the Easter basket, it’s time to move on to knitting the sides. This is where the basket will start to take shape and become more three-dimensional.
To knit the sides of the basket, you will continue working in the round. You should have a set number of stitches on your needles from the base. You will need to divide these stitches evenly onto four double-pointed needles. This will make it easier to knit in the round without any gaps or ladders.
Row 1: Begin by knitting one round in the main color yarn.
Row 2: Next, you will start knitting the sides of the basket. To do this, you will need to work in a pattern of knit and purl stitches. This will create a textured effect and give the basket some structure. Repeat this pattern for the desired height of the basket.
Row 3: Once you have reached the desired height, it’s time to finish off the sides of the basket. You can do this by knitting one round in the main color yarn, and then binding off all stitches.
Now that you have completed knitting the sides of the Easter basket, you can move on to finishing touches such as adding handles or embellishments.
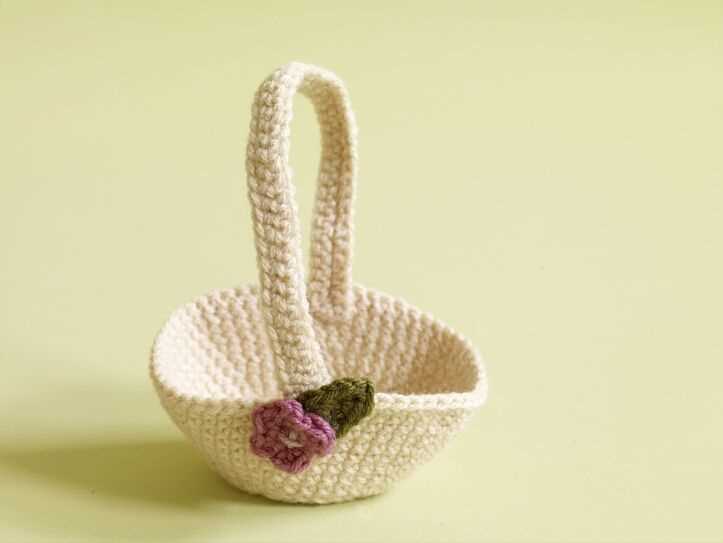
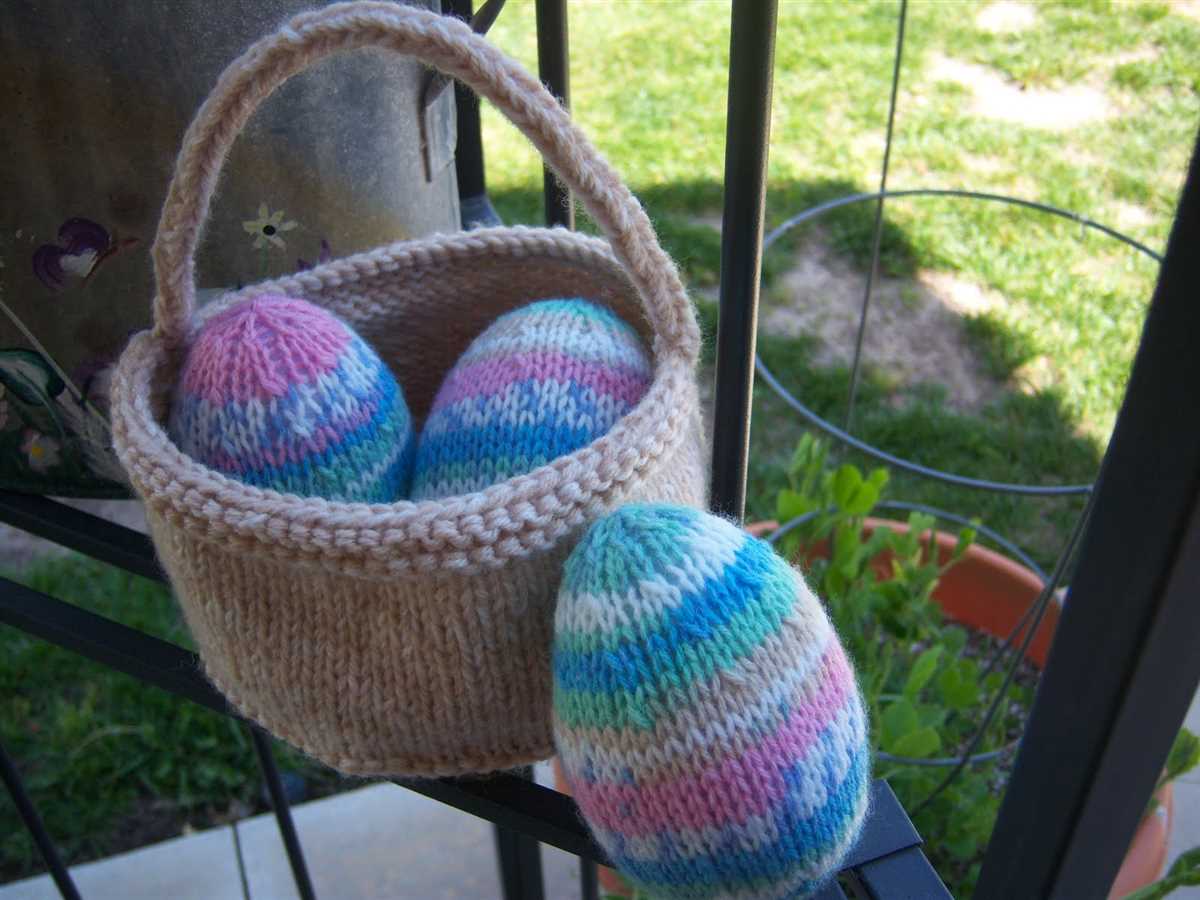
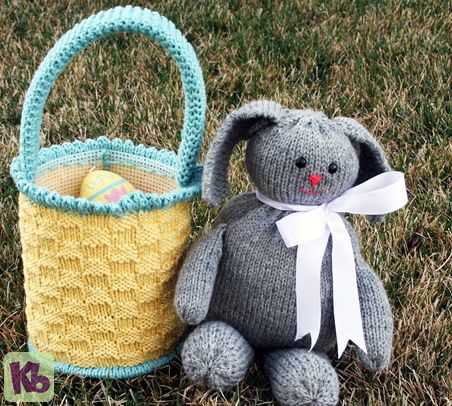
Adding Handles
Adding handles to your Easter basket knitting pattern can make it more convenient and easy to carry. There are several ways you can incorporate handles into your design, depending on your preference and skill level.
If you prefer a simple and straightforward approach, you can knit two long strips of fabric and attach them to the sides of the basket. These strips can be knitted using the same stitch pattern as the rest of the basket or a different pattern for added visual interest. Make sure to securely sew the ends of the strips to the sides of the basket to ensure they can withstand the weight of the contents.
Another option is to create handles using i-cords. I-cords are thin, tubular knitted cords that can be made using double-pointed needles or a knitting spool. You can knit two i-cords of the desired length and attach them to the sides of the basket by sewing them in place. This method provides a more durable and sturdy handle, perfect for carrying heavier loads.
If you want to get creative with your handles, you can experiment with different stitch patterns or even incorporate other materials such as ribbons or ropes. For example, you can knit a basket with eyelet holes along the rim and thread a ribbon or rope through them to create a stylish and adjustable handle. This allows you to customize the length and style of the handle to suit your needs.
Decorative Elements
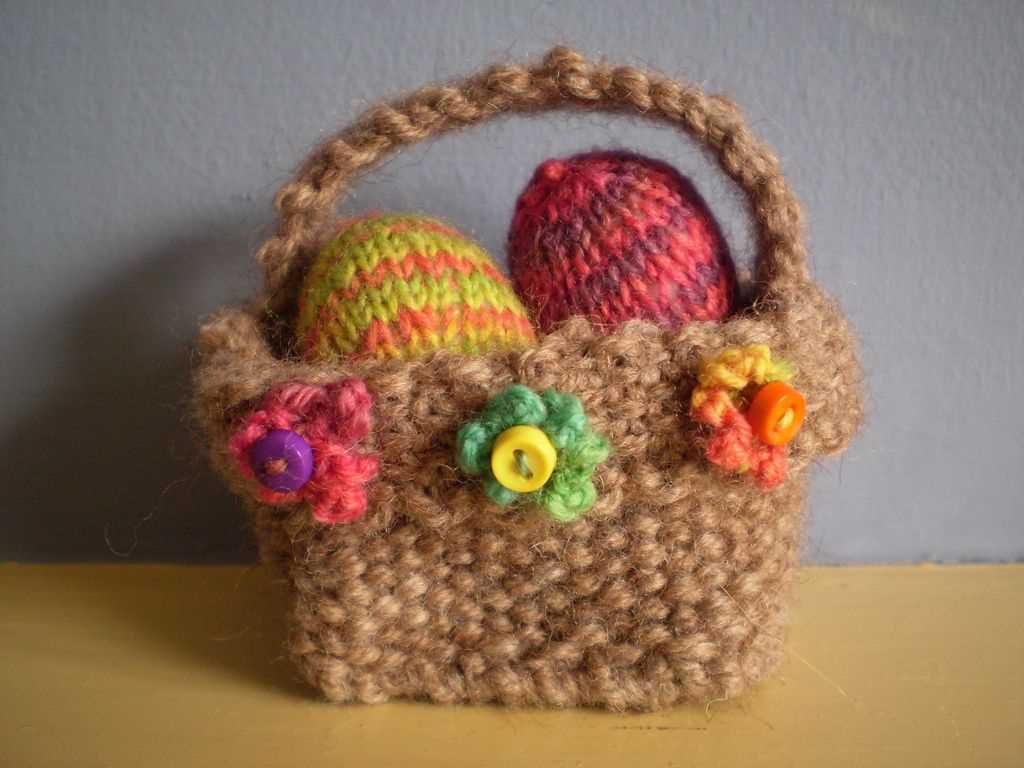
When knitting an Easter basket, adding decorative elements can make it even more special and unique. There are various options to choose from, depending on your preferred style and skill level.
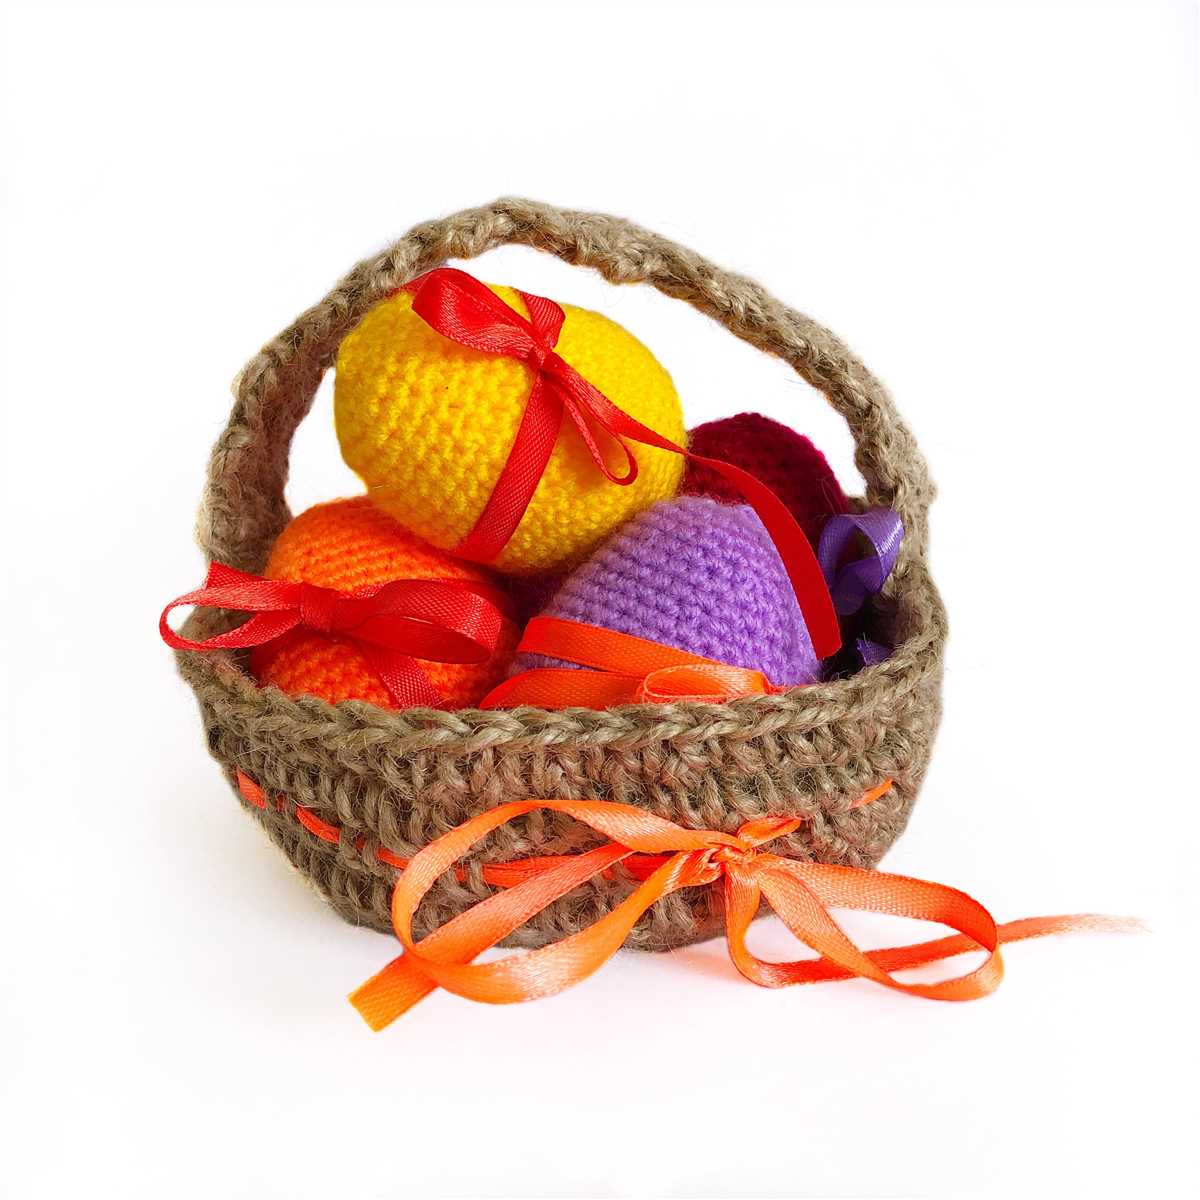
Ribbon and Bow
One of the easiest ways to add a decorative touch to an Easter basket is by attaching a ribbon and bow. You can choose a ribbon in a color that complements the knitted pattern or opt for a contrasting color for a more eye-catching effect. To attach the ribbon, simply thread it through the stitches at the top of the basket and tie it into a beautiful bow.
Embroidery
Embroidery is another popular technique for adding decorative elements to a knitted Easter basket. You can use embroidery floss or yarn in different colors to create intricate designs such as flowers, bunnies, or Easter eggs. The embroidery can be done directly on the basket or on separate pieces that are then attached to the basket with a tapestry needle.
Pom-Poms
Pom-poms are fun and playful decorative elements that can be easily added to an Easter basket. You can make pom-poms using yarn in different colors and sizes and attach them to the corners or along the edges of the basket. Pom-poms can also be used to create a handle for the basket, adding an extra touch of whimsy.
Beads and Buttons

For a more intricate and detailed decoration, you can consider adding beads or buttons to your Easter basket. You can sew beads onto the basket using embroidery floss or yarn, creating patterns or shapes. Buttons can be sewn onto the basket in a similar way, adding a colorful and tactile element to the design.
With these decorative elements, you can personalize your knitted Easter basket and make it a truly special gift or decoration. Let your creativity flow and experiment with different techniques to create a unique and beautiful finished product.
Finishing Touches
Once you have completed knitting your Easter basket, it’s time to add the finishing touches to make it extra special. There are several options you can consider to personalize and enhance your basket.
One option is to add decorative elements such as ribbons, bows, or flowers. These can be attached to the handle of the basket or woven into the knitting itself. You can choose colors that match your Easter theme or opt for contrasting shades to create a vibrant and eye-catching design.
Embroidery and Appliqués
Another way to add a personal touch to your Easter basket is through embroidery or appliqués. You can embroider your child’s name or initials onto the basket, or create cute Easter-themed designs such as bunnies, chicks, or eggs. Appliqués can also be used to add additional details or texture to the basket. These embellishments can be sewn or glued onto the knitted fabric, depending on your preference.
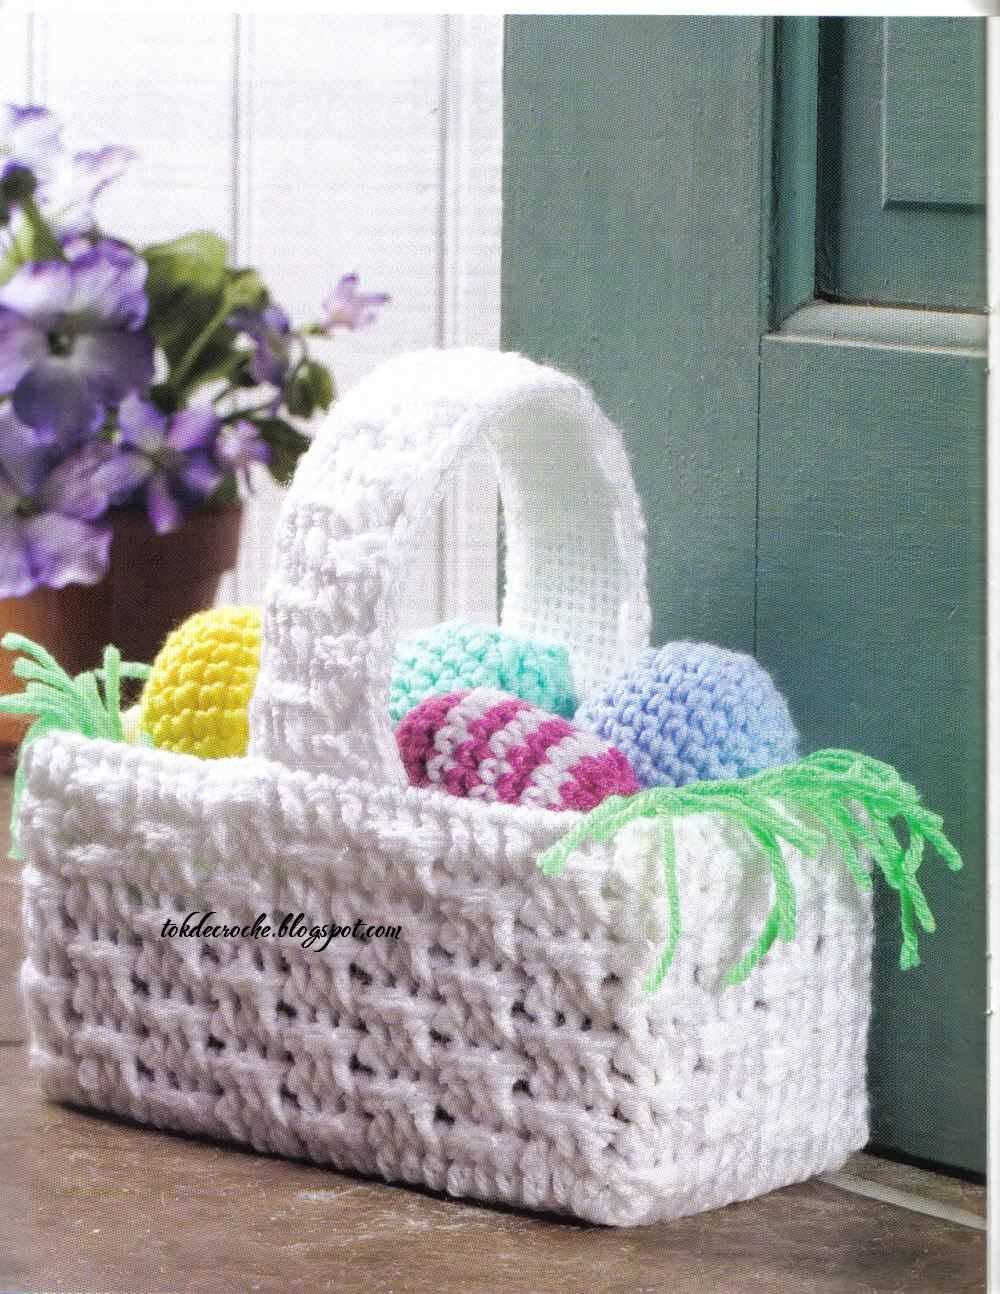
Lining and Filling
To make your Easter basket even more special, consider adding a lining and filling. A fabric lining can be sewn into the basket to provide a soft and comfortable base for your Easter goodies. You can choose a fabric that complements the colors of your basket or opt for a fun and whimsical print. Additionally, filling the basket with Easter grass or shredded paper adds volume and creates a festive look.
By adding these finishing touches to your knitted Easter basket, you can create a unique and personalized gift that is sure to delight both children and adults alike. Whether you choose to embellish with ribbons, embroidery, or lining, your Easter basket will be a cherished keepsake for years to come.
Blocking the Basket
Blocking is an essential step in finishing any knitted project, and Easter baskets are no exception. After you have completed knitting the basket and woven in all the loose ends, it is time to block the basket to give it a professional finished look. Blocking helps to shape and even out the stitches, and it also sets the final dimensions of the basket.
Here is how you can block your Easter basket:
- Prepare a blocking surface: Find a flat surface, such as a clean towel or foam blocking mat, where you can pin the basket to dry. Make sure the surface is larger than the dimensions of the basket.
- Soak the basket: Fill a basin or sink with lukewarm water and add a few drops of mild detergent. Immerse the basket in the water and gently squeeze it to ensure it is fully saturated. Let it soak for about 10-15 minutes.
- Remove excess water: Take the basket out of the water and gently squeeze out the excess water without wringing or twisting the fabric. You can also roll the basket in a clean towel to absorb more water.
- Shape the basket: Place the wet basket on the blocking surface and gently stretch it to the desired shape and size. Smooth out any wrinkles or unevenness in the stitches.
- Pin the basket: Use rust-proof T-pins or blocking wires to secure the edges of the basket to the blocking surface. Start pinning from the center and work your way outwards, making sure to maintain the desired shape.
- Let it dry: Leave the basket to dry completely, which can take anywhere from a few hours to overnight depending on the yarn and the humidity. Avoid moving or touching the basket until it is dry.
- Remove the pins: Once the basket is completely dry, carefully remove the pins or wires. The basket should now hold its shape beautifully and be ready for filling with Easter treats!
Blocking your Easter basket is a simple yet important step that can make a big difference in the finished look of your knitting project. It ensures that the stitches are even and the dimensions are accurate, giving your basket a professional and polished appearance.
Variation Ideas
With this Easter basket knitting pattern, there are endless possibilities for customization. Here are some variation ideas to inspire your creativity:
1. Colorful Stripes: Instead of knitting the entire basket in one color, try adding vibrant stripes. You can choose two or more different colors and alternate them throughout the pattern. This will give your basket a fun and playful look.
2. Lace Detail: If you want to add a touch of elegance to your Easter basket, consider incorporating a lace pattern. You can knit a panel of lace and sew it onto the sides of the basket or knit the entire basket with a lace stitch pattern. This will create a delicate and beautiful design.
3. Embroidery: Personalize your Easter basket by adding embroidered designs. You can stitch flowers, animals, or other Easter-themed motifs onto the basket using different colored yarn. This will make your basket truly unique and special.
4. Pom-poms or Tassels: Add some playful flair to your Easter basket by attaching pom-poms or tassels to the corners. You can make them in coordinating or contrasting colors to make them stand out. This will give your basket a festive and whimsical touch.
5. Appliques: Another way to customize your Easter basket is by adding appliques. You can knit small shapes, such as hearts, bunnies, or Easter eggs, and sew them onto the basket. This will add extra charm and make your basket even more adorable.
These are just a few ideas to get you started. Feel free to experiment with different techniques and designs to create the perfect Easter basket for yourself or your loved ones.
Care Instructions
Follow these guidelines to ensure that your knitted Easter basket remains in good condition for years to come:
- Handwash Only: To avoid damaging the delicate knit fabric, always handwash the Easter basket. Fill a basin with lukewarm water and a mild detergent. Gently submerge the basket and lightly agitate the water to clean it. Rinse thoroughly with cool water and squeeze out excess moisture.
- Air Dry: After washing, reshape the basket by gently stretching it back into shape. Place the basket on a clean, dry towel or a drying rack, and allow it to dry naturally. Avoid exposing the basket to direct sunlight or heat sources, as they may cause the colors to fade or the fabric to shrink.
- Store Properly: When not in use, store the Easter basket in a clean, dry place. Avoid placing heavy objects on top of it to prevent deformations. It is recommended to wrap the basket in tissue paper or fabric to protect it from dust and sunlight.
Note: The care instructions may vary depending on the specific yarn used for the basket. Always check the yarn label for any additional care recommendations.
Conclusion
With proper care, your knitted Easter basket will continue to bring joy for many Easter celebrations to come. Remember to handwash, air dry, and store it properly to keep it in pristine condition.