
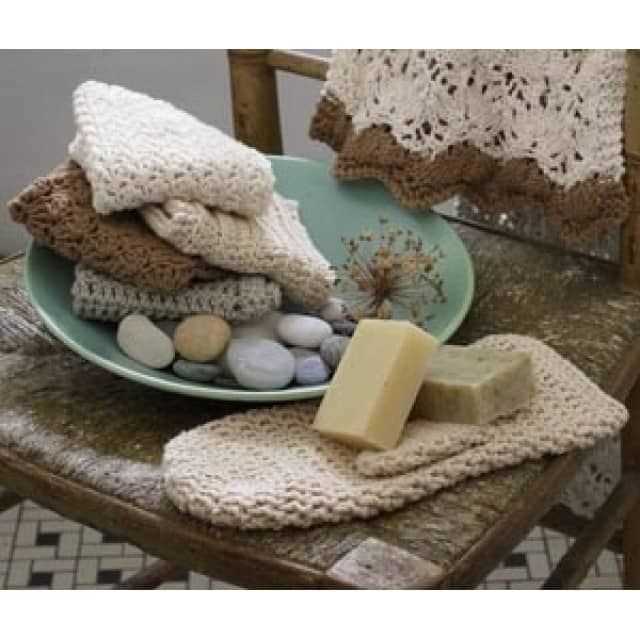
Knitting your own bath mitt is a great way to add a personal touch to your bathing routine. Not only are bath mitts fun to make, but they also make for a practical and useful item in your bathroom. Plus, knitting allows you to create a customized design and choose your favorite yarn colors, making your bath mitt truly unique.
Whether you’re a knitting beginner or expert, this bath mitt pattern is suitable for all skill levels. With clear instructions and step-by-step illustrations, you’ll be able to create a cozy and absorbent bath mitt in no time. The pattern uses basic knitting techniques and stitches, so even if you’re new to knitting, you’ll be able to follow along and create a beautiful end result.
Not only does knitting your own bath mitt save money compared to buying one, but it also allows you to use high-quality materials. You can choose a soft and plush yarn, such as cotton or bamboo, for a luxurious feel on your skin. Additionally, by making your own bath mitt, you can ensure that it’s hygienic and easy to clean, as you can simply throw it into the washing machine after use.
So break out your knitting needles and get ready to create a cozy and practical bath mitt. Whether you’re knitting a bath mitt for yourself or as a gift for a loved one, this pattern will help you make a functional and stylish addition to any bathroom. With just a few hours of knitting, you’ll have a beautiful and personalized bath mitt that will enhance your bathing experience.
Making your own bath mitt
Are you tired of using regular washcloths that don’t provide enough scrubbing power during your shower or bath? Why not try making your own bath mitt? Making your own bath mitt allows you to customize it to your preferences and ensure that it fits your hand perfectly. Plus, it’s a fun and easy knitting project that you can enjoy.
To start making your own bath mitt, you’ll need a few key materials. First, you’ll need some durable and absorbent yarn suitable for bath use. Cotton yarn works well for this purpose. You’ll also need knitting needles in an appropriate size for the yarn you choose and a darning needle for finishing off the mitt. If you want to add some extra exfoliating power to your mitt, you can also include a scrubby yarn or a loofah section.
Once you have your materials ready, you can begin knitting your bath mitt. You can find various bath mitt knitting patterns online or in knitting books. These patterns will guide you through the steps of casting on, knitting the rows, shaping the thumb, and binding off. You can choose a simple pattern for beginners or a more intricate one for advanced knitters.
After knitting your bath mitt, you’ll need to finish it off by weaving in any loose ends and joining the sides together. This can be done using a darning needle and the yarn you used for knitting. Make sure to reinforce the edges of the mitt to prevent unraveling. You can also add a loop at the top of the mitt for hanging it in your shower.
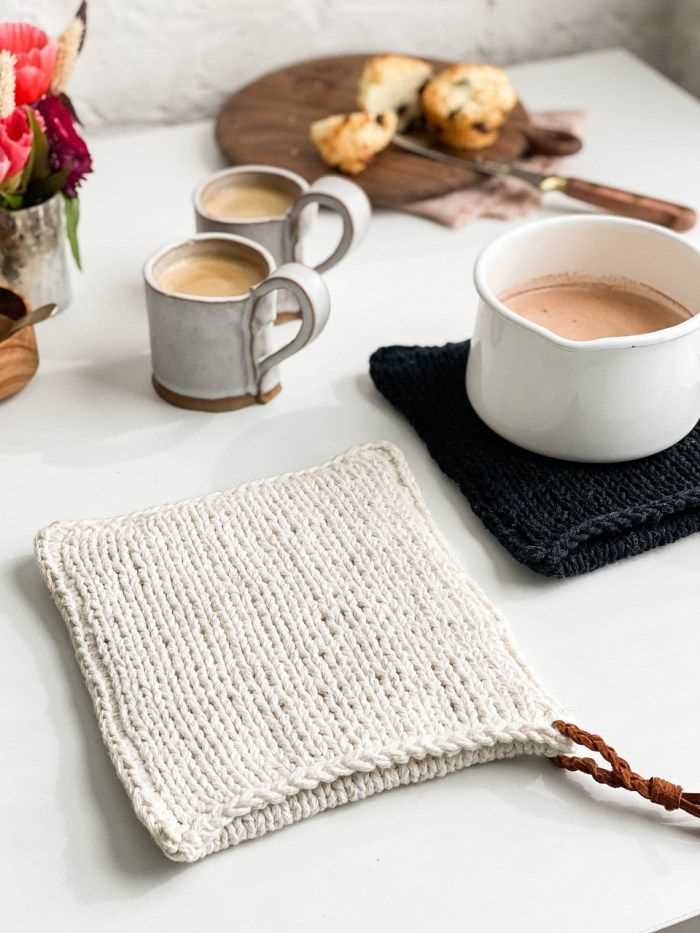
Once your bath mitt is finished, you can enjoy the benefits of using it during your daily shower or bath routine. The texture of the mitt will help exfoliate and cleanse your skin, leaving it feeling refreshed and rejuvenated. Plus, the ability to customize the size and shape of the mitt ensures that it fits comfortably on your hand. Start making your own bath mitt today and elevate your bathing experience.
Choosing the right yarn and needles
When knitting a bath mitt, it is important to choose the right yarn and needles to ensure the final product is both functional and durable. The type of yarn you select will greatly impact the texture and absorbency of the mitt. A popular choice for bath mitts is cotton yarn due to its ability to absorb moisture and its softness against the skin. If you prefer a more exfoliating effect, you may want to consider using a yarn blend with a higher percentage of bamboo or linen, as these fibers have a slight texture that can help remove dead skin cells.
The weight of the yarn is also a critical factor to consider. Thicker yarns, such as worsted or bulky weight, will produce a thicker, more substantial mitt, which may be preferable if you are looking for a plush feel. On the other hand, if you prefer a lighter, more delicate mitt, you may opt for a fingering or sport weight yarn. Keep in mind that the weight of the yarn will also affect the size of the needles you will need. Thicker yarns typically require larger needles, while thinner yarns require smaller needles.
When it comes to choosing needles for your bath mitt, there are a few options to consider. Straight needles, double-pointed needles, or circular needles can all be used, depending on your personal preference. Straight needles are the most traditional choice and often preferred by beginners. Double-pointed needles are commonly used for knitting in the round and can be helpful if you plan on knitting a seamless mitt. Circular needles are a versatile option that can be used for both flat and circular knitting.
No matter what yarn and needles you choose, it is always a good idea to make a gauge swatch before starting your project. This will help ensure that the finished mitt will fit properly and that you are happy with the overall fabric texture. Additionally, don’t be afraid to experiment with different yarns and needle sizes to achieve the desired result. Happy knitting!
Getting started with the cast on
When starting a knitting project, the first step is to cast on. Casting on creates the first row of stitches on one of the needles and sets the foundation for the rest of the project. There are different methods of casting on, and the choice of method depends on the desired edge and the type of yarn being used.
One popular method of casting on is the Long-Tail Cast On. This method creates a neat and elastic edge, making it suitable for a variety of projects. To use this method, begin by leaving a tail of yarn that is approximately three times the width of the knitted piece. Using the thumb and first finger of your left hand, make a slipknot at the end of the tail. Insert the needle through the loop of the slipknot and tighten the loop around the needle, making sure not to make it too tight.
Another common method is the Knitted Cast On. This method is simple and creates a firm and sturdy edge. To use this method, start with a slipknot on the needle. Hold the needle with the slipknot in your right hand and the working yarn in your left hand. Insert the right-hand needle into the slipknot, coming from front to back. Wrap the yarn around the right-hand needle in a counterclockwise direction. Bring the right-hand needle back through the slipknot, creating a loop on the needle. Slide the loop onto the left-hand needle and tighten it.
There are also other casting on methods such as the Cable Cast On, the Provisional Cast On, and the Tubular Cast On, each with their own unique characteristics and uses. It is important to choose the right cast on method for your project to ensure a successful start and professional finish.
Knitting the body of the mitt

Once you have completed the cuff of the bath mitt, it’s time to move on to knitting the body. The body of the mitt is worked in a simple stockinette stitch, which creates a smooth and even texture.
To start, switch to your main color yarn. You will continue working in the round, so make sure your stitches are properly aligned. Knit every stitch in the first round to create the base row of the body.
Next, you will continue knitting in stockinette stitch for the desired length of the mitt. This can vary depending on your personal preference or the size of the mitt you are making. You may want to measure the length of your hand from the cuff to the base of your fingers to determine the appropriate length.
Continue knitting in stockinette stitch for the determined length, making sure to keep a consistent tension. This will ensure that the body of the mitt is even and not too loose or too tight. Once you have reached the desired length, you can move on to the next step of the pattern.
Remember to periodically try on the mitt to check the fit and make any necessary adjustments. It’s important to customize the size of the mitt to your hand to ensure a comfortable fit. Keep knitting with confidence, and soon you will have a completed bath mitt!
Adding texture with stitch patterns
When knitting bath mitts, adding texture with stitch patterns can not only be visually appealing but also functional. Different stitch patterns can create a variety of textures, from smooth and gentle to more scrub-like surfaces. This allows the bath mitt to effectively cleanse and exfoliate the skin while providing a comfortable and enjoyable knitting experience.
One popular stitch pattern that is often used for bath mitts is the seed stitch. This pattern involves alternating knits and purls, creating a bumpy texture that is great for exfoliating the skin. The seed stitch also provides a good grip, making it easier to hold onto the bath mitt while washing.
Another stitch pattern that can add texture to bath mitts is the basketweave stitch. This pattern creates a woven effect, resembling the appearance of a traditional wicker basket. The raised sections of the basketweave stitch provide extra scrubbing power, making it ideal for those who prefer a more intense exfoliation.
In addition to these stitch patterns, cables can also be incorporated into bath mitts to add both texture and visual interest. Cables create raised, twisted sections that not only look beautiful but also offer a gentle massaging effect on the skin. They can be used in combination with other stitch patterns or as standalone features.
Overall, adding texture with stitch patterns is a great way to enhance the functionality and aesthetics of bath mitts. Whether you prefer a gentle exfoliation or a more intense scrub, there are stitch patterns available to suit your needs. Get creative and experiment with different patterns to create unique and personalized bath mitts that are both functional and stylish.
Creating the Thumb Hole
When knitting a bath mitt, it is important to add a thumb hole for easy access to the thumb. This can be done by working a few stitches in a different way to create an opening where the thumb can fit through.
To create the thumb hole, follow these steps:
- On the row where you want to start the thumb hole, knit to the desired location of the hole.
- Next, slip the next few stitches onto a stitch holder or a piece of scrap yarn to hold them temporarily.
- Continue knitting the rest of the row as usual.
- On the next row, when you reach the stitches on the stitch holder, knit them as usual.
- Continue knitting the rest of the row, being sure to maintain the stitch pattern for the mitt.
- Repeat these steps on subsequent rows if necessary to create a larger thumb hole.
- Once the desired size of the thumb hole is reached, resume knitting all stitches as usual.
Note: Depending on the pattern and design of the bath mitt, the instructions for creating the thumb hole may vary. It is important to carefully follow the pattern instructions to ensure the thumb hole is created properly and in the right location.
Shaping the Thumb
One of the key elements in knitting a bath mitt is shaping the thumb. The thumb opening adds functionality to the mitt, allowing the user to easily grip objects while bathing. To achieve this, the knitting pattern includes specific instructions to create the thumb opening.
To begin shaping the thumb, the pattern will typically ask you to work a certain number of stitches in a designated area and then place those stitches on hold. This creates a gap that will become the thumb opening. You will then continue knitting the remaining stitches of the row before turning your work and working on the next row.
- Step 1: Work the specified number of stitches until you reach the designated area for the thumb opening.
- Step 2: Place the indicated number of stitches on hold by slipping them onto a stitch holder or a spare piece of yarn. This creates the gap for the thumb opening.
- Step 3: Continue knitting the remaining stitches of the row.
- Step 4: Turn your work and begin working on the next row, following the instructions provided in the pattern.
The pattern will often provide guidance on how to maintain the established pattern or stitch pattern while working on the thumb section. This may involve working additional rows or rounds in the established pattern or transitioning into a different stitch pattern for the thumb area. It’s important to carefully follow these instructions to ensure the thumb section blends seamlessly with the rest of the mitt.
Once the main body of the mitt is complete, you can revisit the thumb opening and follow the pattern instructions to pick up the stitches on hold and continue knitting the thumb. This may involve casting on additional stitches to bridge the gap and then working in the round or flat, depending on the pattern.
Finishing off the mitt
If you have reached this point, congratulations! You have successfully completed knitting the bath mitt. Now it’s time to give it the finishing touches to make it ready for use.
First, cut the yarn, leaving a long tail for sewing. Thread the tail through the needle and fold the mitt in half, aligning the edges. Starting from the bottom edge, begin sewing the sides together using the mattress stitch. Make sure to sew using a strong and secure stitch to ensure the durability of the mitt.
Tip: If you want to add a hanging loop to your bath mitt, you can do so by using a contrasting color of yarn. Simply create a small chain of stitches and attach it to the top corner of the mitt before sewing the sides together.
Once you have finished sewing the sides together, weave in any loose ends on the inside of the mitt to give it a clean and polished look. Then, fold the top edge of the mitt over to create the ribbed cuff. You can use a whip stitch or the mattress stitch to securely sew the cuff in place.
Finally, give your bath mitt a gentle blocking by spraying it with water and shaping it into the desired form. Leave it to dry completely before using it. And there you have it – your very own hand-knitted bath mitt, ready for pampering and exfoliating your skin.
Blocking and Washing Your Bath Mitt
If you have just finished knitting a bath mitt, congratulations! Now it’s time to give it the final finishing touches. One important step in the process is blocking your mitt. Blocking involves shaping and stretching the knitted fabric to ensure it retains its shape and to give it a more professional appearance.
To block your bath mitt, you will need to wet it first. Fill a sink or basin with lukewarm water and add a small amount of gentle detergent. Gently submerge the mitt in the water, making sure it is completely saturated. Allow it to soak for about 15 minutes to ensure the fibers are fully hydrated.
Blocking the Bath Mitt
After soaking, carefully remove the mitt from the water and gently squeeze out any excess water. Lay the mitt flat on a clean towel and roll it up, pressing firmly to remove even more water. Unroll the towel and transfer the mitt to a blocking mat or a clean surface.
To shape the mitt, gently stretch it to the desired size and shape. Pay attention to the thumb area, ensuring it is correctly positioned. Use rustproof pins or blocking wires to secure the mitt in place. Pinning the edges of the mitt will help maintain its shape while it dries.
Washing Your Bath Mitt
Once the mitt is blocked and shaped, it’s time to wash it. Fill a sink or basin with lukewarm water and add a small amount of mild detergent. Gently agitate the water to create suds. Submerge the mitt and gently massage it to remove any dirt or oils. Rinse the mitt thoroughly with clean water to remove all traces of detergent.
Once washed, gently squeeze out any excess water and lay the mitt flat on a clean towel to air dry. Avoid wringing or twisting the mitt, as this can cause it to lose its shape. Allow the mitt to dry completely before removing the pins or wires.
Blocking and washing your bath mitt not only helps it retain its shape, but it also ensures it is clean and ready for use. Following these steps will help keep your bath mitt looking and feeling its best for many uses to come.
Personalizing your bath mitt
Now that you have completed knitting your bath mitt, it’s time to add some personal touches to make it unique and special. There are several ways you can personalize your bath mitt to suit your style and preferences.
One option is to add decorative stitches or patterns. You can use a contrasting color yarn to create stripes, polka dots, or any other pattern you like. You can also experiment with different stitch patterns such as ribbing, cables, or lace to add visual interest to your bath mitt.
Embroidery
Another way to personalize your bath mitt is through embroidery. You can use embroidery floss or yarn to add initials, names, or even small motifs onto your mitt. This is a great way to make your bath mitt truly one-of-a-kind and to showcase your creative skills.
Add-ons
If you prefer a more functional approach, you can add some handy features to your bath mitt. For example, you can sew a loop or a button on one side of the mitt to easily hang it in your bathroom. You can also attach a small pocket to hold a bar of soap or other bath essentials.
Gift-giving
The personalized bath mitts also make great gifts for your loved ones. You can customize the color, stitch pattern, and embroidery to match the recipient’s taste. This thoughtful gift will show your care and attention to detail, making it an excellent choice for birthdays, holidays, or any special occasion.
Remember, personalizing your bath mitt not only adds a personal touch, but it also enhances its functionality and aesthetic appeal. So get creative, have fun, and make your bath mitt truly yours!
Q&A:
What is a bath mitt knitting pattern?
A bath mitt knitting pattern is a set of instructions that guide you on how to create a bath mitt using knitting techniques. It includes details on the materials needed, the stitches to be used, and the steps to follow in order to complete the project.
What materials are required for a bath mitt knitting pattern?
The materials required for a bath mitt knitting pattern typically include knitting needles, yarn, and a tapestry needle. The specific needle size and yarn thickness may vary depending on the desired outcome and instructions provided in the pattern.
Are there different types of bath mitt knitting patterns available?
Yes, there are different types of bath mitt knitting patterns available. Some patterns may include variations in stitch patterns, sizes, or decorative elements. It’s important to choose a pattern that matches your skill level and desired outcome.
Do I need to have knitting experience to follow a bath mitt knitting pattern?
It depends on the complexity of the pattern. Some bath mitt knitting patterns may be suitable for beginners and include detailed instructions for each step. Others may require more advanced knitting skills, such as using different stitch patterns or shaping techniques.
Where can I find a bath mitt knitting pattern?
A bath mitt knitting pattern can be found in various sources, such as knitting books, magazines, and online knitting communities. Websites and platforms dedicated to knitting often offer a wide range of free and paid patterns to choose from.