
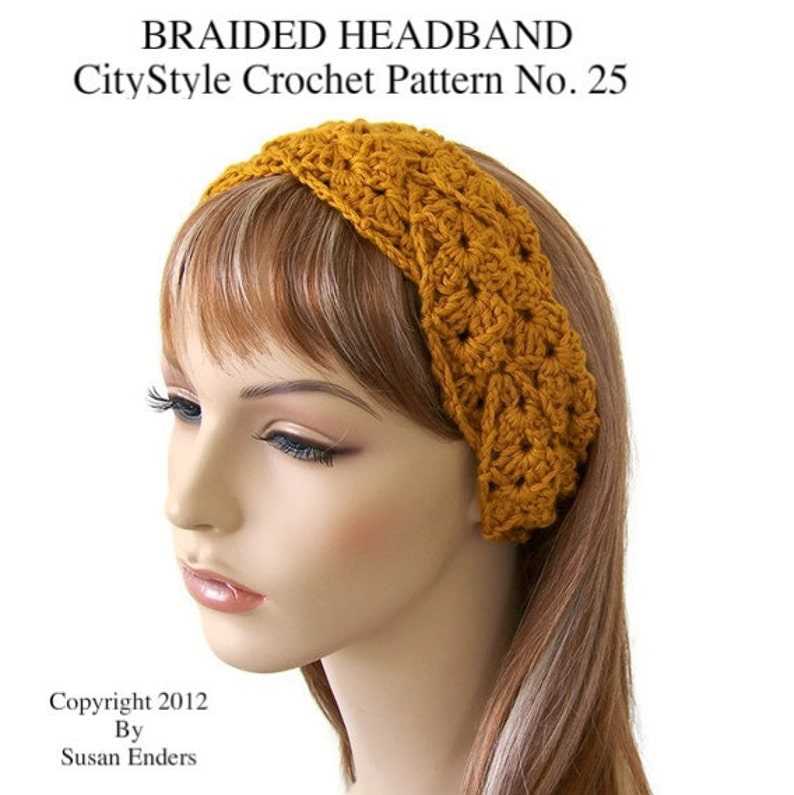
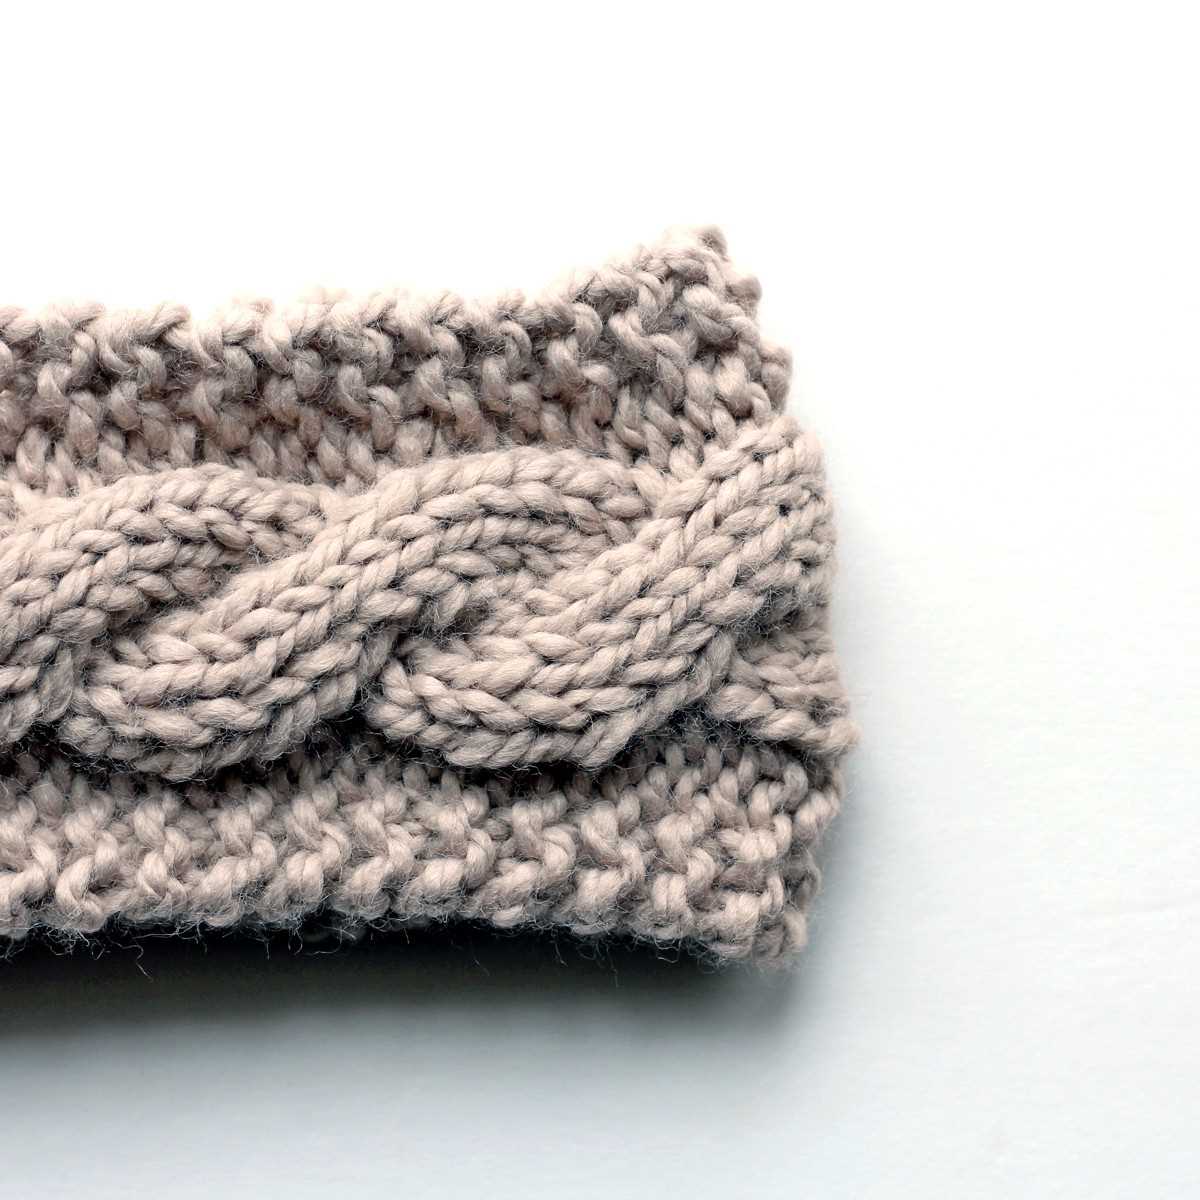
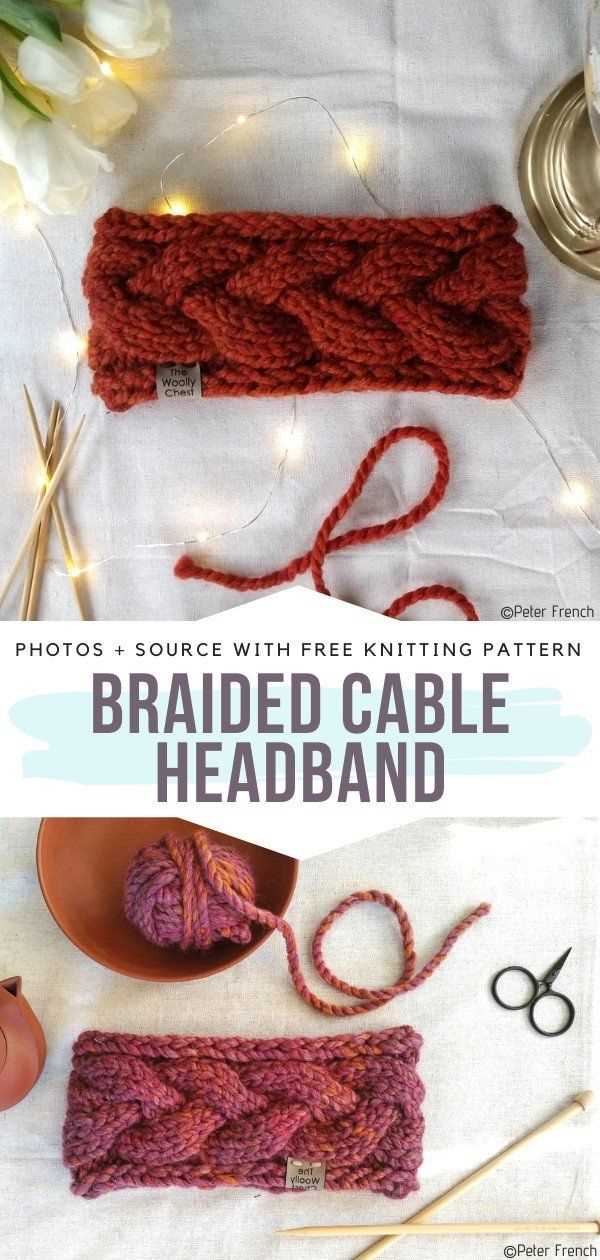
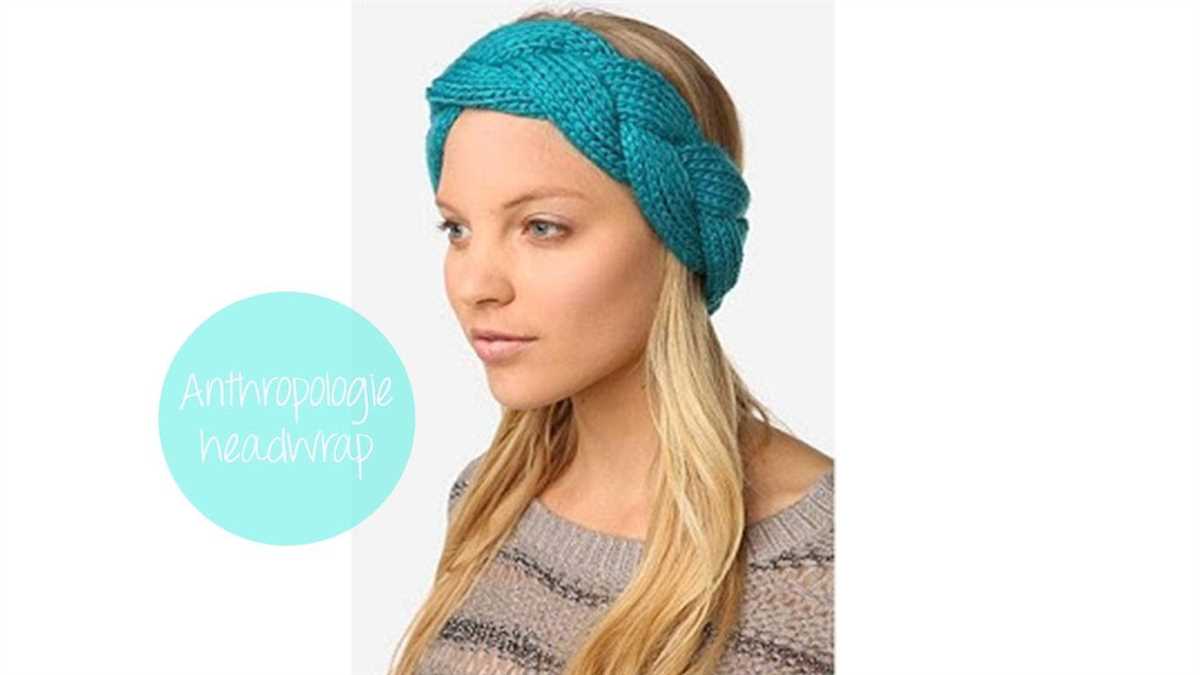
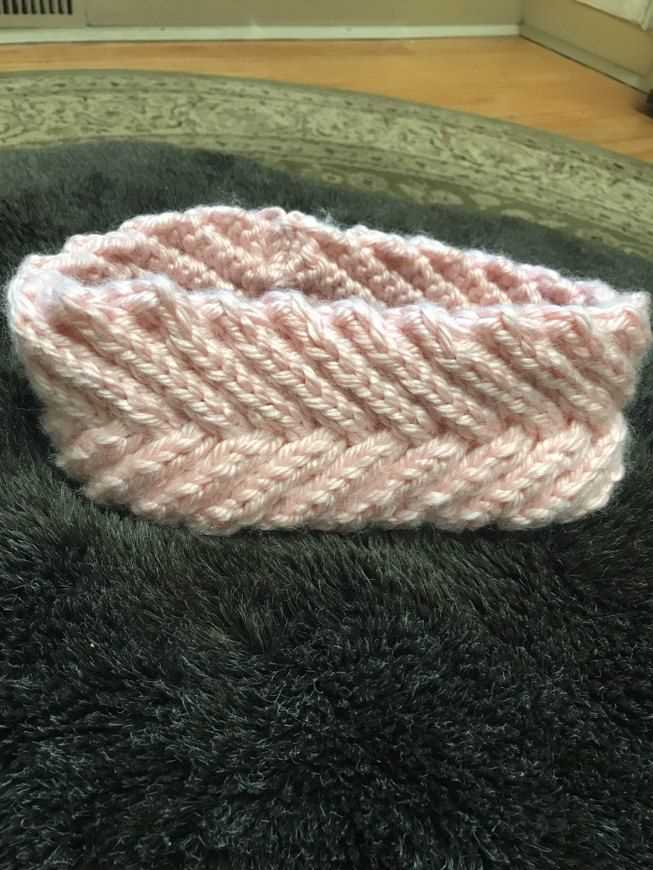
Winter is the season for cozy accessories, and what could be cozier than a knitted braided headband? This stylish and functional accessory is perfect for keeping your ears warm and adding a touch of flair to your winter outfits. Plus, with this free pattern, you can easily make your own headband and customize it to your liking.
Knitting a braided headband may seem intimidating, but it’s actually a simple and fun project that even beginners can tackle. All you need is some soft and warm yarn, a pair of knitting needles, and a basic understanding of knitting stitches. This pattern will take you through each step, from casting on to creating the braided design, so you can have a beautiful headband in no time.
Not only is this headband practical and warm, but it’s also a stylish accessory that can elevate any winter outfit. Whether you’re going for a casual or more dressed-up look, the braided design adds a touch of elegance and texture to your winter ensemble. Plus, since you can choose your own yarn color and style, you can create a headband that perfectly matches your personal style.
Knitted Braided Headband Free Pattern
If you are looking for a stylish and practical accessory to keep your ears warm during the chilly winter months, a knitted braided headband is the perfect choice. This headband not only adds a touch of warmth and style to any outfit, but it is also a fun and easy knitting project that you can easily complete in just a few hours.
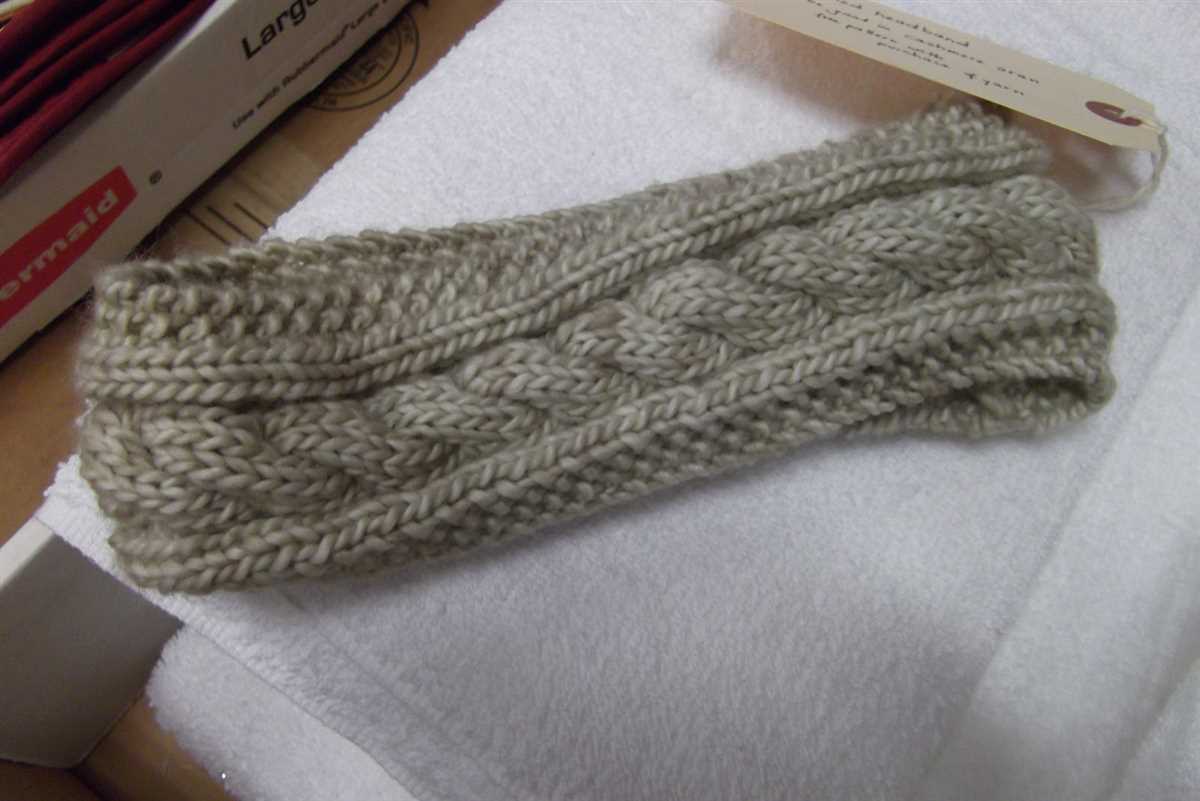
To create your own knitted braided headband, you will need some basic knitting skills and a few supplies. You will need a pair of knitting needles, a skein of chunky yarn, and a cable needle. The pattern consists of a simple ribbed section and a braided cable section, making it suitable for knitters of all skill levels.
- Start by casting on the required number of stitches, which will depend on your gauge and the desired width of the headband.
- Knit the ribbed section using a basic rib stitch pattern. This section will help the headband stretch and fit comfortably on your head.
- Next, switch to the cable stitch pattern. This is where the braided effect comes in. To create the cable, you will need to use the cable needle to hold some stitches in the front while you knit the others.
- Continue knitting the cable stitch pattern for the desired length of the headband, making sure to keep track of your rows.
- Finish off the headband by knitting the last few rows in the rib stitch pattern to match the beginning section.
- Bind off your stitches and weave in any loose ends.
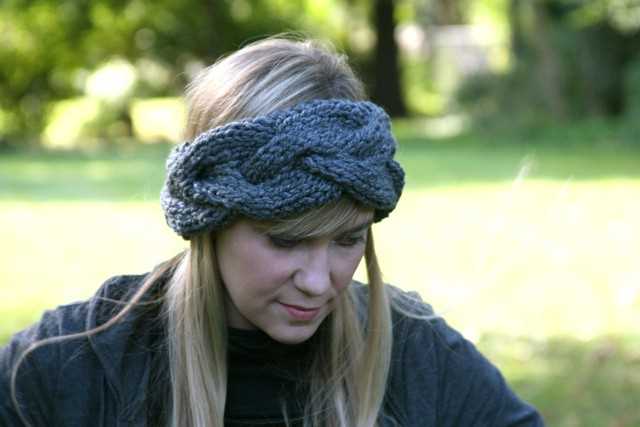
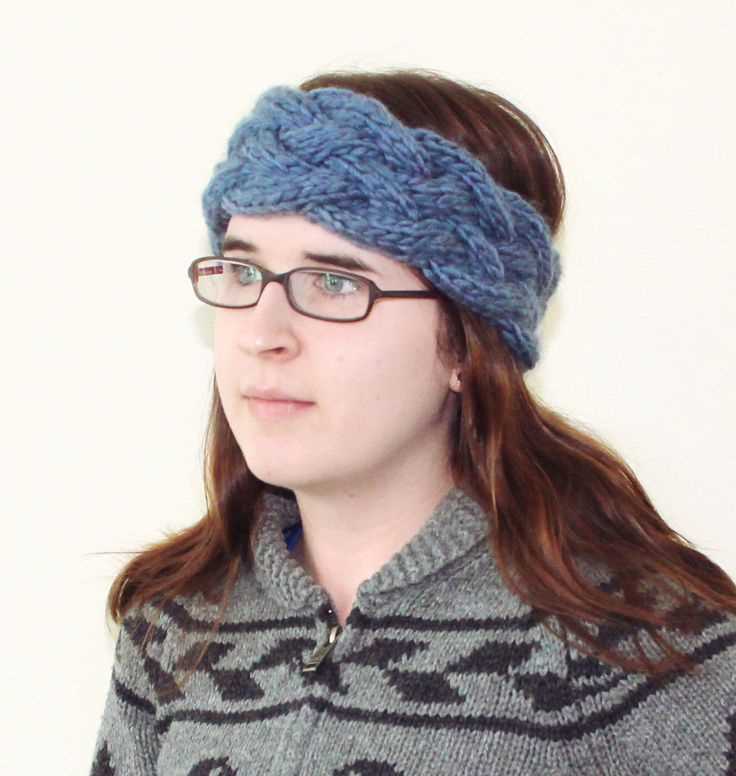
Once you have finished knitting your braided headband, you can wear it in a variety of ways. It can be worn over or under your hair, and you can even experiment with different styles, such as twisting it into a turban or tying it into a bow. The possibilities are endless, and you can tailor the headband to suit your personal style.
With this knitted braided headband free pattern, you can easily create a stylish and cozy accessory to keep you warm all winter long. Whether you are an experienced knitter or a beginner, this project is perfect for honing your knitting skills and creating a unique and fashionable accessory.
Materials Needed for the Knitted Braided Headband
To create a knitted braided headband, you will need a few specific materials to ensure the best results. Here is a list of the essential items you will need:
1. Knitting Needles: A pair of knitting needles in the appropriate size for your headband pattern. Check the pattern instructions for the recommended needle size.
2. Yarn: Choose a soft and comfortable yarn suitable for a headband. Worsted weight yarn is typically a good choice, but you can experiment with different yarn weights to achieve different looks and textures.
3. Stitch Markers: Stitch markers are helpful for keeping track of particular sections or stitches in your knitting pattern. They can be especially useful when working with intricate cable designs.
4. Cable Needle: If your headband pattern includes cable stitches, you will need a cable needle to hold and manipulate the stitches. Cable needles come in different shapes and sizes, so choose one that works best for your project.
5. Tapestry Needle: A tapestry needle, also known as a yarn needle, is used for weaving in loose ends and sewing seams when finishing your headband. Make sure to choose a needle with a large enough eye to accommodate your yarn.
- Optional: Decorative Embellishments
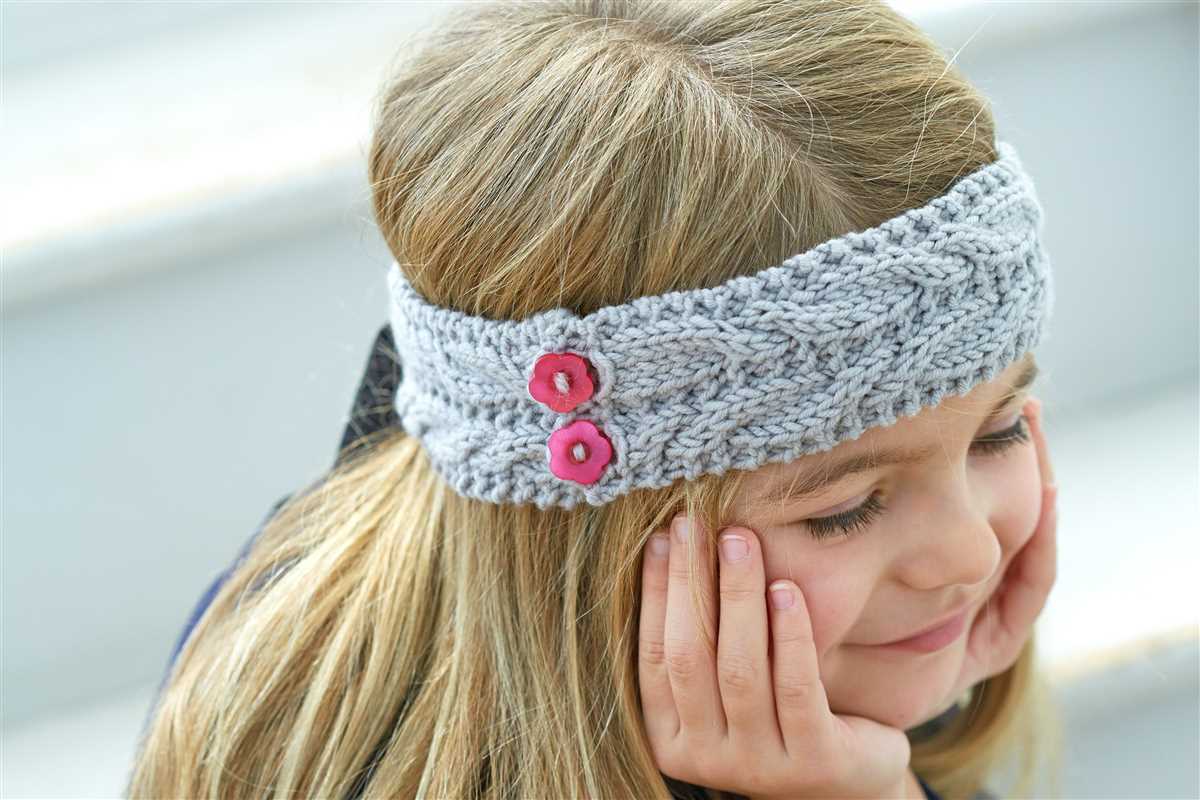
In addition to these basic materials, you may also want to consider adding some decorative embellishments to your knitted braided headband. This could include buttons, beads, or bows to add a personal touch and make your headband stand out.
Now that you have gathered all the necessary materials, you are ready to start knitting your braided headband and create a stylish accessory to keep you warm and fashionable.
Gauge and Sizing for the Knitted Braided Headband
When knitting the braided headband, it is important to achieve the correct gauge in order to ensure that the finished product fits properly and looks as intended. The gauge refers to the number of stitches and rows per inch that the knitted fabric should have. To determine the gauge for this project, it is recommended to use a set of size 8 (5mm) knitting needles and a medium weight yarn.
Before starting the project, it is advisable to make a gauge swatch. This means knitting a small square of fabric using the recommended needles and yarn and measuring the number of stitches and rows within a 4-inch (10 cm) square. The pattern for the braided headband specifies that the gauge should be 16 stitches and 24 rows per 4 inches (10 cm).
If your gauge differs from the suggested measurements, you may need to adjust your needle size accordingly. If you have fewer stitches and rows per inch, you should try using smaller needles. Conversely, if you have more stitches and rows per inch, you should consider using larger needles. It is important to note that changing the needle size may also affect the overall size of the finished headband.
When it comes to sizing, the Knitted Braided Headband pattern is designed to fit an average adult head. However, since the headband is stretchy, it should accommodate a range of head sizes. The pattern recommends starting with a cast-on of 28 stitches, which can be adjusted to make the headband wider or narrower if desired.
To ensure a comfortable fit, it is recommended to measure the circumference of the wearer’s head before starting the project. This way, you can easily make any necessary adjustments to the number of cast-on stitches to ensure a snug fit. Additionally, the length of the headband can also be customized by increasing or decreasing the number of rows knit.
Overall, by accurately achieving the gauge and making any necessary size adjustments, you can create a knitted braided headband that fits well and looks stylish.
Knitting Instructions for the Knitted Braided Headband
The Knitted Braided Headband is a cozy and stylish accessory that can be made with just a few basic knitting techniques. This free pattern is perfect for beginners or experienced knitters looking for a quick and satisfying project.
To start, gather the following materials:
- Worsted weight yarn in your choice of color
- Size 8 knitting needles
- Tapestry needle
Begin by casting on 16 stitches onto your knitting needles. This will create the base of the headband. It’s important to choose a stretchy cast-on method, such as the long-tail cast-on, to ensure a comfortable fit.
Next, work in a basic rib stitch pattern for the entire length of the headband. The rib stitch consists of alternating knit and purl stitches, creating a textured fabric. For this pattern, you will knit 2 stitches, then purl 2 stitches across each row.
Continue knitting in the rib stitch pattern until the headband reaches your desired length, usually around 20-22 inches. Make sure to periodically measure the headband against your head to ensure a proper fit.
Once the headband is the desired length, bind off all stitches in pattern. This will create a clean edge and finish off the headband.
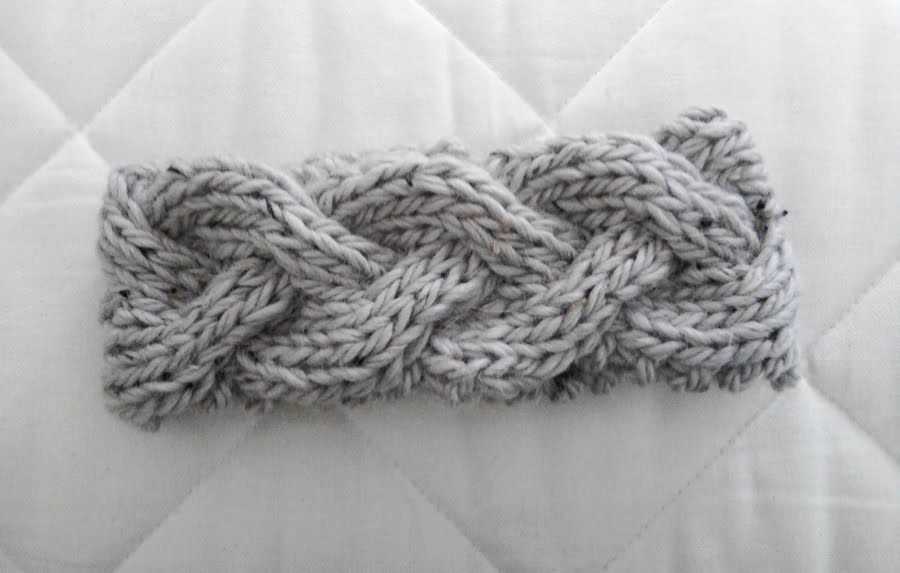
To create the braided effect, you will need to create three separate knitted cords. To do this, cut three lengths of yarn, each measuring approximately 1 yard long. Take one of the yarn strands and using the tapestry needle, thread it through the first stitch on one end of the headband. Repeat this process with the remaining two strands, threading them through the second and third stitches.
Now you have three separate cords. Begin braiding the cords together, just as you would braid hair. Once you reach the end of the cords, secure them by tying a knot or weaving the ends back into the headband.
And there you have it – a beautiful and cozy knitted braided headband! This versatile accessory is perfect for keeping your ears warm in colder weather, adding a touch of style to your outfit, or giving as a handmade gift to loved ones.
Step-by-Step Tutorial for Knitting the Braided Pattern
If you’re looking to add some flair to your winter wardrobe, a knitted braided headband is the perfect accessory. With its intricate design and cozy feel, this headband is sure to keep you warm and stylish all season long. Here is a step-by-step tutorial to help you knit the braided pattern.
Gather your materials
Before you begin, make sure you have all the necessary materials. You will need a pair of knitting needles, a ball of yarn in your desired color, and a yarn needle for finishing. It’s best to choose a medium-weight yarn for this project to ensure a comfortable fit and a sturdy result.
Cast on stitches
To start the headband, you’ll need to cast on an initial number of stitches. The exact number will depend on your desired headband width and the size of your head. A good rule of thumb is to cast on about 10-12 stitches for a standard adult headband. You can adjust the number of stitches accordingly for a smaller or larger size.
Begin the braided pattern
Once you’ve cast on your stitches, it’s time to start the braided pattern. The pattern consists of three main steps: knitting, crossing, and purling. To knit, insert your right-hand needle into the first stitch on your left-hand needle, bringing the yarn over the right-hand needle from back to front. Slide the right-hand needle down and pull the new loop of yarn through the first stitch, slipping the old stitch off the left-hand needle.
- To cross the stitches, slip the next three stitches to a cable needle and hold it in the front of your work. Knit the next three stitches from the left-hand needle. Then, knit the three stitches from the cable needle.
- After crossing the stitches, purl the next three stitches on your left-hand needle. This will create the braided effect.
Repeat the pattern

Continue knitting, crossing, and purling in this pattern until the headband reaches your desired length. Remember to always knit the crossed stitches in the same order to maintain consistency in the braid. It may take some practice to get the hang of the pattern, but once you do, it will become second nature.
Bind off and finish
Once you’ve reached the desired length of your headband, it’s time to bind off and finish. To bind off, knit the first two stitches, then use your left-hand needle to lift the first stitch over the second stitch and off the right-hand needle. Continue this process until you have one stitch left. Cut the yarn, leaving a tail, and pull it through the last stitch to secure it.
Finally, use a yarn needle to weave in any loose ends and join the two ends of the headband to form a circle. Make sure the headband fits comfortably around your head before sewing the ends together. Once you’ve finished, you can proudly wear your knitted braided headband and show off your knitting skills!
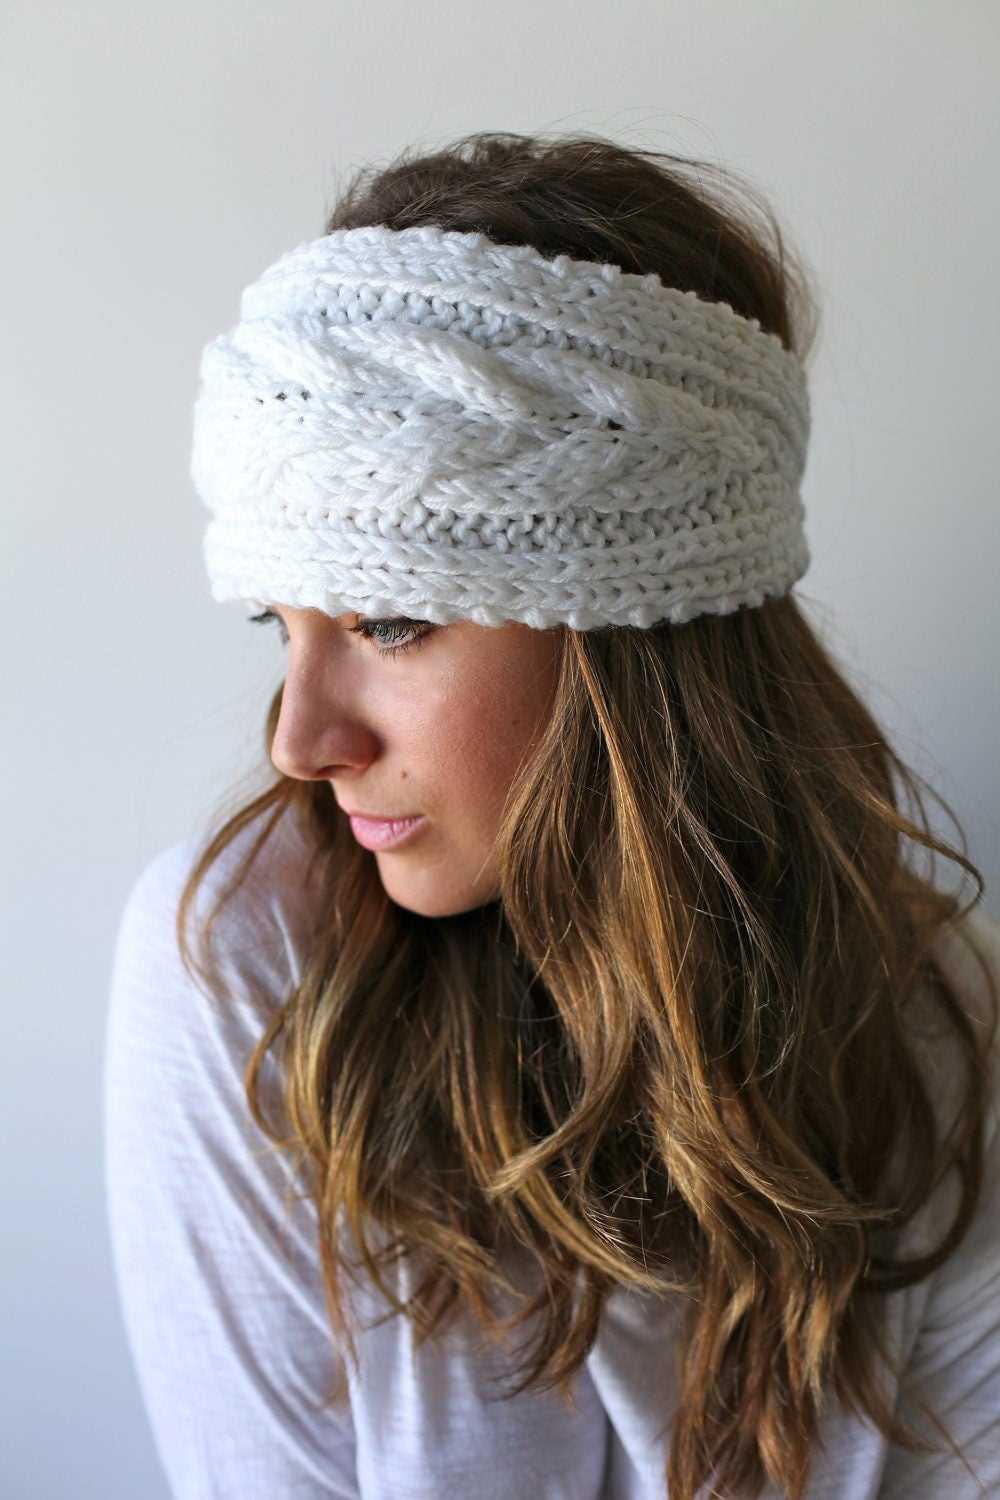
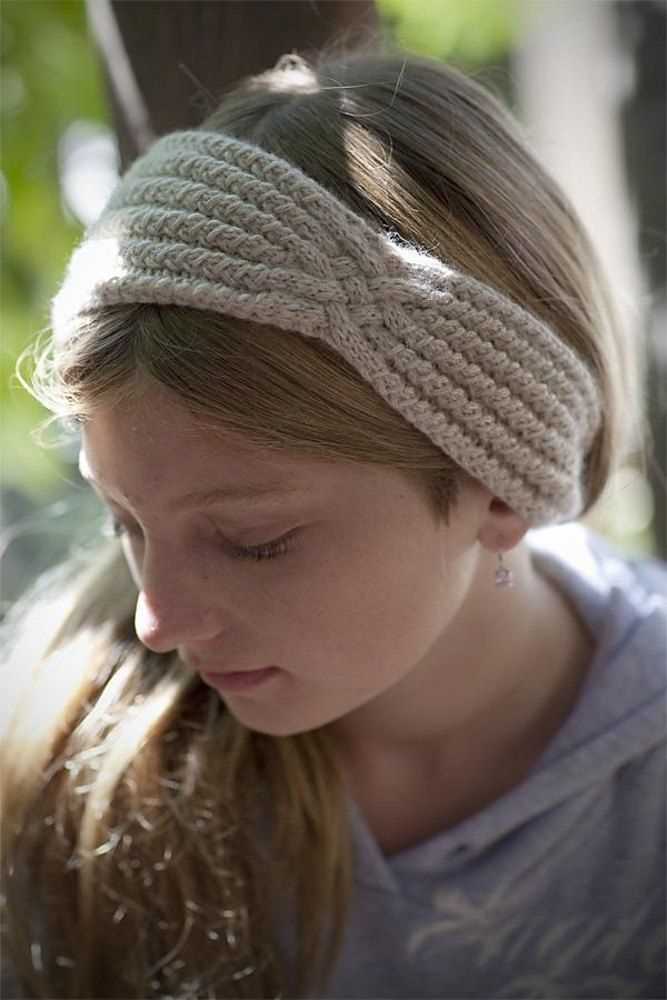
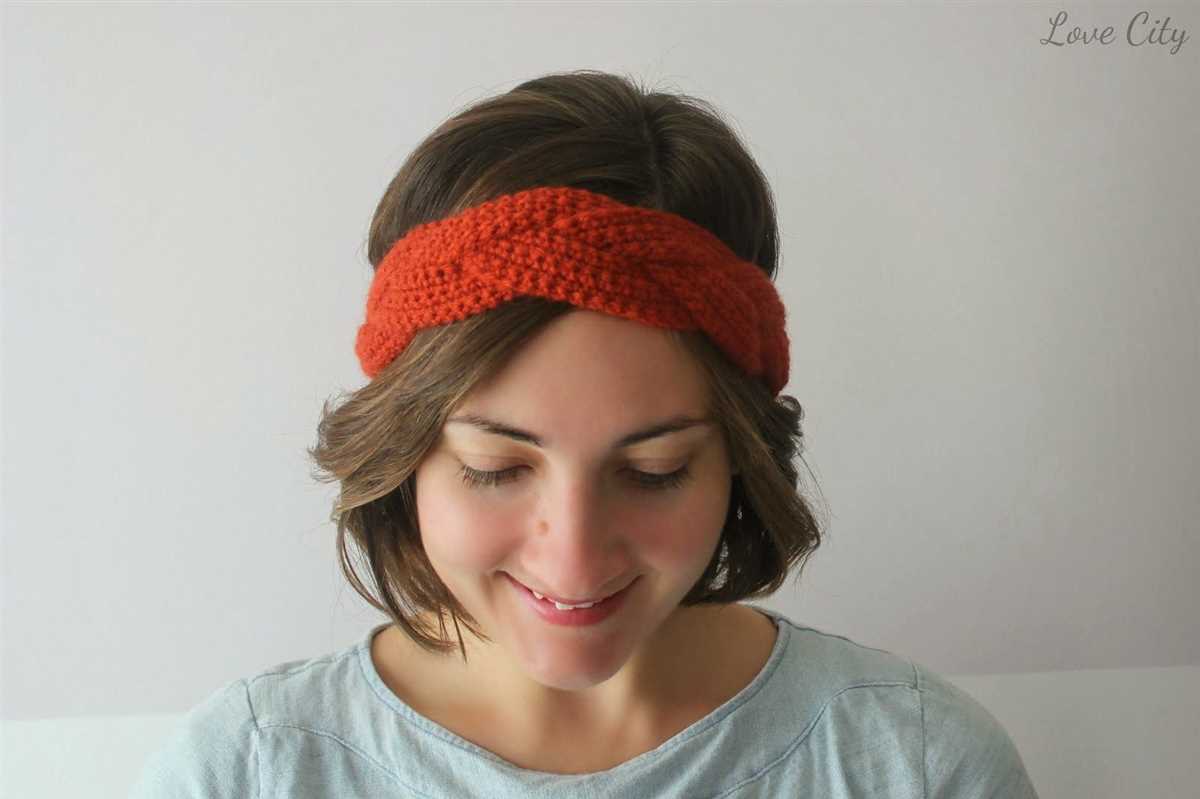
Adding the Twist to the Knitted Braided Headband
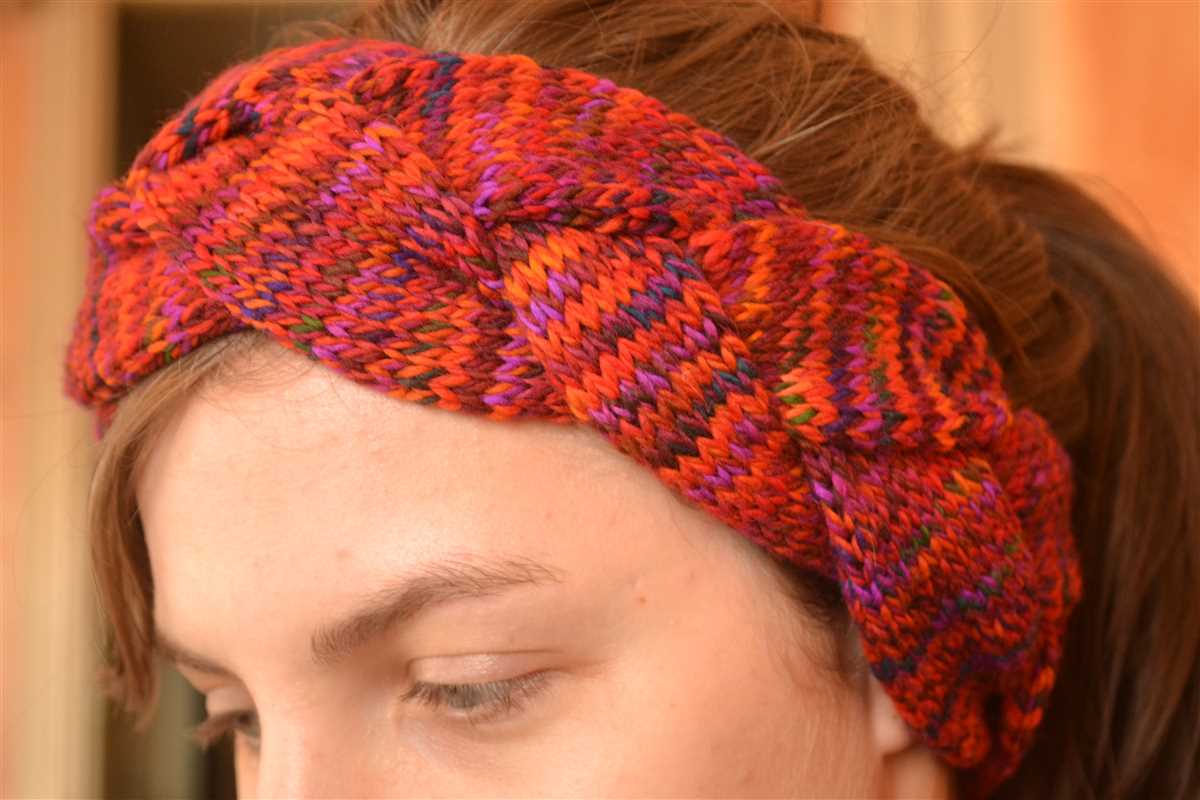
The knitted braided headband is a stylish and warm accessory that can be customized to suit any outfit or personal style. One way to add a unique twist to this headband is by incorporating different colors into the braiding pattern. By using contrasting yarns or alternating colors, you can create a vibrant and eye-catching design that truly stands out.
To achieve this effect, start by selecting two or more colors of yarn that complement each other. Begin knitting the headband using one color until you reach the desired width. Then, introduce the second color by joining it to the working yarn. This can be done by holding both strands together and knitting with them as if they were one.
Once you have both colors incorporated into the knitting, it’s time to start braiding. Divide the stitches into three equal sections, with each section containing a mix of both colors. Begin by crossing the first section over the middle section, then cross the third section over the new middle section. Repeat this braiding pattern until you reach the end of the headband.
The result is a beautiful and dynamic braided headband that showcases the different colors in an artistic and interesting way. This twist on the traditional knitted headband adds an extra level of intricacy and style to your accessory, making it a standout piece in your winter wardrobe.
Finishing and Binding Off the Knitted Braided Headband
Once you have completed knitting the braided headband according to the free pattern, it is time to finish it off and bind off your stitches. This final step will give the headband a polished and professional look.
Step 1: Cutting the Yarn
Before beginning the binding off process, you will need to cut the yarn, leaving a tail that is approximately 6 inches long. This tail will be used to secure the stitches.
Step 2: Binding Off
To bind off, insert the right needle into the first stitch on the left needle. Knit the first stitch as usual. Then, insert the left needle into the second stitch on the right needle and lift it over the first stitch and off the needle.
Continue this process for all the remaining stitches, knitting one stitch and then lifting the previous stitch over until only one stitch remains on the right needle.
All the stitches should now be bound off, leaving you with a neat edge.
Step 3: Securing the Tail
Take the cut yarn tail and thread it through the last stitch. Pull it snugly to secure the stitch and prevent it from unraveling. Weave in the tail on the wrong side of the headband to hide it.
Step 4: Blocking the Headband
To ensure that your headband holds its shape and looks its best, you may choose to block it. Blocking involves wetting the headband, shaping it to the desired dimensions, and allowing it to dry flat.
Once the headband is dry, it is ready to be worn and enjoyed!
Styling Tips for the Knitted Braided Headband
The knitted braided headband is a versatile accessory that can add a touch of style to any outfit. Here are a few tips on how to style this trendy headband:
1. Casual Chic
For a laid-back, everyday look, pair the knitted braided headband with a cozy sweater, jeans, and ankle boots. The headband adds a playful touch to your outfit while keeping your ears warm on chilly days.
2. Bohemian Vibes
If you want to channel your inner bohemian spirit, style the knitted braided headband with a flowy maxi dress, ankle boots, and layered necklaces. This combination creates a whimsical and free-spirited look that’s perfect for music festivals or beach parties.
3. Sporty Glam
Contrast the sporty vibe of the knitted braided headband by pairing it with a leather jacket, leggings, and sneakers. This edgy combination adds a touch of glamour to your athleisure style and is perfect for a day of running errands or grabbing coffee with friends.
4. Elegant Evening
For a more formal look, wear the knitted braided headband with a tailored blazer, a little black dress, and heels. The headband adds an unexpected twist to your evening attire and can elevate your overall look from ordinary to extraordinary.
In conclusion, the knitted braided headband is a versatile accessory that can be styled in various ways to suit different occasions and personal styles. Experiment with different outfits and have fun accessorizing with this trendy headband!
Yarn Recommendations for the Knitted Braided Headband
When selecting yarn for your knitted braided headband, it is important to consider the qualities you desire in your finished product. The right yarn can make a significant difference in the look and feel of your headband. Here are some yarn recommendations that will help you achieve the desired outcome.
1. Worsted Weight Yarn
A popular choice for knitting projects, worsted weight yarn is an excellent option for the knitted braided headband. It offers a good balance between thickness and warmth, making it suitable for both cold winter days and cooler autumn evenings. Worsted weight yarn also provides excellent stitch definition, allowing the braided pattern to stand out beautifully.
2. Soft and Cozy Yarn
For extra comfort and warmth, consider using a soft and cozy yarn for your headband. Look for yarns that are made from natural fibers such as wool or alpaca. These fibers have excellent insulation properties and will keep your ears cozy during chilly weather. Opt for yarns with a smooth texture to ensure a comfortable fit.
3. Variegated or Solid Colors
The choice of color can greatly impact the overall look of your knitted braided headband. Variegated yarns with multiple shades can create an eye-catching and unique pattern for your headband. Alternatively, solid colors can provide a classic and elegant look. It’s all about personal preference, so choose colors that match your style and wardrobe.
4. Machine Washable Yarn
If you prefer easy maintenance, consider using machine washable yarn for your headband. This will allow you to easily clean your headband without worrying about delicate hand-washing processes. Look for yarns that are specifically labeled as machine washable to ensure longevity and durability.
By considering these yarn recommendations, you will be able to find the perfect yarn for your knitted braided headband. Experiment with different textures, colors, and weights to achieve the desired look and feel. Happy knitting!
Variations and Customizations for the Knitted Braided Headband
The knitted braided headband is a versatile accessory that can be customized and modified in various ways to suit different preferences and styles. Here are some ideas for variations and customizations you can try to make your headband unique:
1. Yarn Choice:
Experiment with different types of yarn to create different textures and looks. You can use a chunky yarn for a cozy and warm headband, or a finer yarn for a more delicate and lightweight feel.
2. Color Play:

Play around with different colors to create a headband that matches your outfit or personal style. You can choose a single color for a classic and elegant look, or try a variegated yarn for a more vibrant and eye-catching effect.
3. Embellishments:
Add embellishments to your headband to give it an extra touch of flair. You can sew on beads, buttons, or small fabric flowers for a feminine and decorative look. Alternatively, you can attach a small crochet flower or a knitted bow for a cute and playful twist.
4. Width and Length:
Customize the width and length of your headband to achieve the perfect fit. If you prefer a wider headband for a more statement look, simply cast on more stitches at the beginning. If you have a smaller head or want a narrower band, cast on fewer stitches. Similarly, you can adjust the length of the headband to make it snug or loose, depending on your preference.
5. Additional Stitch Patterns:
Explore different stitch patterns to add more texture and visual interest to your headband. You can incorporate cable stitches, lace patterns, or ribbing for a more intricate and unique design. Just make sure to adjust your stitch count accordingly to maintain the desired width of the headband.
Remember, knitting is a creative and personal craft, so don’t be afraid to experiment and make the knitted braided headband your own. Whether you choose to change the yarn, add embellishments, or adjust the size, your finished headband will be a reflection of your personal style and creativity.
Frequently Asked Questions about the Knitted Braided Headband
Interested in knitting your own braided headband? Here are some frequently asked questions to help guide you through the process.
How do I locate the free pattern for the knitted braided headband?
To find the free pattern for the knitted braided headband, you can visit various knitting websites, crafting blogs, or online knitting communities. These platforms often provide a wide range of knitting patterns, including the braided headband. Use keywords like “knitted braided headband free pattern” in your search engine to locate the specific pattern you are looking for.
What materials do I need to knit a braided headband?
To knit a braided headband, you will need the following materials:
- Yarn in your desired color
- Knitting needles in the appropriate size (usually recommended on the pattern)
- A knitting cable needle
- A yarn needle for sewing in loose ends
- Scissors
Is the braided headband suitable for beginners?

Yes, the knitted braided headband can be suitable for beginners. The pattern usually involves basic knitting techniques such as knit and purl stitches, and the braiding technique is relatively easy to learn. However, it is recommended to have some basic knitting knowledge and experience before attempting this project.
Can I customize the size of the headband?
Yes, you can customize the size of the knitted braided headband. The pattern usually provides instructions on how to adjust the size, such as casting on a different number of stitches or working more or fewer rows. Make sure to follow the pattern’s guidelines for best results.
Are there any variations to the braided headband pattern?
Yes, there are variations to the knitted braided headband pattern. Some patterns may incorporate different stitch patterns or additional embellishments, such as buttons or flowers. You can also experiment with different colors and yarn types to create a unique look.
Can I sell the braided headbands I make from the free pattern?
The permission to sell the braided headbands made from the free pattern depends on the specific pattern’s terms and conditions. Some patterns may allow you to sell the finished items, while others may have restrictions. It is important to read and respect the copyright and licensing information provided by the pattern designer.
Troubleshooting Common Issues with the Knitted Braided Headband
The knitted braided headband is a stylish accessory that can add a touch of elegance and warmth to any outfit. However, like any knitting project, it may encounter some common issues that can be frustrating for the knitter. Here are a few troubleshooting tips to help you overcome these challenges and ensure a beautiful finished product.
1. Gauge issues
One common issue with knitting projects is achieving the correct gauge. This can be especially challenging with the knitted braided headband, as the braided pattern requires precise tension. If your headband is turning out too tight or too loose, try adjusting your needle size. Going up a size can make your stitches looser, while going down a size can make them tighter. Additionally, make sure to check your tension throughout the project to ensure consistency.
2. Twisted stitches
Another common issue when knitting the braided headband is accidentally twisting your stitches. This can happen when you are working the braided pattern and cross the wrong stitches. To avoid this, pay close attention to the pattern instructions and ensure that your stitches are oriented correctly before crossing them. If you notice twisted stitches, you can try unraveling a few rows and fixing them, or simply accept them as a design element.
3. Uneven braids
Creating even and consistent braids is an important aspect of the knitted braided headband. However, it can be challenging to maintain the same tension throughout the entire project. To address this issue, practice knitting with an even tension and pay attention to the tightness of your stitches when working the braided pattern. If you notice that your braids are uneven, you can try adjusting your tension or blocking the headband to even out the stitches.
4. Difficulty with the braiding technique
The braiding technique used in the knitted braided headband can be tricky for beginners. If you’re struggling with the braiding process, take your time and follow the instructions step by step. You can also find video tutorials online that can help clarify the technique. Practice on scrap yarn before working on the actual headband to improve your skills and confidence.
Overall, troubleshooting common issues with the knitted braided headband requires patience, practice, and attention to detail. By addressing gauge issues, twisted stitches, uneven braids, and difficulties with the braiding technique, you can overcome these challenges and create a beautiful headband that showcases your knitting skills.
Final Thoughts on the Knitted Braided Headband
The knitted braided headband is a stylish and functional accessory that can add a touch of warmth and charm to any outfit. Whether you’re keeping your hair out of your face during a workout or simply adding a pop of color to your everyday look, this headband is a versatile option.
This free pattern is a great option for knitters of all skill levels. Its simple design makes it a quick and enjoyable project, while the braided detail adds a unique and eye-catching element. Plus, with the ability to customize the size and color, you can create a headband that perfectly suits your style.
The braided headband is not only fashionable but also practical. Its snug fit ensures that it stays in place, even during active pursuits. The thick, knitted fabric also provides an extra layer of warmth, making it a great choice for colder months or outdoor activities.
Whether you’re a seasoned knitter or just starting out, the knitted braided headband is a rewarding project that you’re sure to love. With its combination of style and functionality, it’s the perfect accessory to complete your winter wardrobe.