
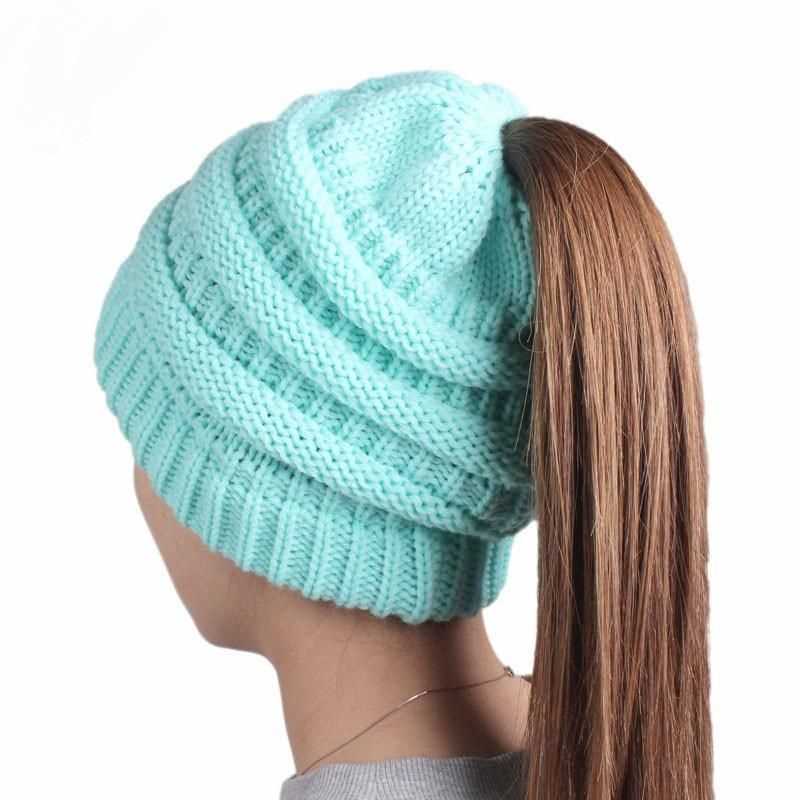
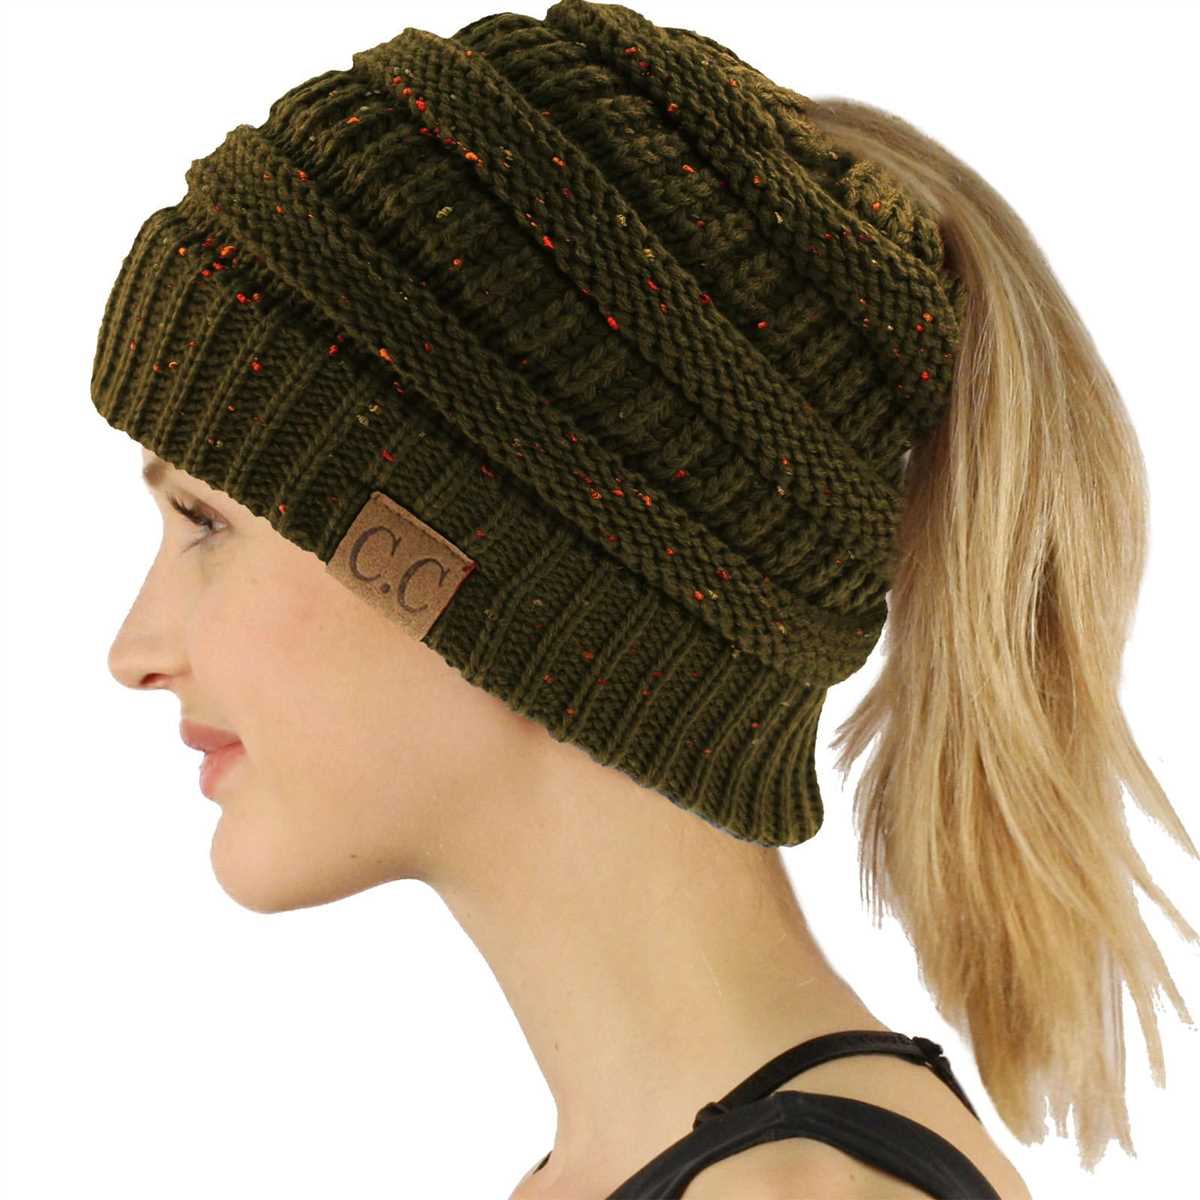
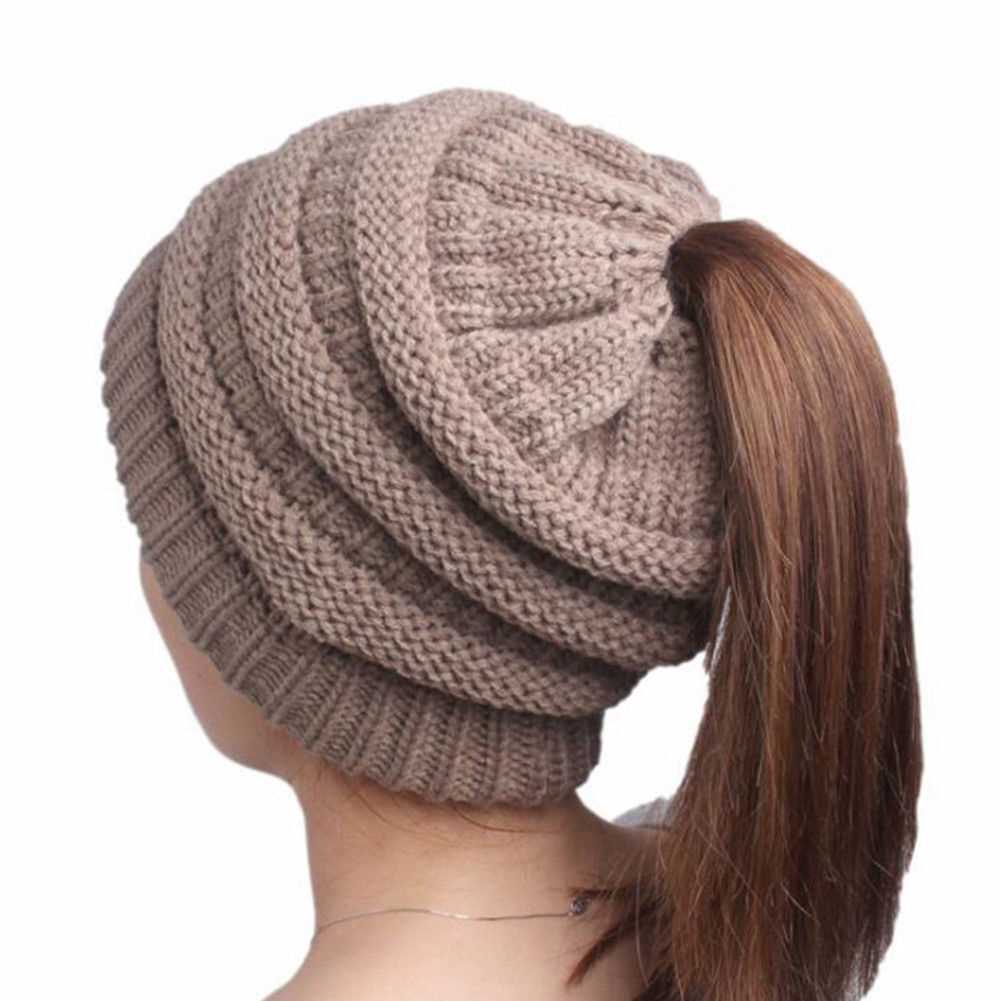
Winter is the perfect time to show off your knitting skills and keep warm at the same time. If you are someone who loves to wear ponytails but hates having to sacrifice warmth for style, then a knit hat with a hole for a ponytail is the perfect solution for you. This trendy and practical accessory allows you to keep your head and ears cozy while still being able to wear your hair in a ponytail or bun.
Knitting a hat with a hole for a ponytail is a great project for beginners and experienced knitters alike. With a few basic knitting techniques and some yarn, you can create a stylish and functional hat in no time. The hole in the hat is strategically placed to allow your ponytail to poke through, while still providing ample coverage and warmth for the rest of your head.
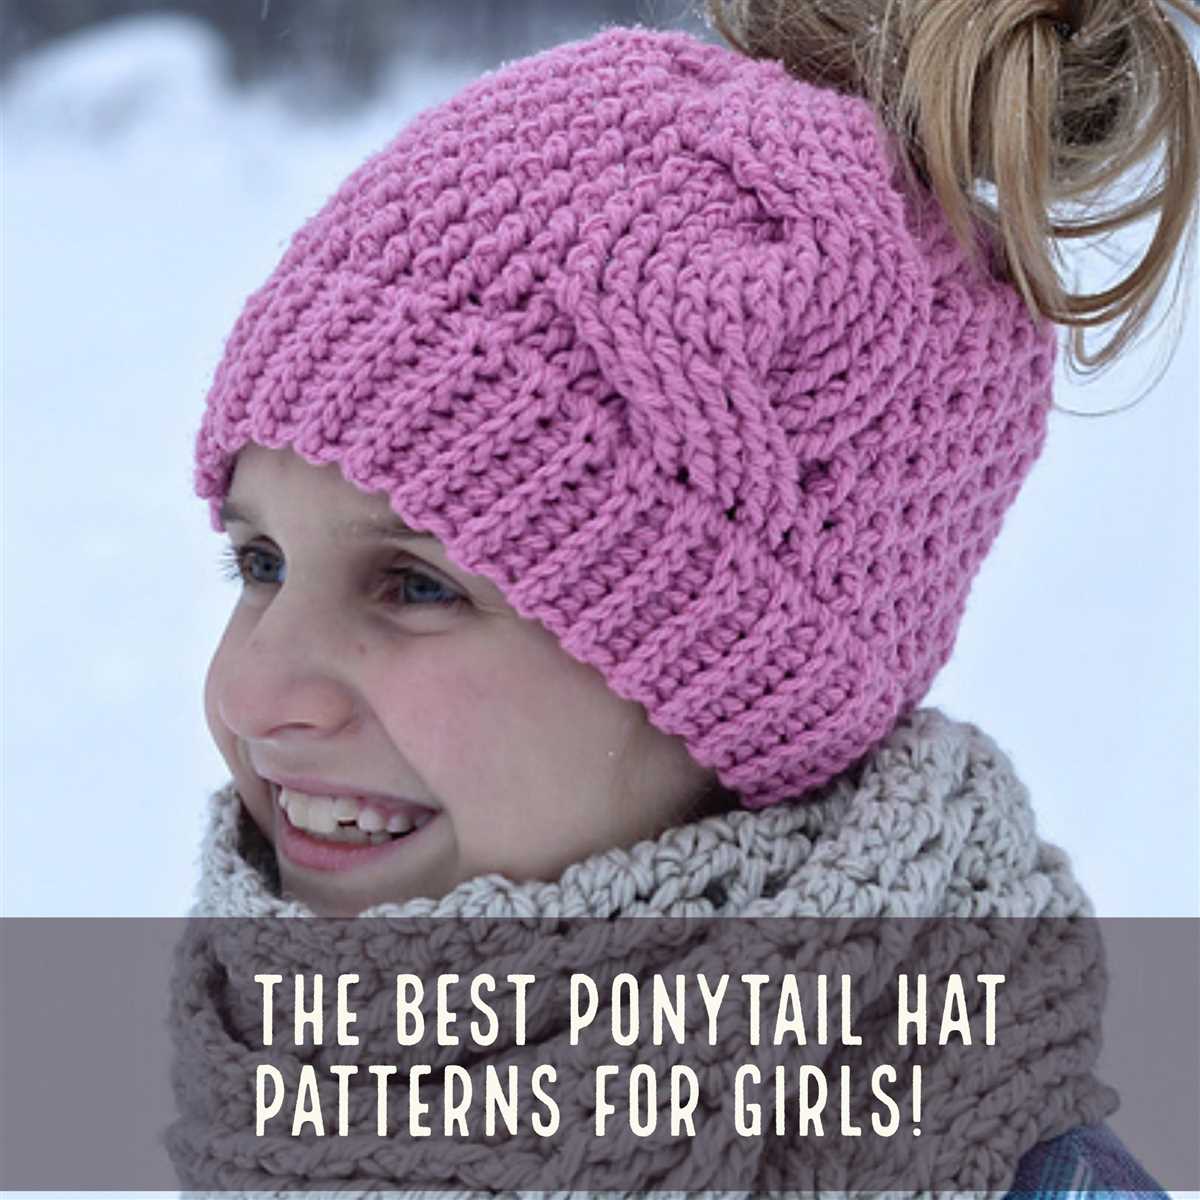
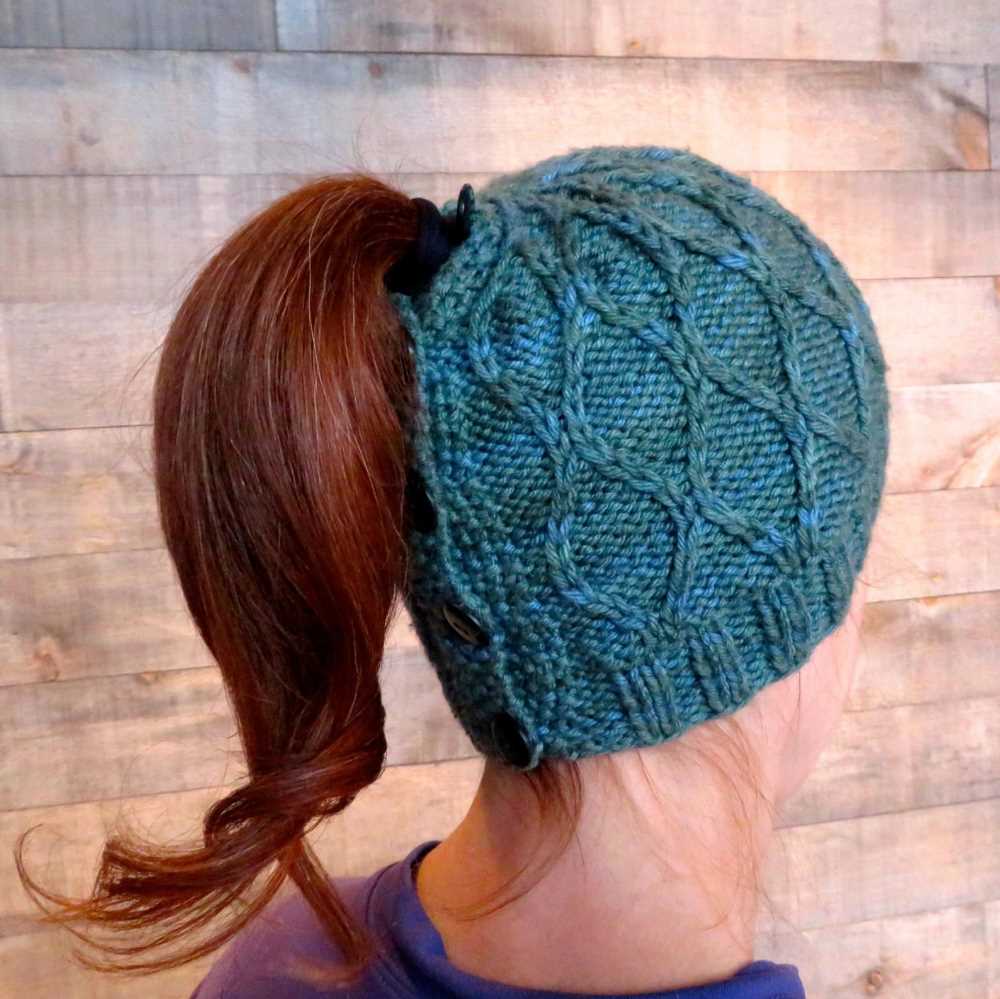
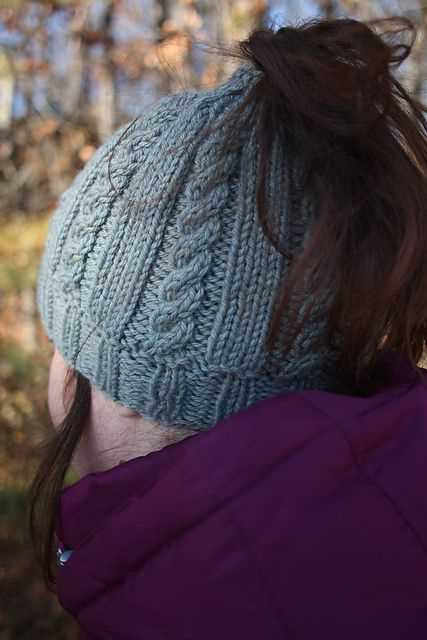
There are countless knit hat patterns available online that include a hole for a ponytail. You can choose from a variety of styles, including slouchy beanies, cable knit hats, or even chunky pom pom hats. The possibilities are endless, and you can easily customize the pattern to fit your personal style and preferences. Whether you prefer neutral tones or bold, vibrant colors, there is a knit hat pattern out there for you.
So why sacrifice style for warmth when you can have both? Knitting a hat with a hole for a ponytail is a fun and practical way to keep warm during the winter months without compromising your hairstyle. Whether you’re an avid knitter or just starting out, this project is sure to be a hit. Get started today and create your own unique and fashionable knit hat with a hole for a ponytail!
Easy Knit Hat Pattern with Hole for Ponytail
Are you tired of sacrificing style for the sake of keeping your head warm during the winter months? Look no further! This easy knit hat pattern with a hole for a ponytail is the perfect solution. It allows you to keep your hair up while still keeping your head cozy and protected from the cold.
So, how does it work? This hat pattern features a strategically placed hole in the back, allowing you to thread your ponytail or bun through. The hole is reinforced to ensure durability and prevent fraying. This design also includes a ribbed brim for a snug fit and added comfort.
Materials Needed:
- Size 8 circular knitting needles
- Worsted weight yarn
- Tapestry needle
- Scissors
Instructions:
- Cast on 80 stitches.
- Join in the round, being careful not to twist your stitches.
- Knit 2 stitches, purl 2 stitches in a ribbed pattern for the brim. Repeat this round for 2 inches.
- Switch to stockinette stitch (knit every round) and continue until the hat measures approximately 7 inches from the cast-on edge.
- Next, create the hole for the ponytail. Knit 10 stitches, bind off the next 20 stitches, and knit the remaining 50 stitches.
- Continue knitting in stockinette stitch for another 2 inches.
- Switch back to the ribbed pattern (knit 2 stitches, purl 2 stitches) for the last 2 inches of the hat.
- Bind off all stitches and weave in any loose ends.
- Your easy knit hat with a hole for a ponytail is now complete!
With this simple and practical pattern, you can enjoy the warmth of a knit hat without sacrificing your hairstyle. Whether you’re heading out for a winter run or simply want to keep your ears warm during your daily commute, this hat has got you covered!
Materials Needed for Knit Hat Pattern
When knitting a hat with a hole for a ponytail, you will need a few specific materials to complete the project. Here is a list of the essential items:
1. Yarn:
Choose a yarn that is suitable for knitting hats. The yarn should be soft and warm, preferably made of wool or a wool blend. Consider the color of the yarn based on your personal preference or the recipient’s taste.
2. Knitting Needles:
You will need a pair of knitting needles suitable for the yarn you have chosen. The size of the needles will depend on the desired gauge or tension for the hat. Refer to the yarn label for needle size recommendations.
3. Stitch Markers:
Stitch markers are small rings or clips that help you keep track of specific stitches in your knitting. They are particularly useful when working with patterns that require increases, decreases, or other stitch variations.
4. Tapestry Needle:
A tapestry needle is used for weaving in loose ends and sewing up any seams in your finished hat. Make sure to choose a needle with a large eye that can accommodate the yarn thickness.
5. Scissors:
A pair of sharp scissors is necessary for cutting the yarn at the end of your knitting or trimming any loose ends. Choose a pair that is comfortable to hold and easy to use.
6. Pattern Instructions:
Finally, you will need a copy of the knit hat pattern with a hole for a ponytail. The pattern will provide you with the specific measurements, stitch counts, and step-by-step instructions to create the hat.
With these materials in hand, you will be ready to start your knit hat project and create a stylish and functional accessory for those with ponytails.
Choosing the Right Yarn for Your Hat
When it comes to knitting a hat with a hole for a ponytail, choosing the right yarn is an important step. The yarn you select will determine not only the look and feel of your hat but also its functionality. Here are some factors to consider when selecting yarn for your ponytail hat.
Weight:
The weight of the yarn will greatly impact the overall look and feel of your hat. For a winter hat, you might want to consider using a bulky or chunky weight yarn to provide extra warmth. On the other hand, a lightweight yarn would be more suitable for a hat that is intended for spring or fall wear. Consider the season and climate when selecting the weight of your yarn.
Fiber Content:
- Wool: Wool is a popular choice for hats as it is warm, breathable, and has good elasticity. It is a great option for winter hats.
- Acrylic: Acrylic yarn is affordable and easy to care for. It’s a good choice if you’re looking for a low-maintenance hat.
- Alpaca: Alpaca yarn is soft, warm, and hypoallergenic. It is a luxurious option but may be more expensive.
- Cotton: Cotton yarn is lightweight and breathable, making it a great choice for hats worn in the warmer months.
Elasticity:
When knitting a hat with a hole for a ponytail, it’s important to choose a yarn with good elasticity. This will ensure that the hat fits snugly around the head and doesn’t slide off when the ponytail is pulled through the hole. Look for yarn that has a high percentage of natural fibers, such as wool or alpaca, as these fibers tend to have better elasticity.
Color:
The color of your yarn can greatly impact the overall look of your hat. Consider the wearer’s skin tone, hair color, and personal style when selecting a color. Additionally, if you’re looking to make a statement or add some flair to your hat, you might consider using variegated or self-striping yarn.
By considering these factors and choosing the right yarn, you can create a stylish and functional hat with a hole for a ponytail. Whether you’re knitting for yourself or as a gift, selecting the right yarn will ensure that your hat is both comfortable and beautiful.
Step-by-Step Instructions for Knitting the Hat
In order to create a knit hat with a hole for a ponytail, you will need a set of knitting needles, yarn, and a crochet hook. Follow these step-by-step instructions to knit the hat:
1. Choose the Needle Size and Yarn:
Select the appropriate needle size and yarn for your project. The needle size will depend on the desired gauge and yarn weight. Consider using a thicker yarn for a warmer hat, or a lighter yarn for a more lightweight hat.
2. Cast On Stitches:
Begin by casting on the desired number of stitches. If you are following a specific pattern, make sure to cast on the recommended number of stitches. Otherwise, cast on enough stitches to comfortably fit around your head.
3. Knit in the Round:
Once you have cast on your stitches, join the round by knitting the first stitch and slipping it onto the opposite needle. This will create a seamless circle. Continue knitting in the round, using the desired stitch pattern or following a specific pattern.
4. Create the Ponytail Hole:
To create the hole for the ponytail, you will need to knit a section of ribbing that will stretch to accommodate the ponytail. About 1-2 inches below the desired position of the hole, switch to a rib stitch pattern, such as K2, P2. Continue knitting in the rib stitch pattern for the desired length of the hole, typically 2-3 inches.
5. Switch Back to Stockinette Stitch:
After knitting the desired length of the ponytail hole, switch back to the original stitch pattern, such as stockinette stitch, for the remaining portion of the hat. Continue knitting until the hat reaches the desired length, typically 6-8 inches.
6. Decrease Stitches:
In order to shape the crown of the hat, you will need to decrease stitches. Follow the specific decreasing instructions in your pattern, or if you are not following a pattern, you can decrease stitches by knitting two stitches together at regular intervals. This will create a tapered shape.
7. Bind Off:
Once you have decreased enough stitches to shape the crown of the hat, bind off the remaining stitches. Cut the yarn, leaving a tail long enough to weave in later.
Congratulations! You have now completed knitting your hat with a hole for a ponytail. Weave in any loose ends, and your hat is ready to wear.
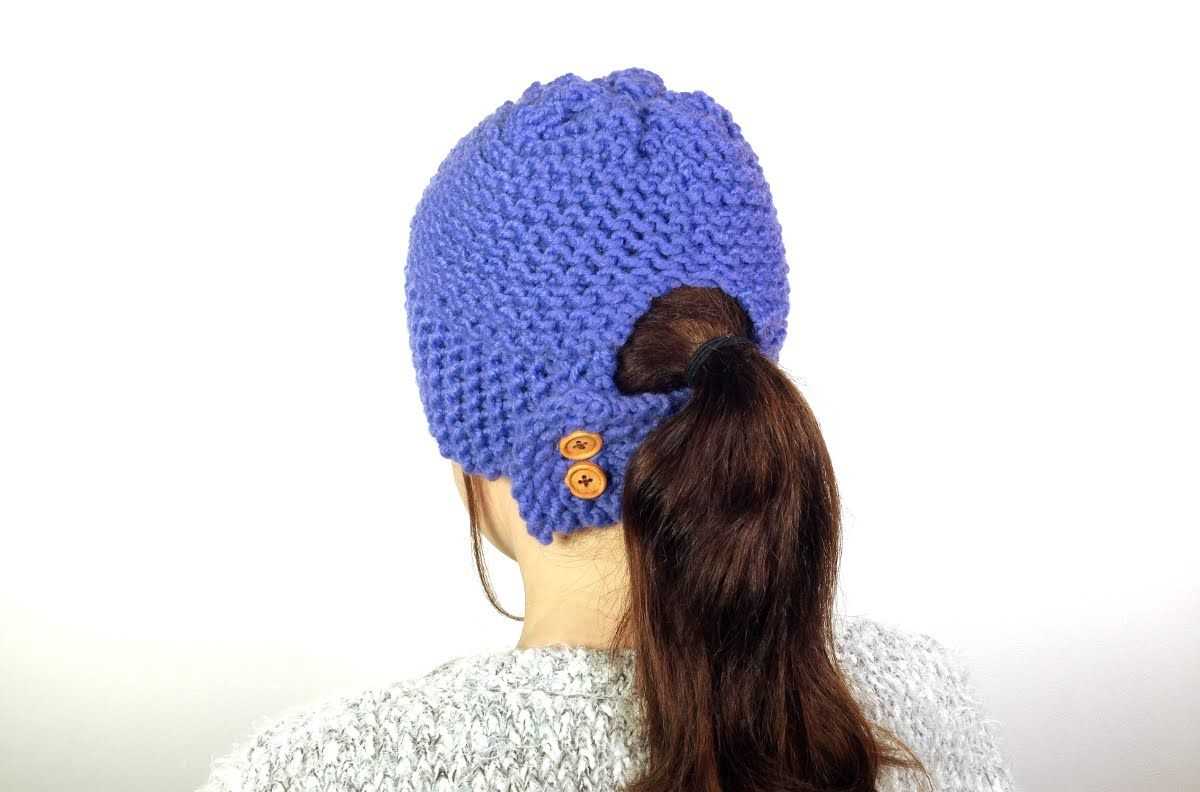
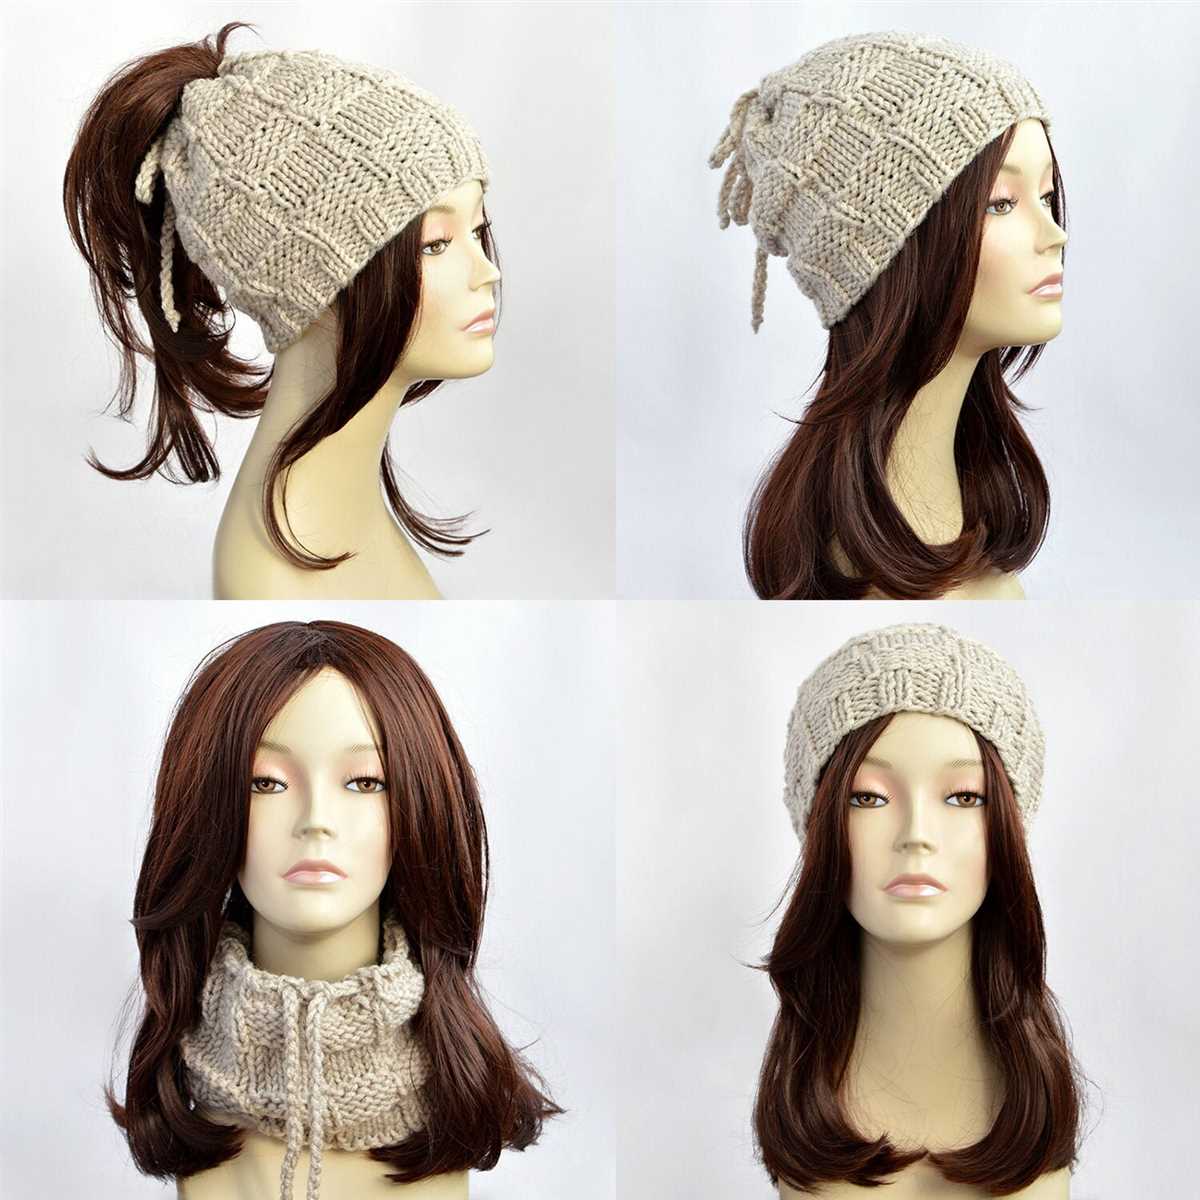
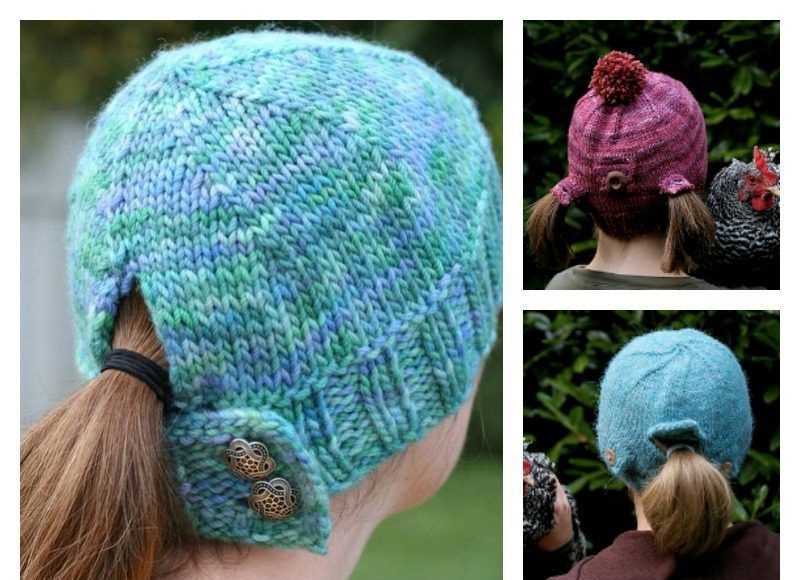
Adding the Hole for the Ponytail
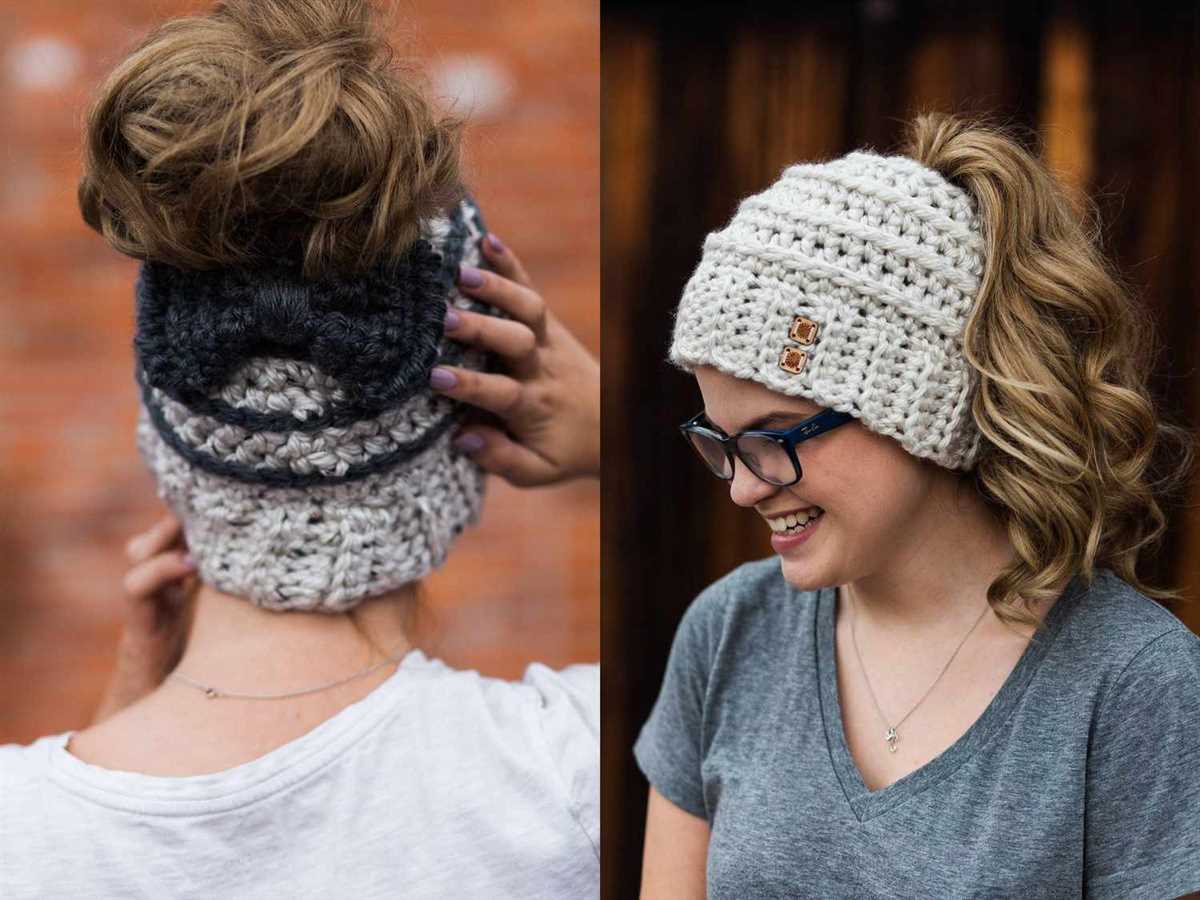
One of the key features of a knit hat with a hole for a ponytail is, of course, the hole itself. This is what allows the ponytail or bun to be pulled through, providing a convenient and stylish solution for those with long hair. When knitting such a hat, it’s important to consider the placement and size of the hole to ensure that it will accommodate different hair thicknesses and styles.
To add the hole for the ponytail, you will need to decide on the desired location on the hat. Typically, the hole is positioned towards the back of the hat, where the hair is typically gathered. It’s important to keep in mind that the hole should be large enough to comfortably fit the hair through, but not so large that it compromises the structure and warmth of the hat.
One common method for creating the hole is to knit a few rows in a different stitch pattern or with a larger needle size. This creates a looser and stretchier section of the hat that can accommodate the ponytail. To do this, simply switch to a larger needle size or a different stitch pattern (such as ribbing or garter stitch) for the desired number of rows. Once the hole section is complete, you can then continue knitting the rest of the hat in the original pattern and needle size.
Customizing Your Knit Hat
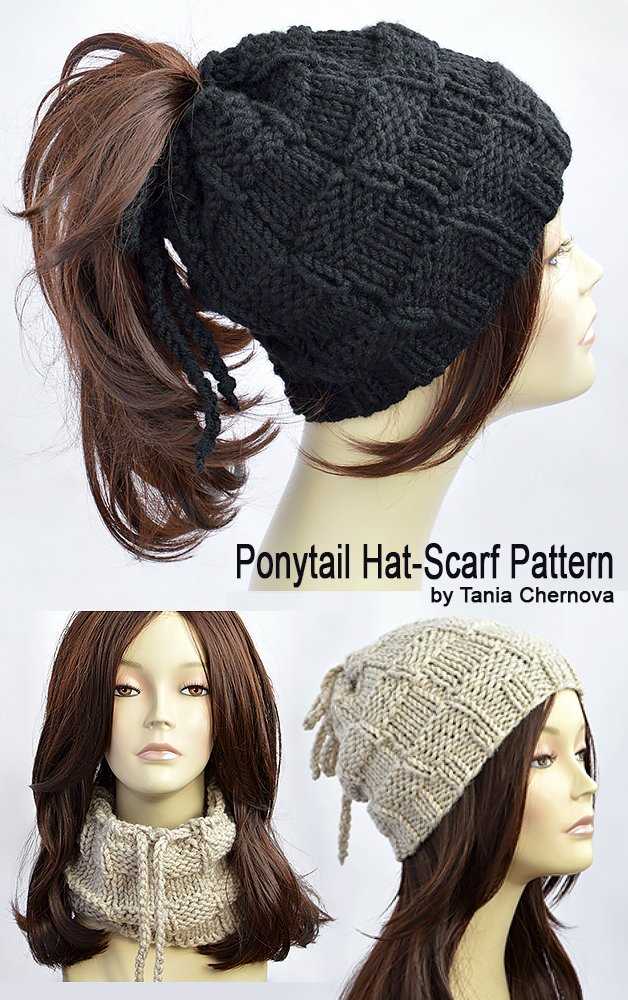
One of the great things about knitting is the ability to customize your projects. With a knit hat, you have the opportunity to make it your own by personalizing it with different colors, patterns, and even adding special features like a hole for a ponytail. Here are some ideas to help you customize your knit hat and make it uniquely yours.
Choose Your Yarn
The first step in customizing your knit hat is to choose the yarn you want to use. There are so many options available, from soft and cozy merino wool to lightweight and breathable cotton. Consider the color and texture of the yarn, and how it will look with the rest of your wardrobe. You can also experiment with different yarn weights to create different effects and textures in your hat.
Play with Colors
When it comes to customizing your knit hat, color is key. You can use a single color for a classic and understated look, or go bold with a mix of bright and vibrant hues. You can also experiment with different colorwork techniques, like stripes or Fair Isle, to create visually interesting patterns. Don’t be afraid to get creative and try out different color combinations that reflect your personal style.
Add a Pattern
If you’re looking to add some extra flair to your knit hat, consider incorporating a pattern. There are countless stitch patterns and motifs to choose from, ranging from simple textures to intricate lace designs. You can find patterns in knitting books, magazines, or online, or even create your own. Adding a pattern to your hat can take it from basic to beautiful, and show off your knitting skills.
Special Features
Lastly, consider adding special features to your knit hat that make it even more functional and unique. For example, if you have long hair and want to keep it up while wearing a hat, you can add a hole or opening in the back of the hat to accommodate a ponytail. This allows you to stay warm and stylish without sacrificing your hairstyle. You can also consider adding buttons, pom-poms, or other embellishments to add a personal touch to your hat.
Overall, customizing your knit hat is a fun and creative process that allows you to make a one-of-a-kind accessory. Whether you’re knitting for yourself or for someone else, take the time to think about the yarn, colors, patterns, and special features that will make the hat truly unique and reflect your personal style. Happy knitting!
Tips and Tricks for Knitting with Circular Needles
Knitting with circular needles can be a great alternative to traditional straight needles, especially when working on larger projects or items in the round. While the process might seem a bit intimidating at first, with a few tips and tricks, you can easily master the art of knitting with circular needles.
Choose the Right Needle Length
When working with circular needles, it’s important to choose the right length for your project. Generally, a 16-inch circular needle is ideal for smaller projects such as hats, socks, or sleeves, while a 24-inch or 32-inch circular needle is better suited for larger projects such as sweaters or blankets. However, this may vary depending on your personal knitting style, so it’s always a good idea to experiment with different lengths to find what works best for you.
Joining in the Round
To successfully join your work in the round, make sure to cast on the required number of stitches and ensure they are not twisted around the cable. Use a stitch marker to mark the beginning of your round, then join the first and last stitches to create a continuous circle. It’s essential to be mindful of this step to avoid any misalignment in your project.
Avoiding Ladder Effect
When knitting with circular needles, it’s common to experience a ladder effect – loose stitches that appear between the needles. To prevent this, ensure that your tension remains consistent throughout your knitting. Give an extra tug to the first stitch of each needle, as this will help tighten the tension and create a more even fabric.
Using Magic Loop Technique
If you’re working on a project with a small circumference, such as socks or mittens, the magic loop technique can be a valuable skill to learn. This technique involves using a longer circular needle and creating a loop with the cable, allowing you to knit on a smaller number of stitches. It’s a handy method that eliminates the need for double-pointed needles.
Overall, knitting with circular needles offers versatility and convenience, making it a popular choice among knitters. By applying these tips and tricks, you’ll be able to confidently tackle any project using circular needles and create stunning knitted pieces.
Finishing Touches: Blocking and Weaving in Ends
After completing your knit hat pattern with a hole for a ponytail, there are a few finishing touches that will enhance the final look and ensure that your hat is ready to wear. Two important steps in this process are blocking and weaving in the ends.
Blocking: Blocking is a technique used to shape and smooth the knitted fabric. It involves wetting the finished piece and then stretching it to the desired shape and size. For a knit hat, you can use a blocking board or a flat surface covered with a towel. Gently pin the hat to the board or surface, shaping it to fit your head or the desired size. Leave it to dry completely, and when you remove the pins, you’ll notice the difference in the smoothness and shape of your hat.
Weaving in Ends: Weaving in ends is an essential step in any knitting project to ensure that all loose yarn tails are secured and hidden. For a hat with a hole for a ponytail, this step is especially important as the hole itself can create extra loose ends. Using a tapestry needle, thread each yarn tail through the surrounding stitches, weaving it in and out to secure it. Take care to weave in the ends on the inside of the hat, so they are not visible from the outside.
Additionally, if you want to add a decorative touch to your knit hat with a ponytail hole, you can consider adding a pom-pom or other embellishments. You can sew a pom-pom or attach it using a removable snap, allowing you to change the look of your hat whenever you want.
With these finishing touches complete, you will have a beautiful and functional knit hat with a hole for a ponytail. Enjoy wearing your new accessory and stay warm in style during the colder months!
How to Care for Your Knit Hat
Knit hats are a cozy and stylish accessory that can keep you warm in cold weather. Whether you have a standard knit hat or one with a hole for a ponytail, it’s important to properly care for it to ensure its longevity and keep it looking good. Here are some tips on how to care for your knit hat:
1. Hand Wash
To maintain the shape and integrity of the knit hat, it’s best to hand wash it. Fill a basin with lukewarm water and add a gentle detergent. Gently immerse the hat in the water and soak it for a few minutes. Gently agitate the hat with your hands to remove any dirt or sweat. Rinse the hat thoroughly with clean water, making sure to remove all soap residue. Avoid wringing or twisting the hat, as this can cause it to stretch or lose its shape.
2. Air Dry
Avoid using a dryer to dry your knit hat, as the heat can cause it to shrink or become misshapen. Instead, lay the hat flat on a clean towel and gently reshape it to its original form. Allow the hat to air dry in a well-ventilated area, away from direct sunlight. It may take several hours for the hat to fully dry, so be patient and avoid trying to speed up the drying process.
3. Storage
When you’re not wearing your knit hat, it’s important to store it properly to prevent it from getting damaged. Avoid hanging the hat, as this can cause it to stretch or lose its shape. Instead, fold the hat neatly and place it in a clean, dry storage container or drawer. If you have a knit hat with a hole for a ponytail, make sure to tuck the hole inside the hat when storing it to protect it from snagging or getting caught on anything.
By following these tips, you can help extend the lifespan of your knit hat and keep it looking good for years to come. Remember to always check the care instructions that come with your specific hat for any additional recommendations or precautions.
Other Variations and Adaptations of the Hat Pattern
If you’re looking to add some extra flair to your ponytail hat, there are several variations and adaptations you can make to the basic pattern. One option is to incorporate different stitch patterns to create texture and interest. You could try adding cables, lace, or even colorwork to the body of the hat. This would give your hat a more unique and personalized look.
Another variation you might consider is adjusting the length and fit of the hat. Depending on how you like to wear your ponytail, you may want a shorter or longer hat. You can easily modify the pattern to make it shorter or add extra length to accommodate longer hair. Additionally, you can experiment with different ribbing or elastic bands to ensure a snug and secure fit.
If you prefer a more slouchy style, you can also modify the pattern to create a looser fit. This can be achieved by knitting with larger needles or increasing the number of stitches in the ribbing or body of the hat.
To add some extra warmth and comfort, you could line the hat with a soft and cozy fabric. This would not only make the hat more comfortable to wear, but it would also provide an additional layer of insulation on chilly days.
Finally, consider adding embellishments to your hat to make it truly one-of-a-kind. You could attach buttons, bows, or even embroidery to add some extra visual interest. This would allow you to personalize your hat and make it reflect your own unique style.
Get Creative: Embellishments and Design Ideas
Once you have mastered the basic knit hat pattern with a hole for a ponytail, it’s time to let your creativity shine! There are countless ways to embellish and personalize your hat, making it truly unique and special. Whether you prefer a minimalist look or enjoy adding a touch of whimsy, here are some design ideas to inspire you:
1. Embroidery:
Embroidery is a fantastic way to add detail and charm to your knit hat. You can stitch on your initials, a small flower, or even a cute animal. The possibilities are endless! Use colorful threads and different types of stitching to create a delightful design that will make your hat stand out.
2. Buttons:
Buttons aren’t just for fastening anymore! Sewing on a few buttons in coordinating colors can add an interesting texture and visual interest to your hat. You can choose buttons of different sizes and shapes, or even find ones with fun patterns or designs. Arrange them in a cluster or as a line to create your own unique button arrangement.
3. Pom-Poms:
Add some playful flair to your hat with a fluffy pom-pom on top! You can make a pom-pom with yarn in a contrasting color or even choose a faux fur pom-pom for an extra luxurious touch. Attach it securely to the crown of your hat for a fun and whimsical accent.
4. Ribbons:
Tie a pretty ribbon around the crown of your hat to add a feminine and delicate touch. Choose a ribbon that complements the color of your hat, or opt for a contrasting shade for a bold statement. You can also tie the ribbon into a sweet bow or leave it as a simple knot.
5. Beads:
Add some sparkle and glamour to your hat by sewing on a few beads. You can incorporate them into a pattern or randomly scatter them across the fabric. Pearls, crystals, or seed beads can all be used, depending on the style you want to achieve. Make sure to choose beads that are sturdy and won’t easily fall off.
Remember, the most important thing is to have fun and experiment with different embellishments and designs. Personalize your knit hat to reflect your own style and personality. Whether you choose to keep it simple or go all out with your creativity, your finished hat will be a reflection of your unique taste and skill.