
The holiday season is just around the corner, and what better way to get into the festive spirit than by wearing a knitted Santa hat? Whether you want to create a fun accessory for yourself or make a thoughtful gift for a loved one, knitting a Santa hat is a great way to add some holiday cheer. In this article, we’ll guide you through a simple and easy-to-follow pattern, so even if you’re a beginner, you’ll be able to create a festive accessory in no time!
To get started, you’ll need some basic knitting skills and materials. You’ll need a set of knitting needles, preferably in a size appropriate for your chosen yarn. Speaking of yarn, you’ll want to choose a soft and cozy yarn in traditional Christmas colors like red and white. You’ll also need a yarn needle for finishing touches, and a pompom maker or a piece of cardboard to create the pompom for the top of the hat.
The pattern we’ll be using is a classic ribbed design, which creates a snug and stretchy hat that will fit most head sizes. The ribbing provides a nice texture and helps the hat stay in place. We’ll start by casting on stitches for the brim of the hat, then work our way up to the crown, decreasing stitches to shape the hat.
Once you’ve completed the main body of the hat, it’s time to add the finishing touches. You can choose to add a pompom to the top of the hat for an extra festive touch. To make a pompom, simply wrap yarn around your pompom maker or cardboard, then secure the loops in the center and cut through the edges. Attach the pompom to the top of the hat, and your knitted Santa hat is complete!
Knitted Santa Hat Pattern
If you’re looking to add some festive cheer to your holiday outfit, then a knitted Santa hat is the perfect accessory. Whether you’re making it for yourself or as a gift, this pattern is sure to bring a smile to anyone’s face. Follow these steps to create your very own knitted Santa hat.
To begin, gather your materials. You’ll need a set of knitting needles, yarn in red and white colors, and a pom pom maker or a piece of cardboard to create the pom pom. Choose a soft and warm yarn that will keep you cozy during the winter months.
Step 1: Cast on
Start by casting on the desired number of stitches onto your knitting needles. This will depend on the size of the hat you want to make. To ensure a snug fit, measure the circumference of your head and subtract a few inches for the stretch of the yarn. Divide this number by the gauge of your chosen yarn to determine the number of stitches to cast on.
Step 2: Knit the brim
Once you have cast on your stitches, begin knitting the brim of the hat using the rib stitch pattern. This will give the hat some stretch and ensure a snug fit. Knit in a 2×2 rib pattern (knit 2 stitches, purl 2 stitches) for the desired length of the brim.
Step 3: Switch to red yarn
After completing the brim, switch to the red yarn and continue knitting in stockinette stitch (knit one row, purl one row) for the body of the hat. Continue knitting until the hat reaches the desired length, keeping in mind that you will need to leave room for the white trim and pom pom.
Step 4: Add the white trim
Once the body of the hat is complete, switch back to the white yarn and knit a few rows for the trim. You can use a simple rib stitch or get creative and add some texture with a different stitch pattern. Knit in the white yarn until you are satisfied with the length of the trim.
Step 5: Finish with a pom pom
To add a festive touch to your hat, finish it off with a pom pom. You can use a pom pom maker or create one using a piece of cardboard. Attach the pom pom securely to the top of the hat, making sure it is centered.
Once your hat is complete, try it on and make any necessary adjustments for fit. Your knitted Santa hat is now ready to be worn and enjoyed throughout the holiday season!
Supplies
To knit a Santa hat, you will need the following supplies:
- Yarn: Choose a bulky or super bulky weight yarn in red and white or red and cream colors. Acrylic or wool blend yarns are ideal for this project.
- Knitting Needles: Use a set of double-pointed needles or a circular needle, depending on your knitting preference. Choose a needle size that will give you the desired gauge for your hat.
- Tapestry Needle: You will need a tapestry needle to weave in the loose ends of your yarn.
- Stitch Markers: Markers will help you keep track of your stitches and rounds in the pattern.
- Measuring Tape: A measuring tape will be helpful to check your gauge and determine the size of your hat.
- Pom Pom: If you desire, you can add a pom pom to the top of your hat. You can make one using a pom pom maker or purchase a pre-made pom pom.
Once you have gathered all these supplies, you will be ready to start knitting your Santa hat! Make sure to check the gauge and follow the pattern instructions carefully to create a festive and cozy Santa hat for yourself or a loved one.
Measurements and Gauge
Before starting your knitted Santa hat, it is important to take accurate measurements to ensure the perfect fit. You will need to measure the circumference of the head and the length from the base of the earlobe to the top of the head. These measurements will guide you in determining the number of stitches and rows needed for your hat.
Once you have determined your measurements, you will need to check the gauge of your knitting. Gauge refers to the number of stitches and rows per inch achieved by the knitter. This is important because it allows you to adjust your knitting needle size and yarn weight if necessary, in order to obtain the desired finished size of the hat. To check your gauge, knit a small swatch using the recommended yarn and needle size, and measure the number of stitches and rows in a 1-inch square. Adjust the needle size as needed until you reach the correct gauge.
It is important to note that gauge can vary depending on the knitter’s tension and knitting style. Therefore, it is recommended to always check your gauge before starting a new project, especially if you are substituting yarn or modifying the pattern. Taking the time to check your measurements and gauge will help ensure that your knitted Santa hat fits perfectly and looks just as you envisioned it.
Cast On
When starting a knitting project, the first step is to cast on. This is the process of creating the first row of stitches on the knitting needle. There are several different methods of casting on, each resulting in a slightly different edge or appearance. The method you choose will depend on the desired outcome of your project.
One of the most common methods of casting on is the long-tail cast on. This method creates a neat and flexible edge, making it suitable for a variety of projects. To do a long-tail cast on, you will need to estimate the amount of yarn you will need for the cast on edge and leave a long tail before making the first stitch. This method can be a bit tricky to master at first, but with practice, it becomes easier.
Another commonly used method is the knitted cast on. This method is quick and easy, making it great for beginners. To do a knitted cast on, you will first create a slipknot on the needle, then knit into this stitch, leaving the new stitch on the left needle. This process is repeated until the desired number of stitches is reached.
Regardless of the method you choose, it is important to cast on with a firm but not too tight tension. If the cast on edge is too tight, it can make it difficult to work the first row of stitches. However, if the tension is too loose, the edge may be sloppy and loose. Practice your chosen cast on method until you can achieve a consistent tension that is suitable for your project.
Ribbing
Ribbing is a common stitch pattern used in knitting, often seen at the brim of hats, cuffs of sleeves, and the hem of sweaters. It is a versatile technique that adds elasticity and structure to knitted garments.
The ribbing stitch pattern is created by alternating knit and purl stitches in a specific pattern. The most common ribbing pattern is the 1×1 rib, where one knit stitch is followed by one purl stitch continuously throughout the row. Other variations include 2×2 rib, 3×3 rib, and so on.
Ribbing is created by using smaller needles and knitting with a tighter tension compared to the main body of the garment. This creates a narrower, denser fabric that helps provide stretch and flexibility.
One of the main benefits of ribbing is its ability to create a snug and comfortable fit. The elasticity allows the garment to stretch and adapt to the wearer’s body, ensuring a secure and cozy feel. Ribbing is often used in hat patterns, including knitted Santa hats, to provide a comfortable fit around the head and to keep the hat in place.
Moreover, ribbing adds visual interest to knitted projects. The alternating knit and purl stitches create a textured pattern that can be used to enhance the overall design of the garment. It can be used as a decorative element on its own or as a complement to other stitch patterns.
Whether you’re knitting a Santa hat or any other project, incorporating ribbing can elevate the look and functionality of your finished piece. It is a versatile technique that adds structure, elasticity, and visual interest to knitted garments.
Body
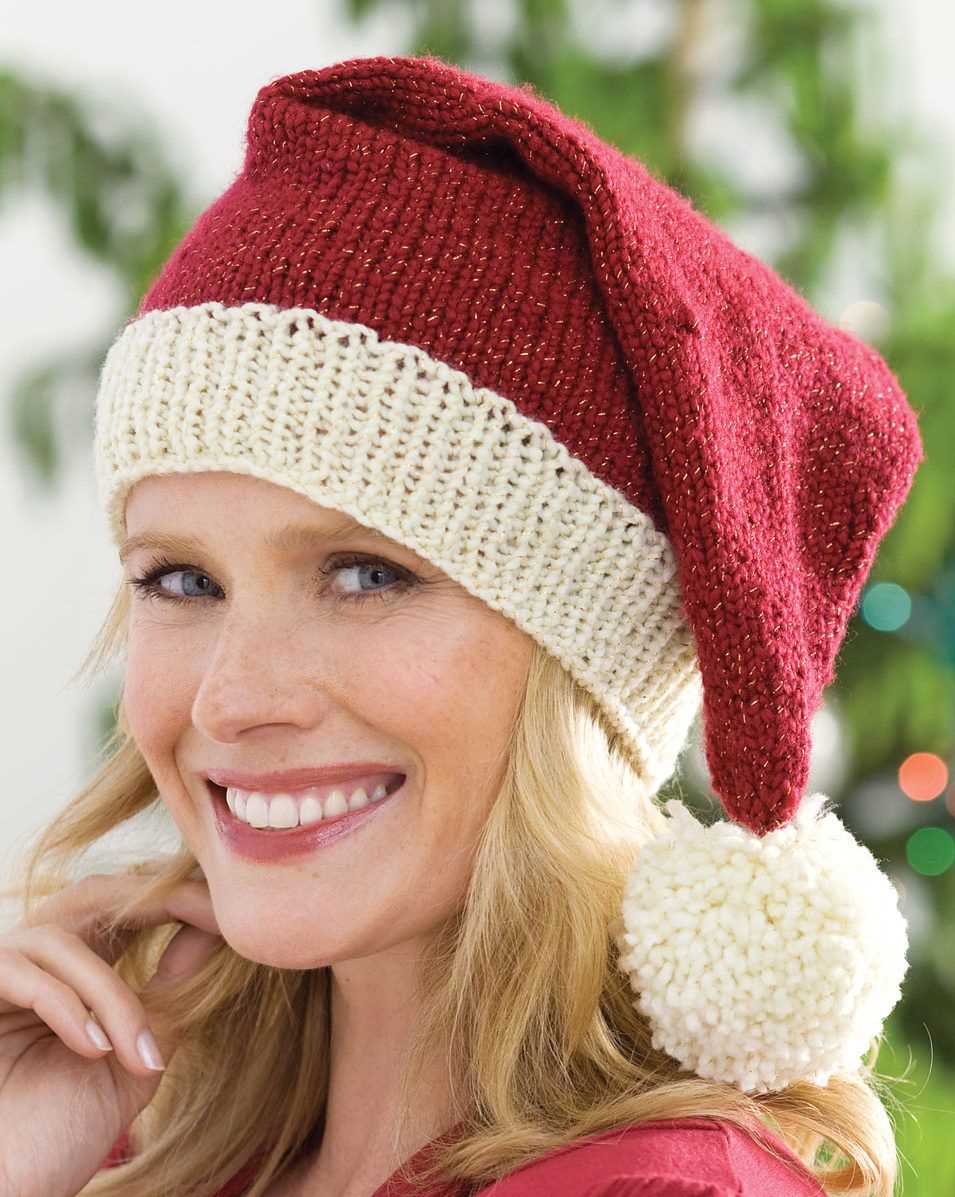
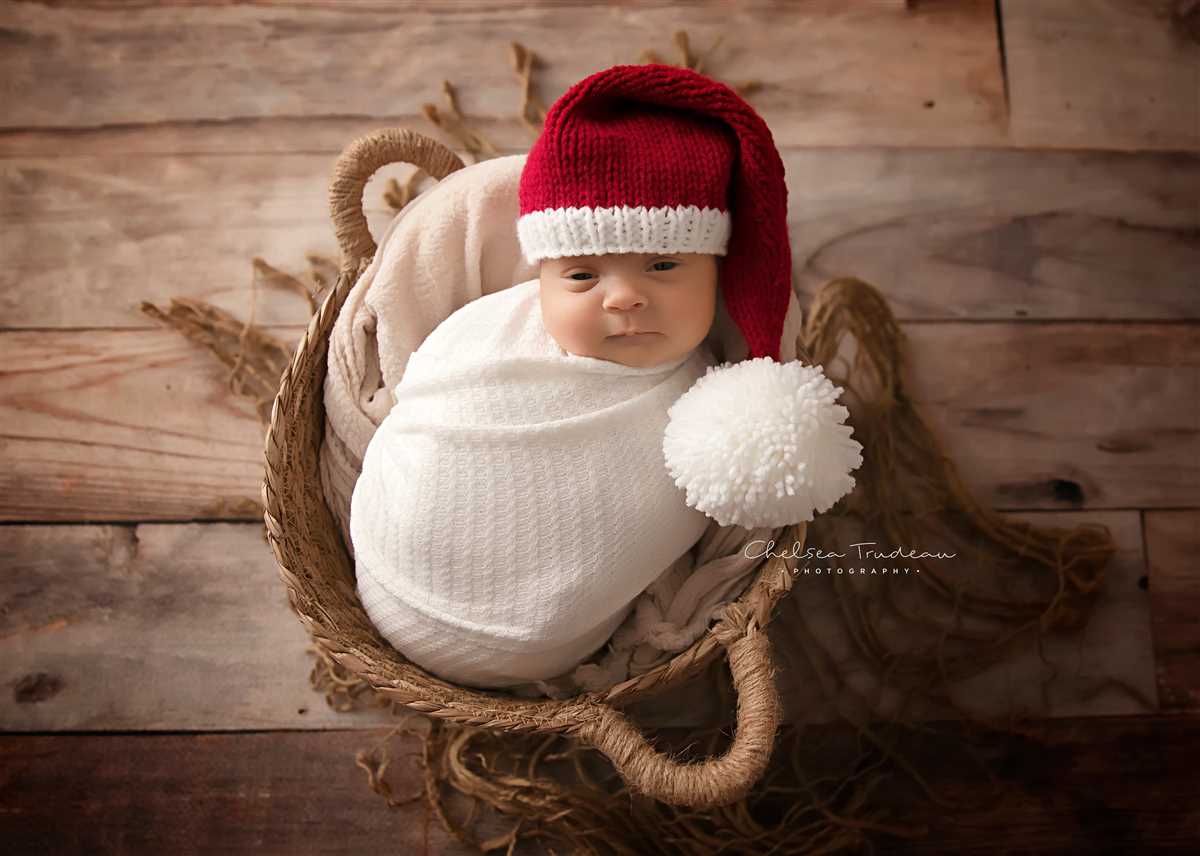
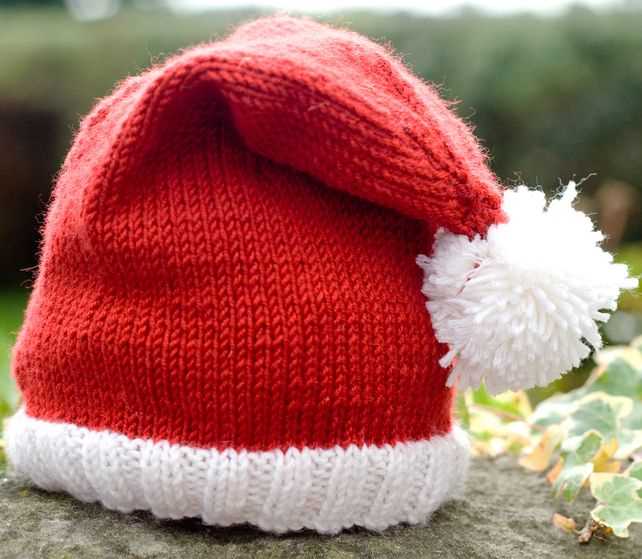
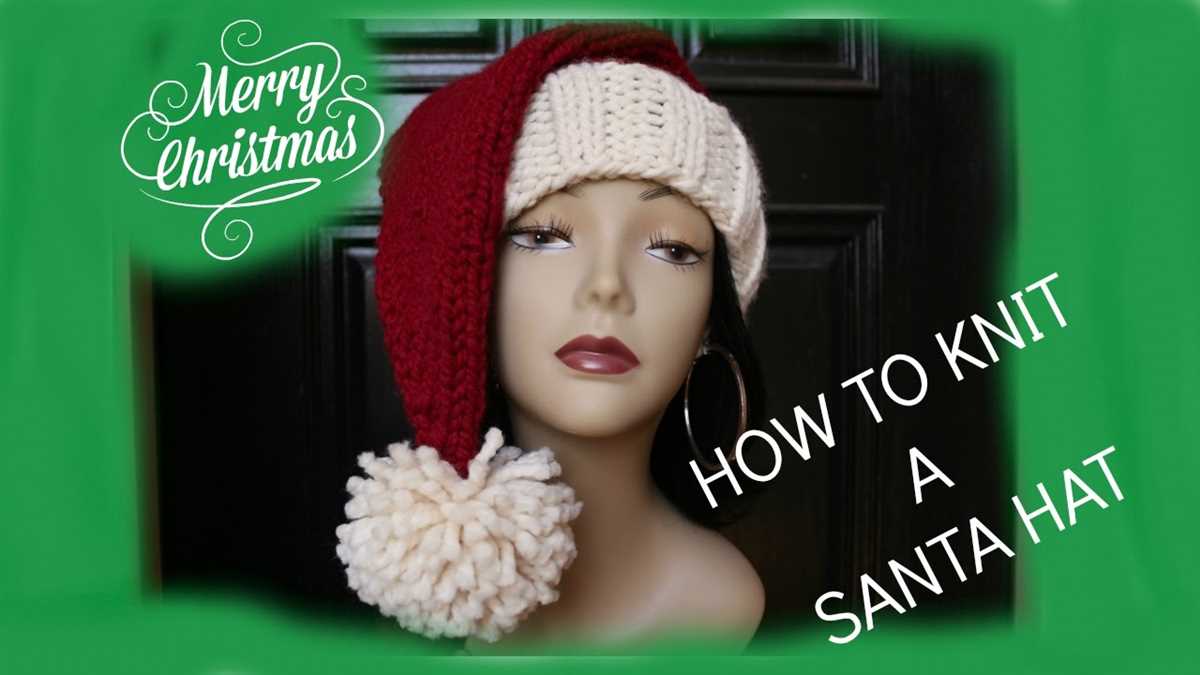
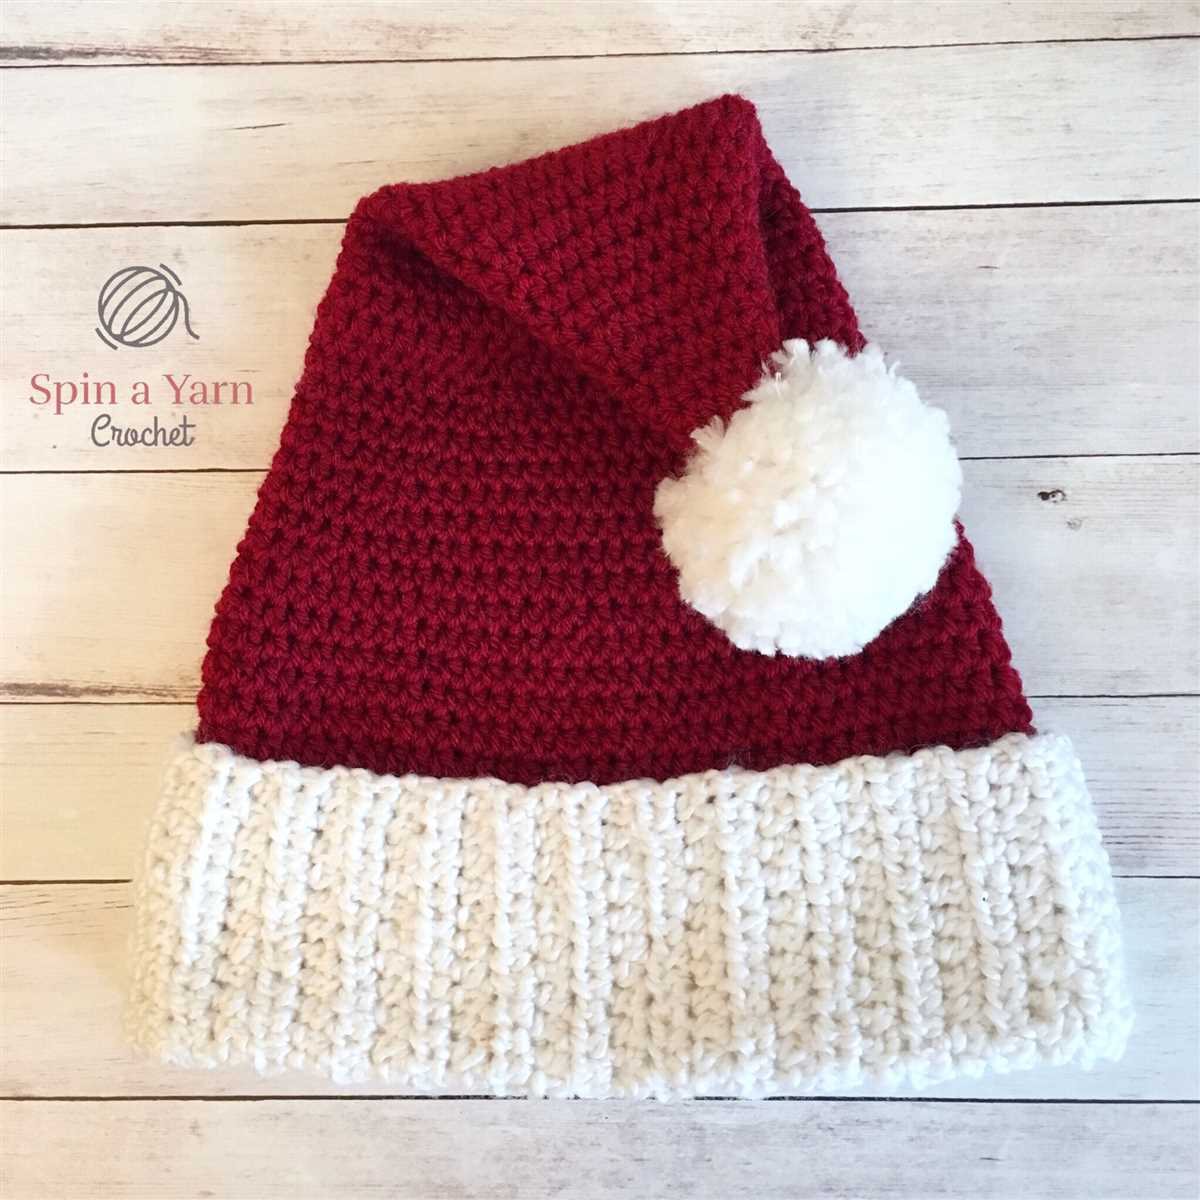
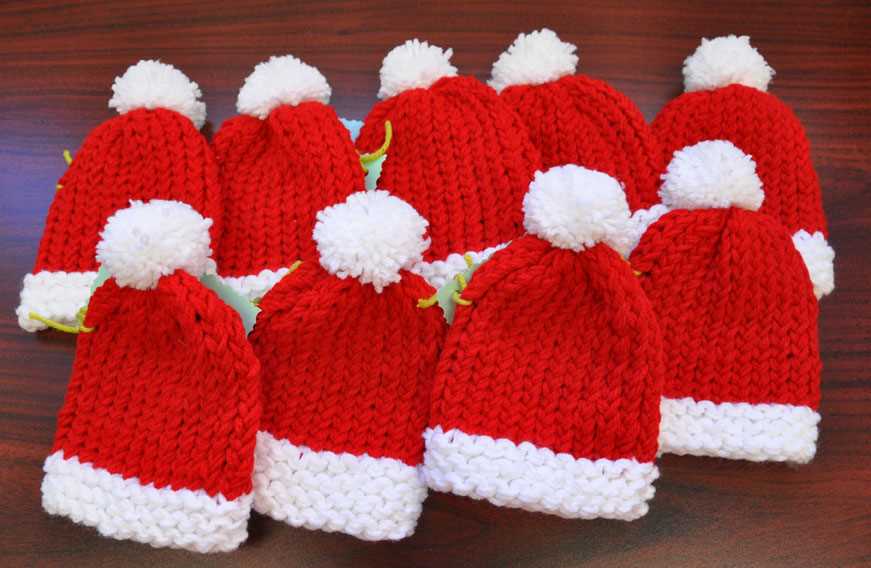
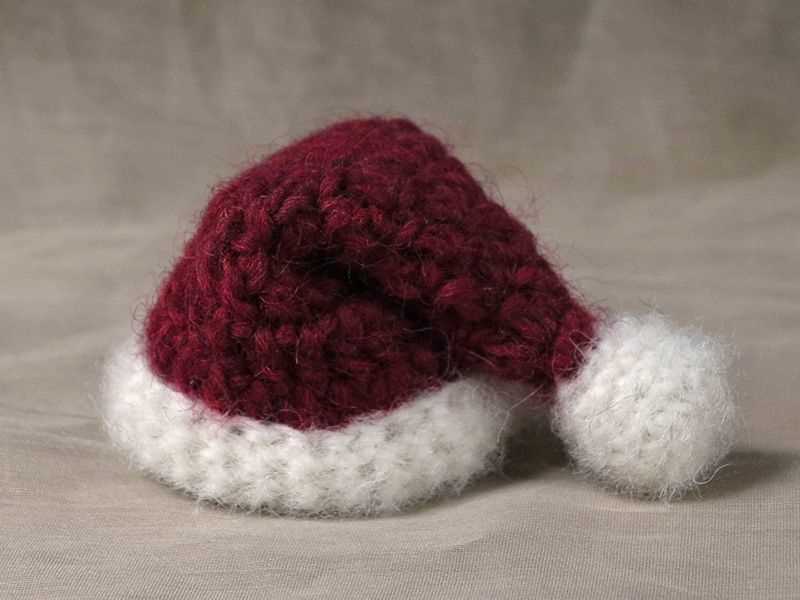
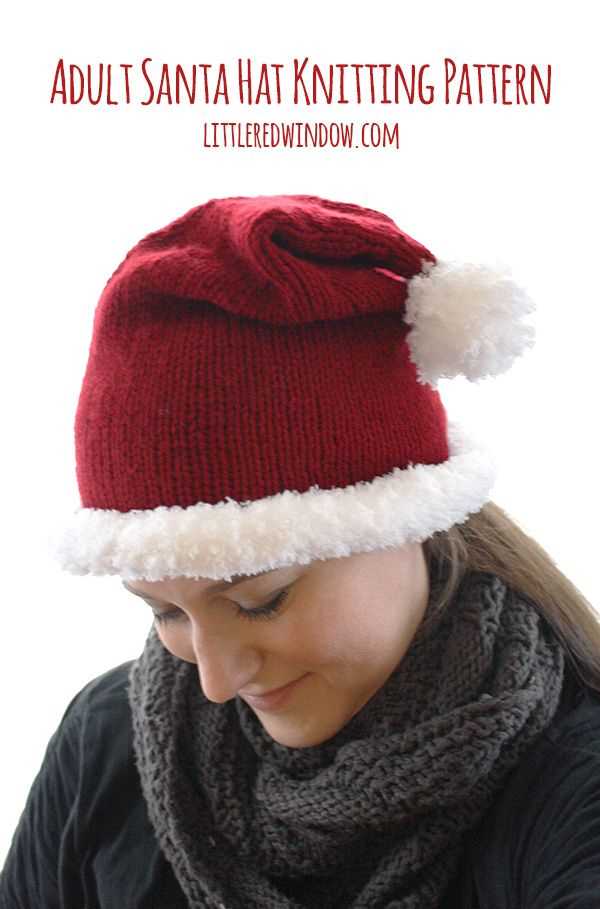
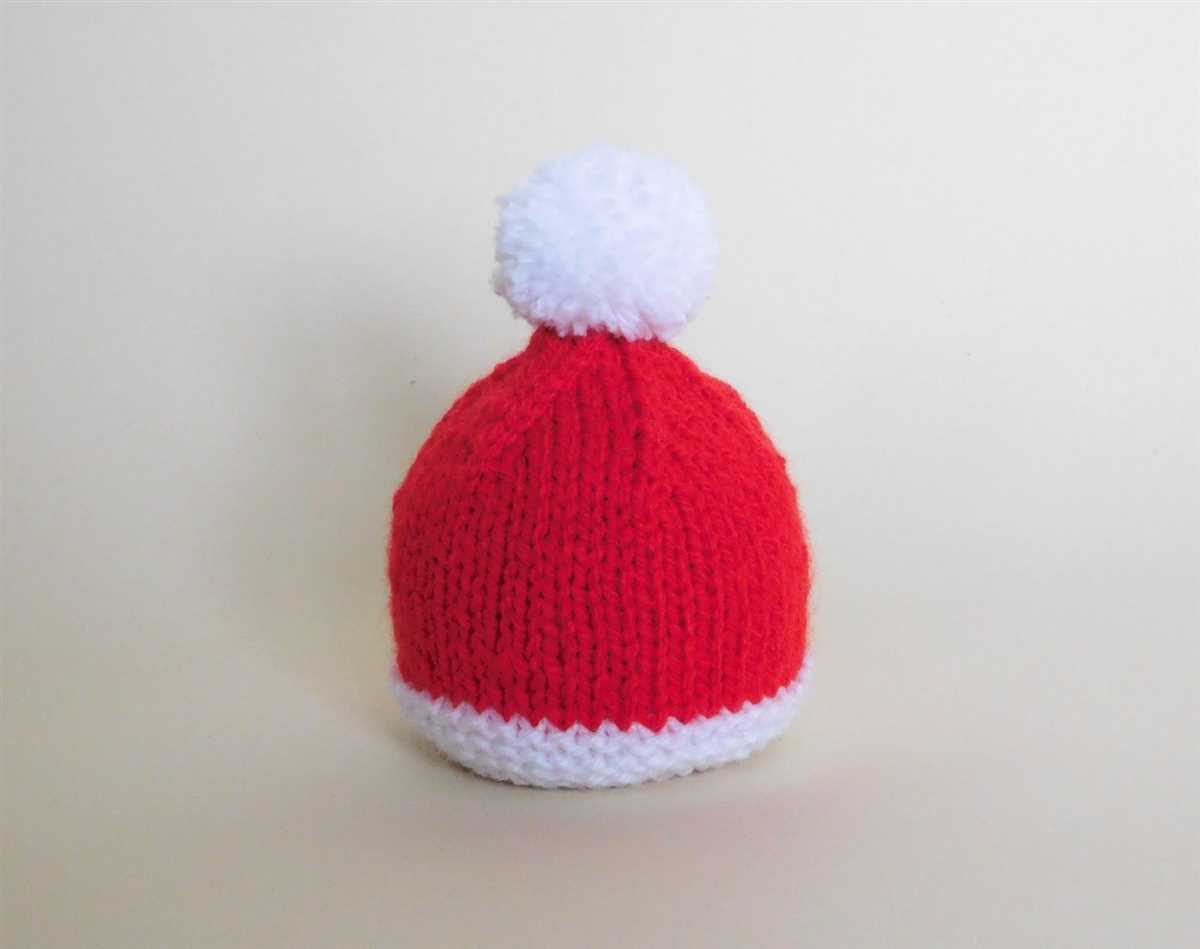
A knitted Santa hat is a festive accessory that adds charm and warmth to your winter wardrobe. It is a popular choice for both children and adults during the holiday season. Whether you are knitting a hat for yourself or as a gift, following a Santa hat pattern can help you create a perfect and unique design.
When choosing a Santa hat pattern, consider the style and size you want. There are various patterns available, ranging from traditional to modern designs. Some patterns may include additional embellishments like pom-poms or tassels, while others focus on simplicity. You can also customize your hat by choosing different colors for the body and the brim.
The body of a knitted Santa hat is typically cone-shaped, resembling the top part of Santa’s traditional red and white hat. It is usually knitted in a combination of red and white yarn, with the majority of the hat being red and a white trim around the brim. The body can be knitted in a simple stockinette stitch or with more intricate patterns, such as cable or Fair Isle designs.
One popular technique for creating the body of a knitted Santa hat is knitting in the round. This allows you to avoid seams and create a seamless hat that fits snugly on your head. If you are new to knitting in the round, there are plenty of tutorials and resources available online to help you get started.
Overall, knitting a Santa hat can be a fun and rewarding project. Whether you are an experienced knitter or a beginner, there is a Santa hat pattern out there that will suit your skill level. So grab your knitting needles, choose your favorite pattern, and get ready to spread some holiday cheer with a cozy and stylish Santa hat!
Decreases
Decreases are an important technique in knitting, especially when working on projects like hats. They help shape the fabric and create a more fitted look. In the context of knitting a Santa hat, decreases are typically used at the crown of the hat to shape it into a neat point.
There are different methods of decreasing in knitting, but two common ones are knit two stitches together (k2tog) and slip, slip, knit (ssk). When knitting a Santa hat, it’s common to use k2tog decreases to achieve the desired shape. This decrease involves knitting two stitches together as if they were one, resulting in one stitch being decreased. It creates a smooth decrease that slants to the right.
Another decrease commonly used in knitting a Santa hat is ssk. This decrease slants to the left, creating a symmetrical look when paired with k2tog decreases. To work ssk, you slip the first stitch as if to knit, slip the second stitch as if to purl, and then knit both slipped stitches together through the back loop. This decreases one stitch and creates a left-leaning decrease.
By incorporating these decreases strategically throughout the pattern, you can create a beautifully shaped Santa hat that fits snugly on the head. The decreases not only add functionality but also add visual interest to the design. Experiment with different decreasing techniques to achieve the desired look and shape for your knitted Santa hat.
Pom Pom
A pom pom is a decorative ball of fluff that is often attached to the top of a hat or used as a fun adornment in various crafts. It adds a playful and whimsical touch to any project.
The construction of a pom pom typically involves wrapping yarn around a pom pom maker or a makeshift tool such as a piece of cardboard or your fingers. Once the desired thickness is achieved, the yarn is tied tightly in the center and cut along the edges to create a fluffy ball. The length of the cut yarn determines the size of the pom pom.
There are various techniques for making pom poms, such as using multiple colors or adding embellishments like beads or sequins. The possibilities are endless! Pom poms can be made in different sizes and styles to suit your personal preference and the project you are working on.
Whether you are adding a pom pom to a knitted santa hat or using it to decorate a holiday wreath, it is sure to bring a festive and cheerful touch to your creations. Pom poms are also popular in children’s crafts and can be a fun activity to do with kids. So grab some yarn, get creative, and make some fluffy pom poms!
Finishing Off
After knitting your Santa hat, it’s time to finish off the project and give it those final touches. Here are some steps to follow:
Weaving in Ends
Start by weaving in any loose ends of yarn that are left from changing colors or joining new balls of yarn. Use a darning needle and thread the yarn end through the stitches on the inside of the hat. Weave it back and forth a few times to secure it, then trim off any excess.
Blocking and Shaping
To give your Santa hat a polished look, you can block and shape it. Wet blocking is recommended for knitted items, especially those made with natural fibers like wool. Gently soak the hat in lukewarm water with a little bit of wool wash. Squeeze out excess water, then shape the hat by smoothing out any wrinkles and stretching it to the desired size. Allow it to air dry completely.
Add Embellishments
To make your Santa hat extra festive, you can add some embellishments. This could include sewing on a pom pom or attaching a decorative ribbon or bow. Get creative and personalize your hat with your own unique touch.
Once you have finished off your Santa hat, you can proudly wear it or give it as a gift. Remember that these instructions are just guidelines, and you can always add your own variations and adjustments to create the perfect Santa hat for you or your loved ones.
Tips and Tricks
Looking to make a knitted Santa hat? Here are some tips and tricks to help you create the perfect holiday accessory.
Choose the right yarn
When knitting a Santa hat, it’s important to choose the right yarn. Opt for a bulky or chunky yarn to create a warm and cozy hat. Consider using a red and white yarn combination to achieve the iconic Santa Claus colors.
Use circular needles
To make the knitting process easier, try using circular needles instead of straight ones. Circular needles can accommodate the large number of stitches required to create a Santa hat, and they also help distribute the weight of the project more evenly.
Master the fair isle technique
The fair isle technique is commonly used to create the contrasting white trim on Santa hats. Practice this technique before starting your hat to ensure clean and even stitches. Remember to keep your floats loose to prevent puckering in the fabric.
Add a pom pom

No Santa hat is complete without a fluffy pom pom on the top. Use a pom pom maker or create one by hand using a piece of cardboard. Attach the pom pom securely to the hat to prevent it from falling off during wear.
Block your hat
After completing your knitted Santa hat, consider blocking it to give it a polished and professional finish. Blocking helps even out the stitches and shape the hat to its desired size. Follow the yarn manufacturer’s instructions for blocking your specific yarn.
- Choose the right yarn
- Use circular needles
- Master the fair isle technique
- Add a pom pom
- Block your hat
Variations
There are many variations of the knitted Santa hat pattern that you can try to customize your own unique design. You can experiment with different color combinations, adding stripes or patterns to the hat. Additionally, you can also adjust the size of the hat by changing the number of stitches or rows. This allows you to create hats for different head sizes, from children to adults.
If you want to add more festive elements to your hat, you can consider incorporating embellishments such as pom-poms or tassels. These can be made with contrasting yarn colors or even added in different shapes, like Christmas tree or snowflake motifs. These embellishments not only add visual interest to the hat but also make it more playful and fun.
Striped Santa Hat
Create a playful look by adding stripes to your Santa hat. You can use two or more colors of yarn to create the stripes. To achieve this, simply alternate the colors every few rows or stitches, depending on the width of the stripes you desire. This striped variation is a great way to make your Santa hat more unique and personalized.
Fair Isle Santa Hat
If you want to take your knitting skills to the next level, you can try the Fair Isle technique to create a more intricate pattern on your Santa hat. Fair Isle involves using two or more colors in a row, carrying the yarn along the back of the work as you switch colors. This technique allows you to create beautiful patterns, such as snowflakes or reindeer, on the body of the hat. The Fair Isle Santa hat is perfect for those who want to showcase their knitting expertise and create a truly eye-catching design.
Patterned Santa Hat
Another variation you can try is incorporating different stitch patterns into your Santa hat. By using different knitting stitches, such as cables or lace, you can create unique textures and patterns on the hat. This adds visual interest and makes the hat stand out even more. Whether you prefer a classic cable pattern or a delicate lace design, the patterned Santa hat is a great option to showcase your knitting skills and create a one-of-a-kind hat.
Size Variations
If you want to make Santa hats for different head sizes, you can easily adjust the pattern. To make a smaller hat for children, you can reduce the number of stitches or rows. For a larger hat, you can increase the stitches or rows. Additionally, you can also adjust the length of the hat to make it shorter or longer, depending on your preference or the recipient’s needs. This flexibility allows you to create Santa hats that fit perfectly and ensure everyone can enjoy the festive spirit.
Frequently Asked Questions
Here are some frequently asked questions about the knitted Santa hat pattern:
1. How can I access the knitted Santa hat pattern?
To access the knitted Santa hat pattern, simply click on the link provided in the description or on the website. This will take you to the pattern page where you can download or print the pattern.
2. What materials do I need to knit the Santa hat?
The materials you will need to knit the Santa hat include:
- Yarn in red and white colors
- Knitting needles in the appropriate size
- A yarn needle for sewing and finishing
- Optional: pom-pom maker for creating a pom-pom for the top of the hat
3. Is this pattern suitable for beginners?
Yes, this pattern is suitable for beginners who have basic knitting skills. The pattern includes clear instructions and stitches that are commonly used in beginner-level projects.
4. Can I customize the size of the Santa hat?
Yes, you can customize the size of the Santa hat by adjusting the number of stitches and rows. The pattern provides instructions for different sizes, but you can also modify it to fit your specific measurements.
5. How long does it take to knit the Santa hat?
The time it takes to knit the Santa hat will depend on your knitting speed and experience. On average, it can take a few hours to complete the hat. However, this may vary for each individual.
6. Can I sell the Santa hats I make using this pattern?
Yes, you can sell the Santa hats you make using this pattern. However, please note that the pattern itself is protected by copyright and cannot be distributed or sold without permission.
7. Can I share my completed Santa hat on social media?
Yes, you can share your completed Santa hat on social media. We encourage you to use the hashtag #KnittedSantaHatPattern to showcase your work and connect with other knitters.
Final Thoughts

In conclusion, knitting a Santa hat can be a fun and rewarding project for the holiday season. Whether you are a beginner or an experienced knitter, there are patterns available to suit your skill level. By following a pattern and using the right materials, you can create a festive and personalized Santa hat that will add a touch of holiday spirit to any outfit.
Keep in mind that knitting can be a time-consuming process, so it’s important to have patience and enjoy the journey. Don’t be afraid to experiment with different colors and embellishments to make your Santa hat unique. Additionally, consider giving your finished hat as a gift to a loved one or using it as a decoration for your home or office.
Remember these key points when knitting a Santa hat:
- Choose the right pattern and yarn for your skill level.
- Take measurements to ensure a proper fit.
- Follow the pattern instructions carefully.
- Have fun and be creative with color and embellishments.
- Give your finished hat as a gift or use it as a decoration.
By following these tips and putting your unique spin on the design, you can create a Santa hat that will bring joy and holiday cheer to those around you. Happy knitting!