
Knitting is a popular hobby that has been enjoyed by people of all ages for centuries. It is a versatile craft that allows you to create beautiful and functional items, such as clothing, accessories, and home decor. One of the most popular knitting projects is making a hat. Whether you are a beginner or an experienced knitter, knitting a hat is a rewarding and enjoyable project.
This knitting pattern will guide you through the steps to create a stylish and cozy hat. The pattern is suitable for knitters of all levels, as it uses basic knitting techniques and stitches. With this pattern, you can customize your hat by choosing your favorite color of yarn and adding your own embellishments, such as pom-poms or buttons.
To get started, you will need a set of knitting needles and a ball of yarn in your chosen color. Make sure to check the recommended gauge and needle size on the yarn label to ensure that your hat will be the right size. The pattern includes instructions for knitting in the round, as well as shaping the crown and adding ribbing to the brim. The finished hat is perfect for keeping you warm and stylish during the cold winter months.
How to Knit a Hat: A Step-by-Step Guide
Knitting a hat can be a fun and rewarding project for both beginners and experienced knitters. Whether you want to make a cozy winter hat or a stylish accessory for any season, the process is simple and can be completed with just a few basic knitting skills. In this step-by-step guide, we will walk you through the process of knitting a hat from start to finish.
Materials needed:
- Yarn of your choice
- Knitting needles (size depends on the desired gauge)
- Tapestry needle
- Scissors
- Stitch markers (optional)
Step 1: Choosing a pattern and yarn
Before you start knitting your hat, it’s important to choose a pattern and yarn that you like. There are countless hat patterns available online or in knitting books, ranging from simple and basic designs to more intricate patterns. Consider the level of difficulty and the type of yarn that will work best for your project.
Step 2: Gauge swatch
Once you have chosen your pattern and yarn, it’s time to determine your gauge. This is important because it will ensure that your hat fits properly. To do this, knit a small sample swatch using your chosen yarn and needles. Measure the number of stitches and rows per inch. Adjust your needle size if needed to match the pattern’s recommended gauge.
Step 3: Casting on
With your gauge swatch complete, you are ready to cast on stitches for your hat. The number of stitches you cast on will depend on your chosen pattern and the size of hat you want to make. Use the long-tail cast-on method or your preferred casting-on technique.
Step 4: Knitting the body of the hat
Now it’s time to knit the body of your hat. Follow the pattern instructions, knitting in the round or using straight needles, depending on the design. Keep track of your rows using stitch markers if necessary.
Step 5: Shaping the crown
As you approach the crown of the hat, you will need to start decreasing stitches to create the rounded shape. Again, follow the pattern instructions for how to decrease, whether it’s through knitting two stitches together or other decrease techniques.
Step 6: Finishing touches
Once you have decreased enough stitches to close the crown, it’s time to finish your hat. Cut the yarn, leaving a long tail. Thread the tail through a tapestry needle and thread it through the remaining stitches. Pull tight to close the top of the hat. Weave in any loose ends and trim excess yarn. Your hat is now complete!
With a little time and patience, you can create a beautiful hat that showcases your knitting skills. Whether you’re knitting for yourself or as a gift for someone else, a handmade hat is sure to be cherished and appreciated. So gather your materials and get started on your next knitting project today!
Choosing the Right Yarn and Needles
When it comes to knitting a hat, choosing the right yarn and needles is crucial to ensure the success of your project. The yarn and needles you select can greatly impact the final result, including the fit, texture, and overall look of the hat.
Yarn: When choosing yarn for a hat, consider the appropriate weight and fiber content. The weight of the yarn will determine the thickness and warmth of the hat. For a chunky and cozy hat, opt for a bulky or super bulky weight yarn. If you prefer a lighter and more breathable hat, choose a sport or fingering weight yarn. Additionally, consider the fiber content of the yarn. Natural fibers like wool are excellent for hats as they provide insulation and elasticity, while synthetic fibers like acrylic are easy to care for and offer a wide range of color options.
Needles: The right needles will depend on your personal knitting style and the pattern requirements. Generally, for hats, circular needles are preferred as they allow you to easily knit in the round. Circular needles also distribute the weight of the hat more evenly, making it more comfortable to work with. The length of the circular needles should be appropriate for the circumference of the hat, ensuring that the stitches fit comfortably without being stretched too tight or bunched up. If you prefer knitting with double-pointed needles, make sure to select a set with the appropriate length and number of needles for the pattern.
- Consider the desired weight and fiber content when choosing yarn for a hat.
- Opt for natural fibers like wool for insulation and stretch.
- Synthetic fibers like acrylic offer easy care and color options.
- Circular needles are preferred for knitting hats in the round.
- Choose the appropriate length depending on the hat’s circumference.
- Double-pointed needles are an option for those who prefer them.
Casting On: Getting Started with Your Hat
If you’re new to knitting or just want a quick and easy project, a hat is a great place to start. It’s a small project that you can easily complete in a short amount of time, making it perfect for beginner knitters or those looking for a quick weekend project. Before you dive in, let’s go over the basics of casting on to get you started on your hat.
Casting on is the first step in any knitting project and it’s how you get your stitches onto your needle. For a hat, you’ll typically need to cast on between 80-100 stitches, depending on the size of your head and the desired fit of your hat. There are several methods of casting on, but the long-tail cast on is a popular choice for hats as it creates a neat and stretchy edge.
To start, you’ll need to estimate how much yarn you’ll need for your cast on. A general rule of thumb is to measure out a length of yarn that’s about three times the width of your finished hat. This will give you enough yarn to cast on all your stitches and leave a tail for weaving in later. Once you have your yarn measured, make a slipknot and place it on your needle.
Now it’s time to start casting on! Hold the needle with the slipknot in your right hand, and with your left hand, hold the yarn coming from the ball. Insert your right-hand needle into the slipknot from left to right, crossing over the left-hand needle. With your right hand, bring the working yarn under and around the right needle, creating a loop on the right needle. Pull this loop through the slipknot on the left needle, creating a new stitch. Repeat this process until you have the desired number of stitches on your needle.
Once you have all your stitches cast on, you’re ready to start knitting your hat! Follow the pattern instructions for the stitch pattern and shaping, and soon you’ll have a beautiful handmade hat to keep you warm in the colder months. Happy knitting!
Knitting the Ribbing: Creating a Stretchy Band
The ribbing is an essential part of any knitted hat as it creates a stretchy band that ensures a snug fit around the head. Whether you’re knitting a beanie, a slouchy hat, or a beret, the ribbing adds both functionality and style to your project.
To start knitting the ribbing, you’ll need to choose the appropriate needle size and yarn weight. Typically, a smaller needle size is used for the ribbing compared to the main body of the hat. This helps create a tighter fabric and enhances the stretchiness of the band.
1. Cast On: Begin by casting on the desired number of stitches using a method such as the long-tail cast on. Make sure to leave a long enough tail for weaving in later.
2. Knit-Purl Repeat: The ribbing is created by alternating knit stitches and purl stitches in every row. This creates a pattern of vertical columns of knits and purls, which contributes to the elasticity of the band. Start the first row with a knit stitch, then alternate knit and purl stitches until you reach the end of the row.
3. Repeat Rows: Continue repeating the knit-purl pattern for the desired length of the ribbing. The number of rows needed will depend on the hat size and the desired width of the band. Keep in mind that the ribbing will naturally contract when worn, so it’s important to measure it against the wearer’s head circumference for a comfortable fit.
4. Bind Off: Once the ribbing reaches the desired length, it’s time to bind off the stitches. Use a method such as the standard bind off or the stretchy bind off to maintain the elasticity of the band. Make sure to bind off loosely to prevent the ribbing from being too tight around the head.
5. Weave In Ends: Finally, weave in any loose ends using a yarn needle to secure the ribbing and give your hat a polished finish. Trim any excess yarn carefully to avoid unraveling.
Now that you’ve completed the ribbing, you’re ready to move on to the main body of the hat. The ribbed band will provide a comfortable and snug fit, making your knitted hat both stylish and functional.
Transitioning to the Main Body: Knitting in the Round
Once you have completed the ribbing for your hat, it’s time to transition to knitting in the round. This technique allows you to create a seamless hat with a clean and professional-looking finish. To start knitting in the round, you will need to switch from using straight knitting needles to either double-pointed needles or a circular needle.
If you choose to use double-pointed needles, you will need to divide your stitches evenly onto three or four needles, depending on the number of stitches. Make sure to distribute the stitches evenly to avoid any gaps or uneven tension. Once your stitches are divided, you can join in the round by knitting the first stitch of your next row with the working yarn from the previous row. This will create a continuous loop of knitting.
If you prefer to use a circular needle, you will need to loosen the stitches on the cable section of the needle and slide the stitches down to the needle tips. The working yarn should be positioned at the right-hand needle tip. To join in the round, simply knit the first stitch of your next row with the working yarn from the previous row.
Regardless of which method you choose, make sure to place a stitch marker at the beginning of your round. This will help you keep track of where your round starts and ensure that your pattern is not skewed. To ensure a smooth and even transition, it is also important to pay attention to your tension. Your stitches should be consistent in size and tension throughout the round.
Once you have successfully transitioned to knitting in the round, you can continue working on the main body of your hat. Follow the instructions of your knitting pattern, whether it involves a simple stockinette stitch or a more intricate pattern. As you work your way up, make sure to periodically check your gauge to ensure that your hat is the correct size.
Creating the Hat’s Length: Knitting Rows
Once you have completed knitting the hat’s brim, it’s time to start working on the length of the hat. This is done by knitting rows of stitches that will gradually build up the height of the hat. The number of rows you need to knit will depend on the desired length of the hat, as specified in the knitting pattern.
To start knitting the rows, you will continue using the same stitch pattern that you used for the brim. This could be a simple knit stitch, purl stitch, or a combination of different stitches to create interesting patterns. Make sure to follow the pattern instructions carefully to ensure you are knitting the correct stitches for each row.
When knitting the rows, it’s important to maintain an even tension and consistency in your stitches. This will ensure that the hat has a neat and polished look. Take your time and focus on each stitch, making sure not to drop or miss any. If you do make a mistake, you can easily undo the stitches and fix it before continuing.
To keep track of your rows, you can use stitch markers or a row counter. This will help you remember the number of rows you have already knitted and make it easier to follow the pattern instructions. It’s also a good idea to place a lifeline after a certain number of rows, especially if you’re working on a complex stitch pattern. This will allow you to easily return to a specific row if needed.
Continue knitting the rows until you reach the desired length for your hat. Remember to check your gauge periodically to ensure that the hat will fit properly. Once you have completed the required number of rows, you can move on to shaping the crown of the hat as indicated in the knitting pattern.
Shaping the Crown: Decreasing Stitches
In order to shape the crown of the hat and create a tapered effect, it is necessary to decrease stitches gradually. This will bring the stitches closer together, forming a dome-like shape. There are different methods to accomplish this, but the most common ones involve knitting or purling multiple stitches together.
1. Decreasing using Knit Two Together (K2tog)
One of the simplest methods to decrease stitches is by knitting two stitches together. This is known as knit two together, or K2tog. To do this, insert the right-hand needle into the next two stitches on the left-hand needle, and knit them together as if they were a single stitch. This will decrease one stitch.
2. Decreasing using Slip, Slip, Knit (SSK)
Another common decrease method is slip, slip, knit, or SSK. To perform this decrease, slip the next two stitches, one at a time, from the left-hand needle to the right-hand needle as if to knit. Then insert the left-hand needle into the front of these two slipped stitches and knit them together. This will also decrease one stitch.
It’s important to keep in mind the pattern’s instructions when shaping the crown. Some patterns may specify the decrease method to be used, while others may leave it up to the knitter’s preference. It’s always a good idea to practice these decrease stitches on a swatch before applying them to your actual hat project. By mastering these techniques, you’ll be able to create a beautiful and well-fitting hat.
Finishing the Hat: Binding Off
Once you have completed knitting your hat and are satisfied with its size and shape, it’s time to finish off your project by binding off. Binding off is the process of creating a neat and secure edge on your knitted piece, preventing it from unraveling.
Steps for Binding Off:
1. Start by knitting two stitches as usual.
2. Insert the left needle into the first stitch on the right needle, from left to right.
3. Lift the first stitch over the second stitch and off the right needle, binding it off.
4. Knit one stitch, then lift the previous stitch over it and off the right needle.
5. Repeat steps 4 and 5 until only one stitch remains on the right needle.
6. Cut the yarn, leaving a tail of about 6 inches.
7. Pull the tail through the last stitch to secure it.
Finishing touches:
After binding off, you can weave in any loose ends using a tapestry needle, ensuring a neat and seamless finish. If you want to add a decorative touch, you can attach a pom-pom, tassel, or other embellishments to the top of the hat.
With the binding off complete and any finishing touches added, your hat is now ready to be worn or gifted! Enjoy the satisfaction of completing your knitting project and the warmth and style that your hat will bring.
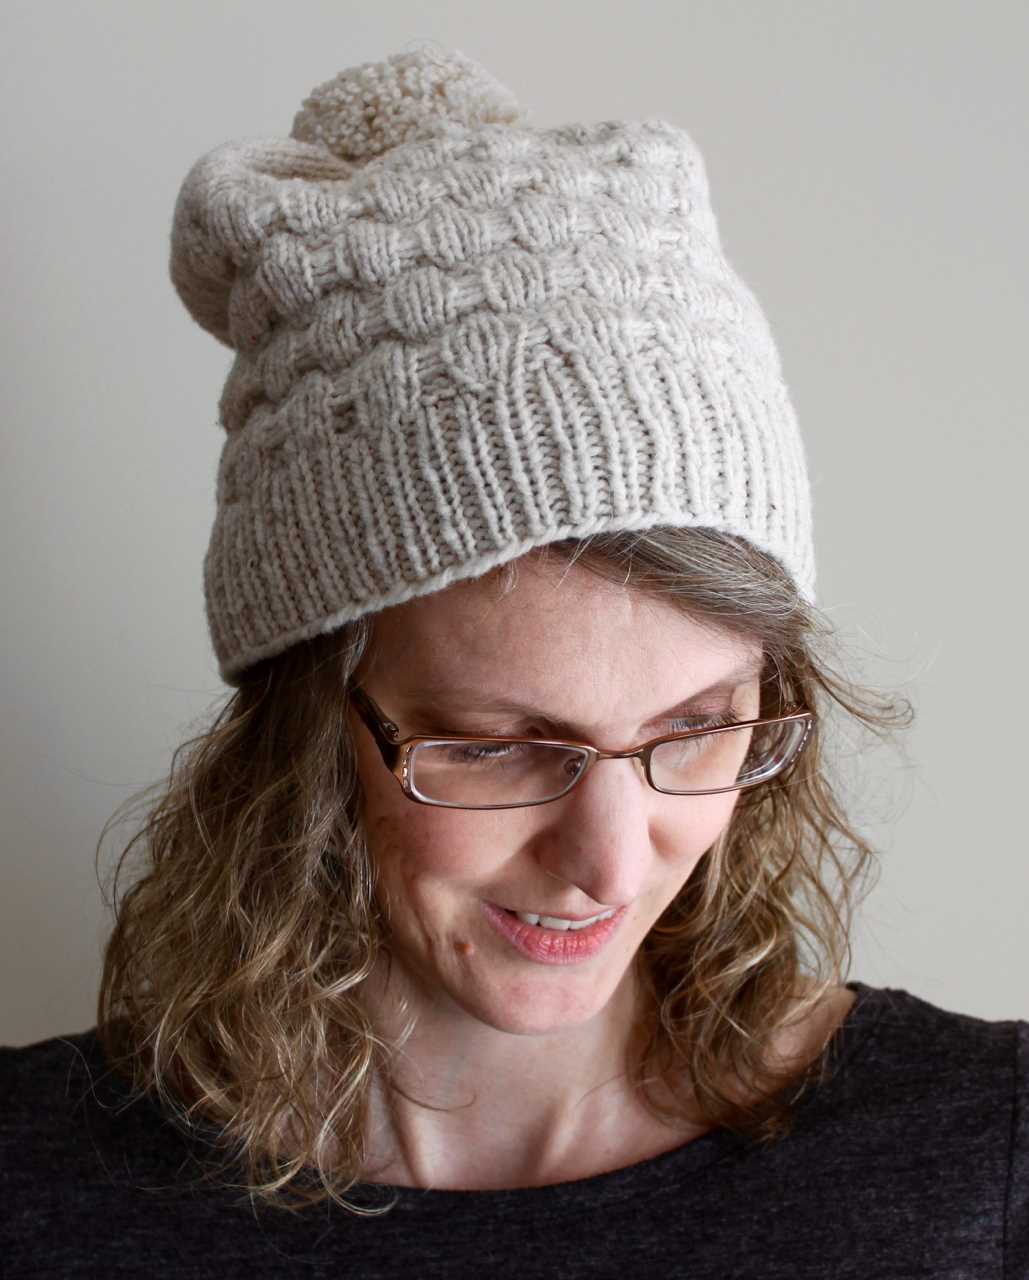
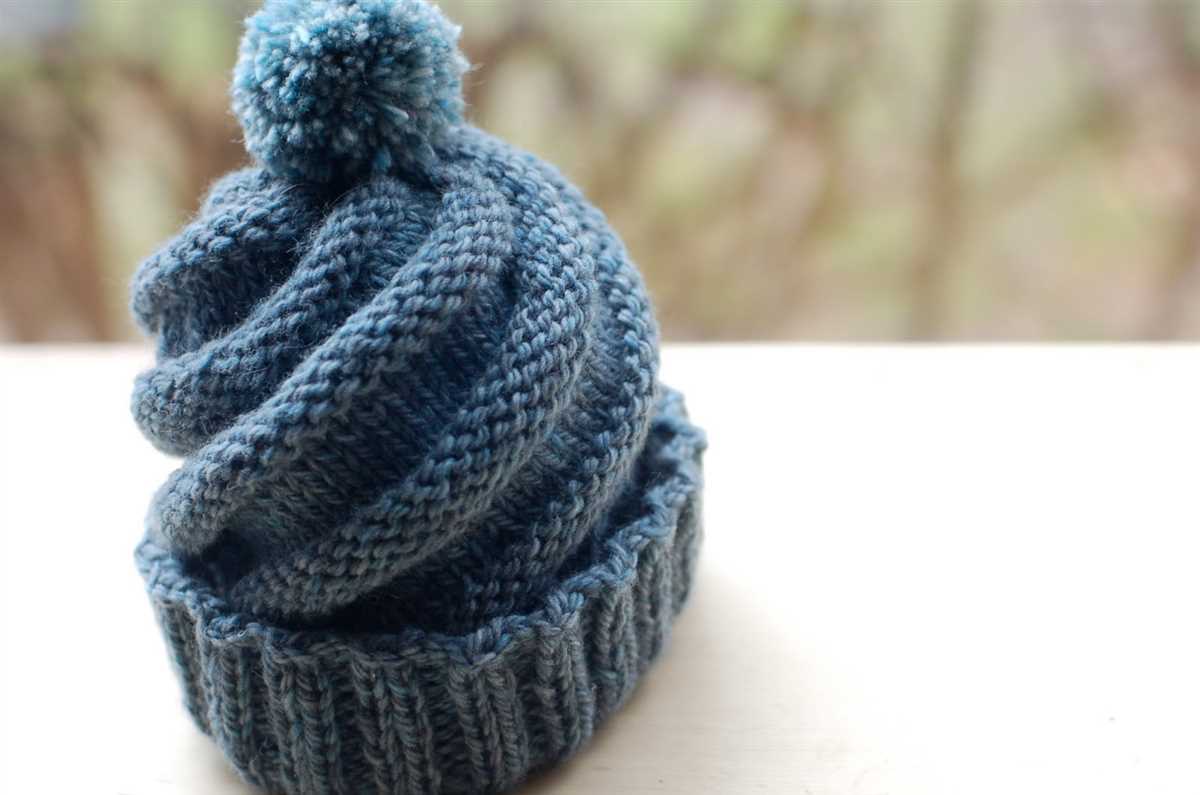
Adding Embellishments: Pom-Poms, Buttons, and More
Once you have finished knitting your hat, you can take it to the next level by adding embellishments. There are many options to choose from, such as pom-poms, buttons, and more. These embellishments can add a touch of fun or elegance to your hat, depending on your personal style and preference.
Pom-poms: Pom-poms are a classic choice for hat embellishments. They can be made from yarn that matches your hat or in a contrasting color for a pop of color. Making pom-poms is easy – all you need is a pom-pom maker or a couple of cardboard circles to wrap the yarn around. Attach the pom-pom securely to the top of your hat, and you’ll instantly have a playful and whimsical accessory.
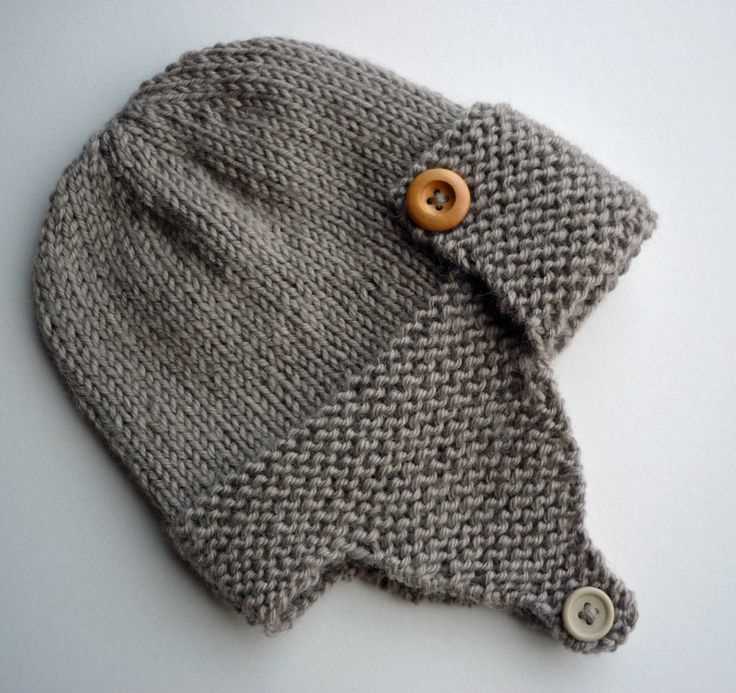
Buttons: Buttons can be a great addition to your hat, especially if you want to add a touch of sophistication. Choose buttons that complement the color and style of your hat. Sew them onto the brim, along the edge, or even in a decorative pattern. This simple embellishment can elevate your hat and make it stand out.
Embroidery: If you’re looking for a more personalized touch, consider adding embroidery to your hat. You can choose to embroider a small design or pattern on the brim or create a larger motif on the body of the hat. Use colorful threads and different stitch techniques to create a unique and eye-catching embellishment.
Ribbons and bows: Ribbons and bows are a feminine and charming addition to a hat. You can tie a ribbon around the base of the hat or attach a small bow to the side. Opt for satin or velvet ribbons for an elegant look, or choose a patterned ribbon for a more playful style. Whichever you choose, ribbons and bows are sure to add a touch of elegance to your hat.
Sequins and beads: For those who want to add some sparkle and shine to their hat, sequins and beads are the perfect choice. Sew them onto your hat in a pattern or scatter them randomly for a more eclectic look. The light-catching properties of sequins and beads will make your hat a statement piece and catch everyone’s attention.
Blocking the Hat: Giving it the Perfect Shape
Blocking is an essential step in knitting that can transform a finished hat into a beautifully-shaped accessory. By carefully stretching and shaping the fabric, blocking helps to set the stitches and even out any uneven tension or inconsistencies. It also allows the knitter to control the final size and shape of the hat, ensuring a perfect fit.
To begin the blocking process, gather the necessary supplies: a large clean towel, pins, a spray bottle filled with cold water, and a flat, non-absorbent surface such as a blocking board or foam mat. Lay the towel on the flat surface to protect it from moisture and place the hat on top.
Step 1: Fill the spray bottle with cold water and lightly mist the hat, making sure to dampen the entire surface evenly. Avoid soaking the hat, as excessive moisture can distort the shape or cause the colors to bleed.
Step 2: Gently stretch the hat to the desired size and shape, focusing on evening out any areas that appear wrinkled or misshapen. Use your hands to smooth and shape the fabric, being careful not to pull too forcefully or stretch the stitches too much.
Step 3: Secure the hat in place by pinning it to the towel. Start by placing pins along the brim, pulling the fabric taut as you go. Then, work your way up the sides of the hat, placing pins every few inches to hold the shape in place.
Step 4: Allow the hat to dry completely before removing the pins. This can take anywhere from a few hours to overnight, depending on the humidity and thickness of the fabric. Avoid disturbing the hat while it is drying, as this can cause the shape to shift.
By taking the time to block your knitted hat, you can ensure that it will have a polished and professional-looking finish. Whether you’re gifting it to a friend or keeping it for yourself, a well-shaped hat is a joy to wear and show off. So don’t skip this important step and enjoy the satisfaction of creating a hat that fits perfectly and looks great!
Hat Sizing Guide: Adjusting for Different Heads
When knitting a hat, it is important to consider the sizing to ensure a perfect fit for different head sizes and shapes. Not all heads are the same, and adjusting the pattern to accommodate different measurements is essential. Here is a handy hat sizing guide to help you adjust your knitting pattern for a variety of head sizes.
Measuring the Head
The first step in adjusting a knitting pattern for different heads is to measure the recipient’s head circumference. Use a flexible measuring tape and wrap it around the widest part of the head, typically just above the eyebrows and ears. Record this measurement in inches or centimeters, depending on your preference.
Calculating the Hat Size
Once you have the head circumference measurement, you can calculate the appropriate hat size. Most knitting patterns will include a gauge, which is the number of stitches and rows per inch or centimeter. By multiplying the gauge by the head circumference measurement, you can determine the number of stitches needed for the hat.
For example, if the gauge is 5 stitches per inch and the head circumference is 20 inches, you would cast on 100 stitches (5 stitches per inch multiplied by 20 inches). This will ensure that the hat will fit snugly but not be too tight.
Adjusting the Length
In addition to adjusting the circumference, it may also be necessary to adjust the length of the hat. Some people have more height or volume in their heads, requiring a longer hat to fully cover their ears. Measure the length from the base of the ear to the top of the head and compare it to the length specified in the pattern. If needed, you can add or subtract rows of knitting to achieve the desired length.
Troubleshooting
If the hat ends up too small or too large after knitting, don’t be discouraged. Knitting is a flexible craft, and modifications can be made to the finished hat. You can try blocking the hat to stretch or shrink it slightly, or unravel and re-knit certain sections to adjust the sizing. Keep in mind that everyone’s head shape is unique, so it may take some trial and error to find the perfect fit.
By following this hat sizing guide and making adjustments as needed, you can create beautiful and comfortable hats for anyone, regardless of their head size or shape. Remember to always measure accurately and trust your instincts when it comes to adjusting patterns. Happy knitting!
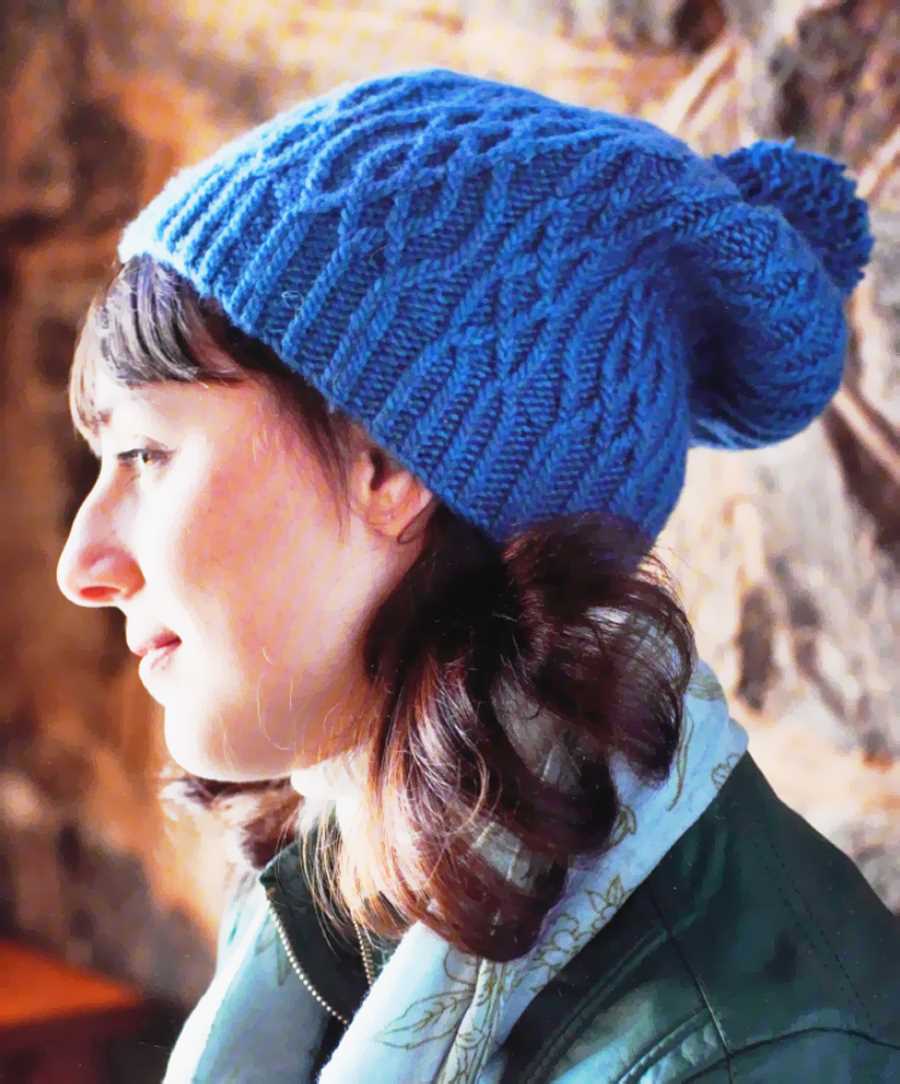
Hat Variations: Cable Knit, Fair Isle, and More
In addition to the basic knit hat pattern, there are many variations you can try to create unique and stylish hats. Different knitting techniques and patterns can add texture and visual interest to your hat projects. Here are a few popular variations:
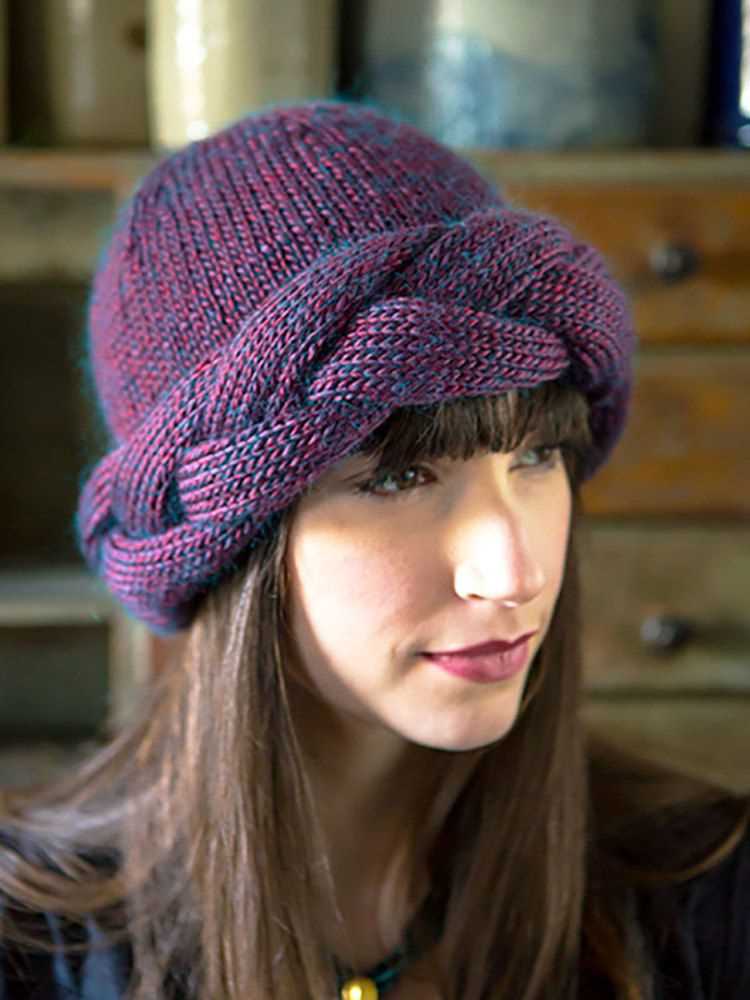
Cable Knit Hats
Cable knitting is a technique where you create twists and braids in your knitting by crossing stitches over each other. This creates a beautiful, textured look that is perfect for winter hats. You can find cable knit hat patterns that range from simple, single cable designs to more complex, intricate patterns.
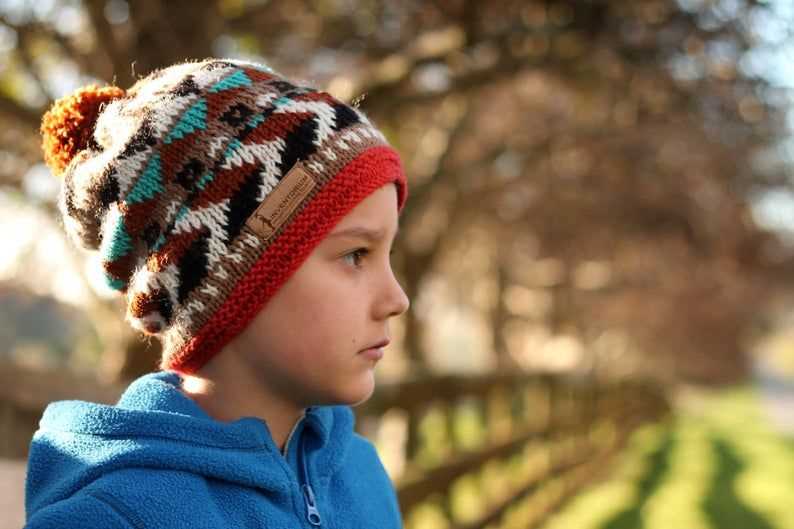
Fair Isle Hats
Fair Isle knitting is a traditional knitting technique that involves knitting with multiple colors in a single row or round. This technique allows you to create colorful and intricate patterns, often with geometric or floral motifs. Fair Isle hats are a great way to add some extra color and personality to your knitting projects.
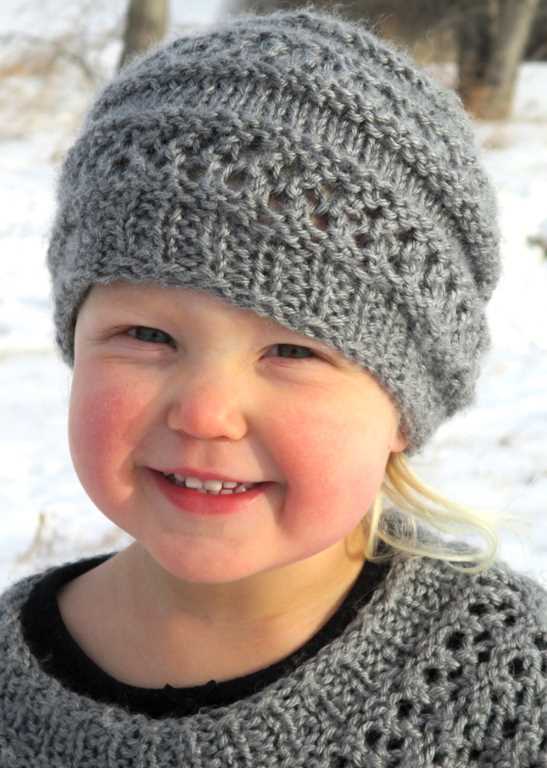
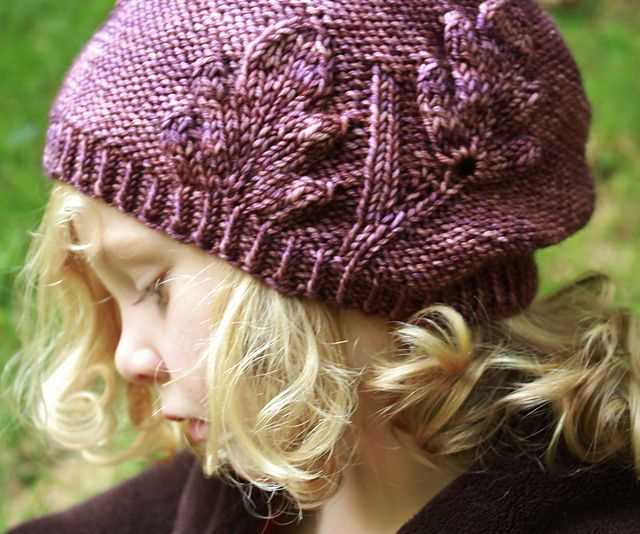
Lace Knit Hats
Lace knitting involves creating delicate and intricate patterns using yarn overs and decreases. Lace knit hats can have a light and airy look, perfect for spring or summer. This technique can be challenging but rewarding, as the final result is often stunning.
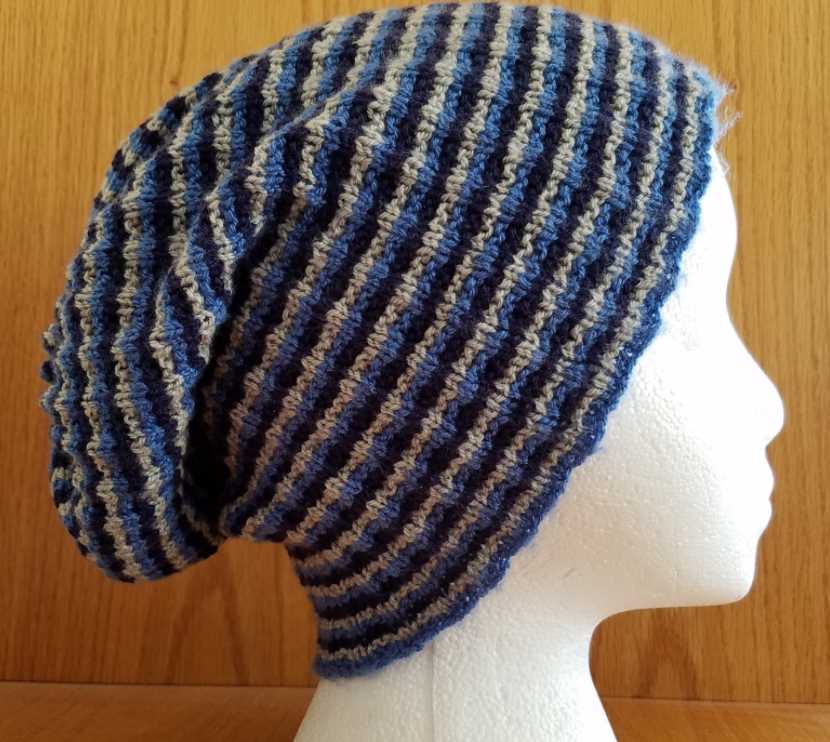
Ribbed Hats

Ribbing is a common knitting technique that creates vertical columns of knit and purl stitches. Ribbed hats have a stretchy and comfortable fit, making them great for anyone. You can experiment with different rib stitch patterns to create unique and interesting designs.
These are just a few examples of the many hat variations you can try. Feel free to experiment with different knitting techniques and patterns to create your own custom hats. The possibilities are endless!