
If you love knitting and want to try your hand at making a fashionable and cozy accessory, then look no further than a women’s beanie. Beanies are a versatile and timeless accessory that can be worn year-round, whether it’s to keep warm in the winter or to add a stylish touch to your outfit in the summer. The best part is, you don’t have to spend a fortune on a beanie – you can easily make one yourself with a free knitting pattern.
This women’s beanie knitting pattern is perfect for beginners and experienced knitters alike. The pattern includes step-by-step instructions and helpful tips to guide you through the process. You can choose from a variety of yarns and colors to create a beanie that reflects your personal style. Whether you prefer a solid color or a fun pattern, the possibilities are endless.
Not only is knitting a beanie a fun and rewarding project, but it also allows you to unleash your creativity and make something truly unique. You can experiment with different stitches and techniques, add embellishments like pom-poms or buttons, and even customize the size to fit your head perfectly. With this free knitting pattern, you’ll be able to create a beanie that you’ll love to wear and show off to your friends.
Women’s Beanie Knitting Pattern Free
If you are a fan of knitting and want to make a cozy beanie for yourself or a loved one, you’re in luck! We have gathered a collection of women’s beanie knitting patterns that are absolutely free. With these patterns, you can easily create stylish and warm beanies for any occasion.
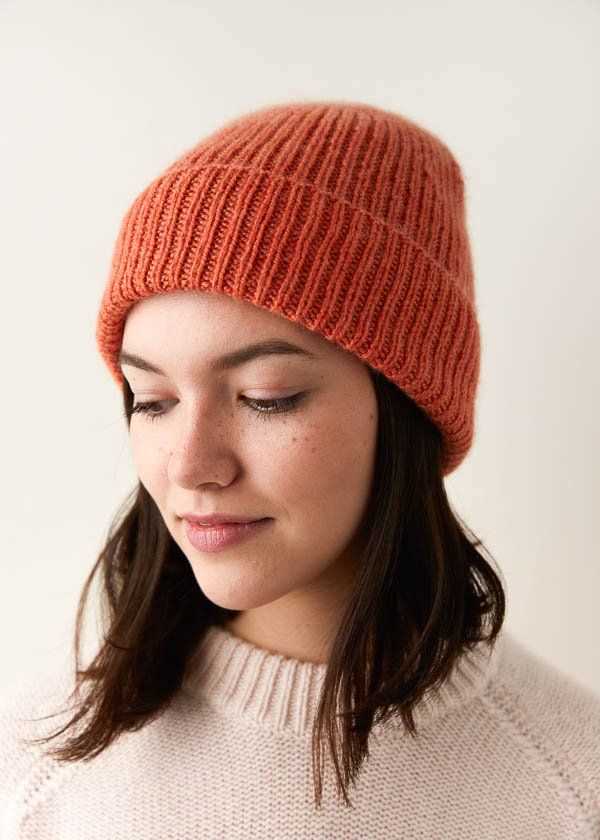
One popular pattern we found is the “Classic Ribbed Beanie.” This pattern is perfect for beginners as it only requires basic knitting stitches. The ribbed texture of the beanie adds a touch of elegance, making it suitable for both casual and formal outfits. You can choose any color of yarn that matches your personal style.
Materials needed:

- Size 8 knitting needles
- Worsted weight yarn
- Tapestry needle
- Stitch marker
Instructions:
- Cast on 100 stitches.
- Join in the round, being careful not to twist the stitches.
- Work in a K2, P2 ribbing pattern for 2 inches.
- Switch to stockinette stitch (knit all stitches) and continue for 6 inches.
- Begin decreasing:
- Round 1: *K2, P2, K2, P2tog* repeat until the end of the round.
- Round 2: Knit all stitches.
- Round 3: *K2, P1, K2, P2tog* repeat until the end of the round.
- Round 4: Knit all stitches.
- Continue decreasing in this pattern until only a few stitches remain.
- Cut the yarn, leaving a long tail. Thread the tail through the tapestry needle, and slip the needle through the remaining stitches. Pull tight to close the top of the beanie.
- Weave in any loose ends.
Once you finish knitting the beanie, you can customize it by adding a pompom or a decorative button. This pattern is versatile, and you can experiment with different colors and yarn types to create unique and personalized beanies. Enjoy the process of knitting and stay warm with your new handmade beanie!
Why Knitting Beanies is So Popular Among Women
Knitting beanies has become an incredibly popular hobby among women for a variety of reasons. One of the main attractions to knitting beanies is the sense of creativity and self-expression it offers. Women can choose from a wide range of patterns and colors, allowing them to customize their beanies to perfectly fit their personal style and preferences. Whether they prefer a classic and simple design or a more intricate and unique pattern, knitting beanies allows women to showcase their individuality through their accessories.
Add to that the meditative and therapeutic nature of knitting, and it’s easy to see why so many women are drawn to this craft. Knitting provides a sense of relaxation and mindfulness, allowing women to unwind and de-stress from their busy lives. The repetitive motions of knitting can be soothing and calming, providing a therapeutic outlet for creativity and self-care. Many women find that knitting beanies not only helps them create beautiful accessories, but also provides a sense of mental and emotional well-being.
Another reason why knitting beanies is popular among women is the practicality of the final product. Beanies are versatile accessories that can be worn in various seasons, making them a staple in many women’s wardrobes. Knitting their own beanies allows women to not only save money, but also personalize their winter wardrobe with unique and handmade pieces. Plus, knitting beanies can be a great way to use up leftover yarn from other projects, making it a sustainable and eco-friendly choice.
Additionally, knitting beanies can foster a sense of community and connection among women. Knitting groups and online communities provide a space for women to share their love for this craft, exchange tips and tricks, and showcase their finished beanies. It’s a way for women to bond over a shared interest and support each other in their creative endeavors. Knitting beanies can bring women together and create lasting friendships, making it a truly special hobby.
In conclusion, the popularity of knitting beanies among women can be attributed to the opportunity for creativity and self-expression, the therapeutic benefits, the practicality of the final product, and the sense of community it fosters. Whether knitting as a form of relaxation or as a way to showcase their style, women find joy and fulfillment in creating their own beanies. So, grab some needles and yarn, and join the growing community of women who enjoy knitting beanies!
Choosing the Right Yarn for Your Beanie
When it comes to knitting a beanie, choosing the right yarn is essential for ensuring a successful and comfortable result. With so many options available, it’s important to consider the specific characteristics of the yarn to find the perfect match for your project.
1. Fiber Content: The fiber content of the yarn will determine its warmth, softness, and durability. Wool is a popular choice for beanies as it provides excellent insulation and is naturally water-resistant. For a softer feel, you can opt for merino wool. Other options include acrylic, which is affordable and easy to care for, or alpaca, which offers a luxurious and lightweight option.
2. Weight: The weight of the yarn refers to its thickness and determines the size of the stitches. For a beanie, you’ll typically want a medium-weight yarn (often labeled as worsted or aran weight). This weight provides enough warmth while still allowing for stitch definition.
3. Gauge: The gauge refers to the number of stitches and rows per inch, and it’s crucial for achieving the desired size and fit of your beanie. Be sure to check the recommended gauge on the yarn label and use the appropriate size needles to match it.
4. Color and Texture: Consider the color and texture of the yarn to complement your desired style. Solid-colored yarns are versatile and can easily match various outfits, while variegated or self-striping yarns can add visual interest to your beanie. Additionally, textured yarns, such as boucle or mohair blends, can create a unique and cozy look.
5. Care Instructions: Lastly, don’t forget to check the care instructions for the yarn. Some yarns may require specific care, such as hand-washing or dry-cleaning, while others can be easily machine-washed and dried. Choose a yarn that suits your preference and lifestyle to ensure that your beanie stays in great condition.
By considering these factors and making an informed choice, you’ll be able to select the perfect yarn for your beanie project. Whether it’s a cozy winter hat or a fashionable accessory, the right yarn can greatly enhance your knitting experience and the final result.
Selecting the Perfect Needle Size for Your Project
When it comes to knitting, selecting the right needle size for your project is essential to achieve the desired outcome. The needle size affects not only the tension and gauge of your stitches but also the overall appearance and feel of the finished piece. Here are some considerations to keep in mind when deciding on the perfect needle size for your knitting project.
Fiber and Yarn Weight
The first factor to consider when choosing a needle size is the fiber content and weight of the yarn you’ll be using. Different fibers and weights require different needle sizes to create the best tension and drape. For example, a lightweight yarn made from fine fibers may require smaller needles to create a tighter fabric, while a bulky yarn may require larger needles for a looser, more open fabric.
- Super Fine and Fine Yarns: These types of yarns, such as lace weight and fingering weight, are best knit with smaller needle sizes, typically ranging from US 0 to US 4.
- Sport and DK Weight Yarns: These medium-weight yarns work well with needle sizes ranging from US 5 to US 7.
- Worsted Weight Yarns: This popular weight, commonly used for a variety of projects, typically requires needle sizes ranging from US 7 to US 9.
- Bulky and Super Bulky Yarns: These heavier yarns often work best with larger needle sizes, ranging from US 10 to US 15 or even larger.
Stitch Patterns and Tension
The stitch pattern you’ll be using also plays a role in selecting the right needle size. Some stitch patterns require a looser gauge, while others require a tighter gauge. For example, lace patterns often benefit from larger needles to create an open and airy fabric, while cables and textured patterns may require smaller needles for more definition.
Additionally, your personal knitting tension can also influence the needle size choice. If you tend to knit tightly, you may need to go up a needle size to achieve the intended gauge. Conversely, if you knit loosely, going down a needle size may be necessary.
Sampling and Swatching
Before starting your project, it’s always a good idea to make a swatch or sample using different needle sizes. This allows you to see how the yarn behaves with different needle sizes and helps determine the appropriate gauge for your project. By knitting a small square or swatch, you can measure the number of stitches and rows per inch and compare them to the pattern’s gauge requirements. Adjusting the needle size accordingly can ensure a perfect fit for your final project.
Remember, the needle size you choose is not set in stone. It’s okay to experiment and make adjustments to achieve the desired result. Happy knitting!
Understanding the Basic Stitches for Knitting a Beanie

Knitting a beanie is a fun and creative project that allows you to create a cozy and stylish accessory for the winter season. To get started, it’s important to understand the basic stitches used in knitting. These stitches will form the foundation of your beanie and determine its shape and texture.
The first stitch you’ll need to master is the knit stitch. This stitch creates a smooth and even fabric and is the building block of many knitting patterns. To knit a stitch, insert the right-hand needle into the stitch on the left-hand needle from left to right, wrap the yarn around the right-hand needle, and pull it through the stitch. This creates a new stitch on the right-hand needle, and the old stitch is passed off onto the right-hand needle.
The purl stitch is another essential stitch for knitting a beanie. It has a bumpy texture and is often used to create ribbing or add visual interest to a pattern. To purl a stitch, insert the right-hand needle into the stitch on the left-hand needle from right to left, wrap the yarn around the right-hand needle, and pull it through the stitch. This creates a new stitch on the right-hand needle, and the old stitch is passed off onto the right-hand needle.
Once you have mastered these basic stitches, you can start exploring more advanced techniques, such as increasing and decreasing stitches, to shape your beanie. There are various methods for increasing stitches, such as yarnovers or knitting into the front and back of a stitch, which allow you to add width to your beanie. Decreasing stitches, on the other hand, help you create a tapered shape for the crown of the beanie.
With a solid understanding of the basic stitches and some practice, you’ll be able to create a beautiful beanie that showcases your knitting skills. Whether you choose to follow a pattern or experiment with your own designs, the possibilities are endless when it comes to knitting a beanie. So grab your needles and yarn, and get ready to create a cozy accessory that will keep you warm all winter long.
Step-by-Step Guide to Casting On and Knitting a Beanie
If you’re looking for a project to keep you warm and stylish during the winter months, knitting a beanie is a perfect choice. With this step-by-step guide, you’ll learn how to cast on and knit a beanie that fits your style and keeps you cozy.
Step 1: Gather Materials
Before you begin knitting your beanie, make sure you have all the necessary materials. You’ll need a pair of knitting needles appropriate for your chosen yarn weight, a measuring tape, a tapestry needle, and of course, your chosen yarn.
Step 2: Determine Gauge
Next, you’ll want to determine the gauge of your knitting. Gauge refers to the number of stitches and rows per inch. This step is crucial to ensure that your beanie will fit properly. To determine your gauge, cast on a few stitches and knit a small swatch.
Step 3: Cast On
Once you have determined your gauge, it’s time to cast on. There are many different cast-on methods you can choose from, such as the long-tail cast-on or the knit cast-on. Select the method that you are most comfortable with, and cast on the required number of stitches according to your pattern.
Step 4: Knit the Body of the Beanie
Now that you have cast on, it’s time to start knitting the body of the beanie. Follow your pattern instructions for the specific stitch pattern and length. Most beanie patterns will have you knit in the round, using circular or double-pointed needles.
Step 5: Decrease for the Crown
Once you have reached the desired length for your beanie, it’s time to shape the crown. Decreasing stitches evenly throughout each round will create a snug fit. Follow your pattern instructions for the specific decrease method and rate.
Step 6: Finish and Secure
Finally, once you have completed the decrease rounds, you’ll need to finish and secure your work. Cut the yarn, leaving a long tail. Thread the tail onto a tapestry needle and slip the needle through the remaining stitches, removing them from the knitting needle. Pull tight to gather the top of the beanie, and then weave in the loose ends.
Following these steps, you’ll be able to create your own personalized beanie that keeps you warm and stylish all winter long.
Add Some Variation to Your Beanie with Different Patterns
When it comes to knitting beanies, there are endless possibilities for adding variety and personality to your creations. One of the easiest ways to achieve this is by experimenting with different patterns. By incorporating unique stitches and textures, you can make your beanie stand out from the rest.
Using cable stitches: Cable stitches are a great way to add an intricate and elegant look to your beanie. By crossing stitches over each other, you can create beautiful braided patterns that instantly elevate the overall design. Whether you opt for a simple single cable or a more complex cable pattern, your beanie is sure to turn heads.
Trying colorwork: Another way to add variation to your beanie is by incorporating colorwork techniques such as fair isle or intarsia. By knitting with multiple colors, you can create intricate patterns and designs that make your beanie truly unique. Whether it’s a subtle gradient or bold geometric shapes, the possibilities are endless.
Playing with lace: If you’re looking to add a touch of femininity to your beanie, lace patterns are a perfect choice. By using delicate lace stitches, you can create a lightweight and breathable beanie that is both stylish and functional. Whether you opt for a simple lace rib or an intricate lace motif, your beanie will exude elegance.
Experimenting with textures: One of the simplest ways to add variation to your beanie is by playing with different textures. By combining knit and purl stitches, you can create ribbing, seed stitch, or even a bobbled texture. These textures add depth and visual interest to your beanie, making it a standout piece.
Incorporating different patterns into your beanie knitting projects allows you to unleash your creativity and make each piece truly unique. Whether you choose to use cable stitches, colorwork, lace patterns, or textures, the possibilities are endless. So, grab your knitting needles and explore the world of patterned beanies!
Finishing Touches: Adding a Pom Pom or Tassel to Your Beanie
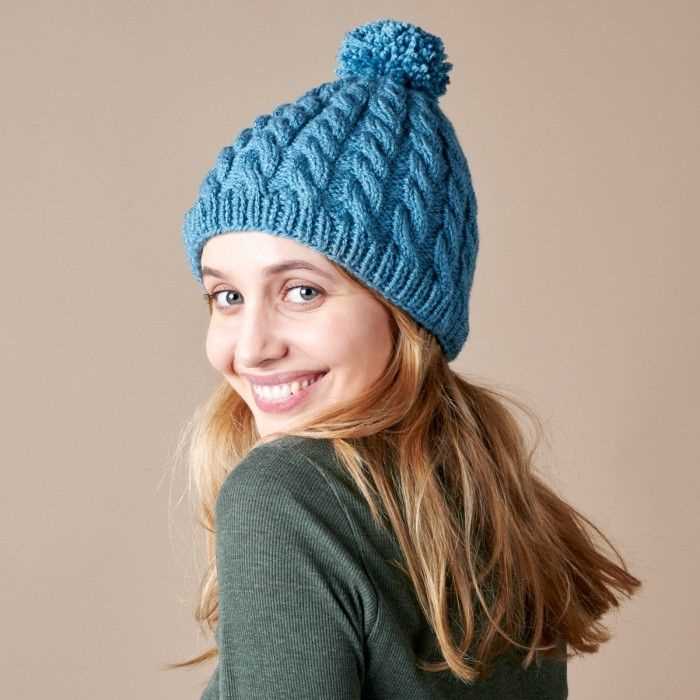
Once you have completed knitting your women’s beanie, it’s time to add some finishing touches to make it truly unique and stylish. One popular option is to add a pom pom to the top of your beanie. Pom poms are fun and playful, and they can add a touch of whimsy to your winter accessory.
To create a pom pom, you will need a pom pom maker or you can make one yourself using cardboard or a fork. Simply wrap your chosen yarn around the pom pom maker, tie it tightly in the middle, and cut through the loops. Fluff and trim the yarn to create a round and full pom pom. Then, attach it securely to the top of your beanie using a yarn needle and some extra yarn.
If you prefer a more elegant and sophisticated look, you may opt for a tassel instead. Tassels can be made using a similar technique as a pom pom, but instead of creating a round shape, you create long strands of yarn. To make a tassel, wrap your yarn around a small piece of cardboard or a book multiple times. Wrap a separate piece of yarn tightly around the top portion of the loops, create a loop to attach the tassel, and then cut through the bottom loops. Adjust the length of the strands if needed, and attach the tassel to the corner or bottom edge of your beanie.
Both pom poms and tassels can be made in various colors and sizes to complement your beanie. They are simple to make and can be easily attached or removed, allowing you to change up the look of your beanie whenever you desire. So go ahead and add some flair to your finished beanie by including a pom pom or tassel, and showcase your knitting skills with pride!
How to Properly Block and Shape Your Beanie
Blocking and shaping your beanie is an important step in the knitting process. It helps to give your beanie a professional and polished look, and ensures that it fits properly on your head. Here are some steps to help you properly block and shape your beanie.
Step 1: Before blocking your beanie, you should first wash it gently in cold water with a mild detergent. This will remove any dirt or oils and help the yarn to relax and reshape.
Step 2: After washing, gently squeeze out the excess water from your beanie. Avoid twisting or wringing it, as this can cause the fibers to stretch or distort. Instead, roll it into a clean towel and press gently to remove the water.
Step 3: Next, you will need to shape your beanie. If your beanie has a ribbed or textured pattern, you can shape it by stretching it horizontally and vertically to achieve the desired size and fit. Use your hands to gently shape the beanie into the desired shape and size.
Step 4: Once you have shaped your beanie, you can proceed to block it. Lay the beanie flat on a clean, dry towel and gently pat it into the desired shape. Smooth out any wrinkles or bumps in the fabric.
Step 5: Finally, allow your beanie to dry completely in a well-ventilated area. This may take a day or two, depending on the thickness of the yarn and the humidity of the air. Avoid hanging the beanie to dry, as this can cause it to stretch.
Following these steps will ensure that your beanie looks great and fits perfectly. Remember to always read and follow the care instructions for your specific yarn to avoid any damage or distortion during blocking and shaping.
Maintaining Your Beanie: Washing and Storage Tips
Proper care and maintenance are essential to prolong the life of your beloved beanie. Follow these washing and storage tips to keep your beanie looking its best.
Washing Tips:
- Read the Care Instructions: Before washing your beanie, always check the care instructions on the label. This will provide guidance on the appropriate washing method.
- Hand Wash: It is generally recommended to hand wash your beanie to prevent any damage. Fill a basin with lukewarm water and mild detergent.
- Gently Wash: Submerge the beanie in the soapy water and gently agitate it with your hands. Avoid excessive rubbing or twisting, as this can lead to stretching or misshaping.
- Rinse Properly: Rinse the beanie with clean water until all the soap is removed. Press out any excess water, but do not wring or twist the beanie.
- Dry Flat: Lay the beanie flat on a clean towel or drying rack to air dry. Avoid hanging or using a dryer, as this can cause misshaping.
Storage Tips:
- Clean Before Storage: Make sure your beanie is clean and fully dry before storing it. This will prevent any potential damage from moisture or dirt.
- Fold Properly: Fold the beanie neatly to avoid any creases or wrinkles. This will help maintain its shape during storage.
- Choose a Pillowcase or Bag: It is recommended to store your beanie in a breathable fabric, such as a pillowcase or a cloth bag. This will protect it from dust and pests while allowing air circulation.
- Avoid Sunlight and Humidity: Store your beanie in a cool and dry place away from direct sunlight and high humidity. Exposure to these elements can cause color fading or mold growth.
- Rotate Occasionally: To prevent any potential damage from long-term storage, consider rotating your beanies every few months.
By following these washing and storage tips, you can ensure that your beanie remains in excellent condition for many winters to come. Remember to always check the care instructions provided by the manufacturer for specific recommendations on your beanie.
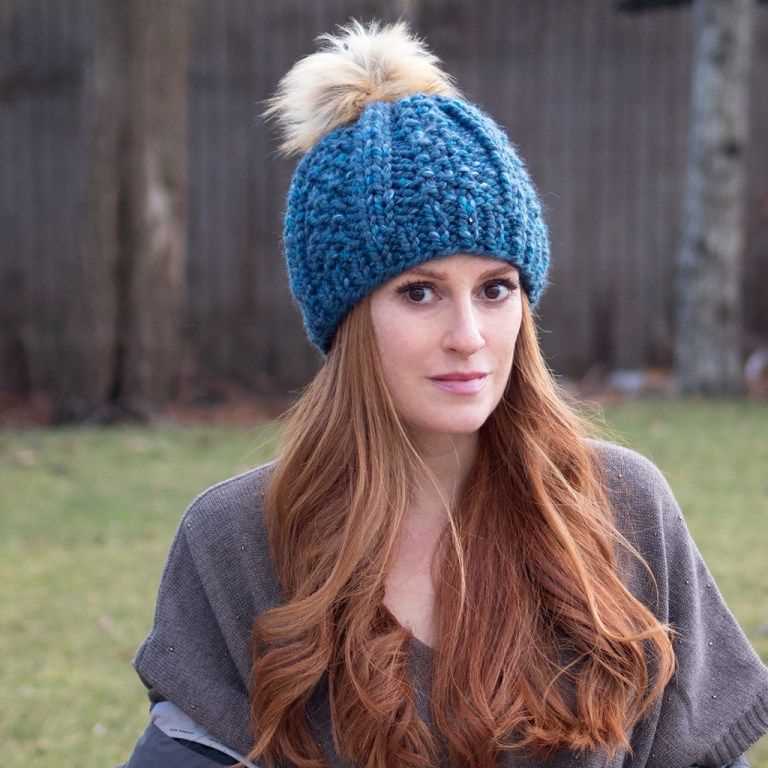
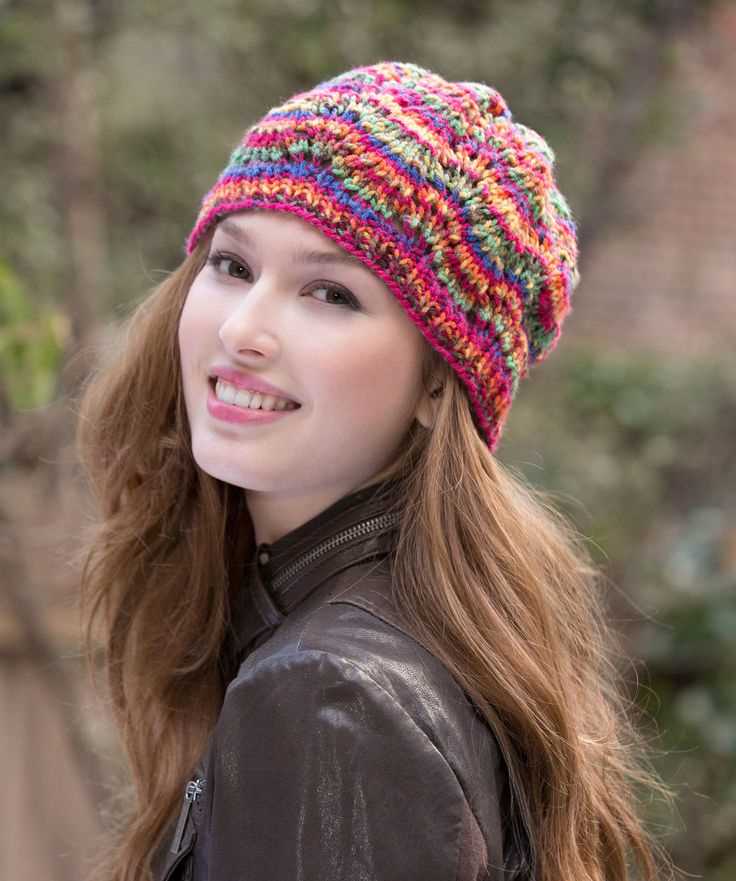
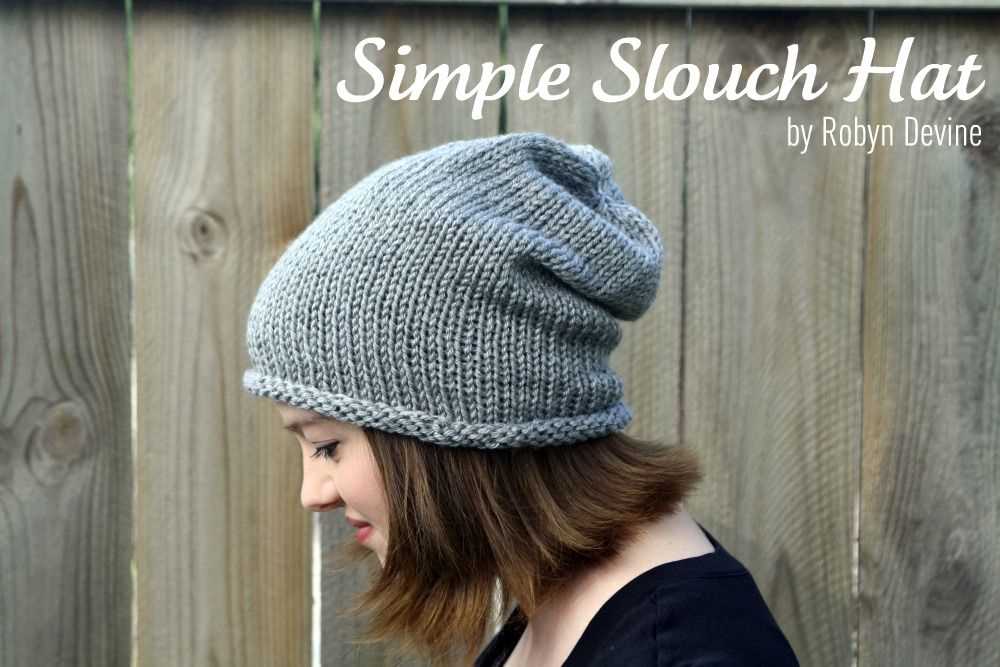
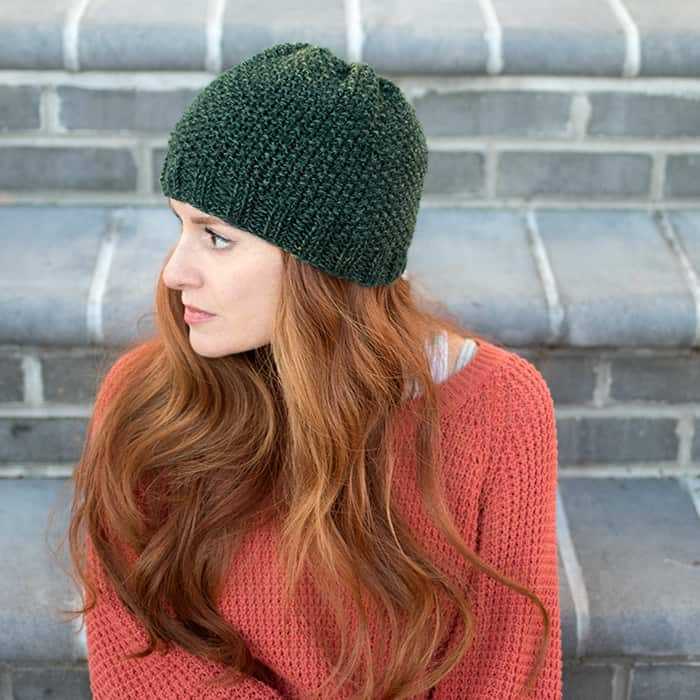
Get Inspired: Showcase of Beautiful Finished Women’s Beanies
After going through the process of selecting the perfect women’s beanie knitting pattern and completing the project, it’s time to showcase your beautiful finished beanies. Whether you are gifting them to your loved ones or adding them to your personal collection, these beanies are sure to impress with their style and warmth. Here are some examples that can inspire you and give you ideas for your next knitting project.
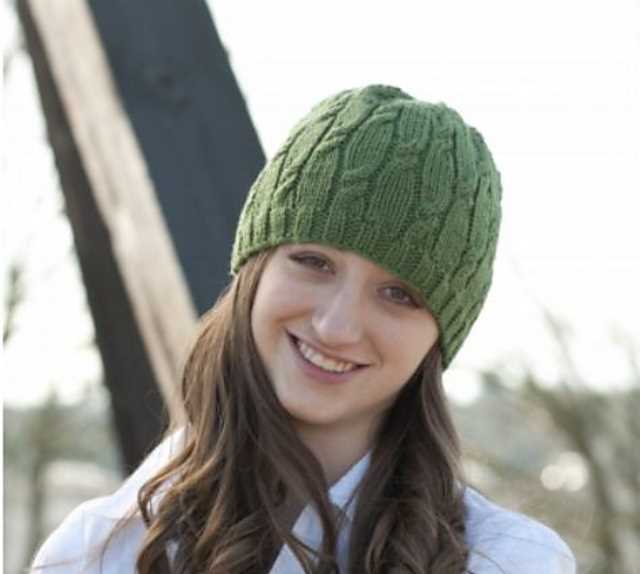
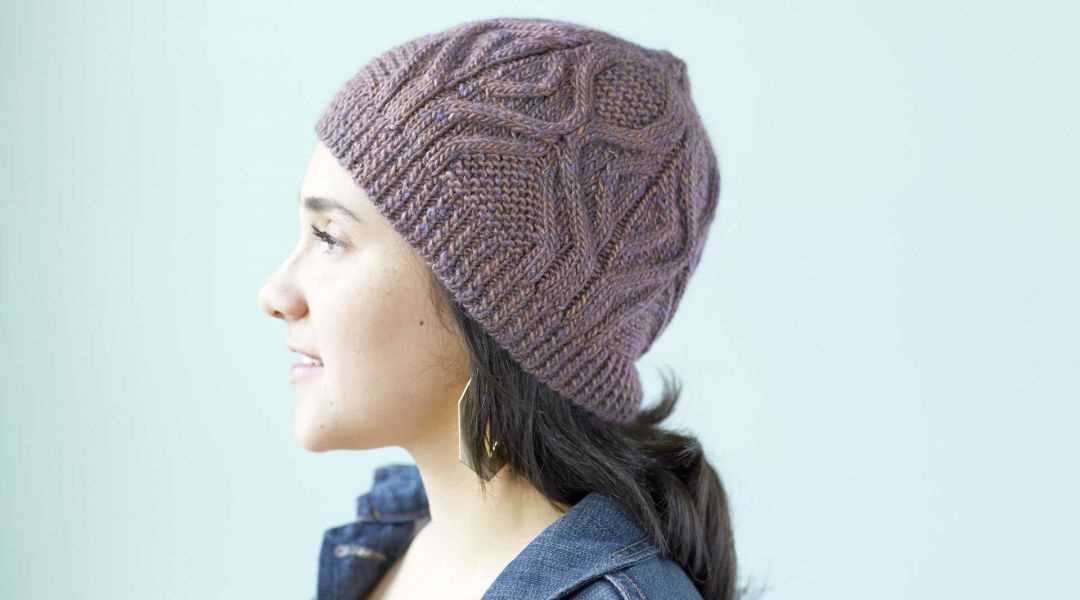
1. Classic Cable Beanie
The classic cable beanie is a timeless design that adds a touch of elegance to any outfit. Knit in a neutral color like gray or black, it complements both casual and formal looks. The intricate cable pattern adds depth and texture to the beanie, making it a true statement piece. Pair it with a cozy sweater and jeans for a chic winter look.
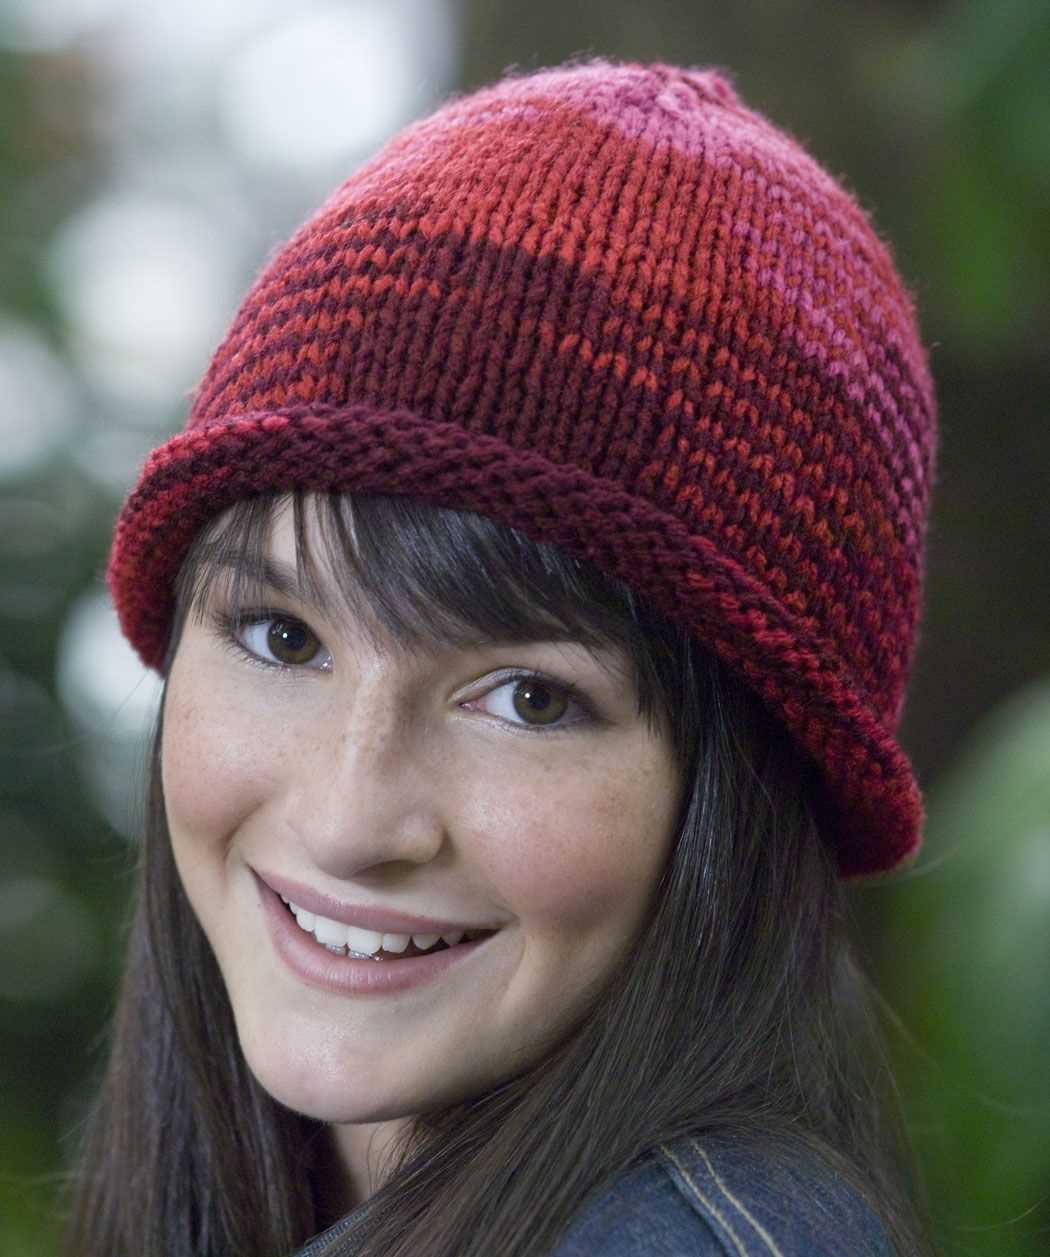
2. Colorful Striped Beanie
If you’re looking for a beanie that adds a pop of color to your winter wardrobe, a colorful striped beanie is the way to go. Choose a combination of bright and playful colors to create a fun and vibrant look. Whether you opt for a thick or thin stripe pattern, this beanie is sure to make a stylish statement. Wear it with a matching scarf or gloves for a coordinated look.
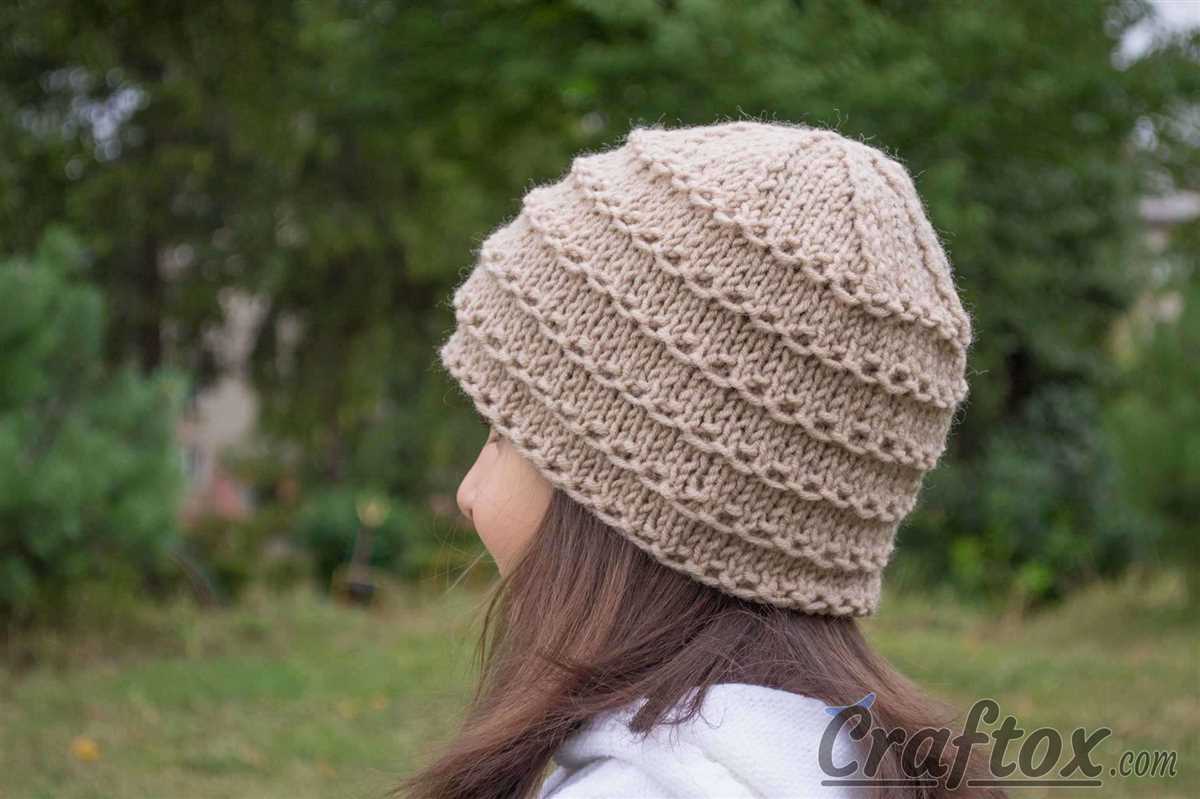
3. Chunky Ribbed Beanie
For those extra chilly days, a chunky ribbed beanie is a must-have. The thick knitting pattern and ribbed texture provide extra warmth and coziness. Opt for a chunky yarn in a neutral or earthy tone to create a versatile beanie that goes well with any outfit. This beanie is perfect for outdoor winter activities or simply lounging by the fireplace.
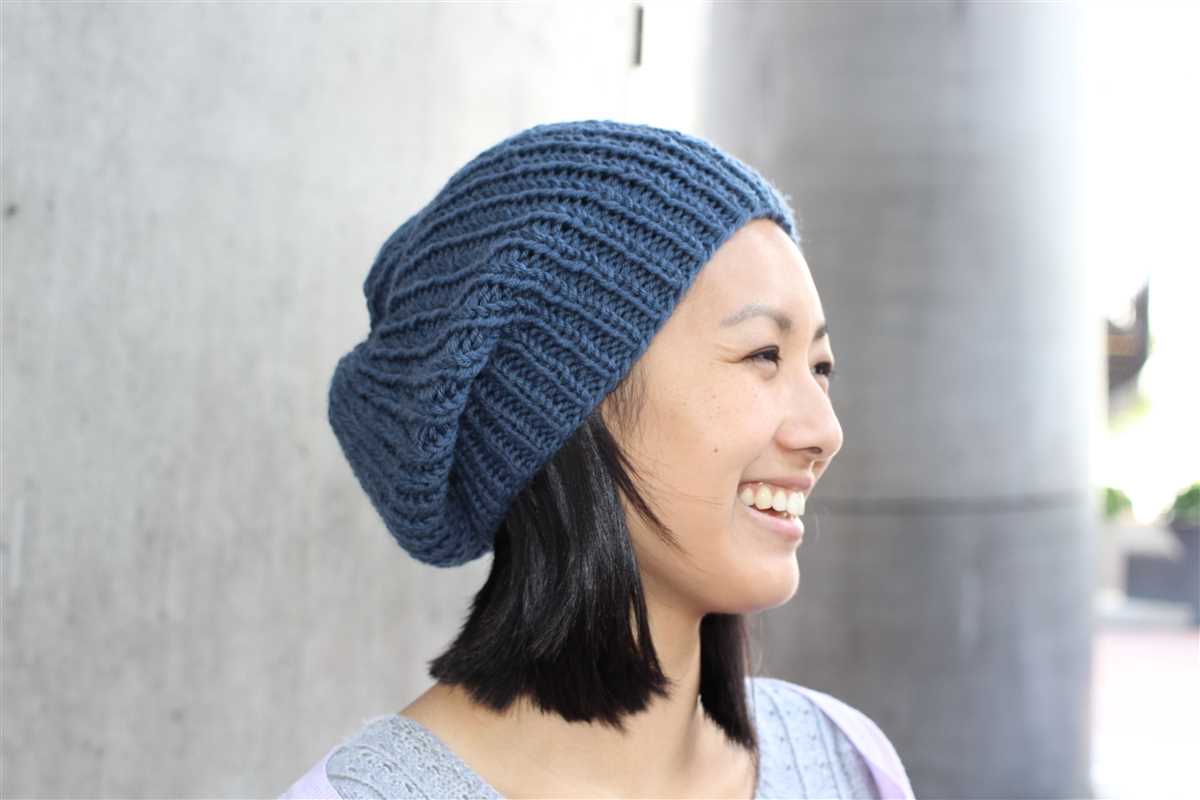
- 4. Slouchy Beanie
For a more relaxed and casual look, try knitting a slouchy beanie. This style is all about comfort and effortless style. The loose fit and extra length create a trendy and laid-back vibe. Knit it in a soft and lightweight yarn to achieve the perfect slouch. Pair it with jeans, a cozy sweater, and ankle boots for an effortlessly cool winter outfit.
These are just a few examples of the beautiful finished women’s beanies that you can create using a free knitting pattern. Let your creativity and personal style shine through as you experiment with different stitches, colors, and patterns. Whether you’re a beginner or an experienced knitter, the possibilities are endless when it comes to designing your own unique women’s beanie. Happy knitting!