
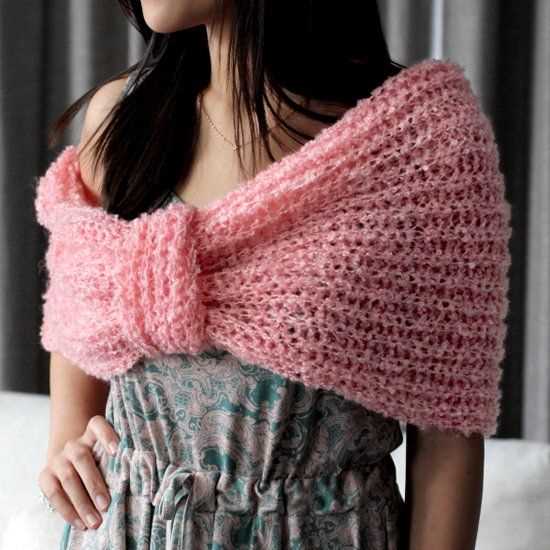
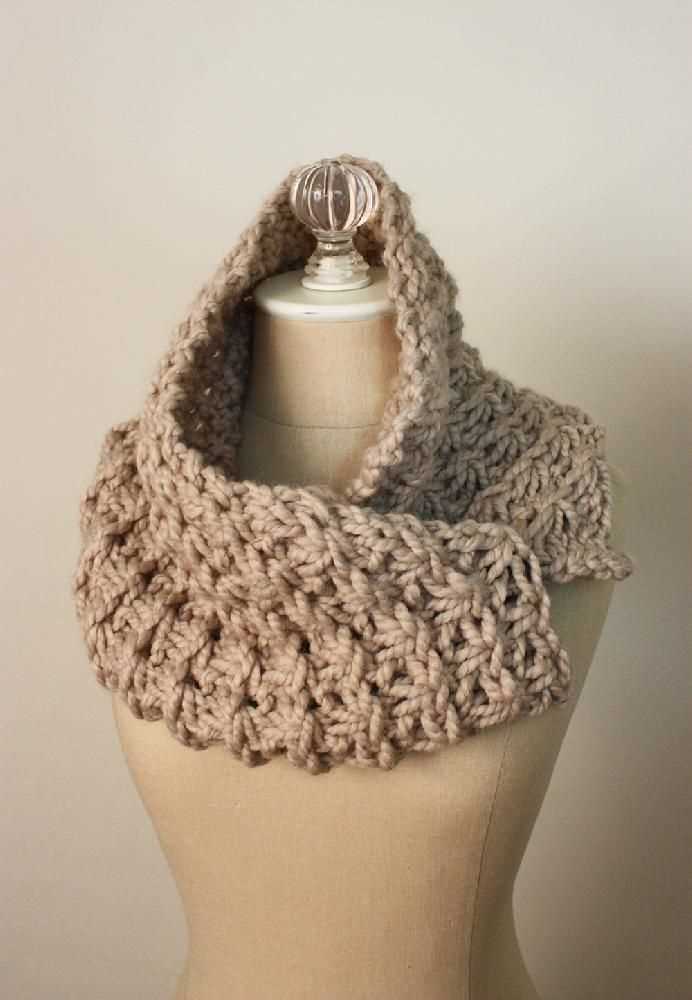
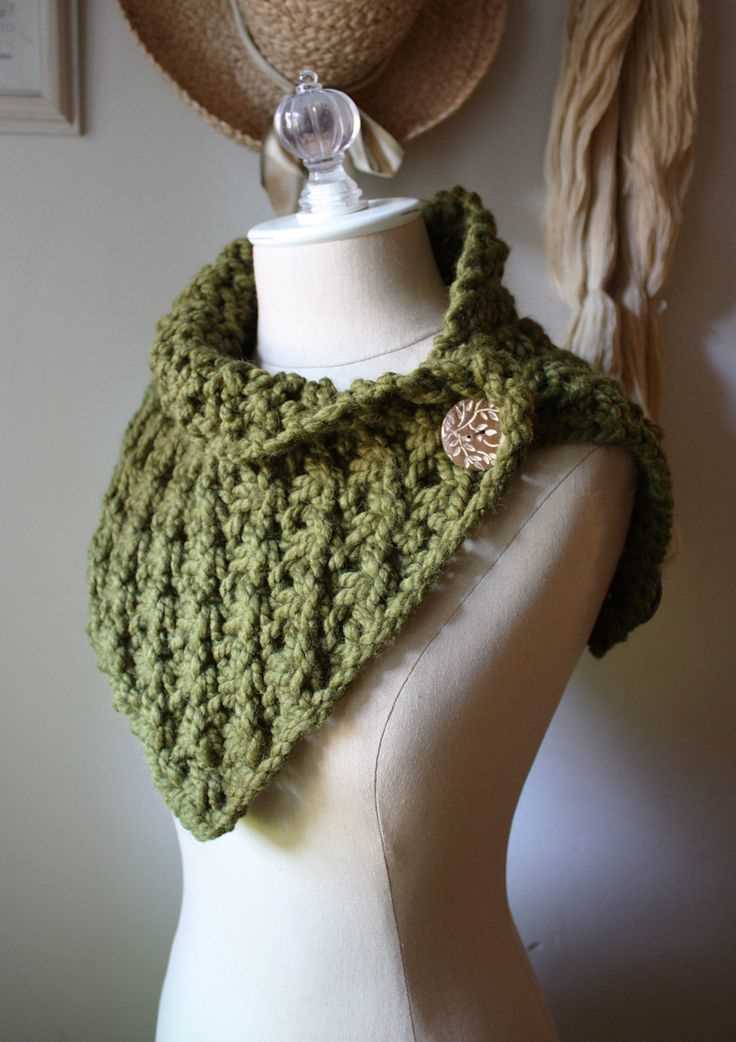
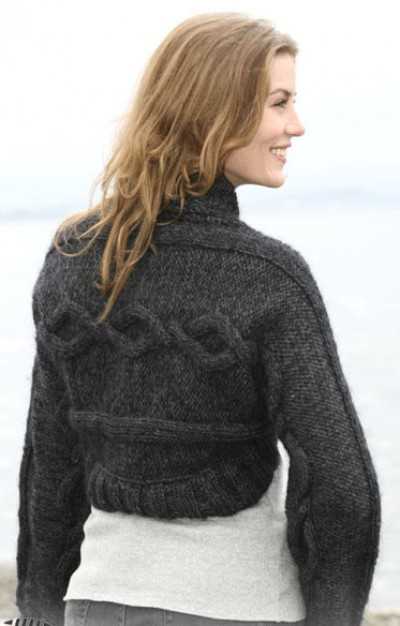
Are you in search of a cozy and stylish accessory to keep your shoulders warm during the colder months? Look no further! In this article, we will be sharing a delightful knit shoulder warmer pattern that is not only free, but also easy to follow. Whether you are a seasoned knitter or a beginner looking for a new project, this pattern is perfect for you.
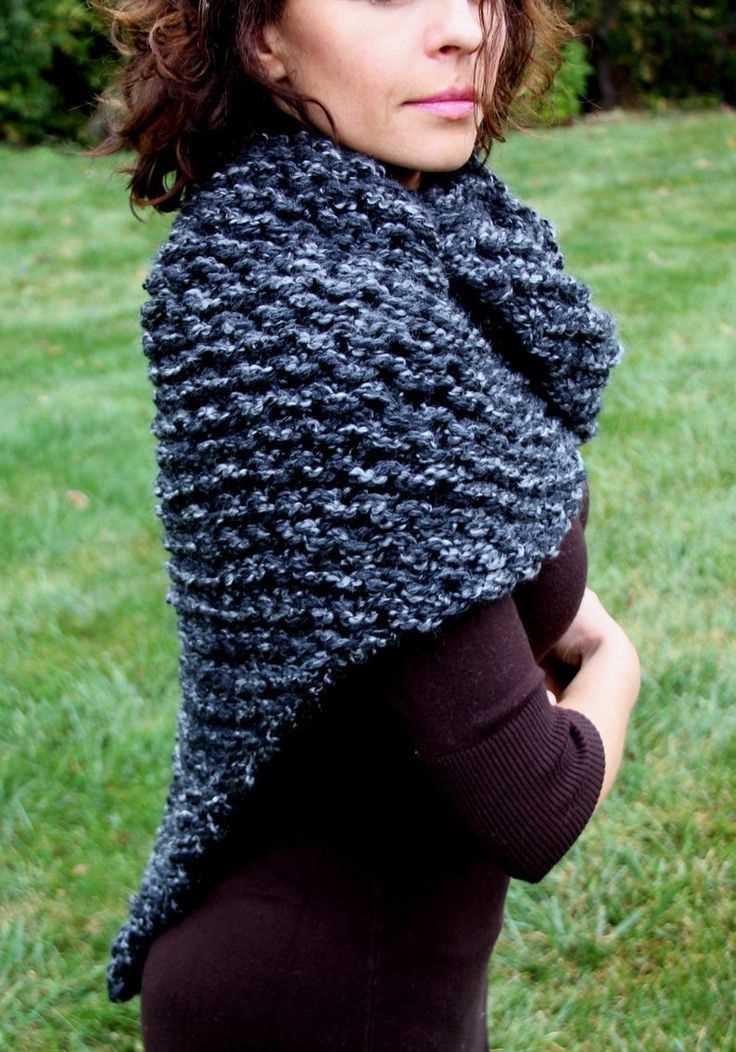
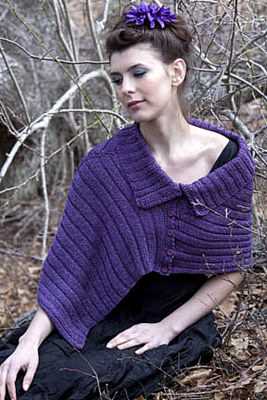
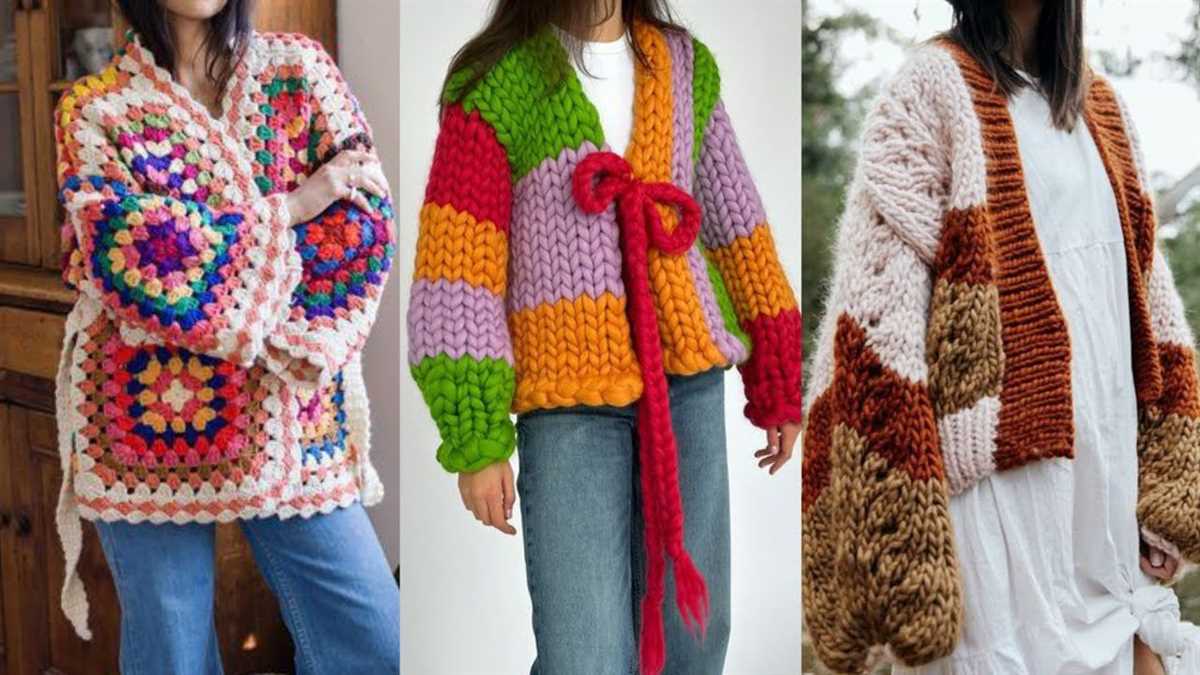
Made with soft and chunky yarn, this shoulder warmer will not only provide you with warmth and comfort, but also add a touch of style to any outfit. With its trendy design and versatility, it can be worn over a dress, a sweater, or even a t-shirt, making it a must-have accessory for every fashion-conscious individual.
The best part about this knit shoulder warmer pattern is that it is completely customizable. You can choose your favorite yarn color and adjust the size to fit your preferences. The pattern includes detailed instructions, as well as photos to guide you through each step, ensuring that even beginners can successfully complete this project.
Knit Shoulder Warmer Pattern Free
Are you looking for a cozy and stylish accessory to keep your shoulders warm during the chilly days? Look no further, because we have a free knit shoulder warmer pattern just for you! This pattern is perfect for beginners and experienced knitters alike, and it can be customized to fit your personal style and taste.
To get started, gather your materials: a pair of knitting needles, yarn in your desired color, and a tapestry needle for weaving in the ends. Once you have everything ready, cast on the desired number of stitches, keeping in mind that the final width of the shoulder warmer will depend on the number of stitches cast on.
For the body of the shoulder warmer, you can use any stitch pattern you like – be it simple stockinette, ribbing, or even a lace pattern. This is your chance to get creative and experiment with different textures and designs. Just make sure to keep track of your pattern if you decide to switch stitches.
As you work your way through the rows, remember to periodically try on the shoulder warmer to ensure that it fits comfortably and covers your shoulders adequately. Once you are happy with the length, it’s time to bind off and weave in any loose ends.
To add some extra flair to your shoulder warmer, consider adding a button closure or an interesting edging. You can also experiment with different types of yarn – from soft and fuzzy to chunky and textured – to create a unique and personalized accessory.
With this free knit shoulder warmer pattern, you’ll not only stay warm but also showcase your knitting skills. It’s the perfect project for those who are looking for a quick and satisfying knitting project. So grab your needles and get started on creating your own cozy shoulder warmer!
Choosing the Right Yarn
When it comes to knitting a shoulder warmer, choosing the right yarn is an important decision. The type of yarn you choose will determine the feel, drape, and warmth of your finished project.
Consider the fiber: There are many different types of yarn fibers to choose from, including wool, acrylic, cotton, and blends. Each fiber has its own unique properties, so think about what you want your shoulder warmer to feel like. Wool is known for its warmth and elasticity, while acrylic is soft and easy to care for. Cotton is breathable and lightweight, perfect for warmer weather projects.
- Take note of the thickness: Yarn comes in various thicknesses, also known as weights. The thickness you choose will affect the overall look and feel of your shoulder warmer. If you want a cozy and chunky shoulder warmer, opt for a bulky or super bulky yarn. For a lighter and more delicate look, choose a fingering or lace weight yarn.
- Consider the color: The color of your yarn can make a big impact on the overall look of your shoulder warmer. Consider the style and vibe you want to achieve, and choose a color that complements your wardrobe. If you’re unsure, neutral colors like black, gray, or cream are versatile and timeless.
In conclusion, choosing the right yarn for your shoulder warmer is essential for achieving the desired look and feel. Consider the fiber, thickness, and color to find the perfect yarn for your project.
Selecting the Appropriate Needle Size
Choosing the right needle size is crucial when knitting a shoulder warmer. The needle size will determine the overall size and texture of the finished garment. The pattern usually specifies the recommended needle size, but it’s important to consider other factors as well.
Firstly, the type of yarn being used plays a significant role in needle selection. Different yarns have different thicknesses and textures, and they will require different needle sizes to achieve the desired result. It’s essential to match the needle size to the yarn weight to ensure a well-balanced and even fabric.
Another factor to consider is the desired drape or stiffness of the shoulder warmer. A smaller needle size will result in a tighter and denser fabric, while a larger needle size will create a looser and more fluid fabric. The pattern’s recommended needle size should align with the desired texture and drape of the final product.
It’s always recommended to swatch before starting a knitting project, especially when it comes to selecting the needle size. Swatching allows you to test the tension and gauge of your knitting and make adjustments if necessary. By swatching, you can see how the yarn and needle size work together and ensure that the final garment will fit as desired.
In summary, selecting the appropriate needle size for knitting a shoulder warmer is critical for achieving the desired size, texture, and drape of the finished garment. Considering the yarn weight, desired drape, and swatching before starting the project will help ensure a successful knitting experience.
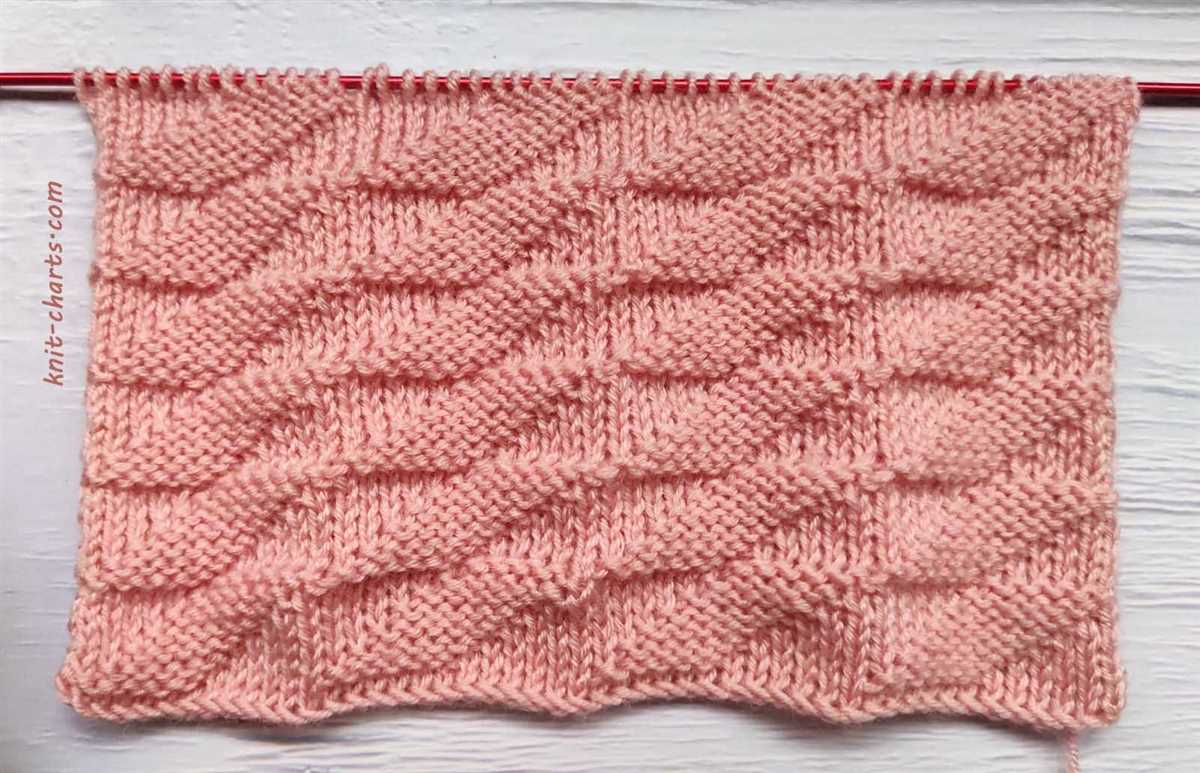
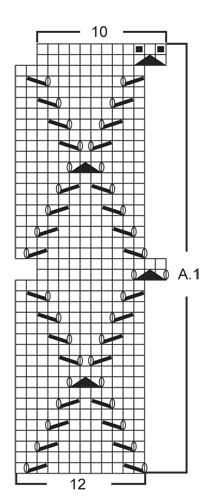
Understanding the Stitch Pattern
When it comes to knitting a shoulder warmer, understanding the stitch pattern is crucial. The stitch pattern determines the overall look and texture of the garment, so it’s important to choose one that suits your style and desired outcome.
The Garter Stitch: One of the simplest and most commonly used stitch patterns is the garter stitch. This pattern involves knitting every row, creating a ridged texture that is both sturdy and stretchy. The garter stitch is great for beginners and adds a classic, timeless look to any garment.
The Stockinette Stitch: Another popular stitch pattern is the stockinette stitch, which alternates between knit and purl rows. This results in a smooth, flat fabric with a distinct “V” pattern on one side and a purl texture on the other side. The stockinette stitch is often used for creating a sleek, polished look.
- Seed Stitch: The seed stitch is a textured pattern made by alternating knit and purl stitches within the same row. This creates a bumpy, pebbled texture that adds depth and visual interest to the fabric. The seed stitch is commonly used for borders, cuffs, and decorative details.
- Ribbing: Ribbing is a stitch pattern often used for creating stretchy, form-fitting garments. It involves alternating knit and purl stitches in a specific sequence, such as K1, P1 or K2, P2. Ribbing is commonly used for cuffs, hems, and necklines.
- Lace Stitch: For a more delicate and intricate look, lace stitch patterns can be used. Lace stitch patterns usually involve yarn overs and decreases to create an open, lacy fabric. Lace stitches are commonly used for shawls, wraps, and feminine garments.
Understanding the stitch pattern will not only help you choose the right design for your shoulder warmer but also ensure that you can follow the instructions accurately. By mastering different stitch patterns, you can create unique and personalized garments that reflect your knitting skills and style.
Casting On Stitches
When starting a knitting project, the first step is to cast on stitches. This process creates a foundation row of stitches that will be worked into throughout the project. There are several methods for casting on stitches, each with its own benefits and uses.
Long-Tail Cast On: One of the most commonly used methods, the long-tail cast on creates a flexible and neat edge. To do this cast on, you will need to estimate the length of yarn needed for the cast on and leave a long tail. The stitches are formed by a combination of loops created from the tail and the working yarn.
Knit Cast On: The knit cast on is a simple method that creates a sturdy edge. It is a good choice for projects that require a firm and stable foundation. To do this cast on, you will begin with a slipknot on one needle and then insert the second needle into the loop, wrapping the working yarn around it and pulling it through to create a new stitch.
- Provisional Cast On:
- Cable Cast On:
- Backward Loop Cast On:
These are just a few examples of the many casting on techniques available to knitters. The choice of cast on method will depend on factors such as the desired edge finish, the type of project, and personal preference. It is important to practice different cast on methods to find the ones that work best for you and your knitting projects.
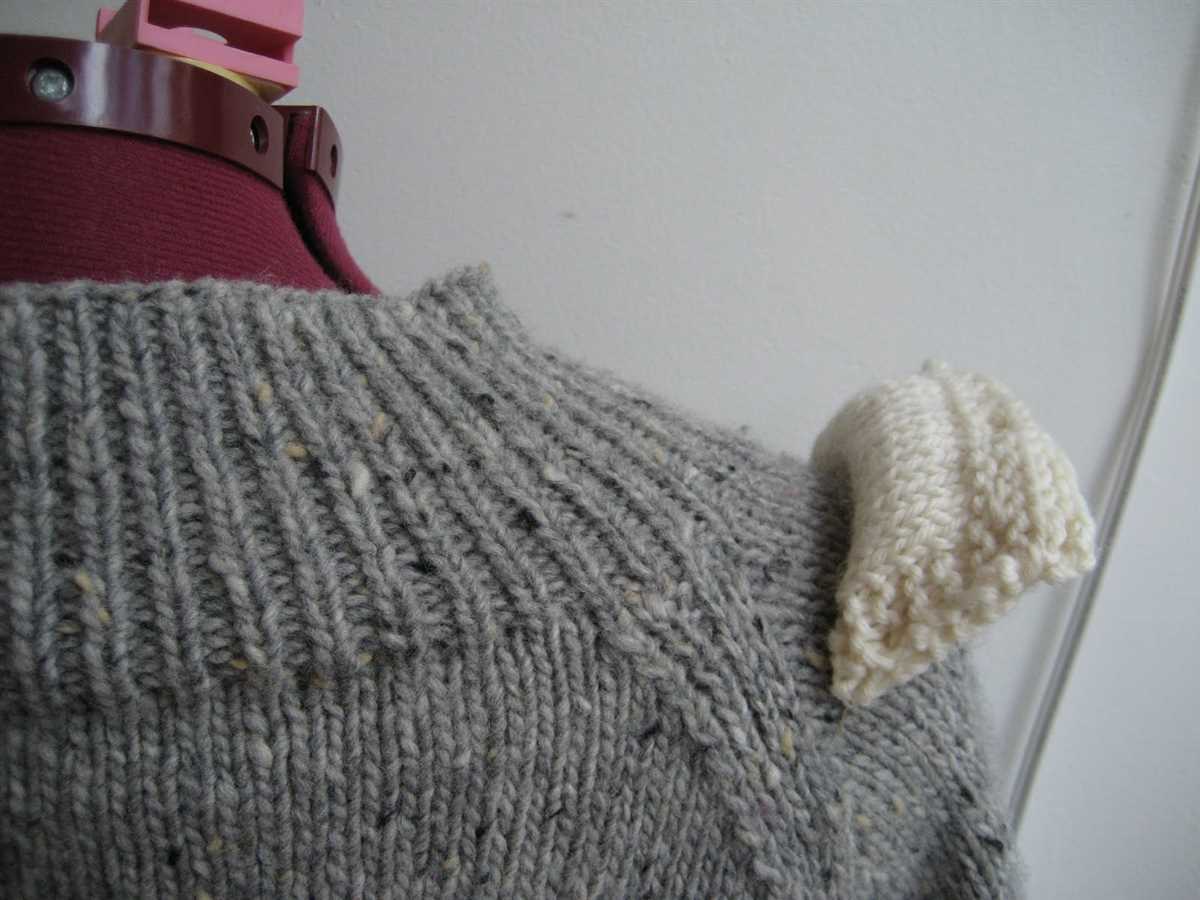
Knitting the Body of the Shoulder Warmer
Once you have finished knitting the ribbed collar of the shoulder warmer, it’s time to move on to the body. The body of the shoulder warmer is where you can have some fun with different stitch patterns and textures to add visual interest to your project. Here, we will outline a simple stitch pattern for the body, but feel free to experiment with different stitch patterns and textures to make it your own!
Materials Needed:
- Knitting needles in the appropriate size for your yarn
- Yarn of your choice
- Stitch markers
- Tapestry needle
Begin by casting on the desired number of stitches for the width of your shoulder warmer. You can refer to the pattern instructions for the specific number of stitches to cast on.
For the body of the shoulder warmer, we will be using a simple garter stitch pattern. Knit every row for the desired length of the body. You can measure the length by wrapping the knitted piece around your shoulders to determine the desired fit and length.
It’s a good idea to place stitch markers at the beginning and end of each row to help keep track of your progress and to make it easier to count rows as you work. This will also help if you need to make any adjustments later on.
Continue knitting in garter stitch until the body reaches the desired length. To ensure the shoulder warmer fits comfortably, it’s a good idea to try it on periodically as you knit to make any necessary adjustments for size or length.
Once you have reached the desired length, you can finish the body of the shoulder warmer by binding off all stitches. Weave in any remaining yarn ends using a tapestry needle, and your shoulder warmer is now ready to be worn and enjoyed!
Creating the Buttonholes
Adding buttonholes to your knit shoulder warmer is an essential step that allows you to fasten the piece securely. Follow these easy steps to create the buttonholes:
Step 1: Determine the placement of your buttonholes
First, decide where you want your buttonholes to be positioned on your knit shoulder warmer. Measure the distance between each buttonhole, ensuring they are evenly spaced across the front or back of the garment.
Step 2: Mark the positions
Using a stitch marker or contrasting yarn, mark the positions where you want your buttonholes to be. Make sure the markers are easily visible.
Step 3: Create the buttonhole
When you reach the marked buttonhole position while knitting, it’s time to create the buttonhole. On the row where the buttonhole will be made, work to the marked stitch.
- Moving the marker: Slip the marked stitch onto the right-hand needle.
- Creating the buttonhole: With the yarn in front, bring the yarn to the back between the needles, then bring it to the front again over the right-hand needle.
- Binding off: Slip the next stitch onto the right-hand needle, pass the slipped marker stitch over the slipped stitch, and off the right-hand needle.
- Finishing: Continue knitting the row as usual.
Step 4: Repeat for each buttonhole
Continue knitting your shoulder warmer, repeating steps 3 and 4 for each buttonhole on your garment, as indicated by your marker placements.
With these simple steps, you can easily create buttonholes on your knit shoulder warmer, allowing you to add buttons or fasteners of your choice and give your garment a functional and stylish touch.
Shaping the Neckline
When knitting a shoulder warmer, one of the key areas to focus on is shaping the neckline. The neckline is where the shoulder warmer sits on the shoulders and around the neck, so it’s important to create a flattering and comfortable shape. There are several different ways to shape the neckline depending on the desired look and the knitting pattern being used.
1. Basic Shaping: The simplest way to shape the neckline is by knitting decreases or increases at the edges of the work. This can be done by either knitting two stitches together (k2tog) or by making a yarn over (yo) and knitting into it on the next row. Decreases create a narrower neckline, while increases create a wider neckline. The number and frequency of these shaping stitches will vary depending on the specific pattern instructions.
- Example: To shape a wider scoop neck, the pattern may instruct to make a yarn over at each end of the work on every other row.
- Example: To shape a higher crew neck, the pattern may instruct to knit two stitches together at each end of the work on every other row.
2. Short Rows: Another technique for shaping the neckline is by using short rows. Short rows are partial rows of knitting that create a curved shape. By knitting only part of the row and then turning the work before reaching the end, the fabric is worked in a different direction, creating an asymmetrical shape. Short rows can be used to shape a deeper scoop neck or to create a more tailored fit around the neck.
- Example: To shape a deeper scoop neck, the pattern may instruct to knit a certain number of stitches and then turn the work before reaching the end of the row, creating a gradual curve.
- Example: To create a more tailored fit around the neck, the pattern may instruct to knit a certain number of stitches and then turn the work, alternating sides until reaching the desired shape.
Finishing Touches: Blocking and Weaving in Ends
Once you have completed knitting your shoulder warmer, there are a few important finishing touches that will give your project a polished and professional look. Blocking and weaving in ends are two essential steps in the final stages of completing a knitted item.
Blocking
Blocking is the process of shaping and sizing the knitted fabric to ensure that it lays flat and even. It can help to even out any irregularities in tension and give your shoulder warmer a smooth and finished appearance. To block your shoulder warmer, start by filling a basin or sink with lukewarm water and a small amount of gentle detergent. Gently submerge your knitted piece in the water, making sure it is fully saturated. Remove it from the water and gently squeeze out any excess moisture.
Next, lay your shoulder warmer out on a clean towel or blocking mat, shaping it to the desired dimensions. Use rust-proof pins to secure the edges and corners in place, being careful not to stretch the fabric too much. Allow it to air dry completely before removing the pins. Blocking can significantly improve the drape and overall look of your shoulder warmer, so it is worth taking the time to do it properly.
Weaving in Ends
After blocking, the next step is to weave in any loose ends or yarn tails that were left from changing colors or joining new balls of yarn. This is important for both the aesthetic appeal and the durability of your shoulder warmer. Using a blunt tapestry needle, carefully thread the yarn tail through the stitches on the wrong side of the fabric, following the path of the knitting. Be sure to weave in the end for a few inches to ensure that it is secure and won’t come undone with wear.
If you have multiple ends to weave in, it can be helpful to split them up and weave them in on different rows or sections of the fabric. This can help to distribute the bulk of the woven ends more evenly and prevent any lumps or bumps from forming. Take your time and be thorough in weaving in all the ends to ensure a clean and finished look.
By taking the time to block and weave in ends properly, you can elevate the quality and appearance of your shoulder warmer. These finishing touches may seem small, but they can make a big difference in the final product. Now that your shoulder warmer is complete, you can proudly wear or gift it, knowing that you have put in the effort to create a beautiful and well-finished knitted accessory.
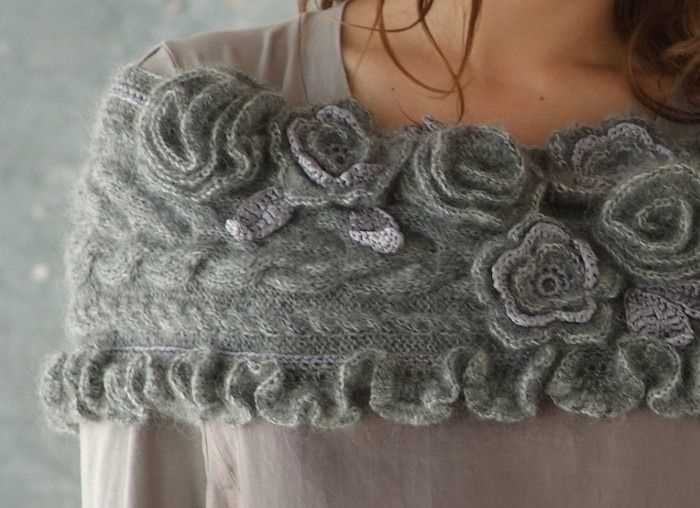
Adding Decorative Edging
When it comes to finishing a knitted shoulder warmer, adding a decorative edging can be the perfect final touch. There are many different options to choose from, depending on the desired look and style. Here are a few ideas to consider:
Picot Edging: This is a classic and delicate option. It creates small, pointed loops along the edge of the shoulder warmer, adding a decorative detail. To create a picot edging, simply cast on a few stitches, then bind them off in the next row, creating a looped effect.
Ribbed Edging: For a more structured and classic look, a ribbed edging is a great choice. This can be as simple as continuing the ribbing pattern used in the main body of the shoulder warmer, or creating a different ribbing pattern for the edging. Knitting a few rows of ribbing at the edges can provide a clean and polished finish.
- Lace Edging: If you’re looking for a more intricate and feminine look, a lace edging can be a beautiful choice. There are countless lace patterns to choose from, ranging from simple eyelet patterns to more complex lace motifs. Adding a lace edging can give the shoulder warmer an elegant and delicate touch.
- Crocheted Edging: A crocheted edging can also be a great option for adding a decorative touch to a knitted shoulder warmer. Whether it’s a simple single crochet border or a more complex crochet pattern, using a crochet hook can create a different texture and look. It can also be a great way to add a pop of color to the shoulder warmer.
Remember to consider the overall style and intention of the shoulder warmer when choosing the decorative edging. Experimenting with different patterns and techniques can help create a unique and personalized finished piece.
Sewing on Buttons
Buttons are an essential component of many garments and accessories, and knowing how to sew them on properly can make all the difference in the final look and durability of your project. Whether you’re sewing on a button for decorative purposes or to secure a closure, there are a few key steps to keep in mind.
1. Choose your thread and needle: When sewing on buttons, it’s important to choose a thread that matches the color and weight of your fabric. For lightweight fabrics, a finer thread may be appropriate, while heavier fabrics may require a thicker, more durable thread. Using a sharp needle will also make it easier to sew through the buttonholes.
2. Positioning the button: Before sewing on the button, determine where it should be placed on your garment or accessory. Mark the placement using pins or tailor’s chalk to ensure that it is centered and aligned properly. If you are sewing on multiple buttons, use a ruler or measuring tape to ensure that they are evenly spaced.
3. Creating a shank: To give your button some space to fit over the fabric, you can create a shank. This is especially important for thicker fabrics or if you want to add some dimension to your button. After sewing the button in place, create a loop or stack a few stitches beneath the button to form a small raised area.
4. Sewing technique: To sew on a button, start by knotting your thread and threading it through the eye of your needle. Bring the needle up through one of the buttonholes and then down through the opposite hole, going through the fabric beneath. Repeat this process several times, making sure to pull the thread tight each time to secure the button in place. Finish off by creating a knot on the backside of the fabric.
5. Finishing touches: Once the button is securely attached, trim any excess thread and remove any marks made during the positioning process. Take a moment to test the button’s functionality by fastening and unfastening it a few times to ensure a smooth movement.
Sewing on buttons may seem like a simple task, but taking the time to do it properly can greatly enhance the overall appearance and durability of your garment or accessory. By following these steps, you can add a professional touch to your sewing projects and create beautiful, functional pieces.
Styling and Wearing Your Knit Shoulder Warmer
Once you have completed your knit shoulder warmer, it’s time to style and wear it with your favorite outfits. Here are a few tips and ideas to help you make the most of this versatile accessory.
1. Layer it over a basic top: Your knit shoulder warmer can instantly elevate a simple and casual outfit. Pair it with a plain white or black t-shirt to add a cozy and stylish touch to your look. The shoulder warmer will not only keep you warm but also make a fashion statement.
2. Pair with a dress: If you want to add some warmth to a dress while still showing off its design, a shoulder warmer is the perfect choice. Whether it is a maxi dress or a fit-and-flare, the knit texture of the shoulder warmer will add an interesting contrast to your ensemble.
3. Go for a monochromatic look: Choose a shoulder warmer in a color similar to the rest of your outfit to create a monochromatic look. This creates a cohesive and polished appearance and allows the shoulder warmer to stand out as the focal point of your outfit.
4. Try different ways of wearing it: Don’t be afraid to get creative with how you wear your shoulder warmer. You can let it hang loose around your neck for a relaxed look or secure it with a belt at the waist for a more structured and put-together style. There are endless possibilities, so experiment and find what works best for you.
5. Accessorize accordingly: Complete your look by adding accessories that complement your shoulder warmer. A statement necklace or a pair of earrings can draw attention to your face and enhance the overall outfit. Consider also pairing it with a coordinating colored bag or some trendy boots.
- Remember to maintain your shoulder warmer’s shape and condition by storing it properly, preferably in a drawer or hanging it on a hanger.
- Make sure to read and follow the care instructions for your specific knitted material to keep it in the best condition.
In conclusion, a knit shoulder warmer is a versatile accessory that can elevate any outfit while providing warmth and comfort. Have fun experimenting with different ways of styling and wearing it to create unique and fashionable looks.
Q&A:
Can you recommend a free pattern for knit shoulder warmers?
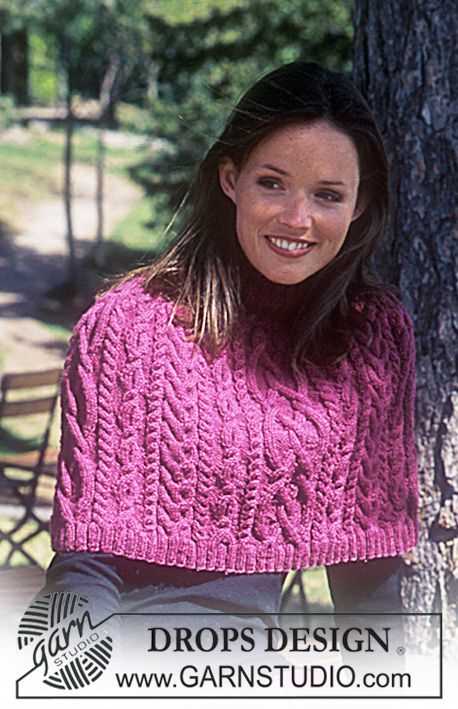
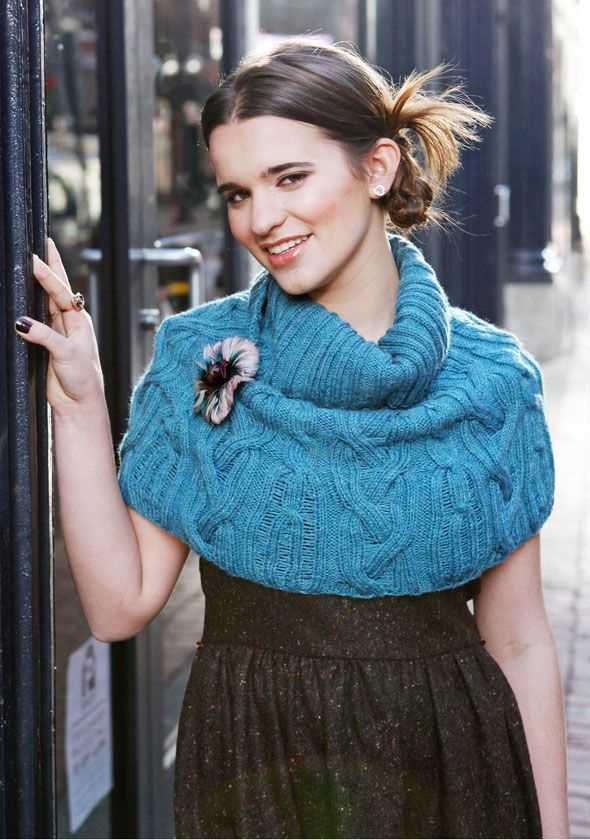
Yes, there are several free patterns available online for knit shoulder warmers. Some popular options include the “Easy Ribbed Shoulder Warmer” pattern by Lion Brand Yarn and the “Cable Shoulder Wrap” pattern by Drops Design. These patterns can be found on their respective websites and can be downloaded for free.
How difficult are these knit shoulder warmer patterns?
The difficulty level of knit shoulder warmer patterns can vary. Some patterns may be suitable for beginners with basic knitting skills, while others may require intermediate or advanced knitting techniques. It’s important to read the pattern instructions carefully to determine the skill level required and ensure that it matches your knitting abilities.
What materials will I need to knit shoulder warmers?
The materials needed to knit shoulder warmers typically include a set of knitting needles in the appropriate size, usually around US 8 or 9, and yarn in the recommended weight and color. The specific yarn and needle requirements will be outlined in the pattern instructions. Additionally, you may need stitch markers, a yarn needle, and scissors for finishing and assembling the shoulder warmers.
How long does it take to knit shoulder warmers?
The time it takes to knit shoulder warmers will depend on factors such as the complexity of the pattern, your knitting speed, and the amount of time you dedicate to knitting each day. Generally, a simple shoulder warmer pattern can be completed in a few days or up to a week, while more intricate designs may take longer. It’s best to check the estimated completion time provided in the pattern or allow yourself enough time to complete the project at your own pace.
Can I modify the knit shoulder warmer patterns to fit my size?
Yes, you can modify the knit shoulder warmer patterns to fit your size. Most patterns will provide instructions on how to adjust the size or provide different size options. You can also customize the length or width of the shoulder warmers by adding or subtracting stitches. However, it’s important to make gauge swatches and carefully follow the pattern instructions to ensure a proper fit and avoid any unwanted changes to the design.
Where can I find a free knit shoulder warmer pattern?
You can find a free knit shoulder warmer pattern on various knitting websites and blogs. Some popular websites that offer free knitting patterns include Ravelry, Knitting Pattern Central, and AllFreeKnitting.
Can you recommend any specific free knit shoulder warmer patterns?
There are many great free knit shoulder warmer patterns available. Some popular ones include the “Simple Shoulder Warmer” pattern by Rebecca Elselaar, the “Chunky Rib Cowl” pattern by Mollie Makes, and the “Cozy Shoulder Warmer” pattern by Purl Soho. These patterns can be found on their respective websites or through a quick internet search.