
Knitting can be a fun and relaxing hobby, and making your own accessories is a great way to personalize your style. One popular project for beginners is knitting a hat. Not only is it a practical and stylish addition to any wardrobe, but it is also a great way to practice your knitting skills.
If you’re new to knitting or just looking for a simple project, hats are a great place to start. You can choose from a variety of beginner-friendly patterns that only require two needles. This means you don’t need to invest in circular or double-pointed needles, making it more accessible for beginners.
There are many resources available online that provide step-by-step instructions and free patterns for knitting hats with two needles. These patterns are designed with beginners in mind, so you don’t need to worry about complicated stitches or techniques. Instead, they focus on basic stitches, such as knit and purl, that are easy to master.
Knitting a hat with two needles allows you to work in rows, which can be more comfortable and less intimidating for beginners. You can easily see your progress and make adjustments along the way. Plus, with two needles, you only need to concentrate on one section at a time, making it easier to keep track of your stitches.
Creating Beautiful Beginner Knitted Hats Using Two Needles
Knitting is a wonderful craft that allows you to create beautiful and functional items using just a pair of needles and some yarn. If you are just starting out in knitting or looking for a beginner project, a knitted hat is a perfect choice. Knitting hats with two needles is a great way to practice the basic stitches and techniques while creating a stylish and warm accessory.
To begin your journey into knitting hats, you will need a few essential supplies. Firstly, choose a soft and warm yarn in your favorite color. Worsted weight or chunky yarns are great choices for hats as they knit up quickly and provide excellent warmth. Next, you will need a pair of appropriately sized knitting needles. The recommended needle size will usually be stated on the yarn label, but for adult-sized hats, a pair of US size 8 or 9 needles should work well.
Once you have your supplies ready, you can start knitting your hat. One simple and popular pattern for beginners is the basic ribbed hat. To create this hat, cast on the desired number of stitches (usually around 80-100) and work in a rib stitch pattern (alternating knit and purl stitches) until your hat reaches the desired length. Finish off by binding off your stitches and sewing up the seam to create a tube. Finally, gather the top of the tube and secure it tightly to create a cozy and stylish hat.
If you are looking for a bit more variety, you can experiment with different stitch patterns and techniques to create unique hats. For example, you can try knitting a hat with a cable pattern to add some texture and visual interest. Cables involve crossing stitches over each other, creating a twisted effect that looks intricate but is surprisingly easy to achieve. By incorporating different stitches and patterns into your hats, you can create beautiful and personalized accessories that are sure to impress.
Getting Started: Essential Knitting Tools and Materials
When it comes to knitting, having the right tools and materials is essential for a successful project. Whether you’re a beginner or an experienced knitter, there are a few key items that you’ll need to get started.
Knitting Needles
The most basic tool you’ll need for knitting is a pair of knitting needles. For beginner hat patterns that are worked with two needles, you’ll want to choose a pair of straight needles. These are typically made of metal, bamboo, or plastic, and come in various sizes. The size of the needles you’ll need will depend on the thickness of the yarn you’re using and the desired gauge of your project. Check the label on your yarn for the recommended needle size, or consult your pattern for guidance.
Yarn
Next, you’ll need to choose your yarn. There are countless options available, but for a beginner hat project, it’s generally best to choose a medium-weight yarn in a solid or variegated color. Look for yarn that is labeled as suitable for the needle size recommended in your pattern. Acrylic or wool blends are good choices for hats, as they are warm, soft, and easy to care for. Be sure to buy enough yarn to complete your project, taking into account any additional yarn you may need for finishing details like pompoms or embellishments.
Additional Tools
In addition to knitting needles and yarn, there are a few other tools that will come in handy as you work on your hat. These include:
- Scissors: For cutting your yarn.
- Tapestry Needle: For weaving in loose ends and sewing seams.
- Stitch Markers: Used to mark specific stitches or sections of your knitting.
- Row Counter: Helps you keep track of the number of rows you’ve knitted.
- Measuring Tape: Used to measure your gauge and the finished size of your hat.
Having these tools on hand will make your knitting process smoother and more enjoyable. As you gain experience and tackle more complex projects, you may find that you need additional tools, such as cable needles or stitch holders. But for now, these basic tools will set you on your way to creating beautiful knitted hats with just two needles.
Choosing the Perfect Yarn: A Guide to Different Hat Yarns
When it comes to knitting a hat, choosing the perfect yarn is essential for achieving the desired look and feel. With so many options available, it can be overwhelming to know where to start. This guide will walk you through the different types of yarns that are commonly used for knitting beginner hats, so you can make an informed decision.
1. Worsted Weight Yarn
Worsted weight yarn is a popular choice for knitting hats because it is versatile and easy to work with. It is slightly heavier than DK weight yarn, making it perfect for creating warm and cozy hats. Worsted weight yarn is typically made from wool or a blend of wool and synthetic fibers, giving it excellent stitch definition and durability. Its medium thickness allows for a variety of stitch patterns and textures, and it can be used with different needle sizes, depending on the desired outcome.
2. Bulky Yarn
If you’re looking to knit a hat that will keep you warm in the colder months, bulky yarn is a great option. This thick and chunky yarn creates hats that are incredibly warm and cozy. Bulky yarn is often made from wool or a blend of natural fibers, providing extra insulation and protection against the cold. Due to its thickness, it knits up quickly, making it an ideal choice for beginners or those who want to finish their project in no time.
3. Chunky Yarn
Similar to bulky yarn, chunky yarn is another great choice for knitting hats. It is slightly lighter than bulky yarn, but still provides the same level of warmth and comfort. Chunky yarn is often made from acrylic or a blend of acrylic and other fibers, making it an excellent option for those with wool allergies. It is easy to work with and produces hats with a soft and cozy feel. Chunky yarn is also a popular choice for colorwork and adding intricate details to your hat.
4. DK Weight Yarn
If you prefer a lighter-weight hat or live in a milder climate, DK weight yarn is worth considering. It is thinner than worsted weight yarn, but still provides warmth and comfort. DK weight yarn is often made from natural fibers such as wool, cotton, or bamboo, giving it excellent breathability and softness. It is great for creating hats with intricate stitch patterns, as the lightweight nature of the yarn allows for more detailed work. DK weight yarn is also ideal for hats with drape and movement.
Choosing the right yarn for your knitted hat is an important step in creating a finished project that you’ll love. Consider the weather, desired level of warmth, and personal preferences when selecting your yarn. With the variety of yarn options available, you’re sure to find the perfect match for your next hat knitting adventure.
Understanding Basic Knitting Techniques
Knitting is a popular craft that allows you to create beautiful and functional pieces out of yarn and needles. Whether you’re a beginner or an experienced knitter, it’s important to understand the basic techniques that form the foundation of knitting.
Casting on is the first step in starting a knitting project. This is the process of creating the first row of stitches on your needle. There are several methods of casting on, but the most common one is the long-tail cast on. This method creates a neat and elastic edge, making it ideal for most projects.
Knit and purl stitches are the two basic stitches in knitting. The knit stitch creates a smooth and tight fabric, while the purl stitch creates a bumpy and looser texture. By combining these two stitches, you can create a variety of patterns and designs in your knitting projects.
Increasing and decreasing stitches are essential techniques in shaping your knitting. Increasing involves adding stitches to your knitting, while decreasing involves removing stitches. These techniques are used to create shaping, such as for sleeves or garment waistlines. There are various methods of increasing and decreasing, including yarn overs, knit two together, and slip, slip, knit.
Binding off is the process of finishing your knitting project. This is done by creating a row of stitches that secure the last row of knitting. Binding off gives your project a neat and finished edge. There are different methods of binding off, such as the basic bind off or the stretchy bind off, depending on the desired result.
By understanding and practicing these basic knitting techniques, you’ll be able to tackle a wide range of knitting projects, from simple scarves to intricate sweaters. Knitting is a versatile craft that allows you to express your creativity and create personalized items that are both functional and beautiful.
Simple and Cozy: Basic Ribbed Hat Pattern for Beginners
Knitting a hat can be a rewarding and enjoyable project, especially for beginners. If you’re just starting out in the world of knitting, a basic ribbed hat pattern is a great place to begin. This pattern is simple, cozy, and can be made using just two needles.
To get started, you’ll need a set of knitting needles (size 8 or 9), a skein of medium-weight yarn, and a pair of scissors. The ribbed pattern creates a stretchy and snug fit, making it perfect for winter wear.
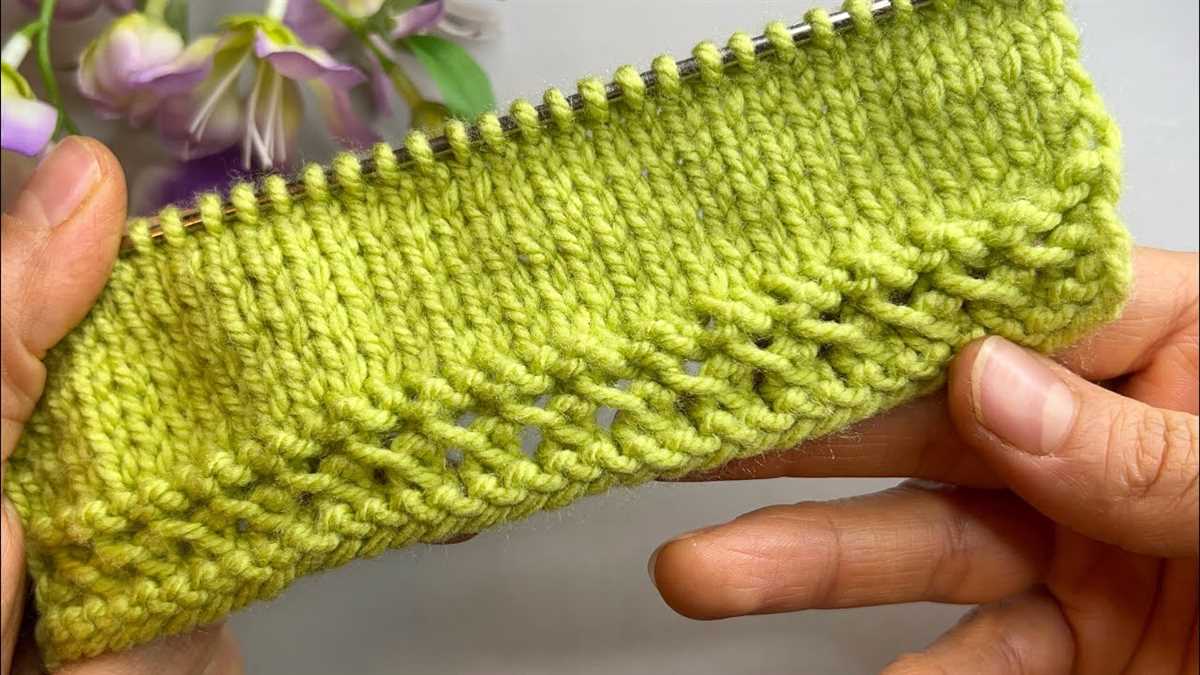
To begin the pattern, cast on 80 stitches using the long-tail cast-on method. This will create the brim of the hat, which provides extra warmth and a comfortable fit. Next, start knitting in a 2×2 rib stitch. This means knitting two stitches, then purling two stitches, and repeating this pattern until the desired length is reached.
The ribbed pattern adds texture and visual interest to the hat, while also allowing the fabric to stretch to fit various head sizes. As you continue knitting, you’ll see the stylish ribbed pattern emerge and take shape. Once the hat reaches the desired length, it’s time to start decreasing the stitches to create the crown.
Continue knitting in the rib pattern, but start decreasing by knitting two stitches together at regular intervals. This will gradually reduce the number of stitches until only a few remain. Finally, cut the yarn, leaving a long tail, and thread it through the remaining stitches to secure them. Use the tail to sew up the seam of the hat, and voila – your cozy ribbed hat is complete!
This basic ribbed hat pattern is a great introduction to knitting hats and can be easily customized by adding stripes, pom-poms, or other embellishments. With a little practice, you’ll be able to whip up this simple and cozy hat in no time, and have a stylish accessory to keep you warm all winter long.
Stylish and Warm: Chunky Cable Hat Pattern Made with Two Needles
Looking for a beginner-friendly knitting project that will keep you warm and stylish? Look no further than this chunky cable hat pattern made with just two needles. Whether you’re a seasoned knitter or just starting out, this pattern is easy to follow and yields beautiful results.
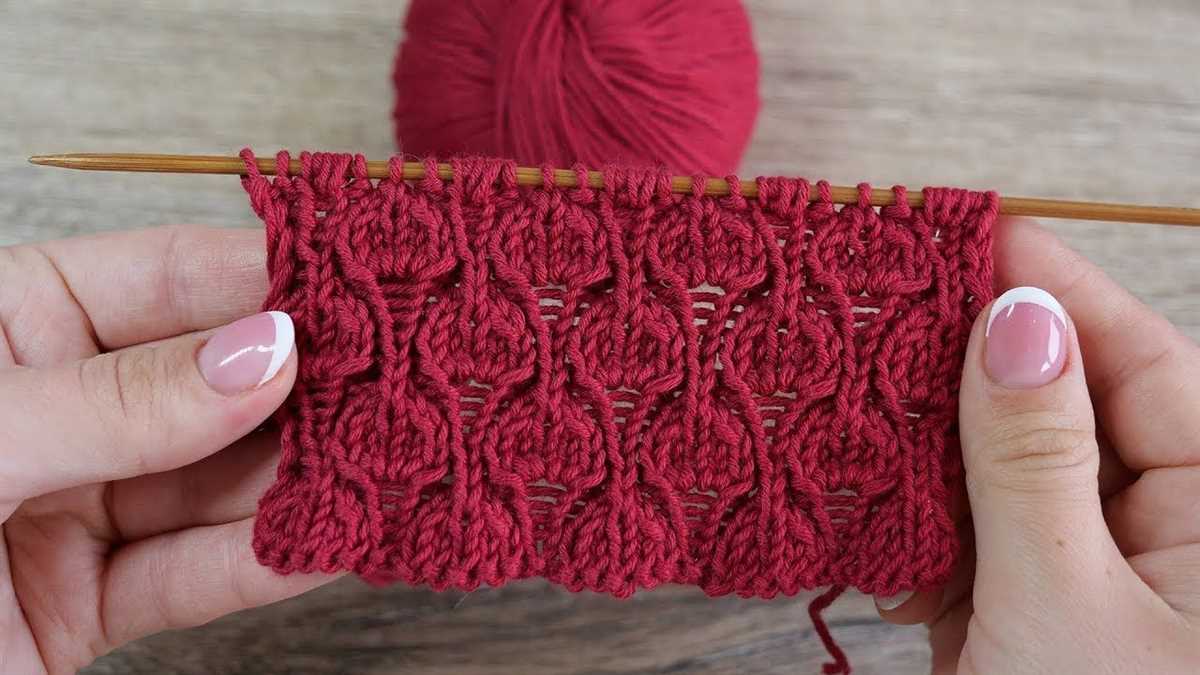
The chunky cable design adds an elegant touch to this hat, making it a versatile accessory that can be worn with any outfit. The thick yarn used in this pattern ensures that the hat is not only fashionable but also incredibly warm. You’ll be able to brave even the coldest winter days with this cozy headwear.
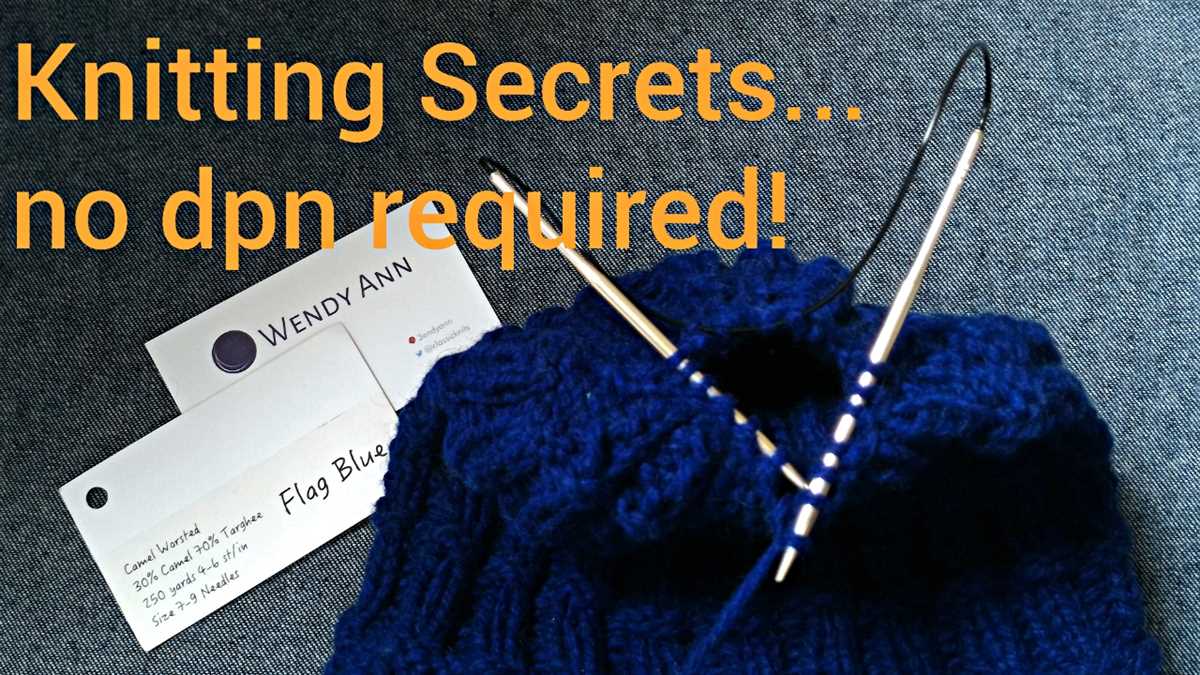
To make this hat, you’ll need a pair of size 10 knitting needles and chunky weight yarn. The hat is worked in a ribbing pattern for the brim, which gives it a snug and comfortable fit. Then, the cable pattern is introduced to create the visually striking design. It may look complicated, but it’s actually quite simple to knit.
This pattern is perfect for knitters who prefer working with two needles rather than circular or double-pointed needles. It’s a great project to practice your knitting skills and create a stunning accessory for yourself or a loved one. So grab your needles and yarn, and start knitting your way to a fashionable and warm winter!
Adding Extra Flair: Incorporating Colorwork into your Hats
Do you want to take your beginner knitted hats to the next level? Adding colorwork is a great way to add extra flair and make your hats truly unique. Colorwork involves knitting with multiple colors to create patterns and designs on your hat. It may sound daunting, but with a little practice and patience, you can easily incorporate colorwork into your knitting projects.
Selecting the Right Yarn: When working with colorwork, it’s important to choose the right yarn. Opt for yarns that have different colors in the same weight and fiber content. You can also choose yarns that have a variegated or self-striping effect to add depth and interest to your hat.
Choosing a Pattern: There are many different colorwork patterns available for hats. Some popular options include fair isle, stranded knitting, and intarsia. Fair isle involves creating small repeated motifs, while stranded knitting uses multiple colors in the same row to create larger, more intricate designs. Intarsia allows you to knit blocks of color separately and then join them together.
Tip: Start with a simple colorwork pattern if you’re new to this technique. This will help you get comfortable with working with multiple colors and reading colorwork charts.
Understanding Colorwork Charts: Colorwork patterns are typically represented by charts rather than written instructions. These charts will show you which color to use for each stitch. Make sure to read the chart from the bottom up and right to left if you’re knitting flat, or from right to left if you’re knitting in the round.
Managing Yarn Tension: Maintaining consistent tension is key when working with colorwork. You want your stitches to be even and not too loose or too tight. To achieve this, try using one hand for each color and practice keeping an even tension with both hands. You can also try using different knitting techniques, such as knitting continental or English style, to see which one works best for you.
Experimenting with Color Combinations: One of the most exciting aspects of colorwork is the endless possibilities for color combinations. Don’t be afraid to mix and match different colors to create unique and eye-catching designs. Consider using contrasting colors for more vibrant patterns or subtle shades for a more muted look.
Adding Colorwork to Simple Hat Patterns: If you already have a go-to hat pattern, you can easily incorporate colorwork into it. Simply choose a section where you want to add the pattern, and follow the colorwork charts accordingly. You can add colorwork to the brim, create stripes, or even add a colorwork motif to the top of the hat.
- Remember to carry your yarn not in use loosely along the back of the work to avoid long floats or twisted yarns.
- Take your time and practice your colorwork technique. It may take a few tries to get the hang of it, but with practice, you’ll be creating stunning colorwork designs in no time.
Personalize Your Hat: Knitting Patterns with Embellishments
If you’re looking to add a personal touch to your knitted hat, consider incorporating embellishments into your pattern. These small additions can take your hat from simple to stylish, and they’re also a great way to experiment with different techniques and materials. Whether you prefer subtle details or bold statements, there are plenty of options to choose from.
Pom-Poms: A classic and playful addition to any hat, pom-poms bring a touch of fun and whimsy. You can knit your own pom-poms using leftover yarn, or purchase ready-made ones in various sizes and colors to match your hat. Attach them securely to the crown of the hat using a needle and thread or a hot glue gun for a secure hold.
Buttons: Buttons are another versatile embellishment option that can add charm and character to your hat. You can sew on a single button as a focal point, or create a row of buttons for added visual interest. Choose buttons in contrasting colors or interesting shapes to make them stand out even more.
Embroidery: If you enjoy needlework, adding embroidery to your hat is a great way to personalize it. You can embroider a small motif, your initials, or even a personalized message onto the hat. Use a contrasting color of yarn or embroidery floss to make the design pop. Be sure to choose a stitch that works well with knitted fabric, such as the running stitch or backstitch.
Ribbons and Bows: For a feminine and elegant touch, consider adding ribbons or bows to your hat. You can attach a ribbon around the base of the hat, tie it into a bow on one side, or create a bow and sew it onto the front or side of the hat. Choose a ribbon in a color or pattern that complements your hat for a cohesive look.
Charms and Beads: For a unique and eye-catching embellishment, try adding charms or beads to your hat. You can attach them using a needle and thread or by threading them onto a thin strip of elastic and sewing the ends onto the hat. Charms and beads come in a wide variety of shapes and colors, allowing you to create a personalized design that suits your style.
Cables and Texture: If you prefer to stick with knitting techniques for your embellishments, consider incorporating cables or textured stitches into your hat pattern. These techniques can add depth and visual interest to your hat, making it stand out from the crowd. Experiment with different cable patterns or textured stitch patterns to find the one that suits your hat design the best.
Conclusion
When it comes to personalizing your knitted hat, the options are endless. Whether you choose to add pom-poms, buttons, embroidery, ribbons, charms, or cables, the key is to have fun and let your creativity shine. Don’t be afraid to try new techniques and materials, and don’t be afraid to make mistakes. After all, knitting is all about the joy of creation, and adding embellishments to your hat is just another way to express your unique style.
Beyond the Basics: Intermediate Knitted Hat Patterns for Growth
Once you have mastered the basics of knitting hats with two needles, you may be ready to take your skills to the next level with intermediate patterns. These patterns will challenge you to expand your knowledge and techniques, allowing for growth and development in your knitting abilities.
One intermediate hat pattern that you may find appealing is the cable knit hat. This pattern involves creating intricate cable designs using a cable needle. The result is a hat with beautiful texture and visual interest. By tackling cable knitting, you will gain a deeper understanding of stitch manipulation and pattern reading.
Experiments in Colorwork
Another avenue to explore in intermediate knitting is colorwork. This technique involves incorporating multiple colors of yarn into your designs to create unique and eye-catching patterns. Fair Isle knitting, for example, combines two or more colors in a single row, resulting in a stunning geometric or pictorial motif. With colorwork, you will learn about yarn dominance, tensioning techniques, and how to carry yarn along the back of your work.
The Challenge of Lace
If you are up for a challenge, lace knitting may be the next step in your knitting journey. Lace patterns consist of intricate openwork designs that are created by using various decreases and yarn overs. Knitting lace requires careful attention to detail and concentration, but the end result is a delicate and elegant hat. With lace knitting, you will learn how to read lace charts, execute complex stitch patterns, and create airy and lightweight fabric.
As you progress with these intermediate hat patterns, you will not only expand your knitting skills, but also gain confidence in your abilities. With each project, you will learn new techniques and overcome challenges, paving the way for further growth and exploration in the world of knitting.
Sharing the Joy: Knitting Hats for Charity and Gifting
Knitting hats is not only a creative and fulfilling hobby, but it can also be a way to spread joy and make a positive impact in the community. One way to do this is by knitting hats for charity. By using your knitting skills to create warm and stylish hats, you can help those in need during the cold winter months.
Donating hand-knitted hats to charities and organizations that support individuals experiencing homelessness or low-income families can make a real difference in their lives. These hats not only provide warmth and protection from the elements but also serve as a symbol of care and compassion. They can bring comfort and a sense of dignity to those who receive them, reminding them that they are not alone in their struggles.
When making hats for charity, it’s important to consider the specific needs and preferences of the recipients. Opt for soft and cozy yarns that will provide warmth without causing irritation. Choose versatile colors and patterns that will suit a variety of individuals and styles. Additionally, making hats in different sizes can ensure that everyone, from children to adults, can benefit from your generosity.
In addition to donating hats to charity, knitting hats as gifts can also bring joy to your loved ones. Hand-knitted hats make thoughtful and personalized presents that show your care and dedication. Whether you’re knitting for a friend, family member, or coworker, customizing the hat with their favorite colors or adding unique embellishments can make the gift even more special.
Knitting hats can be a wonderful way to share your love for the craft with others while making a positive impact in your community. Whether it’s by donating hats to those in need or gifting them to loved ones, the joy of knitting can be spread far and wide.
Mastering the Craft: Tips for Improving Your Knitting Skills
Knitting is a skill that can bring both relaxation and creativity to your life. Whether you’re a beginner or have been knitting for years, there are always ways to improve your skills and take your projects to the next level. Here are some tips to help you master the craft of knitting:
1. Practice regularly:
Like any skill, knitting improves with practice. Set aside dedicated time each week to work on your knitting projects. The more you practice, the more comfortable and confident you will become with the various stitches and techniques.
2. Start with simple projects:
When you’re trying to improve your knitting skills, it’s best to start with simple projects that allow you to focus on honing your technique. Choose patterns that use basic stitches and gradually work your way up to more complex patterns as you gain confidence.
3. Take advantage of online resources:

The internet is a treasure trove of knitting resources. Look for online tutorials, videos, and forums where you can learn new techniques and get advice from experienced knitters. Online platforms are also a great place to find new knitting patterns for inspiration.
4. Join a knitting group:
Knitting with others can be an enjoyable and educational experience. Consider joining a local knitting group or attending knitting classes. Not only will you have the opportunity to learn from more experienced knitters, but you’ll also make new friends who share your passion for the craft.
5. Experiment with different yarns and needles:
Don’t be afraid to branch out and try new materials. Experiment with different types of yarns and various sizes of knitting needles to see how they affect your finished projects. Each combination can create a unique texture and look, allowing you to expand your knitting skills and create more diverse designs.
6. Keep a knitting journal:
Keeping track of your projects, patterns, and progress in a knitting journal can be a valuable tool for improving your skills. Note down any challenges you faced, new techniques you learned, and successful projects you completed. This journal will not only serve as a reference for future projects but also highlight your growth as a knitter.
With these tips and a little time and dedication, you can continue to improve and master the craft of knitting. Remember to be patient with yourself and enjoy the process. Happy knitting!