
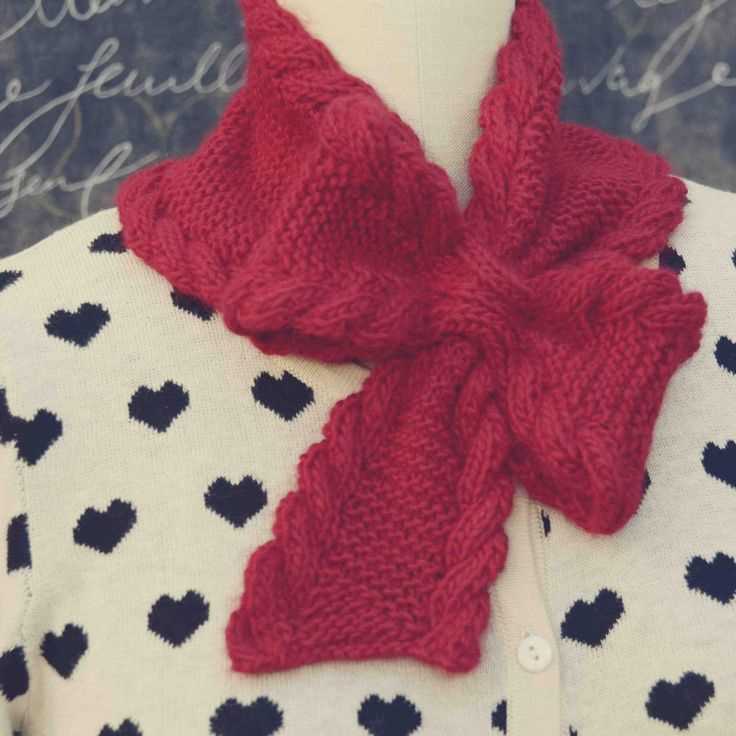
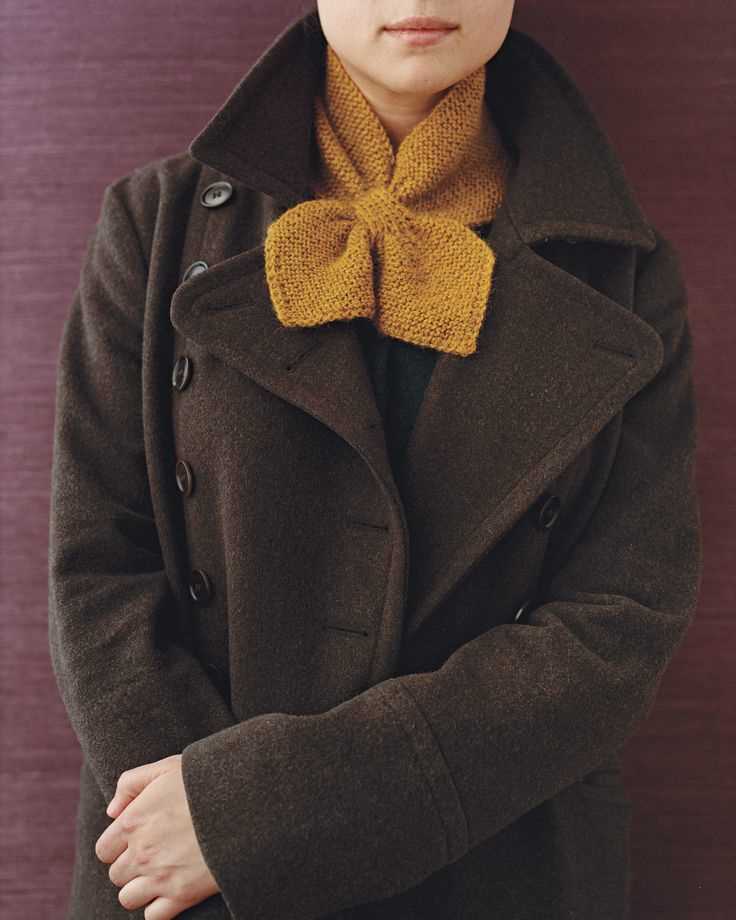
Knitting is a popular hobby that allows you to create beautiful and unique pieces of clothing and accessories. If you’re looking to expand your knitting skills and add a touch of elegance to your winter wardrobe, why not try knitting a bow scarf? This charming accessory is perfect for adding a feminine touch to any outfit and keeping you warm during the colder months.
The bow scarf knitting pattern is relatively simple and can be adapted to suit any skill level. Whether you’re a beginner or an experienced knitter, you’ll be able to create a stunning bow scarf that is sure to turn heads. The pattern typically involves using a medium weight yarn and a pair of size 8 knitting needles, but feel free to experiment with different yarn weights and needle sizes to achieve the desired look and feel.
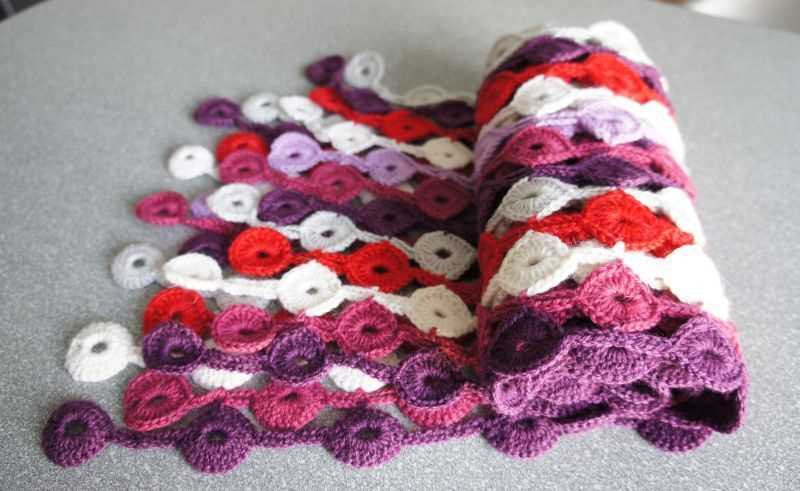
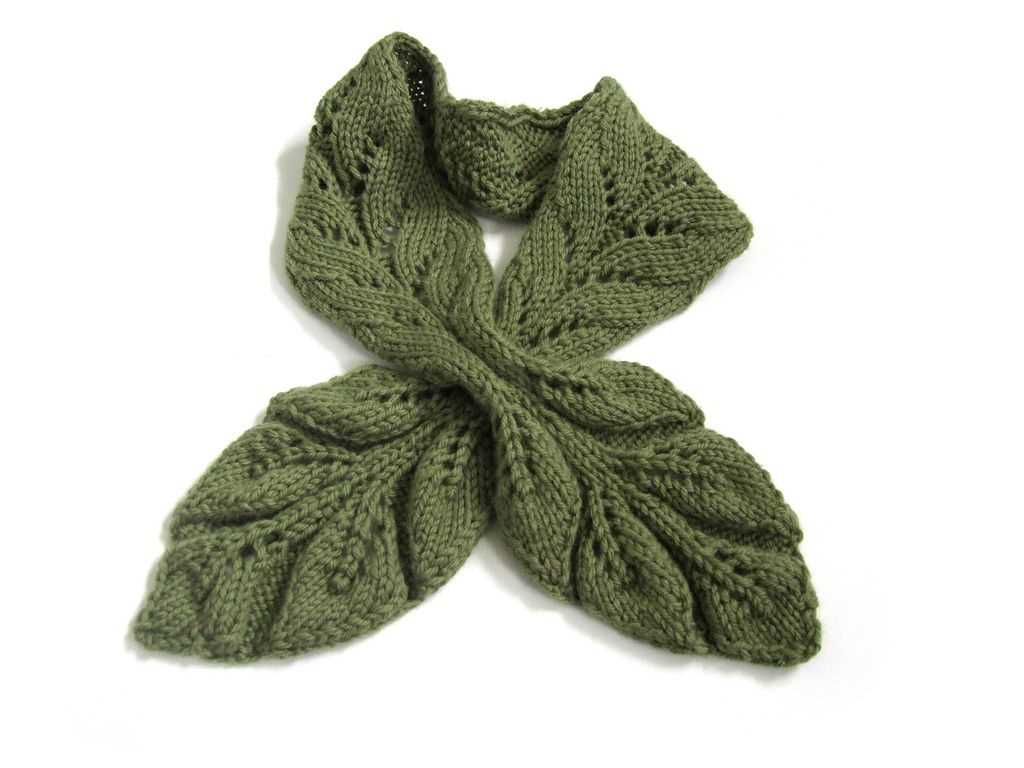
One of the great things about knitting a bow scarf is that it allows you to be creative and add your own personal touch to the design. You can choose from a wide range of yarn colors to match your personal style and fashion preferences. Additionally, you can experiment with different stitch patterns to create unique textures and patterns on your scarf. The possibilities are endless, and you’ll have a one-of-a-kind accessory that you can proudly wear or gift to a loved one.
Bow Scarf Knitting Pattern
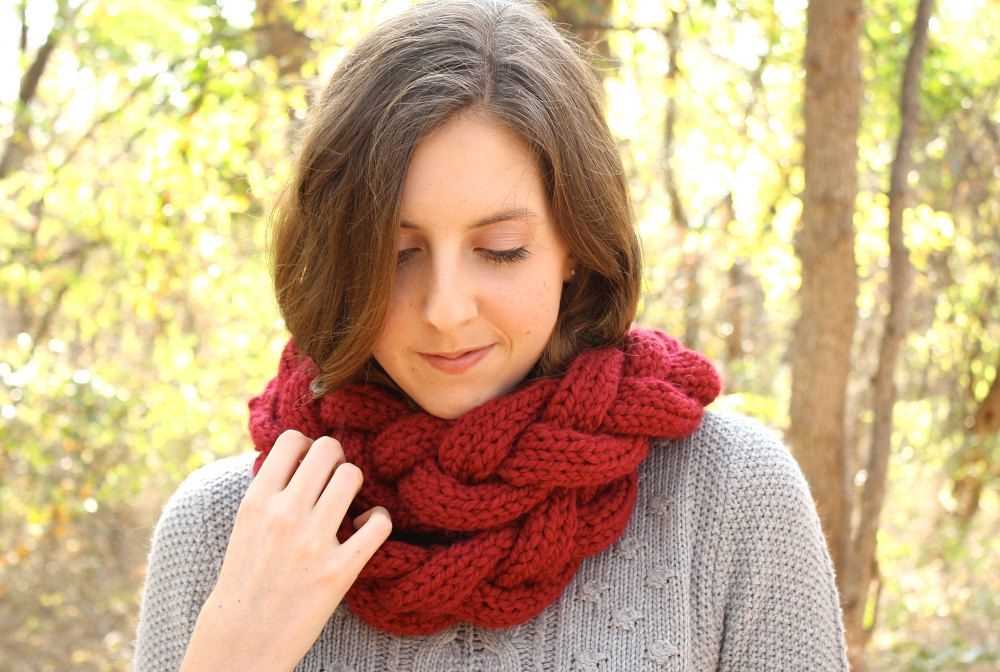
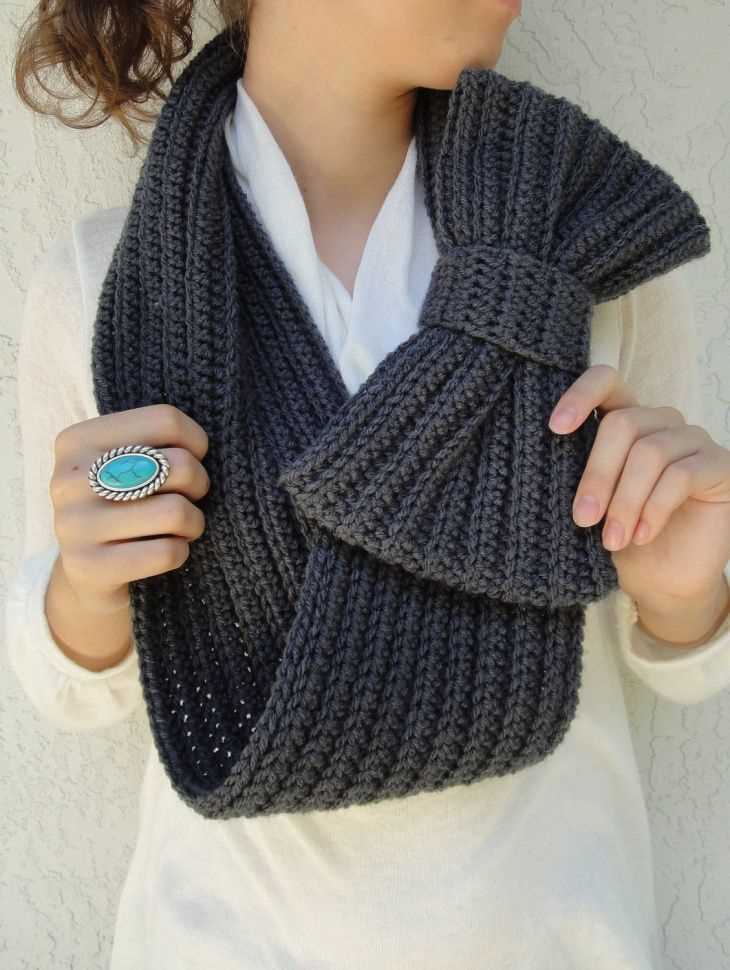
Are you looking to add some style and flair to your winter wardrobe? Look no further than the bow scarf knitting pattern! This pattern is not only practical for keeping you warm during the colder months, but it also adds a fashionable touch to any outfit.
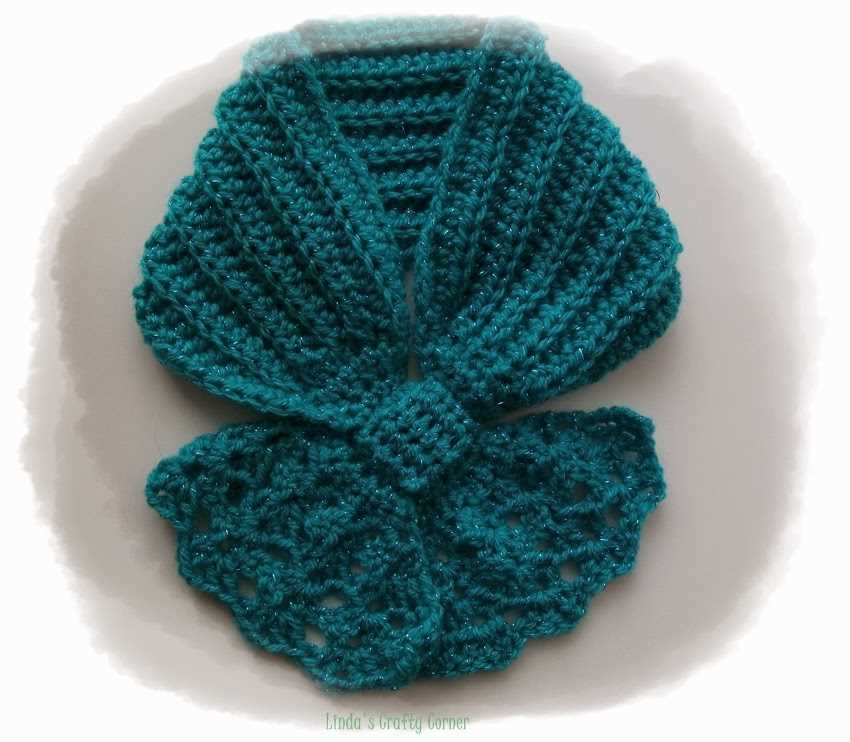
The bow scarf knitting pattern is a versatile and customizable design that allows you to create a unique accessory that reflects your personal style. Whether you prefer a chunky knit for extra warmth or a lightweight yarn for a more delicate look, this pattern can be adapted to suit your preferences. With the option to choose different colors and textures, you can create a bow scarf that perfectly complements your winter outfits.
Materials Needed:
- Knitting needles (size will depend on your chosen yarn)
- Yarn of your choice
- Scissors
- Tapestry needle
Instructions:

- Cast on the desired number of stitches for your scarf width.
- Continue knitting in your chosen stitch pattern until the scarf reaches your desired length.
- Bind off the stitches and cut the yarn, leaving a long tail for sewing.
- To create the bow, fold the scarf in half widthwise and sew the ends together to form a loop.
- Take another piece of yarn and wrap it tightly around the middle of the loop, creating the bow shape.
- Secure the yarn with a knot and weave in any loose ends.
- Try on your new bow scarf and adjust the bow shape as desired.
Now you have a stylish and cozy bow scarf that is sure to turn heads wherever you go. This versatile accessory can be worn with a variety of outfits, from casual to dressy, making it a must-have for your winter wardrobe. So grab your knitting needles and get ready to create your own unique bow scarf!
Materials Needed
Before you begin knitting your bow scarf, make sure you have all the necessary materials on hand. Here is a list of what you will need:
- Yarn: Choose your preferred yarn in the colors you want for your bow scarf. Make sure the yarn is suitable for the desired size and thickness of your scarf.
- Knitting Needles: Select the appropriate size of knitting needles for your chosen yarn. The recommended needle size is usually indicated on the yarn label.
- Scissors: Have a pair of sharp scissors ready to cut the yarn or trim any excess.
- Tapestry Needle: A tapestry needle with a large eye will be useful for weaving in the loose ends of yarn and adding any finishing touches.
- Stitch Markers: If you like, you can use stitch markers to help keep track of your stitches or mark specific sections of your scarf.
- Measuring Tape: It’s always handy to have a measuring tape nearby to check the dimensions of your scarf as you go along.
- Pattern and Instructions: Of course, you’ll need the pattern and instructions for the bow scarf. You can either print out a copy or have it accessible on your computer or mobile device.
Once you have gathered all these materials, you’ll be ready to start knitting your bow scarf and create a cozy and stylish accessory for yourself or someone special.
Getting Started
If you are looking to knit a bow scarf, then you have come to the right place. This knitting pattern will guide you through the process of creating a stylish and trendy accessory that will keep you warm during the colder months.
Materials:
- Knitting needles (size 8)
- Worsted weight yarn (approximately 200 yards)
- Tapestry needle
- Scissors
Instructions:
- Begin by casting on 28 stitches using the long-tail cast on method. This will create the desired width for your bow scarf.
- Next, knit every row for a total of 42 rows. This will result in a smooth and uniform texture for your scarf.
- After completing the 42 rows, bind off all stitches to finish the main body of the scarf.
- Now it’s time to create the bow. For this, you will need to cast on 6 stitches.
- Knit every row for a total of 16 rows to create a rectangular shape.
- Once the rectangular shape is complete, bind off all stitches.
- Take the rectangular piece and fold it in half lengthwise, with the right sides facing each other.
- Using a tapestry needle and yarn, sew the two sides of the rectangular piece together, leaving a small opening in the center to turn it right side out.
- After turning it right side out, sew the remaining opening closed.
- Finally, attach the bow to one end of the scarf using the tapestry needle and yarn.
Congratulations! You have successfully completed your bow scarf. Now you can wrap it around your neck, tie the bow, and stay warm and stylish all winter long.
Casting On
When starting out with a knitting project, the first step is to cast on. Casting on is the process of creating the initial row of stitches on your knitting needle. This sets the foundation for your project and determines the width or circumference of your scarf. There are several methods you can use to cast on, but one common method is the long-tail cast on.
To cast on using the long-tail method, begin by creating a slip knot. This is done by making a loop with the yarn, and then pulling the end of the yarn through the loop. Slide the slip knot onto one of your knitting needles, and hold the needle with the slip knot in your right hand. With your left hand, bring the yarn over your thumb and hold it in place with your index finger.
- Hold the yarn tail in your right hand and wrap it around your left thumb, creating a loop.
- Bring the needle that holds the slip knot under the yarn on your thumb, from front to back.
- Bring the needle over the yarn and under the loop on your thumb. Then, bring it through the loop on your thumb and pull tight.
- Repeat these steps until you have the desired number of stitches on your needle.
The long-tail cast on method creates a neat and flexible edge, making it a popular choice for many knitting projects. However, there are other casting on methods you can explore as well, such as the backward loop cast on or the cable cast on. Each method has its own advantages and may be better suited for different types of projects. It’s always a good idea to practice different casting on techniques to find which one works best for you and your knitting style.
Knitting the Main Body
Once you have finished casting on and completing the border of your bow scarf, you can begin knitting the main body. The main body consists of rows of knit and purl stitches that create the textured pattern for the scarf.
To start, follow the pattern instructions for the first row. This may involve knitting a certain number of stitches, purling a certain number of stitches, or a combination of both. Pay close attention to any pattern repeats or special stitches that may be included in the instructions.
Continue working the pattern stitch for the specified number of rows or until you reach the desired length for your scarf. Make sure to count your stitches and rows regularly to ensure that you are staying on track and achieving the correct gauge.
If you make a mistake or notice any errors in your knitting, don’t panic! Mistakes happen, and they can often be fixed. If it’s a small mistake, you can simply rip back a few stitches and correct the error. For larger mistakes, you may need to rip back an entire row or even more. Remember to always use a lifeline, a contrasting color of yarn that is threaded through a row of stitches, before attempting any major corrections.
Using Lifelines
Lifelines are especially useful for complex or intricate patterns where it can be difficult to pick up dropped stitches or fix mistakes. To use a lifeline, simply thread a tapestry needle with a length of smooth, contrasting yarn and carefully thread it through the stitches on the needle. This provides a safety net so that if you need to rip back your knitting, you can easily pick up the stitches from the lifeline rather than trying to pick them up one by one.
Once you have completed the main body of your bow scarf, you can move on to the next section, which will cover shaping the ends and finishing the scarf.
Adding the Bow
Once you have completed knitting your scarf, it’s time to add the bow for a charming finishing touch. The bow will be attached at the center of the scarf, creating a lovely focal point.
To create the bow, you will need additional yarn in a matching or complementary color. Choose a yarn that is similar in weight and texture to the one used for the main body of the scarf.
Instructions:
- Measure and cut two equal lengths of yarn from the additional yarn. These lengths will be used to create the loops of the bow. The length will depend on how big you want your bow to be, so adjust accordingly.
- Fold each length of yarn in half, creating a loop. Make sure the ends of the yarn are even.
- Take one loop and twist it in the center. This will create a figure-eight shape. Repeat with the second loop.
- Place the twisted loops on top of each other, aligning the centers. The loops should be perpendicular to the scarf.
- Using a yarn needle, thread the yarn tail through the center of the loops. Secure the loops to the center of the scarf by stitching them in place. Make sure the stitches are inconspicuously hidden within the loops.
- Fluff the loops to create a fuller bow. Adjust the loops and tails as desired to achieve the desired look.
- Trim the tails of the bow to your preferred length. You can leave them long for a whimsical look or trim them short for a more polished finish.
Your bow is now complete! Admire your handiwork and enjoy wearing your cozy and stylish scarf with a charming bow accent.
Shaping the Bow
When creating a bow scarf, shaping the bow is an important step that gives the scarf its distinctive look. The shaping is done through a combination of increases and decreases in the knitting pattern.
To begin shaping the bow, you will first need to determine the width of the bow. This will depend on your personal preference and the size of the scarf. Once you have decided on the desired width, you can start increasing stitches to create the center of the bow. This can be done by knitting into the front and back of each stitch, or by using other increase stitches such as yarn overs.
After the center stitches have been increased to the desired width, you can start shaping the sides of the bow by decreasing stitches. This is done by knitting two stitches together, or by using other decrease stitches such as slip, slip, knit (ssk). The number of decreases needed will depend on the width and shape of the bow you want to create.
It is important to keep track of the number of stitches and rows as you shape the bow to ensure symmetry and consistency. You may want to use stitch markers or a row counter to help you keep track of your progress.
Attaching the Bow
Once you have finished knitting your bow scarf, the final step is attaching the bow. This will add a stylish and decorative touch to your scarf, making it a beautiful accessory for any outfit.
To attach the bow, start by finding the center of the scarf. You can either fold the scarf in half lengthwise or measure the width to locate the center. Once you have identified the center, use a yarn needle to sew the bow onto the scarf. Thread the needle with the same yarn used to knit the scarf for a seamless look.
Option 1: If you have knitted a separate bow piece, position it in the center of the scarf and sew it on. Make sure the bow is secure by sewing through the back of the bow and the scarf, creating stitches that are invisible from the front.
Option 2: If you have knitted the bow directly onto the scarf, carefully fold the bow in half to create the desired shape. Sew the folded bow onto the center of the scarf, making sure to secure both ends of the bow to the scarf with a few stitches.
Once you have attached the bow, you can adjust its shape and position to your liking. Play around with different placement options, such as slightly off-center or angled, to add visual interest to your scarf. Don’t be afraid to experiment until you find the perfect look!
When you’re satisfied with how the bow looks, trim any excess yarn and weave in the loose ends to ensure a clean finish. Now, your bow scarf is complete and ready to be worn with pride!
Finishing Touches
After completing your bow scarf knitting pattern, it’s time to add the finishing touches to make it look perfect. These final details can elevate the overall appearance of the scarf and give it a polished, professional look. Here are some finishing touches you can consider:
1. Blocking:
- Blocking is an essential step in knitting that helps to shape and even out the stitches.
- It involves gently dampening the scarf and pinning it down to a blocking board or towel, allowing it to dry in the desired shape.
- This process can help smooth any uneven stitches and give the scarf a more polished look.
2. Edging:
- Adding a decorative edging to your bow scarf can enhance its overall appearance.
- You can choose from various edging options, such as a simple garter stitch border, a lace edging, or a picot edge.
- These edgings can add a touch of elegance and uniqueness to your scarf.
3. Embellishments:
- If you want to add some extra flair to your bow scarf, consider incorporating embellishments.
- You can sew on buttons, attach ribbons, or even add small crocheted flowers.
- These embellishments can bring a pop of color and personality to your scarf.
Remember, the finishing touches are what truly make your bow scarf stand out. Take your time and pay attention to detail to create a scarf that you will be proud to wear or gift to someone special.
Blocking the Scarf
Blocking is an essential step in knitting a scarf, as it helps to shape and set the stitches, giving the scarf a professional finish. It involves stretching the knitted fabric to even out the tension and open up the pattern, making the scarf look more polished and beautiful.
To block the bow scarf, start by soaking it in a basin of lukewarm water with a mild detergent. Gently squeeze out the excess water and lay the scarf flat on a clean towel. Roll the towel up, pressing gently to remove more water. After that, unroll the towel and lay the scarf on a blocking mat or foam board.
Pinning and shaping
Using rustproof pins, begin pinning the edges of the scarf, following the measurements specified in the pattern. Spread the scarf out evenly, making sure the edges are straight and the corners are sharp. As you pin, gently stretch the fabric to open up the stitches and create a smooth surface.
Pay special attention to the bow section of the scarf, ensuring that the loops are defined and the shape is preserved. Pin the bows in place, making sure they are symmetrical and well-positioned. This will help the scarf lie flat and showcase the beautiful bow design.
Drying and finishing
Leave the scarf to dry completely, which may take a day or two depending on the weather and humidity. Once dry, carefully remove the pins and admire the beautifully blocked scarf. The stitches will be more even, the pattern more pronounced, and the scarf will have a lovely drape.
Lastly, gently steam the scarf with an iron set on low heat to further set the stitches and smooth any wrinkles. Be careful not to touch the iron directly to the fabric, as it can damage the fibers. Use a pressing cloth or a piece of fabric between the iron and the scarf to protect it.
Blocking is an important step in the knitting process, and taking the time to block your scarf will ensure that it looks its best and lasts for years to come. It’s a satisfying final touch that can turn a good scarf into a great one.
Final Thoughts
In conclusion, knitting a bow scarf can be a fun and rewarding project for knitters of all skill levels. This versatile accessory can add a touch of style and elegance to any winter outfit. With the help of a free knitting pattern and some basic knitting techniques, you can create a beautiful bow scarf that will keep you warm and stylish throughout the colder months.
Throughout this article, we have discussed the materials and tools needed for knitting a bow scarf, as well as provided a step-by-step guide to create this accessory. We have also shared some tips and tricks to help you achieve the best results, such as using the right yarn and needle size, and adjusting the length and width of the scarf to your preference.
Remember, practice makes perfect. If you are new to knitting or have never knitted a scarf before, don’t be discouraged if your first attempt doesn’t turn out exactly as planned. Keep practicing and experimenting until you find the techniques and patterns that work best for you.
Now that you have all the knowledge and resources you need, it’s time to grab your knitting needles and start making your own bow scarf. Have fun and enjoy the process of creating something beautiful with your own hands!