
Making your own knit kerchief is a great way to add a touch of style to your wardrobe while keeping warm and cozy. Whether you’re a beginner or an experienced knitter, this pattern is perfect for you. With its simple yet beautiful design, you’ll be able to create a fashionable accessory that will complement any outfit.
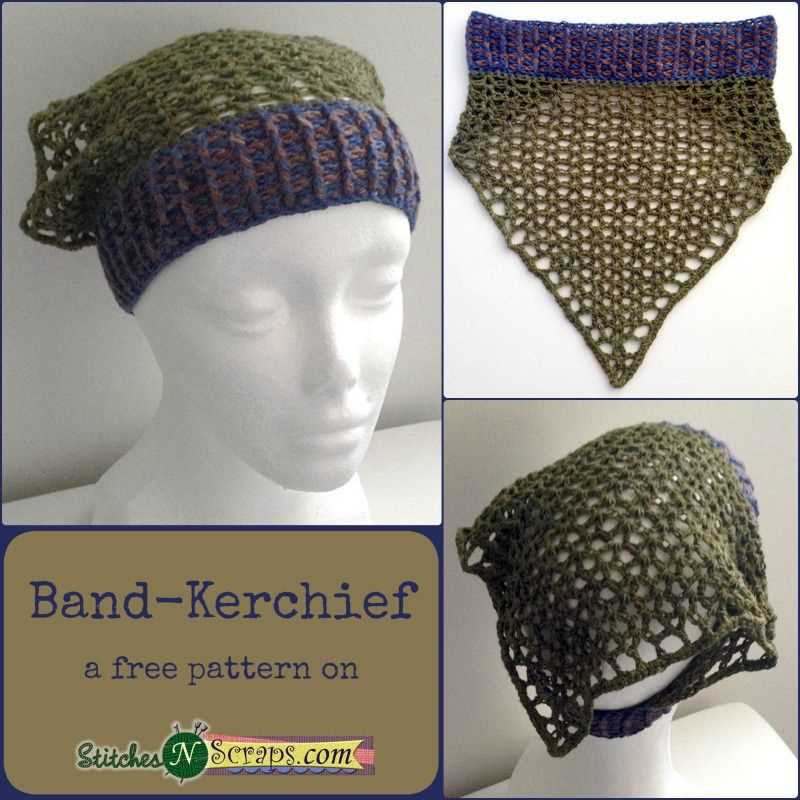
Knitting a kerchief is not only fun, but also a practical project. It’s a versatile accessory that can be worn in many different ways – around your neck, over your shoulders, or even as a headband. With this free pattern, you’ll have the opportunity to experiment with different color combinations and yarn textures to create a unique kerchief that reflects your personal style.
Don’t worry if you’re new to knitting – this pattern is beginner-friendly and easy to follow. It provides step-by-step instructions along with clear diagrams to help you through each stitch. Even if you’ve never knitted before, you’ll be able to master this project in no time and enjoy the satisfaction of creating something beautiful with your own hands.
Knit Kerchief Pattern Free
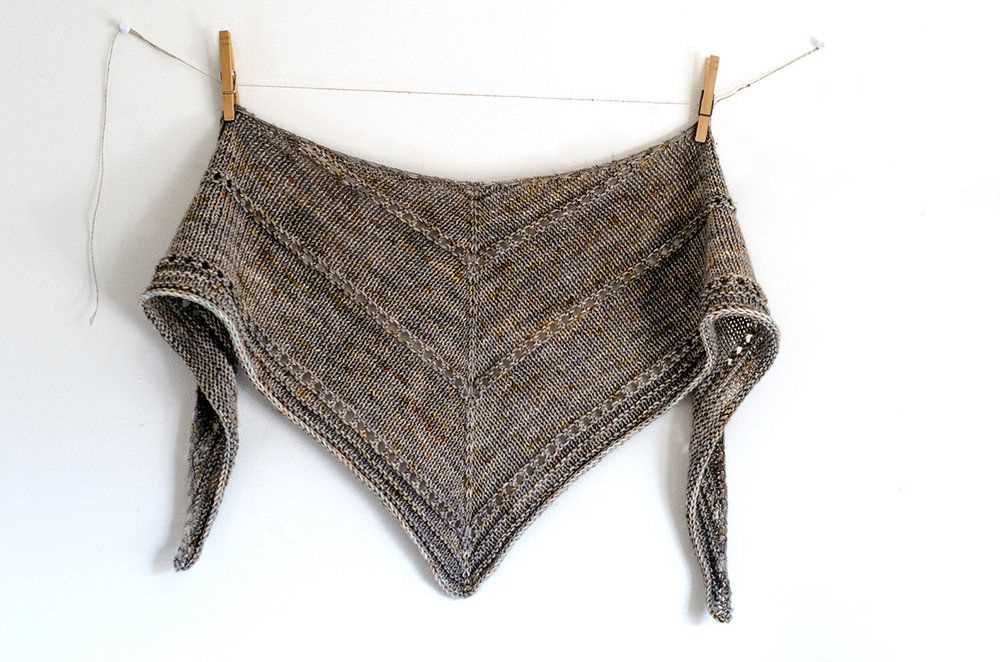
A knit kerchief is a versatile and stylish accessory that can add an extra layer of warmth and fashion to any outfit. Whether you’re looking for a cozy option for chilly days or a fashionable accessory for everyday wear, a knit kerchief can be the perfect choice. Plus, with so many free patterns available, you can easily find the perfect pattern to suit your style and skill level.
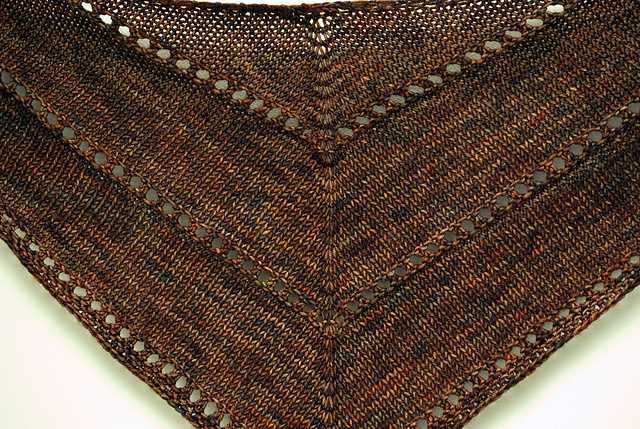
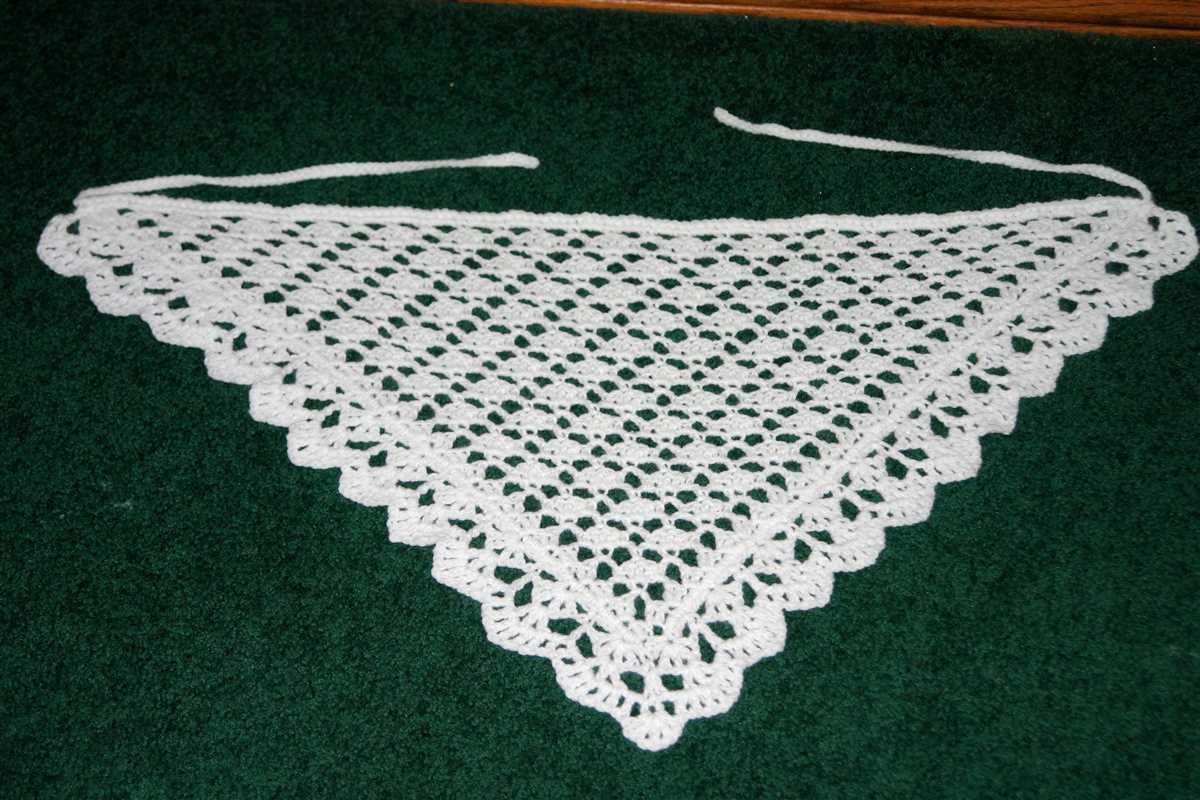
When searching for a knit kerchief pattern, you’ll find a wide variety of options. Some patterns may feature intricate lacework, while others may focus on simple and classic designs. Whatever your preference, there’s sure to be a pattern that catches your eye.
Materials:
- Yarn: Choose a yarn that suits your preferences and the season. You can opt for a cozy wool yarn for colder months or a lightweight cotton or linen blend for warmer weather.
- Knitting Needles: Use needles that are appropriate for the yarn you’ve chosen. Check the pattern for the recommended needle size.
- Tapestry Needle: This will be used to weave in any loose ends.
- Stitch Markers: Optional, but can be helpful for keeping track of stitch patterns.
Instructions:
- Begin by casting on the required number of stitches as indicated in the pattern.
- Work the specified stitch pattern for the desired length.
- Follow the pattern instructions for any shaping or finishing details, such as decreases or bind-offs.
- Weave in any loose ends using a tapestry needle.
- Optional: Block your kerchief to help it maintain its shape and drape. This can be done by wetting the kerchief, gently squeezing out excess water, and then shaping it on a blocking mat or towel to dry.
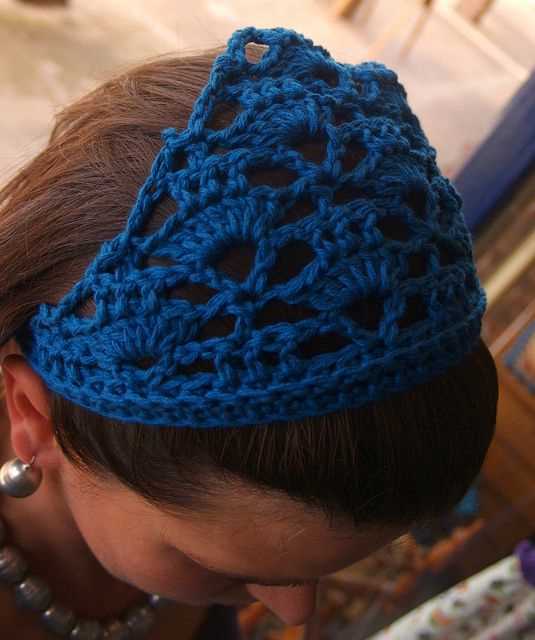
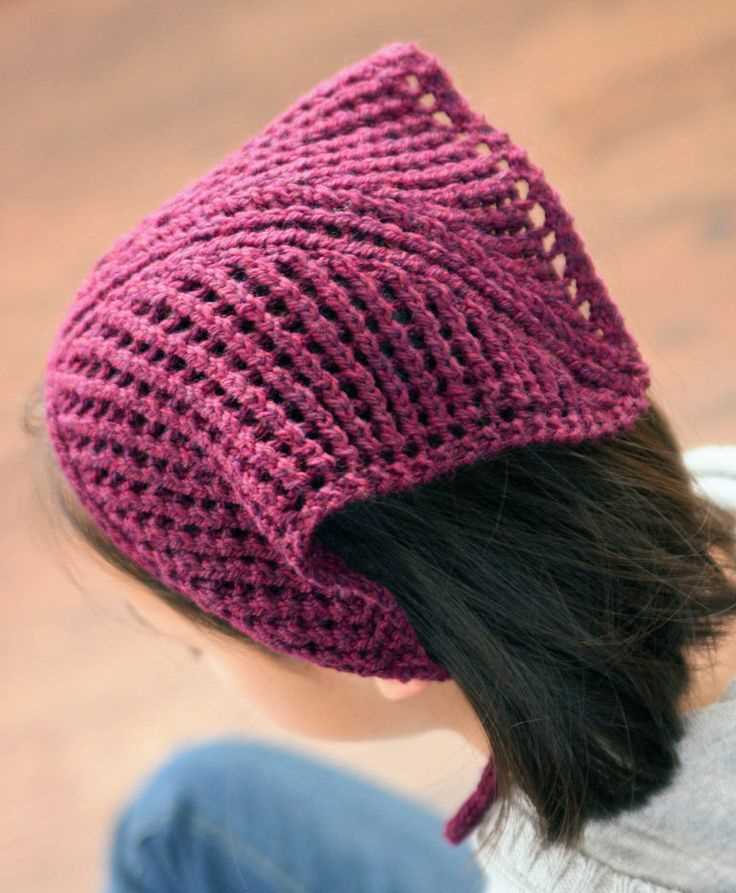
Once you’ve completed your knit kerchief, you can wear it in a variety of ways. You can tie it around your neck for a classic look, or wear it more like a headband for a trendy twist. You can even tie it around your favorite handbag for an added touch of style.
With a free knit kerchief pattern, you can create a stylish accessory that expresses your personal style and keeps you warm and cozy. So grab your knitting needles and get started on your next project!
Supplies Needed

In order to knit a kerchief, there are a few supplies that you will need. These include:
- Yarn: Choose a soft, lightweight yarn in your desired color. Look for yarn specifically labeled for knitting.
- Knitting Needles: Size US 4 or 5 knitting needles work well for this project. You can use either straight or circular needles, depending on your preference.
- Tapestry Needle: This type of needle is used for weaving in ends and seaming projects. Make sure it has a large eye that can accommodate your yarn.
- Scissors: You will need a pair of sharp scissors to cut the yarn after completing your project.
- Stitch Markers: These small plastic or metal rings are used to mark specific stitches or sections in your knitting. They can help you keep track of where you are in the pattern.
- Measuring Tape: A measuring tape is useful for checking your gauge and measuring the length of your kerchief.
Having these supplies on hand will ensure that you are well-equipped to start your knitting project. Make sure to gather all of these items before you begin, so you can knit without any interruptions.
Choosing Yarn and Needles
When it comes to knitting a kerchief, one of the first things to consider is the type of yarn you will be using. There are many different types of yarn available, each with its own unique qualities and characteristics. One popular choice for kerchiefs is cotton yarn, as it is lightweight and breathable, making it perfect for warmer weather. Another option is wool yarn, which is known for its warmth and durability. Additionally, acrylic yarn is a great choice for beginners, as it is easy to work with and comes in a wide variety of colors.
After choosing the type of yarn, the next step is to select the appropriate needles. The size of the needles you use will depend on the thickness of the yarn and the desired gauge of your project. It is important to check the yarn label for a recommended needle size, as this will give you a starting point. If you prefer a looser and drapier fabric, you may want to use larger needles, while smaller needles will create a tighter and denser fabric. Circular needles are a popular choice for kerchief knitting, as they allow you to work a larger number of stitches without the need for a long straight needle.
Once you have chosen your yarn and needles, be sure to swatch before starting the kerchief. This involves knitting a small sample square to check your gauge and ensure that your finished kerchief will be the desired size. Swatching is an important step that can prevent any surprises or disappointment later on. Remember to also consider the color and texture of the yarn, as these factors can greatly impact the overall look of your finished kerchief. With the right yarn and needles, you will be well on your way to knitting a beautiful and functional kerchief.
Gauge and Measurements
When knitting a kerchief, it is important to achieve the correct gauge. Gauge refers to the number of stitches and rows per inch or centimeter in the knitted fabric. This information is crucial for ensuring that the finished kerchief matches the desired measurements.
To determine the gauge, it is recommended to knit a swatch using the same yarn and needles that will be used for the kerchief. Knit a square that measures at least 4 inches (10 centimeters) on each side. After blocking the swatch, measure the number of stitches and rows within a 1-inch (2.5-centimeter) section.
For example:
- If the pattern instructs a gauge of 20 stitches and 24 rows = 4 inches (10 cm) in stockinette stitch, the knitter must achieve this gauge to ensure the kerchief turns out as intended.
- If the knitted swatch measures 22 stitches and 26 rows within a 1-inch section, the knitter’s gauge is too tight and they need to switch to larger needles.
- If the knitted swatch measures 18 stitches and 22 rows within a 1-inch section, the knitter’s gauge is too loose and they need to switch to smaller needles.
Once the correct gauge is determined, it is important to take accurate measurements for the kerchief. This will ensure the final piece fits properly and achieves the desired look. Measurements that may be required include the length, width, and any special shaping details.
For example:
- A kerchief might require a length of 20 inches and a width of 10 inches.
- If the kerchief has a specific shaping detail, such as a decrease section, the pattern will provide instructions on where and how this shaping should be done.
By achieving the correct gauge and taking accurate measurements, knitters can confidently start creating their knit kerchief, knowing that it will turn out as intended. Following the pattern instructions, they can enjoy the process of knitting and create a beautiful accessory.
Cast On

When starting a knitting project, one of the first steps is to cast on. This is the process of creating the first row of stitches on the knitting needle. There are several different methods for casting on, each with its own advantages and purposes.
Long-Tail Cast On: The long-tail cast on is a common and versatile method. It creates a neat and elastic edge, making it suitable for a wide range of projects. To do the long-tail cast on, you will need to estimate the length of yarn needed for each stitch, which can be a bit tricky for beginners. However, once you get the hang of it, it becomes a quick and efficient way to start your knitting.
Knitted Cast On: The knitted cast on is another popular method that creates a firm and sturdy edge. It is often used when a more stable edge is required, such as for a button band or neckline. To do the knitted cast on, you will need to know how to do the knit stitch. This method is also easy to learn and provides a clean and professional-looking edge.
Other Casting On Methods
In addition to the long-tail cast on and the knitted cast on, there are many other methods you can use to cast on your stitches. Some other common methods include the cable cast on, the backward loop cast on, and the tubular cast on. Each method has its own unique properties and is suited for different types of projects, so it’s worth experimenting with different techniques to find the one that works best for you.
Once you have cast on your stitches, you are ready to begin knitting! The cast on edge forms the foundation of your project, so it’s important to take your time and ensure that your stitches are evenly spaced and not too tight or too loose. With practice, casting on will become second nature and you’ll be ready to tackle all kinds of knitting projects!
Knitting the Body
When it comes to knitting the body of a kerchief, there are a few key steps to follow in order to create a beautiful and functional accessory. Whether you are an experienced knitter or just starting out, these guidelines will help you achieve the desired result.
Choosing the Right Yarn and Needles
Before starting to knit the body of the kerchief, it is important to choose the right yarn and needles. The type of yarn you select will determine the overall feel and look of the kerchief. If you want a lightweight and airy kerchief, choose a yarn with a thinner weight. On the other hand, if you prefer a warmer and cozier kerchief, opt for a thicker yarn. Additionally, make sure to choose the appropriate needle size that matches the yarn weight.
Casting On and Knitting the Rows
To begin knitting the body of the kerchief, cast on the desired number of stitches. This will determine the width of the kerchief. If you want a wider kerchief, cast on more stitches; if you prefer a narrower kerchief, cast on fewer stitches. Once you have cast on, start knitting the rows according to the chosen pattern. Follow the instructions carefully, making sure to knit each stitch correctly.
As you progress with knitting the body, keep an eye on your tension to ensure even and consistent stitches. Adjust your tension as needed to maintain the desired gauge. If you notice any mistakes or dropped stitches, fix them immediately to prevent any unraveling or unevenness in your work.
Creating Decreases and Shaping
Depending on the desired shape of the kerchief, you may need to create decreases or shaping in the body. This can be done by following specific instructions in the pattern or by using basic knitting techniques, such as knitting two stitches together or making yarn overs. These techniques will help you achieve the desired shape and design of the kerchief.
Continue knitting the body until you reach the desired length and shape. Once you have finished, bind off your stitches, carefully weaving in any loose ends. Give your kerchief a gentle blocking to even out the stitches and help it hold its shape. Finally, admire your beautiful and handmade knit kerchief!
Decreasing
Decreasing is an essential technique in knitting that allows you to shape your projects by reducing the number of stitches. There are several ways to decrease stitches, and each method creates a different decorative effect in your work.
1. Knit Two Together (K2tog): This is perhaps the most common decrease method used in knitting. To K2tog, simply insert your right needle into the next two stitches on your left needle and knit them together as if they were one stitch. This creates a single decrease that slants to the right.
2. Slip, Slip, Knit (SSK): SSK is another commonly used decrease technique. To perform SSK, slip the next stitch knitwise onto your right needle, then slip the following stitch the same way. Insert the left needle back into these two slipped stitches and knit them together through the back loop. This creates a single decrease that slants to the left.
There are other decrease methods, such as the purl two together (P2tog) and the centered double decrease (CDD), which is used to create a centered decrease. It’s important to practice these techniques and experiment with different decrease methods to achieve the desired shaping and decorative effects in your knitting projects.
Bind Off
When knitting a kerchief, the bind off technique is used to finish off the edge and prevent the stitches from unraveling. There are various ways to bind off, depending on the desired look and stretchiness of the edge.
One common method of binding off is the standard bind off. To do this, knit the first two stitches. Then, using your left-hand needle, pass the first stitch over the second stitch and off the needle. Knit the next stitch and repeat the process of passing the previous stitch over until one stitch remains on the right-hand needle. Cut the yarn, leaving a tail, and pull it through the final stitch to secure.
Another option for binding off is the stretchy bind off. This technique is useful when you want a more flexible and elastic edge. To do the stretchy bind off, knit the first two stitches as usual. Then, insert the left-hand needle into the front of both stitches, wrap the working yarn around the needle, and pull it through both stitches. This creates a new stitch. Repeat this process until one stitch remains on the right-hand needle. Cut the yarn, leaving a tail, and pull it through the final stitch to secure.
For a decorative edge, the picot bind off can be used. To do the picot bind off, knit two stitches. Then, slip the first stitch back to the left-hand needle, pass the second stitch over the first stitch, and knit the next stitch. This creates a picot loop. Repeat this process until one stitch remains on the right-hand needle. Cut the yarn, leaving a tail, and pull it through the final stitch to secure.
These are just a few examples of ways to bind off when knitting a kerchief. Each method provides a unique finish to the edge of your knitted project. Experiment with different bind off techniques to find the one that works best for your kerchief pattern and desired outcome.
Finishing Touches
Now that you have completed knitting your kerchief, it’s time to add the finishing touches. These final steps will help give your kerchief a polished and professional look.
1. Blocking
Before you start any finishing touches, it’s important to block your knitted kerchief. Blocking is the process of shaping and stretching your knitted fabric to achieve the desired shape and size. To block your kerchief, wet it with water and lay it flat on a towel. Gently shape the kerchief to the desired dimensions and let it dry completely. Blocking will help even out your stitches and give your kerchief a smooth and neat appearance.
2. Weaving in Ends
Next, you’ll need to weave in the loose ends of yarn from your knitting. Using a tapestry needle, thread the yarn through the stitches on the wrong side of your kerchief, following the natural path of the yarn. Be sure to weave in the ends securely to prevent them from coming undone. Trim any excess yarn, leaving a small tail for added security.
3. Adding Decorative Border
If you want to add a decorative border to your kerchief, you can do so by picking up stitches along the edges. Choose a contrasting color of yarn and use a smaller needle size to pick up and knit stitches along the edge of your kerchief. You can then knit a few rows of your desired border pattern, such as a simple garter stitch or a lace pattern. Finish off by binding off loosely and weaving in the ends.
4. Blocking Again
Finally, after adding the decorative border, it’s a good idea to block your kerchief once more to ensure that the border lies flat and doesn’t curl. Wet the kerchief again and lay it flat to dry, shaping the border as needed.
With these finishing touches, your knitted kerchief is now complete! It’s ready to be worn or given as a thoughtful handmade gift. Enjoy the satisfaction of completing your knitting project and showcasing your newly acquired knitting skills.
Q&A:
Where can I find free knit kerchief patterns?
You can find free knit kerchief patterns on various websites such as Ravelry, LoveCrafts, and Knitting Pattern Central.
What materials do I need to knit a kerchief?
To knit a kerchief, you will need yarn in your desired colors, knitting needles in the appropriate size, a pair of scissors, and a yarn needle for weaving in ends.
Are there any knit kerchief patterns suitable for beginners?
Yes, there are many knit kerchief patterns that are suitable for beginners. Look for patterns with simple stitch patterns and clear instructions.
Can I customize the size of the kerchief?
Yes, you can customize the size of the kerchief by adjusting the number of stitches and rows in the pattern. Be sure to make a gauge swatch before starting to ensure the correct size.
Are there any knit kerchief patterns for children?
Yes, there are knit kerchief patterns available for children. These patterns often have smaller sizes and fun designs to appeal to young kids.