
Knitting is a beloved hobby for many people around the world. It not only allows you to create beautiful and unique garments, but it also provides a sense of relaxation and satisfaction. One popular item to knit is a pair of cozy hug boots, which are not only trendy but also incredibly comfortable. Whether you want to knit a pair for yourself or as a gift for a loved one, this knitting pattern is perfect for all skill levels.
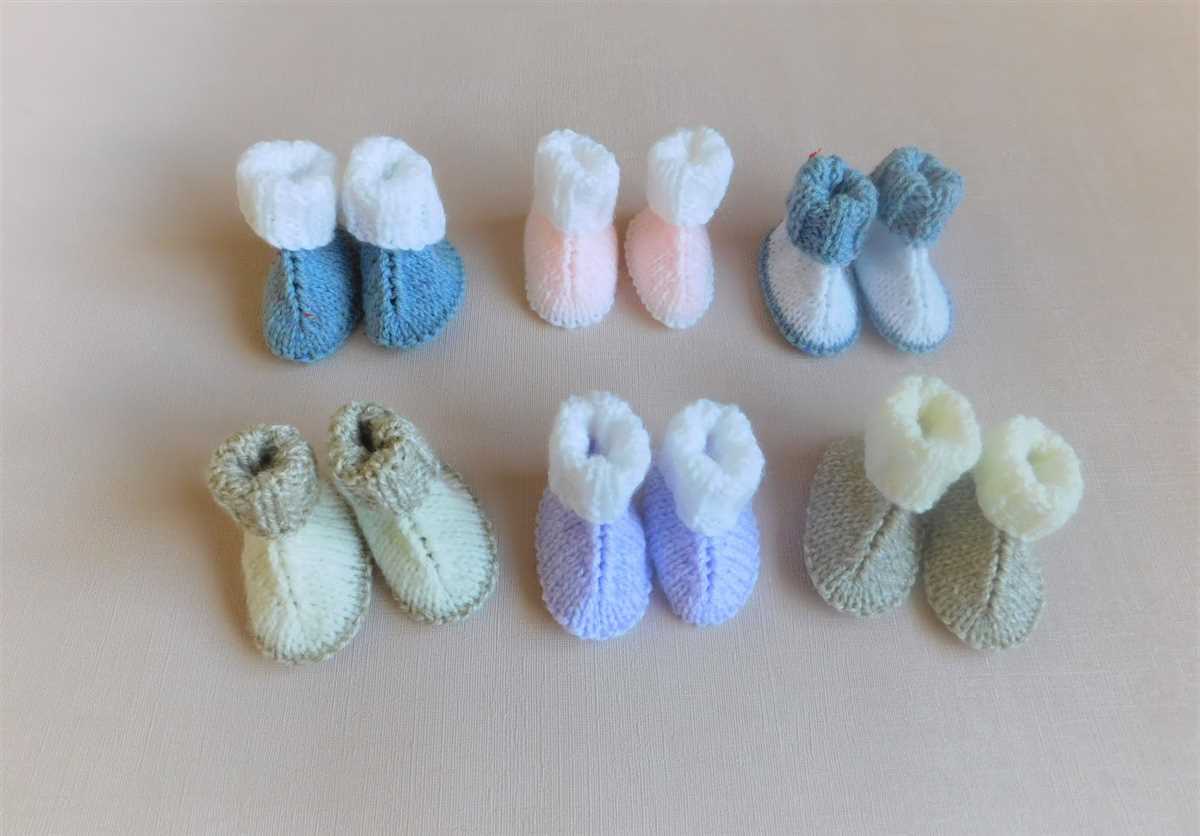
The hug boots knitting pattern is designed to create a snug fit that will keep your feet warm and toasty during the colder months. The pattern includes instructions for knitting the boots in a variety of sizes, from children to adults, so you can make a pair for everyone in the family. The pattern also offers options for customizing the boots with different colors, patterns, and embellishments, allowing you to create a truly one-of-a-kind pair that reflects your personal style.
With this knitting pattern, you’ll be able to create a pair of hug boots that are not only fashionable but also functional. The pattern includes detailed instructions and step-by-step photos to guide you through the knitting process, making it easy for even beginners to follow along. Additionally, the pattern provides tips and tricks for achieving the perfect fit and finishing touches, ensuring that your boots will be both comfortable to wear and visually appealing.
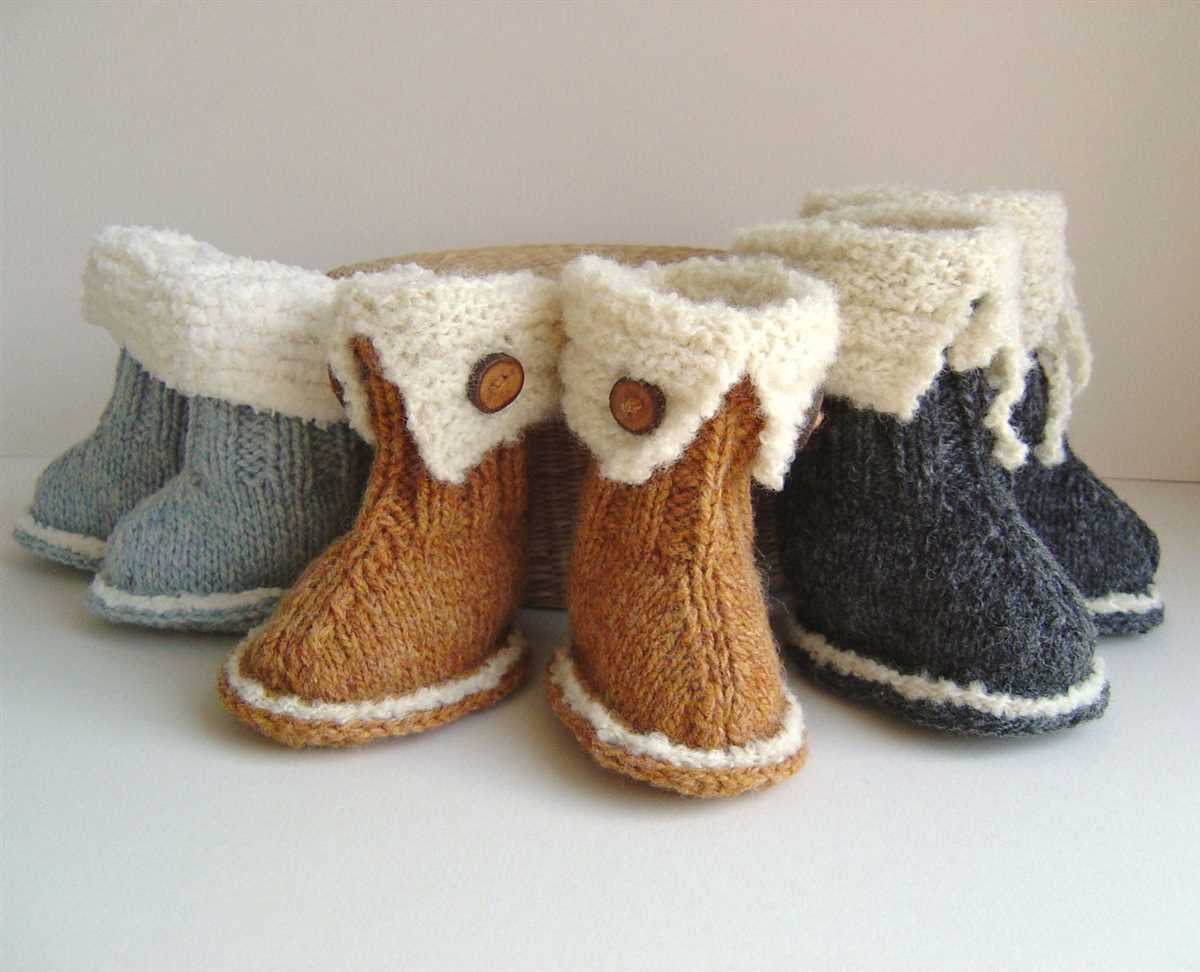
Hug Boots Knitting Pattern
If you are looking for a cozy and warm pair of boots to knit, then the Hug Boots knitting pattern is perfect for you. These boots are not only stylish but also incredibly comfortable to wear, making them the perfect accessory for colder weather. Whether you’re a beginner or an experienced knitter, this pattern is easy to follow and allows you to customize the boots to your desired fit and style.
Materials
- Size 8 knitting needles
- Super bulky yarn of your choice (approximately 300g)
- Darning needle
- Scissors
Instructions
- Start by casting on 30 stitches.
- Work in rib stitch (knit 2, purl 2) for the first 2 inches.
- Switch to stockinette stitch (knit on right side, purl on wrong side) for the next 6 inches.
- Shape the heel by decreasing 1 stitch on each end of the next 2 rows.
- Continue working in stockinette stitch for another 4 inches.
- Begin shaping the toe by decreasing 1 stitch on each end of the next 2 rows.
- Continue decreasing 1 stitch on each end of every 4th row until you have 10 stitches remaining.
- Work in rib stitch for the last 2 inches.
- Bind off all stitches and sew up the back seam using a darning needle.
- Repeat the above steps to make a second boot.
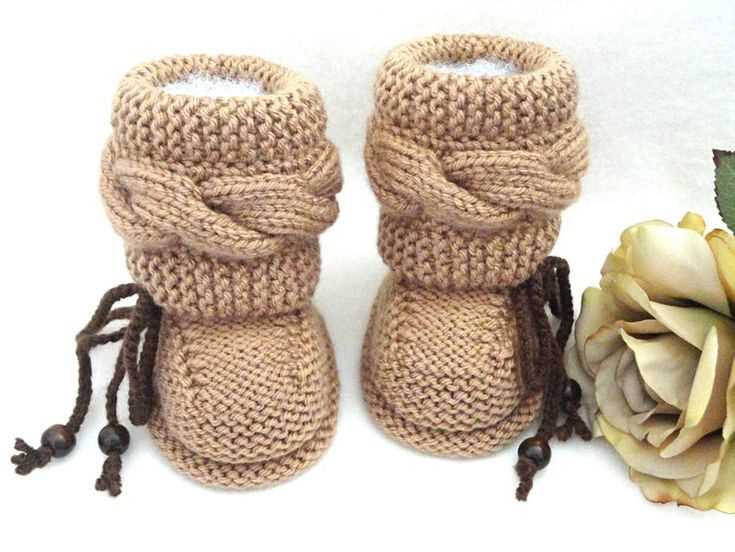
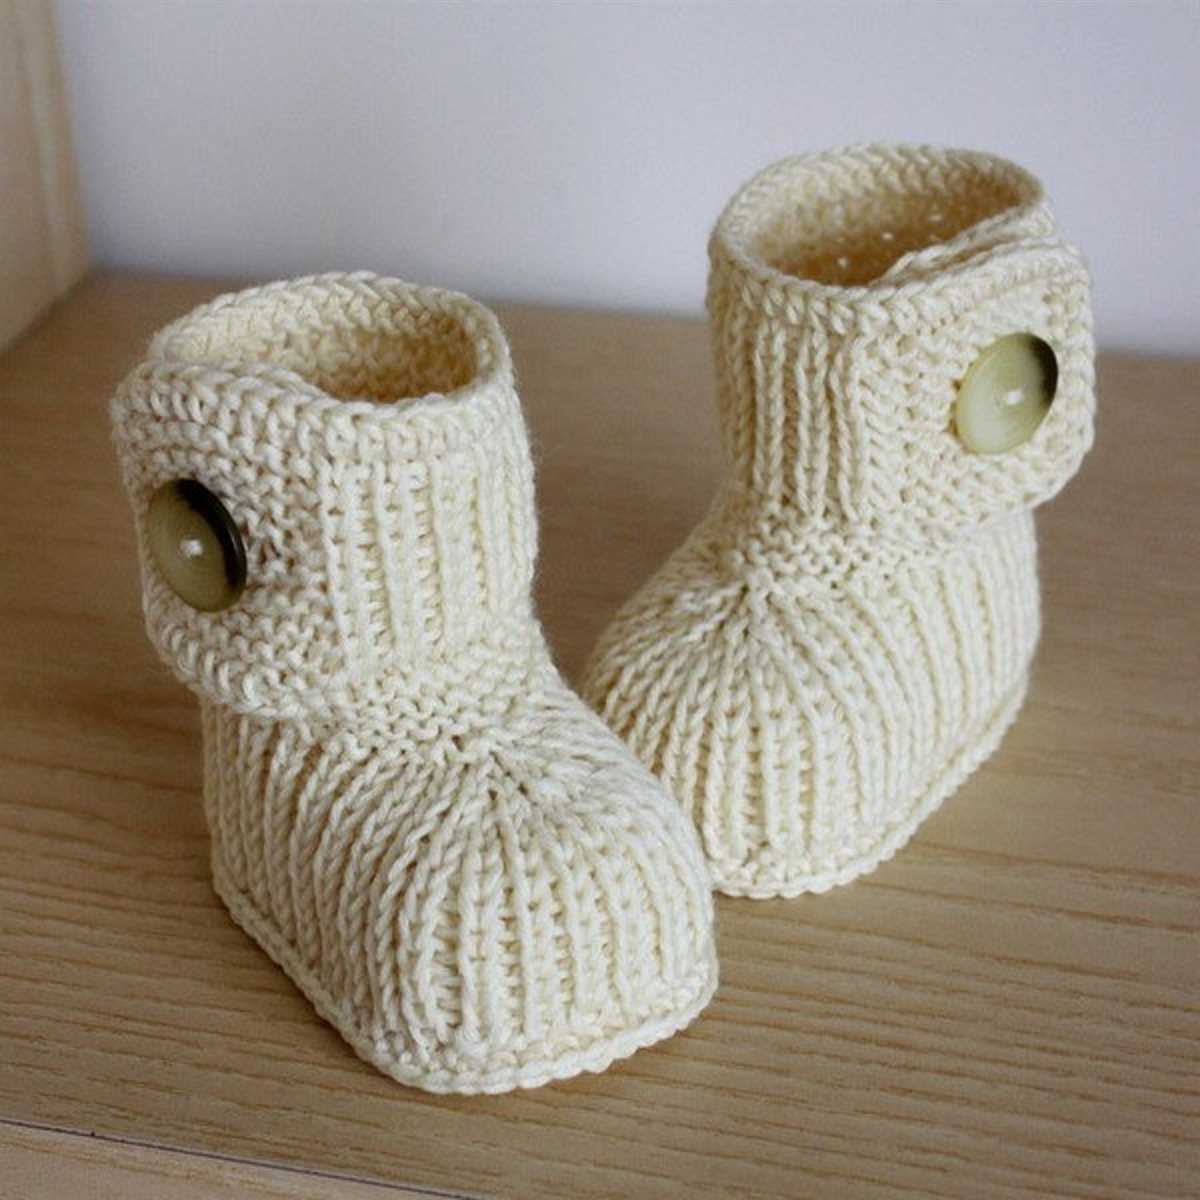
Once you have completed both boots, you can add your own personal touches such as buttons, pom-poms, or tassels for added style. These Hug Boots make a great gift or a cozy treat for yourself, and with the endless color options available, you can create a pair to match any outfit. So grab your knitting needles and get started on making your own pair of Hug Boots today!
History of the Hug Boots

The Hug Boots, also known as Ugg Boots, have a fascinating history that stretches back several centuries. These cozy boots originated in Australia and were traditionally worn by sheep shearers in the early 19th century. Made from sheepskin, the boots offered excellent insulation and warmth, making them perfect for the harsh Australian winters.
It wasn’t until the 1960s that the Hug Boots gained popularity outside of their traditional sheep-shearing roots. Surfers in Australia started wearing them to keep their feet warm after riding the waves. The boots soon became a staple for surfers around the world, as they were not only comfortable but also practical for beach activities.
Throughout the 1970s and 1980s, the Hug Boots continued to gain popularity, especially among young people who embraced the laid-back, bohemian fashion trend. Celebrities and musicians also played a role in boosting the boots’ reputation as a fashionable and timeless footwear choice. In the 1990s, the boots experienced another surge in popularity when they were featured on the catwalks of high-end fashion designers.
Nowadays, the Hug Boots have become a global phenomenon, loved by people of all ages and walks of life. They are no longer just a functional winter boot but have also become a fashion statement. Whether paired with jeans or a dress, the Hug Boots add a cozy and stylish touch to any outfit.
Materials Needed for Knitting Hug Boots
Knitting hug boots is a cozy and stylish project that requires a few essential materials to get started. Whether you are a beginner or an experienced knitter, having the right materials is crucial to ensure the success of your project.
1. Yarn: The first and most important material required for knitting hug boots is yarn. Choose a soft and thick yarn that will provide warmth and comfort to your boots. Opt for a yarn specifically designed for knitting projects, such as bulky or super bulky yarn, to achieve the desired thickness and texture.
2. Knitting Needles: A pair of long knitting needles is necessary to create the stitch pattern and shape of the boots. The size of the needles will depend on the yarn thickness and the desired gauge. Check the yarn label or the knitting pattern for the recommended needle size to ensure the correct stitch tension.
3. Stitch Markers: Stitch markers are helpful tools to keep track of specific stitches or sections in the knitting pattern. They can be used to mark the beginning of rounds, decreases, or any other key points in the pattern. Use small, removable stitch markers that won’t snag on the yarn.
4. Tapestry Needle: A tapestry needle, also known as a yarn needle or darning needle, is essential for finishing touches and sewing up any seams. It is used to weave in loose ends, attach buttons or other embellishments, and assemble the different pieces of the boots.
5. Scissors: A pair of sharp scissors is necessary for cutting the yarn and trimming any excess threads. Choose scissors with a comfortable grip and sharp blades to ensure clean cuts without damaging the yarn.
6. Measuring Tape: A measuring tape is useful for checking gauge, determining the size of the boots, and ensuring proper fit. Measure the length, width, and circumference of your feet or the recipient’s feet to choose the correct size for the boots.
7. Crochet Hook: A crochet hook may be required for certain stages of the knitting pattern, such as picking up stitches or creating decorative edges. Choose a crochet hook that is compatible with the yarn thickness and matches the recommended gauge.
With these essential materials in hand, you are ready to start knitting your own cozy and comfortable hug boots. Follow the knitting pattern instructions and enjoy the process of creating a unique pair of boots to keep your feet warm during the colder months.
Choosing the Right Yarn for Hug Boots
When it comes to knitting a pair of hug boots, choosing the right yarn is essential to achieve the desired comfort, warmth, and durability. The yarn you select will greatly influence the final outcome of your project, so it’s important to consider a few key factors before making your decision.
Fiber type: The type of fiber used in the yarn can make a significant difference in the look and feel of your hug boots. Wool is a popular choice due to its natural insulation properties and ability to keep your feet warm even in cold weather. Additionally, wool is quite durable and can withstand regular wear. However, if you’re looking for a vegan-friendly option or have wool allergies, you can opt for synthetic fibers like acrylic or nylon, which also offer warmth and durability.
Weight: The weight of the yarn determines the thickness and heaviness of your hug boots. Thicker yarns, such as chunky or bulky weight, will create a more substantial and cozy pair of boots, perfect for colder climates. On the other hand, lighter weight yarns, such as fingering or sport weight, will result in a more delicate and lightweight pair of boots, suitable for mild temperatures. Consider the intended use and climate when selecting the yarn weight for your project.
Texture: The texture of the yarn can add an extra dimension to your hug boots. Smooth and even yarns will create a clean and polished look, while textured or tweed yarns can add visual interest and depth to your boots. If you prefer a more rustic or natural appearance, you can opt for yarns with a slight fuzz or halo, such as mohair or angora blends.
By considering these factors and experimenting with different yarns, you can find the perfect match for your hug boots knitting project. Remember to always check the yarn label for care instructions and gauge recommendations to ensure the best outcome. Happy knitting!
Gauge and Sizing for Hug Boots
The gauge and sizing for hug boots determine the overall fit and comfort of the finished product. It is important to carefully follow the instructions and use the suggested materials to achieve the desired outcome. The gauge refers to the number of stitches and rows per inch, and it ensures that the boots will fit snugly and stay in place on the feet.
To measure gauge, use the specified yarn and needle size and knit a swatch. Measure the number of stitches and rows in a 4-inch square to determine if your gauge matches the pattern requirements. Adjust your needle size if necessary to achieve the correct gauge. A smaller gauge will result in a smaller finished size, while a larger gauge will make the hug boots larger.
Sizing
The sizing for hug boots typically includes instructions for multiple shoe sizes, ranging from adult to child sizes. It is important to refer to the sizing chart provided in the pattern and select the appropriate size based on foot measurements. Measure the length of the foot and use that measurement to determine the closest size in the pattern. It is also advisable to measure the circumference of the foot and ankle to ensure a good fit.
When making hug boots for infants or toddlers, it is important to take into account their growth and allow for extra room. Consider adding a few centimeters to the foot length to accommodate growth. Additionally, adjust the ankle and leg circumference if necessary to ensure a comfortable fit.
By paying attention to both gauge and sizing, you can create beautifully fitting hug boots that are both stylish and cozy. Taking the time to measure accurately and adjust as needed will result in a finished product that is sure to please both the knitter and the wearer.
Getting Started: Casting On and Leg Section
Before you can start knitting your own pair of cozy hug boots, you will need to cast on your stitches and begin working on the leg section of the pattern. This is the foundation of your project and will set the stage for the rest of the knitting process.
To begin, gather your materials: a set of knitting needles suitable for the yarn you are using and the chosen yarn itself. You may also want to have a tape measure and a pair of scissors handy. It’s important to choose the right size needles to achieve the desired gauge and ensure a proper fit for your boots.
Casting On
Once you have all your supplies ready, it’s time to cast on. There are several casting on methods to choose from, but for hug boots, a long tail cast on is commonly used. This method creates a sturdy and stretchy edge that is perfect for this type of project.
To begin the long tail cast on, make a slipknot on one of your needles, leaving a long enough tail to work with. Hold the needle with the slipknot in your right hand, and using your left hand, hold the working yarn and the tail of the yarn together. Insert the right needle into the slipknot from front to back, and wrap the working yarn around the right needle counterclockwise.
Next, pull the loop through the slipknot, forming a new stitch on the right needle. Repeat this process for the desired number of stitches. Make sure to keep your tension consistent to ensure an even edge. Once you have cast on all your stitches, you can distribute them evenly onto the other needle(s) if you are working with double-pointed needles or continue working in the round if you are using circular needles.
Leg Section
With your stitches cast on, it’s time to move on to the leg section of the hug boots. This section will determine the length of the boots from the top of the foot to the desired height on your leg. The leg section usually consists of a simple stitch pattern, such as ribbing or a basic stockinette stitch, to provide some stretch and structure.
Follow the pattern instructions for the leg section, working each row or round as indicated. If you are working with double-pointed needles, make sure to distribute your stitches evenly onto each needle to avoid any laddering or gaps. If you have chosen a stitch pattern with a specific repeat, make sure to keep track of your rows or rounds to maintain an even and consistent pattern.
Continue working on the leg section until you have reached your desired length or as specified in the pattern. Once you have completed this section, you can move on to the next stage of the knitting pattern, which will typically involve shaping the heel or continuing with the foot section.
Knitting the Foot Section of Hug Boots
When knitting the foot section of hug boots, it is important to follow the pattern carefully to ensure a perfect fit. The foot section is where the boots will provide cozy warmth and comfort to the wearer, so attention to detail is key.
To begin, make sure you have the correct size of knitting needles and yarn specified in the pattern. This will ensure that your hug boots turn out the way you want them to. Start by casting on the required number of stitches for the foot section. This may vary depending on the size and style of the boots. Use stitch markers to indicate any important sections or increases and decreases along the way.
As you work through the foot section, you will be knitting in the round. This means that you will continue knitting in a spiral without turning your work. Pay close attention to any stitch patterns or cable patterns included in the design, making sure to follow the pattern instructions for each round. This will create a beautiful texture and design on the foot of the hug boots.
As you approach the toe section, you may need to decrease stitches to create the desired shape. Follow the pattern instructions carefully to ensure that you are decreasing evenly and maintaining the correct stitch count. This will ensure a snug and comfortable fit for the wearer.
Once you have completed the foot section, you can move on to knitting the leg section or any other components of the hug boots. Take your time and enjoy the process of creating a cozy and stylish pair of boots with your knitting skills.
Shaping the Toe of the Hug Boots
The toe of the Hug Boots is an important part of the pattern as it determines the shape and fit of the finished boots. To achieve the desired shape, the toe is shaped through decreasing stitches in a specific pattern.
To begin shaping the toe, the pattern will instruct you to work a certain number of stitches, typically in the middle of the row. This is the starting point for the decrease rounds. The decreases are usually worked on both sides of a specific stitch or a marker, which helps to maintain symmetry in the pattern.
When working the decrease rounds, stitches are usually decreased either by knitting or purling two stitches together. This creates a smooth and seamless look to the toe. The decrease rounds are repeated for a certain number of times, gradually reducing the number of stitches until the desired width for the toe is reached.
It is important to follow the pattern closely and keep track of the number of decrease rounds completed. Carefully counting the stitches after each round will help to ensure that the correct number of stitches remains, preventing any errors in the shaping of the toe. Once the toe has been properly shaped, the remaining stitches can be bound off or continued with the rest of the pattern to complete the Hug Boots.
Finishing Touches: Sewing Up and Adding Embellishments

Once you have completed knitting your Hug boots, it’s time to sew them up and add any desired embellishments. This final step will give your boots a polished and professional look.
To sew up your Hug boots, start by folding the knitted piece in half, making sure that the right sides are facing each other. Use a tapestry needle and coordinating yarn to sew the side seams together. Take care to sew neatly and securely, ensuring that there are no gaps or loose stitches. Once the side seams are sewn, you can also sew up the toe and heel seams if necessary.
Embellishing your Hug boots
The next step is to add any desired embellishments to your Hug boots. You can get creative here and choose from a variety of options to make your boots unique. Some popular embellishment ideas include:
- Adding pom-poms or tassels to the top of the boots
- Sewing on buttons or beads for added texture and visual interest
- Attaching ribbons or bows to the sides of the boots
Finishing touches
Finally, once you have sewn up your boots and added embellishments, take the time to inspect the finished product. Make any necessary adjustments or repairs, ensuring that everything is secure and tidy. You can also choose to block your knitted boots, which involves wetting them, shaping them to the desired size, and allowing them to dry flat.
By sewing up your Hug boots with care and adding embellishments, you can take your knitting project to the next level. The finishing touches will give your boots a professional and polished look, ensuring that they are wearable and fashionable.
Tips and Tricks for Knitting Hug Boots
Knitting hug boots can be a fun and rewarding project, but it can also be challenging, especially for beginners. Whether you are making hug boots for yourself or as a gift, here are some tips and tricks to help you along the way.
1. Choose the Right Yarn
When knitting hug boots, it’s important to choose the right yarn. You want a yarn that is soft and warm, but also durable. Look for yarn that has a good stitch definition and will hold its shape well. Wool or wool-blend yarns are often a good choice, as they offer warmth and durability.
2. Use Stitch Markers
Stitch markers can be incredibly helpful when knitting hug boots, especially for keeping track of increases and decreases. Place a stitch marker at the beginning of each round to mark the end of the round. You can also use different color stitch markers to mark specific sections or pattern repeats.
3. Check Your Gauge
Gauge is crucial when knitting hug boots, as it determines the size and fit of the finished project. Before you begin knitting, take the time to knit a gauge swatch and measure it to ensure that you are using the correct needle size and achieving the correct number of stitches per inch. Adjust your needle size as needed to achieve the correct gauge.
4. Pay Attention to Tension
Tension plays a big role in knitting hug boots. You want your stitches to be even and consistent throughout the project, so make sure to pay attention to your tension as you knit. If you notice that your tension is too tight or too loose, try adjusting your needle size or the way you hold your yarn to achieve a more even tension.
5. Take Breaks
Knitting hug boots can be a time-consuming project, so remember to take breaks and stretch your hands and wrists to avoid fatigue and repetitive strain injuries. It’s important to take care of yourself while knitting to ensure that you can continue to enjoy this craft for years to come.
With these tips and tricks in mind, you’ll be well on your way to successfully knitting a pair of cozy and stylish hug boots. Enjoy the process and embrace the satisfaction of creating something beautiful with your own two hands!
Styling and Wearing the Hug Boots
Once you have finished knitting your Hug Boots, it’s time to style them and show them off! These cozy and stylish boots are perfect for keeping your feet warm and comfortable during the colder months. Here are some tips on how to style and wear your Hug Boots:
1. Pair with leggings or skinny jeans
One of the best ways to style Hug Boots is by pairing them with leggings or skinny jeans. The slim fit of these bottoms complements the chunky and cozy look of the boots. You can choose to tuck the leggings or skinny jeans into the boots for a sleek and polished look, or let them slouch down for a more relaxed and casual vibe.
2. Layer with cozy socks
If you’re looking for extra warmth and comfort, consider layering your Hug Boots with cozy socks. Not only will this add an extra layer of insulation, but it will also add a pop of color and texture to your overall outfit. Opt for socks in a contrasting color or pattern to make a bold fashion statement.
3. Style with oversized sweaters or cardigans
The oversized trend is perfect for pairing with Hug Boots. Opt for an oversized sweater or cardigan to create a cozy and fashionable look. The loose and relaxed fit of these tops complements the relaxed and slouchy look of the boots. You can even add a belt to cinch in the waist and create a more structured silhouette.
4. Add accessories
To elevate your Hug Boots look, don’t forget to add some accessories. Consider accessorizing with a chunky scarf, a beanie, or even a statement necklace. These accessories will not only add a touch of style to your outfit but will also complement the cozy and warm vibe of the boots.
In conclusion, Hug Boots are not only a practical and comfortable footwear option but also a stylish addition to your winter wardrobe. With the right styling and pairing, you can create a chic and cozy outfit that will keep you warm and fashionable all season long!