
Knitting arm warmers is a great way to stay warm and stylish during the colder months. With a simple pattern and a pair of straight needles, you can create a cozy accessory that will keep your arms toasty and add a touch of flair to any outfit. Whether you’re a beginner or an experienced knitter, this pattern is perfect for you.
Using straight needles instead of circular needles may seem a bit unconventional for arm warmers, but it actually offers several advantages. Not only does it make the knitting process easier and more accessible for beginners, but it also allows for more versatility in terms of stitch patterns and design options. Plus, it eliminates the need to invest in circular needles if you don’t already have them.
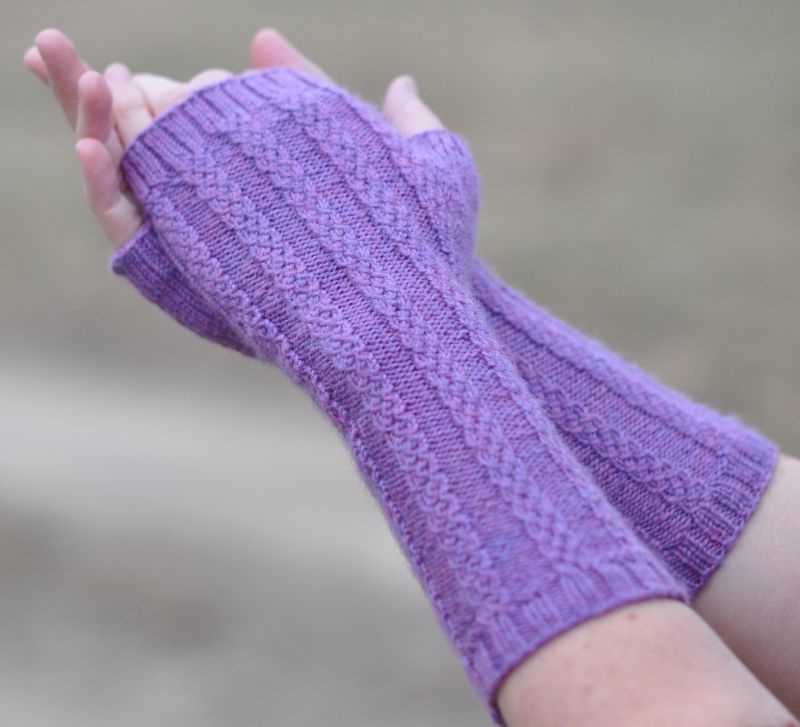
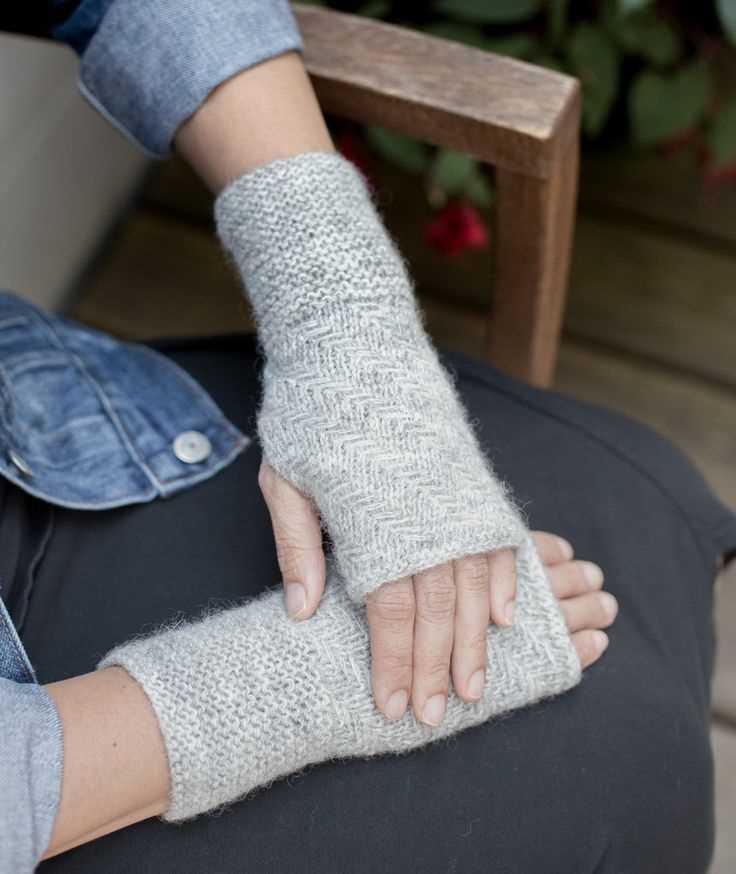
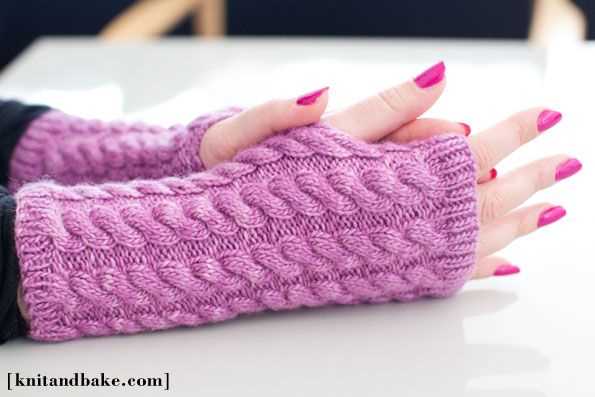
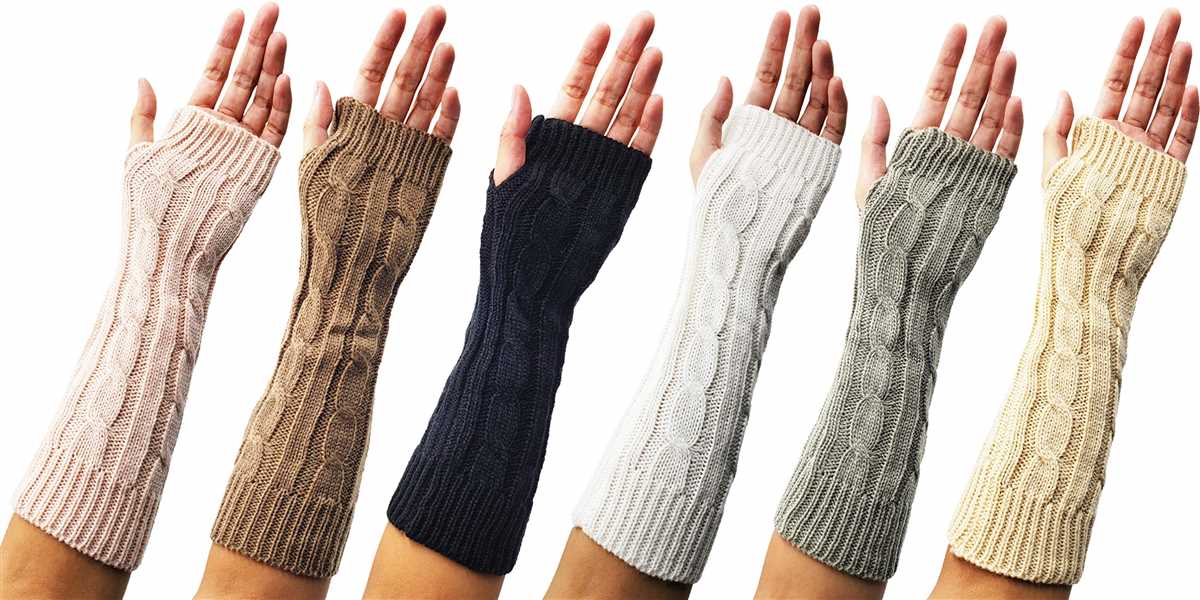
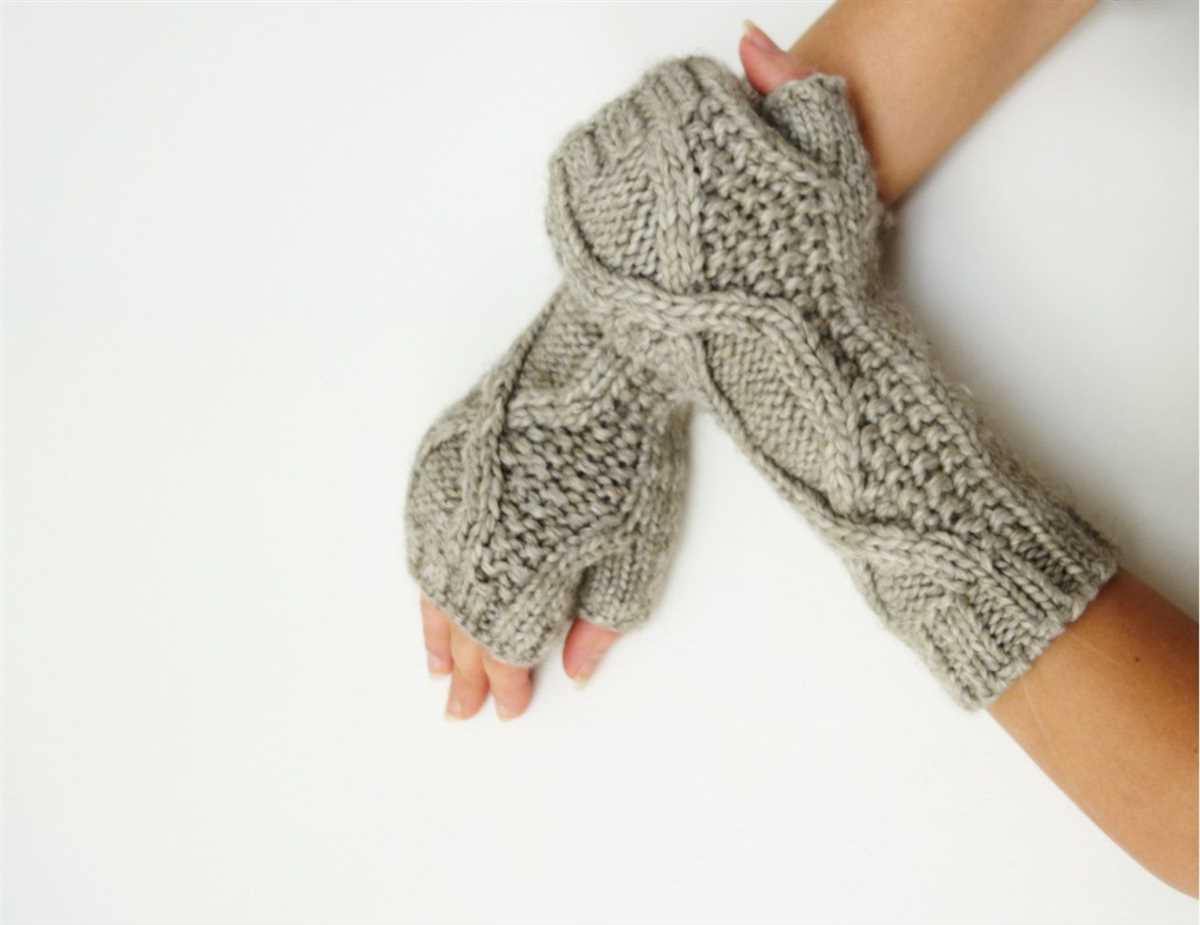
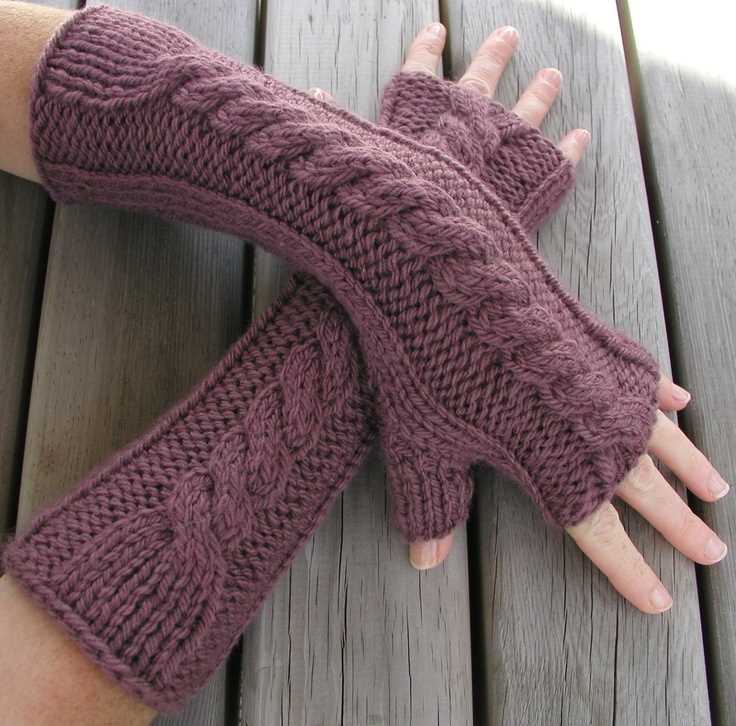
This arm warmer knitting pattern is suitable for knitters of all skill levels. It features a ribbed cuff for a snug fit, a stretchy, yet close-knit body for optimal warmth, and a decorative cable pattern for added visual interest. The pattern includes detailed instructions, as well as a list of materials and abbreviations to make the knitting process as smooth as possible.
So, if you’re ready to embark on a knitting adventure and create a cozy accessory that is both functional and fashionable, grab your straight needles and give this arm warmer knitting pattern a try. You’ll be amazed at how quickly you can whip up a pair of arm warmers that will keep you warm and stylish all winter long.
Arm Warmers for Cold Weather
In cold weather, it’s important to keep your body warm, and one area that often gets neglected is the arms. Arm warmers are a great solution to this problem, providing extra warmth and protection for your arms while allowing you to move freely.
Whether you’re going for a winter run, cycling in chilly temperatures, or simply want to stay cozy indoors, arm warmers can make a big difference. They are designed to cover the arms from the wrist to just below the elbow, providing insulation and blocking out cold air.
When choosing arm warmers, it’s important to consider the materials used. Wool is a popular choice due to its excellent insulation properties, but there are also options made from synthetic fibers that offer warmth while wicking away moisture. Look for arm warmers that are soft, breathable, and stretchy for a comfortable fit.
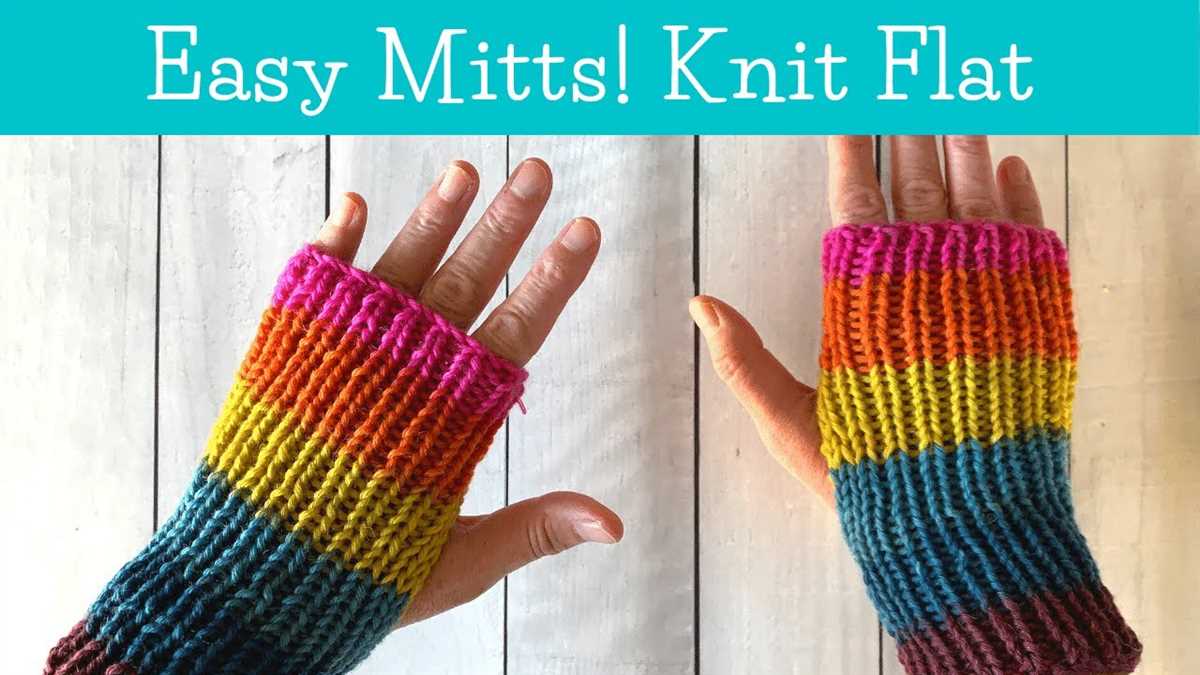
Arm warmers come in various styles and designs, allowing you to express your personal style while staying warm. You can find simple solid-colored arm warmers or opt for ones with patterns or prints to add a pop of color and flair to your outfit.
Whether you’re a runner, cyclist, or simply someone who wants to stay warm during the cold weather, arm warmers are a practical and fashionable accessory. They provide warmth and protection for your arms, allowing you to enjoy outdoor activities or stay cozy indoors without sacrificing comfort.
Advantages of knitting arm warmers
Knitting arm warmers is a popular craft activity that offers a range of advantages. Whether you are a beginner knitter or an experienced one, knitting arm warmers can be a rewarding project that provides several benefits.
1. Warmth and comfort
Arm warmers are designed to keep your arms warm and cozy during colder months or in chilly environments. With their snug fit and soft materials, they provide insulation and protect your arms from the cold. Knitted arm warmers can be worn indoors or outdoors, making them versatile accessories for any outfit.
2. Style and fashion
Knitted arm warmers are not only functional but also stylish. They come in a variety of patterns and designs, allowing you to showcase your creativity and personal style. You can choose from simple or intricate patterns, solid colors or bold prints, and customize them to match your wardrobe. Arm warmers can be a fashionable accessory that adds a unique touch to your look.
3. Portability and convenience
Arm warmers are small and lightweight, making them easy to carry in your bag or pocket. They can be quickly put on or taken off as needed, providing additional warmth when necessary. Knitting arm warmers can be a portable project that you can work on while commuting, traveling, or during your leisure time.
4. Skill development
Knitting arm warmers can help you improve your knitting skills. They involve various techniques, such as casting on, knitting, purling, increasing, decreasing, and finishing. By knitting arm warmers, you can practice and refine these techniques, gain confidence in your knitting abilities, and enhance your overall skill level.
5. Personalized gifts

Knitted arm warmers can be great personalized gifts for your loved ones. You can create unique designs and color combinations that reflect their individual style and preferences. Handmade arm warmers are thoughtful and heartfelt presents that show your care and dedication in crafting something special for them.
In conclusion, knitting arm warmers offer warmth, style, convenience, skill development, and the opportunity to create personalized gifts. Whether you are knitting for yourself or others, arm warmers can be a rewarding and enjoyable project.
Choosing the Right Yarn for Arm Warmers
When it comes to knitting arm warmers, choosing the right yarn is essential to ensure both comfort and functionality. There are several factors to consider when selecting a suitable yarn for your project.
1. Fiber Content: The fiber content of the yarn will determine its warmth, breathability, and durability. For arm warmers, you want a yarn that is soft and cozy yet able to provide insulation. Natural fibers, such as wool or alpaca, are excellent choices as they offer warmth without being overly bulky. However, if you prefer a lighter weight yarn, blends that incorporate synthetic fibers like acrylic or nylon can be a good option.
2. Gauge: The gauge of the yarn refers to the number of stitches and rows per inch it creates when knitted. It is crucial to choose a yarn that matches the recommended gauge for your arm warmer pattern. Using the wrong gauge can result in a finished piece that either doesn’t fit or lacks the desired stretch. Be sure to check the pattern specifications and choose a yarn that will allow you to achieve the correct tension.
3. Color and Texture: Arm warmers can be a stylish accessory, so consider the color and texture of the yarn to create a visually appealing finished product. Solid colors can be versatile and complement a range of outfits, while variegated or self-striping yarns can add a touch of uniqueness. Additionally, textured yarns, such as boucle or mohair, can add an extra dimension to your arm warmers.
4. Care Instructions: Lastly, consider the care instructions for the yarn. Some yarns require handwashing, while others can be machine washed. If you prefer low-maintenance arm warmers, opt for a yarn that is easy to care for and can withstand regular washing without losing its shape or color.
By carefully considering these factors, you can choose the perfect yarn for your arm warmers, ensuring a comfortable and stylish accessory that will keep you warm during the colder months.
Getting the right gauge for your arm warmers

When knitting arm warmers, it is crucial to achieve the correct gauge in order to ensure that the finished product fits properly. The gauge refers to the number of stitches and rows per inch of the knitted fabric. To determine the appropriate gauge for your arm warmers, it is essential to follow the instructions provided in the knitting pattern.
To achieve the correct gauge, it is important to use the recommended needle size and yarn weight specified in the knitting pattern. The needle size affects the tension of your stitches, while the yarn weight determines the overall thickness and drape of the fabric. Knitting with a different needle size or yarn weight can lead to a different gauge, resulting in arm warmers that are either too tight or too loose.
Before starting your arm warmers, it is advisable to make a gauge swatch. This involves knitting a small sample of the pattern using the recommended needle size and yarn weight. Measure the swatch using a ruler or a gauge tool to determine the number of stitches and rows per inch. If your gauge does not match the pattern’s gauge, you may need to adjust the needle size and try again.
Remember to wash and block your gauge swatch before measuring. The process of washing and blocking can affect the gauge, so it is important to simulate the final treatment that the arm warmers will receive. If the washed and blocked gauge swatch matches the pattern’s gauge, you can confidently proceed with knitting the arm warmers, knowing that they will fit as intended.
By carefully paying attention to the gauge and making any necessary adjustments, you can ensure that your arm warmers are the perfect fit and provide maximum comfort and warmth.
Knitting Needle Size for Arm Warmers
When it comes to knitting arm warmers, the needle size you choose can have a significant impact on the final result. The right needle size will help you achieve the desired gauge and ensure that the arm warmers fit comfortably.
Using straight needles: If you’re planning to knit arm warmers using straight needles, the recommended size will depend on the yarn weight you’re using and your personal tension. Generally, a needle size between US 7 (4.5mm) and US 9 (5.5mm) works well for worsted weight yarn, while US 5 (3.75mm) to US 7 (4.5mm) are suitable for sport weight yarn. It’s important to check the gauge swatch before starting your project to make sure you’re getting the correct tension.
Choosing circular needles: If you prefer to use circular needles for knitting arm warmers, you can follow the same guidelines for needle size as with straight needles. However, circular needles allow you to knit in the round, which can be more convenient for arm warmer projects. Using circular needles also comes in handy when working with small stitch counts, as they provide a more compact knitting space.
- For chunky or bulky weight yarn, you may need to use larger needle sizes, such as US 10 (6mm) or even US 13 (9mm), to achieve the desired fabric thickness.
- If you like a looser gauge, you can go up a needle size, but keep in mind that this might affect the fit and drape of the arm warmers.
- In addition to needle size, you’ll also need to consider the length of the needles. For arm warmers, shorter needles around 10 inches (25 cm) are often more comfortable to work with, as they allow you to easily knit the smaller circumference.
Experimenting with different needle sizes can be a fun way to personalize your arm warmers and achieve the desired fit and look. Just remember to swatch for gauge and adjust accordingly to achieve the best results!
Arm Warmers Knitting Pattern using Straight Needles
Knitting arm warmers can be a fun and rewarding project for those who prefer straight needles. With this easy-to-follow pattern, you’ll be able to create stylish and cozy arm warmers in no time.
To start, you’ll need a pair of straight knitting needles in the appropriate size for your selected yarn. Additionally, you’ll need a set of stitch markers to help keep track of your progress.
Begin by casting on the desired number of stitches, ensuring that the cast on edge is loose enough to comfortably fit around your wrist. For a snug fit, typically around 35 stitches would be suitable.
Next, knit in a ribbed pattern (knit 1, purl 1) for a few inches to create a stretchy cuff. This will help the arm warmers stay in place on your arm.
Once the desired cuff length is achieved, switch to a stocking stitch pattern (knit one row, purl one row) for the main section of the arm warmer. Continue knitting in the stocking stitch until the desired length is reached, typically around 12 inches for a full arm warmer.
To finish off the arm warmer, switch back to the ribbed pattern for a few more inches to create a snug and stretchy top cuff. Bind off the stitches loosely, making sure not to pull them too tightly.
Repeat the same steps for the second arm warmer, ensuring that both arm warmers are identical in size and length.
Once both arm warmers are completed, weave in any loose ends and sew any openings together if necessary. Finally, try on your cozy arm warmers and enjoy the warmth and style they bring to your outfit.
Step-by-step instructions for knitting arm warmers
Knitting arm warmers can be a fun and rewarding project, and with this simple pattern, you can easily create your own cozy pair. Whether you’re a beginner or an experienced knitter, these step-by-step instructions will guide you through the process.
Materials:
- Straight knitting needles
- Worsted weight yarn
- Tapestry needle
- Scissors
Instructions:
- Start by casting on 40 stitches using the long tail cast on method. This will be the width of your arm warmer.
- Work in a rib stitch pattern (k2, p2) for the first 2 inches to create the cuff of the arm warmer.
- Switch to stockinette stitch (knit one row, purl one row) for the next 4 inches to create the main body of the arm warmer.
- After reaching the desired length, switch back to the rib stitch pattern for the last 2 inches.
- Bind off all stitches and cut the yarn, leaving a tail long enough to weave in later.
- Repeat the above steps to create a second arm warmer.
Once you have completed both arm warmers, use a tapestry needle to weave in any loose ends and trim excess yarn. Try on your new arm warmers and adjust the length if necessary. These arm warmers will keep your arms cozy and stylish during the cooler months, and they also make great gifts for friends and family. Happy knitting!
Adding ribbing for a better fit
When knitting arm warmers, adding ribbing to the cuffs can help create a better fit and ensure that they stay in place on your arms. Ribbing is a stretchy and elastic pattern created by alternating knit and purl stitches in a specific sequence. This ribbing not only adds a touch of style but also allows the arm warmers to comfortably stretch and conform to your arm’s shape.
To add ribbing to your arm warmers, you can follow a simple pattern. Start by casting on your desired number of stitches using straight needles. Then, begin working in a ribbing pattern, such as a 1×1 rib (alternating one knit stitch and one purl stitch) or a 2×2 rib (alternating two knit stitches and two purl stitches).
As you continue knitting the ribbing, you will notice that the fabric starts to create a stretchy band. This band will provide a snug fit around your wrist or forearm, preventing the arm warmers from sliding down or feeling too loose. The ribbing also helps the arm warmers stay securely in place, even during active movements or sports activities.
After working the desired length of ribbing, you can switch to another stitch pattern or continue the ribbing if you prefer. The ribbing can be a decorative feature on the arm warmers, especially if you use contrasting colors or different textures for the ribbing and the main body of the arm warmers.
In summary, adding ribbing to your arm warmers can enhance their fit, comfort, and style. By incorporating a ribbing pattern into your knitting, you can ensure that the arm warmers stay in place while providing a stretchy and snug fit on your arms. Experiment with different ribbing patterns and combinations to create unique arm warmers tailored to your preferences.
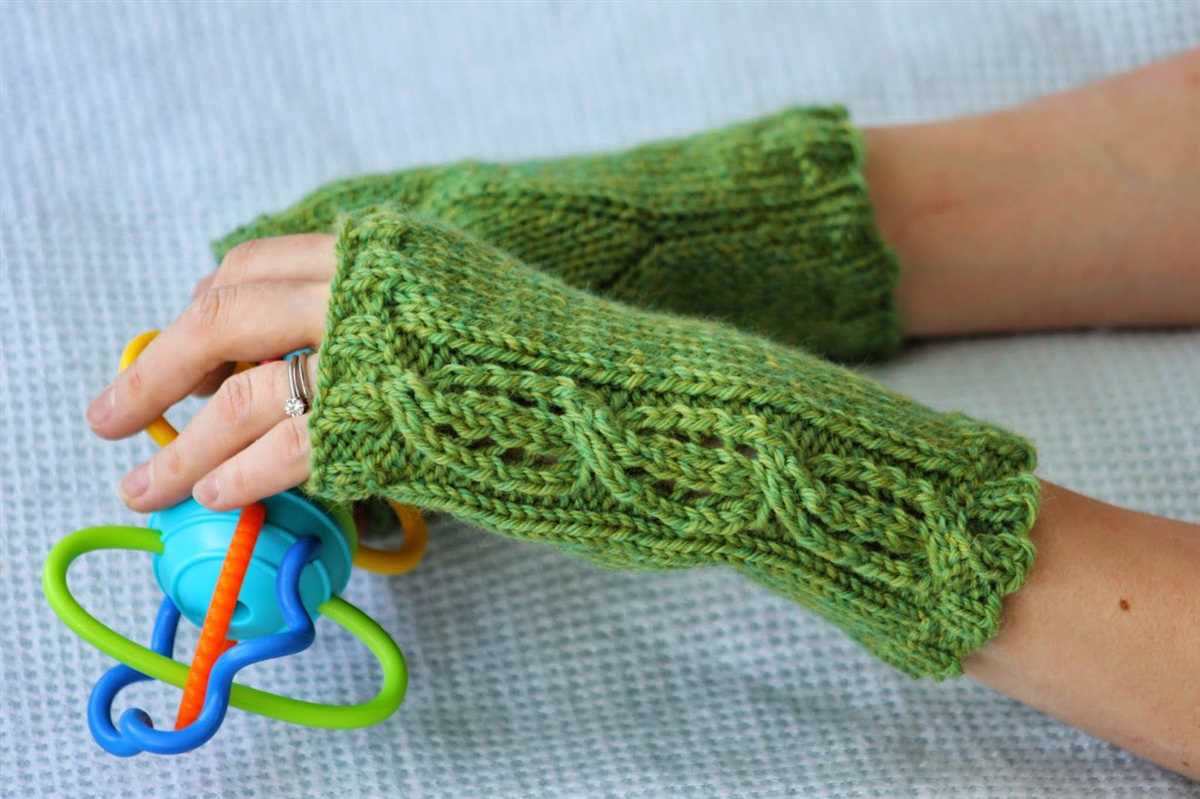
Creating a Thumb Hole for Arm Warmers
Arm warmers are a cozy accessory to keep your arms warm during the colder months. If you’re knitting a pair of arm warmers on straight needles, you may want to incorporate a thumb hole for added comfort and functionality. A thumb hole allows you to free your thumb while still keeping the rest of your hand covered and warm.
To create a thumb hole, you will need to make a few adjustments to your knitting pattern. One common method is to knit a few stitches in a different stitch pattern or on waste yarn to create an opening for the thumb. This can be done by binding off a certain number of stitches in the middle of a row and then casting on the same number of stitches on the next row to continue the pattern.
Here is a step-by-step guide to creating a thumb hole:
- When you reach the desired length for your arm warmers and are ready to create the thumb hole, decide on the number of stitches you want to reserve for the thumb. This will depend on the size of your hand and personal preference.
- Knit to the point where you want the thumb hole to begin. For example, if you decide to reserve 10 stitches for the thumb, knit to the 11th stitch.
- Bind off the specified number of stitches for the thumb. This can be done by knitting the first stitch, then slipping the next stitch over the knit stitch and off the needle. Repeat this process until you have bound off the desired number of stitches.
- Continue knitting the remaining stitches until you reach the end of the row.
- On the next row, cast on the same number of stitches that were bound off for the thumb. This can be done by using the backward loop cast-on method or any other preferred cast-on method.
- Continue knitting the pattern as usual, incorporating the thumb hole into the design.
By following these steps, you can easily create a thumb hole for your arm warmers. Remember to adjust your knitting pattern accordingly to accommodate the thumb hole and enjoy your cozy and functional arm warmers!
Finishing touches for your arm warmers
When it comes to completing your arm warmers, the finishing touches can make all the difference. Adding a few final details can help personalize your arm warmers and give them a polished, professional look. Here are some finishing touches to consider:
1. Ribbed cuffs
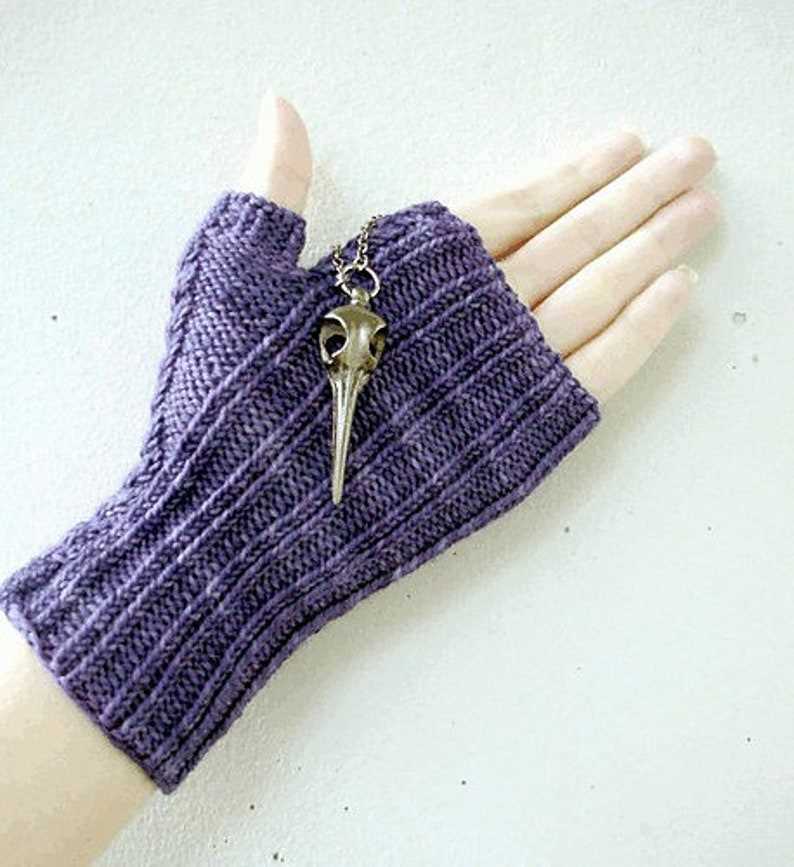
Add a ribbed cuff to your arm warmers to create a snug fit and prevent them from slipping down your arms. A simple 1×1 or 2×2 ribbing pattern can easily be added to the cuff by alternating knit and purl stitches. This not only adds a stylish touch but also helps to keep the arm warmers in place.
2. Button closures
For a decorative touch and added functionality, consider adding button closures to your arm warmers. Sewing a row of small buttons along the length of the arm warmer allows you to adjust the fit and securely fasten them around your wrists. Choose buttons that complement the color and style of your arm warmers to enhance their overall appearance.
3. Embellishments
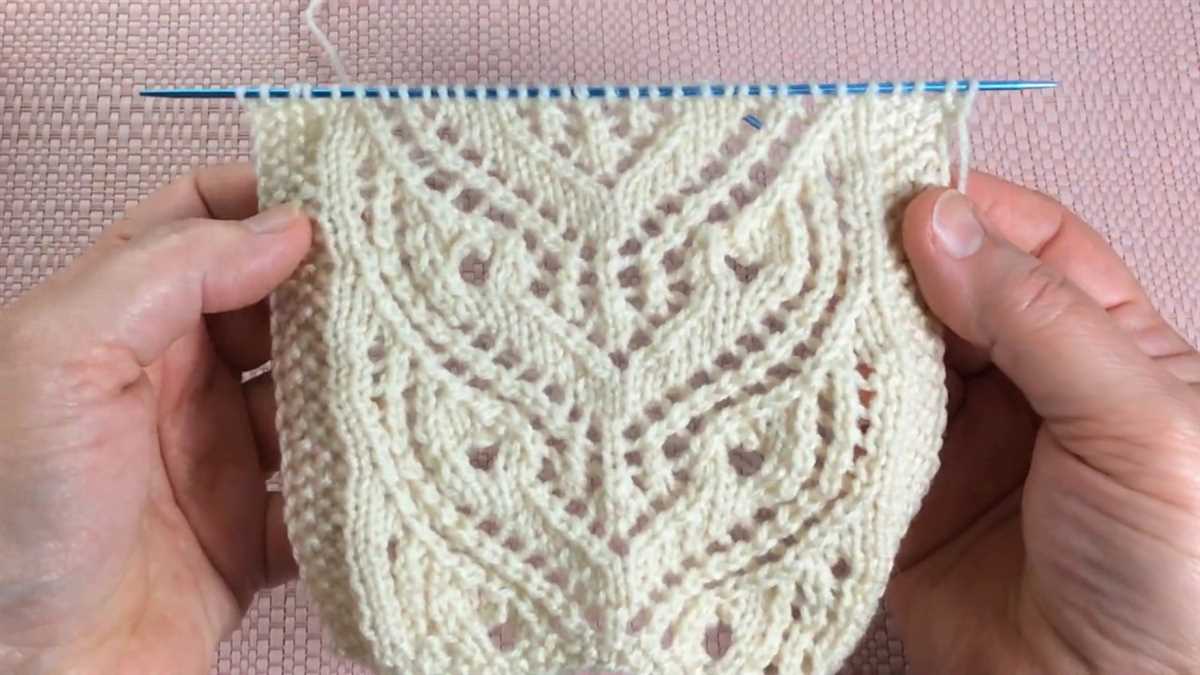
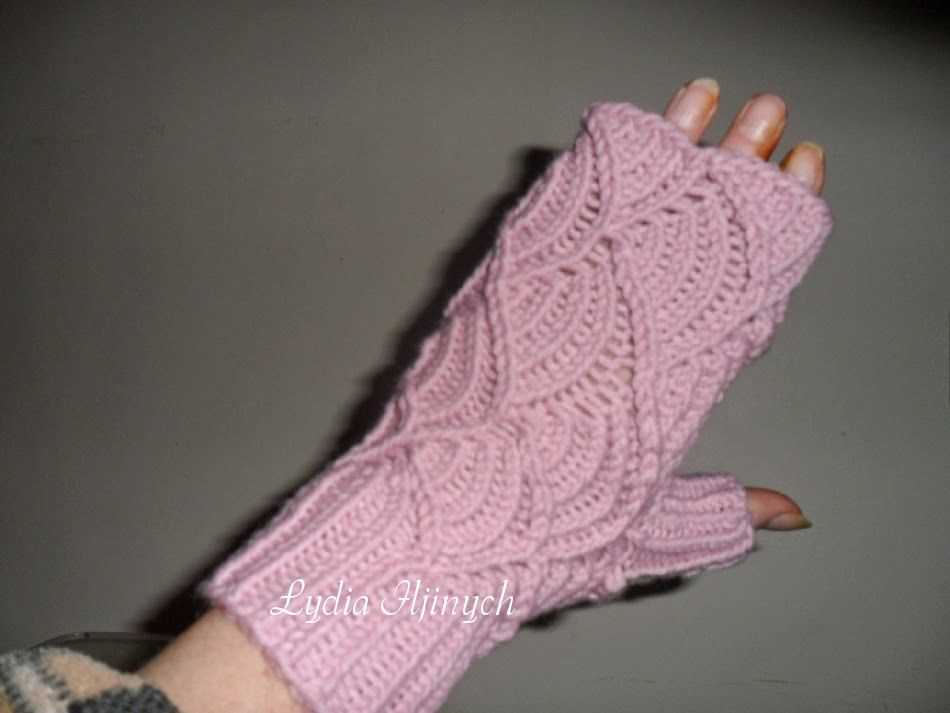
Get creative with embellishments to add a personal touch to your arm warmers. You can use yarn of a contrasting color to create decorative stripes, or add small embroidered motifs or beads for a unique look. Knitted-in cables or lace patterns can also add texture and visual interest to your arm warmers.
4. Blocking

Before wearing your arm warmers, consider blocking them to ensure they maintain their shape and drape nicely on your arms. Blocking involves gently wetting the knitted fabric, shaping it to the desired dimensions, and allowing it to dry flat. This helps to even out any irregularities and gives your arm warmers a more professional finish.
- 8. Lining
Wearing and styling your arm warmers
Arm warmers are not only functional but also fashionable accessories. They can add a stylish touch to your outfit while keeping your arms warm. Here are some tips on how to wear and style your arm warmers:
1. Pair them with a short-sleeved top: Arm warmers look great when worn with a short-sleeved or sleeveless top. They add a layer of warmth and can make your outfit more interesting and unique.
2. Layer them with a jacket or sweater: Arm warmers can be worn under a jacket or sweater for extra warmth. They provide added insulation without the bulk of a full-sleeved layer.
3. Match them with your outfit or accessories: Choose arm warmers that complement the colors and patterns of your outfit or accessories. They can be a subtle way to tie your overall look together.
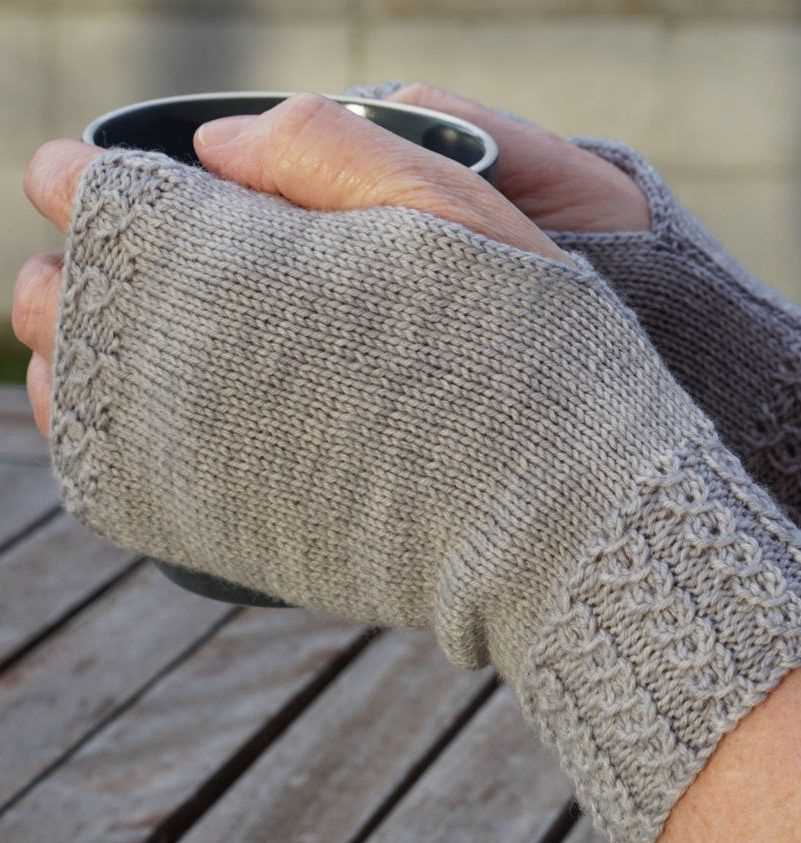
4. Experiment with different lengths and designs: Arm warmers come in various lengths and designs. You can try different styles to find the one that suits your personal style. Consider lace patterns, ribbed textures, or even fingerless designs for added versatility.
5. Use them as an accessory: Arm warmers can also be worn as an accessory even when you don’t necessarily need them for warmth. They can add a touch of elegance or edginess to your outfit, depending on the design and how you style them.
6. Share your style: If you’ve found a unique way to wear and style your arm warmers, don’t be afraid to share it with others. You can inspire others with your creativity and create a sense of community around this versatile accessory.
In conclusion, arm warmers are not only practical but also versatile accessories that can elevate your outfit and keep you comfortable. Whether you pair them with a short-sleeved top, layer them with a jacket, or use them as an accessory, arm warmers can add a stylish touch to any look. So go ahead and experiment with different styles and designs to find the perfect arm warmers for you!
Q&A:
What are arm warmers?
Arm warmers are knitted accessories that cover the lower part of the arm, from the wrists to just below the elbows. They are designed to provide warmth and insulation to the arms while keeping the fingers and hands free.
Can arm warmers be knitted with straight needles?
Yes, arm warmers can be knitted with straight needles. However, it is more common to use circular needles or double-pointed needles for smaller circumference knitting like arm warmers. Using straight needles may require seaming the arm warmers together afterwards.
Are there any specific knitting patterns for arm warmers with straight needles?
Yes, there are many knitting patterns available for arm warmers that can be knitted with straight needles. Some patterns may require adjustments in terms of stitch count or size to fit individual preferences. Websites, knitting books, and online communities are great resources to find such patterns.
How many arm warmers can be made using a knitting pattern?
A knitting pattern usually provides instructions to make a pair of arm warmers, which means two arm warmers. However, some patterns may offer instructions for a single arm warmer as well. It is important to check the pattern details to determine the number of arm warmers included.