
Knitting is a wonderful hobby that allows you to create beautiful and functional items with just a few simple tools: knitting needles and yarn. One project that many knitters find rewarding is knitting an open cardigan. An open cardigan is a versatile piece of clothing that can be worn year-round and easily paired with various outfits.
When it comes to knitting an open cardigan, there are endless possibilities in terms of design and style. From chunky oversized cardigans to delicate lace patterns, there is something for everyone. The best part is that you can customize the pattern to fit your own personal style and preferences.
If you’re new to knitting, don’t worry! Knitting an open cardigan is a great way to improve your skills and learn new techniques. With a bit of patience and practice, you’ll be able to create a beautiful garment that you can be proud of.
Open Cardigan Knitting Pattern
An open cardigan is a stylish and versatile addition to any wardrobe. With its loose fit and open front, it’s perfect for layering over other garments or for wear as a lightweight outer layer. Knitting your own open cardigan allows you to customize the design and create a unique piece that reflects your personal style.
When choosing a knitting pattern for an open cardigan, consider the level of difficulty and the type of yarn recommended. Some patterns may be more intricate and require advanced knitting skills, while others may be suitable for beginners. It’s important to choose a pattern that matches your skill level to ensure a successful and enjoyable knitting experience.
Materials:
- Yarn: Choose a soft and breathable yarn that drapes well for a comfortable and stylish finished garment. The amount of yarn required will depend on the size of the cardigan and the chosen pattern.
- Needles: Use the size of needles recommended in the pattern or adjust as necessary to achieve the correct gauge.
- Stitch markers: These can be helpful for marking different sections or increases/decreases within the pattern.
- Tapestry needle: This will be used for weaving in ends and seaming the finished garment.
Pattern:
- Start by casting on the required number of stitches, as indicated in the pattern. Be sure to check the gauge to ensure the correct fit.
- Follow the pattern instructions for the body of the cardigan, including any stitch patterns or shaping techniques.
- Continue knitting until the desired length is reached, as specified in the pattern.
- Once the body is complete, move on to knitting the sleeves according to the pattern instructions.
- After both sleeves are finished, it’s time to seam the cardigan. Use the tapestry needle to sew the sleeves onto the body, following the pattern instructions for placement.
- Finally, weave in any loose ends and block the finished cardigan to give it a polished and professional look.
With the right materials and a well-chosen pattern, you can create a beautiful open cardigan that will become a staple in your wardrobe. Whether you prefer a classic, timeless design or something more modern and trendy, the possibilities are endless in the world of knitting.
What is an Open Cardigan?

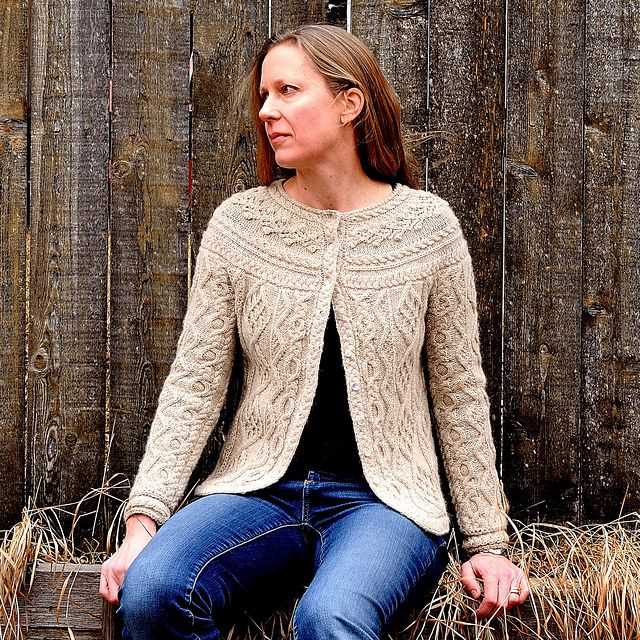
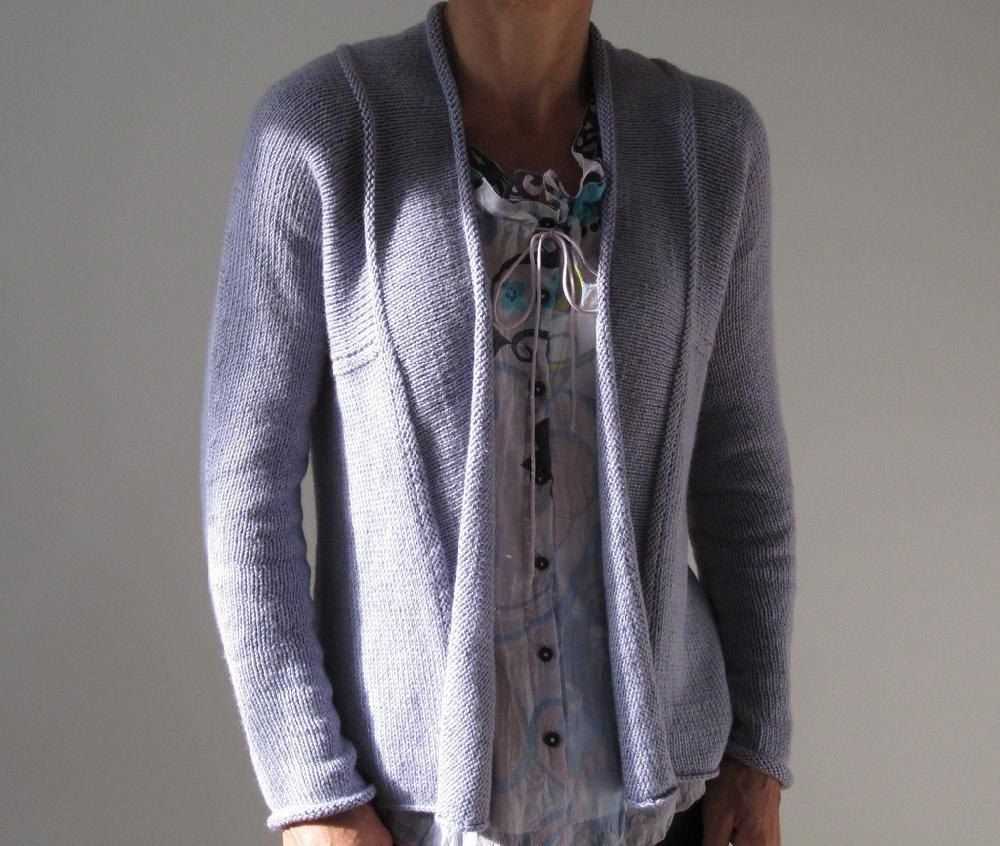
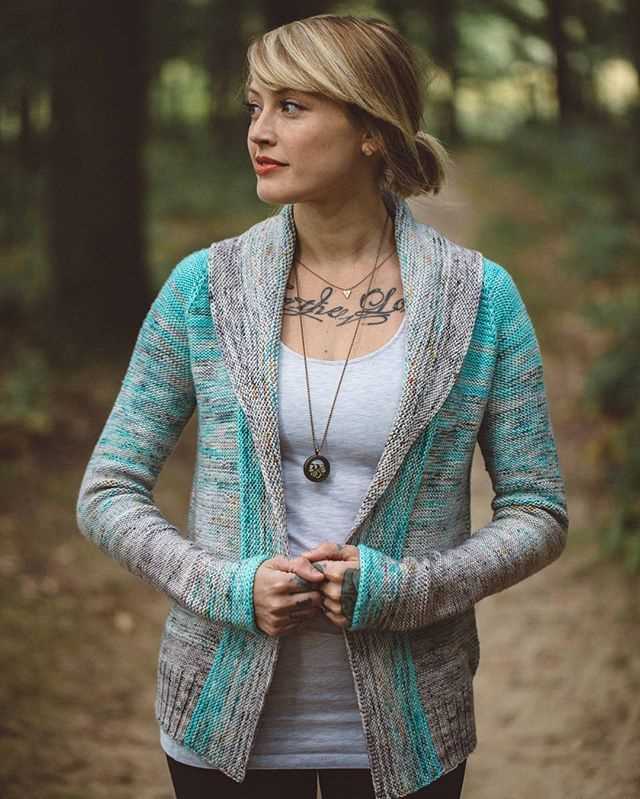
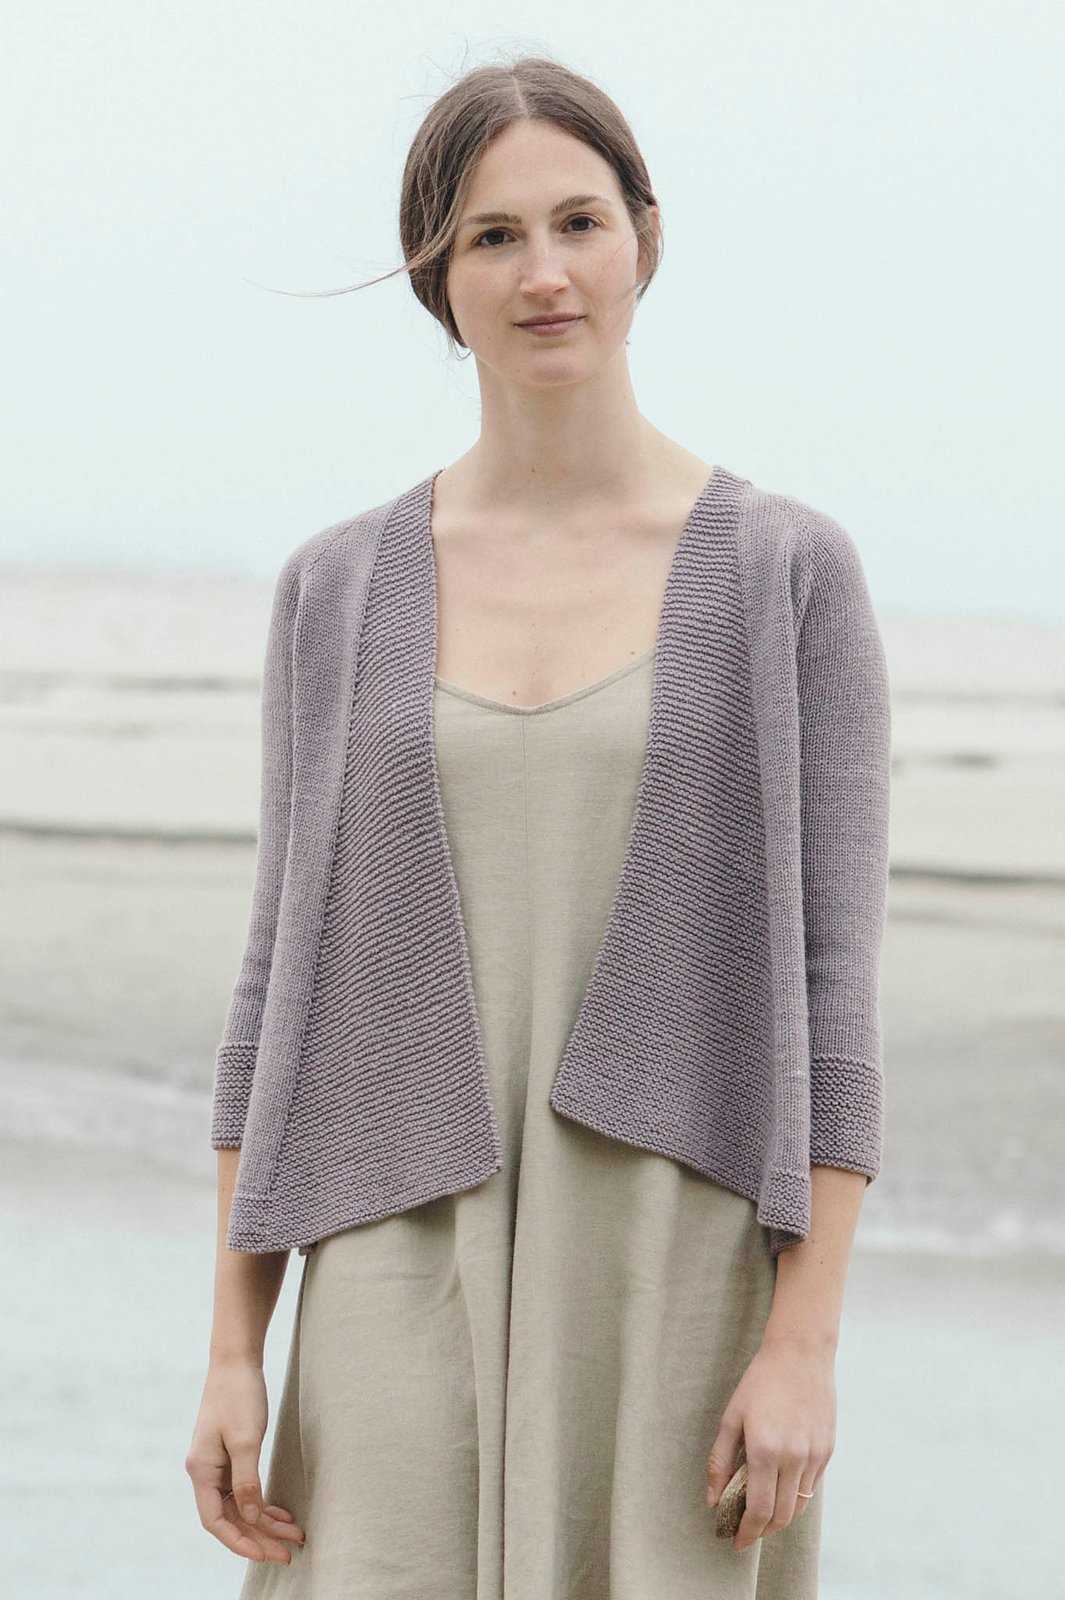
An open cardigan is a type of knitted garment that is typically worn as a layering piece. It is characterized by its open front, which does not have any buttons or closures. The cardigan is designed to be worn open, allowing it to drape loosely over the body. This makes it a versatile and comfortable option for different occasions and weather conditions.
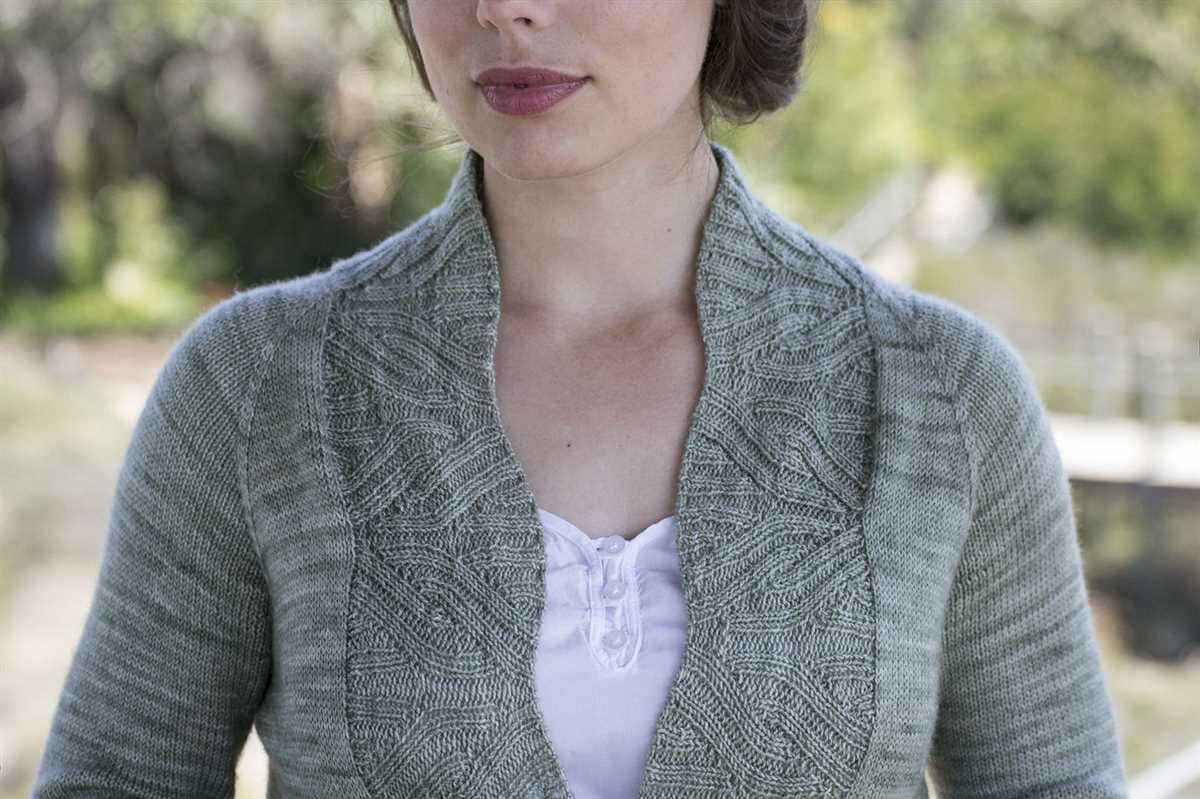
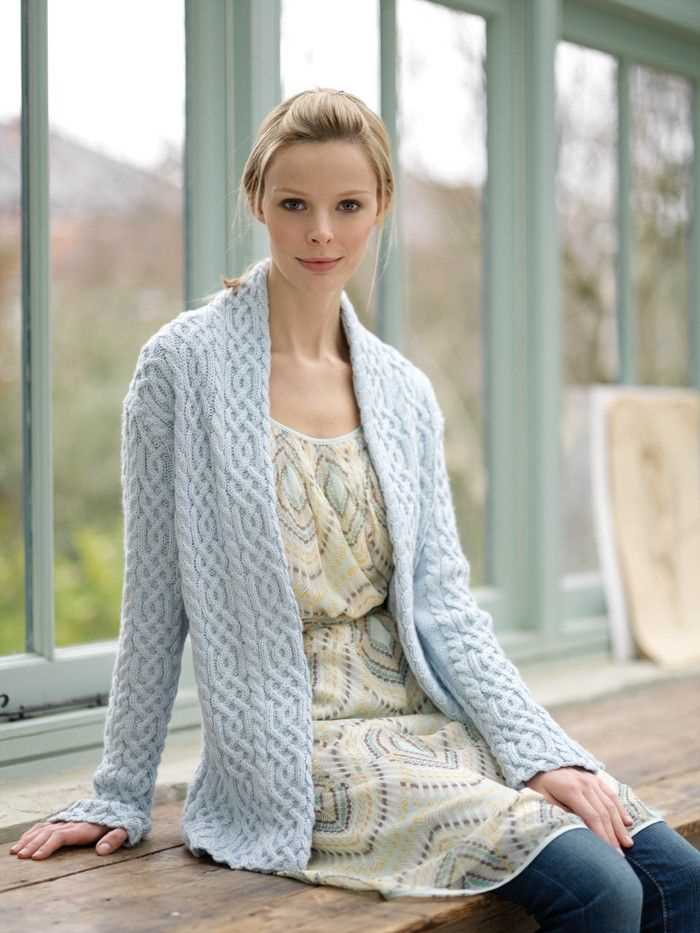
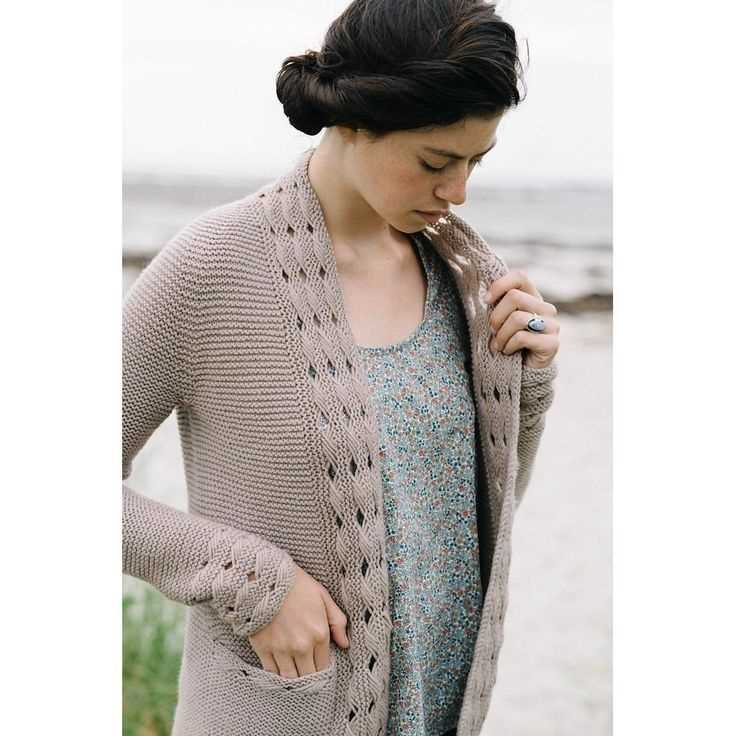
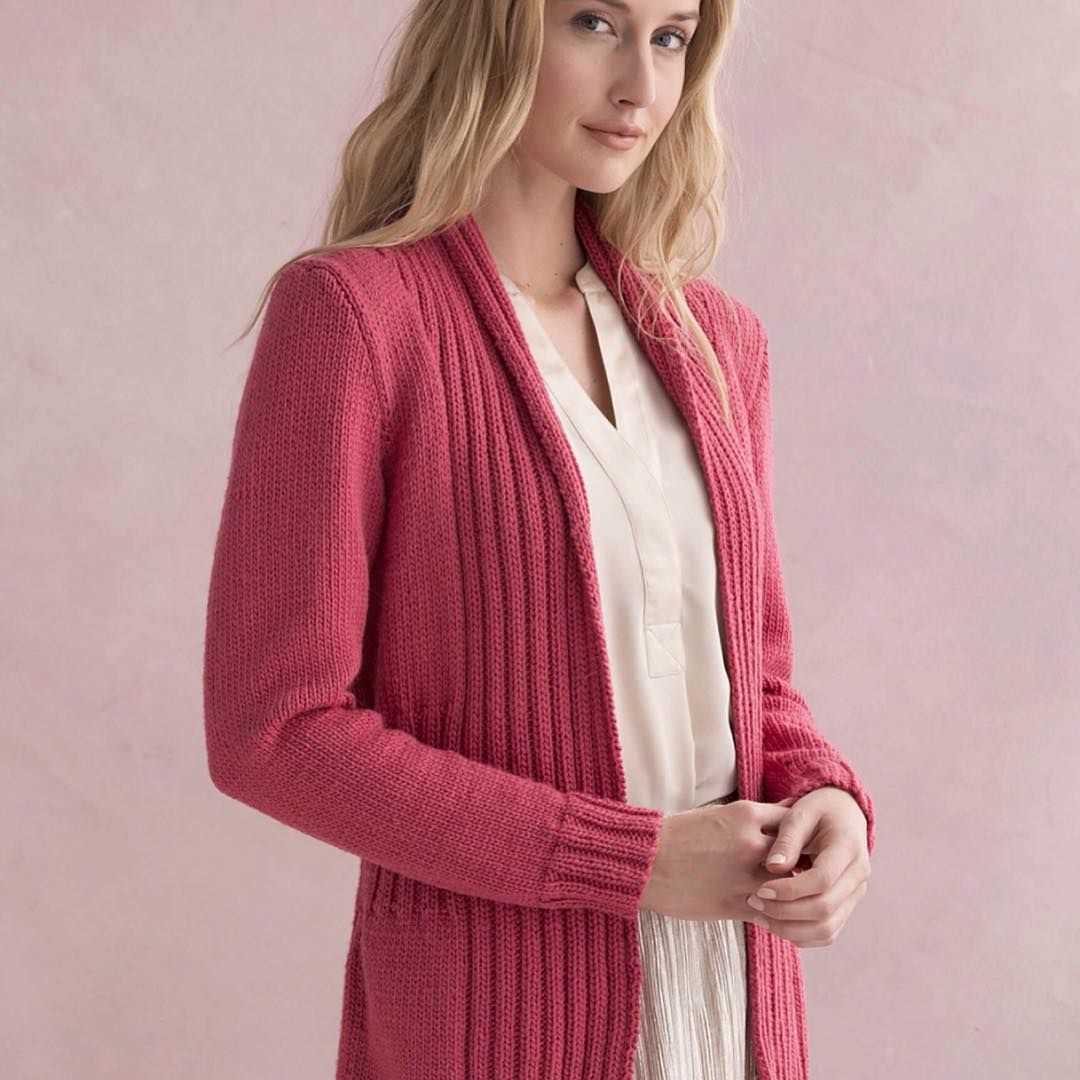
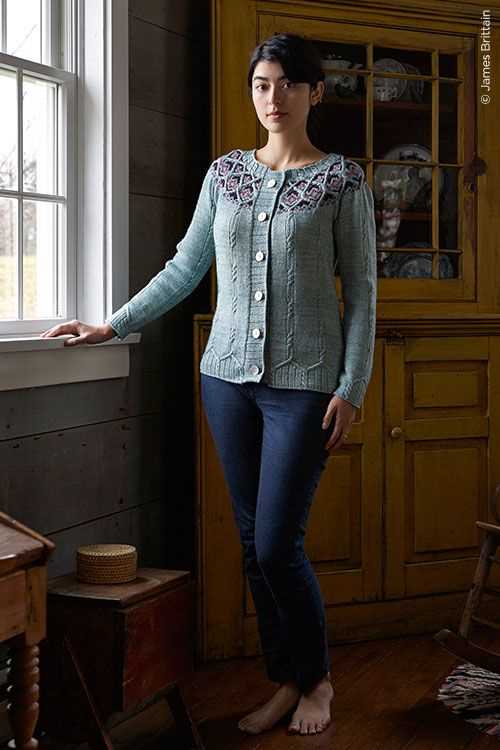
The open cardigan can be made from various types of yarn and can feature different knitting patterns and textures. It can be crafted using a variety of techniques, such as ribbing, cables, or lace stitches, to create different visual effects and styles. Some open cardigans may have pockets, hoods, or other design elements to add functionality and interest to the garment.
Open cardigans are popular wardrobe staples because of their versatility. They can be dressed up or down, depending on the occasion. They can be paired with jeans and a t-shirt for a casual look or worn over a dress or blouse for a more polished ensemble. The open front design allows for easy layering, making it a practical choice for transitional seasons or unpredictable weather.
Furthermore, open cardigans are often favored by knitters because they offer endless possibilities for customization. Knitters can choose their preferred yarn, colors, and patterns to create a unique and personalized cardigan. Knitting an open cardigan can be a fulfilling and enjoyable project that allows knitters to showcase their skills and creativity.
In summary, an open cardigan is a versatile and stylish knitted garment that features an open front without closures. It can be made from different types of yarn and can be customized with various knitting patterns and design elements. Open cardigans are popular for their versatility, ease of layering, and the opportunity for knitters to showcase their creativity.
Benefits of Knitting an Open Cardigan
Knitting an open cardigan can bring numerous benefits to both experienced knitters and beginners. Whether you are looking for a new project to challenge your skills or enjoy the therapeutic effects of knitting, an open cardigan pattern can be the perfect choice.
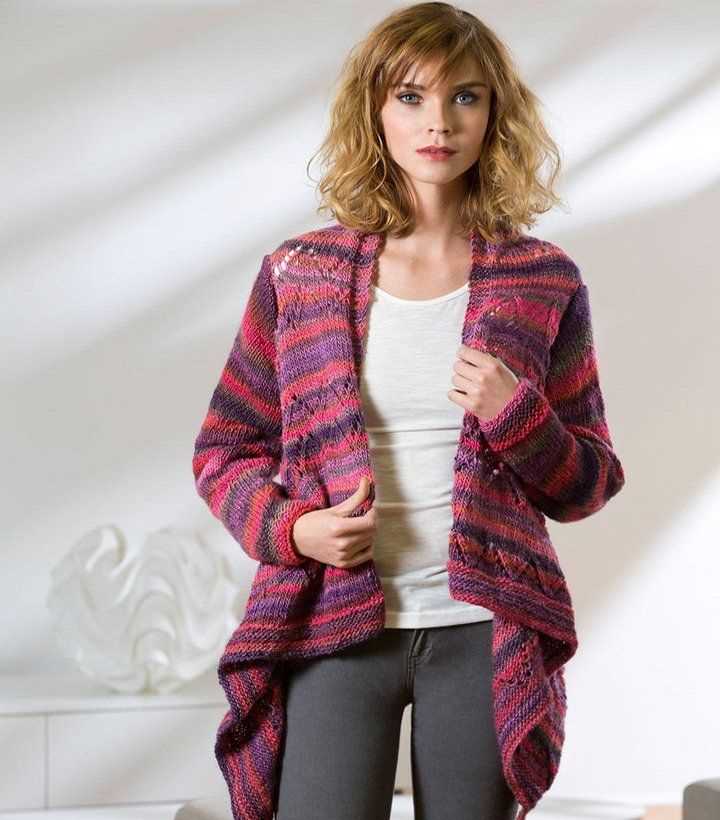
1. Versatile Style: An open cardigan is a versatile piece of clothing that can be easily dressed up or down. It can be worn casually over a t-shirt or paired with a stylish dress, making it suitable for various occasions. With different yarn choices and stitch patterns, you can create a unique cardigan that reflects your personal style.
2. Customization: Knitting an open cardigan allows you to customize it according to your preferences. You can choose the color, yarn type, and stitch pattern that you like the most. Additionally, you can adjust the length, sleeve style, and neckline to achieve the desired fit. This level of customization ensures that you create a cardigan that fits your body shape and suits your individual taste.
3. Skill Building: If you are a beginner knitter or looking to challenge your skills, knitting an open cardigan can be a great project. It offers opportunities to learn and practice different techniques, such as various stitch patterns, shaping, and finishing. By working on a bigger garment, you can gain confidence and enhance your knitting skills.
4. Relaxation and Stress Relief: Knitting is known for its relaxation and stress relief benefits. The repetitive and rhythmic motions of knitting can help calm the mind and reduce anxiety. Knitting an open cardigan allows you to focus on the pattern and enjoy the meditative qualities of the craft. It can also provide a sense of accomplishment when you see your project taking shape.
In conclusion, knitting an open cardigan offers versatile style options, customization opportunities, skill building possibilities, and relaxation benefits. It is a rewarding and enjoyable knitting project that can result in a beautiful and functional garment.
Choosing the Right Yarn for Your Open Cardigan
When it comes to knitting an open cardigan, choosing the right yarn is essential to achieving the desired look and feel of your finished garment. The yarn you select will not only affect the overall appearance of your cardigan but also how it drapes, how warm it is, and how easy it is to care for.
Fiber Content: One of the first things to consider when choosing yarn for your open cardigan is the fiber content. Natural fibers like wool, alpaca, or cotton are often favored for their warmth, breathability, and durability. These fibers also have a natural elasticity, which can help your cardigan retain its shape over time. Synthetic fibers like acrylic or nylon can be a more affordable option and may offer a wider range of colors and textures, but they may not be as warm or breathable as natural fibers.
Weight: The weight of the yarn you choose will also impact the drape and coziness of your open cardigan. Lighter weight yarns like fingering or sport weight will result in a more delicate and lightweight garment, while bulkier yarns like worsted or chunky weight will create a more substantial and cozy cardigan. Consider the climate of the area where you will be wearing your cardigan and choose a weight that suits your needs.
Gauge: Your chosen pattern will specify a gauge, which is a measure of how many stitches and rows should be worked in a given measurement. It is important to select a yarn that matches the gauge specified in the pattern, as this will ensure that your cardigan turns out the correct size and shape. If your gauge is off, your cardigan may end up too big or too small.
Texture and Color: Finally, consider the texture and color of the yarn you choose. Yarns with texture, such as those with a boucle or tweed effect, can add visual interest to your cardigan. Similarly, selecting a color that complements your skin tone or matches your wardrobe will ensure that your cardigan becomes a versatile and well-loved piece in your wardrobe.
By taking these factors into account and carefully selecting the right yarn for your open cardigan, you can create a beautiful and functional garment that you will enjoy for years to come.
Essential Tools for Knitting an Open Cardigan
When it comes to knitting an open cardigan, having the right tools is essential for a successful project. From the yarn and needles to the stitch markers and tapestry needle, each tool plays its own important role in bringing your cardigan to life.
Yarn: The first tool you’ll need is the yarn. Choose a yarn that is suitable for the open cardigan pattern you’re using. Consider the weight, fiber content, and color options available. A soft and durable yarn is ideal for creating a cozy and comfortable cardigan.
Knitting Needles:
Next, you’ll need a pair of knitting needles. The size of the needles will depend on the gauge specified in the pattern. Make sure to use the correct size to achieve the desired fit and stitch tension. Circular needles are often preferred for cardigan projects, as they allow you to easily accommodate the large number of stitches.
Stitch Markers:
Stitch markers are essential for keeping track of your progress and marking important points in your pattern, such as increases or decreases. They can be simple plastic rings or decorative charms, and are easily placed onto your needles to mark specific stitches or sections.
Tapestry Needle:
A tapestry needle is used for seaming and weaving in loose ends. It’s important to choose a needle with a large eye that can accommodate the thickness of your yarn. This will make the finishing steps of your cardigan much easier and neater.
Measuring Tape:
A measuring tape is an essential tool for checking your gauge and ensuring the correct sizing of your cardigan. It allows you to accurately measure the length and width of your work to match the pattern’s instructions.
Scissors:
A pair of sharp scissors is necessary for cutting yarn and trimming loose ends. Make sure to keep them nearby for any necessary adjustments or finishing touches.
- Stitch Counter: A stitch counter can be useful for keeping track of the number of rows or repeats in your pattern.
- Row Counter: Similar to a stitch counter, a row counter helps you keep track of the number of rows you’ve knitted.
- Blocking Tools: Blocking tools, such as blocking mats and pins, may be needed to shape and stretch your finished cardigan to the correct dimensions.
With these essential tools at hand, you’ll be well-prepared to embark on your open cardigan knitting journey. Remember to take your time, follow the pattern instructions, and enjoy the process of creating your own cozy and stylish cardigan.
Getting Started: Knitting the Sleeves
One of the key components of an open cardigan is the sleeves. Knitting the sleeves can be an exciting and rewarding part of the process. Before you begin, it’s important to have all your materials ready, including the specified yarn and knitting needles. You’ll also need a pattern or instructions to ensure you’re following the correct measurements and stitch patterns.
Step 1: Cast On
Start by casting on the required number of stitches for your sleeve. This may vary depending on the size and style of the cardigan. Be sure to use the specified method of casting on indicated in the pattern. For an open cardigan, you may choose to use a long-tail cast on, which creates a neat and stretchy edge.
Step 2: Knit the Ribbing
Once you have cast on, it’s time to begin knitting the ribbing for the cuff of the sleeve. The ribbing is usually worked in a variation of knit and purl stitches, such as 1×1 or 2×2 ribbing. This creates a stretchy and decorative edge. Follow the pattern instructions for the required number of rows or inches to complete the ribbing section.
Step 3: Transition to Main Stitch Pattern
After completing the ribbing, it’s time to transition to the main stitch pattern for the sleeve. This may involve changing the type of stitch or following a specific stitch pattern as indicated in the pattern. Pay close attention to the pattern instructions to ensure you’re knitting the correct stitches in the correct order. Take your time to work each row carefully and accurately.
Step 4: Work the Body of the Sleeve
Once you’ve transitioned to the main stitch pattern, continue working the body of the sleeve according to the pattern instructions. This may involve knitting a certain number of rows or inches before making any further adjustments. Take breaks as needed to avoid strain on your hands and wrists, and remember to keep a consistent tension throughout the knitting process.
Step 5: Shape the Sleeve
Depending on the style of the open cardigan and the desired fit, you may need to shape the sleeve by increasing or decreasing stitches. This is typically done at specific intervals and in specific patterns to maintain the overall design. Follow the pattern instructions closely to ensure your sleeve matches the desired shape and size.
Step 6: Bind Off
Finally, when you have reached the desired length for the sleeve, it’s time to bind off. Follow the pattern instructions for the specified bind off method, which may include a simple bind off or a more decorative edge. Take care to bind off evenly and securely so that your sleeve has a professional and polished finish.
By following these steps and paying attention to the pattern instructions, you can successfully knit the sleeves for your open cardigan. Remember to take breaks when needed, enjoy the process, and be proud of your progress as you work towards completing your handmade garment.
Knitting the Body of the Open Cardigan
Now that you have finished knitting the sleeves, it’s time to move on to the body of the open cardigan. This is where the cardigan really starts to take shape and you can see your work come together.
To begin, you will need to join the sleeves and the back panel together. This can be done by placing the sleeves on either side of the back panel and using the mattress stitch to sew the pieces together. Make sure to match up the stitches and seams to create a seamless look.
Once the sleeves are joined to the back panel, you can start knitting the body. Using the same stitch pattern as the sleeves, continue knitting in your chosen stitch pattern until you reach the desired length for the cardigan. This will typically be longer than the length of the sleeves.
It’s important to keep track of your row counts, especially if you’re using a stitch pattern that requires a specific number of rows or repeats. You can use stitch markers to help you keep track of your rows and ensure that you’re knitting the body evenly.
As you knit the body, you may want to consider adding shaping to create a more flattering silhouette. This can be done by decreasing or increasing stitches at strategic points, such as the waist or hips, to create a more tailored fit. You can find instructions for shaping in most open cardigan knitting patterns.
Once you have completed knitting the body, you can cast off and finish any remaining details, such as adding buttons or pockets. Blocking the cardigan is also an important step to ensure that the stitches and seams lie flat and the cardigan has a polished look.
With the body of the open cardigan completed, you’re one step closer to finishing your knitting project. With the right stitch pattern, shaping, and finishing touches, you’ll have a beautiful and cozy cardigan to wear and show off your knitting skills.
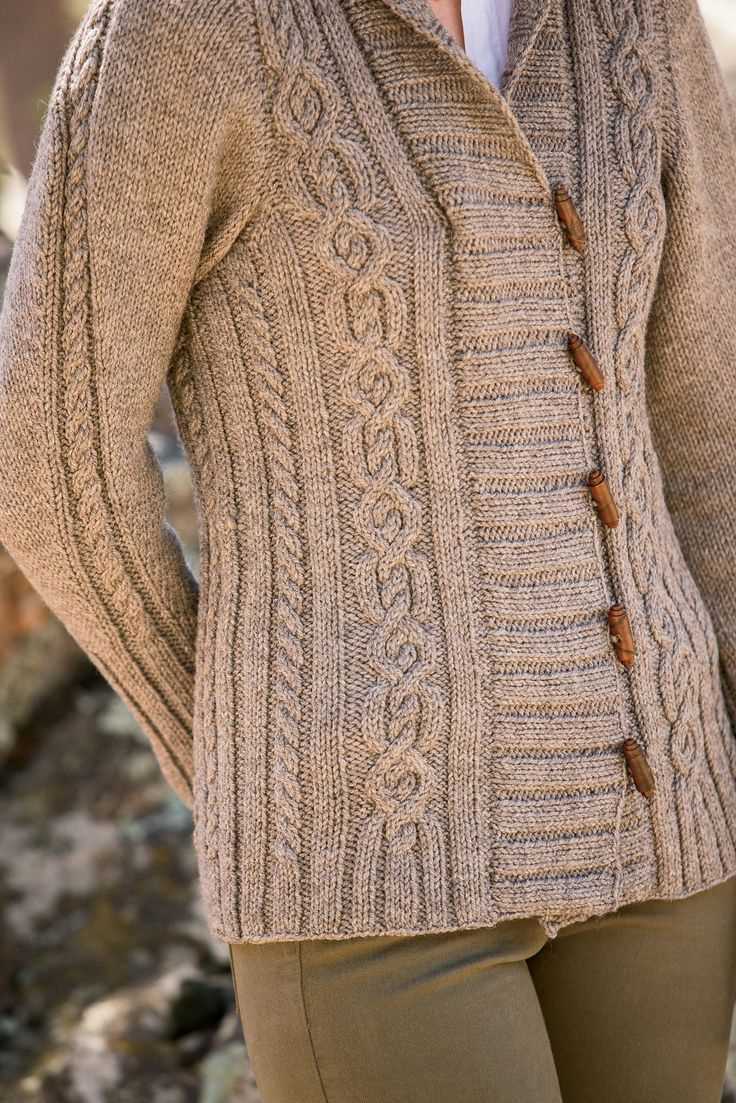
Adding Buttonholes and Buttons
In order to complete your open cardigan, you will need to add buttonholes and buttons to the front panels. This will allow you to close the cardigan and keep it secure. Adding buttonholes and buttons is a simple and straightforward process that can be done with basic knitting techniques.
To create the buttonholes, you will need to determine the desired placement and size of the buttonholes. Measure the distance between the buttonholes evenly along the front panels of the cardigan, keeping in mind the size of the buttons you will be using. Mark the desired locations with stitch markers or pins.
Once you have marked the locations for the buttonholes, you can begin knitting the buttonholes. To create a buttonhole, you will need to bind off a few stitches and then cast them back on in the next row. This will create a small opening for the button to pass through.
Start by binding off the specified number of stitches at the marked locations. Use a standard bind off method, such as a knit bind off or a purl bind off, depending on the stitch pattern of your cardigan. After binding off the stitches, continue knitting the rest of the row as instructed in the pattern.
In the next row, when you reach the bound off stitches, you will need to cast them back on. To do this, use the backward loop method or the cable cast on method, depending on your preference and the desired appearance of the buttonhole. Cast on the same number of stitches that you bound off in the previous row.
After casting on the stitches, continue knitting the rest of the row as instructed in the pattern. Repeat this process for each of the marked buttonhole locations along the front panels of the cardigan.
Once you have finished knitting the buttonholes, you can sew on the buttons. Choose buttons that complement the style and color of your cardigan. Sew the buttons onto the opposite front panel from where the buttonholes are located, ensuring that they line up with the buttonholes when the cardigan is closed.
Make sure to securely attach the buttons using a strong thread or yarn that matches the color of your buttons. You can sew the buttons on by hand using a needle, or you can use a sewing machine if you prefer. Take care to sew the buttons on tightly and securely to prevent them from coming loose.
Once you have finished sewing on the buttons, your open cardigan is complete! You can now enjoy wearing your cozy and stylish cardigan, knowing that it will stay closed and secure with the buttonholes and buttons that you have added.
Finishing Touches: Blocking and Seaming

Once you have finished knitting your open cardigan, it is time to give it the finishing touches. Blocking and seaming are two important steps in the process that will help to improve the overall look and fit of your cardigan.
Blocking: Blocking is the process of shaping your knitted piece to its correct dimensions. It involves wetting the garment and then carefully stretching and pinning it into shape. Blocking allows the stitches to even out and creates a more professional and polished finish. To block your open cardigan, fill a basin with lukewarm water and add a touch of gentle soap. Submerge the cardigan and gently squeeze out any excess water. Lay the cardigan out on a clean towel and use pins to shape it to the desired size. Leave it to dry completely before removing the pins.
Seaming: Seaming refers to the process of joining the different pieces of the cardigan together. Depending on the pattern, you may have separate pieces for the back, fronts, sleeves, and collar. To seam your open cardigan, you will need a darning needle and yarn in the same color as your cardigan. Start by placing the pieces on a flat surface with the right sides facing each other. Using the darning needle, sew the pieces together using a mattress stitch or a whip stitch. Take care to match the stitch pattern and keep your seams as invisible as possible.
When you have finished blocking and seaming your open cardigan, take a moment to admire your finished project. The time and effort you put into creating it will be evident in the final result. Make sure to try it on and make any necessary adjustments before wearing it proudly or gifting it to someone you love.
Tips for Customizing Your Open Cardigan
When knitting an open cardigan, there are several ways you can customize the pattern to make it uniquely yours. Whether you want to adjust the fit, add embellishments, or choose different yarn colors, the possibilities are endless. Here are some tips to help you customize your open cardigan:
1. Adjusting the Fit
If you’d like to make your open cardigan more fitted or loose, you can easily adjust the pattern to suit your preferences. To make it more fitted, you can decrease the number of stitches in the body or sleeves. For a looser fit, you can increase the number of stitches. Remember to keep track of your changes and make adjustments to the shaping accordingly.
2. Adding Embellishments
To give your open cardigan a personal touch, consider adding embellishments such as buttons, beads, or embroidery. You can choose buttons that complement the color of your yarn or add decorative stitches along the edges. Be creative and experiment with different embellishments to make your cardigan stand out.
3. Choosing Different Yarn Colors
The color of your yarn can greatly influence the overall look of your open cardigan. If you prefer a more vibrant and eye-catching cardigan, choose bright and bold colors. For a more classic and versatile piece, opt for neutral shades. You can also experiment with different color combinations or gradients to create a unique and visually appealing design.
4. Modifying the Length and Sleeves

If you want a shorter or longer cardigan, you can easily modify the length by adjusting the number of rows or adding extra rows to the pattern. The same goes for the sleeves – you can make them shorter or longer to suit your preferences. Just make sure to keep track of your modifications and adjust the shaping accordingly.
- Remember to swatch before starting your project to ensure the correct gauge.
- Take accurate measurements of your body to ensure a proper fit.
- Consider using different stitch patterns or textures to add interest to your cardigan.
By following these tips and letting your creativity shine through, you can create a truly customized open cardigan that reflects your personal style and fits you perfectly.
Styling Your Open Cardigan
Now that you have finished knitting your open cardigan, it’s time to think about how to style it. The great thing about open cardigans is that they can be dressed up or down depending on the occasion. Here are a few ideas on how to style your open cardigan:
- Casual Look: For a casual look, pair your open cardigan with a basic t-shirt or tank top, jeans, and sneakers. This is a great outfit for running errands or meeting friends for a casual get-together.
- Office Chic: To create a more polished look for the office, layer your open cardigan over a blouse or button-down shirt, and pair it with tailored pants or a skirt. Complete the outfit with heels or flats, and you’ll be ready to conquer the workday in style.
- Date Night: For a romantic date night, wear your open cardigan over a fitted dress or a blouse with a skirt. Add some accessories like statement earrings or a clutch to complete the look.
- Cozy Comfort: When you just want to be cozy, wrap yourself up in your open cardigan and pair it with leggings or sweatpants. This is the perfect outfit for a lazy Sunday at home or a casual movie night.
Remember, the key to styling your open cardigan is to play with different textures, colors, and patterns. Mix and match with your existing wardrobe to create unique and personalized looks. Have fun experimenting and discovering new ways to wear your open cardigan!