
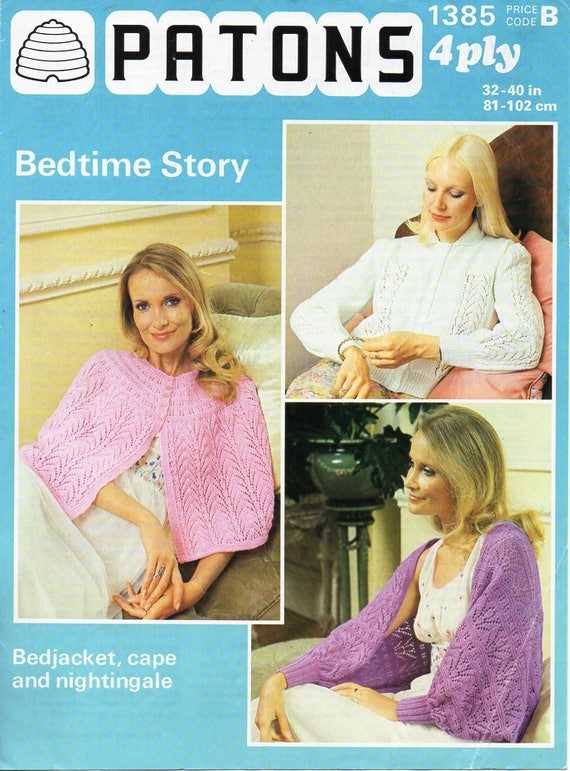
A bed jacket is a cozy and comfortable garment that is perfect for keeping warm during chilly nights or lazy mornings. It is an essential item of clothing for those who enjoy knitting, as it is a relatively simple and quick project that yields great results. Knitting a bed jacket allows you to customize the style, color, and size to your preference, making it a truly personalized piece of clothing.
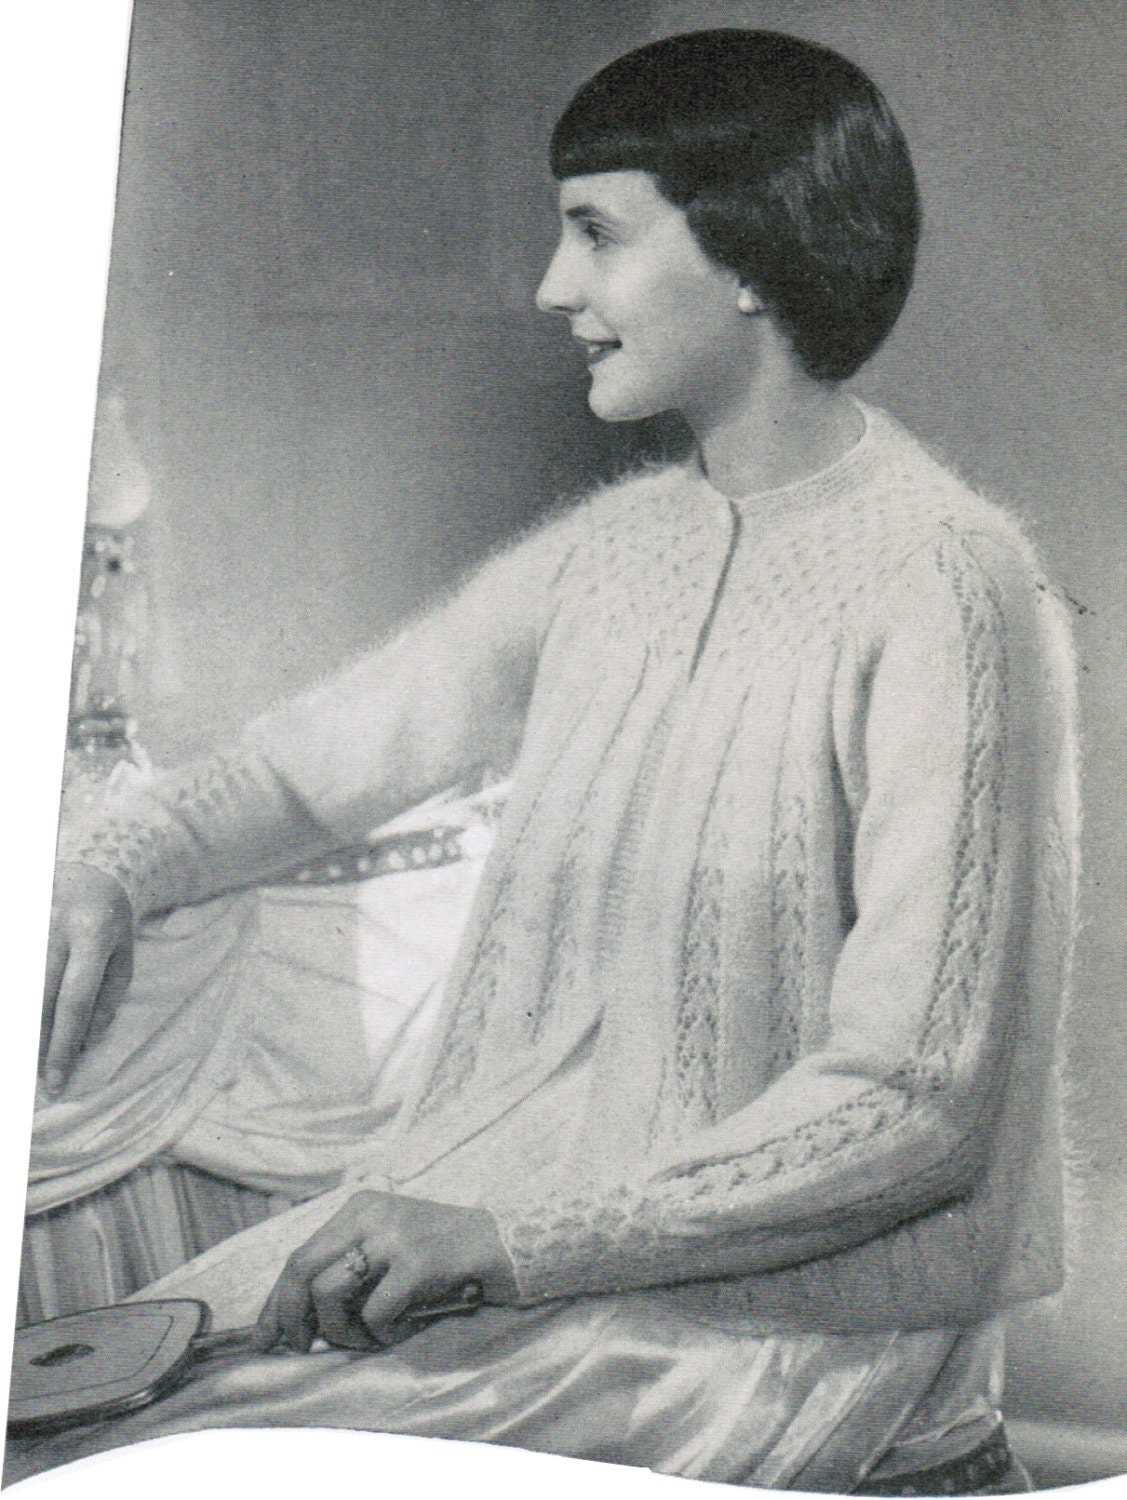
When it comes to choosing a knitting pattern for a bed jacket, there are countless options available. You can opt for a classic design with a ribbed collar, cuffs, and bottom band, or you can get creative and choose a pattern with lace or cable details. The possibilities are endless, and you can let your imagination run wild to create a bed jacket that is as unique as you are.
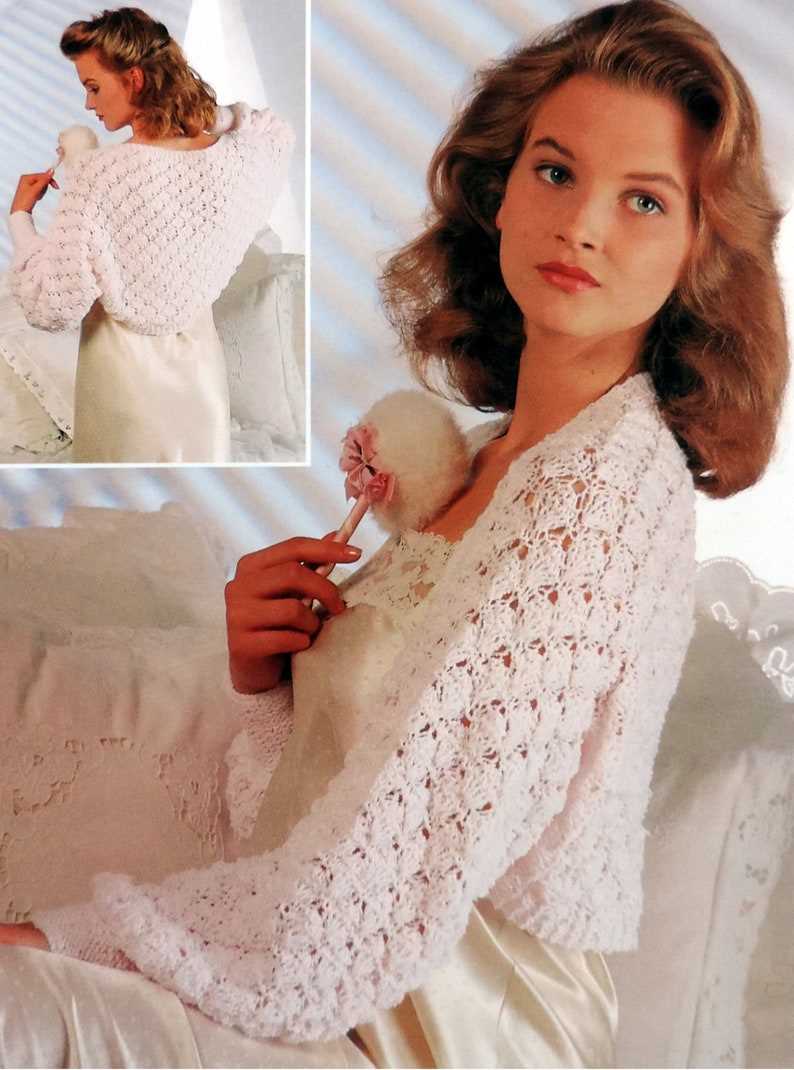
One of the great things about knitting a bed jacket is that it is a versatile item that can be worn in a variety of situations. You can wear it over your pajamas while lounging around the house, or you can throw it on top of your favorite outfit for a stylish and cozy look. It is also a perfect gift idea for family and friends, as you can customize it to their preferences and create a truly special and heartfelt present.
How to choose the right yarn and needles
When it comes to knitting a bed jacket, choosing the right yarn and needles is crucial to ensure that the final result meets your expectations. The yarn you choose will not only affect the look and feel of the jacket, but also the overall fit and durability. Here are some factors to consider when selecting yarn:
1. Fiber content:
The fiber content of the yarn will determine its characteristics, such as warmth, softness, and draping. For a bed jacket, you may want to consider using a soft and warm yarn, such as merino wool or cashmere, to keep you cozy during cooler nights. Alternatively, you can opt for acrylic or cotton blends for a lighter and more breathable fabric.
2. Gauge:
The gauge of the yarn refers to the number of stitches and rows per inch. It is important to match the gauge specified in your knitting pattern to ensure that your bed jacket turns out the right size. If your gauge doesn’t match, you may need to adjust your needle size to achieve the correct tension.
3. Color and texture:
Consider the color and texture of the yarn when choosing for your bed jacket. Opt for colors that complement your personal style and preferences. Additionally, if you want your bed jacket to have a specific texture, such as a chunky or fuzzy look, choose a yarn that provides the desired effect.
Once you have chosen the right yarn, you will also need to select appropriate knitting needles. Here are some tips to help you choose the right needles for your bed jacket:
1. Needle size:
The needle size you use will depend on the gauge of your yarn and the desired fabric density. Some patterns will specify the recommended needle size, but if not, you can refer to the gauge listed to make a decision. Test your yarn with different needle sizes to achieve the desired tension and fabric structure.
2. Material:
Knitting needles can be made from various materials, such as metal, wood, or plastic. Each material has its own advantages and characteristics. Metal needles tend to be more slippery, while wooden needles provide more grip. Consider your personal preference and the characteristics of your chosen yarn when selecting the material of your needles.
By carefully considering these factors, you can ensure that you select the right yarn and needles for your knitting project. This will help you achieve the desired look, feel, and fit for your bed jacket.
Tips for reading and following knitting patterns
Knitting patterns can sometimes seem confusing and overwhelming, especially for beginners. However, with a few tips and tricks, you can easily read and follow knitting patterns like a pro.
1. Familiarize yourself with the abbreviations
Knitting patterns often use abbreviations to represent different stitches and techniques. Before starting a pattern, make sure you understand the abbreviations used. Keep a knitting abbreviation guide handy for quick reference. This will help you follow the pattern instructions and ensure accuracy.
2. Read the pattern thoroughly before starting
Before diving into a knitting project, take the time to read the entire pattern from start to finish. This will give you an overall understanding of the steps involved and help you anticipate any challenges or tricky parts. Pay attention to stitch counts, measurements, and any special instructions mentioned.
3. Take notes and use markers
As you read through the pattern, consider taking notes or using markers to highlight important sections. You can write down stitch counts, mark where shaping occurs, or indicate any modifications you plan to make. This will help you stay organized and keep track of your progress as you knit.
4. Use a row counter or stitch marker
To keep track of your rows and stitches, consider using a row counter or stitch marker. This can be especially helpful for complex patterns with pattern repeats or multiple shaping sections. Simply move the counter or marker up each time you complete a row or reach a specific stitch count.
5. Practice reading charts
Many knitting patterns include charts, which provide a visual representation of the pattern stitches. It’s a good idea to practice reading charts, especially if you plan to tackle more advanced knitting projects. Familiarize yourself with the symbols used and practice following along with the chart’s instructions.
6. Don’t be afraid to ask for help
If you come across a section of the pattern that you don’t understand, don’t hesitate to ask for help. Reach out to fellow knitters, join online knitting communities, or consult knitting resources and tutorials. There is a wealth of knowledge and support available to help you navigate through any knitting pattern challenges.
With these tips in mind, you’ll be ready to tackle any knitting pattern with confidence and ease. Happy knitting!
Essential knitting stitches for bed jacket
When knitting a bed jacket, it is important to have a good understanding of the essential knitting stitches. These stitches will help create the desired texture and structure of the bed jacket, making it both cozy and stylish. Here are some key stitches to consider:
1. Stockinette Stitch
The stockinette stitch is one of the most basic and commonly used knitting stitches. It creates a smooth and even fabric with rows of knit stitches on one side and rows of purl stitches on the other side. This stitch is often used for the body of the bed jacket to provide a sleek and polished look.
2. Ribbing Stitch
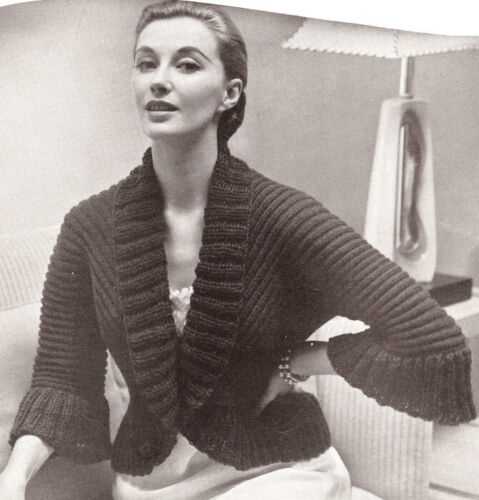
Ribbing stitch is another essential knitting stitch for a bed jacket. It is created by alternating knit and purl stitches in the same row. Ribbing stitch is commonly used for the cuffs, collar, and waistband of the bed jacket as it provides elasticity and helps the garment to retain its shape.
3. Cable Stitch
Cable stitch is a beautiful technique that adds texture and interest to the bed jacket. It involves crossing stitches over each other to create a twisted cable effect. Cable stitches are often used in the center or along the edges of the bed jacket to create intricate and decorative patterns.
4. Seed Stitch
The seed stitch is an easy and versatile stitch that adds depth and texture to the bed jacket. It is created by alternating knit and purl stitches in the same row and then repeating the pattern in the following rows. The seed stitch is commonly used for borders, collars, and edgings, as it creates a dense and richly textured fabric.
5. Garter Stitch
Garter stitch is created by knitting every row, resulting in a fabric with ridges of knit stitches on both sides. This stitch is often used for the edges and trims of the bed jacket, as it lays flat and provides a clean and neat finish. It is also a great stitch for beginners as it is easy to execute.
By incorporating these essential knitting stitches into your bed jacket pattern, you can create a beautiful and cozy garment that will keep you warm and stylish. Experiment with different stitch combinations and patterns to personalize your bed jacket and make it truly unique.
Step-by-step instructions for knitting the back panel
Before you begin knitting the back panel of the bed jacket, make sure you have all the necessary materials, including the right size knitting needles and the appropriate yarn. Double-check the knitting pattern to ensure you understand the instructions and have a clear idea of the final product.
1. Cast on stitches: To start, cast on the required number of stitches specified in the pattern. Use a long-tail cast-on or your preferred cast-on method.
2. Knit the first row: After casting on, knit the entire first row. This will create the foundation row for the back panel.
3. Begin the pattern: Follow the pattern instructions to start knitting the back panel. This may involve knitting a specific number of rows in a particular stitch pattern or following a chart.
4. Maintain stitch count: As you work through the pattern, make sure to maintain the correct number of stitches. Count your stitches periodically to ensure accuracy.
5. Shape the panel: If the pattern requires shaping, make sure to follow the instructions to create the desired shape. This may involve decreasing or increasing stitches at specific intervals.
6. Continue knitting: Keep knitting according to the pattern instructions until you reach the desired length for the back panel. Double-check the measurements provided in the pattern to ensure accuracy.
7. Bind off: Once the back panel reaches the desired length, bind off all stitches using your preferred bind-off method. This will secure the stitches and finish the edge of the panel.
8. Repeat if necessary: Depending on the specific pattern, you may need to knit additional back panels if the bed jacket requires multiple pieces. Follow the pattern instructions to determine if this step is necessary.
By following these step-by-step instructions, you will be able to knit the back panel of your bed jacket accurately and efficiently. Remember to take your time, double-check your work, and enjoy the knitting process!
Creating the front panels and sleeves
When creating the front panels of the bed jacket, you will need to cast on the required number of stitches according to the pattern instructions. This will typically involve using the chosen yarn and needle size to achieve the desired gauge. Once you have cast on, you will begin working in the specified stitch pattern, following the pattern instructions for any shaping or stitch changes.
As you work on the front panels, you may need to incorporate additional elements such as buttonholes or lace patterns. These can be accomplished by following the pattern instructions and making any necessary adjustments to ensure proper placement and alignment. It may be helpful to use stitch markers or row counters to help keep track of your progress and make sure you are working the correct number of rows or stitches.
To create the sleeves, you will typically start by casting on the required number of stitches and working in the chosen stitch pattern. The pattern may include instructions for increasing or decreasing stitches to achieve the desired size and shape. Additionally, you may need to work in a different stitch pattern or add decorative elements to the sleeves, such as lace or cables, depending on the design of the bed jacket.
As you work on the sleeves, it is important to maintain an even tension and consistent gauge to ensure that the sleeves match the front panels in size and appearance. This may require adjusting your needle size or technique if necessary. Once the desired length of the sleeves is achieved, you can bind off the stitches and weave in any loose ends.
Assembling the bed jacket: a detailed guide
After completing all the knitting sections of the bed jacket, it is time to assemble the pieces together. Follow these step-by-step instructions to ensure a smooth and professional finish to your project.
1. Block the pieces
Before assembling, it is important to block each piece of the bed jacket. This process involves gently stretching the knitted fabric and pinning it into shape to ensure that all the pieces are of the same dimensions and that the finished jacket fits properly. Use a blocking board or a clean towel on a flat surface to lay out the pieces, then pin them in place. Allow the pieces to dry completely before moving on to the next step.
2. Sew the shoulder seams
With the right sides facing each other, use a tapestry needle and the same yarn used for knitting to sew the shoulder seams. Start at one edge and use a whip stitch or mattress stitch to join the pieces together. Make sure the seams are neat and secure. Repeat the process for the other shoulder seam.
3. Attach the sleeves

Taking one sleeve and aligning the center of its top edge with the shoulder seam, use the same yarn and tapestry needle to sew the sleeve to the body of the bed jacket. Start at the center and work your way outward, making sure to maintain an even tension. Repeat the process for the other sleeve.
4. Sew the side and sleeve seams
With the right sides facing each other, sew the side seams and sleeve seams using the same yarn and technique as before. Start at the bottom edge and work your way up, aligning the stitches and ensuring that the seams are neat and secure. Leave an opening for armholes if necessary. Trim any excess yarn and weave in the loose ends.
Congratulations! You have successfully assembled your bed jacket. Now you can enjoy the warmth and comfort it provides, or gift it to someone special.
Adding buttons or other closures
If you want to add buttons or other closures to your knitted bed jacket, there are a few different options you can consider. One option is to sew on buttons and create corresponding buttonholes. This can be done by placing the buttons on one side of the front opening and creating small slits or holes on the opposite side to accommodate the buttons. Make sure to space the buttons evenly and sew them securely so that they do not easily come undone.
Another option for closures is to use snaps or velcro. These can be sewn onto the front opening and provide a secure closure without the need for buttons and buttonholes. Snaps are small metal pieces that can be easily sewn onto the fabric, while velcro is a hook-and-loop fastener that can be sewn or adhered to the fabric. Both options are easy to use and provide a convenient closure for the bed jacket.
If you prefer a more decorative closure, you can also consider using a ribbon or tie closure. This can be done by attaching a ribbon or fabric tie to the front opening of the bed jacket. You can either sew the ribbon directly onto the fabric or create small loops or openings to thread the ribbon through. This type of closure adds a feminine touch to the bed jacket and allows for easy adjustment and customization.
When choosing your closure method, consider the overall design and style of your bed jacket. Select a closure that complements the aesthetic and functionality of the garment. Experiment with different options and techniques to achieve the desired look and feel for your knitted bed jacket.
Finishing touches: blocking and weaving in ends
As you near the completion of your knitting project, the finishing touches play a crucial role in giving your work a polished and professional look. Two important steps in this process are blocking and weaving in ends.
Blocking:
Blocking is the process of shaping and stretching your knitted item to achieve the desired shape and size. It evens out the stitches and helps your project lay flat and drape nicely. To block your bed jacket, you will need to soak it in lukewarm water and a mild detergent, then gently squeeze out the excess water and lay it flat on a clean towel. Use pins to straighten and shape the jacket, making sure to follow the pattern instructions for measurements and dimensions. Leave it to dry completely before removing the pins.
Weaving in Ends:
Weaving in ends refers to the process of securing the loose yarn tails from your knitting project. When you finish a section or change colors, you are left with loose ends that need to be properly woven into the fabric to prevent unraveling. To do this, thread the loose end onto a tapestry needle and weave it in and out of the neighboring stitches, going in one direction and then back in the opposite direction. Make sure to weave in the ends for at least an inch to ensure they are securely tucked away.
Blocking and weaving in ends are essential steps in completing your knitting project. They not only enhance the overall appearance of your bed jacket but also ensure that your hard work retains its shape and finish for a long time.
Customizing your bed jacket with embellishments
When it comes to knitting a bed jacket, there are endless possibilities for customizing the final product. One way to add a personal touch to your bed jacket is by embellishing it with various decorations. Adding embellishments not only adds visual interest to the jacket but also allows you to showcase your creativity and style.
Here are some ideas for embellishing your bed jacket:
- Embroidery: One of the easiest ways to add embellishments to your bed jacket is by incorporating embroidery. You can add delicate floral patterns, decorative borders, or even monograms to personalize your jacket.
- Buttons: Choosing unique and decorative buttons can instantly transform the look of your bed jacket. You can opt for vintage buttons, colorful buttons, or even buttons with intricate designs to add a touch of elegance to your jacket.
- Ribbons and trims: Adding ribbons or trims to your bed jacket can give it a feminine and delicate look. You can use lace, satin ribbons, or even velvet trims to create a beautiful and luxurious effect.
- Appliques: Appliques are another great way to embellish your bed jacket. You can sew on small fabric or knitted shapes like flowers, butterflies, or even hearts to add a whimsical touch to your jacket.
- Beads and sequins: For a more glamorous and eye-catching look, consider adding beads or sequins to your bed jacket. You can choose to scatter them randomly or create intricate patterns to make your jacket sparkle.
Incorporating these embellishments will not only make your bed jacket one-of-a-kind but also reflect your personal style and taste. Whether you prefer a more subtle and elegant look or want to create a bold and vibrant statement piece, there are endless possibilities to customize your bed jacket to suit your preferences.
Styling and Caring for Your Knitted Bed Jacket
Once you have completed knitting your bed jacket, you can style it in a variety of different ways to suit your personal taste and preferences. Here are some styling tips for your knitted bed jacket:
- Wear it open over a nightgown or pajamas for a more relaxed and casual look.
-
Close it with buttons, a belt, or a ribbon for a more polished and put-together appearance.
- Pair it with matching or contrasting bottoms, such as shorts or trousers, for a coordinated outfit.
- Layer it over a long-sleeve top or turtleneck during colder months for added warmth.
- Accessorize with a statement necklace or a scarf to add a touch of elegance and personality.
When it comes to caring for your knitted bed jacket, it is essential to follow the care instructions provided with the yarn you used. However, here are some general tips:
- Hand wash your bed jacket in lukewarm water with a mild detergent specifically designed for delicate garments.
- Gently squeeze out the excess water, being careful not to wring or twist the knitted fabric.
- Reshape the bed jacket while damp and lay it flat to dry to maintain its shape and prevent stretching.
- Avoid hanging or using clothespins to dry, as they can cause the fabric to stretch or lose its shape.
- Store your knitted bed jacket in a cool, dry place to prevent any potential damage from moths or other pests.
In conclusion, your knitted bed jacket can be styled in various ways to suit your preferences and can be cared for to ensure its longevity. With these tips, you can enjoy wearing your cozy and stylish knitted bed jacket for years to come.