
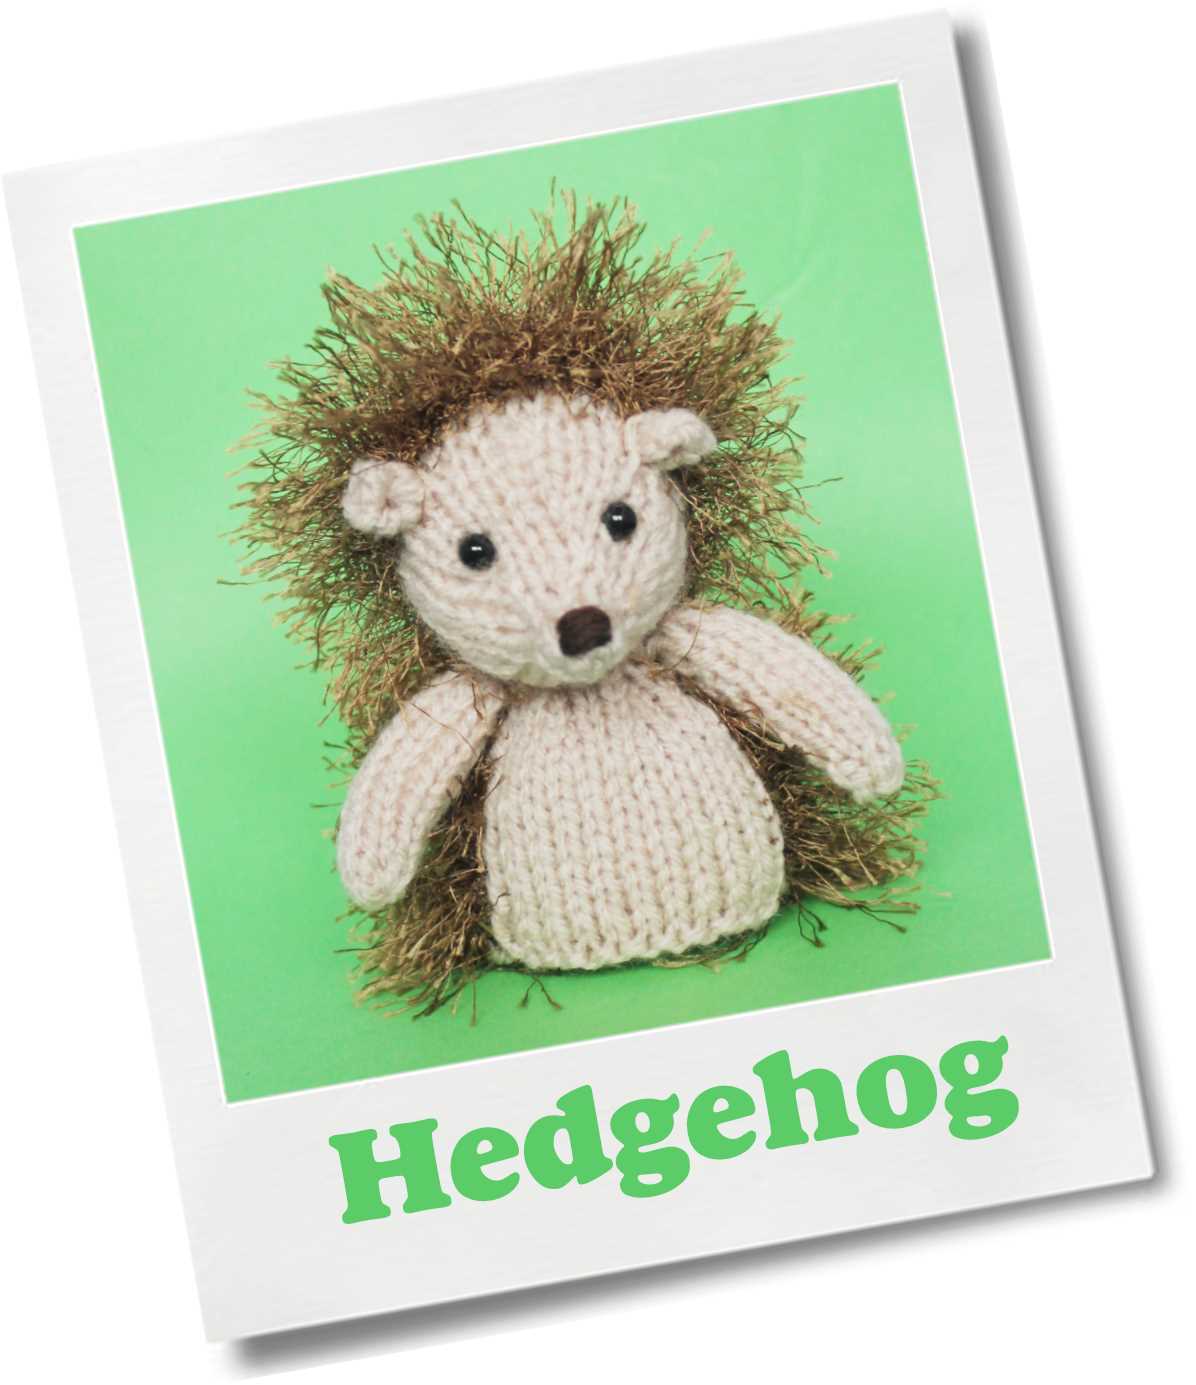
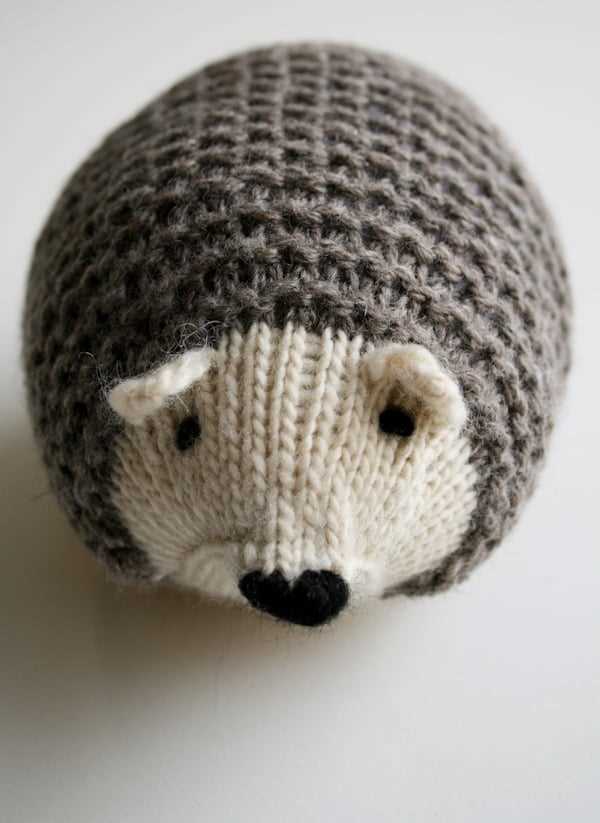
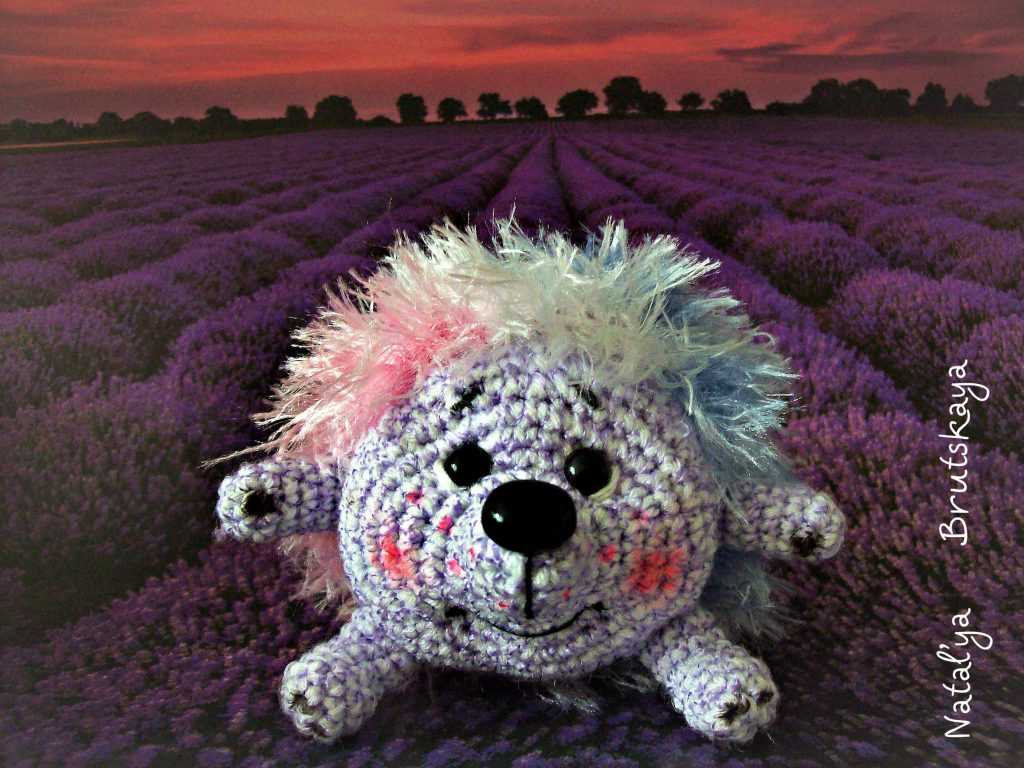
Hedgehogs are adorable little creatures that are loved by many. If you are a fan of hedgehogs and knitting, why not combine your two passions by creating your very own hedgehog plush toy?
This free easy hedgehog knitting pattern is perfect for beginners and experienced knitters alike. With simple stitches and clear instructions, you will be able to create a cute and cuddly hedgehog in no time.
To get started, all you need is some yarn in your favorite colors and a pair of knitting needles. The pattern provides step-by-step instructions on how to knit the body, head, and legs of the hedgehog. There are also instructions on how to sew the pieces together and add the finishing touches like eyes and a nose.
Once you have finished knitting your hedgehog, you can use it as a decoration on your bookshelf or give it as a gift to a fellow hedgehog enthusiast. Either way, this hedgehog plush toy is sure to bring a smile to anyone’s face!
Free Easy Hedgehog Knitting Pattern
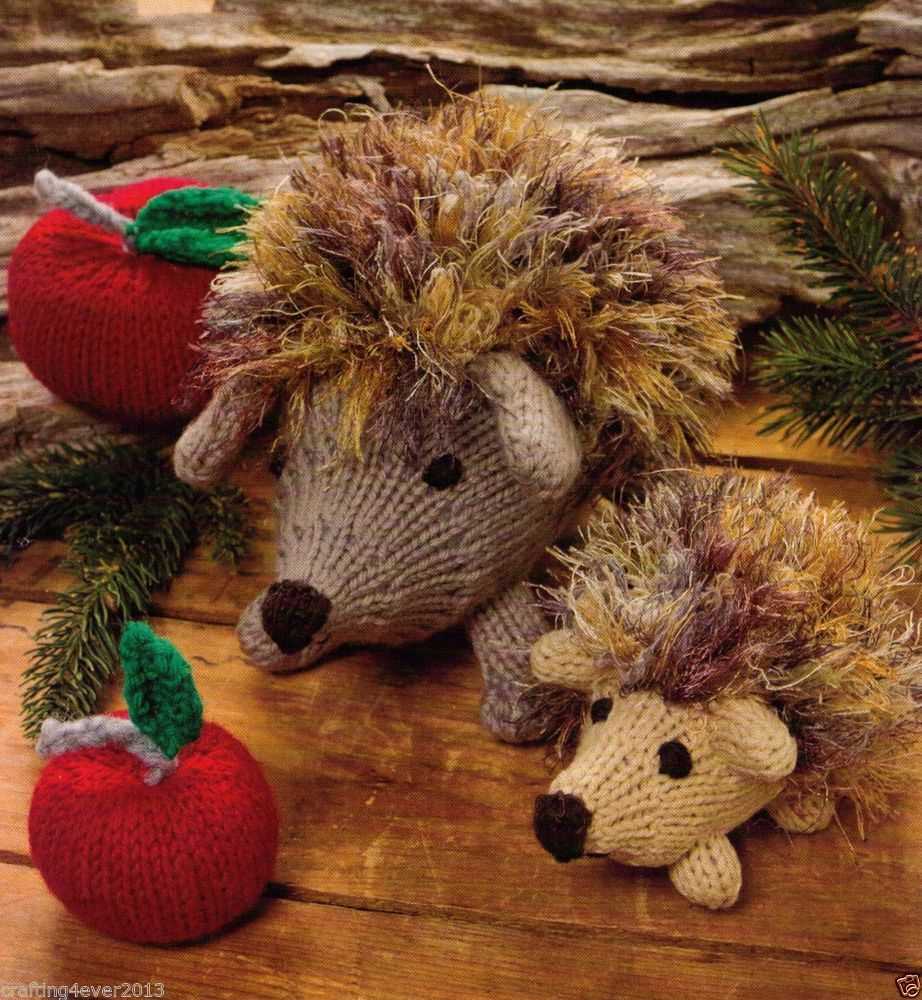
Are you looking for a cute and cuddly knitting project? Look no further than this free easy hedgehog knitting pattern! This pattern is perfect for knitters of all skill levels, from beginners to advanced. With its simple stitches and clear instructions, you’ll be able to create your very own adorable hedgehog in no time.
To get started, all you’ll need is some yarn in your chosen colors and a pair of knitting needles. The pattern includes a list of recommended yarns and needle sizes, but feel free to use whatever you have on hand. Once you have your materials ready, you can begin knitting the various parts of the hedgehog, such as the body, snout, and limbs.
The pattern includes step-by-step instructions for each part, as well as detailed photos to help guide you along the way. You’ll also find tips and tricks for achieving the perfect stitches and finishing touches. Once you’ve finished knitting all the parts, it’s time to assemble your hedgehog. Simply sew the pieces together and stuff it with fiberfill or any other soft material. You can even add some small details, like eyes or a nose, for an extra touch of cuteness.
With this free easy hedgehog knitting pattern, you’ll have a delightful new friend to cuddle and display in your home. Whether you’re an experienced knitter looking for a fun project or a beginner looking to improve your skills, this pattern is sure to bring joy and satisfaction. So grab your needles and get knitting!
Materials Needed for Hedgehog Knitting
Knitting hedgehogs is a fun and creative project that requires a few specific materials. Before you get started, make sure you have the following items:
- Yarn: Choose a soft and thick yarn in the color of your choice. This will be the main material for creating the hedgehog’s body.
- Knitting Needles: Use a pair of knitting needles that are appropriate for the yarn weight you have chosen. The size will depend on your personal knitting style and tension.
- Stuffing: You will need some stuffing material to fill the hedgehog’s body and give it a fluffy appearance. Use polyester fiberfill or any other type of stuffing that is safe and non-toxic.
- Embroidery Floss: Get a small amount of embroidery floss in black or brown for sewing the eyes and nose of the hedgehog.
Note: If you want to add some extra flair to your hedgehog, you can also gather the following optional materials:
- Buttons: Choose small buttons in different colors to use as the hedgehog’s eyes. This will give your creation a unique and personalized touch.
- Ribbon: Consider using a small piece of ribbon to tie around the hedgehog’s neck as a decorative accessory.
- Miniature Hat or Scarf: If you want to dress up your hedgehog, you can find or knit a tiny hat or scarf to add some winter charm.
Now that you have gathered all the necessary materials, you are ready to start knitting your adorable hedgehog!
How to Cast On Stitches

Casting on stitches is the first step in starting any knitting project. It is the process of creating a row of stitches on the knitting needle to form the foundation for your work. There are several different methods for casting on, but the most common one is the long-tail cast on.
To begin the long-tail cast on, start by leaving a long tail of yarn, approximately three times the width of the finished project. Make a slipknot at the end of the tail, leaving a small loop. Insert the knitting needle into the loop, and tighten the knot around the needle.
Step 1: Hold the knitting needle in your right hand, and the tail end of the yarn in your left hand. With your left hand, bring the yarn over the top of the needle, creating a loop.
Step 2: Insert the needle through the loop, from left to right, and catch the yarn with the needle. Pull the loop through, creating a new stitch on the needle.
Repeat steps 1 and 2 until you have cast on the desired number of stitches. The stitches should be evenly spaced along the needle. You can use your fingers or a knitting needle to adjust the tension of the yarn as you go.
Once you have finished casting on, you are ready to start knitting your project!
Knitting the Body of the Hedgehog
Once you have finished knitting the head and nose of your hedgehog, it’s time to move on to the body. This part of the pattern requires you to work in the round, so make sure you have your double-pointed needles ready.
Begin by casting on the desired number of stitches for the body of your hedgehog. The exact number will depend on the size of your yarn and needles, as well as the desired final size of the hedgehog. For a medium-sized hedgehog, you may want to cast on around 30 stitches.
Next, join the round and work in the round using the desired stitch pattern. Many knitters prefer to use a simple stockinette stitch for the body, as it creates a smooth finish. However, you can also experiment with other stitch patterns such as garter stitch or seed stitch for added texture.
Continue knitting in the round until the body reaches the desired length. This will again depend on personal preference, but a length of around 6-8 inches is common for a medium-sized hedgehog. Make sure to periodically check the length by measuring from the base of the head to the desired point on the back of the body.
When the body is at the desired length, you can begin tapering it towards the tail. This can be done by gradually decreasing the number of stitches in each round. You may choose to do this every few rounds or every round, depending on how tapered you want the body to be.
Continue decreasing until you have only a few stitches left on your needles. Cut the yarn, leaving a long tail, and thread it through the remaining stitches to secure them. Finally, sew the body to the head and stuff the hedgehog with fiberfill or another stuffing material.
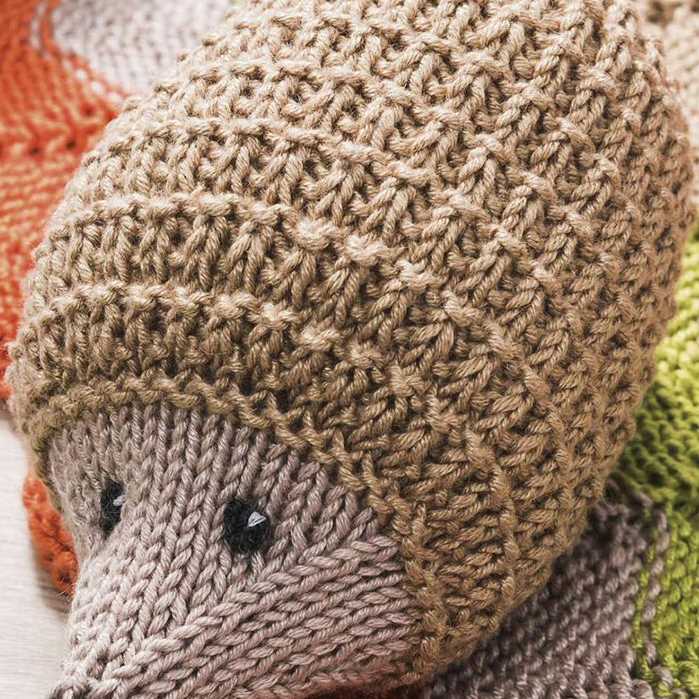
Shaping the Head and Snout
One of the key steps in knitting a hedgehog is shaping the head and snout. This is what gives the hedgehog its characteristic shape and personality. To begin, you will need to follow the instructions for increasing and decreasing stitches to create the desired shape. Use a combination of knit and purl stitches to achieve the texture and pattern you desire.
Start by knitting the head of the hedgehog, using the specified number of stitches and rows. Once you reach the desired length, you can begin shaping the snout. To do this, you will need to decrease stitches gradually to create a tapered shape. Follow the pattern instructions carefully to ensure you decrease the correct number of stitches in each row.
Creating the Facial Features
To give the hedgehog its adorable face, you will need to add some facial features. Use small pieces of yarn in contrasting colors to create the eyes, nose, and mouth. French knots or small embroidery stitches can be used to create the eyes, while a simple straight stitch can be used for the nose and mouth.
Another option is to use safety eyes for a more lifelike appearance. These can be attached securely to the head using a plastic washer or by sewing them in place. Remember to position the eyes, nose, and mouth in the desired location before attaching them permanently.
Adding Eyes and Nose
When it comes to adding eyes and a nose to your knitted hedgehog, there are a few different options you can choose from. It all depends on the look you want to achieve.
If you want a more realistic look, you can use small black beads or buttons for the eyes. Simply sew them onto the face of the hedgehog, making sure to space them out evenly and position them where you want them to be. For the nose, you can use a small black bead or button as well, or you can embroider a small triangle shape using black yarn.
If you prefer a cuter, more cartoon-like look, you can use safety eyes for the eyes of your hedgehog. These are available in various sizes and colors, so you can choose the ones that best match your hedgehog’s color. Simply push the eye through the knitted fabric, following the instructions on the package to secure it in place. For the nose, you can either use a small black bead or button, or you can sew a triangle shape using black yarn.
Whichever option you choose, make sure that the eyes and nose are securely attached to the hedgehog so that they don’t come off during play. It’s also a good idea to stitch them on tightly to prevent any potential choking hazards for young children.
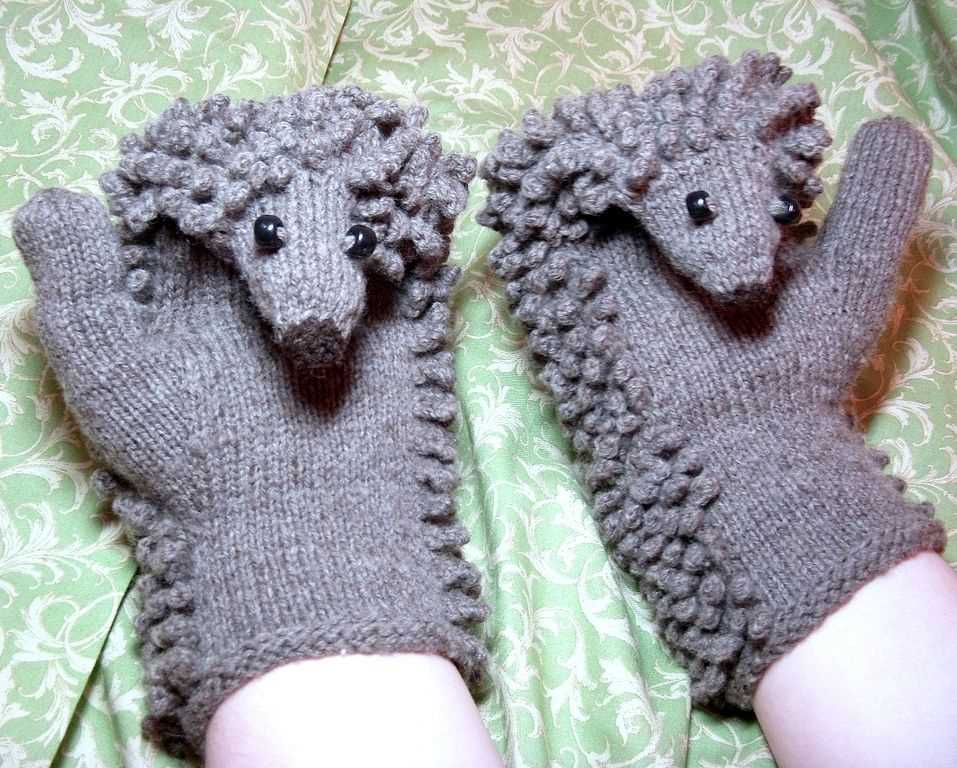
Knitting the Quills
When creating your own hedgehog using the free easy knitting pattern, one of the key elements that brings the adorable creature to life is the quills. These spiky features are what make hedgehogs so unique and lovable, and knitting them requires a bit of skill and attention to detail.
To start knitting the quills, you will need to choose the appropriate yarn and knitting needles. A chunky or worsted weight yarn works best for this part of the project, as it will give the quills a nice thickness and texture. You can also experiment with different colors to add some personality to your hedgehog.
Begin by casting on a small number of stitches, around 6-10 depending on the size of your hedgehog. Then, work in stockinette stitch for a few rows to create a flat base for the quills. Once you have the base, it’s time to add the quills themselves.
To create the quills, you can use a simple technique called “I-Cord”. This involves knitting a small tube of stitches that will serve as the quill. To do this, you knit a row of stitches on your main needle, then without turning your work, slide the stitches to the other end of the needle and knit them again. Repeat this process until you have a tube that is the desired length for your quill.
After knitting the quills, you will need to attach them to the body of the hedgehog. There are several ways to do this, depending on your preference and the effect you want to achieve. You can sew them on with a tapestry needle, use a crochet hook to pull them through the body, or even attach them with small beads or buttons.
Finally, don’t forget to arrange the quills in a realistic pattern on your hedgehog. They should be evenly spaced and angled slightly upward to mimic the actual appearance of a hedgehog’s quills. Take your time with this step to ensure your hedgehog looks as authentic as possible.
Attaching Quills to the Body

When creating a hedgehog knitted toy, one of the most important steps is attaching the quills to the body. The quills not only give the toy its iconic hedgehog appearance, but also add texture and character. Here are some tips on how to attach quills to the body for a free easy hedgehog knitting pattern:
1. Gather the materials:
Before starting the process, make sure you have all the necessary materials. These include the knitted body of the hedgehog, a yarn needle, and the quills, which can be made of either yarn or felt. If using yarn for the quills, make small knitted tubes; if using felt, cut small strips.
2. Positioning the quills:
Decide on the placement of the quills on the hedgehog’s body. They are typically placed in rows, starting from the top of the head and going down to the base of the body. Make sure to leave some space between each row of quills for a more realistic look.
3. Sewing the quills:
Take the knitted tube or felt strip and thread it through the yarn needle. Starting from the base of the tube or strip, insert the needle through the knitted body of the hedgehog. Pull the needle through to secure the quill in place. Repeat this process for each quill, following the predetermined placement pattern.
4. Securing the quills:

To ensure that the quills stay in place securely, tie a knot at the base of each quill on the inside of the hedgehog’s body. This will help prevent the quills from coming loose during play or handling.
By following these steps, you can successfully attach quills to the body of your knitted hedgehog toy. Have fun creating your unique hedgehog friend!
Creating the Legs and Feet
When knitting a hedgehog, the legs and feet are an important part of bringing the little creature to life. To create the legs and feet, follow these simple steps:
Step 1: Start with the Legs
To begin, cast on the required number of stitches for the legs. You can use double-pointed needles or a circular needle depending on your preference. Make sure to leave a long tail of yarn for sewing later.
Next, work in the round to create the length of the legs. You can use a simple knit stitch or a more complex pattern depending on your skill level and desired outcome. Be sure to keep track of your stitches and rows to maintain symmetry between the legs.
Step 2: Shaping the Feet
Once you have reached the desired length for the legs, it is time to shape the feet. This can be done by decreasing stitches in a strategic manner to create the appearance of paws.
You can use a basic decrease method, such as k2tog (knit two stitches together), to gradually reduce the number of stitches. Alternatively, you can experiment with more decorative decrease stitches, such as ssk (slip, slip, knit), to add extra detail to the feet.
Step 3: Finishing Touches
After shaping the feet, bind off the remaining stitches and fasten off the yarn. Cut the yarn, leaving a tail to sew the legs and feet onto the body of the hedgehog later.
Repeat these steps to create all the legs and feet needed for your hedgehog. Make sure to use the same stitch count and shaping techniques for each leg to maintain consistency in your finished project.
Finishing Touches for the Hedgehog
After completing the knitting part of your hedgehog, it’s time to add some finishing touches to make it come alive! Here are a few steps you can follow to give your hedgehog that extra charm.
1. Embroider the Face: Using black yarn, carefully embroider the hedgehog’s eyes and nose. Start by stitching two small circles for the eyes and a small triangle for the nose. You can use a French knot stitch or a simple straight stitch, depending on the look you prefer. Take your time to make sure the facial features are symmetrical.
2. Add Ears: Cut out two small ear shapes from felt or fabric. Sew them onto the hedgehog’s body, positioning them just above the eyes. Make sure the ears are securely attached so they don’t come off easily.
3. Attach Spikes: To give your hedgehog its characteristic spikes, cut out small triangles from felt or fabric in a contrasting color. Sew one triangle onto each row of stitches on the hedgehog’s back, starting from the top and working your way down to the bottom. Make sure the spikes are evenly spaced and securely attached.
4. Finishing Details: To complete the hedgehog, you can add some additional details like a tiny scarf or a miniature hat, using scrap yarn or fabric. These extra touches will give your hedgehog a unique personality and make it even more adorable.
With these finishing touches, your knitted hedgehog will be ready to bring joy and warmth to anyone who sees it. Enjoy the process of adding these final details and let your creativity shine!
Tips and Tricks for Knitting Hedgehogs
Knitting hedgehogs can be a fun and rewarding project for any knitting enthusiast. With their adorable prickly appearance, they make great gifts or decorations. Here are some tips and tricks to help you create the perfect hedgehog:
Choose the Right Yarn
When knitting a hedgehog, it is important to choose the right type of yarn. Opt for a soft and fluffy yarn that can mimic the texture of hedgehog quills. Mohair or angora blends work well for this purpose, as they provide a fuzzy and realistic look.
Use Small Needles
To achieve a tight and compact knitted hedgehog, use small needles. Thinner needles create smaller stitches, resulting in a denser fabric. This is important for achieving a realistic hedgehog shape and texture.
Incorporate the Right Techniques
There are a few techniques that can help you create the perfect hedgehog knitting pattern. One technique is to use short rows to shape the body and create a curved back. This will give the hedgehog a rounded appearance. Another technique is to use the popcorn stitch or small bobbles to create the texture of the quills. These techniques will add depth and detail to your hedgehog.
Pay Attention to Details
When knitting a hedgehog, paying attention to small details can make a big difference. For example, adding tiny black beads for the eyes can bring your hedgehog to life. Embroidering a small pink nose and using a contrasting color for the tummy can also add charm and character to your creation.
Experiment with Colors
While hedgehogs are commonly associated with brown or gray colors, feel free to experiment with different shades and patterns. You can knit a hedgehog with a vibrant pink or blue body, or even create a rainbow-colored hedgehog. Don’t be afraid to let your creativity shine through!
By following these tips and tricks, you will be able to create adorable hedgehog knitting patterns that are sure to delight everyone who sees them. Enjoy the process and have fun knitting these charming creatures!
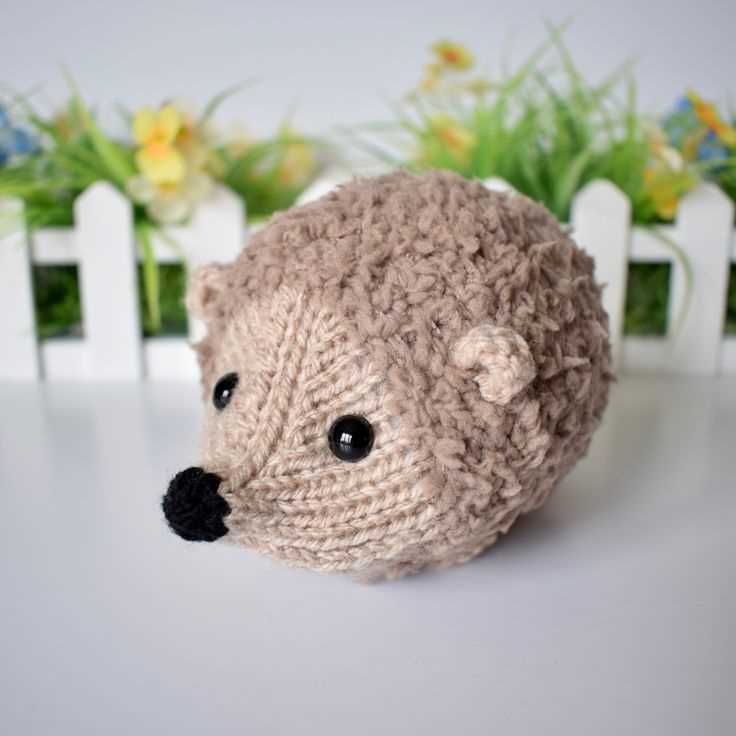
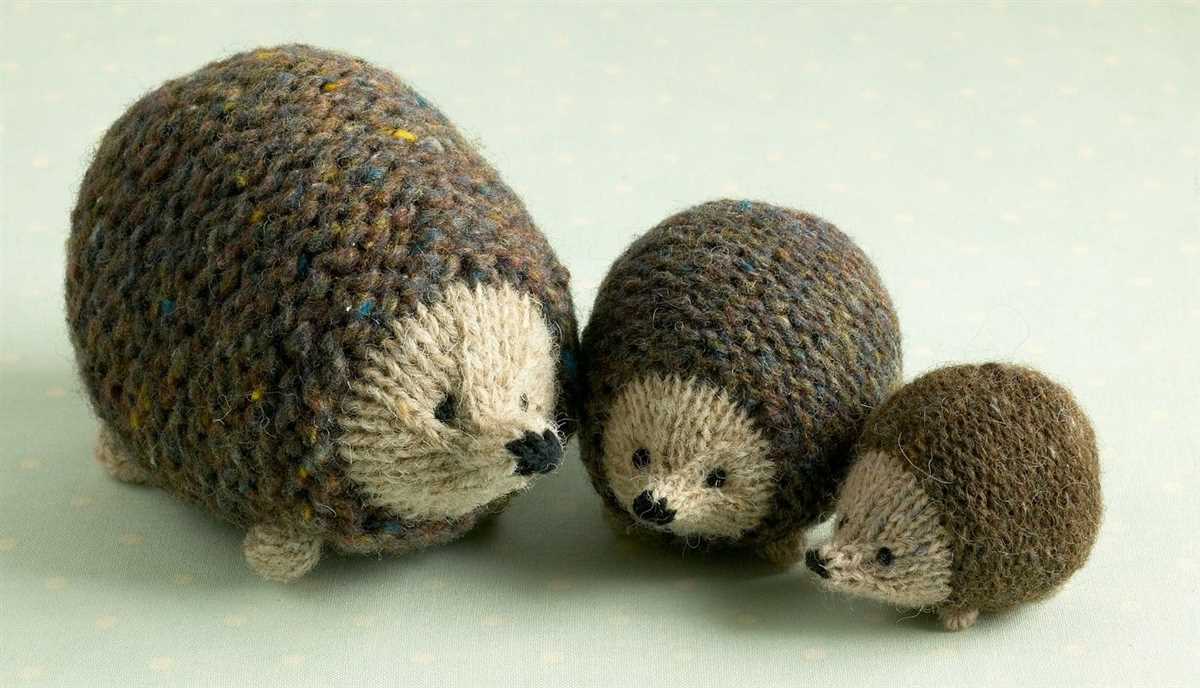
Enjoying Your Knitted Hedgehog
Now that you have successfully completed your adorable knitted hedgehog, it’s time to enjoy your creation! Whether you’ve made it for yourself or as a gift for someone special, here are a few ways to make the most of your knitted hedgehog:
- Display it: Find a special place to showcase your knitted hedgehog. It can be a shelf, a desk, or even a bedside table. Its cute and cuddly appearance will surely bring a smile to your face every time you see it.
- Play with it: Hedgehogs might not be the most traditional of playmates, but your knitted hedgehog can bring joy and entertainment. Create little scenes with other toys, or use it in imaginative play. Let your creativity soar!
- Use it as a pincushion: If you’re into sewing or crafts, your knitted hedgehog can be a cute and functional addition to your crafting space. Use it to hold pins and needles, making your projects even more delightful.
- Give it as a gift: If you’ve knitted multiple hedgehogs or just feel like sharing the joy, consider giving your creation as a gift. It’s a unique and personalized present that will surely bring a smile to someone’s face.
In conclusion, knitting a hedgehog can be a fun and rewarding experience. Not only does it allow you to practice your knitting skills, but it also gives you a cute and cuddly companion. Whether you choose to keep it for yourself or give it as a gift, your knitted hedgehog is sure to bring joy and happiness wherever it goes!
Q&A:
Do you have a free easy hedgehog knitting pattern?
Yes, we have a free easy hedgehog knitting pattern available. It is a simple and fun pattern suitable for beginner knitters.
Where can I find the free hedgehog knitting pattern?
You can find the free hedgehog knitting pattern on our website. Simply visit our website and search for the hedgehog knitting pattern in the free patterns section.
What materials do I need to knit the hedgehog?
To knit the hedgehog, you will need a set of double-pointed knitting needles, yarn in the color of your choice, a yarn needle for sewing up, and stuffing for the hedgehog’s body.
How long does it take to complete the hedgehog knitting project?
The time it takes to complete the hedgehog knitting project may vary depending on your knitting speed and experience. On average, it may take a few hours to a couple of days to complete the project.
Can I modify the hedgehog knitting pattern?
Yes, you can modify the hedgehog knitting pattern to your liking. Feel free to experiment with different yarn colors, add accessories, or change the size of the hedgehog. Knitting is a creative craft, so feel free to let your imagination run wild!
Where can I find a free easy hedgehog knitting pattern?
You can find free easy hedgehog knitting patterns on various crafting websites, such as Ravelry, LoveKnitting, and AllFreeKnitting. These patterns are usually shared by fellow knitters and are available to download or view online.
Are there any specific materials required for knitting a hedgehog?
Most hedgehog knitting patterns require basic knitting supplies such as yarn, knitting needles, and stuffing. Some patterns may also require additional materials like safety eyes or embroidery floss for details. The specific materials needed will be listed in the pattern instructions.