
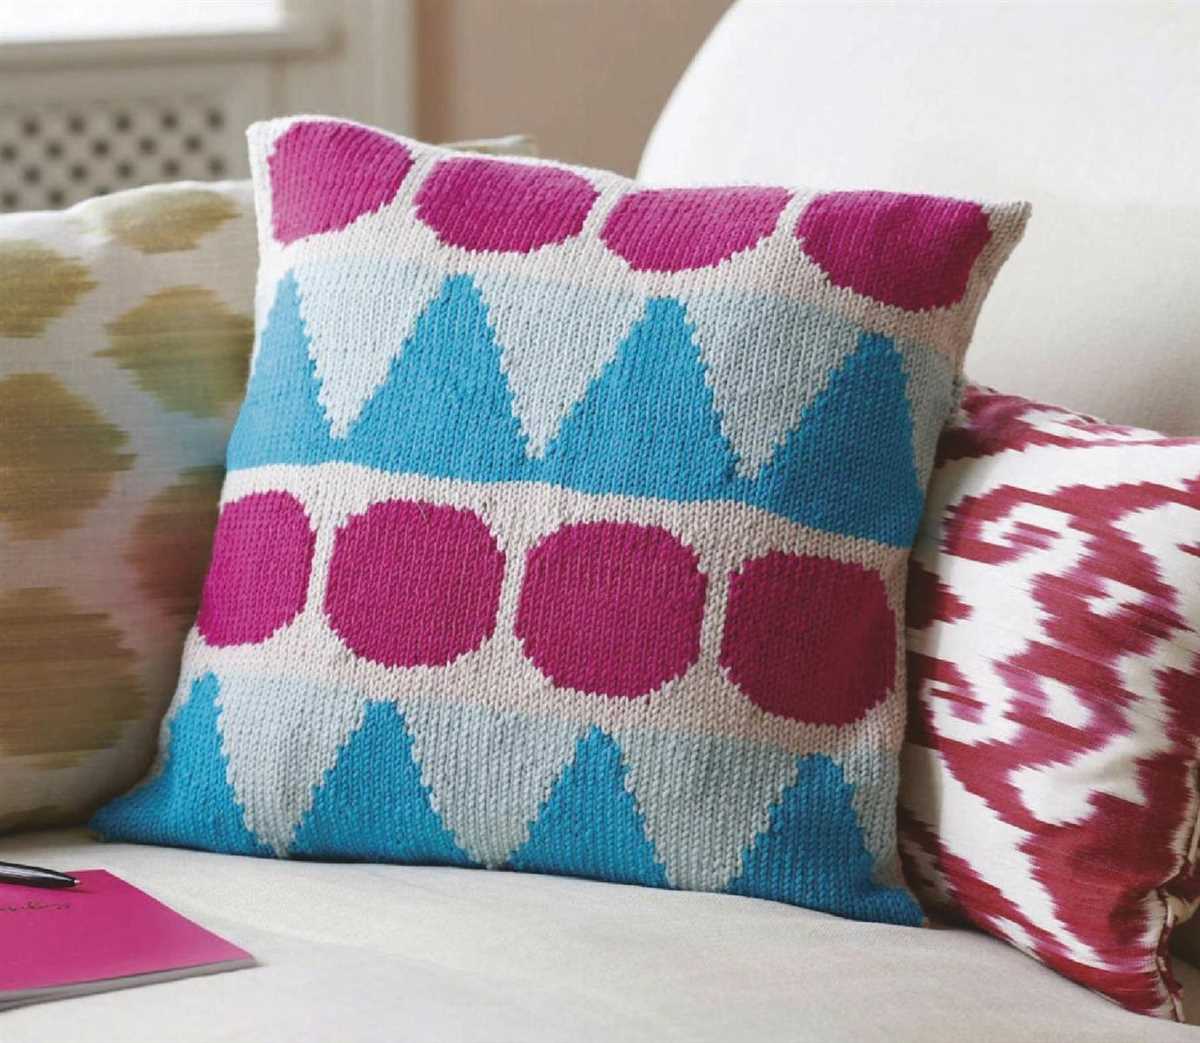
If you are looking for a fun and versatile knitting project, look no further than a cushion cover knitting pattern! Cushion covers are a great way to add a personal touch to your home décor, and they also make wonderful gifts. This particular pattern is knitted with DK weight yarn, which makes it perfect for beginners or for those who want a quick and easy project.
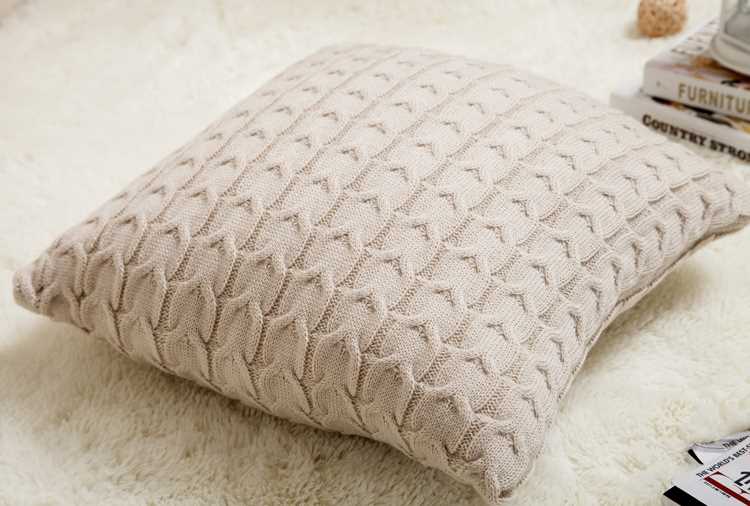
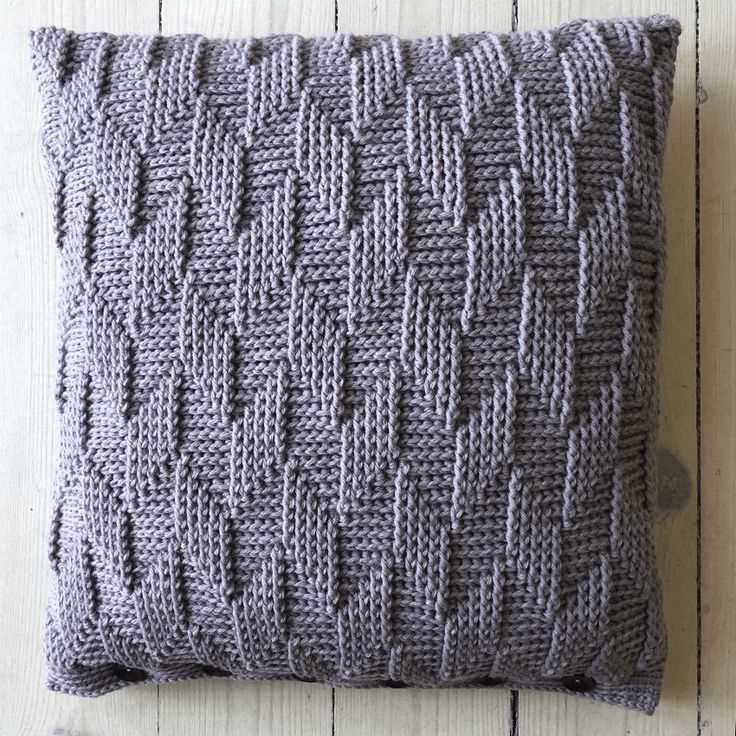
The cushion cover pattern features a classic textured design, which adds a cozy and inviting feel to any room. The pattern is worked in a simple stitch pattern, making it perfect for knitters of all skill levels. Whether you are a beginner or an experienced knitter, you will love how quickly this project comes together.
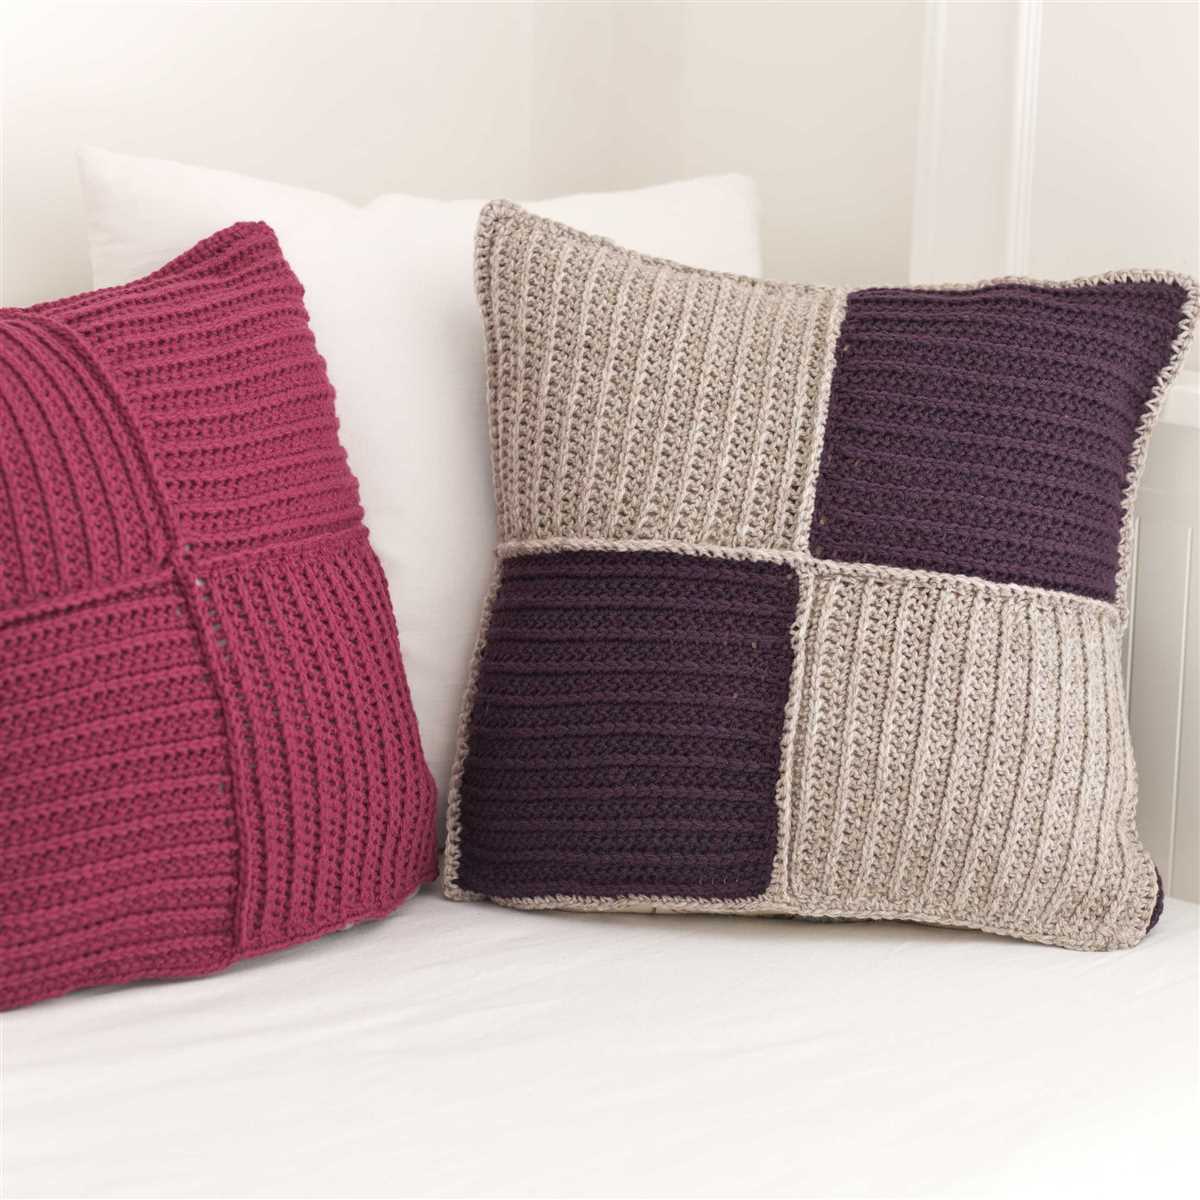
The pattern includes instructions for making a removable cover that fits a standard size cushion. The cover is knit in two pieces – the front panel and the back panel – and is then seamed together. The pattern also includes instructions for creating a button closure on one side of the cover, making it easy to remove and clean.
Cushion Cover Knitting Pattern: Easy Step-by-Step Guide
Knitting your own cushion covers is a great way to add a personal touch to your home decor. With a few simple tools and this easy-to-follow knitting pattern, you’ll be able to create beautiful and cozy cushion covers in no time.
To get started, you’ll need some basic knitting supplies, including a pair of knitting needles and some DK weight yarn in your desired colors. You’ll also need a measuring tape to ensure that your cushion cover will fit your pillow perfectly.
Step 1: Cast On
Begin by casting on the required number of stitches for your cushion cover. It’s important to choose a cast-on method that will give you a nice, stretchy edge. The long-tail cast-on method is a popular choice for cushion covers as it provides both stretch and stability.
Step 2: Knit the Main Body
Once you’ve cast on, it’s time to start knitting the main body of the cushion cover. This simple pattern uses a combination of knit and purl stitches to create a textured design. Follow the pattern instructions carefully and repeat the specified pattern rows until the cover reaches your desired length.
Step 3: Shape the Corners
To give your cushion cover a nice square shape, you’ll need to shape the corners. This can be done by decreasing stitches evenly on each side of the cover. The pattern will provide instructions on the number of stitches to decrease and how often to do so. Follow the pattern closely to ensure that your corners turn out neat and symmetrical.
Step 4: Finishing Touches
Once you’ve completed the main body and shaped the corners, it’s time to finish off your cushion cover. Bind off all stitches and weave in any loose ends. Depending on the pattern, you may also need to sew or button up a closure for your cushion cover. This will ensure that your pillow stays securely inside.
With this easy step-by-step guide, you’ll be able to create beautiful cushion covers that perfectly match your home decor. Experiment with different yarn colors and patterns to create unique designs that showcase your knitting skills. Happy knitting!
Materials and Tools Needed for Cushion Cover Knitting
Knitting your own cushion cover can be a fun and rewarding project. To get started, you will need a few materials and tools to ensure a successful knitting journey.
Yarn: Choose a durable and soft yarn that is suitable for the size and style of cushion cover you want to knit. A DK (double knitting) weight yarn is a popular choice for cushion covers, as it provides a good balance of thickness and drape.
Knitting Needles: You will need a pair of knitting needles in a size that is appropriate for your chosen yarn. The pattern you are following or your personal preference will determine the needle size. It is important to have needles that are comfortable to hold and work with.
Tapestry Needle: A tapestry needle or yarn needle is essential for weaving in loose ends and sewing the cushion cover together. Make sure to choose a needle with a large enough eye to accommodate the size of yarn you are using.
Stitch Markers: Stitch markers can be helpful for keeping track of specific stitches or sections in your pattern. You can use different colored markers to designate different stitch types or to mark the beginning of a round if you are knitting in the round.
Scissors: A good pair of scissors is necessary for cutting yarn and trimming any excess. Make sure they are sharp enough to cut through the yarn cleanly.
Measuring Tape: A measuring tape or ruler will help you ensure that your cushion cover is the correct size. It is important to check your measurements as you progress to avoid any surprises at the end.
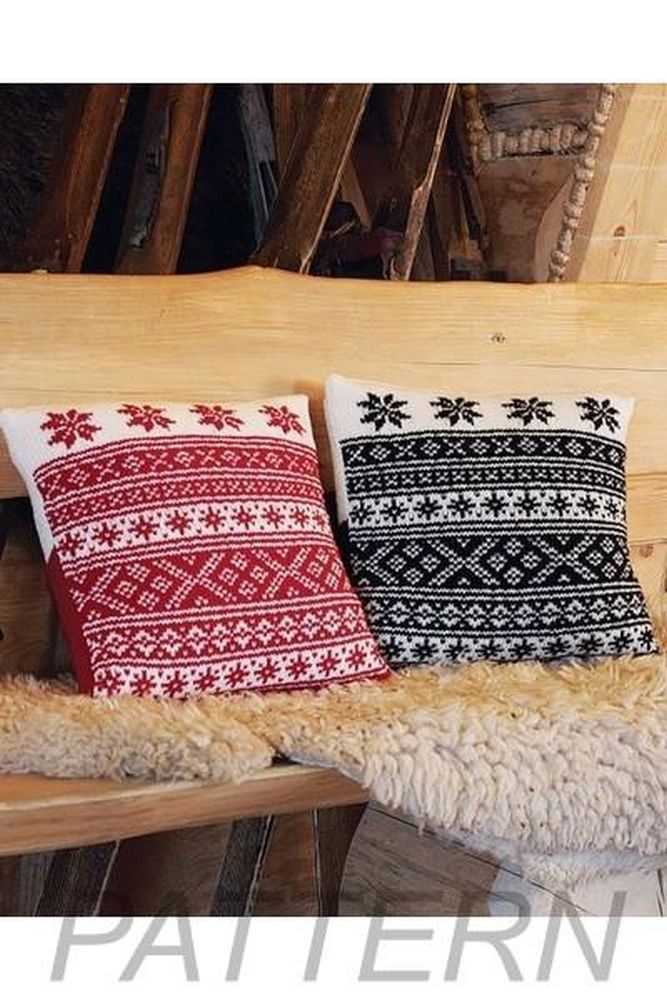
Pattern: Finally, you will need a cushion cover knitting pattern. This can be in the form of a printed pattern, a digital download, or an online tutorial. Make sure to choose a pattern that matches your skill level and desired style.
Gathering these materials and tools before you start your cushion cover knitting project will help set you up for success. With everything in place, you can begin creating a beautiful and cozy cushion cover that will add a personal touch to your home.
Choosing the Right Yarn for Your Cushion Cover
When it comes to knitting a cushion cover, choosing the right yarn is crucial to achieve the desired results. The type of yarn you select will determine the overall look, feel, and durability of your finished project. Here are some factors to consider when deciding on the perfect yarn for your cushion cover.
1. Fiber Content
The first thing to consider is the fiber content of the yarn. Different fibers have unique characteristics that will affect the final product. For a cushion cover, you may want to choose a yarn that is both soft and durable, such as a blend of cotton and acrylic. This combination will provide the desired comfort and longevity.
2. Weight
The weight of the yarn is another important factor to consider. The weight determines the thickness and warmth of the cushion cover. For a standard cushion cover, a DK (double knitting) weight yarn is often a good choice. It provides a balance between thickness and manageability, making it easier to knit and ensuring a cozy finished product.
3. Color and Design
The color and design of the yarn will also play a role in the overall aesthetic of your cushion cover. Consider the color scheme and style of your home when selecting the yarn. You may want a solid color that complements your existing decor, or you might prefer a variegated yarn for a more vibrant and eye-catching result. Additionally, you can choose a yarn with a textured or patterned design to add extra visual interest to your cushion cover.
4. Gauge and Tension
Lastly, it’s important to check the gauge and tension recommendations provided with the knitting pattern for your cushion cover. These instructions will help you determine the appropriate yarn thickness and needle size to achieve the desired size and proportions. Following the recommended gauge and tension will ensure that your cushion cover turns out exactly as planned.
Ultimately, choosing the right yarn for your cushion cover is a personal decision based on your desired outcome and preferences. Considering factors such as fiber content, weight, color and design, as well as gauge and tension, will help you make an informed choice that will result in a beautiful and functional cushion cover.
Selecting the Appropriate Knitting Needles
When it comes to knitting, choosing the right needles is essential to achieving the desired results. The type of knitting needles you select will depend on various factors, including the type of yarn you are using and the pattern you are following. Here are some key points to consider when selecting knitting needles:
Size
Needle sizes are often indicated by a number on the needle or in the pattern. The size of the needles you choose should match the recommended gauge for the pattern. If the gauge is too tight, you may need to use larger needles, while a loose gauge may require smaller needles. Always check the pattern for the recommended needle size before starting your project.
Material
Knitting needles come in a variety of materials, including metal, wood, bamboo, and plastic. Each material has its own unique characteristics. Metal needles are durable and smooth, making them great for fast knitting. Wood and bamboo needles are lightweight and provide a comfortable grip, which can be helpful for those with arthritis or hand pain. Plastic needles are affordable and can be a good option for beginners. Consider your personal preferences and the type of yarn you are using when selecting the material for your knitting needles.
Type
There are two main types of knitting needles: straight needles and circular needles. Straight needles are commonly used for flat knitting, such as scarves or blankets. Circular needles, on the other hand, can be used for both flat and circular knitting. They are particularly useful for knitting in the round, such as making hats or sweaters. Consider the type of project you are working on and choose the appropriate type of knitting needles accordingly.
By considering the size, material, and type of knitting needles, you can ensure that you are using the right tools for your knitting projects. This will help you achieve the desired results and make your knitting experience more enjoyable.
Additional Tools for a Perfect Knitting Experience
Knitting is not just about yarn and needles. There are several additional tools that can enhance your knitting experience and make your projects even more enjoyable. Whether you are a beginner or an experienced knitter, having the right tools can make a big difference in the outcome of your project.
Stitch Markers
Stitch markers are small, often colorful, rings or clips that are used to mark specific stitches in your knitting. They can be very helpful in keeping track of your progress and ensuring accuracy in complex patterns. Stitch markers are particularly useful for projects with shaping elements like increases and decreases. They can also be used to mark the beginning of a round in circular knitting. Having a collection of stitch markers in different sizes and colors can be handy for different types of projects.
Row Counter
A row counter is a small device or tool that helps you keep track of the number of rows you have knitted. It can be attached to your knitting needles, worn as a bracelet, or kept separately. Using a row counter eliminates the need to constantly count your rows manually, making it easier to stay on track with your pattern. Row counters come in various designs, including mechanical counters and digital counters. Choose one that suits your preference and keeps you organized.
Blocking Tools
Blocking is an important step in knitting that helps to shape and set your finished piece. Blocking tools include blocking mats, T-pins, and blocking wires. Blocking mats provide a soft surface for blocking your knitted items and protect them from getting damaged. T-pins and blocking wires are used to stretch and shape your knitting, ensuring that it dries evenly and maintains its desired dimensions. These tools can be particularly useful for lace knitting or projects with intricate stitch patterns.
Yarn Ball Winder
Using a yarn ball winder can make the process of winding yarn much faster and more organized. It creates neat, center-pull yarn cakes that are easy to work with. Yarn ball winders come in different sizes and styles, and they are an excellent investment for knitters who regularly work with hanks or skeins of yarn. Having a yarn ball winder can also help to prevent tangles and ensure that your yarn is in the best condition for knitting.
- Stitch markers
- Row counter
- Blocking tools
- Yarn ball winder
These additional tools can greatly enhance your knitting experience and help you create beautiful, professional-looking projects. Whether you are knitting for relaxation, self-expression, or as a gift for someone special, investing in these tools will be well worth it. So gather these tools, pick up your knitting needles, and let your creativity flow.
Getting Started: Casting On Stitches
When knitting a cushion cover, the first step is to cast on stitches. Casting on is the process of creating the foundation row of stitches that will form the base of your knitting project. This foundation row will determine the width of your cushion cover, so it’s important to cast on the correct number of stitches.
To cast on stitches, you will need a pair of knitting needles and your chosen yarn. It’s recommended to use a DK weight yarn for the cushion cover, as it provides a good balance between thickness and ease of knitting. Before you start casting on, make sure to read the knitting pattern carefully to determine the required number of stitches.
There are different methods to cast on stitches, but one of the most common techniques is the long-tail cast on. To do this, start by making a slipknot at the end of your yarn. Insert one knitting needle through the slipknot and hold it in your right hand. With your left hand, hold the working end of the yarn and create a loop around your thumb and index finger.
Using the knitting needle, reach through the loop from left to right and pick up the strand of yarn that leads to the ball of yarn. Pull this strand of yarn through the loop, and slide the loop onto the needle. Repeat this process, picking up the strand of yarn between your thumb and index finger, and pulling it through the loop on the needle. Continue until you have cast on the required number of stitches.
Basic Knitting Stitches for Your Cushion Cover
When knitting a cushion cover, it’s important to have a solid foundation of basic knitting stitches. These stitches will determine the texture and pattern of your cover, so it’s crucial to understand and master them. Here are some essential stitches to get you started:
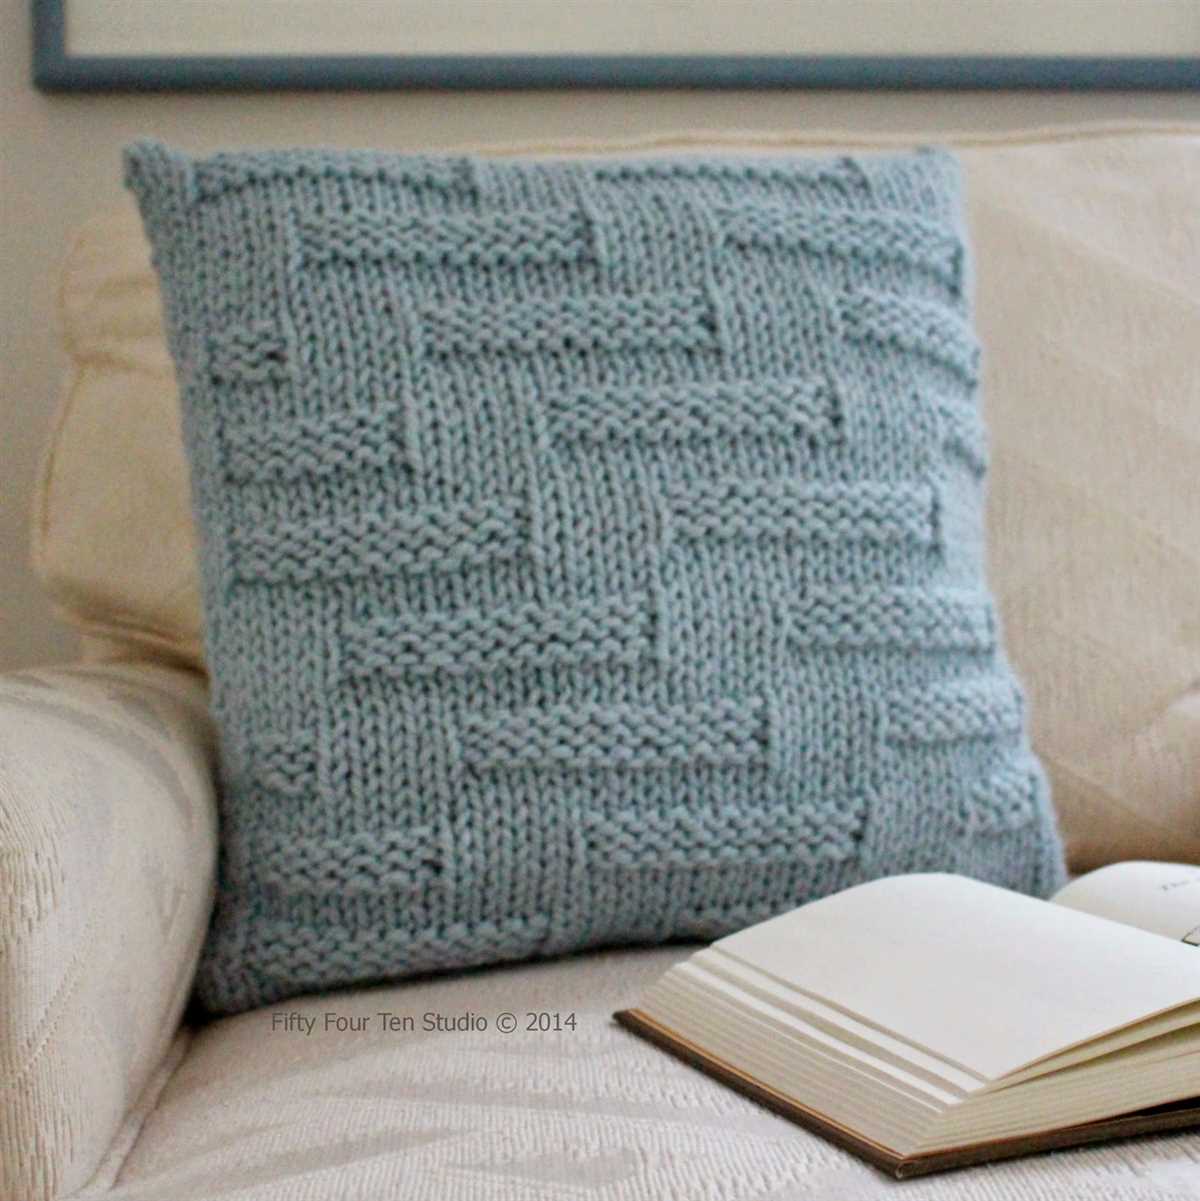
1. Garter stitch:
The garter stitch is one of the simplest and most commonly used stitches in knitting. It’s created by knitting every row, resulting in a bumpy texture on both sides of the fabric. This stitch is perfect for creating a cozy and classic look for your cushion cover.
2. Stockinette stitch:
The stockinette stitch is another basic stitch that creates a smooth and polished fabric. It is achieved by alternating between knitting one row and purling the next. The right side of the fabric will have a smooth, “v”-shaped texture, while the wrong side will have a bumpy texture. This stitch is great for showcasing simple patterns or creating a sleek and modern look.
3. Seed stitch:
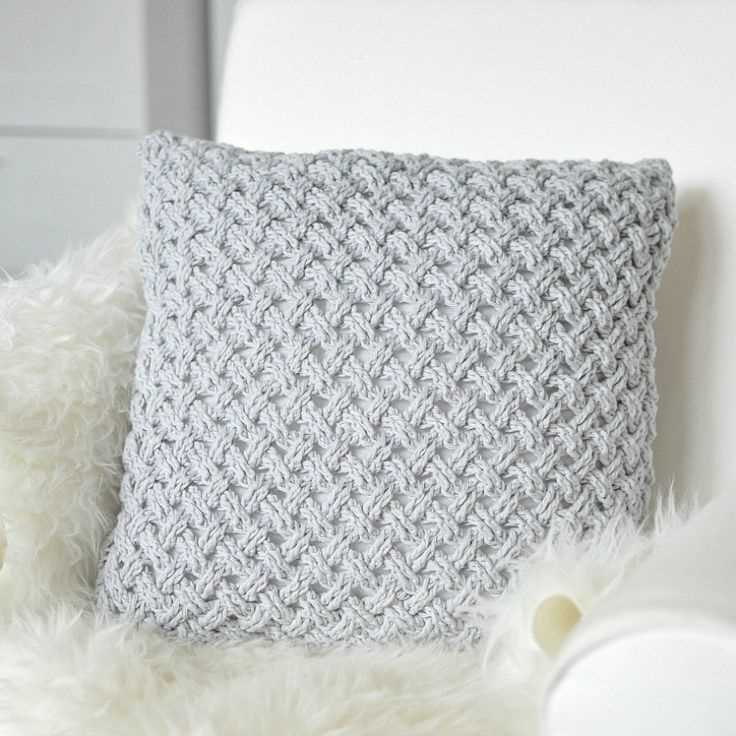
The seed stitch is a textured stitch pattern that creates a bumpy and dainty fabric. It is achieved by alternating between knitting and purling stitches in a pattern, typically with a multiple of two stitches. The alternating knits and purls create a raised seed-like texture. This stitch is perfect for adding depth and visual interest to your cushion cover.
4. Ribbing:
Ribbing is a versatile stitch pattern commonly used for cuffs, hems, and edges. It is achieved by alternating between knitting and purling stitches in a regular pattern, often with a multiple of two or four stitches. Ribbing creates a stretchy and flexible fabric with vertical lines. This stitch is excellent for creating a snug and fitted edge for your cushion cover.
By mastering these basic knitting stitches, you’ll be able to create a wide variety of textures and patterns for your cushion cover. Experiment with different combinations and stitch patterns to achieve the desired look and feel. Happy knitting!
Knit Stitch
The knit stitch is one of the fundamental stitches in knitting. It is commonly used to create the main fabric of a knitted piece, such as a cushion cover. The knit stitch is characterized by its neat V-shaped appearance, which is created by pulling a loop of yarn through the loop on the knitting needle.
To knit a stitch, insert the right-hand needle into the loop on the left-hand needle, from front to back. Then, wrap the working yarn around the right-hand needle, moving from back to front. Finally, pull the right-hand needle and the loop of yarn through the loop on the left-hand needle, creating a new stitch. This process is repeated for each stitch in a row.
The knit stitch can be used to create a variety of different textures and patterns, depending on how it is combined with other stitches. For example, when knit stitches are alternated with purl stitches, it creates the classic stockinette stitch, which has a smooth side and a bumpy side. Other stitch patterns, such as ribbing or cables, can also be created using combinations of knit and purl stitches.
When knitting a cushion cover, it is important to pay attention to the tension of your knit stitches. Tension refers to how tight or loose your stitches are. If your tension is too tight, the fabric may become stiff and inflexible. If your tension is too loose, the fabric may be floppy and lack structure. To achieve the desired tension, you may need to adjust your needle size or the amount of tension you apply to the yarn. It is also important to check your gauge before starting a project, as this will ensure that your cushion cover will be the correct size.
The knit stitch is a versatile and essential skill for any knitter. Once you master this stitch, you can create a wide variety of beautiful and functional knitted items, such as cushion covers, scarves, and sweaters. So pick up your knitting needles and start practicing the knit stitch today!
Purl Stitch
The purl stitch is one of the basic knitting stitches, along with the knit stitch. It creates a raised texture on the fabric and is commonly used for creating ribbing, adding depth to patterns, and creating variety in stitching patterns. The purl stitch is the opposite of the knit stitch, as it is worked on the wrong side of the fabric.
To work a purl stitch, insert the right-hand needle from right to left into the front of the first stitch on the left-hand needle. Make sure the working yarn is in front of the right-hand needle. Wrap the yarn around the needle, moving it from the back to the front. Use the right-hand needle to push the wrapped yarn through the stitch and off the left-hand needle. Repeat these steps for each stitch.
When knitting a pattern that includes purl stitches, the instructions will usually indicate when to switch from knitting to purling and vice versa. Pay attention to these instructions to ensure the correct stitch is being worked in each row. If you mistakenly knit instead of purl or vice versa, the pattern may not turn out as intended.
The purl stitch can be used to create a wide variety of stitch patterns, such as seed stitch, moss stitch, and ribbing. By combining knit and purl stitches in different ways, you can create interesting textures and patterns in your knitting projects.
Following the Cushion Cover Knitting Pattern
Knitting a cushion cover can be a fun and rewarding project for knitters of all skill levels. By following a cushion cover knitting pattern, you can create a beautiful and unique accessory for your home. Whether you prefer a classic design or something more modern, there are plenty of patterns available to suit your style.
The first step in following a cushion cover knitting pattern is to gather the necessary materials. A typical pattern will specify the type and weight of yarn, as well as the size of knitting needles needed. Make sure to choose a yarn and needle combination that will give you the desired gauge for your project. Additionally, you may need other materials such as a tapestry needle for seaming or buttons for closure.
Once you have your materials ready, it’s time to start knitting! The pattern will provide detailed instructions on how to create the various sections of the cushion cover, such as the front and back panels, and any additional decorative elements. Pay close attention to the stitch patterns and any shaping instructions, as these will determine the final look of your cushion cover.
Some patterns may also include charts or diagrams to help visualize the stitches and patterns. If you’re new to reading charts, take some time to familiarize yourself with the symbols used before starting your project. This will make it easier to follow the pattern and ensure that you’re creating the correct stitch pattern.
As you work through the pattern, don’t be afraid to ask for help if something is unclear or if you encounter any difficulties. Online knitting communities and forums can be a great resource for getting advice and support from fellow knitters. Remember, knitting is a skill that takes time to master, so be patient with yourself and enjoy the process.
Shaping the Cushion Cover: Increasing and Decreasing Stitches
When knitting a cushion cover, shaping the fabric is an essential step to create a well-fitted and visually appealing final product. Two techniques commonly used in shaping are increasing and decreasing stitches. By altering the number of stitches on each row, you can create curves, angles, and specific measurements.
Increasing stitches: To add stitches to your work, you can use various methods such as yarn overs or make one (M1) increases. Yarn overs create a small hole in the fabric, which can be used for decorative purposes, while make one increases are more invisible. By adding stitches, you are expanding the width of your cushion cover, allowing for a wider shape or more intricate designs.
Decreasing stitches: On the other hand, to decrease stitches, you can use techniques such as knitting two stitches together (K2tog) or slip, slip, knit (SSK). These techniques create a decrease in the number of stitches, resulting in a narrower fabric. Decreasing stitches is especially useful when creating tapered edges, sharp corners, or specific measurements.
When shaping a cushion cover, it is important to keep track of your increases and decreases to ensure symmetry and consistent shaping. Create a chart or write down the number of stitches you are working with on each row to help you stay organized.
Tips:
- Read through the pattern carefully before starting to understand where and how the shaping occurs.
- Practice the increasing and decreasing techniques on a swatch or scrap yarn before applying them to your cushion cover.
- Take accurate measurements of your cushion before beginning to ensure a perfect fit.
- Pay attention to the pattern instructions for the correct type of increase or decrease to use.
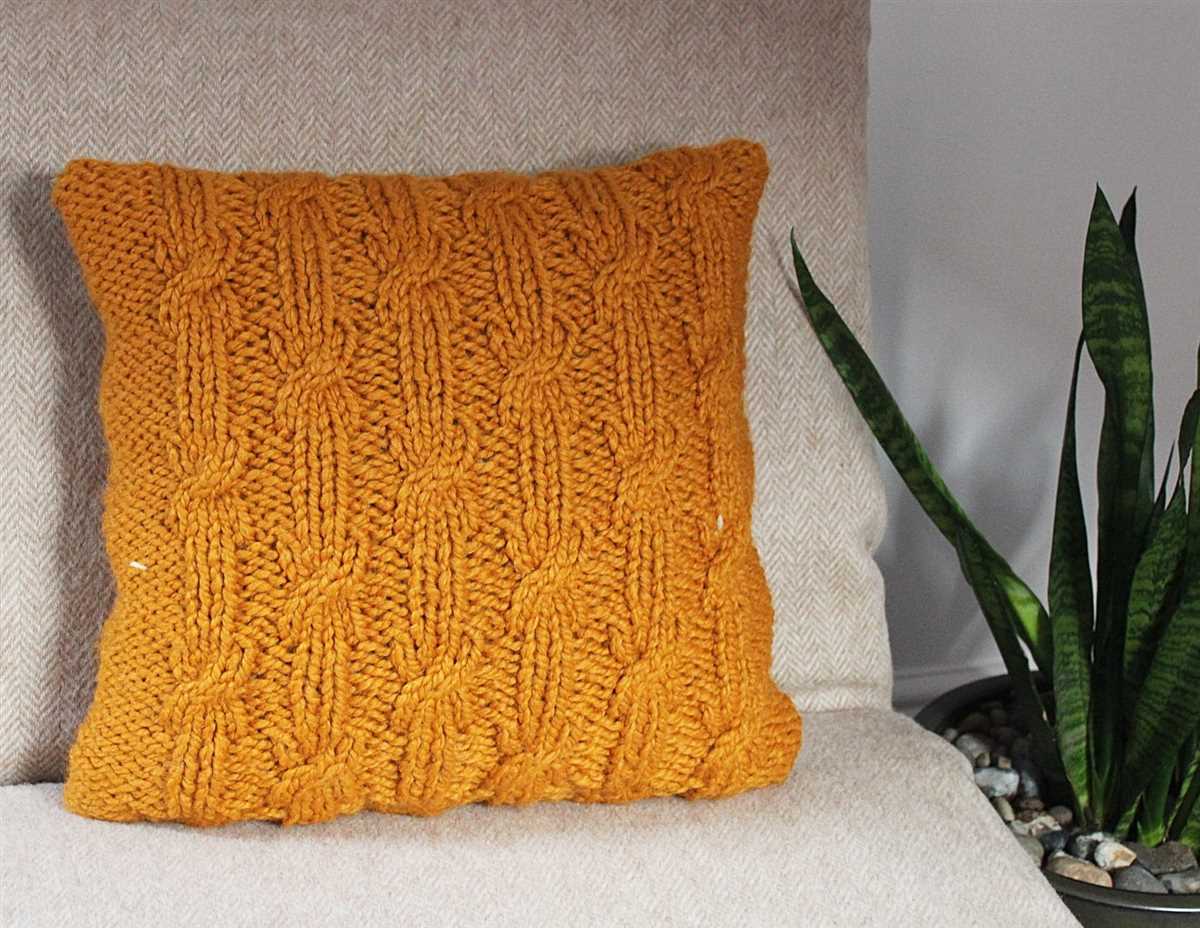
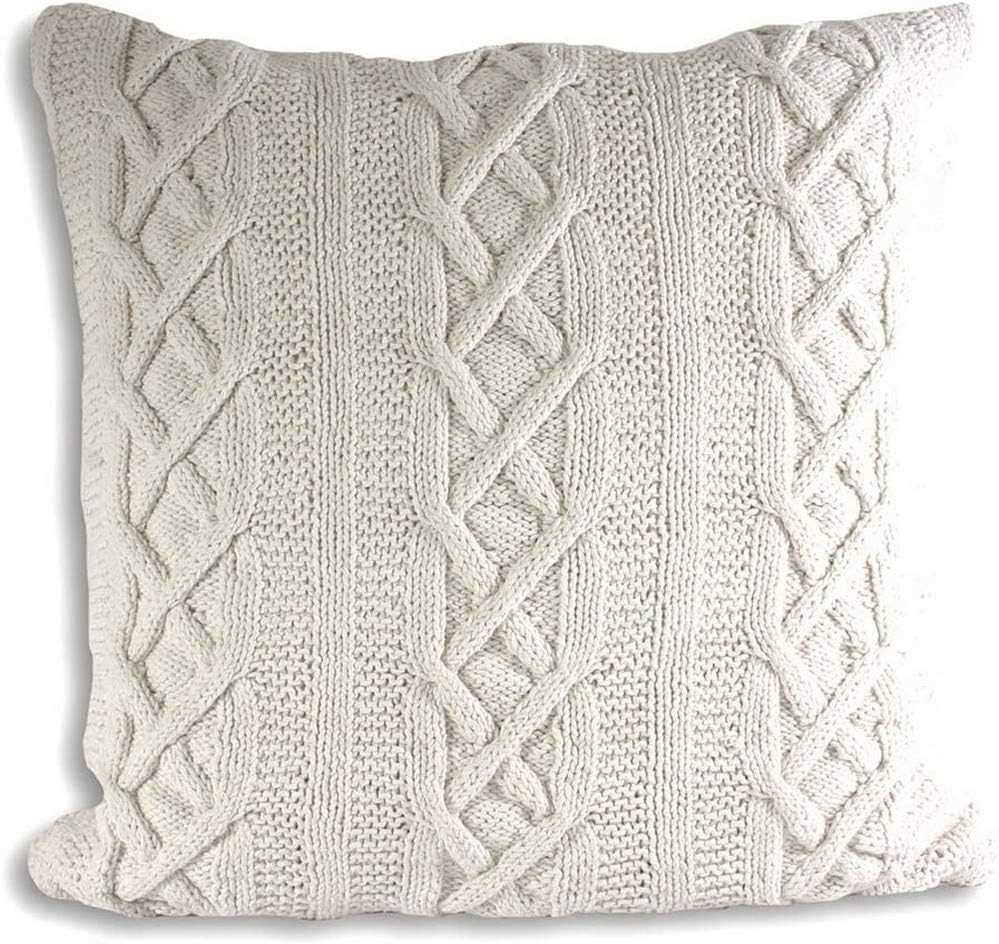
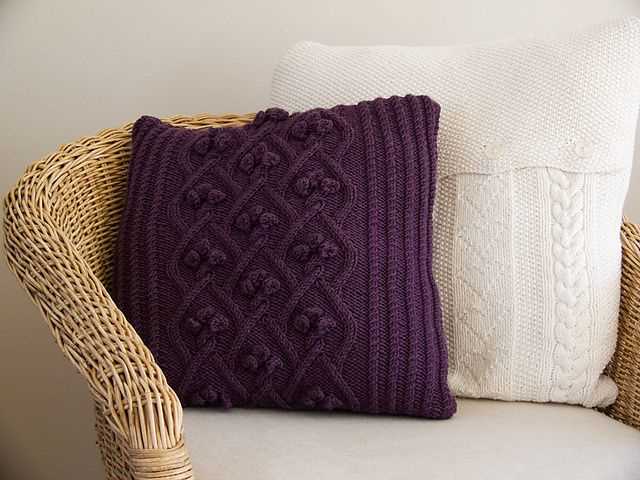
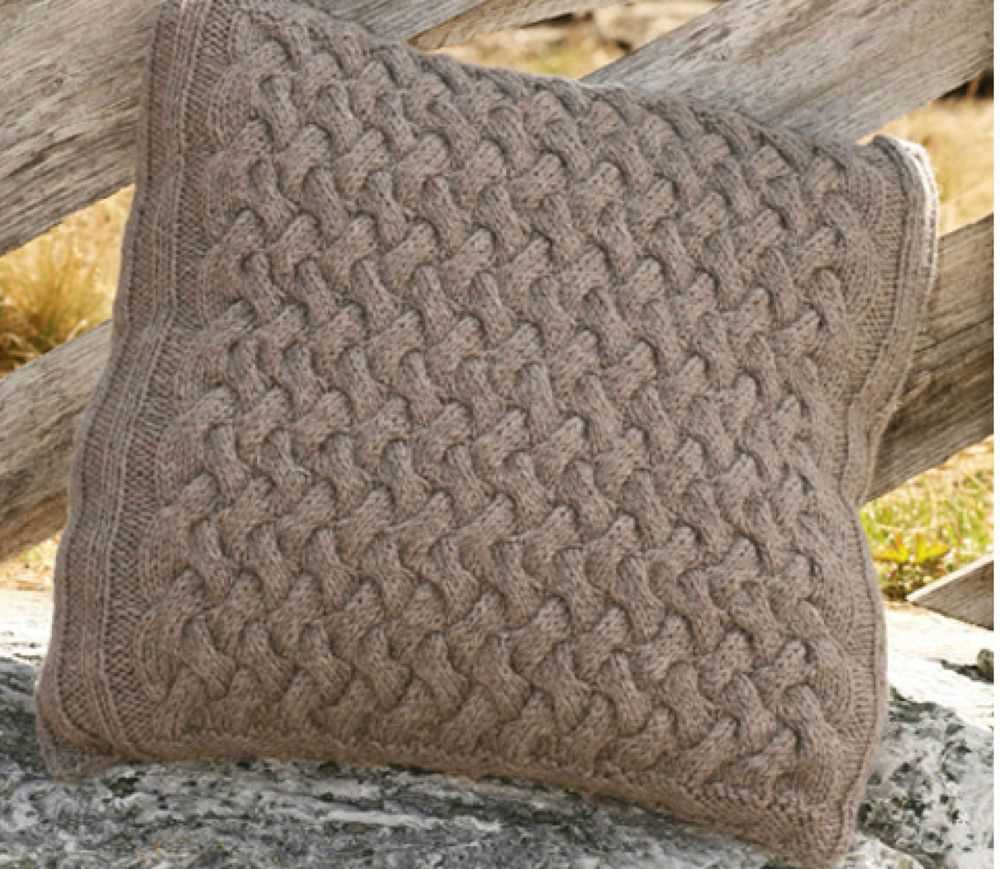
Adding Texture to Your Cushion Cover: Cable Knitting
If you’re looking to add some texture and visual interest to your cushion cover, cable knitting is a great option to consider. Cable knitting involves twisting and crossing the stitches to create a raised, woven-like pattern that adds depth and dimension to your project. Not only does it look impressive, but it also provides a cozy and tactile feel to your cushion cover.
The process of cable knitting involves using a cable needle or a spare needle to hold a set of stitches while you work on the next set. By crossing the stitches and working them out of order, you create the cable pattern. The number of stitches and the order in which you cross them determines the final look of the cable.
To start cable knitting, you will need:
- A cushion cover knitting pattern that includes cable instructions
- DK weight yarn in your chosen color
- Straight or circular knitting needles in the appropriate size
- A cable needle or a spare knitting needle
- Tapestry needle for weaving in ends
Here’s a step-by-step guide to get you started:
- Begin by casting on the required number of stitches for your cushion cover.
- Follow the pattern instructions to establish the base rows and any necessary stitch patterns.
- When you reach the section where cables are introduced, carefully read and follow the cable instructions provided in the pattern.
- Use your cable needle or spare knitting needle to hold the stitches that will be crossed.
- Slip the required number of stitches onto the cable needle, either to the front or the back.
- Knit or purl the next set of stitches on your main needle.
- Transfer the stitches from the cable needle back to the main needle and knit or purl them in the correct order.
- Continue following the cable instructions until the desired length is reached.
- Once you’ve completed the cable section, continue knitting according to the pattern’s instructions.
- Finish off your cushion cover by binding off the stitches and weaving in any loose ends.
Cable knitting adds a touch of elegance and sophistication to any cushion cover. By incorporating cable patterns into your knitting, you can transform an ordinary cushion cover into a stunning focal point for your living space. Whether you choose a simple twist or an intricate interwoven cable design, the texture and visual interest that cable knitting produces will make your cushion cover truly stand out.
Finishing Touches: Binding Off and Weaving in Ends
After completing the main body of your cushion cover, it’s time to finish off the edges and secure any loose ends. Here are the final steps to give your cushion cover a polished and professional look.
Binding Off
To bind off your stitches, work the first two stitches as usual. Then, insert the left needle into the first stitch on the right needle, from the left to the right, and slip it over the second stitch and off the needle. Repeat this process until you have one stitch left on the right needle. Cut the yarn, leaving a tail, and pull it through the final stitch to secure.
Note: If you’re using a ribbing or any other stitch pattern, make sure to bind off using the appropriate technique to maintain the pattern.
Weaving in Ends
After binding off, you’ll have a few loose ends of yarn from joining new skeins or changing colors. To weave in these ends and prevent them from unraveling, thread the yarn through a blunt yarn needle. Insert the needle under the stitches on the wrong side of your work, following the path of the yarn. Weave the needle in and out of the stitches for about an inch, and then cut the excess yarn close to the fabric.
Tip: When weaving in ends, try to avoid bulky knots or leaving long tails that could show through the fabric. Instead, aim to weave the yarn into the stitches in a way that is invisible from the right side of your cushion cover.
Once you have bound off and woven in all the ends, give your cushion cover a final inspection to make sure everything is secure and neat. If needed, gently block your cushion cover to give it a smooth and even appearance.
Now that you’ve completed the finishing touches, your cushion cover is ready to be enjoyed! Place it on your favorite chair or sofa, and admire your handiwork.