
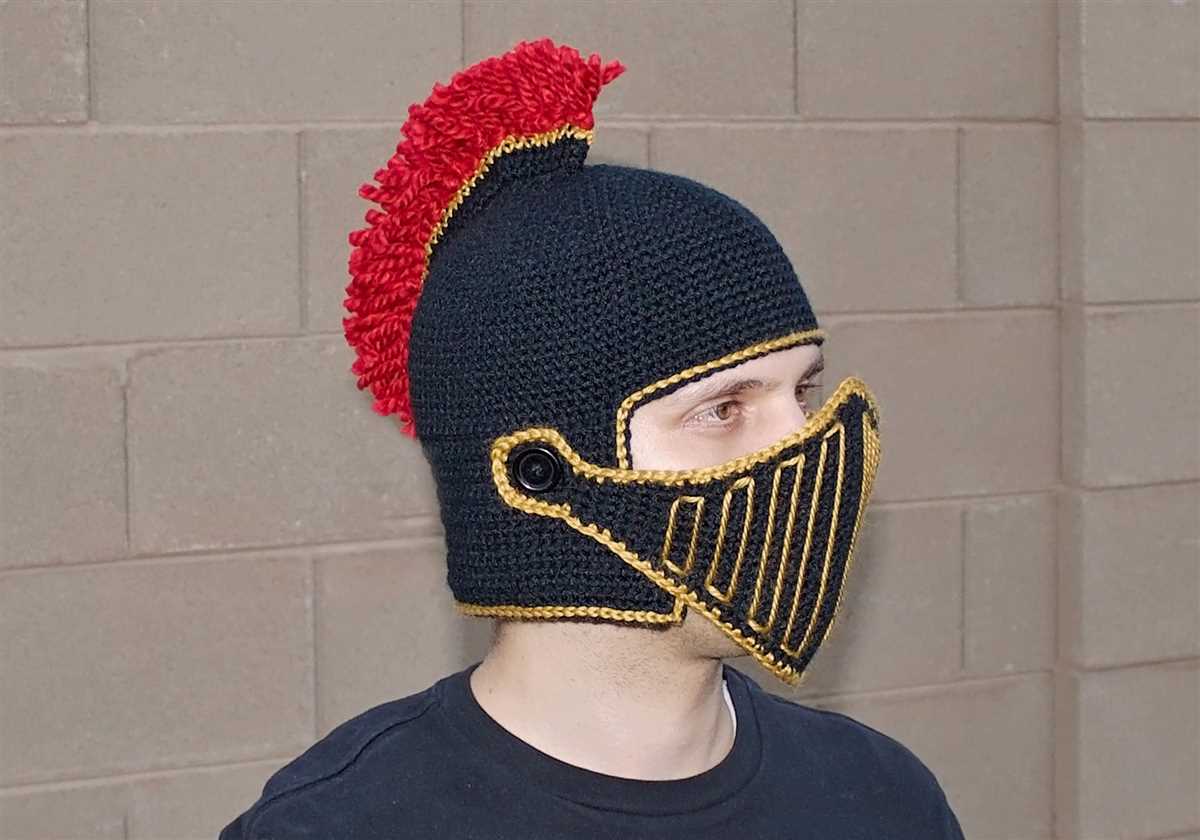
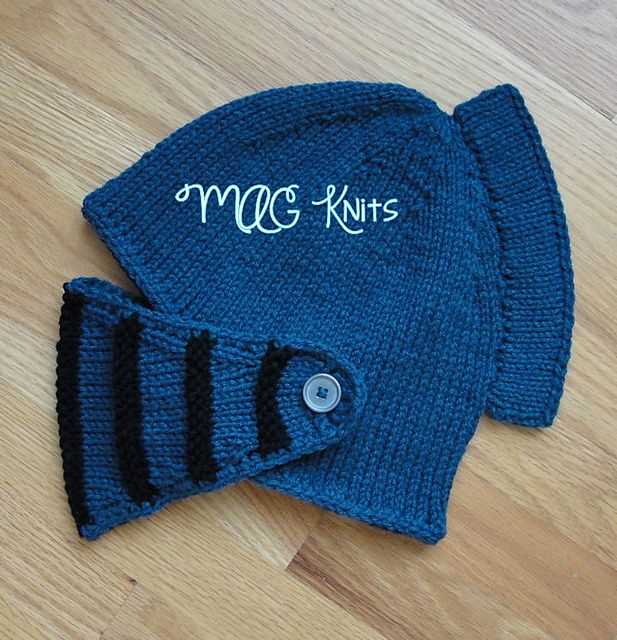
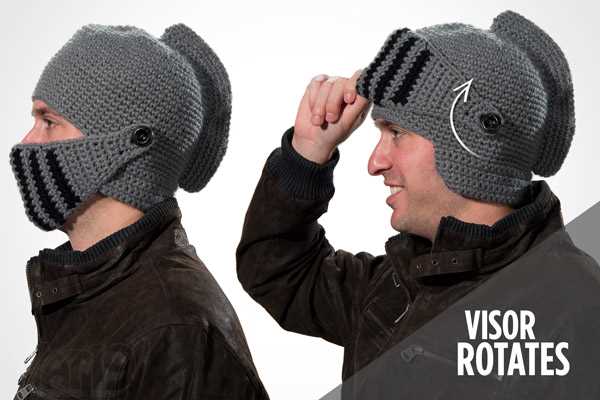
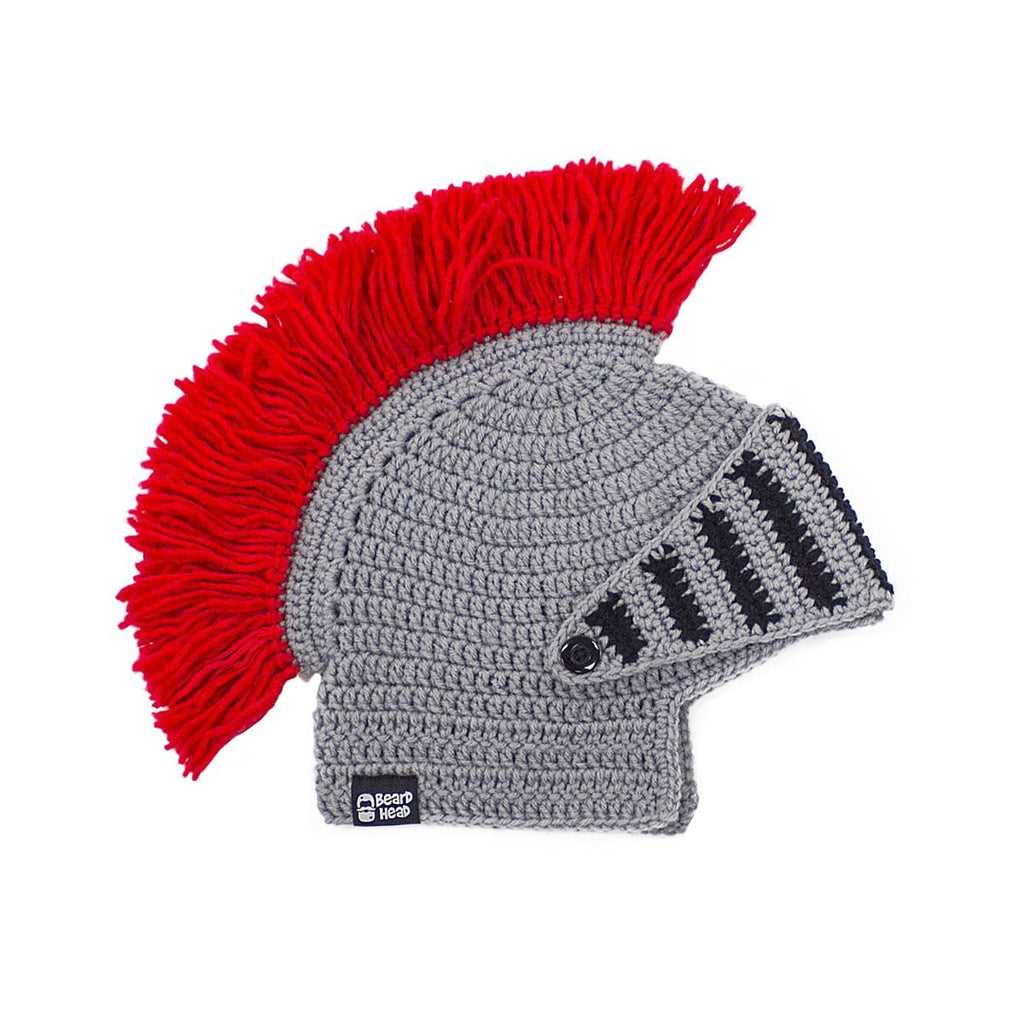
Knitting is not just a hobby; it is a way to create unique and personalized items. One such item is the knight helmet, a charming accessory that can add a touch of whimsy to any outfit. This pattern is perfect for both beginners and experienced knitters, offering a fun and rewarding project.
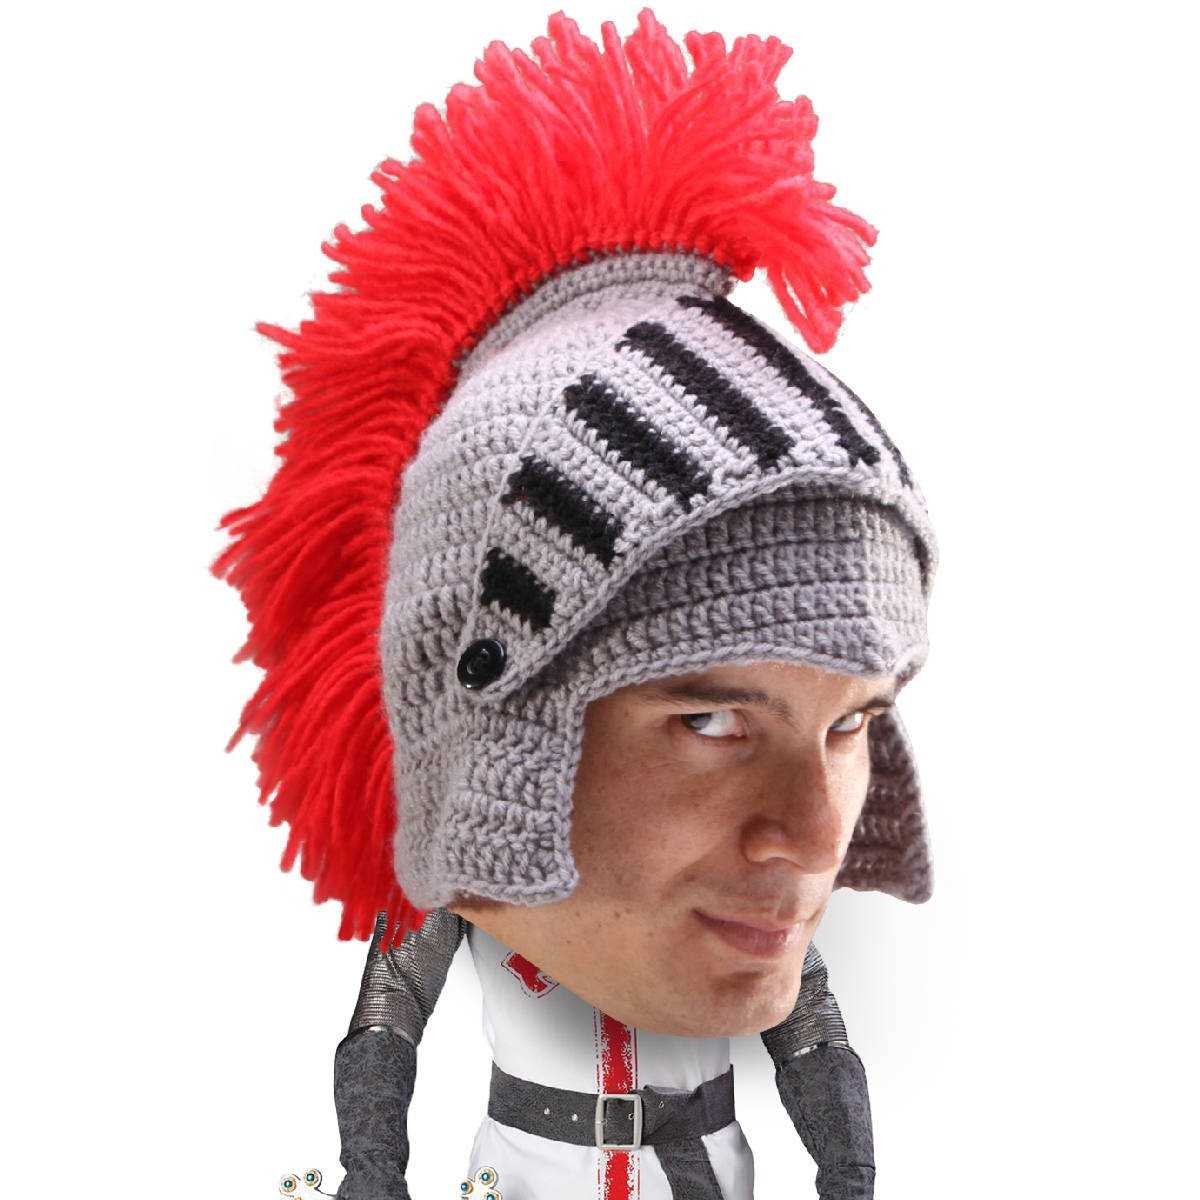
The knight helmet knitting pattern allows you to unleash your creativity and make a one-of-a-kind piece. With just a few basic stitches and a bit of imagination, you can create a helmet that will transport you to a world of medieval knights and adventures. Whether you want to make it for a child’s costume or as a quirky addition to your own wardrobe, this knitting pattern is sure to bring a smile to your face.
This pattern includes step-by-step instructions and detailed illustrations to guide you through the process. You’ll need some yarn, knitting needles, and a few other basic supplies. With a little time and patience, you’ll soon have a beautiful knight helmet to show off to your friends and family. So, grab your yarn and let’s get knitting!
Knight Helmet Knitting Pattern: Step-by-Step Guide for Beginners
If you’re a beginner knitter looking to take on a fun and challenging project, a knight helmet pattern might be just what you’re looking for. Knitting a knight helmet can be a rewarding endeavor, allowing you to create a unique and whimsical accessory. In this step-by-step guide, we’ll walk you through the process of knitting a knight helmet from start to finish.
Gather Your Materials: Before you begin, make sure you have all the necessary materials on hand. You’ll need a set of knitting needles, a skein of yarn in your chosen color, a tape measure, a pair of scissors, and a darning needle for finishing touches.
Cast On: To start, you’ll need to cast on the required number of stitches. This will vary depending on the size of the helmet you want to create. Refer to the pattern for the specific cast on instructions and be sure to check your gauge to ensure the correct fit.
Knit in the Round: Once you’ve cast on, join the ends of your work to create a circle and begin knitting in the round. This means you’ll be knitting in a continuous spiral, rather than knitting back and forth in rows. Follow the pattern instructions for the stitch pattern and continue knitting until the desired length is reached.
Shape the Helmet: As you knit, you’ll need to shape the helmet to give it structure and form. This typically involves decreasing stitches at certain points to create a curved shape. The pattern will guide you on when and how to shape the helmet, so be sure to follow the instructions carefully.
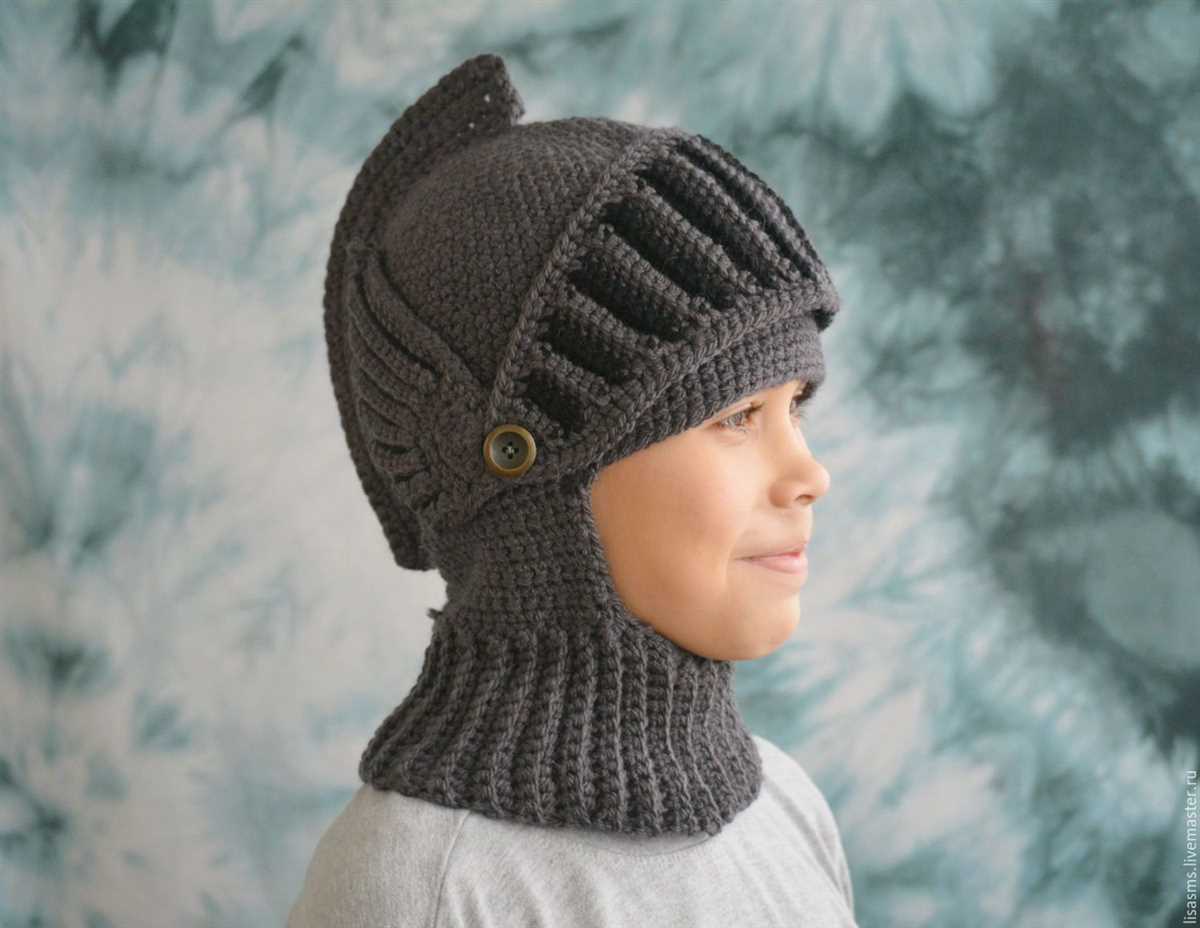
Finishing Touches: Once you’ve completed the main body of the helmet, it’s time to add finishing touches. This may include knitting ear flaps, a chin strap, or even a plume at the top. The pattern will provide instructions on these additional elements, so be sure to follow them closely.
Finishing Off: To finish off your knight helmet, weave in any remaining yarn ends using a darning needle. Make sure all loose ends are secure and trim any excess yarn. Give your helmet a gentle stretch to shape it, and it will be ready to wear or gift to a lucky recipient.
With this step-by-step guide, even a beginner knitter can take on the challenge of creating a knight helmet. Just make sure to follow the pattern closely, take your time, and enjoy the process of knitting your very own whimsical accessory.
Why Choose a Knight Helmet Knitting Pattern?
If you’re looking for a unique and fun knitting project, a knight helmet knitting pattern can be a great choice. Whether you’re making it for yourself, a friend, or a child, a knight helmet is sure to add a touch of whimsy and excitement to any wardrobe.
1. Creativity and Personalization: With a knight helmet knitting pattern, you have the freedom to choose your own colors, yarns, and embellishments. This allows you to get creative and personalize the helmet to suit your style or the recipient’s preferences. You can make it as simple or as elaborate as you like, adding unique details like braids, feathers, or even a crest.
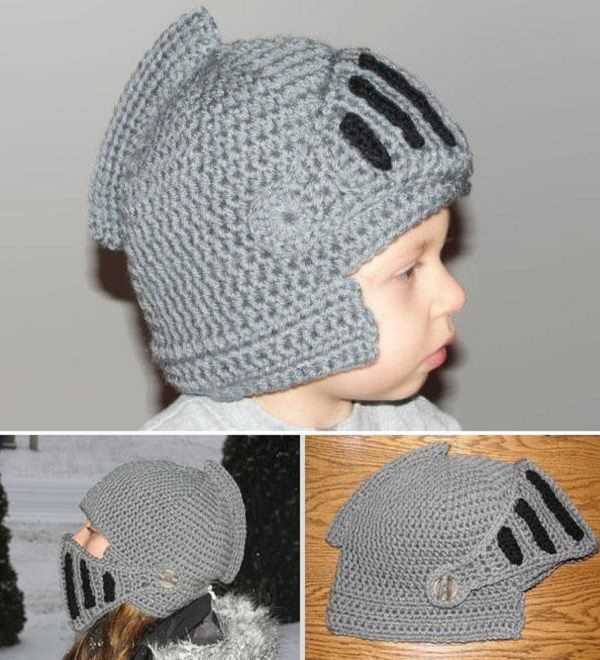
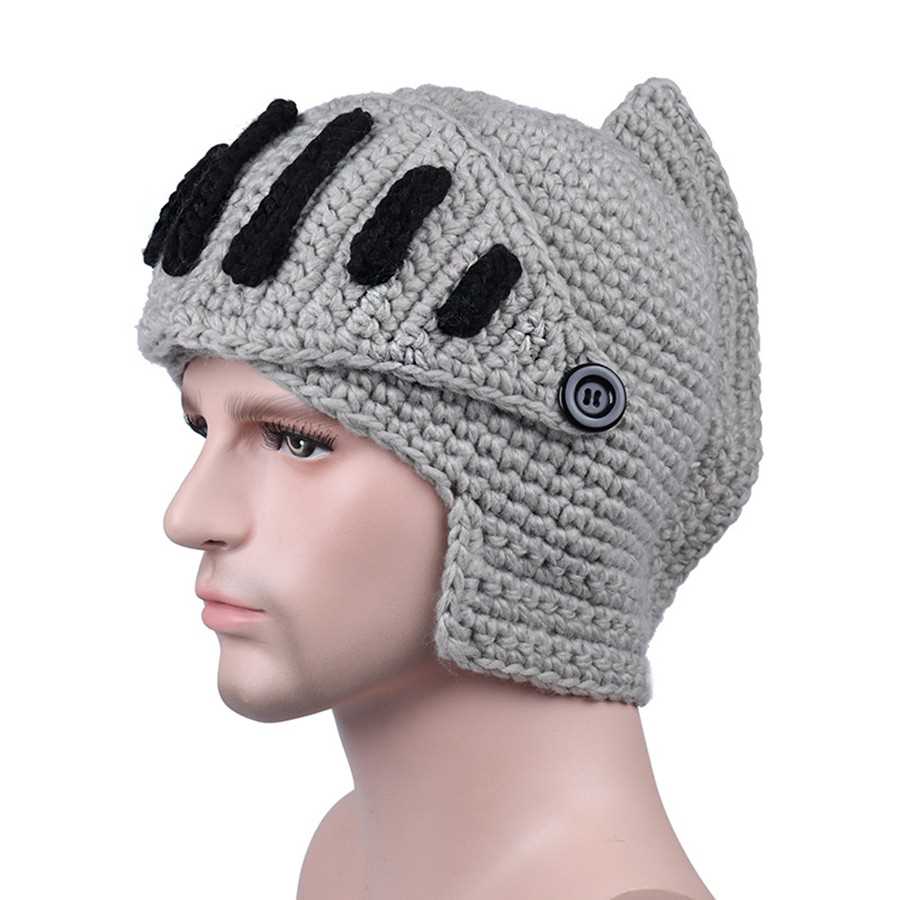
2. Versatility: A knight helmet can be worn for a variety of occasions. It’s not just limited to Halloween or costume parties. You can wear it to themed events, Renaissance fairs, or even as a playful accessory on a cold winter day. It’s a versatile piece that can be enjoyed year-round.
3. Warmth and Comfort: Knitted helmet patterns are usually made from cozy and warm yarns, making them perfect for cold weather. The helmet shape provides extra warmth for the head and ears, making it a practical choice for those chilly winter months.
4. Fun and Playfulness: Wearing a knight helmet brings a sense of adventure and playfulness to any occasion. It can transform an ordinary day into a magical one, sparking imagination and creativity. Both children and adults can enjoy the fun of wearing a knight helmet and embracing a whimsical fantasy world.
5. Handmade with Love: When you knit a knight helmet using a pattern, you’re creating something special with your own hands. It’s a labor of love that shows care and thoughtfulness. Handmade gifts like these are cherished and appreciated, and they hold sentimental value for both the maker and the recipient.
Materials Needed for Knitting a Knight Helmet
In order to knit a knight helmet, you will need a few specific materials to ensure the best results. These materials will help you create a sturdy and authentic-looking helmet that can be worn or used as a decorative piece.
1. Yarn:

A sturdy yarn is essential for knitting a knight helmet. It’s recommended to use a medium to heavy weight yarn that is durable and can withstand regular wear. You can choose a color that matches the knight theme or go for a metallic yarn to add a touch of shine.
2. Knitting Needles:
A pair of appropriately sized knitting needles is necessary to create the helmet. The needle size will depend on the thickness of the yarn you are using. It’s recommended to use circular needles to accommodate the large number of stitches required for the helmet.
3. Stitch Markers:
Stitch markers are useful tools to keep track of specific stitches or sections in your knitting. They can help you identify important points such as the start of a round or specific shaping points in the helmet pattern.
4. Cable Needle:
If you are planning to incorporate cable stitches in your knight helmet pattern, a cable needle will be necessary. This tool helps you hold stitches aside while you work on other stitches, creating the intricate cable designs.
5. Yarn Needle:
A yarn needle, also known as a tapestry needle, is used for weaving in loose ends and sewing any necessary seams in your finished helmet. It’s important to choose a needle with a large eye to accommodate the thickness of the yarn.
6. Scissors:
A good pair of scissors is essential for cutting yarn and trimming any excess once you’ve finished knitting your helmet. Make sure they are sharp and easily accessible.
By gathering these materials, you will have everything you need to start knitting your own knight helmet. Remember to follow the pattern instructions and take your time to create a truly impressive and unique piece. Happy knitting!
Choosing the Right Yarn and Needle Size
When it comes to knitting a knight helmet, choosing the right yarn and needle size is essential to ensure the final product turns out as desired. The type and weight of the yarn will affect both the appearance and functionality of the helmet, while the needle size determines the gauge or tension of the stitches.
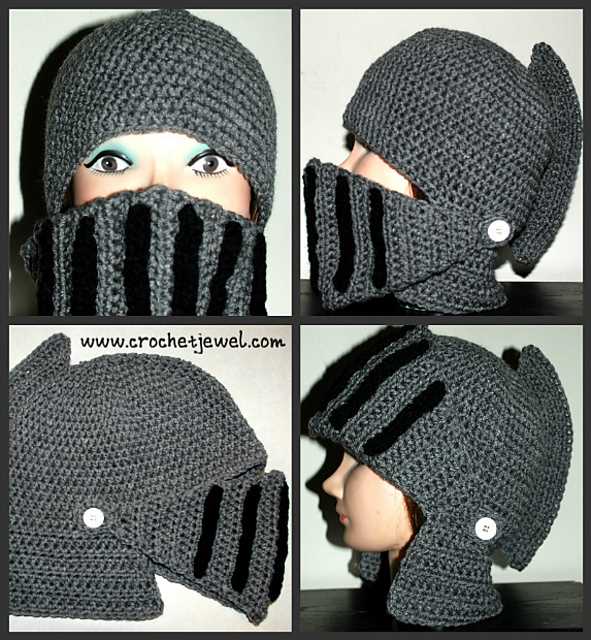
Yarn: For a knight helmet, it is important to choose a yarn that is durable and can hold its shape. A medium-weight, acrylic yarn is often a good choice as it is easy to work with, affordable, and offers good stitch definition. The yarn should also be soft enough to provide comfort when worn on the head. Consider using a yarn in colors that would suit the knight theme, such as metallic silver or a dark shade of gray.
Needle size: The needle size should be selected based on the yarn’s recommended gauge. It is important to check the pattern or yarn label for the suggested needle size and aim to match it as closely as possible to achieve the desired outcome. Using a smaller needle will result in a tighter, denser fabric, while a larger needle will create a looser, more open texture. In the case of a knight helmet, a medium-size needle would typically be suitable for a medium-weight yarn.
Considerations:
- Take into account the wearer’s head size and any necessary adjustments that may need to be made to the pattern. A larger head may require a bigger needle size to accommodate the additional circumference.
- Experiment with different yarns and needle sizes to achieve the desired look and feel. Swatching before starting the actual project can help determine if any adjustments are needed and can prevent any surprises in the final product.
- Consider the care instructions for the chosen yarn. Since the knight helmet will likely be worn and handled frequently, it is important to select a yarn that can withstand regular washing and wear. Machine-washable yarns are often a practical choice in this case.
By carefully considering the yarn and needle size for a knight helmet knitting project, you can ensure that the final result is both functional and visually appealing. Happy knitting!
Understanding the Basic Stitches for the Knight Helmet Pattern
Before starting the Knight Helmet knitting pattern, it is important to understand the basic stitches that will be used throughout the project. These stitches will help create the intricate design and structure of the helmet.
Knit Stitch: The knit stitch is the most basic stitch in knitting. It is formed by inserting the right needle into the front of the stitch on the left needle, wrapping the yarn around the right needle, and pulling it through to create a new stitch. In the Knight Helmet pattern, the knit stitch is used for the majority of the hat.
Purl Stitch: The purl stitch is the reverse of the knit stitch. It is formed by inserting the right needle into the back of the stitch on the left needle, wrapping the yarn around the right needle, and pulling it through to create a new stitch. The purl stitch is often used to create texture and variation in knitting. In the Knight Helmet pattern, the purl stitch is used to create the ribbed brim of the helmet.
Decrease Stitch: Decrease stitches are used to reduce the number of stitches in a row. There are different types of decrease stitches, such as knit two together (k2tog) and slip slip knit (ssk). These stitches are used in the Knight Helmet pattern to shape the crown of the helmet and create the pointed top.
Yarn Over: A yarn over is a simple increase stitch that creates an extra stitch and a small hole in the fabric. It is formed by simply wrapping the yarn around the right needle without inserting it into a stitch. Yarn overs are used in the Knight Helmet pattern to create decorative eyelet patterns.
Other Techniques: In addition to these basic stitches, the Knight Helmet pattern also uses techniques such as knitting in the round, picking up stitches, and binding off. These techniques are explained in the pattern instructions and are essential for creating the helmet shape and finishing details.
By understanding and mastering these basic stitches, you will be able to confidently tackle the Knight Helmet knitting pattern and create a unique and impressive helmet for yourself or a loved one.
Casting On: Starting the Knight Helmet
When it comes to knitting a knight helmet, the first step is to cast on the stitches. The cast on is the foundation of your knitting project, and in the case of the knight helmet, it will determine the size and fit of the finished product.
To begin casting on, you will need your chosen yarn and knitting needles. Make sure that you have the required needle size for your yarn, as this will ensure that your stitches are even and not too tight or loose.
There are several methods you can use to cast on, but for the knight helmet pattern, the long tail cast on method is recommended. This method creates a neat and elastic edge, perfect for the brim of the helmet. To cast on using the long tail method, start by making a slipknot and securing it onto one of the knitting needles. Leave a long tail of yarn, as this will be used to create the stitches.
Next, hold the needle with the slipknot in your right hand and the other needle in your left hand. Insert the left-hand needle into the slipknot from left to right, as if you were knitting.
With your right hand, bring the long tail of yarn around the back of the left-hand needle and hold it in place with your thumb. This creates a loop on the right-hand needle.
Now, slide the loop off the left-hand needle and tighten it gently, ensuring that it is snug but not too tight. Repeat this process to cast on the desired number of stitches, as specified in the knight helmet pattern.
Once you have cast on all the stitches, you can begin knitting the knight helmet according to the pattern instructions. The cast on edge will form the brim of the helmet, so it’s important to make sure it is neat and even. Take your time with the casting on process to ensure a successful start to your knitting project.
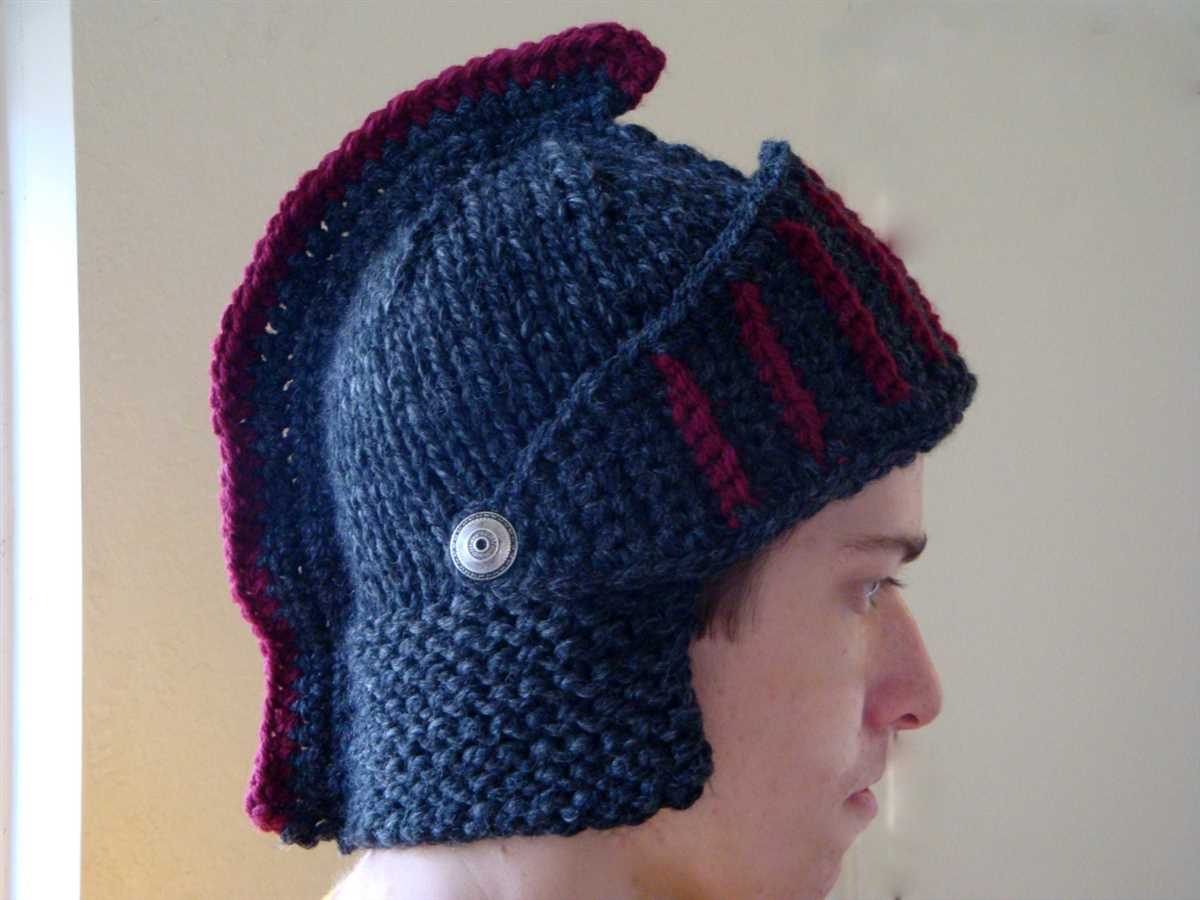
Knitting the Brim of the Knight Helmet
When knitting the brim of the knight helmet, it’s important to start off with a strong foundation. The brim is the part of the helmet that frames the face and adds structure to the overall design. To achieve this, you will need to cast on the required number of stitches for the brim. This will vary depending on the size of the helmet you are knitting.
Next, work in rib stitch. The rib stitch creates a stretchy and flexible brim that will comfortably fit around the wearer’s head. To achieve this stitch pattern, you will alternate between knitting and purling across each row. This will create a series of vertical ridges that add texture to the brim. Make sure to follow the given pattern instructions carefully to create the desired rib stitch.
As you knit the brim, it’s important to maintain an even tension throughout. This will ensure that the brim has a consistent appearance and allows for a comfortable fit. It can be helpful to use stitch markers to divide the brim into sections, especially if the pattern calls for shaping or increases. These markers will act as visual guides and help you keep track of your progress.
Finally, finish off the brim with a clean edge. Once you have completed the desired number of rows for the brim, you will need to bind off the stitches to create a neat and finished edge. This can be done using a basic bind-off method, such as the traditional bind-off or the stretchy bind-off, depending on the desired result. Take your time and make sure to bind off the stitches evenly to create a professional-looking edge.
By following these steps, you will be able to knit the brim of the knight helmet with confidence. The brim not only adds functionality to the design but also gives it a polished and finished look. Enjoy the process of knitting and creating a unique and whimsical helmet for yourself or a loved one.
Creating the Helmet’s Body
Knitting the body of the knight helmet is an essential step in creating a cozy and protective headpiece. To begin, you will need to gather your materials, including yarn in the desired color, knitting needles, and a stitch marker. The size of your needles will depend on the gauge of your yarn, so be sure to check the recommended needle size on the yarn label.
Once you have your materials ready, you can start by casting on the required number of stitches. The number of stitches will vary depending on the size of the helmet you wish to create. It’s best to refer to a knitting pattern or guide for specific instructions on the stitch count.
Next, you will begin knitting the body of the helmet in the desired stitch pattern. This could be a simple stockinette stitch or a more intricate cable pattern. Be sure to follow the instructions carefully, making note of any stitch changes or pattern repeats.
To ensure a proper fit, it’s important to regularly measure your progress. You can do this by placing a stitch marker at the beginning of each round and measuring the circumference of the knitting. This will help you adjust the size of the helmet if needed.
Continue knitting the body of the helmet until you reach the desired length. This will depend on the measurements provided in the pattern or your personal preference. Once you’ve reached the desired length, you can move on to shaping the crown of the helmet.
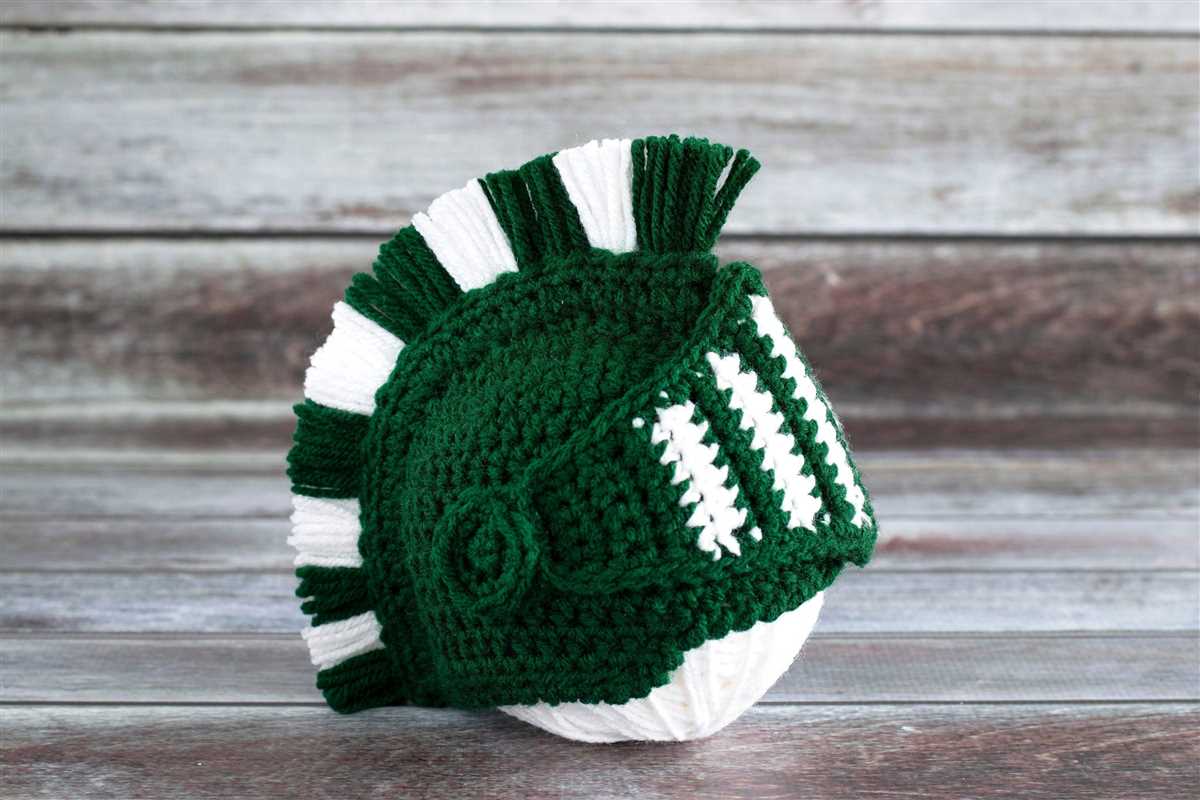
Shaping the Top of the Helmet
Once you have completed knitting the base of the knight helmet, it’s time to shape the top to give it that iconic pointy look. To achieve this, you will need to decrease the number of stitches gradually.
To begin, you will need to divide your stitches evenly onto three double-pointed needles. This will make it easier to manipulate the stitches as you work on shaping the top. Make sure to distribute the stitches as evenly as possible.
Next, you will start decreasing the stitches. You will do this by knitting the first two stitches together, then knitting the next stitch. Repeat this pattern of knitting two stitches together and then knitting one stitch until the end of the round. This will decrease the total number of stitches by one-third.
Continue working in this manner for several rounds until you have reached your desired pointy shape. Keep in mind that the number of rounds you need to work will depend on the size of your helmet and the gauge of your knitting. It’s a good idea to periodically try on the helmet to see if it fits your head comfortably or if you need to make any adjustments.
Once you are satisfied with the shape, you can finish off your knight helmet by cutting the yarn, leaving a long tail for sewing the top closed. Thread the tail through the remaining stitches, removing them from the needles. Pull tight to close the top of the helmet, and secure the yarn with a knot to keep it in place. Trim any excess yarn.
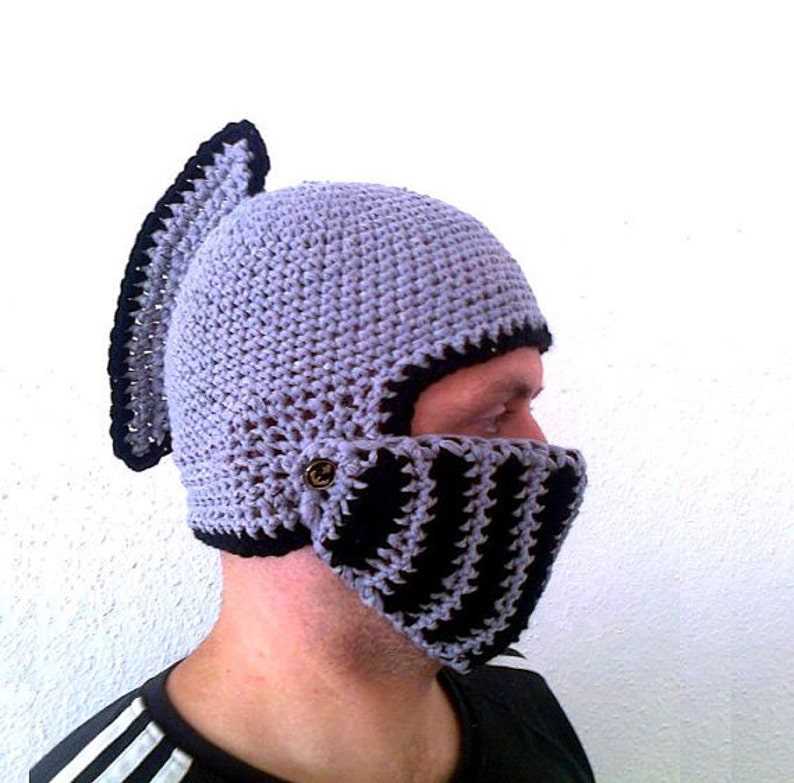
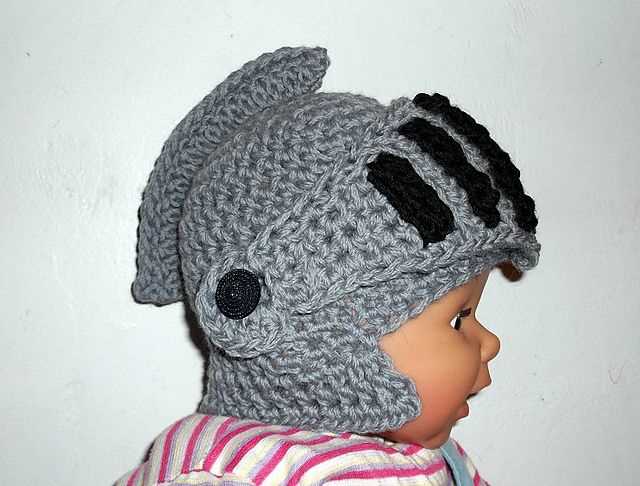
Now that you have completed shaping the top of your knight helmet, you can proceed to add any additional embellishments or decorations, such as a faceplate or plume, to make your helmet truly unique.
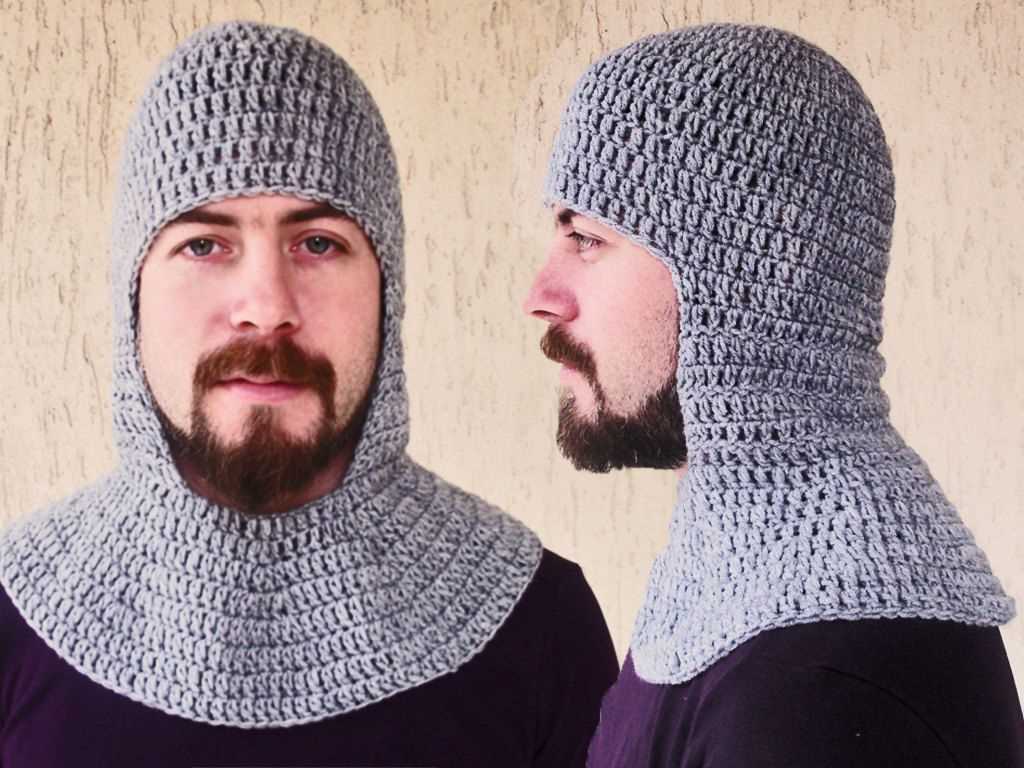
Adding Earflaps to the Knight Helmet
If you want to add a little extra warmth and style to your knight helmet knitting project, why not incorporate earflaps? Earflaps are a great addition to any helmet, providing protection and comfort to your ears during colder weather. With the right techniques and materials, you can easily add earflaps to your knight helmet knitting pattern.
First, gather the necessary materials, including your knight helmet knitting pattern, yarn in a complementary color, and knitting needles in the appropriate size. You’ll also need a tape measure, scissors, and a darning needle. Before you begin, make sure you have a clear understanding of the basic knitting stitches and techniques required for the pattern.
Here’s a step-by-step guide on how to add earflaps to your knight helmet knitting pattern:
- Start by measuring the distance from one side of your helmet to the other, passing over the crown of your head. This measurement will determine the length of your earflaps.
- Using the measurements you obtained, cast on the required number of stitches for one earflap. You can use a basic cast on method of your choice.
- Work the earflap in the desired stitch pattern, following the instructions in your knitting pattern. You can use simple knit or purl stitches, or get creative with more intricate stitch patterns.
- Continue knitting until the earflap reaches the desired length.
- Repeat steps 2 to 4 to create the second earflap.
- Once both earflaps are complete, you’ll need to attach them to your knight helmet. Position the earflaps along the sides of the helmet, making sure they align with your ears when the helmet is worn.
- Using the darning needle and complementary yarn, carefully sew the earflaps onto the helmet. Make sure to secure the earflaps firmly, ensuring they won’t come loose during wear.
- Once you’ve finished sewing the earflaps, trim any excess yarn and weave in the loose ends to give your helmet a clean and polished appearance.
By following these steps, you can easily customize your knight helmet knitting pattern with the addition of earflaps. Not only will your helmet provide warmth and protection, but it will also showcase your knitting skills and personal style. Enjoy the process of knitting and wearing your unique knight helmet creation!
Personalizing the Knight Helmet: Decorative Options
The knight helmet knitting pattern provides a fun and creative opportunity to personalize your helmet with various decorative options. By adding unique touches and embellishments, you can make your helmet truly one-of-a-kind and showcase your personal style. Here are some ideas to consider:
1. Color Choices
Experiment with different color combinations for the helmet. You can choose traditional knight colors such as silver or gold, or go for a more whimsical approach with bright and vibrant hues. Consider incorporating your favorite colors or matching the helmet to the rest of your knight attire.
2. Embroidery and Appliques
Add embroidery or appliques to enhance the details of your helmet. You can embroider delicate patterns or symbols onto the helmet using colorful threads that contrast with the main color of the helmet. Alternatively, you can use iron-on appliques to easily add decorative shapes and designs.
3. Beading and Sequins
Create a sparkling effect by incorporating beads and sequins into your design. Add rows of beads or sequins along the edges of the helmet or create intricate patterns for a glamorous touch. It will give your knight helmet a dazzling and eye-catching appearance.
4. Feathers and Ribbons
Attach feathers or ribbons to add a touch of elegance and movement. Choose feathers in colors that complement your helmet or opt for ribbons that match your knight’s armor or crest. Attach them to the top or sides of the helmet for an extra flair.
5. Decorative Trims
Consider using decorative trims to enhance the overall look of your knight helmet. Use metallic trims, lace, or even faux fur to add texture and visual interest. Trims can be added along the edges or around specific sections of the helmet for a refined finish.
With these decorative options, you can truly make your knight helmet knitting project your own. Let your creativity shine through and transform a simple helmet into a personalized piece of art that reflects your unique style and identity.
Finishing Touches: Sewing and Blocking the Knight Helmet
Now that you have completed knitting the pieces for your knight helmet, it’s time to put it all together. The finishing touches involve sewing the various parts and blocking the helmet to give it the desired shape.
Sewing: Start by sewing the back seam of the helmet using a tapestry needle and a length of yarn that matches your knitting. Align the stitches on both sides, and using a whipstitch or mattress stitch, sew them together. This will create a neat and seamless back seam for your helmet.
Next, sew the side seams of the helmet. Match the stitches on both sides and sew them together using the same technique as the back seam. This will close the sides of the helmet and create a snug fit.
Blocking: After sewing the seams, it’s time to block the knight helmet to ensure it maintains its shape. To block your knitting, you’ll need to wet it and pin it into the desired shape.
Start by thoroughly soaking the helmet in lukewarm water. Gently squeeze out the excess water, being careful not to wring or twist the knitting. Lay the helmet flat on a clean towel and roll it up to remove even more moisture.
Using blocking pins or T-pins, pin the helmet to a blocking mat or a towel, stretching it slightly to achieve the desired shape. Pay attention to the edges and any decorative details, making sure they lie flat and even.
Allow the helmet to dry completely before removing the pins. This can take several hours or even overnight. Once dry, the helmet should hold its shape and be ready to wear or display.
With the sewing and blocking complete, your knight helmet is now finished and ready to be enjoyed. Whether it’s for a costume, a dress-up playtime, or a fun knitting project, your knight helmet is sure to be a hit!
Tips for Wearing and Caring for the Knight Helmet
Now that you have your beautiful knight helmet, it’s time to learn how to wear it properly and take care of it to ensure it lasts for a long time.
Wearing the knight helmet:
- Make sure the helmet fits snugly on your head without being too tight or too loose.
- Adjust the chin strap to keep the helmet securely in place.
- Position the helmet so that it covers your forehead and the back of your head.
- Avoid wearing the helmet for an extended period, as it may cause discomfort.
- Take breaks to allow your head to breathe and prevent excessive sweating.
- Avoid wearing the helmet in extreme weather conditions, as it may affect its durability.
Caring for the knight helmet:
- When not in use, store the helmet in a cool and dry place to avoid damage from moisture or heat.
- Avoid placing heavy objects on top of the helmet, as it may dent or deform its shape.
- Regularly inspect the helmet for any signs of damage or wear and tear.
- Clean the helmet gently with a soft cloth and mild soap if necessary.
- Avoid using harsh chemicals or abrasive materials that may scratch or damage the helmet’s surface.
- If the helmet becomes misshapen, try reshaping it with your hands or utilizing a padded object to restore its original form.
By following these tips, you can confidently wear your knight helmet and keep it in excellent condition for many adventures to come!