
When the temperature drops, it’s time to break out the warm accessories, and what better way to keep your hands cozy than with a pair of knitted fingerless mitts? Fingerless mitts are a versatile and practical accessory that allow you to keep your hands warm while still giving you the dexterity to use your fingers.
Knitting your own fingerless mitts allows you to customize the pattern, color, and yarn to match your personal style. Whether you prefer a simple and classic design or something more intricate and eye-catching, there are countless patterns available for knitters of all skill levels.
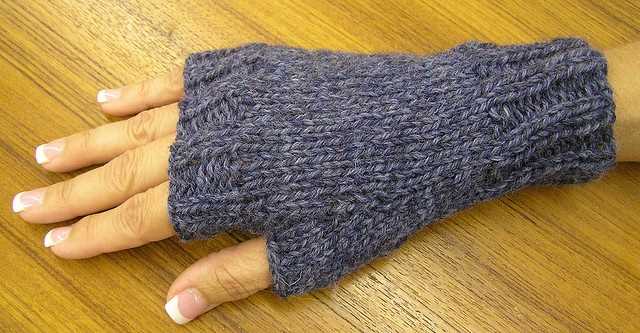
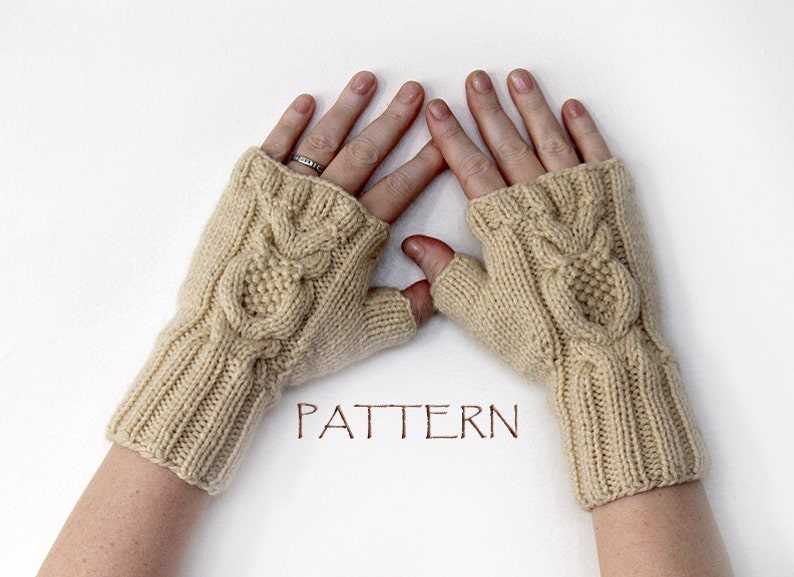
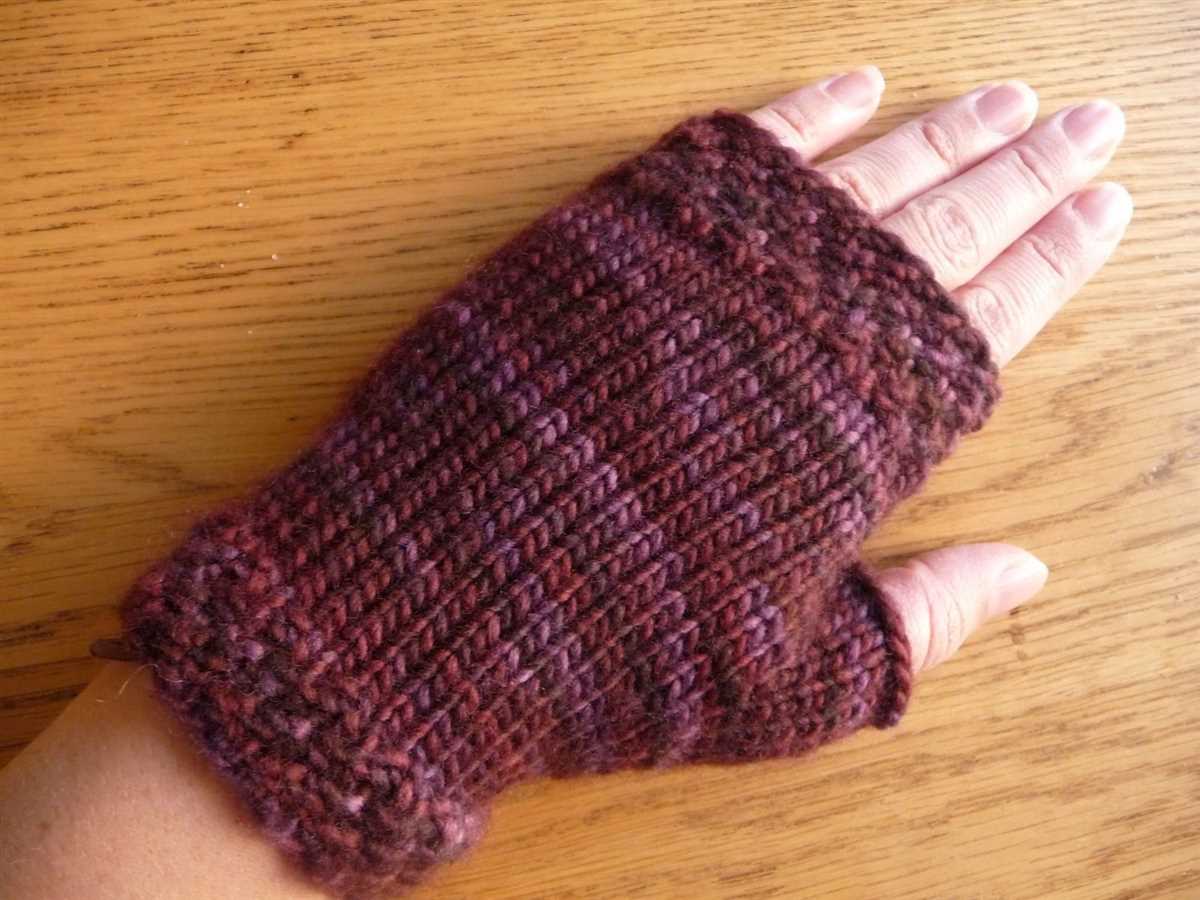
One popular fingerless mitts pattern features a ribbed cuff, a textured body, and a thumb gusset for a comfortable fit. This pattern is great for beginners as it incorporates basic knitting stitches and techniques. For those looking for a more advanced project, try a lace or cable pattern that will truly showcase your knitting skills.
Knitted fingerless mitts make a wonderful gift for loved ones and can be completed in just a few hours or over a weekend. They are also a fantastic way to use up leftover yarn from previous projects. So grab your knitting needles, choose a pattern, and get ready to create a cozy and stylish accessory that will keep your hands warm all winter long!
Knitted Fingerless Mitts Pattern
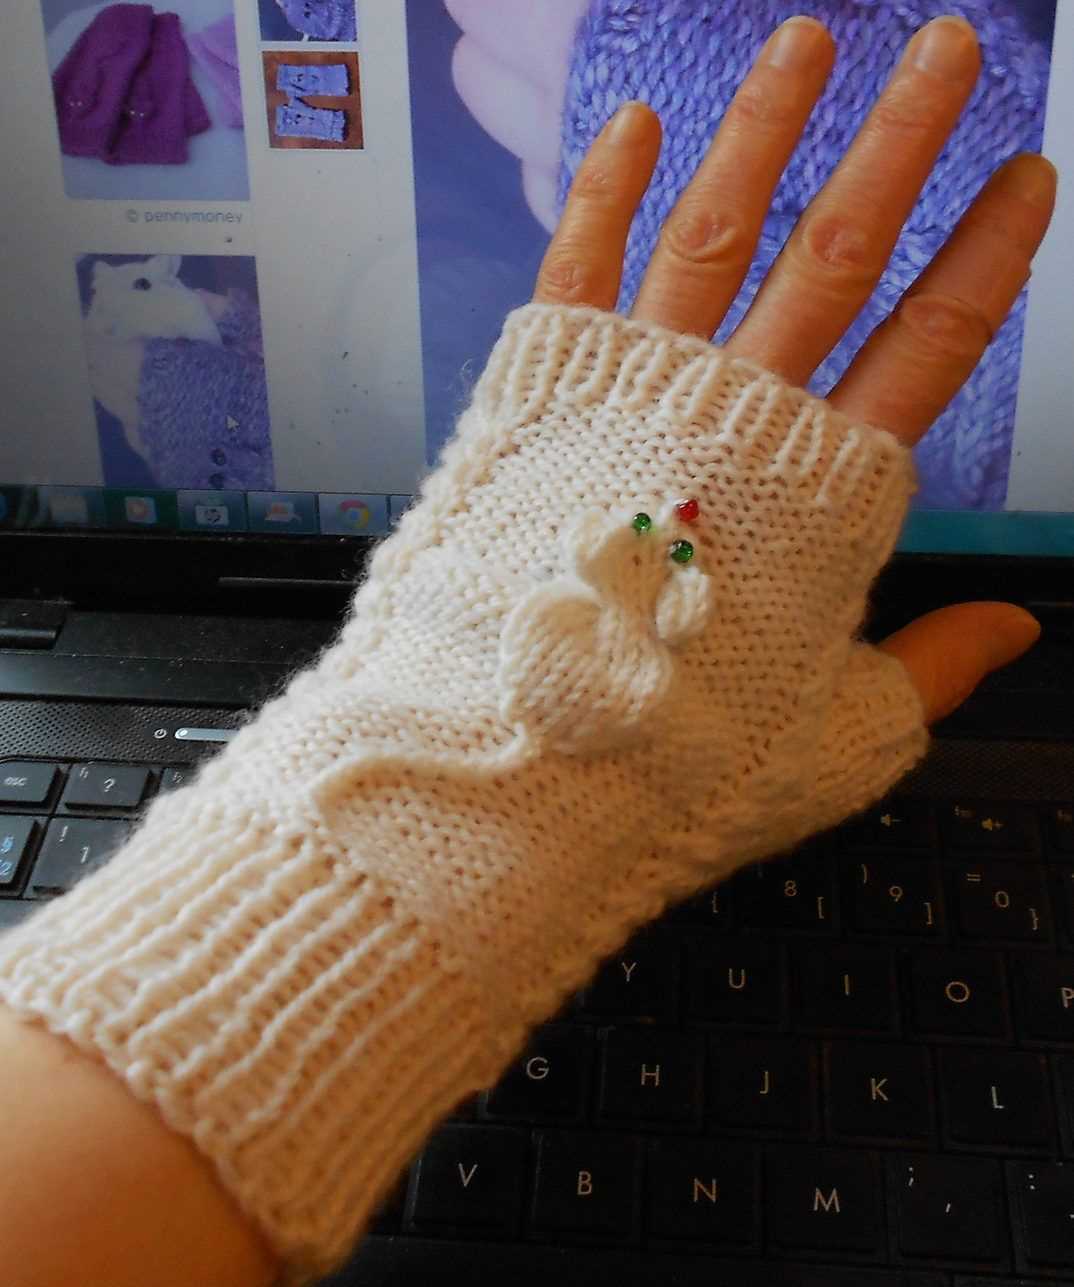
Fingerless mitts are a stylish and practical accessory that add warmth and comfort to your hands while leaving your fingers free. They are perfect for keeping your hands cozy during chilly days and are also great for using your phone, typing, or any activity that requires dexterity. With this knitted fingerless mitts pattern, you can create your own pair of mitts that are both functional and fashionable.
To start knitting your fingerless mitts, you will need a set of double-pointed needles and yarn in your desired color. The pattern usually starts with casting on the desired number of stitches and then working in rounds to create a tube shape. You can choose to knit in a simple stockinette stitch for a classic look, or experiment with different stitch patterns to add some texture and interest.
When it comes to sizing, fingerless mitts are generally one-size-fits-all. However, you can easily adjust the size by adding or subtracting stitches to accommodate larger or smaller hands. The length can also be customized based on your preferences, whether you prefer wrist-length mitts or ones that extend further up your forearm.
This pattern can be customized further with the addition of ribbing, cables, or lace patterns. You can also experiment with different types of yarn, such as a luxurious wool blend for extra warmth, or a soft cotton for a lightweight and breathable option. The possibilities are endless, and you can create a unique pair of fingerless mitts that match your style and personality.
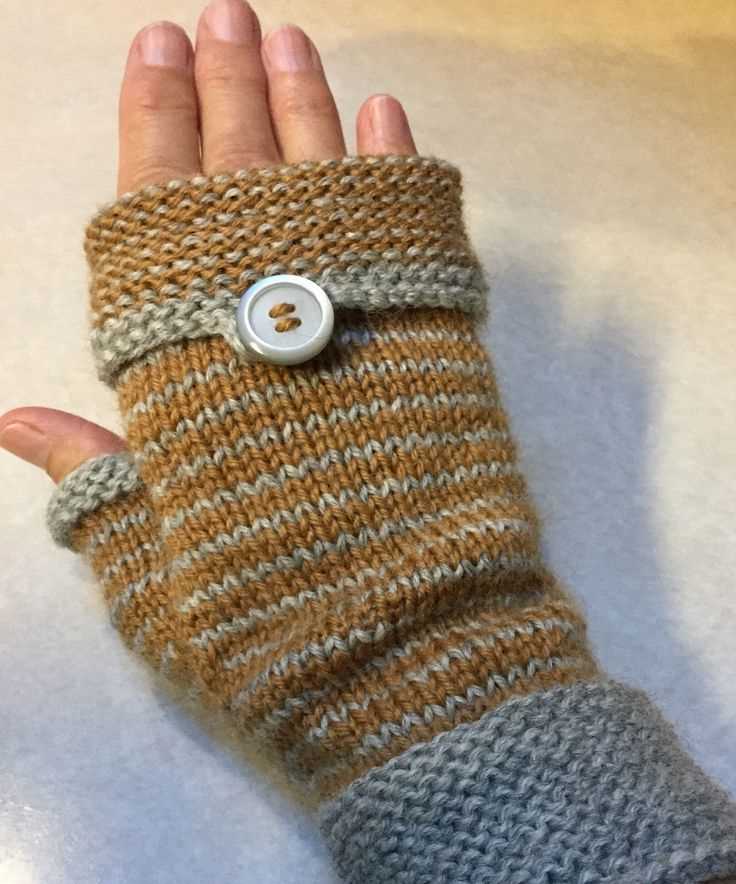
Once you have finished knitting your mitts, you can add any desired embellishments, such as buttons, bows, or embroidery, to make them truly your own. They also make great gifts for family and friends, as they are quick to knit up and are sure to be appreciated by anyone in need of some cozy hand warmth.
- Stylish and practical accessory
- Keep your hands warm while leaving your fingers free
- Perfect for using your phone or any activity that requires dexterity
- Requires double-pointed needles and yarn
- Can be customized with different stitch patterns and yarn types
- Adjustable sizing and length
- Adding embellishments for a personalized touch
- Great gift idea
What Are Fingerless Mitts?
Fingerless mitts, also known as fingerless gloves or wristwarmers, are a type of hand accessory that cover the wrist and palm while leaving the fingers exposed. They are typically made of knitted or crocheted material, allowing for flexibility and movement while providing warmth and protection to the wrists and palms.
These mitts are designed to keep the hands warm in cooler weather conditions, while still allowing the fingers to remain free for tasks that require dexterity and fine motor skills. They are often favored by individuals who need to use their hands for activities such as typing, writing, or crafting, as they provide an added layer of insulation without restricting finger movement.
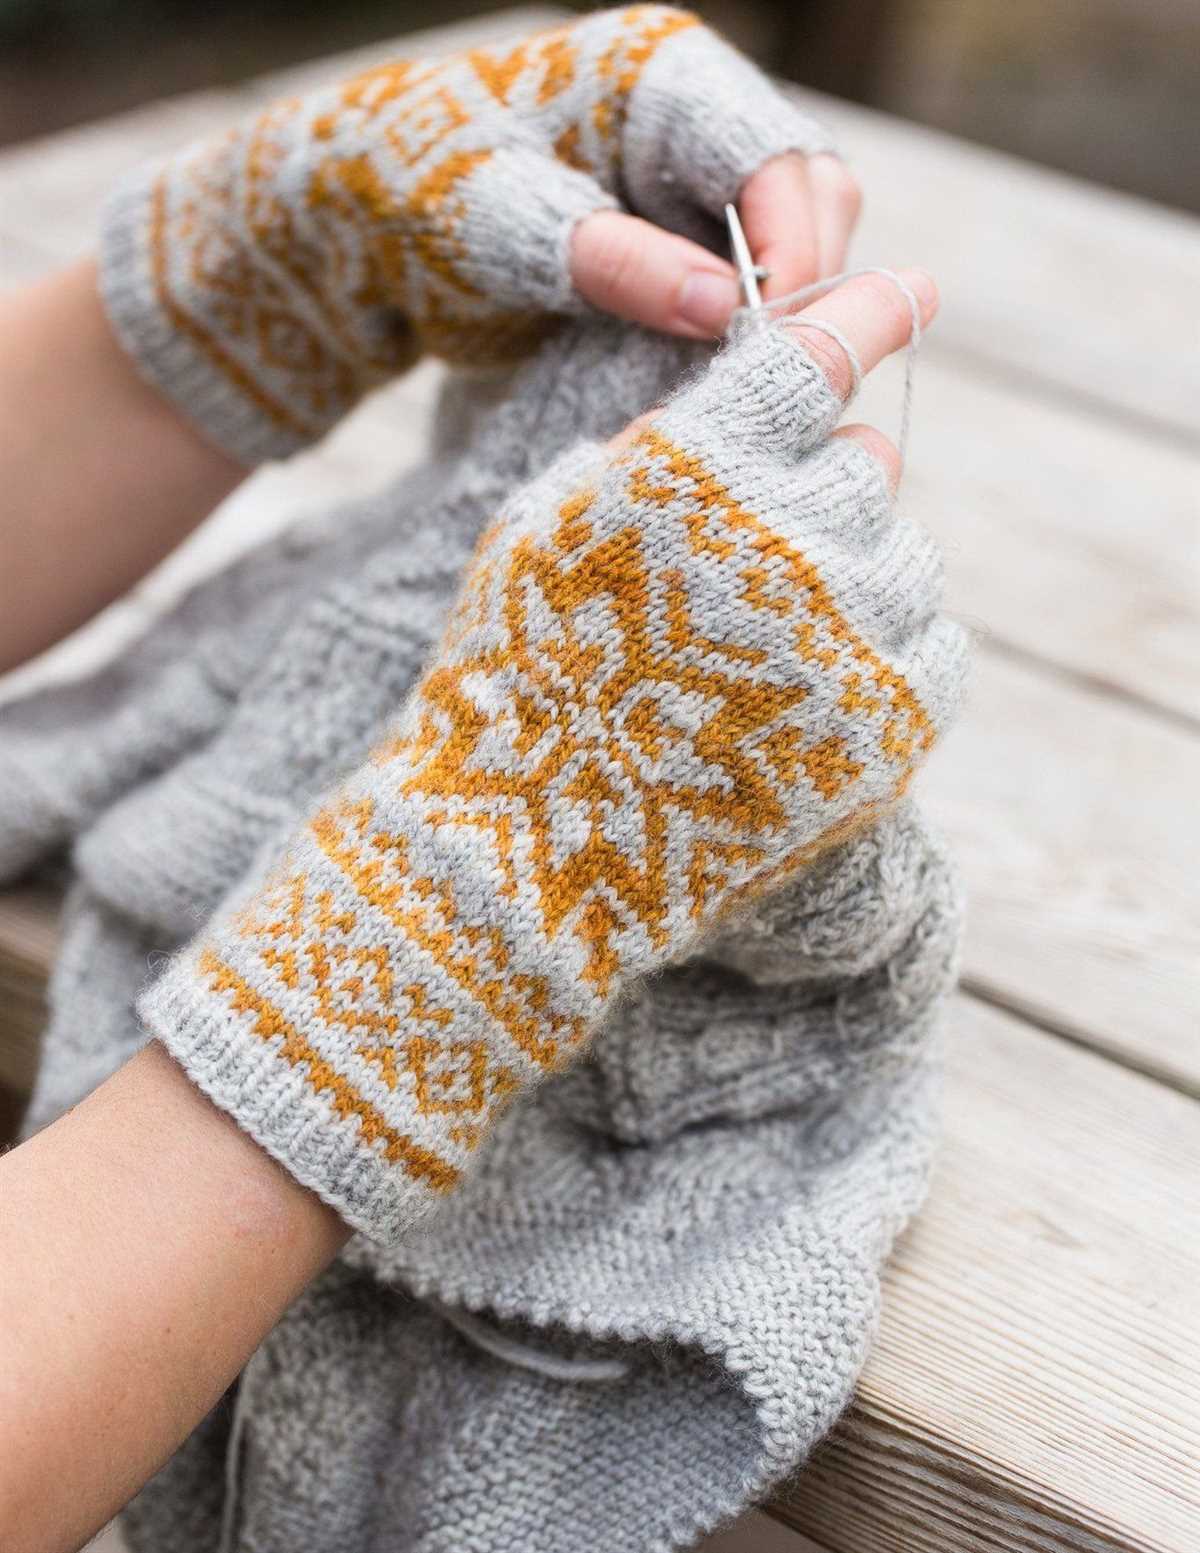
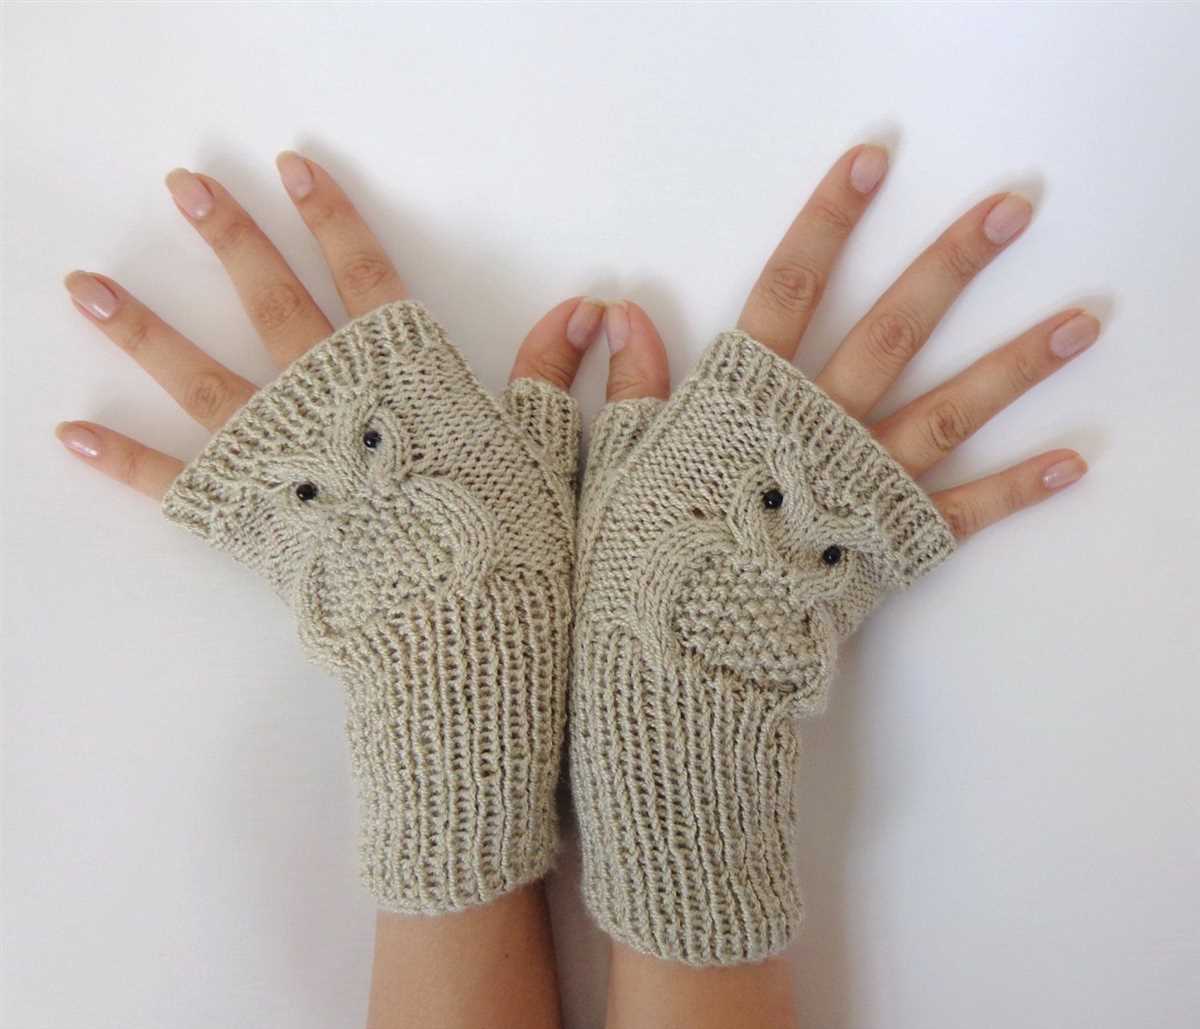
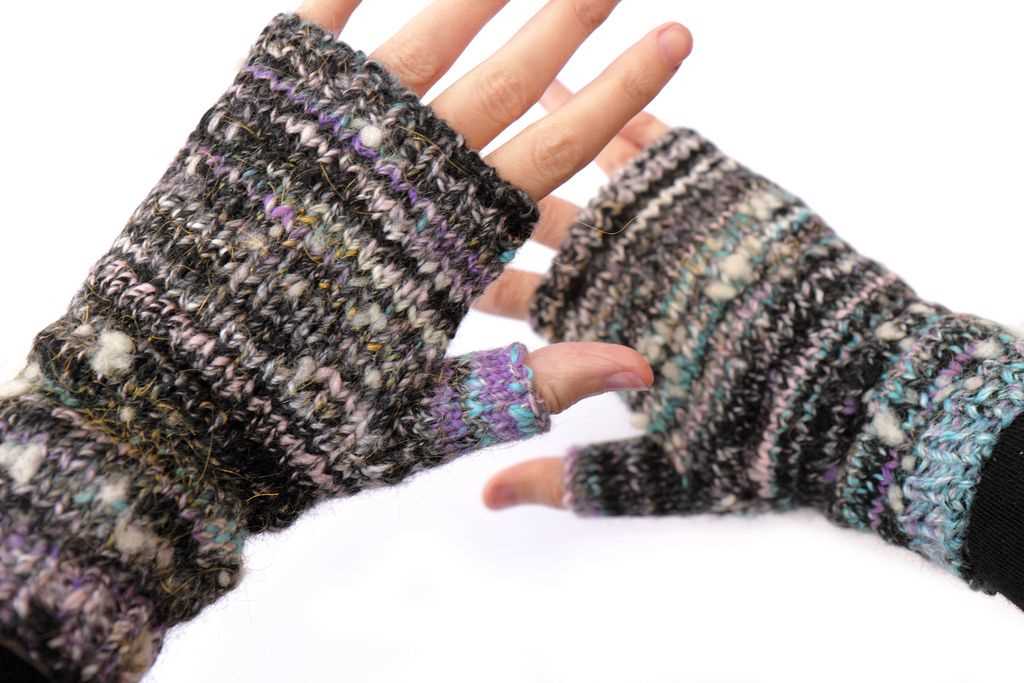
Fingerless mitts come in a variety of styles, colors, and patterns, making them a fashionable accessory for both men and women. They can be plain and simple, with a basic ribbed or textured design, or they can feature intricate lacework, cables, or colorwork patterns. Some fingerless mitts even have additional features such as buttons, bows, or finger flaps that can be pulled over the fingers for extra warmth when needed.
Overall, fingerless mitts are a practical and stylish accessory that can be worn in various settings and seasons. Whether you need them for outdoor activities in chilly weather or as a fashion statement for everyday wear, fingerless mitts provide the perfect combination of comfort, functionality, and style.
Why Choose Fingerless Mitts?
Fingerless mitts, also known as fingerless gloves or wrist warmers, are a popular accessory for several reasons. These versatile and functional hand coverings offer a range of benefits that make them an attractive choice for many individuals.
Warmth and Comfort
One of the key reasons why people choose fingerless mitts is for their warmth and comfort. Despite leaving the fingers exposed, fingerless mitts provide adequate insulation for the hands, ensuring that they stay warm and cozy. The design allows for better dexterity and freedom of movement compared to traditional gloves, making them comfortable to wear for extended periods of time.
Style and Fashion
Fingerless mitts have become a trendy fashion accessory in recent years. With a wide range of colors, patterns, and materials available, fingerless mitts offer a stylish alternative to regular gloves. They can add a touch of uniqueness and individuality to any outfit, allowing for personal expression and style.
Convenience and Functionality
Fingerless mitts are a practical choice for those who need to keep their hands warm while still having access to their fingers. They are particularly useful for tasks that require precision and dexterity, such as typing, using touchscreens, or playing musical instruments. These mitts are also convenient for outdoor activities such as hiking or photography, where the fingers need to be mobile.
Versatility
Another reason to choose fingerless mitts is their versatility. They can be worn in various settings and for different occasions. Whether it’s a casual day out, a formal event, or a winter sports activity, fingerless mitts provide a versatile option that can be easily matched with different outfits.
In conclusion, fingerless mitts offer a combination of warmth, style, convenience, and versatility that make them a popular choice among individuals of all ages and lifestyles.
Types of Yarns for Knitting Fingerless Mitts
When it comes to knitting fingerless mitts, choosing the right yarn is important to ensure both comfort and durability. There are various types of yarns available in the market, each with its own unique characteristics and benefits.
1. Worsted Weight Yarn: Worsted weight yarn is a popular choice for knitting fingerless mitts. It is medium-weight, giving the mitts a substantial feel while still being soft and comfortable. This type of yarn is perfect for colder climates, as it provides warmth without being too bulky.
2. Fingering Weight Yarn: Fingering weight yarn is a lightweight option for knitting fingerless mitts. It creates a delicate and airy texture, making it ideal for wearing in milder weather or for those who prefer a more lightweight feel. Fingering weight yarn is also great for detailed patterns and intricate designs.
3. Merino Wool Yarn: Merino wool yarn is known for its softness and warmth, making it an excellent choice for fingerless mitts. The fibers of merino wool are fine and smooth, providing a luxurious feel against the skin. It is also highly breathable, wicking away moisture to keep the hands dry and comfortable.
4. Alpaca Yarn: Alpaca yarn is another popular option for fingerless mitts. It is incredibly soft and lightweight, making it a great choice for those with sensitive skin. Alpaca yarn also boasts excellent insulation properties, providing warmth without adding bulk. Additionally, it is hypoallergenic, making it suitable for those with allergies or sensitivities.
5. Cotton Yarn: Cotton yarn is a versatile choice for knitting fingerless mitts. It is lightweight and breathable, making it perfect for warmer climates or for those who prefer a more lightweight feel. Cotton yarn is also easy to care for and is machine washable, making it a practical option for everyday wear.
When selecting the yarn for knitting fingerless mitts, it is important to consider factors such as the desired texture, level of warmth, and sensitivity of the wearer’s skin. Each type of yarn offers its own unique qualities, allowing for a customized knitting experience and a pair of fingerless mitts that are not only functional but also stylish.
Tools and Materials Needed for Knitting Fingerless Mitts
Before you begin knitting fingerless mitts, it is important to gather all the necessary tools and materials. Having everything at hand will make the knitting process much smoother and enjoyable. Here is a list of the essential items you will need:
Knitting Needles:
- – Size US 5 (3.75 mm) double-pointed knitting needles.
Yarn:
- – Worsted weight yarn in your preferred color. Choose a high-quality yarn that is soft and comfortable to wear.
- – Approximately 200 yards of yarn for a pair of fingerless mitts.
Stitch Markers:
- – Stitch markers are essential for keeping track of stitches and pattern repeats. Use removable markers that can easily be moved as you progress.
Tapestry Needle:
- – A tapestry needle is necessary for weaving in loose ends and finishing touches.
Scissors:
- – A pair of small, sharp scissors will come in handy for cutting yarn and trimming loose ends.
Measuring Tape:
- – A measuring tape is essential for accurately measuring your hand size and determining the length of the mitts.
Pattern:
- – Lastly, you will need a knitting pattern for fingerless mitts. There are various patterns available online or in knitting books. Choose a pattern that matches your skill level and desired style.
With these tools and materials in hand, you are ready to embark on your fingerless mitts knitting project. Enjoy the process and get creative with different yarn colors and stitch patterns!
Basic Knitting Techniques for Fingerless Mitts
When it comes to knitting fingerless mitts, there are a few basic techniques that you should be familiar with to create a beautiful and functional accessory. Whether you’re a beginner knitter or have some experience under your belt, these techniques will help you create mitts that fit well and look great.
1. Casting On
Before you can start knitting your fingerless mitts, you’ll need to cast on your stitches. The most common method is the long-tail cast on, which creates a neat and stretchy edge. To do this, measure a length of yarn about three times the width of your project. Make a slipknot and place it on your needle. Hold the needle with the slipknot in your right hand and the working yarn over your left thumb and the tail over your left index finger. Use the needle to pick up the yarn from behind your thumb and the tail from behind your index finger, forming a new loop on the needle. Repeat this process until you have the desired number of stitches.
2. Knitting in the Round
Fingerless mitts are often knit in the round, which means you’ll be working in a continuous spiral without turning your work. To do this, you’ll need a set of double-pointed needles or a circular needle with a small circumference. Once you’ve cast on your stitches, arrange them evenly on your needles and join them in a circle. Use a stitch marker to mark the beginning of each round. As you knit, be careful not to twist your stitches, as this will result in a twisted project. Keep your tension even and consistent to create a smooth and professional finish.
3. Ribbing
Ribbing is a common pattern used at the cuff of fingerless mitts to create a snug and stretchy fit. The most common ribbing pattern is k1, p1, which involves alternating knit and purl stitches. This creates a textured pattern that stretches easily and molds to the shape of the wrist. To create a ribbed cuff, work the desired number of rounds in k1, p1, then switch to your main stitch pattern for the body of the mitts.
4. Thumb Gusset
The thumb gusset is an essential feature of fingerless mitts, allowing for freedom of movement while keeping the hands warm. To create a thumb gusset, you’ll need to increase stitches at the side of the mitt where the thumb will be. This is typically done by working increases on every other round until you have the desired number of thumb stitches. These stitches are then placed on waste yarn or a stitch holder until you’re ready to work the thumb.
By mastering these basic knitting techniques, you’ll be well on your way to creating beautiful fingerless mitts that are both stylish and functional. Experiment with different stitch patterns, colors, and yarns to personalize your mitts and make them uniquely yours. Happy knitting!
How to Cast On for Fingerless Mitts
When starting a knitting project, it is important to cast on correctly to ensure an even and secure edge. This is especially important for fingerless mitts, as the edges will be visible and may be subject to more wear and tear. Here is a step-by-step guide on how to cast on for fingerless mitts.
1. Choose the right cast on method:
There are several cast on methods you can choose for fingerless mitts, such as the long-tail cast on, the cable cast on, or the knit cast on. Select the method that you are most comfortable with and that will provide the desired stretchiness and edge finish for your mitts.
2. Determine the number of stitches:
Follow the pattern instructions or decide on the desired width of your fingerless mitts to determine the number of stitches you need to cast on. Make sure to account for any stitch patterns or motifs that need to be included in the design.
3. Prepare your yarn:
Before you start casting on, make sure that your yarn is properly wound and that you have enough yarn to complete the project. Cut a long tail that is approximately three times the width of your mitts and secure the end to prevent unraveling.
4. Begin casting on:
Hold the needle with the slipknot in your right hand and the working yarn in your left hand. Insert the needle into the slipknot from left to right, and pull the working yarn through to create a new stitch. Repeat this process until you have cast on the desired number of stitches.
5. Check for accuracy:
After casting on, double-check that you have the correct number of stitches. Count each stitch and make sure they are evenly spaced on the needle. If necessary, adjust the tension of your cast on to ensure a consistent edge.
6. Continue with your pattern:
Once you have successfully cast on for your fingerless mitts, you can proceed with the rest of the pattern, following the instructions for the stitch pattern, shaping, and any other elements included in the design.
By following these steps, you can confidently cast on for fingerless mitts and start creating your own cozy and stylish hand warmers.
Knitting the Thumb Gusset
The thumb gusset is an essential part of fingerless mittens as it allows for movement and flexibility in the thumb area. Knitting the thumb gusset involves increasing stitches to create a triangular-shaped opening for the thumb.
To start the thumb gusset, you will need to mark the stitches where the gusset will be placed. This can be done by using stitch markers or simply by keeping track of the stitches on your knitting needles. The number of stitches to increase will depend on the desired width of the thumb opening and the pattern instructions. It is important to follow the pattern carefully to ensure the correct number of increases.
Once the gusset stitches are marked, you can begin increasing the stitches. This is typically done by working a set number of stitches, then making an increase. There are different types of increases that can be used, such as knit front and back (kfb), make one right (M1R), make one left (M1L), or yarn over (YO). Again, it is important to follow the pattern instructions for the correct type of increase.
As you continue knitting the thumb gusset, the triangular shape will start to form. The increases are typically worked on the right side rows, while the wrong side rows are worked without any increases. It is important to keep track of the row count and follow the pattern instructions for the correct increase placement.
Once the desired number of increases are completed, you will have created a thumb opening. At this point, you can put the gusset stitches on hold by sliding them onto a stitch holder or a piece of scrap yarn. This will allow you to continue working on the main body of the fingerless mitts. In some patterns, you may also be instructed to place the gusset stitches back onto the knitting needles before continuing.
Overall, knitting the thumb gusset is an important step in creating fingerless mittens. It allows for movement and comfort in the thumb area and adds an extra touch of functionality to the design. By following the pattern instructions and carefully increasing the stitches, you can create a beautiful and functional thumb gusset for your fingerless mitts.
Shaping the Hand for Fingerless Mitts
One of the essential aspects of knitting fingerless mitts is shaping the hand. This process involves creating a pattern that fits snugly around the hand, providing warmth and comfort while allowing the fingers to remain free. There are various techniques and methods for shaping the hand, depending on the desired style and fit of the mitts.
One common technique is to start with a ribbed cuff, which helps to provide elasticity and a secure fit around the wrist. From there, the pattern may include increases or decreases to shape the hand. These can be done gradually or in specific areas, such as the thumb or palm, to create a more tailored fit. The pattern may also include different stitch patterns or textures to add visual interest and enhance the overall design.
When shaping the thumb area, various methods can be used, including provisional cast-on, afterthought thumb, or a gusset construction. These techniques allow for flexibility and customization, ensuring a comfortable and functional thumb opening. Additionally, some patterns may incorporate additional shaping on the palm or back of the hand to create a more ergonomic fit.
Overall, shaping the hand for fingerless mitts requires careful planning and attention to detail. It is essential to consider the size and proportions of the hand, while also taking into account the desired style and functionality of the mitts. With the right techniques and a well-designed pattern, knitters can create fingerless mitts that are both fashionable and practical for everyday wear.
Knitting the Thumb
When knitting fingerless mitts, one of the unique features is the thumb opening. Knitting the thumb requires a bit of extra attention and skill compared to the rest of the mitt. It is essential to determine the placement of the thumb opening and follow a specific pattern or technique to create a well-fitting and functional thumb.
Thumb Gusset
A common method for knitting the thumb is to create a thumb gusset. This involves increasing stitches in a specific area to make room for the thumb. The thumb gusset is usually positioned on the side of the mitt, close to the index finger. By gradually increasing stitches in this area, you can shape the thumb opening.
To start the thumb gusset, you will need to place a marker to indicate the beginning and end of the gusset. This marker will help you keep track of where the thumb opening will be. From there, you can follow the pattern instructions to make the necessary increases at the appropriate rows.
Working the Thumb
Once the thumb gusset is complete, you will need to transfer the stitches for the thumb onto a separate set of double-pointed needles or a circular needle. This will allow you to work solely on the thumb without affecting the rest of the mitt.
Continue working the thumb stitches according to the pattern instructions. This may involve knitting in the round or working back and forth in rows, depending on the design. You will typically decrease stitches gradually to shape the top of the thumb and create a tapered finish.
- Remember to read the pattern carefully and follow the specific instructions for knitting the thumb.
- Ensure that the tension and gauge of your thumb knitting match the rest of the mitt to maintain consistent sizing and fit.
- Take your time and practice the thumb section to achieve a neat and professional-looking finish.
By carefully knitting the thumb on your fingerless mitts, you can create a functional and stylish accessory that will keep your hands warm while allowing for dexterity. The thumb opening will provide flexibility for activities such as texting, typing, or knitting, making these mitts a practical choice for chilly days.
Binding Off for Fingerless Mitts
Binding off is the final step in knitting fingerless mitts, and it is important to do it correctly to ensure a neat and secure edge. There are different methods for binding off, and the one you choose will depend on the desired finish and the type of yarn you are using.
One common method for binding off fingerless mitts is the standard bind off. To do this, knit the first two stitches as usual, then use the left needle to lift the first stitch over the second stitch and off the right needle. Knit the next stitch, then repeat the process of lifting the previous stitch over the newly knit stitch until all stitches have been bound off. Cut the yarn, leaving a long tail, and pull it through the last stitch to secure the bind off.
Another option is a stretchy bind off, which is great for fingerless mitts that need to stretch to fit comfortably. The stretchy bind off is similar to the standard bind off, but with an extra step to create more elasticity. After knitting the first two stitches, knit the third stitch through the back loop instead of the front loop. Then, lift the second stitch over the third stitch as usual. Repeat this process, knitting through the back loop on every third stitch, until all stitches have been bound off. Cut the yarn and pull it through the last stitch to secure.
- Standard bind off: Knit 2 stitches, lift first stitch over second stitch, repeat until all stitches are bound off.
- Stretchy bind off: Knit 2 stitches, knit third stitch through back loop, lift second stitch over third stitch, repeat until all stitches are bound off.
Choose the bind off method that best suits your project and the look you want to achieve. It may be helpful to practice each method on a swatch before binding off your fingerless mitts to ensure you are comfortable with the technique. With the right bind off, your fingerless mitts will have a professional finish and be ready to wear or gift to someone special.
Finishing Touches for Fingerless Mitts
When it comes to finishing touches for fingerless mitts, there are several options to consider. Adding a decorative edging can give your mitts a polished look and also help prevent them from unraveling. One popular edging technique is the picot edge, which involves creating small loops along the edge of the mitts. This can be achieved by making a chain stitch, followed by a slip stitch into the first chain stitch. Another option is to use a simple ribbed or garter stitch border, which can add texture and stretch to the mitts.
Embroidery is another way to add a personal touch to your fingerless mitts. You can use colorful yarn or thread to create intricate designs or simple embellishments. Flower motifs, geometric patterns, or even initials can be stitched onto the mitts for a unique and customized look. Embroidery can also be used to cover up any mistakes or imperfections in your knitting, making it a useful skill to have.
Buttons, beads, or other embellishments can also be added to fingerless mitts to give them a playful or elegant touch. Sewing on a row of small buttons along the wrist or adding a single large button can create an interesting focal point. Beads or sequins can be added to create a bit of sparkle or shine. These small details can make your fingerless mitts stand out and reflect your personal style.
In summary, there are many finishing touches you can add to your fingerless mitts to make them unique and stylish. Whether it’s a decorative edging, embroidered designs, or added embellishments, these details can take your mitts from simple to sophisticated. Get creative and have fun experimenting with different techniques to make your fingerless mitts truly one-of-a-kind.
Variations and Customizations for Fingerless Mitts
Fingerless mitts are a versatile accessory that can be customized in many ways to suit individual preferences and styles. Here are some ideas for variations and customizations:
1. Different Stitch Patterns
One simple way to customize fingerless mitts is by using different stitch patterns. You can experiment with ribbing, cables, lace, or any other stitch pattern that you like. This can completely change the look and feel of the mitts.
2. Additional Embellishments
To add a unique touch to your fingerless mitts, you can embellish them with additional details. This can include buttons, beads, embroidery, or even crochet flowers. These embellishments can be added to the cuff, the back of the hand, or anywhere else you desire.
3. Varied Thumb Openings
The thumb hole in fingerless mitts can be customized to suit different preferences. You can make a simple opening by leaving a gap in the knitting or create a more structured thumb opening by adding a gusset or a button closure.
4. Adjusting the Length
The length of fingerless mitts can also be adjusted according to personal preference. Some people prefer longer mitts that cover more of the forearm, while others prefer shorter mitts that end just below the wrist. You can easily adapt the pattern to create the desired length.
5. Play with Colors
Another fun way to customize fingerless mitts is by playing with colors. You can use different color combinations for the body and the cuff, or create striped or color-blocked designs. The possibilities are endless, and you can let your creativity run wild.
With these variations and customizations, you can create fingerless mitts that are truly one-of-a-kind, reflecting your personal style and preferences.