
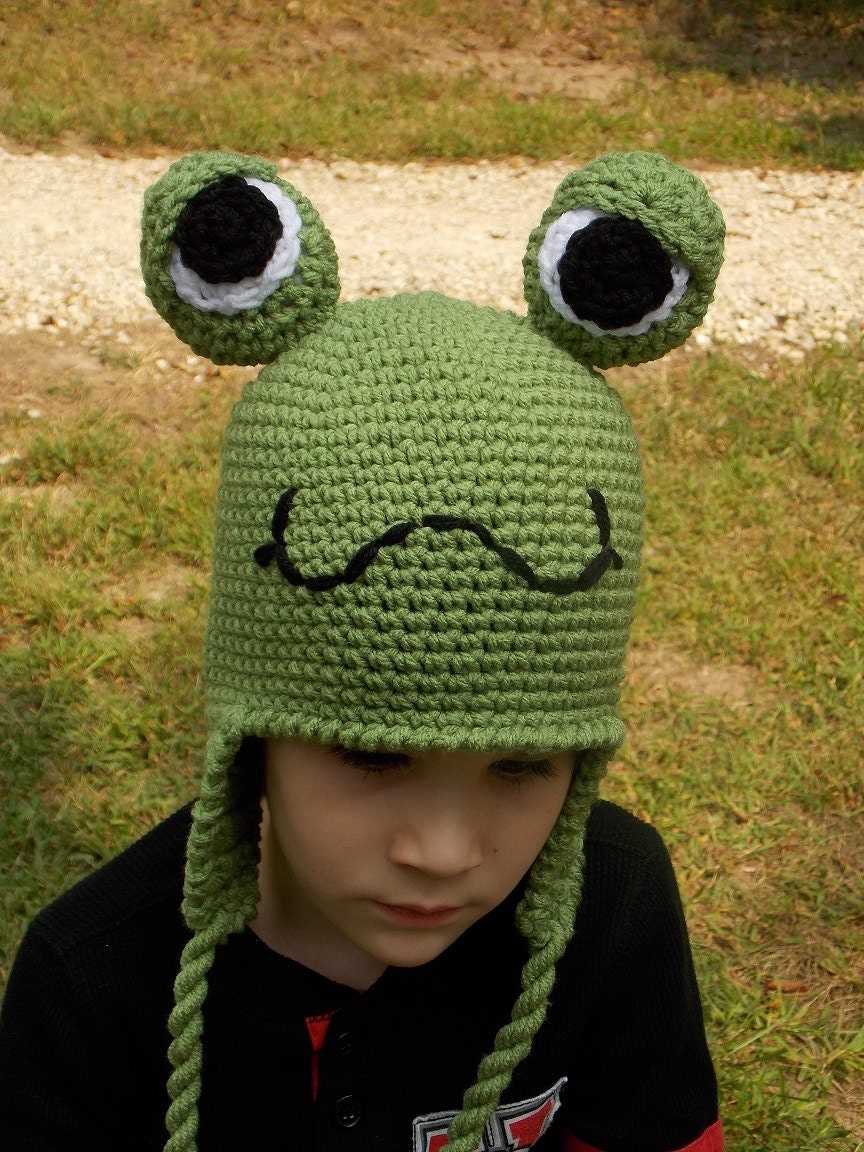
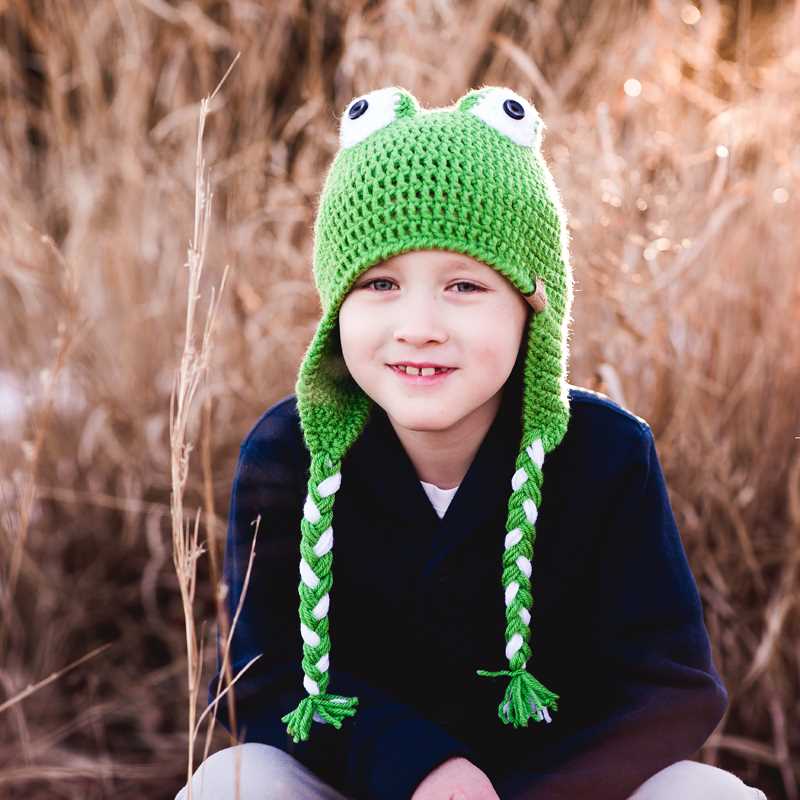
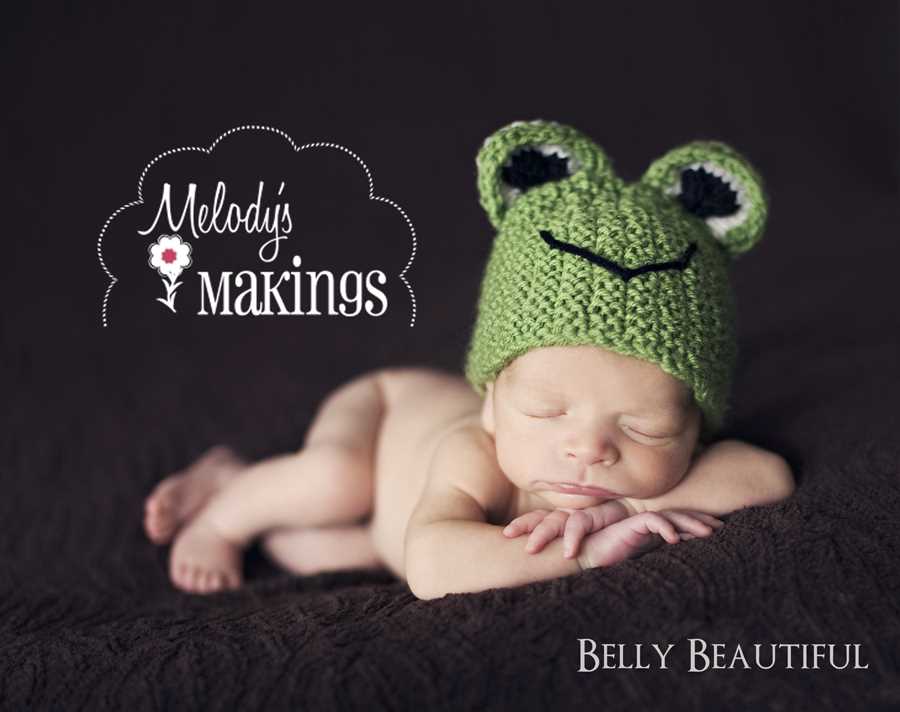
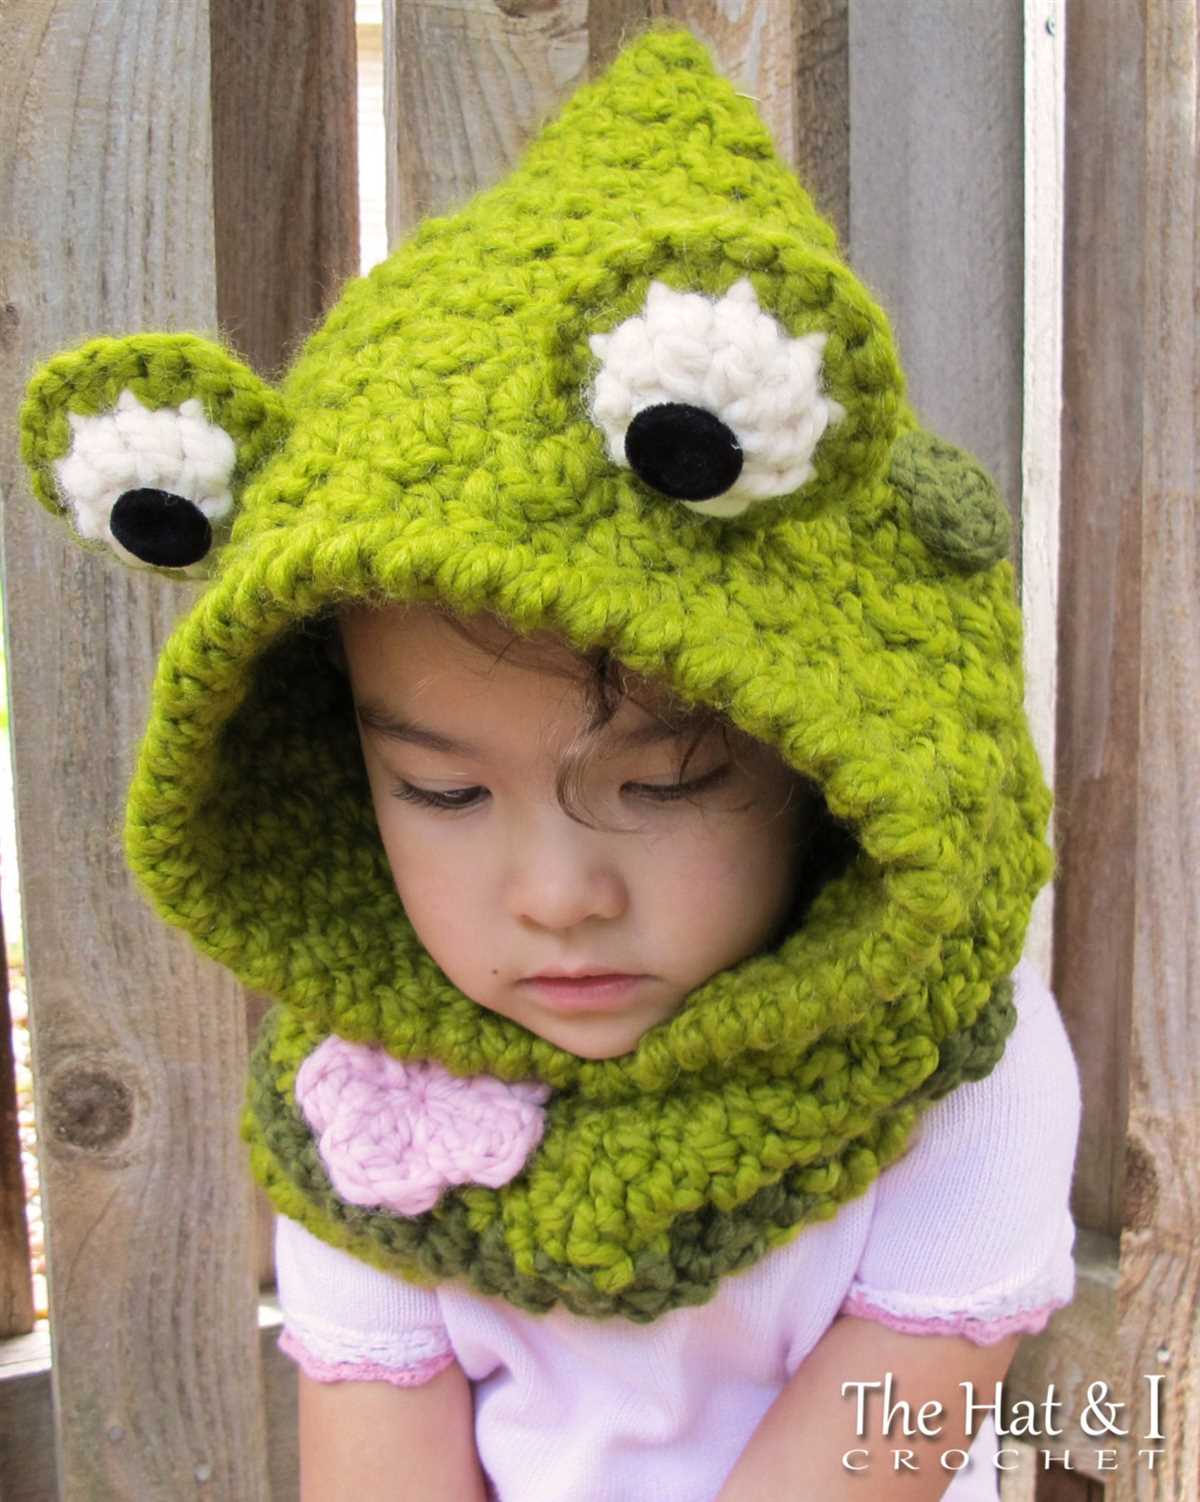
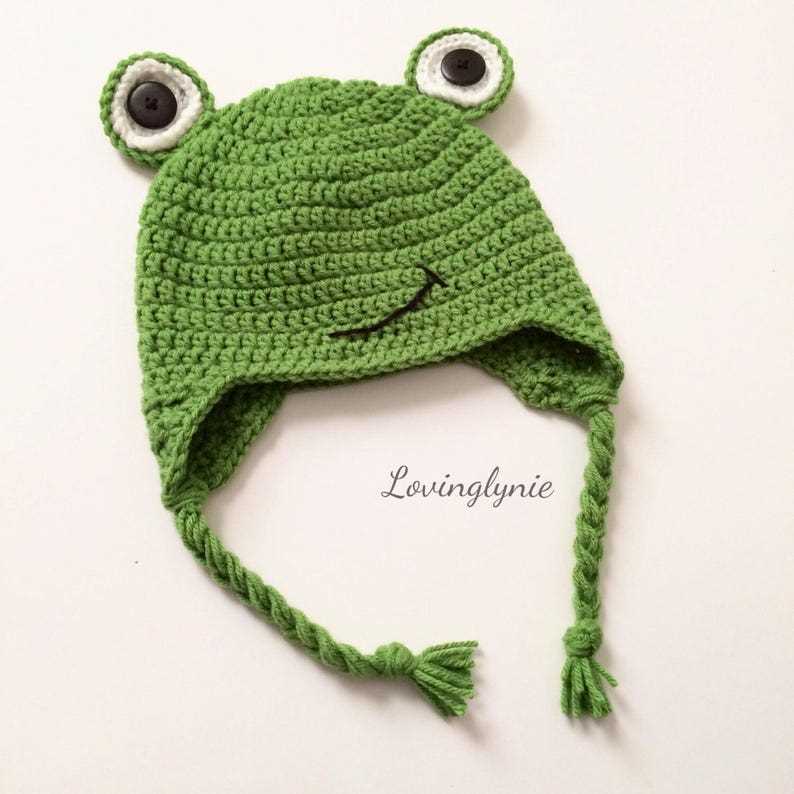
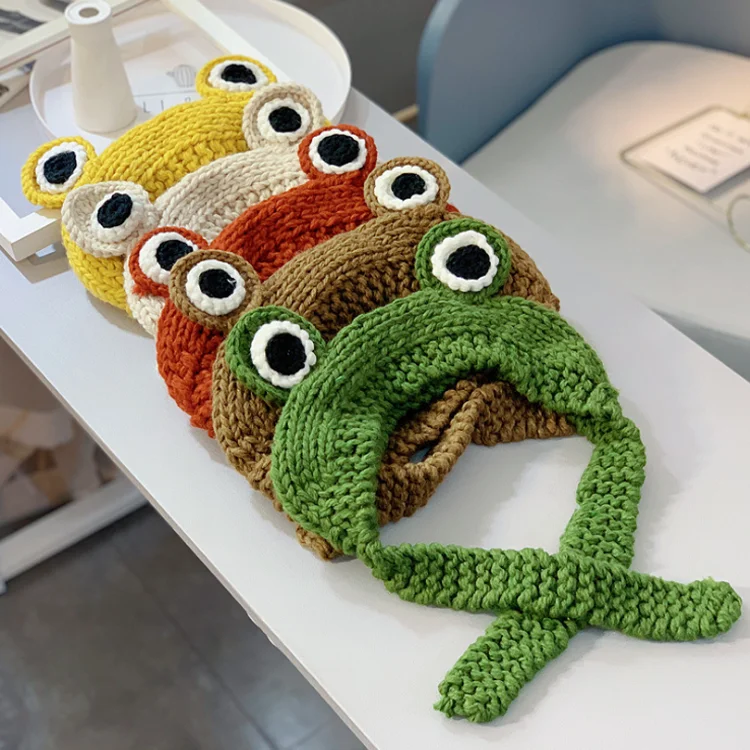
Knitting is a craft that has been around for centuries, and there are endless possibilities when it comes to creating unique, hand-knit items. One of the most popular trends in knitting right now is animal-themed accessories, and one of the cutest patterns out there is the frog knit hat pattern. This adorable hat features a green body, big eyes, and even little froggy legs!
Whether you’re knitting for a baby, a child, or even an adult, the frog knit hat pattern is a fun and playful project that is sure to bring a smile to anyone’s face. The pattern is relatively simple, making it a great choice for beginners or more experienced knitters looking for a quick and satisfying project.
This pattern typically calls for worsted weight yarn, and you can choose any shade of green or even mix it up with some fun contrasting colors. You’ll also need a set of double-pointed needles or a circular needle, depending on your preferred method of knitting in the round.
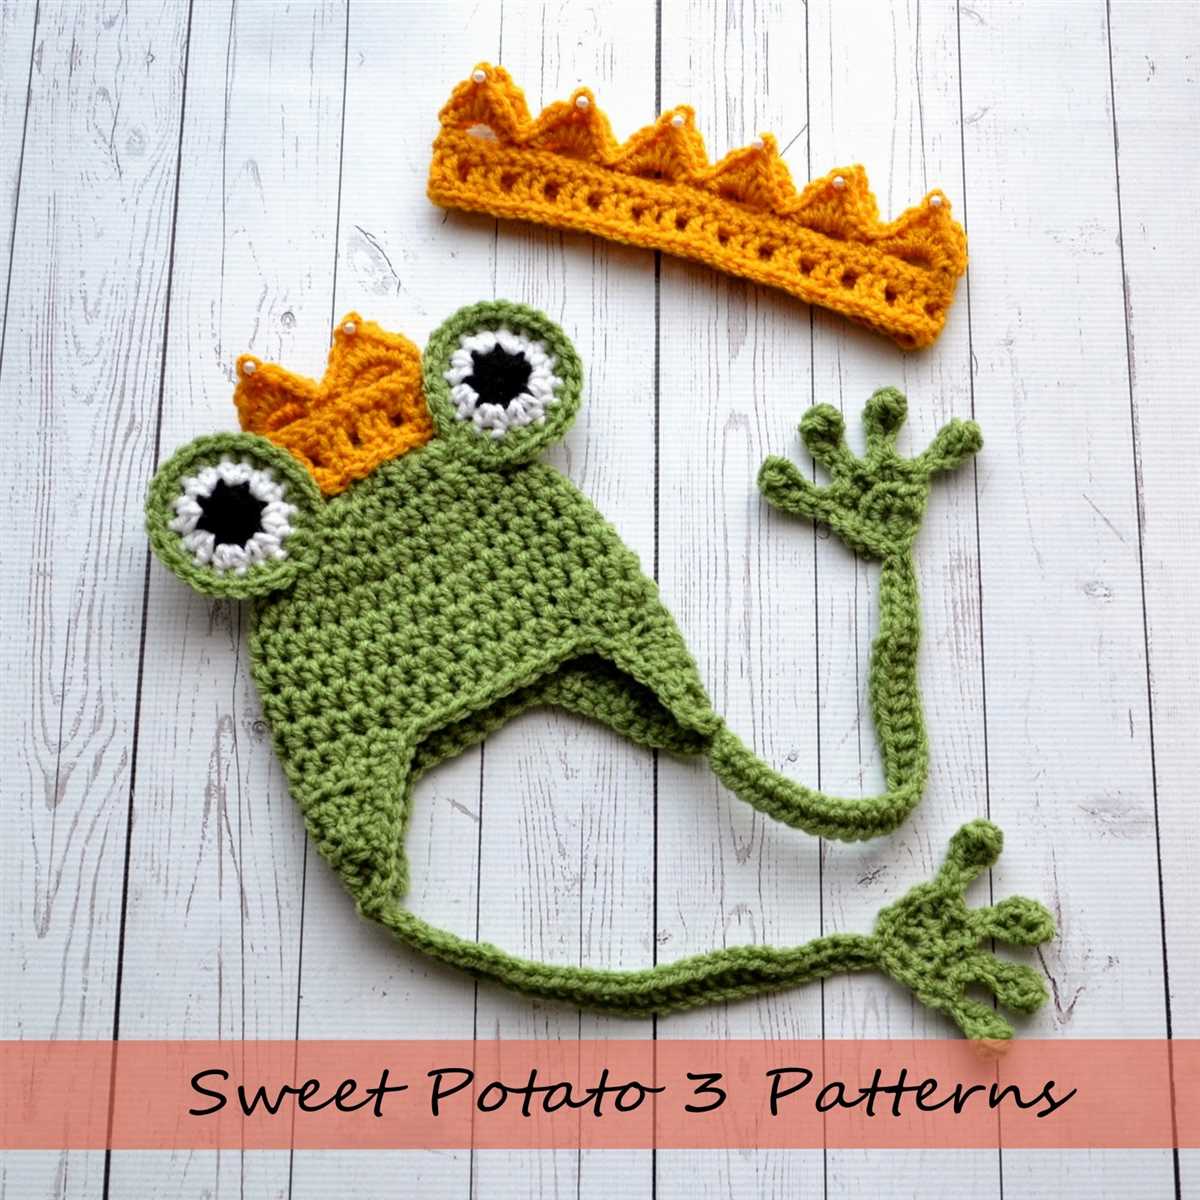
Once you’ve finished knitting your frog hat, you can add the finishing touches such as sewing on the eyes and legs. You can even get creative and add other embellishments like a tiny felt tongue or a crown of crochet flowers. The possibilities are endless!
Frog Knit Hat Pattern
If you are a fan of frogs or know someone who is, then you’ll love this Frog Knit Hat Pattern. It’s a fun and whimsical pattern that will bring a smile to anyone’s face. Whether you’re knitting it for yourself or as a gift, this pattern is sure to be a hit.
To start, you’ll need a few basic knitting supplies, including yarn in green and white, knitting needles, and a yarn needle. The pattern is worked in the round, so you’ll also need circular knitting needles or double-pointed needles, depending on your preference.
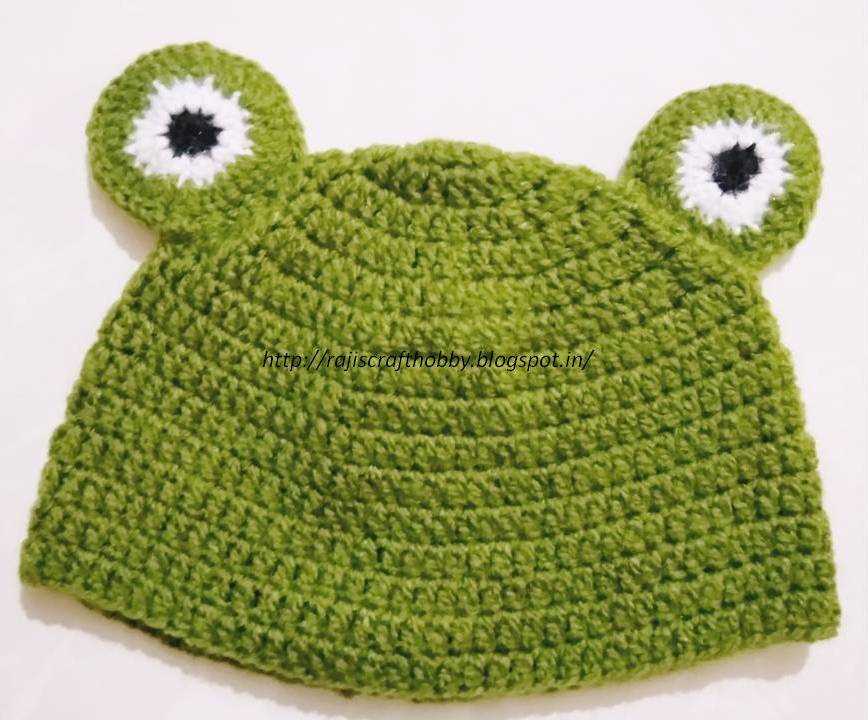
Begin by casting on the required number of stitches for the hat size you want to make. Then, follow the pattern instructions to create the body of the hat, which features a textured stitch pattern that resembles frog skin. The main color of the hat is green, while the white yarn is used to create the frog’s eyes and mouth.
To add a finishing touch, you can embellish the hat with a pair of frog eyes and a mouth. You can either purchase pre-made eyes or make your own using felt. Simply stitch them onto the hat using the yarn needle and white yarn.
This Frog Knit Hat Pattern is a fun and unique way to show off your love for frogs. Whether you wear it for a costume or just for fun, this hat is sure to be a conversation starter wherever you go. So grab your knitting needles and get started on this adorable project today!
Why Knit a Frog Hat?
Knitting a frog hat can be a fun and creative project that allows you to showcase your knitting skills and express your personality. Whether you are an experienced knitter or just starting out, knitting a frog hat can be a great way to challenge yourself and learn new techniques. Plus, who doesn’t love frogs?
By knitting a frog hat, you can create a unique accessory that stands out from the crowd. Instead of wearing a plain, ordinary hat, you can sport a whimsical and eye-catching design that will turn heads and spark conversations. The frog theme adds a touch of playfulness and charm to your outfit, making it perfect for children and adults alike.
Knitting a frog hat is also a great way to show off your love for animals and the environment. By wearing a hat adorned with a frog, you can raise awareness about the importance of preserving wildlife and their habitats. It can serve as a gentle reminder to respect and protect our natural world.
When it comes to knitting a frog hat, the possibilities are endless. You can choose from different patterns and designs, allowing you to make a hat that suits your personal style and preferences. Additionally, knitting can be a therapeutic activity that helps to reduce stress and promote relaxation. So why not combine your love for knitting and frogs and create a hat that brings joy to both yourself and others?
- It’s a fun and creative project that showcases your knitting skills.
- It adds a touch of playfulness and charm to your outfit.
- It’s a great way to show off your love for animals and the environment.
- You can choose from different patterns and designs to suit your style.
- Knitting can be a therapeutic activity that promotes relaxation.
Choosing the Right Yarn and Needles
When it comes to knitting a frog hat, choosing the right yarn and needles is essential to achieve the desired look and texture. The right combination of yarn and needles will ensure that your finished project is not only comfortable to wear but also has the perfect amount of stretch and structure.
Yarn: When selecting yarn for your frog hat, opting for a soft and cozy yarn is ideal as it will provide warmth and comfort. Consider using a worsted weight yarn that is made of natural fibers like wool or a blend of acrylic and wool. This type of yarn will give your hat a nice drape and make it easier to shape the frog details.
Needles: The choice of needles will depend on your personal knitting preference and the type of yarn you’re working with. For a frog hat, circular needles are commonly used as they allow for seamless knitting in the round. Look for a pair of circular needles in the appropriate size for your chosen yarn. Additionally, you may also need a set of double-pointed needles for knitting the frog’s eyes.
Remember to always check the recommended needle size on the yarn label and make sure to use the appropriate needle size to obtain the correct gauge. This will ensure that your frog hat turns out to be the perfect size and fit. Experimenting with different yarns and needle sizes can also give you different effects and textures, so don’t be afraid to try out different combinations until you find the perfect one for your frog hat pattern.
Essential Knitting Techniques
Whether you’re a beginner or an experienced knitter, there are certain techniques that are essential to know in order to create beautiful and well-fitting knitted items. These techniques can help you improve your skills and take your knitting projects to the next level. Here are some of the key knitting techniques every knitter should know:
Casting On
Casting on is the first step in starting any knitting project. It’s the process of creating the first row of stitches on your knitting needle. There are different methods of casting on, such as the long tail cast on, the knitted cast on, and the cable cast on. Each method creates a different edge and has its own advantages, so it’s important to learn and practice different casting on techniques.
Knit Stitch
The knit stitch is the most basic stitch in knitting. It creates the classic “v” pattern and is used in a wide variety of knitting patterns. To knit, you insert the right-hand needle into the first stitch on the left-hand needle from left to right, wrap the yarn around the right-hand needle, and pull it through the stitch to create a new stitch on the right-hand needle. Mastering the knit stitch is essential to becoming a proficient knitter.
Purl Stitch
The purl stitch is the reverse of the knit stitch. It creates a bumpy texture and is often used in combination with the knit stitch to create different stitch patterns. To purl, you insert the right-hand needle into the first stitch on the left-hand needle from right to left, wrap the yarn around the right-hand needle, and pull it through the stitch to create a new stitch on the right-hand needle. Learning to knit and purl opens up a world of possibilities in knitting.
Increasing and Decreasing
Increasing and decreasing are techniques used to shape knitted fabric. Increasing adds stitches to your knitting, while decreasing removes stitches. There are different methods of increasing and decreasing, such as yarn overs, knit front and back, and slip slip knit. These techniques are used in a variety of knitting patterns, from shaping sleeves to creating lace patterns.
Finishing Techniques
Finishing techniques are the final steps in completing a knitting project. They include binding off, seaming, and weaving in ends. Binding off is the process of creating the last row of stitches and securing them so they don’t unravel. Seaming involves joining knitted pieces together, such as when making a sweater. Weaving in ends is the process of hiding yarn tails by threading them through the knitted fabric. These finishing techniques give your knitted items a polished and professional look.
By mastering these essential knitting techniques, you’ll be able to tackle a wide range of knitting patterns and create beautiful knitted items that you can be proud of. Practice and patience are key to improving your knitting skills, so don’t be afraid to start with simple projects and gradually work your way up to more complex ones.
Casting On and Creating the Brim
To begin knitting the frog hat, you will need to cast on your stitches. The number of stitches you cast on will depend on the size of the hat you are making and the weight of the yarn you are using. You can refer to the pattern for the specific cast on instructions. It’s important to make sure your cast on is not too tight or too loose, as this will affect the fit of the hat.
Once you have cast on your stitches, you can begin creating the brim of the hat. The brim is often knit in a ribbing pattern, such as a knit 2, purl 2 rib, to create a stretchy and snug fit. This ribbing pattern is created by alternating knit stitches and purl stitches across each row.
- Start by knitting the first two stitches.
- Then, bring the yarn to the front of the work and purl the next two stitches.
- Repeat this sequence of knitting two stitches and purling two stitches across the row.
- At the end of the row, you will have completed one row of the ribbing pattern.
Continue knitting in this ribbing pattern for the specified number of rows or until the brim reaches your desired length. The ribbing will create a stretchy and comfortable fit around the wearer’s head. Once the brim is complete, you can move on to the next step in the frog hat knitting pattern.
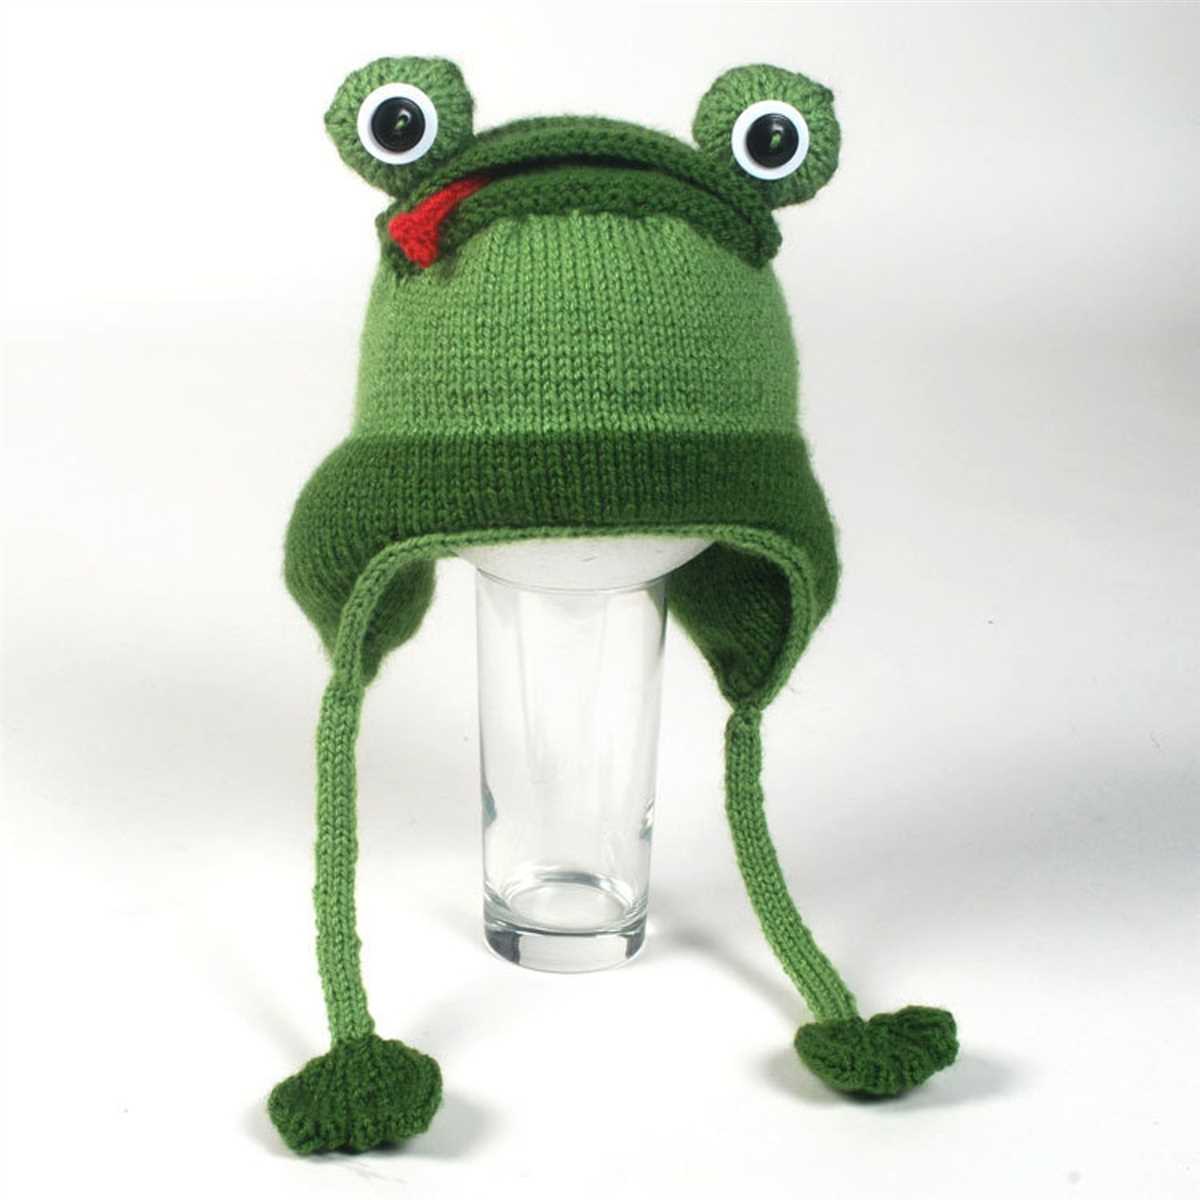
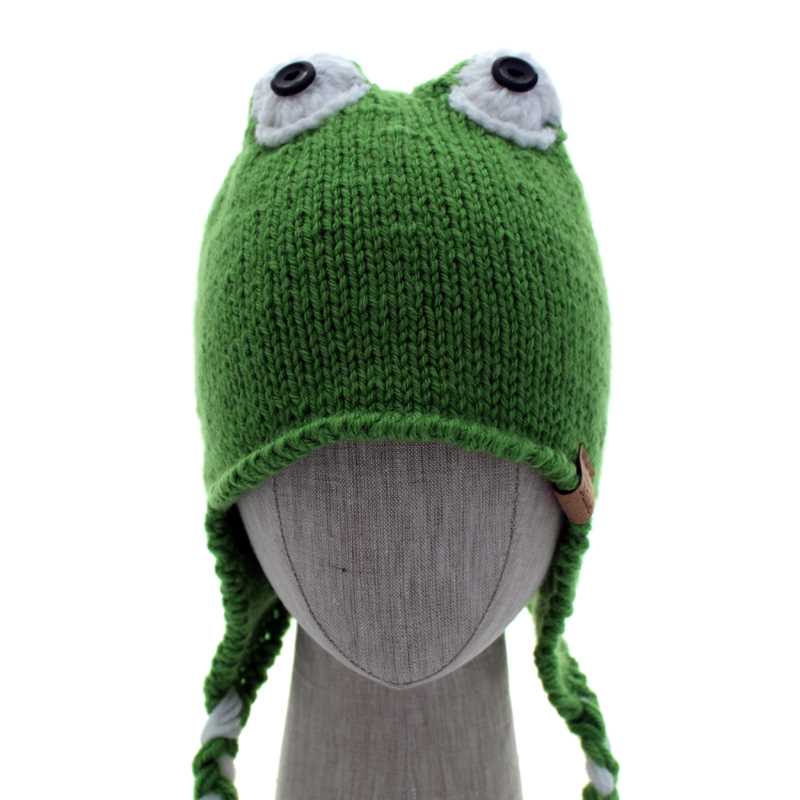
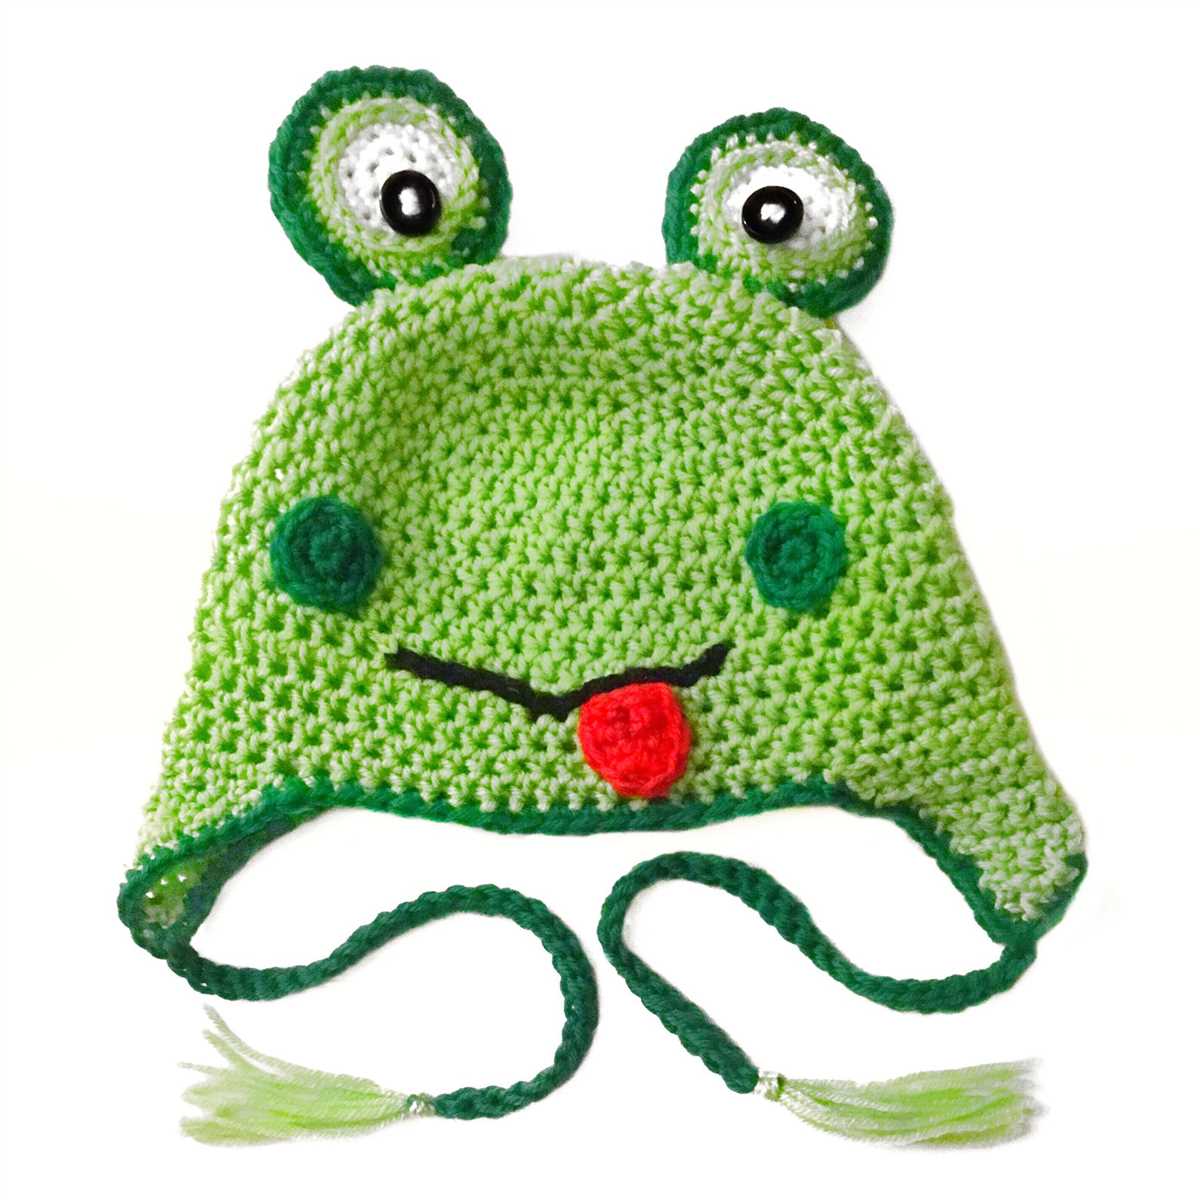
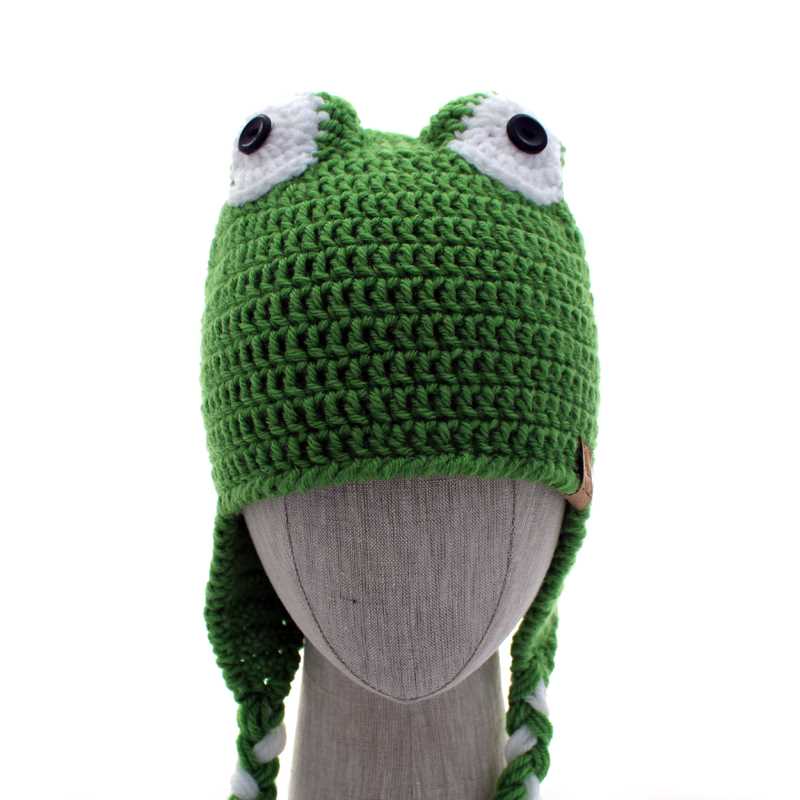
Knitting the Frog Eyes
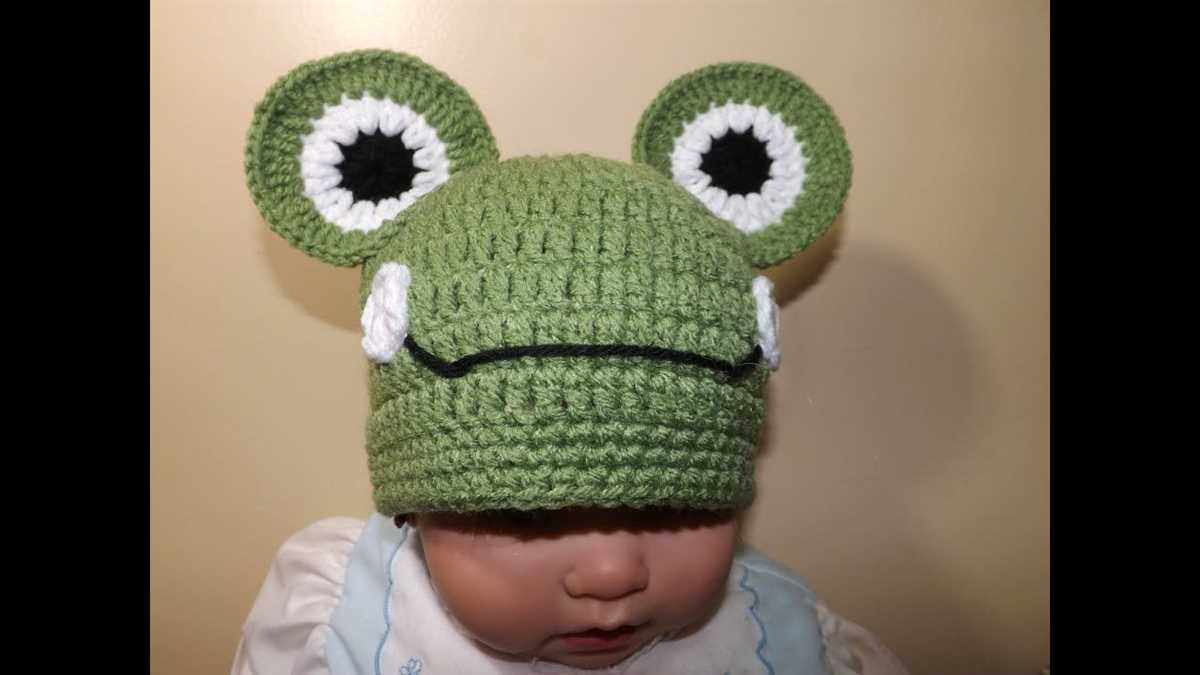
When knitting a frog-themed project, one crucial aspect that cannot be overlooked is the frog’s eyes. The eyes are an essential feature that brings the frog to life and adds a touch of whimsy to the finished piece. Whether you’re knitting a frog hat, a stuffed toy, or any other frog-inspired creation, the eyes play a vital role in capturing the frog’s character.
To create the frog eyes, you can use various techniques and materials. One popular method is to knit or crochet small circles in contrasting colors and sew them onto the project. These circles can be stuffed lightly to give the eyes a three-dimensional look. Another option is to use safety eyes, which are plastic eyes with a shank that can be inserted directly into the knitted fabric. Safety eyes come in different sizes and colors, allowing you to choose the right ones for your project.
When choosing the colors for the frog eyes, consider using bright and vibrant shades to make them stand out. Green and yellow are classic choices that mimic the natural colors of a frog. However, you can also get creative and use playful combinations like blue and red, or purple and pink. By experimenting with different colors, you can add a unique and personal touch to your frog-themed project.
If you prefer a more detailed approach, you can embroider the eyes onto the knitted fabric. This technique allows you to add intricate details like the frog’s pupils or an expressive eyebrow. Embroidery also gives you the freedom to customize the eyes, making each frog you knit truly one-of-a-kind.
In conclusion, when knitting the frog eyes, let your imagination soar. Have fun experimenting with different materials, colors, and techniques to create eyes that perfectly capture the spirit of the frog. Whether your frog is cute and whimsical or bold and charismatic, the eyes will be the focal point that brings your creation to life.
Shaping the Top of the Hat
Once you have completed knitting the body of the frog hat, it’s time to start shaping the top to create the cute and round frog face. This is done by decreasing the number of stitches gradually, until you reach the desired size for the top of the hat.
To begin shaping, you will need to switch to double-pointed needles or a circular needle with the magic loop method. This will allow you to easily work with a smaller number of stitches. Divide the stitches evenly onto three or four needles, depending on the method you choose.
Start by knitting two stitches together (k2tog) at regular intervals across each round. This will decrease the stitch count by one each time. Continue knitting in the round, decreasing by one stitch every few rounds, until you have reached the desired number of stitches for the top of the hat.
It’s important to maintain the frog pattern while shaping the top of the hat. You can do this by following the frog chart or repeating the frog stitch pattern as established earlier in the project. Be sure to refer to the pattern instructions for any specific guidance on maintaining the pattern while decreasing.
Once you have completed all the necessary decreases and reached the desired stitch count, you can fasten off the yarn, leaving a long tail for weaving in. Carefully thread the tail through the remaining stitches and pull tight to close the top of the hat. Weave in any remaining ends and your frog hat is ready to be enjoyed!
Adding the Frog Mouth

Once you have completed the main body of the hat following the frog knit hat pattern, it’s time to add the frog mouth. The frog mouth is a fun and adorable detail that will bring your hat to life.
To create the frog mouth, you will need to pick up stitches along the edge of the hat where you want the mouth to be. Start by placing your knitting needle into the first stitch and wrap the working yarn around the needle. Pull the yarn through, creating a new stitch. Continue this process along the edge of the hat, creating the desired number of stitches for the frog mouth.
Next, you will work in a stockinette stitch pattern for the frog mouth. This means that you will knit one row, and then purl the next row. Continue this pattern until the frog mouth reaches the desired length. Keep in mind that the frog mouth should be shorter than the overall height of the hat.
When you have completed the stockinette stitch pattern for the frog mouth, you can add any additional details, such as eyes or a tongue, using different colored yarns. You can embroider the eyes or use buttons, depending on your preference. Be sure to securely fasten any embellishments to prevent them from coming loose.
Finally, bind off the stitches of the frog mouth and weave in any loose ends. Your frog knit hat is now complete, and ready to be worn or gifted to someone who will appreciate its whimsical charm!
Creating the Frog Legs

When knitting a frog knit hat, one of the most important features to pay attention to is the frog legs. These legs give the hat its distinct frog-like appearance and add an element of fun to the design. To create the frog legs, you will need to follow a specific pattern that includes increases and decreases to shape the legs and bring them to life.
To start, cast on the required number of stitches for the frog legs. The pattern will usually specify how many stitches are needed. Once the stitches are cast on, you can begin working on the leg section. This typically involves working in a combination of knit and purl stitches to create the desired texture. You may also need to incorporate additional stitch patterns, such as ribbing, to achieve the desired effect.
As you work through the leg section, the pattern will instruct you on when to increase or decrease stitches. These increases and decreases will shape the legs and give them their curved appearance. By following the pattern carefully and executing the increases and decreases as instructed, you will be able to create a pair of realistic-looking frog legs for your knit hat.
Once the leg section is complete, you can move on to the next part of the pattern, which may involve shaping the body and adding other frog-like features, such as the eyes or mouth. Each pattern may vary slightly in the specific technique used to create the frog legs, so it’s important to refer to the pattern instructions and follow them closely to achieve the desired result. With some patience and practice, you’ll be able to create adorable frog legs that will make your knit hat stand out!
Finishing Touches
Once you have completed knitting your frog hat, it’s time to add the finishing touches to make it truly special. Whether you’re making it for yourself or as a gift, these extra details will add charm and personality to your creation.
Embroidered Eyes and Mouth
One of the most important features of a frog hat are its cute little eyes. To create the eyes, you can embroider them using black yarn or thread. Start by making two small French knots for the pupils and then stitch a larger rounded shape around them for the iris. Additionally, you can use a contrasting color to create a smiling mouth across the frog’s face. This will bring your hat to life and make it even more adorable.
Crocheted Flower Accent
To add a touch of whimsy to your frog hat, you can create a crocheted flower accent. Choose a bright color that complements the yarn you used for the hat. Simply crochet a small flower using a simple pattern, and then sew it onto the side or top of the hat. This will give your hat a playful and feminine touch, perfect for anyone who loves the combination of cute and fashionable.
Pom-Pom Ears
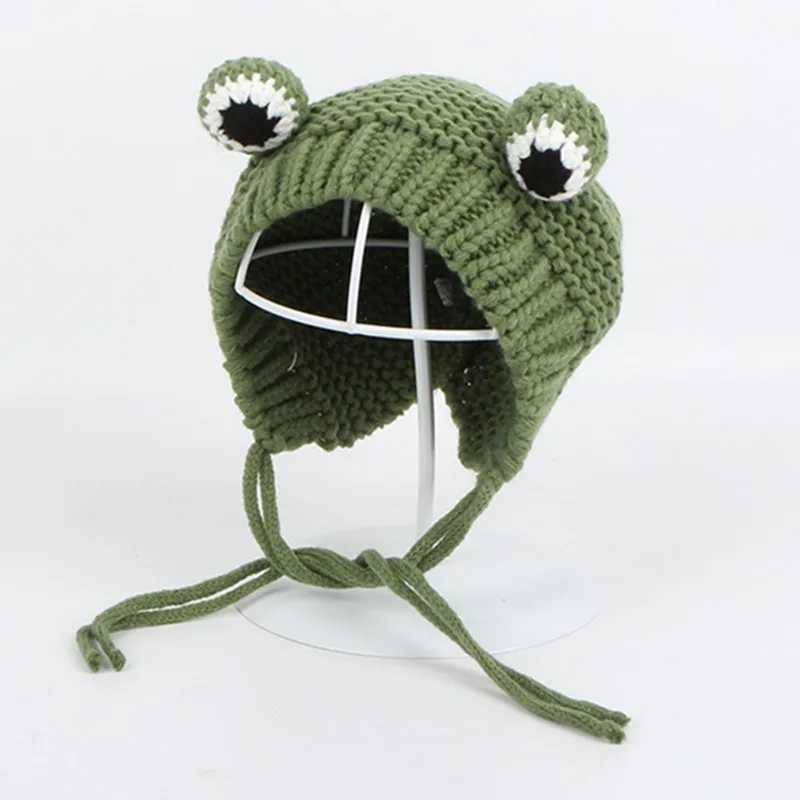
For an extra fun element, consider adding pom-pom ears to your frog hat. Using a contrasting yarn color, create two small pom-poms using a pom-pom maker or your fingers. Attach them to the sides of the hat, just above the eyes, using a yarn needle and some thread. These pom-poms will give your hat a playful and quirky look, and they’re sure to make people smile when they see you wearing it.
Button Closure
To ensure a snug and comfortable fit, consider adding a button closure to the chin strap of your frog hat. This will allow you to adjust the hat to fit your head size or the head size of the person you’re making it for. Simply sew a button onto one end of the chin strap and create a small loop on the opposite end to fasten it securely in place. This will add functionality to your hat and make it easier to wear.
Once you have added these finishing touches, your frog hat will be complete and ready to wear. Whether you’re wearing it for a costume party, a winter’s walk, or simply to add some fun to your day-to-day look, your frog hat will bring a smile to everyone who sees it.
Tips and Tricks for a Perfect Finish
When knitting a frog knit hat, achieving a perfect finish is important to ensure a polished and professional look. Here are some tips and tricks to help you achieve just that:
1. Use the right yarn:
Choosing the right yarn for your frog knit hat is crucial for a perfect finish. Opt for a yarn that is soft, durable, and has good stitch definition. This will not only make it easier to knit, but also result in a more polished and professional look.
2. Check your gauge:
Before starting the pattern, make sure to check your gauge using the recommended needle size. This will ensure that your hat turns out the right size and fits properly. Adjust your needle size if needed to achieve the correct gauge.
3. Pay attention to tension:
Consistent tension is key to achieving a neat and even finish. Make sure to maintain the same tension throughout your knitting, especially when switching between different stitch patterns. This will prevent any unevenness or puckering in your finished hat.
4. Blocking:
Blocking your finished hat can help in giving it a more polished look. Follow the instructions provided in the pattern for blocking the hat. This process will help to even out the stitches, open up the lace sections, and give the hat its final shape.
5. Finishing touches:
Take the time to properly weave in ends and sew up any seams. This will give your hat a professional and seamless finish. Use a yarn needle and carefully weave in the ends, making sure they are secure and not visible on the right side of the hat.
By following these tips and tricks, you can ensure that your frog knit hat has a perfect finish and looks like it was made by a pro. Happy knitting!
Final Thoughts and Other Frog-Inspired Knitting Projects
Knitting a frog-themed knit hat can be a fun and creative project for both beginners and experienced knitters. Whether you are making it for yourself or as a gift for someone else, the frog hat pattern offers a unique and whimsical design.
The pattern provided in this article is just one of many possibilities for frog-inspired knitting projects. There are many other patterns available online that feature frogs, whether as the main design element or as a small accent. Knitting a frog-themed plush toy, scarf, or even a pair of mittens are just a few examples of other frog-themed projects you can try.
When choosing a pattern, consider your skill level and the amount of time you want to dedicate to the project. Some frog patterns may require more advanced knitting techniques, such as colorwork or cable knitting, while others may be suitable for beginners.
Remember to have fun and experiment with different colors and yarns to make your frog-inspired knitting projects uniquely yours. Whether you prefer a realistic-looking frog or a more whimsical interpretation, there are endless possibilities to explore.
So, grab your knitting needles and unleash your creativity with frog-inspired knitting projects. Hop to it and start knitting today!