
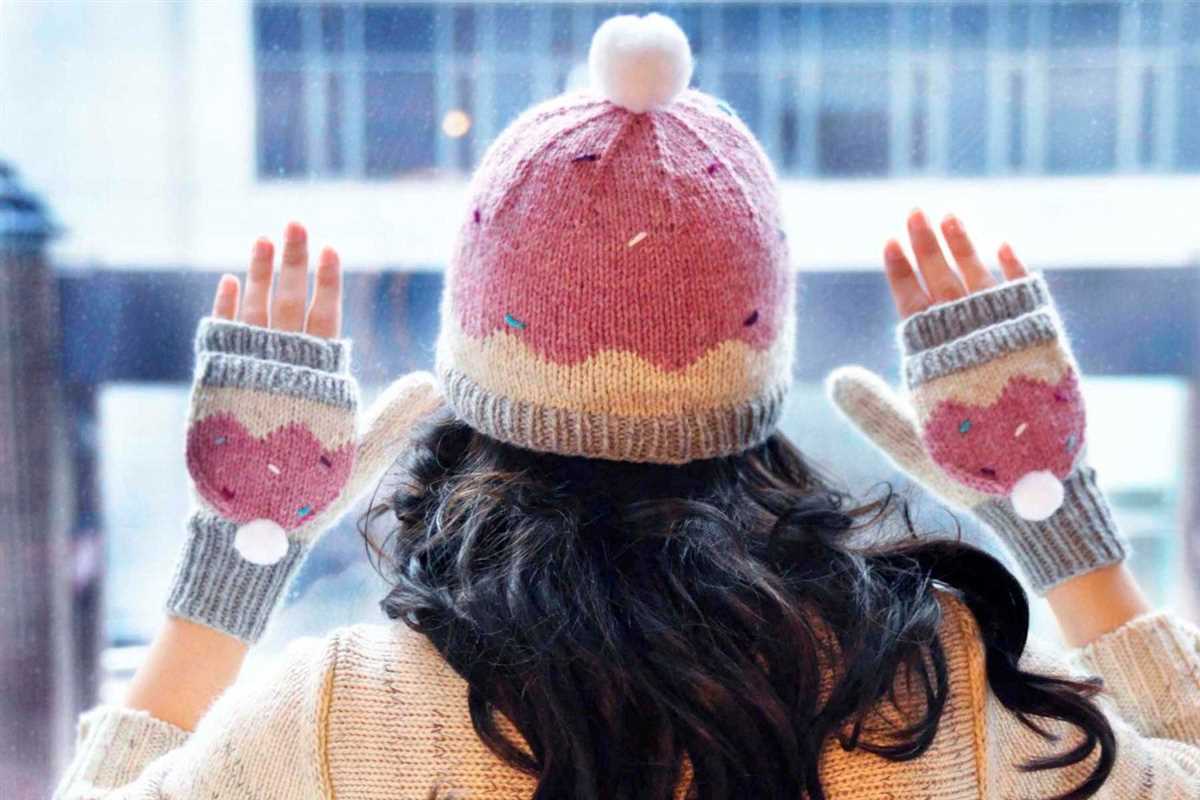
Winter is just around the corner, and that means it’s time to bundle up in warm and cozy accessories. Knitting your own hat, scarf, and gloves not only allows you to customize them to your personal style, but it also gives you the opportunity to create something truly unique. Plus, knitting is a relaxing and satisfying hobby that can be enjoyed by all skill levels.
If you’re looking for a free knitting pattern to get started on your winter accessories, look no further. We have a fantastic hat, scarf, and gloves pattern that is perfect for beginners and experienced knitters alike. With its simple yet stylish design, this pattern can be easily adapted to match any outfit or color scheme.
Knitting your own hat, scarf, and gloves allows you to choose the perfect yarn for the project. Whether you prefer a soft and cozy merino wool or an acrylic blend for easy care, the choice is yours. You can even experiment with different textured stitches or add embellishments such as pom-poms or buttons to make your accessories truly one-of-a-kind.
Overview
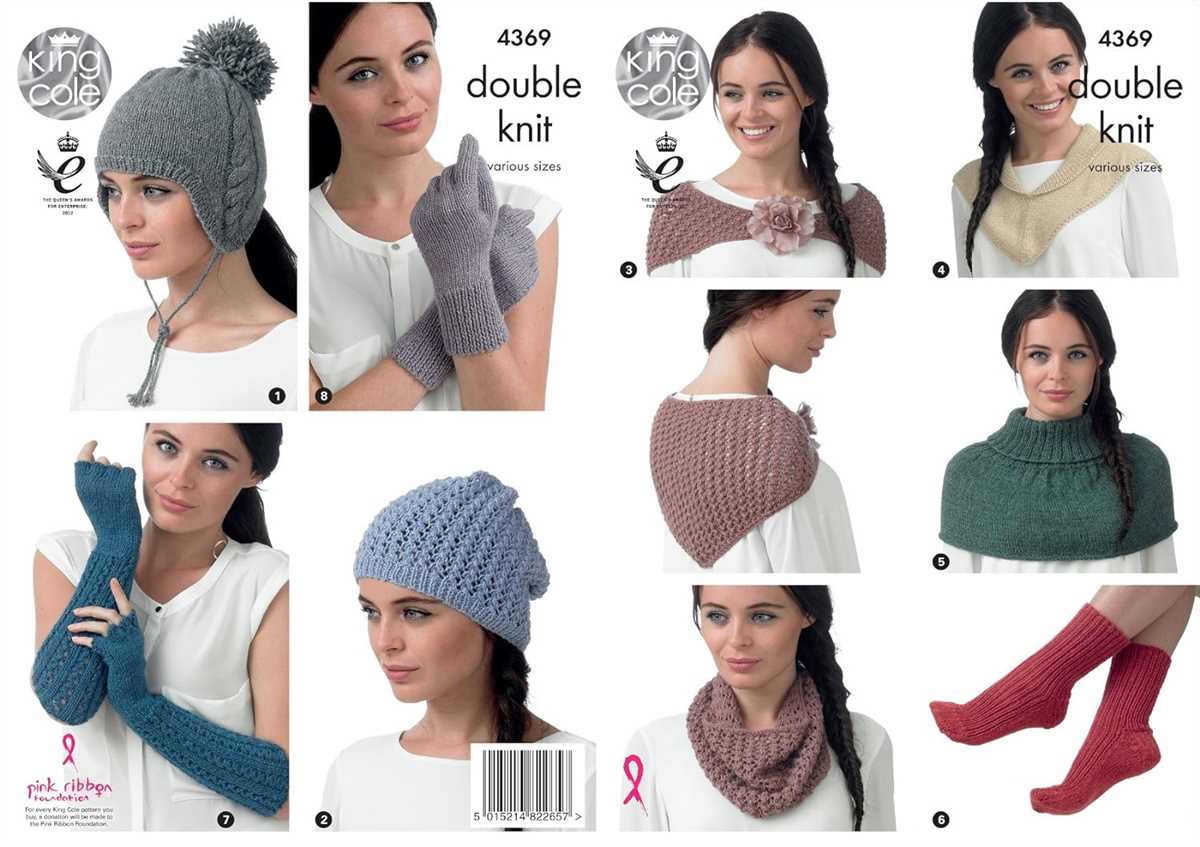
If you’re looking for a free hat, scarf, and gloves knitting pattern, you’ve come to the right place. Knitting your own winter accessories is not only a great way to stay warm, but also a fun and creative project. With a wide range of patterns available, you can find one that suits your style and skill level.
When choosing a knitting pattern, consider the materials you have on hand or the type of yarn you prefer to work with. Some patterns may require specific types of yarn or needle sizes, so it’s important to read through the instructions carefully before getting started. Whether you’re a beginner or an experienced knitter, there’s a pattern out there for you.
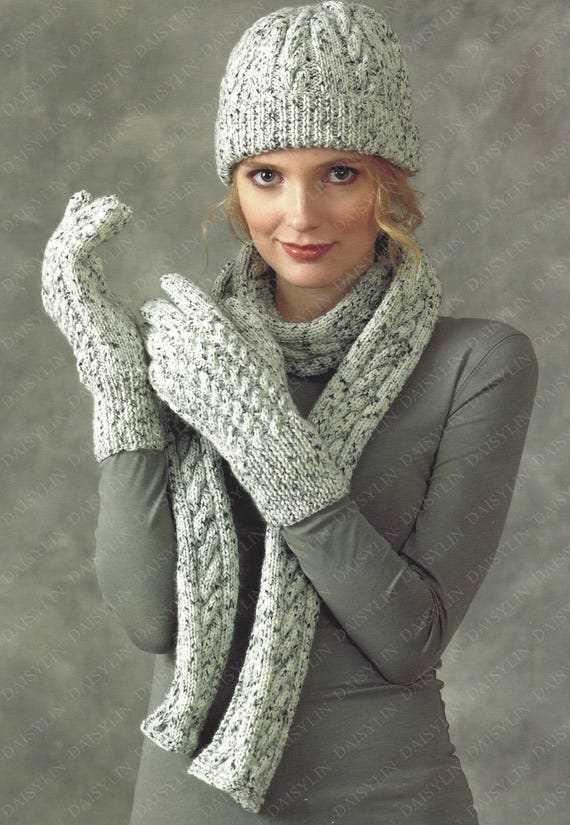
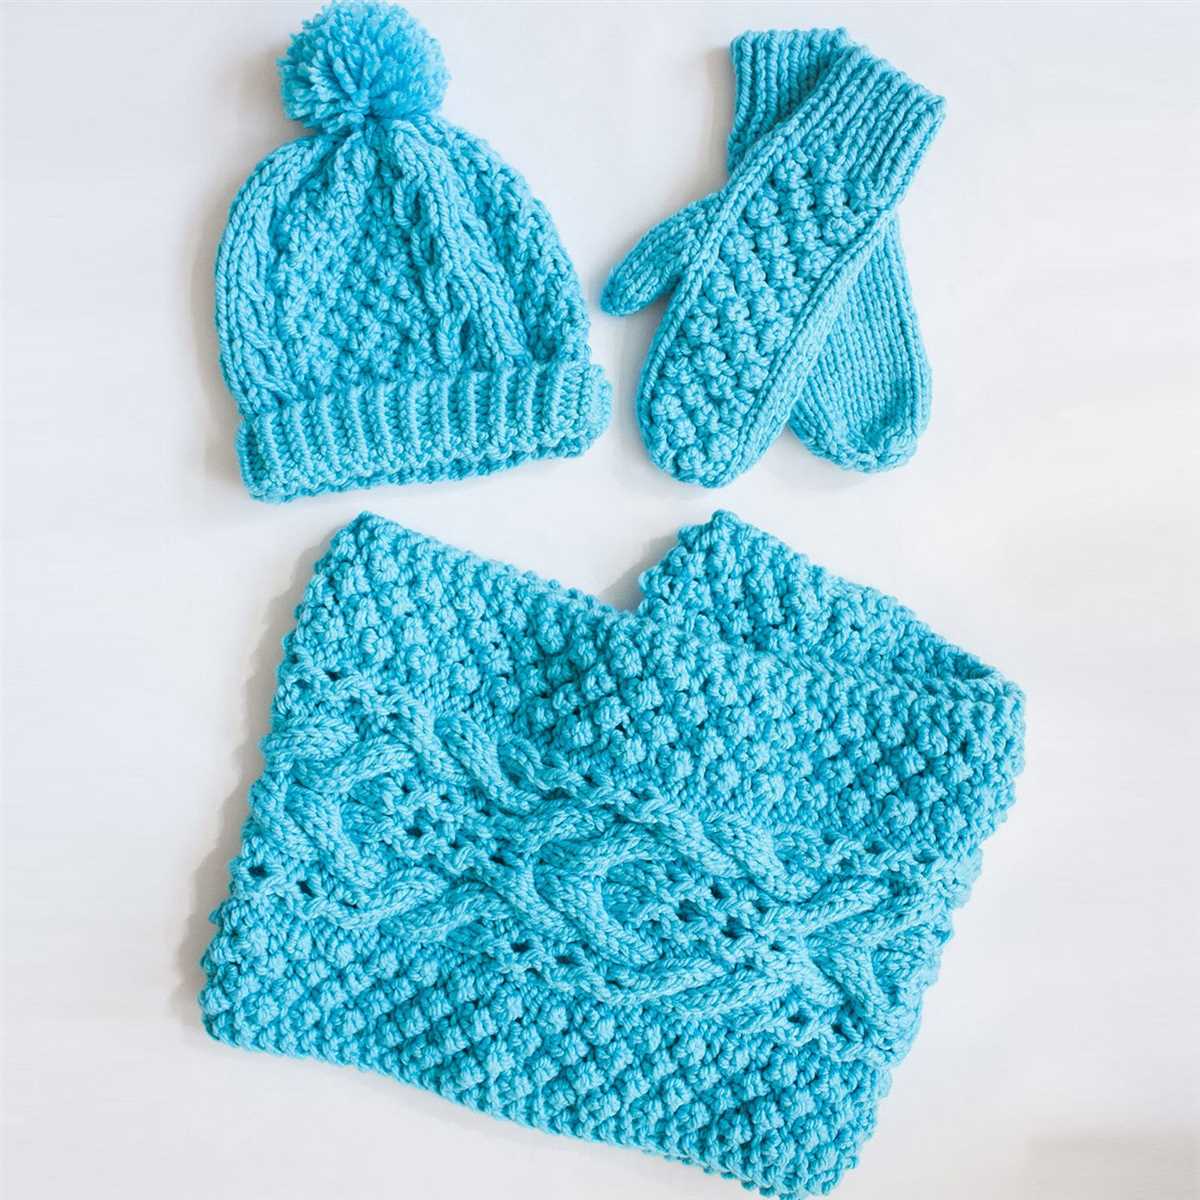
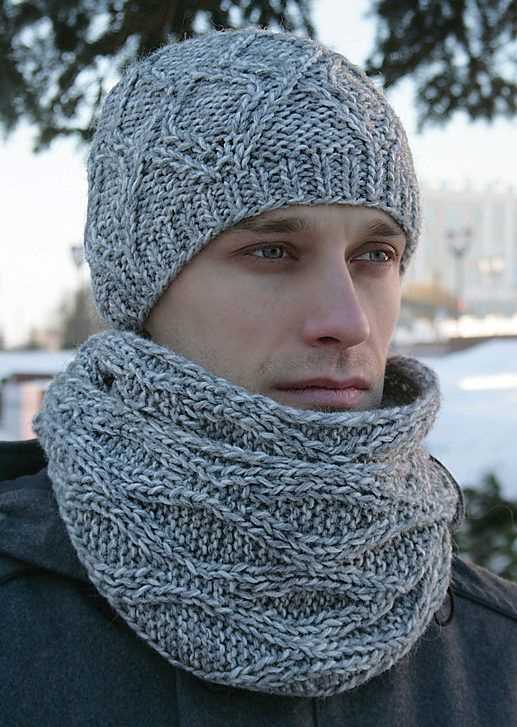
Pattern 1: Chunky Cable Hat, Scarf, and Gloves Set
- This pattern features a chunky cable design that adds texture and warmth to your winter accessories.
- The hat pattern includes instructions for different sizes, so you can knit one for yourself or for a loved one.
- The scarf pattern is long enough to wrap around your neck for added coziness.
- The gloves pattern includes instructions for different sizes and includes a thumbhole for added functionality.
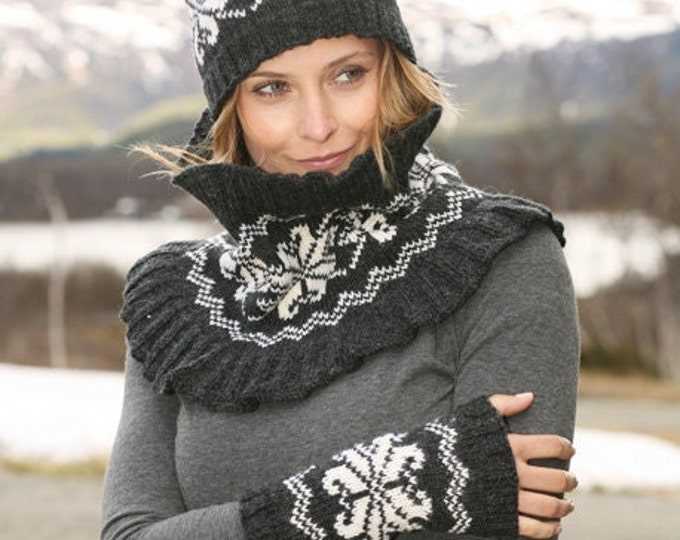
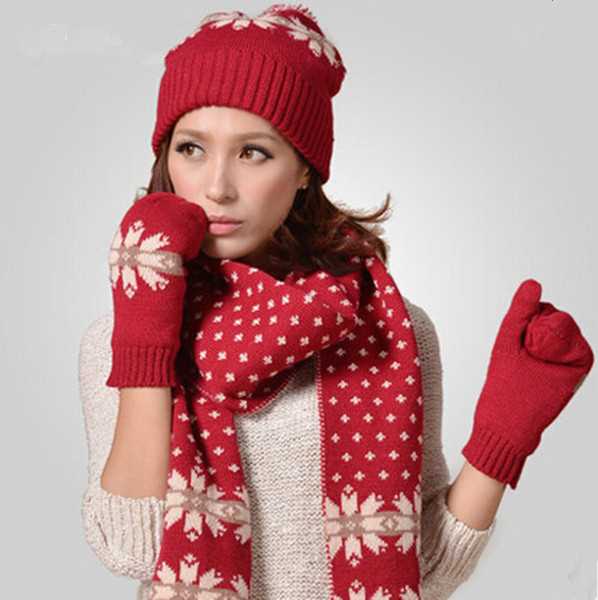
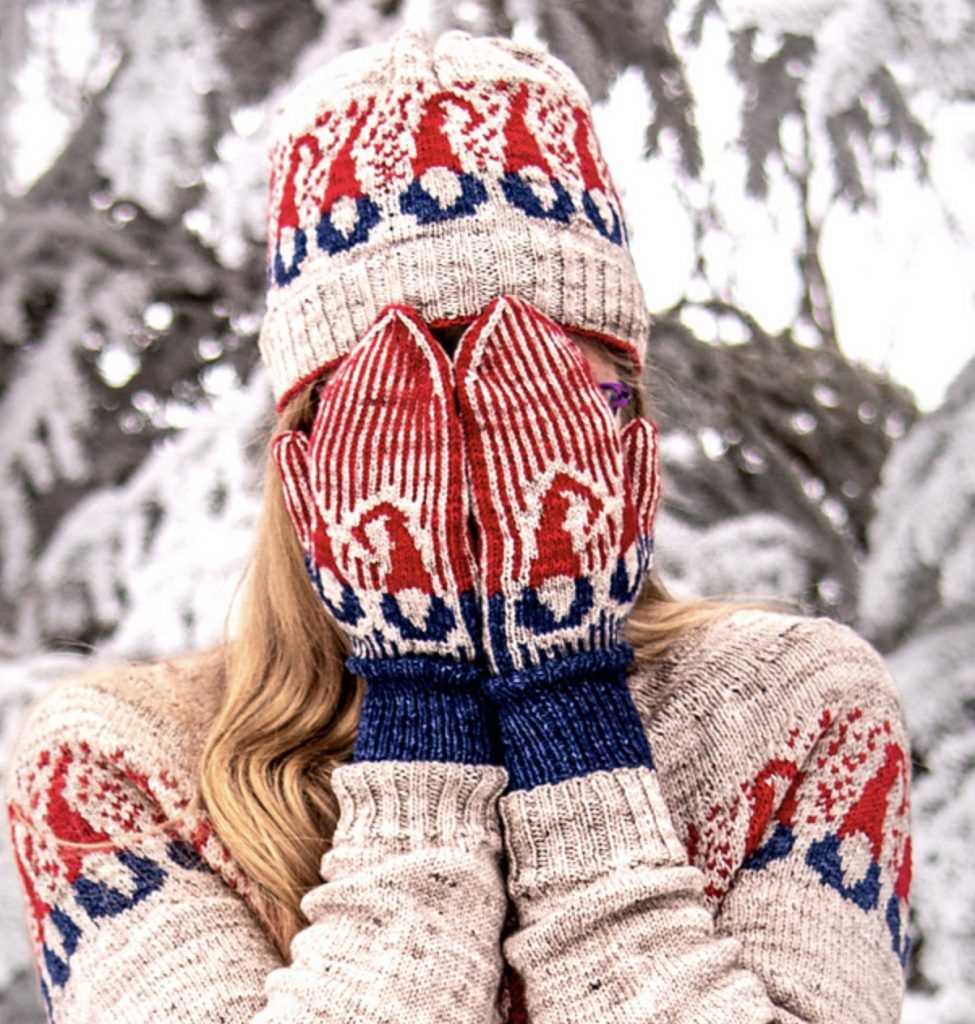
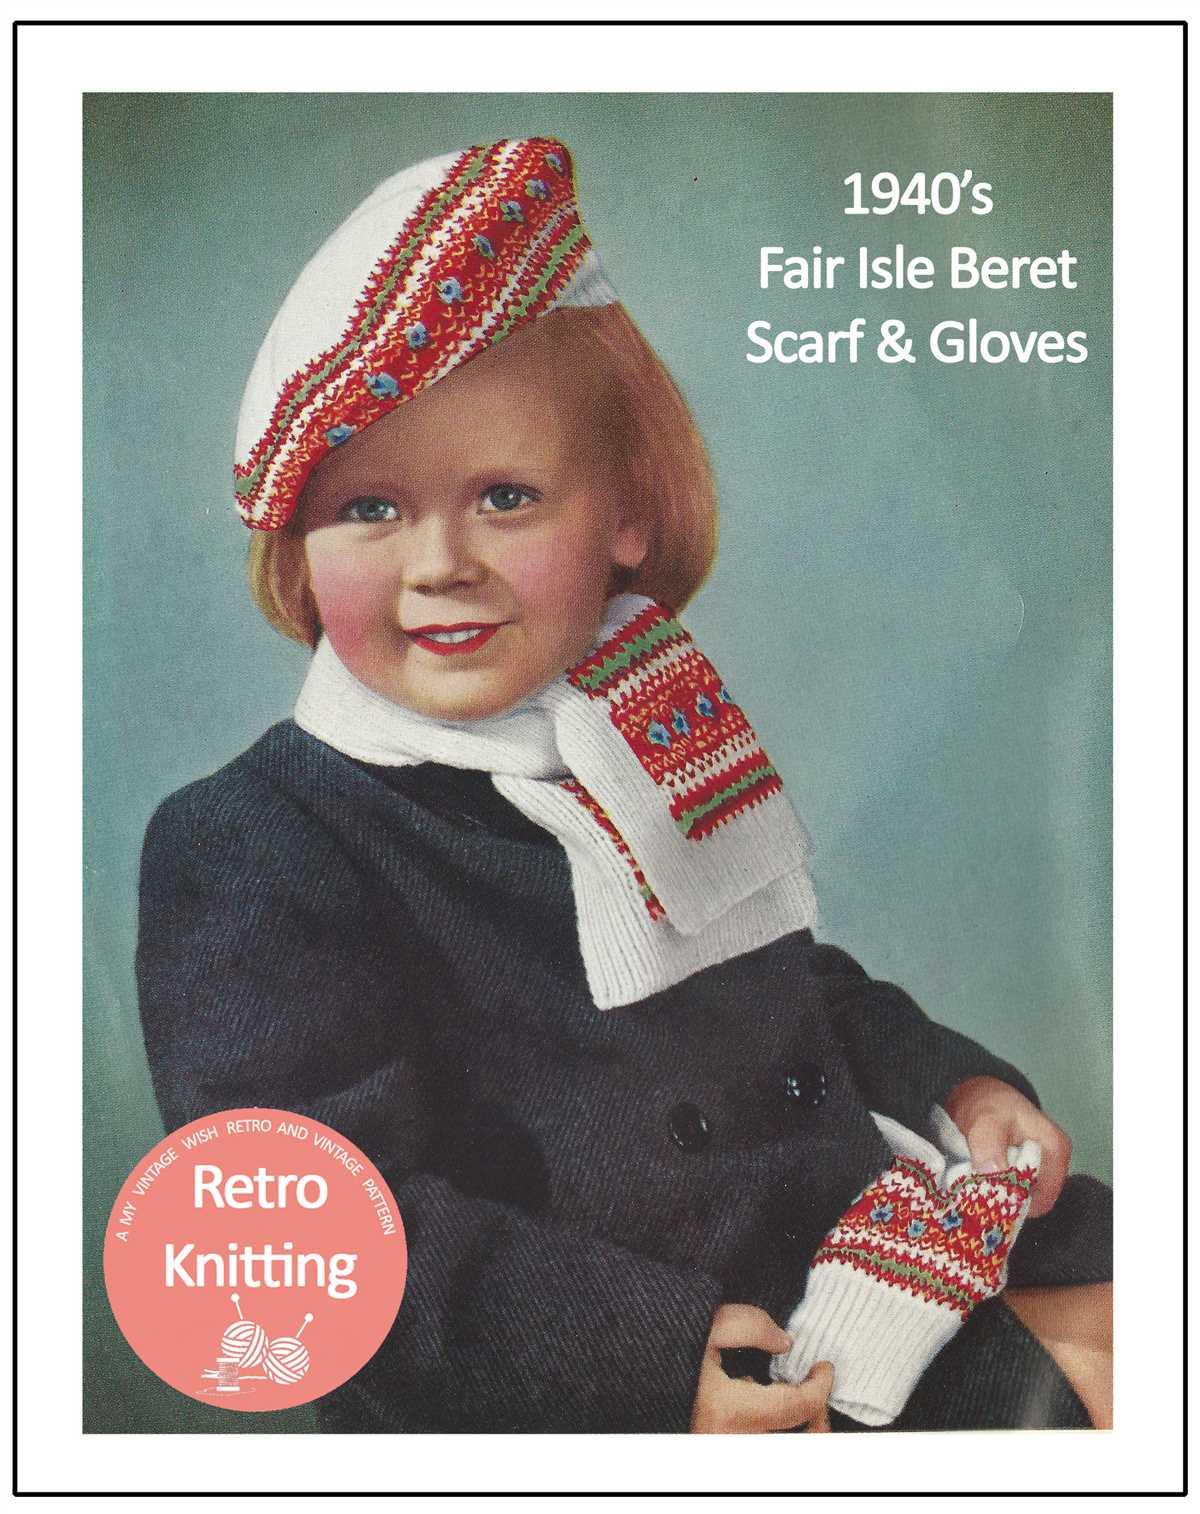
Pattern 2: Fair Isle Hat, Scarf, and Gloves Set
- This pattern features a classic Fair Isle design, with colorful motifs that create a beautiful and stylish look.
- The hat pattern includes instructions for different sizes and includes a ribbed brim for a snug fit.
- The scarf pattern allows you to practice your Fair Isle knitting skills and can be customized with your favorite colors.
- The gloves pattern includes instructions for different sizes and features a ribbed cuff for added warmth.
These are just two examples of the many free hat, scarf, and gloves knitting patterns available. Whether you prefer a simple and classic design or something more intricate and eye-catching, there’s a pattern out there that will suit your preferences. So grab your knitting needles and get ready to create cozy and stylish winter accessories.
Materials needed
In order to complete the free hat, scarf, and gloves knitting pattern, you will need the following materials:
- Yarn: Choose a yarn that is suitable for knitting accessories, such as a chunky or bulky weight yarn. The amount of yarn needed will depend on the size of the items you are knitting and the stitch pattern you choose.
- Knitting Needles: Select knitting needles that are appropriate for the yarn you have chosen. For a chunky or bulky weight yarn, you will likely need larger needles, such as size 10 or higher.
- Stitch Markers: These small, removable markers will help you keep track of your stitches, especially when working in the round.
- Tapestry Needle: This needle is used for weaving in ends and sewing up any seams.
- Scissors: A pair of sharp scissors will be needed to cut the yarn.
- Measuring Tape: Use a measuring tape to check your gauge and to measure the finished size of your items.
Make sure to gather all of these materials before you begin the project. Having everything on hand will make the knitting process much smoother and more enjoyable.
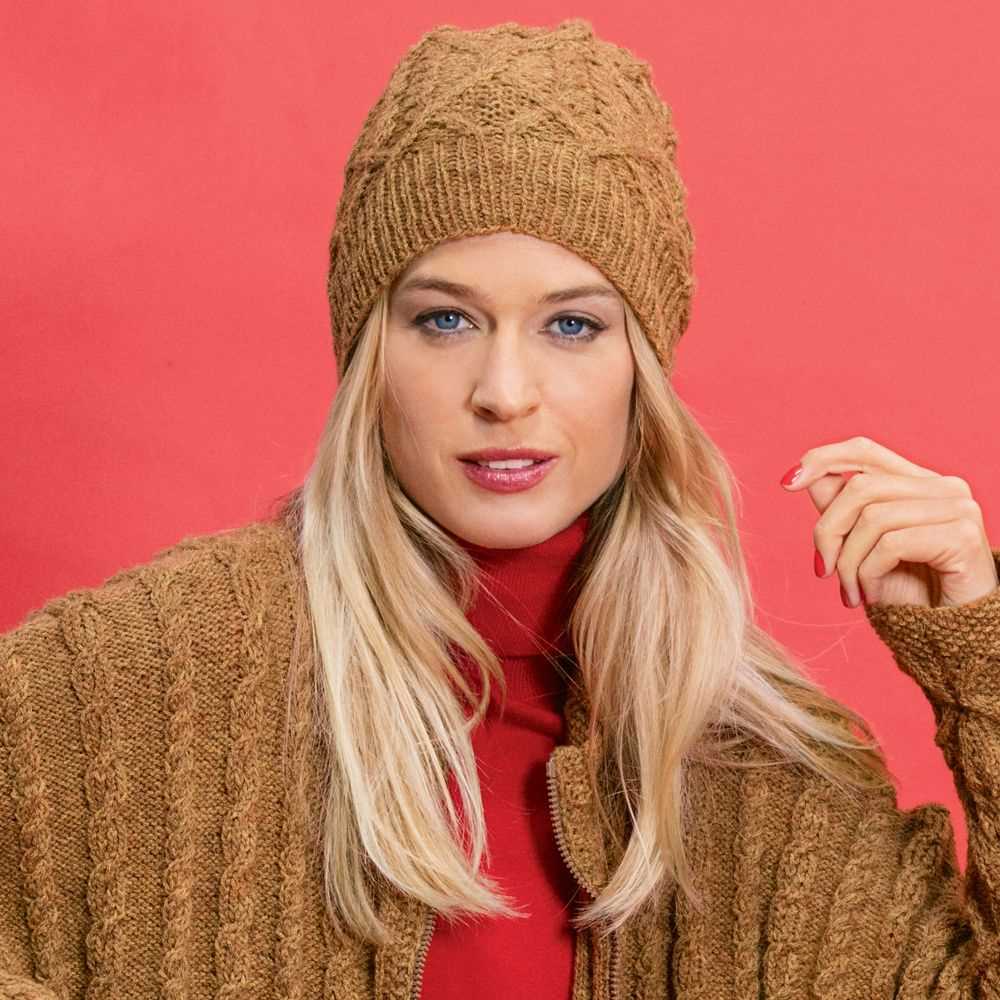
Free Hat Pattern
If you’re looking for a cozy and stylish hat pattern to knit, you’ve come to the right place! Our free hat pattern is perfect for keeping warm during the colder months, and it’s also a great project for beginner knitters.
Materials:
- Yarn – choose a soft and warm yarn in your favorite color
- Knitting needles – size 8 or as recommended for your yarn
- Tapestry needle – for weaving in ends
- Stitch markers – optional, but useful for keeping track of your stitches
Instructions:
- Cast on 80 stitches.
- Knit in a rib stitch pattern (knit 2, purl 2) for the first 2 inches.
- Switch to stockinette stitch (knit one row, purl one row) and continue until the hat measures 7 inches from the cast-on edge.
- Start decreasing: knit 6 stitches, knit 2 together, repeat across the row.
- Next row: purl all stitches.
- Continue decreasing in this way (knit 5, knit 2 together; purl all stitches) until you have 10 stitches left on your needle.
- Break yarn, leaving a long tail. Thread the tail through the tapestry needle, slide the needle through the remaining stitches, and pull tight to close the top of the hat.
- Weave in all ends and block the hat to shape.
That’s it! Your hat is now ready to keep you warm and stylish all winter long. Feel free to customize your hat with pom-poms, buttons, or any other embellishments you like. Happy knitting!
Scarf Pattern
Are you ready to get cozy this winter? Knitting your own scarf is a great way to stay warm and stylish. With our free knitting pattern, you can create a beautiful scarf that will keep you comfortable and fashionable all season long.
To get started, gather your materials. You will need a set of knitting needles, yarn in your desired color, and a pair of scissors. Once you have everything you need, it’s time to cast on. Simply make a slipknot and slide it onto one of your knitting needles. Now you’re ready to begin.
Step 1: Start by knitting the first row. Insert your right-hand needle into the first stitch on your left-hand needle, from left to right. Wrap the yarn around the right-hand needle counterclockwise, and pull it through the stitch. Slip the old stitch off the left-hand needle, and you have completed your first knit stitch.
Step 2: Continue knitting each row in the same manner until you have reached your desired length for the scarf. To create a long and cozy scarf, you may want to knit at least 60 rows. Remember to keep an even tension and avoid making your stitches too tight or too loose.
- Tip: If you want to add a bit of flair to your scarf, you can experiment with different stitch patterns. Consider trying a rib stitch, garter stitch, or seed stitch for added texture.
- Tip: Don’t forget to weave in your loose ends once you have finished knitting your scarf. This will give your project a polished look and prevent any unraveling.
Once you have completed your scarf, you can wrap it around your neck and enjoy the warmth and comfort it provides. Whether you’re heading out for a winter walk or snuggling up by the fire, your handmade scarf will be a cozy companion throughout the season.
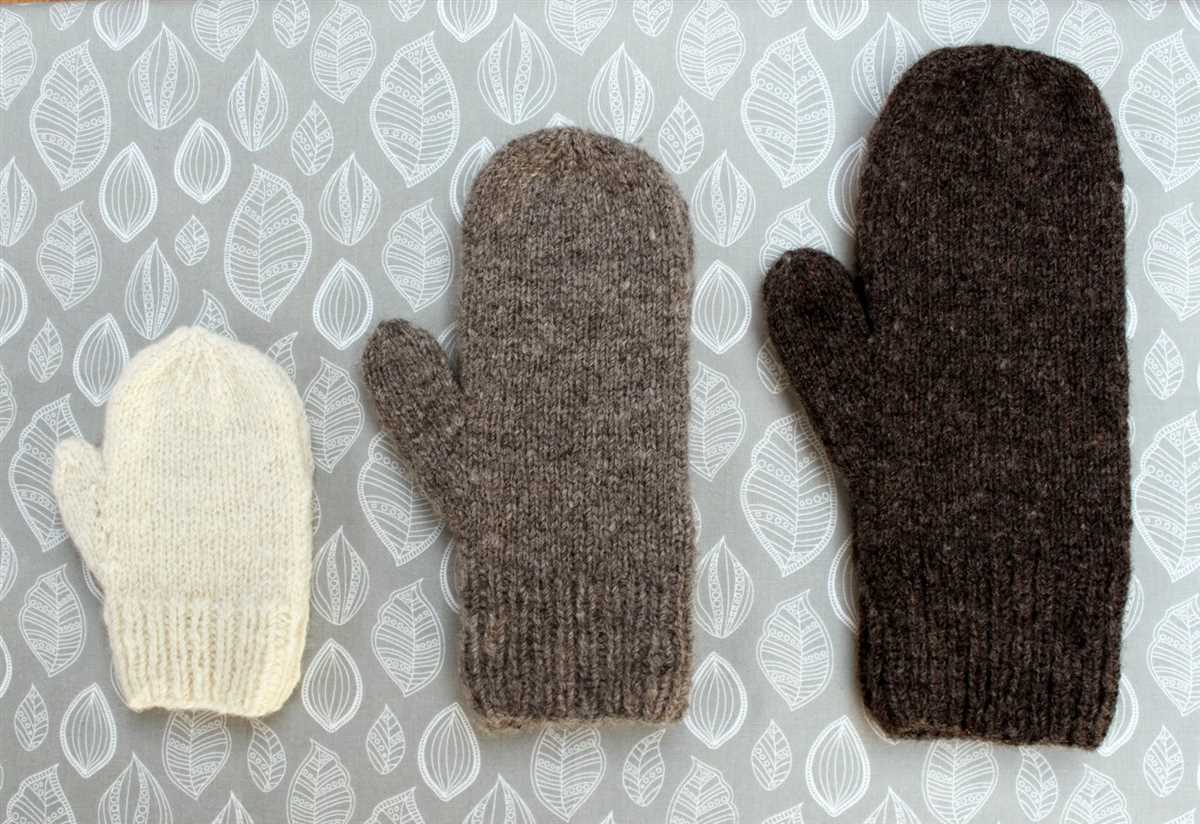
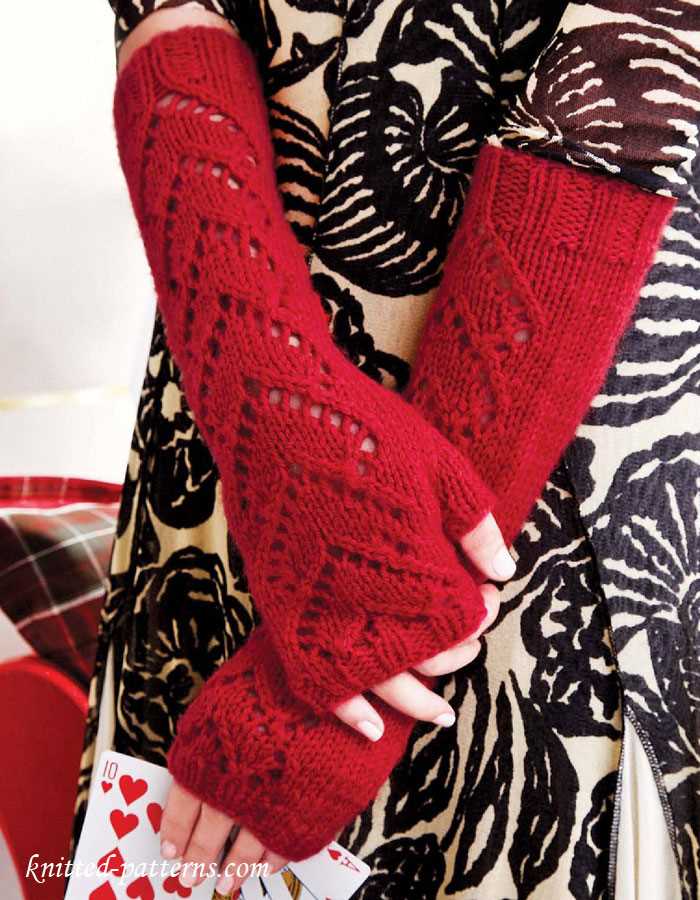
Gloves Pattern
Knitting gloves can be a fun and rewarding project. Whether you’re a beginner looking for a simple pattern or an experienced knitter wanting to try something new, there are plenty of glove patterns to choose from. With the right pattern and materials, you can create a cozy pair of gloves to keep your hands warm during the colder months.
When choosing a gloves pattern, it’s important to consider the skill level required. Some patterns are designed specifically for beginners, while others may require more advanced techniques. Make sure to read through the pattern carefully before starting to ensure you understand the instructions and have the necessary skills.
Materials Needed
- Knitting needles (size will depend on the pattern)
- Yarn (the pattern will specify the type and amount needed)
- Tapestry needle
- Stitch markers
- Scissors
Choosing Yarn
The type of yarn you choose can greatly impact the final result of your gloves. Consider the warmth, texture, and durability of the yarn. Some patterns may suggest specific yarn types, while others may give you more flexibility. It’s also important to check the gauge of the pattern to ensure your yarn choice will result in the correct fit.
Following the Pattern
Once you have chosen your pattern and gathered your materials, it’s time to start knitting. Follow the instructions in the pattern carefully, paying attention to any abbreviations or special stitches. It’s a good idea to keep track of your progress using stitch markers or a row counter so you don’t lose your place.
As you work through the pattern, you will gradually shape the gloves by increasing and decreasing stitches. This will create the thumb and finger areas. Take your time and be patient, as gloves can be more intricate than other knitting projects. With practice and perseverance, you’ll be able to complete a beautiful pair of gloves that you can proudly wear or give as a gift.
Choosing the right yarn
When it comes to knitting a hat, scarf, and gloves, choosing the right yarn is crucial. The yarn you select will determine the overall look, feel, and functionality of your finished project. There are several factors to consider when choosing yarn for your knitting project.
Fiber: One of the first decisions to make is what type of fiber you want to use. Wool is a popular choice for winter accessories as it is warm and insulating. Acrylic yarn is a cost-effective option that is durable and easy to care for. For a luxurious feel, consider using alpaca or cashmere yarn. Ultimately, the fiber you choose will depend on your personal preferences and the desired qualities of the finished items.
Weight: The weight of the yarn refers to its thickness. This will affect both the appearance and warmth of your project. Bulky or chunky yarns are great for creating cozy winter accessories with a lot of texture. For a lighter and more delicate look, consider using a fingering or lace weight yarn. It’s important to choose a yarn weight that is suitable for the pattern you’re using and the desired outcome.
Color: The color of the yarn can greatly impact the overall look of your hat, scarf, and gloves. Bold, vibrant colors can make a statement and add a pop of color to your winter wardrobe. Neutral tones, such as black, gray, or cream, are timeless and versatile. Consider the colors that you enjoy wearing and think about how they will complement your existing wardrobe.
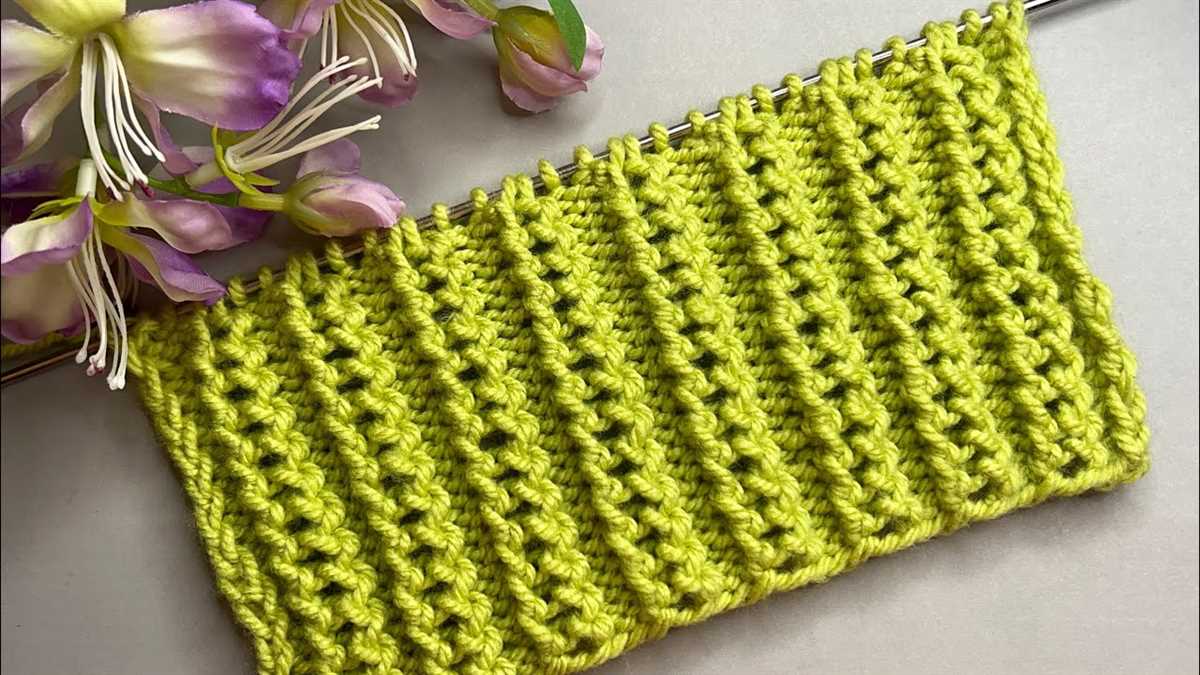
Texture: The texture of the yarn can add interest and dimension to your knitted items. Smooth, even yarns will create a clean and polished look, while yarns with texture, such as boucle or tweed, can add a cozy and rustic feel. Consider the overall style you want to achieve and choose a yarn that will help you achieve that aesthetic.
By considering these factors and selecting the right yarn for your project, you can ensure that your knitted hat, scarf, and gloves will not only be warm and functional but also stylish and unique.
Selecting the Appropriate Needle Size
When it comes to knitting projects, selecting the appropriate needle size is crucial for achieving the desired outcome. The needle size will impact the final size and drape of the finished garment, as well as the overall knitting experience.
Consider the yarn weight: One of the key factors in determining the needle size is the weight of the yarn being used. Yarns are typically categorized into different weights, such as lace, fingering, sport, worsted, or bulky. Each weight requires a specific needle size to ensure that the stitches are neither too tight nor too loose. Generally, lighter weight yarns require smaller needles, while heavier weight yarns require larger needles.
Check the pattern instructions: When working from a knitting pattern, it is important to follow the recommended needle size provided by the pattern designer. These instructions are usually based on the desired gauge of the project, which is the number of stitches and rows per inch. Using the correct needle size will help you achieve the same gauge as the pattern, resulting in a garment that fits as intended.
Experiment and swatch: If you’re not working from a specific pattern or if you want to adjust the size or drape of your project, it can be helpful to experiment with different needle sizes. Knitting a swatch using different needle sizes will give you a sense of how the fabric changes and help you determine which needle size will achieve the desired effect. Take note of the stitch definition, drape, and overall look of the swatch with different needle sizes to guide your decision.
Consider your personal knitting style: Everyone has a unique knitting style, which can impact the gauge and drape of the fabric. Some knitters may naturally knit more tightly or loosely than others. If you know that you have a particular knitting style, you may need to adjust the needle size accordingly. Knitting a swatch and measuring the gauge can help you determine if you need to go up or down a needle size to achieve the desired outcome.
In conclusion, selecting the appropriate needle size is crucial in knitting projects to ensure the desired outcome. Factors such as yarn weight, pattern instructions, personal knitting style, and experimentation with swatches can help guide you in choosing the right needle size for your project.
Tips for beginners
Starting a new knitting project can be both exciting and overwhelming, especially if you are a beginner. Here are some useful tips to help get you started on your hat, scarf and gloves knitting journey.
1. Choose the right yarn and needles
Before you start knitting, it’s important to select the right yarn and needles for your project. For beginners, it’s recommended to choose a medium-weight yarn and a pair of straight needles in a size appropriate for your chosen yarn. This will make it easier for you to handle the yarn and create even stitches.
2. Start with simple patterns
As a beginner, it’s best to start with simple knitting patterns for your hat, scarf, and gloves. Look for patterns that involve basic stitches like knit and purl, and gradually progress to more complex patterns as you gain confidence and skills. It’s also a good idea to practice these basic stitches before starting your project to ensure you are comfortable with them.
3. Take your time and be patient
Knitting requires patience and practice. Don’t rush through the knitting process, as it can lead to mistakes and uneven stitches. Take your time to understand each step of the pattern and focus on creating neat and even stitches. If you make a mistake, don’t get discouraged – it’s part of the learning process. Instead, take a deep breath, unravel the stitches, and start again.
4. Use stitch markers
Stitch markers are small loops or clips that can be placed on the knitting needles to mark specific stitches or sections of your project. They are especially helpful when following intricate patterns or when working on projects with multiple sections, like gloves. Using stitch markers can help you keep track of your progress and prevent you from making mistakes.
5. Don’t be afraid to ask for help
If you’re struggling with a particular aspect of your knitting project or if you’re unsure about a certain technique, don’t hesitate to ask for help. Reach out to experienced knitters, join knitting groups or forums, or take knitting classes. Learning from others can provide valuable insights and help improve your skills.
Remember, knitting is a journey and it’s natural to make mistakes along the way. Stay patient, practice regularly, and soon you’ll be creating beautiful hats, scarves, and gloves to keep you warm during the colder months!
Knitting techniques explained
Knitting is a popular craft that involves creating fabric by interlocking loops of yarn with knitting needles. There are various techniques in knitting that are used to create different patterns and textures. Understanding these techniques is essential for any knitter, whether you are a beginner or experienced.
Casting on: Casting on is the first step in starting a knitting project. It involves creating the very first row of stitches on your needle. There are different methods of casting on, such as the long-tail cast on, the knit cast on, and the cable cast on. Each method has its own advantages and is used depending on the desired result.
Knitting stitches: Knitting stitches are the basic building blocks of any knitting project. The most common stitch is the knit stitch, which creates a smooth and even fabric. The purl stitch is another fundamental stitch that creates a bumpy texture when combined with the knit stitch. These two stitches can be combined in various ways to create beautiful patterns and textures.
Increasing and decreasing: Increasing and decreasing are techniques used to change the number of stitches in a row. Increasing involves adding new stitches to create a larger piece, while decreasing involves eliminating stitches to create shaping. There are different methods of increasing and decreasing, such as yarn over, make one, and knit two together.
- Yarn over: Yarn over is a technique used to create an eyelet or increase a stitch. It involves wrapping the yarn around the needle to create an extra loop.
- Make one: Make one is a technique used to increase a stitch. It involves picking up the strand of yarn between two stitches and knitting into it.
- Knit two together: Knit two together is a technique used to decrease a stitch. It involves knitting two stitches together as if they were one stitch.
Binding off: Binding off is the final step in knitting, where the stitches are secured and the fabric is finished. It involves passing one stitch over the other to create a neat edge. There are different methods of binding off, such as the traditional bind off, the stretchy bind off, and the picot bind off.
These knitting techniques are just a starting point, and there are many more advanced techniques to explore. With practice and patience, you can become proficient in these techniques and create beautiful knitted items.
Common mistakes to avoid
When knitting a hat, scarf, and gloves set, it is important to avoid common mistakes that can lead to an unsatisfactory finished product. Here are some key mistakes to be aware of and try to avoid:
1. Incorrect gauge
One of the most common mistakes in knitting is not achieving the correct gauge. This can result in the finished item being too small or too large. It is essential to check your gauge before starting the project and adjust your needle size if necessary. Use the suggested yarn and needle size in the pattern as a guide.
2. Lack of attention to pattern instructions
It is crucial to carefully read and follow the instructions provided in the knitting pattern. Skipping or misinterpreting a step can lead to mistakes and an incorrect finished product. Take the time to understand the pattern before starting and refer back to it as needed.
3. Incorrect stitch count
Maintaining the correct stitch count is essential for achieving the desired shape and size of the hat, scarf, and gloves. Count your stitches regularly to ensure you are on track with the pattern. Adding or skipping stitches can result in a distorted or ill-fitting finished product.
4. Inconsistent tension

Consistent tension is crucial for creating a visually appealing and well-fitted set of hat, scarf, and gloves. Uneven tension can cause the finished product to appear uneven and sloppy. Practice maintaining consistent tension and adjust your knitting style if necessary.
5. Not blocking the finished items
Blocking is the process of shaping and setting the knitted items to their intended size and shape. Many knitters skip this step, but it is essential for achieving a professional-looking finished product. Follow the blocking instructions provided in the pattern to ensure the hat, scarf, and gloves look their best.
Avoiding these common mistakes will help ensure that your knitted hat, scarf, and gloves set turns out beautifully. Paying attention to gauge, carefully following pattern instructions, maintaining the correct stitch count, consistent tension, and blocking will make a significant difference in the final result. Happy knitting!
Frequently Asked Questions
Here are some frequently asked questions about knitting patterns for hat, scarf, and gloves:
1. Can I sell the items I make from these patterns?
Answer: Yes, you are free to sell the items you make from these patterns. However, please note that the patterns themselves are protected by copyright and cannot be resold or distributed without permission.
2. Are these patterns suitable for beginners?
Answer: Yes, these patterns are designed for knitters of all skill levels, including beginners. They include detailed instructions and tips to help you successfully complete your project.
3. Do I need special yarn or needles for these patterns?
Answer: The patterns provide recommendations for yarn weight and needle size, but you can use any yarn and needles that achieve the specified gauge. Feel free to experiment and make the patterns your own!
4. Can I customize the patterns to fit my own measurements?
Answer: Absolutely! These patterns can be easily customized to fit your desired measurements. The instructions include guidance on how to adjust the size of the items to fit your needs.
5. Where can I find additional help or support?
Answer: If you need additional help or support while working on these patterns, you can join online knitting communities and forums where experienced knitters are often willing to offer assistance. You can also reach out to the pattern designer for specific questions or concerns.
Summary
In this article, we provided you with a collection of free knitting patterns for hats, scarves, and gloves. These patterns are suitable for knitters of all skill levels and can be customized to fit your desired measurements. You are free to sell the items you make from these patterns, but remember to respect the copyright of the patterns themselves. If you need extra help or support, online knitting communities and the pattern designer are great resources to turn to. Happy knitting!