
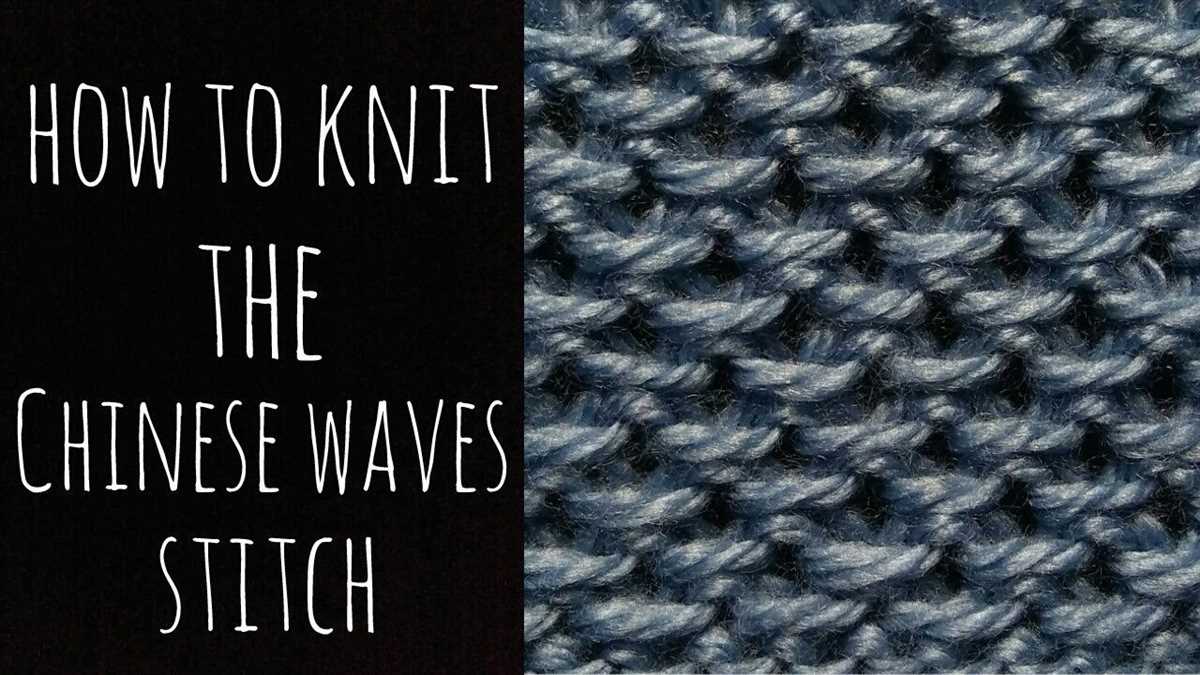
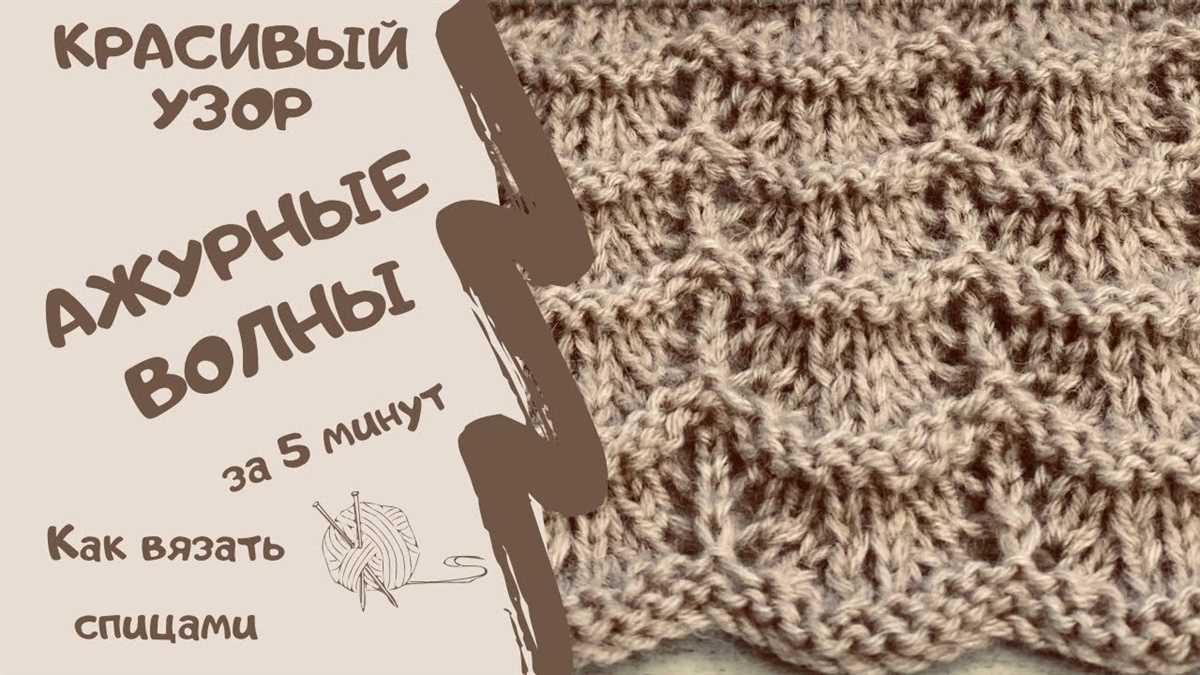
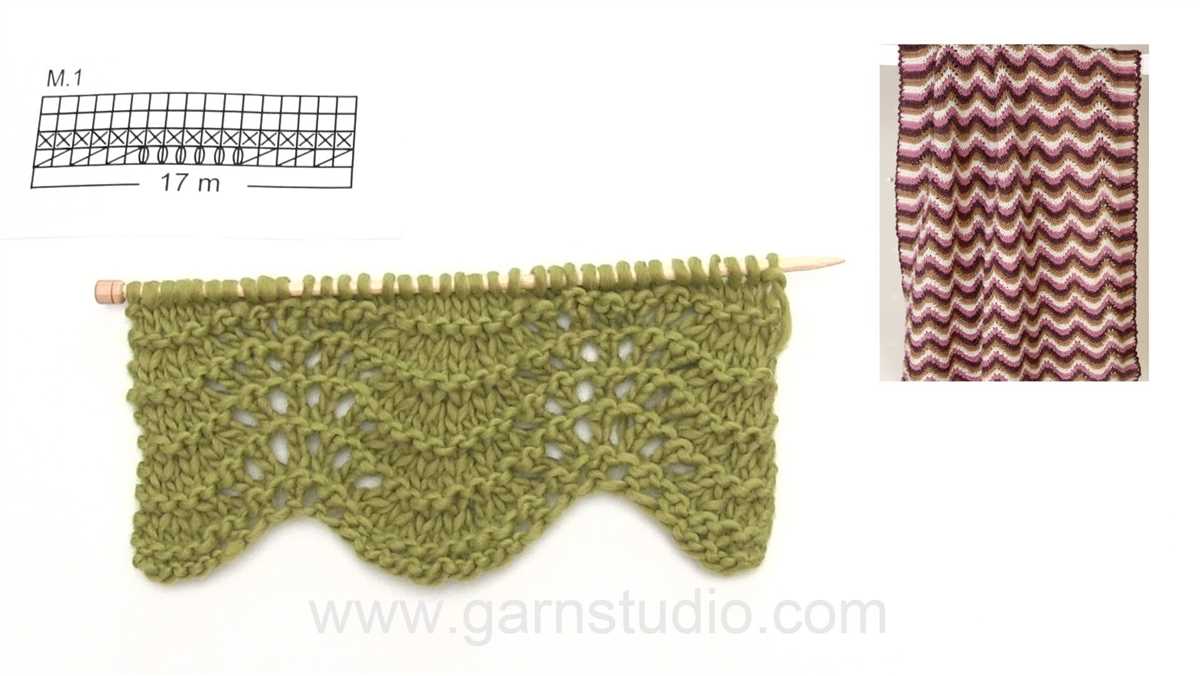
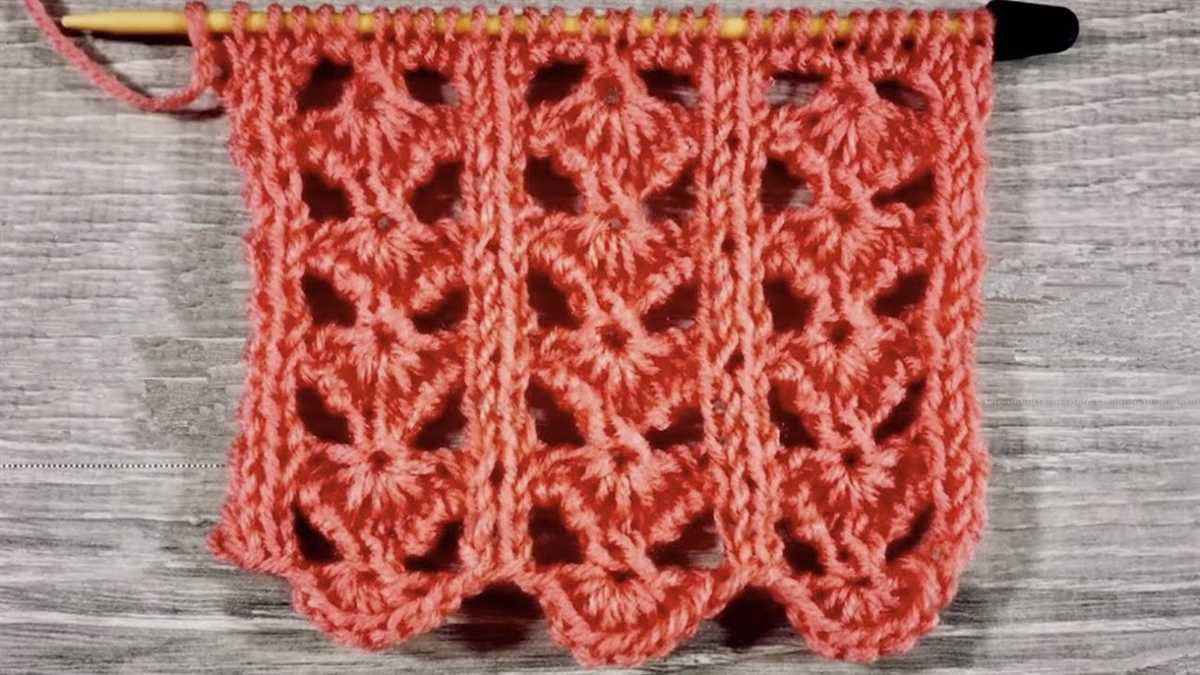
If you’re a knitting enthusiast looking to try out a new and mesmerizing pattern, then the wave pattern is perfect for you. The wave pattern is an intricate and eye-catching design that creates the illusion of gentle waves on your knitted fabric. It is a versatile pattern that can be used in a variety of projects, such as scarves, blankets, and even sweaters. With a little patience and practice, you can master the wave pattern and create stunning pieces that will impress everyone.
To knit the wave pattern, you will need some basic knitting skills and a few supplies. You will need a pair of knitting needles, yarn in your desired color, and a tapestry needle for weaving in the loose ends. It is recommended to choose a yarn with good stitch definition to make the waves stand out more. Additionally, using a light-colored yarn can enhance the wave effect. Once you have gathered all your supplies, you are ready to dive into the wave pattern.
The wave pattern consists of a repeating sequence of knit and purl stitches. It may look intimidating at first, but once you understand the pattern’s structure, it becomes easier to knit. The pattern typically starts with a series of knit stitches, followed by purl stitches, and then a combination of knit and purl stitches. This combination creates the wave effect. It’s important to pay attention to the pattern’s stitch count and repeat it consistently throughout your project to maintain the wave’s continuity.
How to Knit Wave Pattern
Knitting a wave pattern adds a unique and eye-catching texture to your projects. Whether you’re knitting a scarf, sweater, or blanket, incorporating a wave pattern can take your knitting to the next level. In this tutorial, we’ll guide you through the steps of knitting a simple wave pattern.
Gather your materials
Before you start knitting the wave pattern, make sure you have all the necessary materials. You will need yarn in your desired color, knitting needles in the appropriate size for your yarn, and a pair of scissors. It’s also helpful to have a tapestry needle for weaving in the ends.
Cast on and set up the pattern
To begin, cast on the desired number of stitches for your project. Make sure the number is divisible by the wave pattern repeat, which is typically 6 or 8 stitches. Once you have cast on, work a few rows in a basic knit stitch to create a foundation for the pattern.
Note: It’s helpful to use stitch markers at the beginning and end of each wave repeat to help you keep track of your stitches.
Begin the wave pattern
Once you’ve set up the pattern, it’s time to start knitting the wave design. The wave pattern consists of alternating knit and purl stitches to create the wave effect. For example, you might knit 2 stitches, then purl 4 stitches, and repeat this pattern until the end of the row.
Note: The exact pattern will depend on the number of stitches in your wave repeat and the desired look of your project.
Repeat the pattern
Continue knitting the wave pattern for the desired length of your project. Each row of the pattern will build on the previous row to create the wave effect. Make sure to follow the pattern carefully, paying attention to the placement of knit and purl stitches.
Finish the project
Once you’ve reached the desired length, it’s time to finish your project. Bind off your stitches and weave in any loose ends using a tapestry needle. Give your finished piece a gentle blocking to help the wave pattern stand out and shape the project.
Now that you know how to knit a wave pattern, you can experiment with different wave designs and incorporate them into your future knitting projects. Have fun exploring this versatile and visually appealing technique!
Getting Started
Before you can start knitting the wave pattern, you will need to gather all the necessary materials. Make sure you have the right type and amount of yarn, as well as the appropriate knitting needles. For the wave pattern, you might want to choose a yarn that has good stitch definition and shows off the pattern well, such as a smooth cotton or wool blend.
Once you have your materials ready, you will need to cast on the required number of stitches. The wave pattern usually works over a multiple of a specific number of stitches, so make sure to check the pattern instructions for the exact cast on number. It’s important to cast on loosely but evenly to ensure that your knitting has the right tension.
Next, you’ll need to familiarize yourself with the wave pattern stitch itself. The wave pattern typically consists of a repeating sequence of stitches that create the wave effect. The pattern may involve different types of stitches, such as knit, purl, and yarn overs. Take the time to read through the pattern instructions and understand how each stitch contributes to the overall design.
Before you start knitting the wave pattern, it’s a good idea to practice the pattern on a small swatch. This will help you get comfortable with the stitches and gauge your tension. It will also allow you to make any necessary adjustments before working on your actual project.
Once you feel confident with the pattern, you can begin knitting the wave pattern on your project. Remember to follow the pattern instructions carefully and keep track of your rows and stitch counts. Knitting the wave pattern can be enjoyable and rewarding, and with practice, you’ll be able to create beautiful wave designs in your knitting projects.
Choosing the Right Yarn and Needles
When it comes to knitting a wave pattern, choosing the right yarn and needles is essential to achieve the desired results. The type of yarn you select will greatly impact the texture, drape, and overall appearance of your finished project. Additionally, the size and material of your knitting needles will determine the tension and gauge of your work.
Yarn Choice: When selecting yarn for a wave pattern, it is important to consider the fiber content, thickness, and color. Cotton or acrylic yarns are ideal for creating soft and lightweight waves, while wool or alpaca yarns provide more warmth and texture. The thickness of the yarn will affect the size of your waves, with thinner yarns creating smaller, daintier waves and thicker yarns producing larger, more pronounced waves. Additionally, choosing yarns in complementary or contrasting colors can enhance the visual impact of your wave pattern.
Needle Selection: The size and material of your knitting needles will determine the tension and drape of your wave pattern. Smaller needles create tighter stitches and result in a denser and more structured fabric, while larger needles produce looser stitches and create a lighter and more fluid fabric. The material of the needles, such as metal, wood, or plastic, can also affect the overall feel and handle of your knitting. It is important to choose needles that are comfortable for you to work with and that suit the desired outcome of your project.
Overall, selecting the right yarn and needles for your wave pattern is crucial in achieving the desired texture, drape, and visual impact. Experimenting with different yarns and needle sizes can help you find the perfect combination to bring your wave pattern to life.
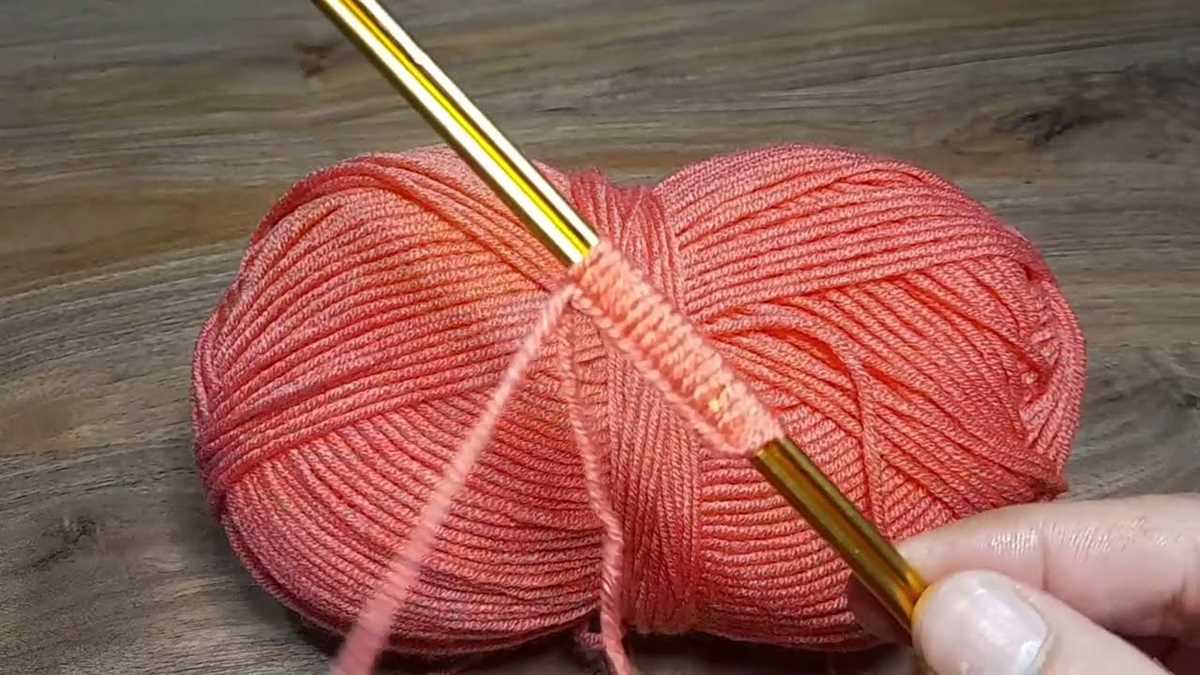
Casting On
Casting on is the first step in knitting a wave pattern. It creates the foundation row of stitches that you will work with. There are several different methods to cast on stitches, but for this particular pattern, we will be using the long-tail cast on method.
To start the long-tail cast on, you will need to estimate the amount of yarn you will need. Hold the end of the yarn tail in your right hand and the working yarn in your left hand. Make a slipknot by crossing the yarn tail over the working yarn and pulling the tail through the loop. Place the slipknot on the knitting needle and tighten the loop.
- Hold the knitting needle with the slipknot in your right hand, and the working yarn in your left hand.
- Use your thumb and index finger of your left hand to hold the yarn tail and the working yarn together.
- Bring the needle under the yarn tail, then up and over the tail, forming a loop on the needle.
Continue making loops in this way until you have cast on the desired number of stitches. Keep the loops loose, as you will need to work into them in the next row. Once you have cast on all the stitches, you can begin knitting the wave pattern as instructed in the pattern guide.
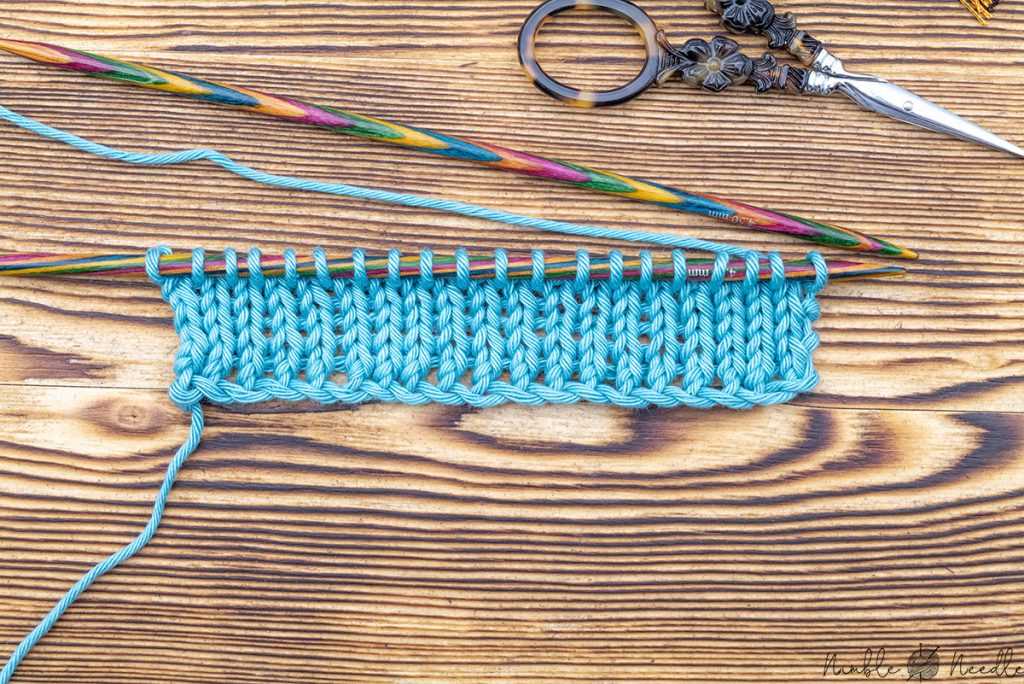
Knitting the First Row
Before you begin knitting the wave pattern, you need to create the foundation row. This row will set the stage for the alternating knit and purl stitches that will create the wave design.
To start, cast on the required number of stitches onto your knitting needle. Make sure to leave a long enough tail to weave in later. A suitable cast-on method for this pattern is the long-tail cast on.
Once you have cast on, you are ready to begin the first row of the wave pattern. The first row is worked entirely in knit stitches. Insert your right-hand needle into the first stitch on your left-hand needle from left to right. Bring the yarn over the right-hand needle, towards the back, making sure it goes under the needle.
Slide the right-hand needle down and out of the stitch, while simultaneously pulling the yarn through to create a new stitch on the right-hand needle. Repeat this process for each stitch on the left-hand needle until you have completed the entire row. Make sure to keep the tension even throughout.
The first row is crucial as it lays the foundation for the wave pattern. Ensuring that all the stitches are knitted correctly and with consistent tension will help create a clean and neat pattern. Take your time and pay attention to each stitch to achieve the desired look.
- Cast on the required number of stitches using the long-tail cast on method.
- Insert the right-hand needle into the first stitch from left to right and bring the yarn over the needle towards the back, under the needle.
- Slide the right-hand needle down and out of the stitch, pulling the yarn through to create a new stitch. Repeat for each stitch on the left-hand needle.
- Keep even tension throughout the row and take your time to ensure clean and neat stitches.
Creating the Wave Pattern
To create the wave pattern in your knitting project, you will need to follow a specific sequence of stitches. This pattern involves alternating between knit and purl stitches to create the wave-like effect. Let’s take a look at the steps involved in creating this pattern.
Step 1: Cast on
To begin, cast on the desired number of stitches onto your knitting needle. The number of stitches will depend on the width of your project and the desired size of the waves. Make sure to use a smooth, medium-weight yarn that is suitable for the needle size you are using.
Step 2: Set up the pattern
Once you have cast on, you will need to set up the pattern by knitting the first few rows in a specific sequence. For example, you can start with a few rows of garter stitch or ribbing to create a border for your wave pattern. This will help the waves stand out and give your project a neat finished look.
Step 3: Begin the wave pattern
After setting up the pattern, you can start creating the wave effect. To do this, you will alternate between knit and purl stitches in each row. For the first row, knit the first stitch, then purl the next stitch, and continue this pattern to the end of the row. When you reach the end of the row, turn your work and start the next row by purling the first stitch, then knitting the next stitch, and so on.
You will continue this pattern of alternating knit and purl stitches in each row until you have reached the desired length for your project. The number of rows you knit will depend on the height of the waves you want to create. Once you have finished knitting, you can bind off and weave in any loose ends to complete your wave pattern project.
Knitting the Second Row
Once you have completed the first row of your wave pattern, it’s time to move on to the second row. The second row involves a series of knit and purl stitches that will create the wave effect. Follow the instructions below to knit the second row of the wave pattern.
1. Start with a knit stitch:
Begin the second row by knitting the first stitch. Insert your right needle into the front loop of the first stitch on your left needle, bringing the yarn over the needle and through the stitch to create a new loop. Slide the original stitch off the left needle, and you have completed one knit stitch.
2. Purl the next stitch:
Next, you will purl the next stitch on the left needle. Insert your right needle into the front loop of the stitch from right to left, bringing the yarn over the needle and through the stitch to create a new loop. Slide the original stitch off the left needle, and you have completed one purl stitch.
3. Repeat the knit and purl stitches:

Continue knitting and purling stitches alternately across the row, following the pattern established in the first row. Each knit stitch will create a raised ridge, while each purl stitch will create a valley, forming the wavy design.
4. When you reach the end of the row, turn your work and begin the third row using the same sequence of knit and purl stitches as outlined above. Continue repeating these steps to create your wave pattern.
Continuing the Wave Pattern

To continue the wave pattern in your knitting, you will need to follow the established pattern and repeat the sequence of stitches. The wave pattern typically consists of a combination of knit and purl stitches, creating alternating rows of raised and flat sections.
Step 1: Begin by working the next row according to the established pattern. If the previous row ended with a knit stitch, start the next row with a purl stitch. If the previous row ended with a purl stitch, start the next row with a knit stitch.
Step 2: Continue working the pattern as established for the desired number of rows. Make sure to maintain the proper stitch sequence to keep the wave pattern consistent throughout your knitting.
Step 3: If you want to make the wave pattern more pronounced, you can increase or decrease stitches within the pattern. This can be done by adding or subtracting stitches in the flat sections or by working multiple stitches together in the raised sections.
Step 4: As you continue knitting the wave pattern, periodically check your work to ensure that the pattern is still being followed correctly. Mistakes can easily be made, especially when working with more complex wave patterns, so it’s important to catch any errors early on and correct them.
Step 5: Once you have completed the desired number of rows in the wave pattern, you can either continue knitting in the wave pattern or switch to a different stitch pattern. The choice is yours!
Increasing and Decreasing Stitches
In knitting, increasing and decreasing stitches are essential techniques that allow you to shape your knitted fabric. By adding or removing stitches, you can create curves, angles, and patterns in your knitting projects.
Increasing stitches: To increase stitches, you can use several methods, depending on the effect you want to achieve. One common method is the “knit front and back” (KFB) increase, where you knit into the front and back loop of the same stitch, creating two stitches out of one. Another method is the yarn over (YO) increase, where you simply wrap the yarn around the needle before knitting the next stitch. This creates an eyelet and adds a new stitch.
Decreasing stitches: Decreasing stitches is necessary when you want to narrow your knitting or create a specific shape. The most common decrease method is the knit two stitches together (K2tog), where you knit two stitches as one. Another popular method is the slip, slip, knit (SSK), where you slip two stitches individually knitwise, then insert the left needle into the front loops of the slipped stitches and knit them together. This creates a left-leaning decrease.
It’s important to follow knitting patterns and instructions to determine when and how many stitches to increase or decrease. These techniques require practice to master, but once you become comfortable with them, you can use them to create intricate designs and achieve the desired shape in your knitting projects.
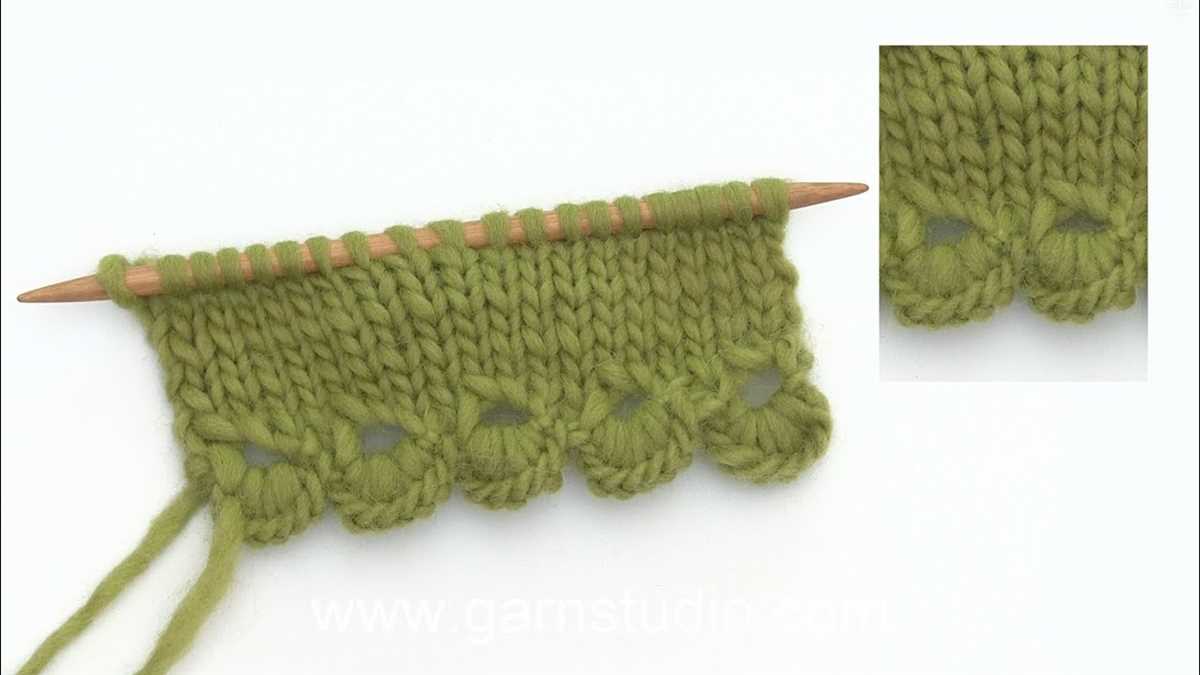
Binding Off
When you reach the end of your knitting project and it’s time to finish off, you’ll need to bind off your stitches. Binding off creates a neat and secure edge, preventing your knitting from unraveling.
To bind off, start by knitting the first two stitches as usual. Then, using your left-hand needle, insert it into the first stitch on your right-hand needle and lift it up and over the second stitch and off the needle. This will leave one stitch on your right-hand needle. Knit the next stitch on your left-hand needle, and repeat the process of lifting the stitch up and over the one just knitted.
Continue this process until you have only one stitch left on your right-hand needle. Cut your yarn, leaving a tail that is long enough to weave in later. Thread the tail through the last stitch and pull it tight. Your knitting is now bound off!
Binding off is an important step in completing your knitting project. It creates a finished edge that is secure and prevents your stitches from unraveling. Practice this technique to achieve a professional-looking finish to your knitting projects.
To add some extra flair to your bound off edge, you can try using a different bind off technique or using a contrasting color yarn. This can give your knitting a unique and personalized touch.
Once you have bound off your stitches, you can move on to any additional finishing steps for your project, such as weaving in ends or blocking.
Blocking Your Finished Project
Blocking is an essential step in finishing your knitted project. It allows you to shape and smooth out the finished fabric, ensuring that it looks its best and fits properly. Blocking also helps to set the stitches and even out any uneven tension or stitches that may have occurred during the knitting process.
To block your finished project, start by filling a basin or sink with lukewarm water. Add a small amount of mild soap or wool wash and gently agitate the water to create a lather. Carefully place your knitted item into the water, making sure it is fully submerged. Let it soak for about 15-20 minutes.
Step 1: Removing Excess Water
After soaking, gently press out the water from your project, being careful not to wring or twist the fabric. You can roll the item in a towel and press down to absorb even more water. The goal is to remove as much excess water as possible without stretching or distorting the fabric.
Step 2: Shaping and Pinning
Lay a clean, dry towel on a flat surface and carefully place your project on top. Gently shape the fabric to its desired dimensions, pulling and stretching if necessary. Use rustproof T-pins or blocking wires to pin the edges of the fabric in place, ensuring that it stays flat and holds its shape as it dries.
Note: If you’re working on a lace project, it’s important to open up the lace pattern and stretch it out to fully showcase the intricate details. Pinning the lace aggressively will help achieve this effect.
Step 3: Allowing to Dry
Leave your project to dry completely in a well-ventilated area, away from direct sunlight or heat sources. Depending on the size and weight of your project, this process can take anywhere from a few hours to a couple of days. Once dry, carefully remove the pins or wires, and your project will be beautifully blocked and ready to wear or display!
Blocking is a simple yet effective technique that can greatly enhance the final appearance of your knitted project. Taking the time to block your finished work will ensure that it looks polished, professional, and ready to show off.
Tips and Variations
Knitting the wave pattern can be both challenging and fun. Here are some tips and variations to help you make the most out of this pattern:
Tips:
- Make sure to use the correct size of knitting needles and yarn weight suggested in the pattern. This will ensure that your wave pattern is well-defined and the finished project turns out as expected.
- Pay attention to your tension while knitting. Keeping a consistent tension throughout the project will help maintain the wave pattern’s shape and prevent any unwanted puckering or stretching.
- Count your stitches regularly. It can be easy to lose track of the wave pattern, especially if you get distracted or take breaks between knitting sessions. Counting your stitches will help you stay on track and avoid any mistakes.
- Practice the wave pattern on a small swatch before starting your main project. This will give you a chance to familiarize yourself with the pattern and make any necessary adjustments before committing to a larger project.
Variations:
Once you’re comfortable with the wave pattern, feel free to explore different variations to create unique and personalized projects:
- Experiment with different colors to create a striped effect within the wave pattern. You can use multiple colors for each wave or alternate between two contrasting colors.
- Add additional stitch patterns, such as cables or lace, in between the wave pattern rows. This will create an interesting texture and add more complexity to your project.
- Modify the number of waves in each row to create a wider or narrower pattern. You can also adjust the height of the waves for a more dramatic or subtle effect.
- Combine the wave pattern with other stitch patterns to create a unique design. For example, you can alternate between the wave pattern and a basic ribbing pattern to add texture and visual interest.
Remember, knitting is a creative process, and the wave pattern provides a great foundation for you to experiment and unleash your creativity. Have fun and enjoy the journey of knitting the wave pattern!