
Knitting is a popular craft that allows people to create beautiful and personalized items. One of the most satisfying projects for knitters is making a jumper, or sweater, from scratch. Whether you are a beginner or an experienced knitter, having a basic jumper knitting pattern can be incredibly helpful.
This article provides a free basic jumper knitting pattern that you can use to create your own cozy and stylish sweaters. The pattern includes instructions for knitting the jumper in various sizes, so you can make it for yourself or as a gift for someone else.
The pattern uses basic knitting stitches and techniques, making it suitable for knitters of all skill levels. Even if you are new to knitting, you can easily follow the step-by-step instructions and create a beautiful jumper.
So grab your knitting needles, choose your favorite yarn, and get ready to start creating your own unique jumper with this free basic knitting pattern!
Basic Jumper Knitting Pattern Free
Knitting jumpers is a popular hobby for many people. It allows you to create unique and personalized garments that are both stylish and cozy. If you are new to knitting or have been looking for a simple pattern to follow, this basic jumper knitting pattern is perfect for you. Best of all, it’s free!
This pattern is designed for those who have a basic understanding of knitting stitches and techniques. It is a simple and straightforward pattern that can be easily customized to fit your preferences. Whether you prefer a loose or snug fit, you can adjust the size and length of your jumper accordingly.
Materials needed:
- Yarn: Choose a soft and warm yarn of your choice. Worsted weight yarn is recommended for this pattern.
- Knitting needles: Use the appropriate size needles for your chosen yarn. The recommended size is US 8 (5mm) circular needles.
- Stitch markers: These will help you keep track of your stitches.
- Tapestry needle: For weaving in the ends of your yarn.
Instructions:
- Cast on the desired number of stitches for your size. Make sure it is a multiple of 4 stitches plus 3.
- Row 1: *Knit 2, purl 2; repeat from * to the last stitch, knit 1.
- Row 2: Knit 1, *purl 2, knit 2; repeat from * to end.
- Repeat rows 1 and 2 until your work measures the desired length for the body of the jumper, ending with row 1.
- Next, divide the stitches for the front and back of the jumper. This will create the neckline.
- Continue working in the established pattern on each side separately until the front and back pieces measure the desired length for the shoulders.
- Bind off all stitches.
- Join the shoulder seams using a mattress stitch or your preferred method.
- Pick up stitches around the armholes and knit ribbing for the cuffs.
- Weave in all loose ends and block your jumper to give it a finished look.
With this basic jumper knitting pattern, you can create a versatile and comfortable garment that is perfect for any season. Whether you want to add some color or experiment with different stitch patterns, this pattern provides a solid foundation for your creativity. So grab your needles and yarn, and start knitting your own personalized jumper today!
Why Choose a Basic Jumper Knitting Pattern
When it comes to knitting a jumper, there are countless patterns available to choose from. However, opting for a basic jumper knitting pattern can offer several advantages. Whether you’re new to knitting or simply prefer a more straightforward design, here are some reasons why you might want to consider a basic jumper pattern.
Simplicity and Versatility
A basic jumper knitting pattern typically features a simple stitch pattern and minimal detailing, making it ideal for beginners or those who prefer a clean, timeless look. The simplicity of the pattern also means that it can be easily customized and adapted for different sizes, yarn weights, or personal preferences. Whether you prefer a classic crew neck or a cozy turtleneck, a basic jumper pattern can serve as a versatile foundation for your project.
Ease of Knitting
With a basic jumper knitting pattern, you can focus on honing your knitting skills without the distraction of intricate stitch patterns or complex shaping. The repetitive nature of a basic pattern allows you to develop a rhythm and make progress quickly. This can be particularly beneficial for beginners, as it helps build confidence and ensures a smoother knitting experience.
Timelessness
A basic jumper often has a timeless appeal that can withstand passing trends. By choosing a simple design, you can create a garment that will remain stylish and relevant for years to come. Additionally, the versatility of a basic jumper makes it easier to incorporate into different outfits, allowing you to get more wear out of your handmade creation.
Customization Opportunities

One of the advantages of a basic jumper knitting pattern is that it provides a blank canvas for customization. Whether you want to add colorwork, experiment with different textures, or include unique details, a basic pattern provides the perfect starting point. It allows you to showcase your creativity and make the jumper truly your own.
Overall, a basic jumper knitting pattern offers simplicity, versatility, ease of knitting, timelessness, and customization opportunities. Whether you’re a beginner looking for a straightforward project or an experienced knitter wanting to personalize a design, choosing a basic jumper pattern can be a rewarding and enjoyable knitting experience.
Getting Started with Your Basic Jumper
Knitting a jumper is a rewarding and enjoyable project that allows you to create a cozy and stylish garment to keep you warm during the colder months. Whether you’re a beginner or an experienced knitter, a basic jumper pattern is a great place to start. With this pattern, you’ll learn the essentials of jumper construction and be able to customize your garment to suit your personal style.
The first step in getting started with your basic jumper is to gather your materials. You’ll need a pair of knitting needles in the appropriate size for your chosen yarn, as well as the yarn itself. Make sure to choose a yarn that is suitable for the jumper pattern and that you love the color and texture of. Additionally, you’ll need a tape measure, scissors, and a cable needle if your pattern includes cables.
Once you have all your materials, it’s time to cast on. Follow the pattern’s instructions for the number of stitches to cast on and the type of cast on to use. The cast on is the foundation of your jumper, so take your time and make sure your stitches are even and not too tight. This will ensure that your jumper fits well and is comfortable to wear.
After casting on, you’ll begin working the body of the jumper in the stitch pattern specified in the pattern. This may involve simple knit and purl stitches or more advanced techniques such as cables or lace. Follow the instructions carefully, keeping track of your rows and stitches to ensure an even and symmetrical garment.
Once you’ve completed the body of the jumper, you’ll move on to the sleeves. The pattern will guide you through the necessary increases and decreases to shape the sleeves. Pay attention to the length and width measurements provided in the pattern to ensure a proper fit.
Finally, you’ll finish the jumper by seaming the sides and sleeves, and adding any necessary finishing touches such as ribbing or a collar. Use the recommended seaming method for the pattern to ensure a professional-looking finish. Block your jumper by washing and drying it according to the yarn’s instructions to even out any uneven stitches and give it a polished appearance.
With your basic jumper complete, you’ll have a versatile and comfortable garment that you can wear with pride. Don’t be afraid to experiment with different yarns, stitch patterns, and colors to make each jumper uniquely yours. Happy knitting!
Choosing the Right Yarn and Needles
When it comes to knitting a basic jumper, one of the most important decisions you’ll make is choosing the right yarn and needles. The type and weight of your yarn, as well as the size of your needles, will determine the overall look and feel of your finished garment.
Yarn: There are a variety of yarn options available for knitting jumpers, ranging from natural fibers like wool and cotton to synthetic blends. Consider the season and climate in which you will be wearing the jumper, as well as any specific requirements or preferences you have for the garment. A heavier yarn will create a warmer jumper, while a lighter yarn may be more suitable for layering or warmer weather. Additionally, the fiber content of the yarn will impact the drape, stretch, and durability of the finished jumper.
Needles: The size and type of needles you choose will determine the gauge and tension of your knitting, which will in turn affect the fit and size of your jumper. It’s important to match the recommended needle size in the pattern, as this will ensure that your jumper turns out the correct size. If you knit too loosely or too tightly, your jumper may end up too big or too small. Consider using circular needles if you are working on a larger jumper, as they can accommodate a larger number of stitches and make it easier to knit in the round.
Ultimately, the choice of yarn and needles for your basic jumper will depend on your personal preferences and the look you want to achieve. By carefully considering the weight, fiber content, and needle size, you can create a jumper that is not only comfortable to wear but also matches your style and aesthetic.
Understanding Knitting Abbreviations
Knitting patterns often use abbreviations to make instructions shorter and easier to read. However, if you’re new to knitting or have never encountered a particular abbreviation before, it can be quite confusing. In this article, we will explore some common knitting abbreviations and explain what they mean.
1. K: This stands for knit stitch. When you see this abbreviation, it means that you should insert the right-hand needle into the front of the stitch on the left-hand needle, wrap the yarn around the right-hand needle, and pull it through to form a new stitch.
2. P: This stands for purl stitch. Similar to the knit stitch, the purl stitch creates a different texture. To purl, you should insert the right-hand needle into the back of the stitch on the left-hand needle, wrap the yarn around the right-hand needle, and pull it through to form a new stitch.
3. RS: This stands for right side. In knitting, the right side refers to the side of the fabric that will be the front or visible side. Instructions that say “work on the RS” mean that you should perform the specified stitches on this side.
4. WS: This stands for wrong side. The wrong side refers to the side of the fabric that will be the back or hidden side. Instructions that say “work on the WS” mean that you should perform the specified stitches on this side.
5. BO: This stands for bind off. When you reach the end of your knitting project, you’ll need to bind off to secure the stitches and create a neat edge. Each pattern may have different bind off methods, so be sure to follow the specific instructions.
6. St(s): This stands for stitch(es). Whenever you see this abbreviation, it means that you should perform the specified action on one or more stitches, depending on the context.
These are just a few examples of the many knitting abbreviations you may come across in patterns. It’s important to become familiar with these abbreviations to fully understand and follow knitting instructions. Keep in mind that different patterns or designers may use slightly different abbreviations, so always refer to the pattern’s key or legend for clarification.
Casting On for Your Jumper
When starting your knitting project, it is important to cast on properly to ensure a good foundation for your jumper. The cast on method you choose will depend on your personal preference and the desired outcome of your project. There are several different cast on methods you can try, including the long tail cast on, the knitted cast on, and the cable cast on.
The long tail cast on is a popular choice for many knitters. To do this, you will need to estimate the length of yarn needed for your cast on stitches. Leave a long tail at the end of your yarn, and make a slipknot at the end. Insert your needle into the slipknot and tighten it around the needle. Then, with your other hand, bring the yarn over your thumb and under your index finger. Use the needle to pick up the yarn between your thumb and index finger, and bring it back towards you. This will create a new loop on your needle. Continue this process until you have cast on the desired number of stitches.
The knitted cast on is another simple method that is easy to learn. To do this, start with a slipknot on your needle. Then, insert your needle into the slipknot and bring the working yarn forward between your needles. With your right-hand needle, slip it into the stitch on your left-hand needle as if to knit. Wrap the yarn around the right-hand needle and pull it through, creating a new stitch. Slip this new stitch onto your left-hand needle, and repeat the process until you have cast on the desired number of stitches.
Remember, the cast on is the first step in your knitting project, so take your time and make sure it is done correctly. Once you have cast on your stitches, you can begin working on the body of your jumper.
Knitting Your Jumper Body

Once you have completed the ribbing for the cuffs and hem, it’s time to start knitting the body of your jumper. To do this, you will need to continue with the same size needles and yarn that you used for the ribbing. Since this pattern is for a basic jumper, you will be working in stockinette stitch for the body.
Start by knitting a few rows in stockinette stitch. This means that you will knit every stitch on the right side of the fabric, and purl every stitch on the wrong side. This will create a smooth and even fabric for the body of your jumper. You can adjust the length of the body by knitting more or fewer rows, depending on your preferences.
Next, you will need to shape the waist of your jumper. This is done by decreasing stitches evenly across the row. To do this, you can use a technique called “knit 2 together” (k2tog). This involves knitting two stitches together as if they were one. Repeat this decrease every few rows until you have reached your desired waist width.
After shaping the waist, you will continue knitting in stockinette stitch until you reach the desired length for your jumper. Remember to periodically try on your jumper to ensure that it fits properly and make any necessary adjustments. Once the body is complete, you can move on to knitting the sleeves and the neckline, following the instructions in the pattern.
Shaping Your Jumper Sleeves
When knitting a jumper, one important aspect to consider is the shaping of the sleeves. Properly shaped sleeves can greatly enhance the fit and comfort of the jumper. There are several techniques you can use to shape your jumper sleeves, depending on the style and design you want to achieve.
1. Increasing and decreasing: One common method for shaping sleeves is to use increases and decreases. This technique involves adding or removing stitches to gradually shape the sleeve. You can use various types of increases and decreases, such as knit two together (k2tog) or make one (m1), to achieve the desired shape. Keep in mind that the placement and frequency of the increases or decreases will greatly affect the final shape of the sleeve.
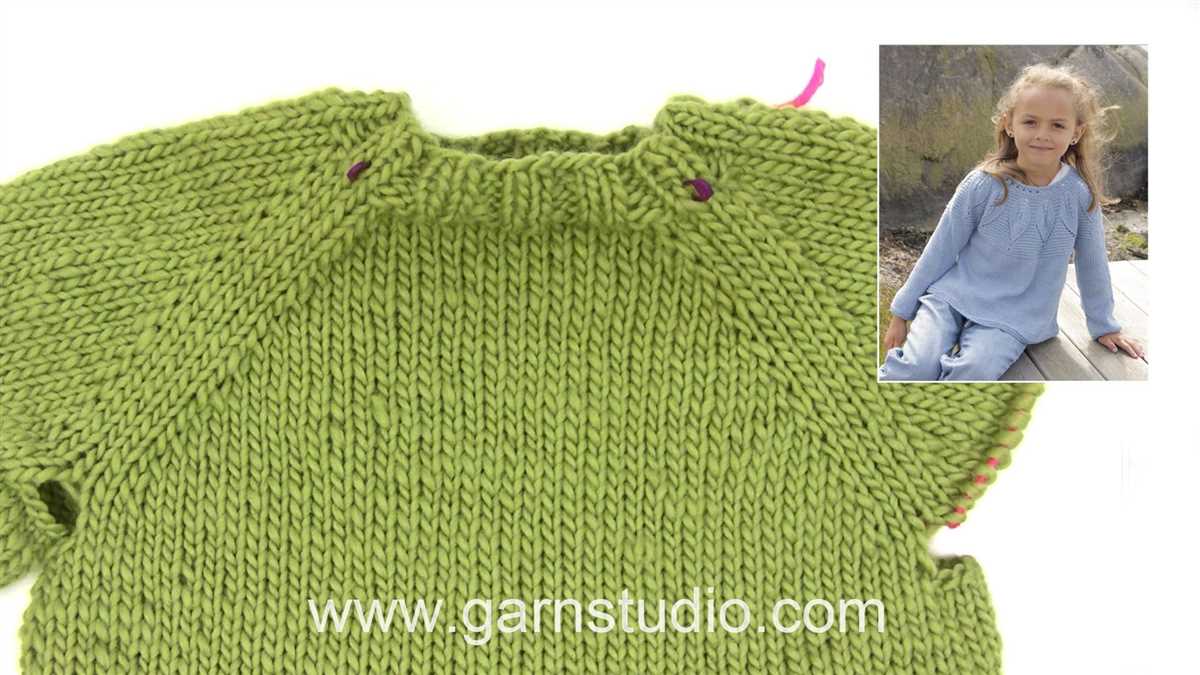
2. Raglan shaping: Raglan shaping is another popular method for shaping jumper sleeves. This technique involves diagonal lines that run from the underarm to the neck, creating a seamless transition from the body of the jumper to the sleeves. Raglan sleeves provide a comfortable fit and allow for ease of movement. To shape the sleeves using raglan shaping, you will need to follow a specific pattern or chart that indicates the increase and decrease points.
It’s important to have a clear plan and understanding of the shaping you want to achieve before starting to knit your jumper sleeves. Consult your knitting pattern or design to determine the specific shaping instructions. Remember to take accurate measurements and adjust the shaping accordingly to ensure a proper fit. With careful attention to detail and precision, you can shape your jumper sleeves to create a beautifully fitted garment.
Adding Finishing Touches
Once you have finished knitting your basic jumper, it’s time to add some finishing touches to make it truly complete. These final steps will not only enhance the overall appearance of your jumper, but also ensure that it is properly finished and ready to be worn.
Blocking: The first step in adding finishing touches to your jumper is blocking. This process involves wetting your knitted garment and then carefully shaping it to the desired dimensions. Blocking helps to even out any uneven stitches, correct any stretching or shrinking that may have occurred during the knitting process, and give your jumper a polished look. To block your jumper, you can lay it flat on a clean towel or a blocking board and use rustproof pins to secure it in place. Allow it to dry completely before removing the pins.
Seaming: Once your jumper is blocked and dry, you can move on to seaming. Seaming is the process of joining the various pieces of your jumper together to create a cohesive garment. This usually involves stitching the shoulder seams, side seams, and sleeve seams. You can use a tapestry needle and matching yarn to seam your jumper, ensuring that the stitches are secure and the seams are tidy. Take your time and make sure that the seams line up and that the finished edges are even.
Finishing details: The final step in adding finishing touches to your jumper is to add any desired details or embellishments. This can include adding a ribbed or garter stitch collar, cuffs, and hem, sewing on buttons or other closures, or even adding decorative embroidery or other stitch patterns. These finishing details can really elevate the overall look of your jumper and give it a unique and personalized touch.
By taking the time to add these finishing touches to your basic jumper, you can transform it from a simple knitted garment into a beautifully finished piece that is ready to be worn and enjoyed. So don’t forget to block, seam, and add those final details to truly complete your jumper.
Blocking and Seaming Your Jumper
Blocking and seaming are important steps in finishing your knitted jumper to give it a professional look and ensure a proper fit. Blocking involves shaping and stretching the knitted fabric to the correct dimensions. This is done by wetting the jumper, laying it flat on a towel, and pinning it into shape. This process helps to even out any uneven stitches and smooth the fabric.
Once your jumper has been blocked and dried, it is time to seam it together. Seaming is the process of joining the knitted pieces together to create a finished garment. This is typically done using a tapestry needle and matching yarn. You will need to carefully sew the shoulder seams, side seams, and sleeve seams to assemble the jumper.
To seam the shoulder seams, place the front and back pieces side by side with the right sides facing up. Use the tapestry needle and yarn to stitch the shoulders together, taking care to keep your stitches even and secure. Repeat this process for the side seams and sleeve seams, ensuring that the pattern matches up correctly.
Seaming can be time-consuming and requires attention to detail, but it is an important step in creating a well-finished jumper. Taking the time to block and seam your jumper will result in a garment that fits properly and looks polished. So, don’t skip these steps and enjoy the satisfaction of completing your own handmade jumper.
Troubleshooting Common Jumper Knitting Issues
Knitting a jumper can be a rewarding and fulfilling project, but sometimes, things don’t go as planned. Here are some common issues that knitters may encounter while knitting a jumper and some troubleshooting tips to help you overcome them.
1. Uneven Stitches
If you notice that your stitches are uneven, it could be due to inconsistent tension. To fix this, try to maintain a consistent tension throughout your knitting. You can also try blocking your finished jumper to even out any minor imperfections.
2. Holes or Gaps in the Knitted Fabric
If you discover holes or gaps in your knitted fabric, it may be due to dropped stitches or unintentional yarn overs. To fix this, carefully unravel the affected section of knitting and fix the mistake by either picking up the dropped stitch or correcting the yarn overs.
3. Too Tight or Too Loose Gauge
If your finished jumper doesn’t match the recommended gauge, it may result in a garment that is too tight or too loose. To fix this, you can try using a different needle size to achieve the desired gauge. Alternatively, you may need to adjust your tension while knitting.
4. Twisted or Misaligned Seams
When seaming the pieces of your jumper together, it’s important to ensure that the seams are straight and aligned. If you find that your seams are twisted or misaligned, carefully undo the stitching and resew the seams, ensuring that they match up correctly. Using stitch markers can help you maintain the correct alignment.
5. Uneven Sleeve Lengths

If the sleeves of your jumper turn out to be uneven in length, it can be quite noticeable. To fix this issue, measure and mark the desired length for each sleeve before you start knitting. This will help you ensure that both sleeves match in length.
6. Misshapen Neckline or Shoulders
If you find that your jumper has a misshapen neckline or shoulders, it may be due to incorrect shaping or blocking. To fix this, carefully follow the pattern instructions for shaping and make any necessary adjustments. Blocking your finished jumper can also help reshape and correct any minor issues.
Remember, knitting is a skill that takes practice, and it’s common to encounter challenges along the way. By troubleshooting common issues and making any necessary adjustments, you’ll be on your way to creating beautiful hand-knit jumpers.
Q&A:
Where can I find a basic jumper knitting pattern for free?
You can find free basic jumper knitting patterns on various websites such as Ravelry, Knitting Patterns Galore, and LoveCrafts. These websites offer a wide range of patterns for different skill levels.
What materials do I need to knit a basic jumper?
To knit a basic jumper, you will typically need a set of knitting needles, the appropriate yarn for your chosen pattern, a tapestry needle for sewing up seams, and any additional notions specified in the pattern such as buttons or zippers.
Are there any specific knitting techniques I need to know for a basic jumper?
For a basic jumper, you will need to be familiar with basic knitting techniques such as casting on, knitting and purling stitches, increasing and decreasing stitches, and casting off. Some patterns may also include more advanced techniques such as colorwork or cables.
Can I modify a basic jumper knitting pattern to fit my size?
Yes, you can modify a basic jumper knitting pattern to fit your size by adjusting the number of stitches and rows in the pattern. You may need to make a gauge swatch to determine your tension and calculate the adjustments needed. It’s always a good idea to consult the pattern instructions for any specific sizing guidance.
Can I sell items made from a free basic jumper knitting pattern?
The copyright and usage rights for free knitting patterns may vary, so it’s important to check the specific pattern’s terms and conditions. Some patterns may allow you to sell items made from their patterns, while others may have restrictions on commercial use. It’s always best to respect the designer’s copyright and usage rights to avoid any legal issues.
What is a basic jumper knitting pattern?
A basic jumper knitting pattern is a pattern that provides instructions on how to knit a simple and basic sweater or jumper. It usually includes information on the type and size of yarn to use, the required knitting needles, and step-by-step instructions on how to knit the jumper. It may also include information on how to create different stitches or patterns on the jumper.
Where can I find free basic jumper knitting patterns?
There are many websites and online platforms where you can find free basic jumper knitting patterns. Some popular websites include Ravelry, Knitting Pattern Central, and LoveKnitting. You can also find free patterns in knitting magazines or by searching for specific patterns on search engines. Additionally, many knitting bloggers and designers offer free patterns on their websites or through their social media accounts.