
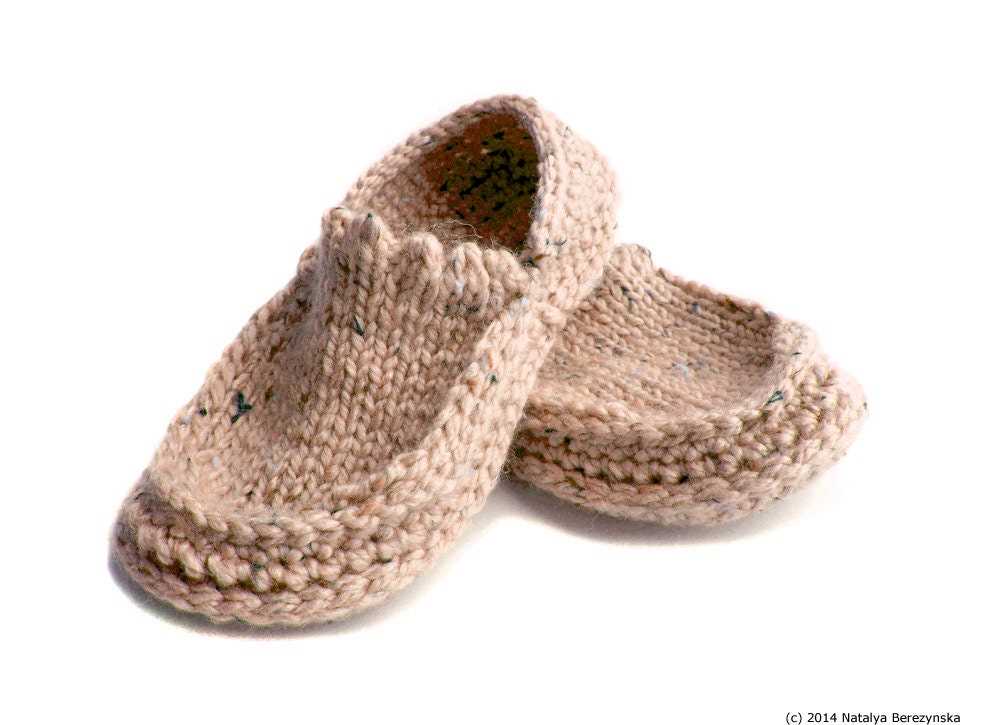
Slippers are a cozy and practical accessory that can be knitted easily at home. Whether you’re a beginner knitter or have years of experience, this easy slipper knitting pattern is perfect for you. With just a few basic stitches and some soft yarn, you can create a pair of warm and comfortable slippers to keep your feet toasty during the colder months.
This pattern is designed to be simple and straightforward, making it ideal for knitters of all skill levels. It’s a great project for those looking to relax and unwind, or for those who want to create a thoughtful and handmade gift for a loved one. With this easy slipper knitting pattern, you’ll be able to achieve professional-looking results without the stress or frustration.
One of the great things about this pattern is that it can be easily customized to suit your personal style and preference. You can experiment with different types of yarn, colors, and stitch patterns to create a unique pair of slippers. Plus, the pattern includes instructions for various sizes, so you can make slippers for the whole family.
Easy Slipper Knitting Pattern
Slippers are the perfect cozy accessory for the colder months. They keep your feet warm and comfortable while adding a touch of style to your loungewear. If you enjoy knitting and want to create your own pair of slippers, look no further than this easy slipper knitting pattern.
This pattern is designed for beginners, so even if you’re new to knitting, you can easily follow along. The materials you’ll need include a pair of knitting needles, yarn of your choice, and a yarn needle for finishing touches. The pattern is customizable, allowing you to choose your desired size and yarn color.
Step 1: Cast on
To begin, cast on the desired number of stitches using the long-tail cast on method. This will create the foundation row for your slipper.
Step 2: Knit the first row
Once you’ve cast on the required stitches, knit across the first row. This simple stitch creates the base of your slipper.
Step 3: Continue knitting
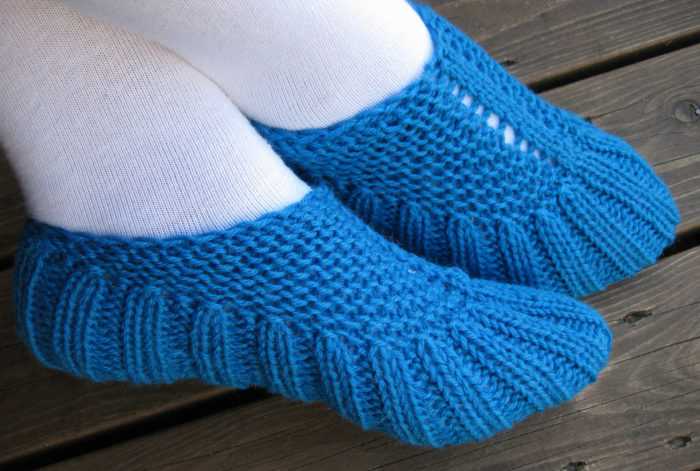
After knitting the first row, continue knitting in the desired stitch pattern until your slipper reaches the desired length. You can choose from various stitch patterns, such as garter stitch or ribbing, to add texture and visual interest to your slipper.
Step 4: Shape the toe
When you’ve reached the desired length, it’s time to shape the toe. Decrease stitches gradually by knitting two stitches together at regular intervals until you have a smaller number of stitches left on your needles.
Step 5: Finish off
To finish off your slipper, cut the yarn, leaving a long tail. Thread the tail through the yarn needle and weave it through the remaining stitches to secure them. Finally, sew the sides of the slipper together using the mattress stitch or any other preferred seaming method.
With this easy slipper knitting pattern, you’ll be able to create your very own pair of cozy and stylish slippers. Whether you’re knitting them for yourself or as a gift, this pattern is sure to bring warmth and comfort to your feet.
Choose the Right Yarn and Needles
When it comes to knitting a pair of slippers, choosing the right yarn and needles is essential for achieving the desired result. The type of yarn you use can greatly affect the fit, comfort, and durability of the slippers. Additionally, the size of the needles will determine the gauge or tension of your knitting, which in turn will determine the size and shape of your finished slippers.
Yarn
When selecting yarn for your slippers, it is important to consider the desired warmth, softness, and durability of the finished product. For cozy and warm slippers, a thick and wooly yarn is a great choice. If you prefer a softer and more lightweight slipper, you may opt for a yarn blend that includes acrylic or bamboo fibers. It’s also worth considering the color and pattern of your yarn to ensure that it complements your personal style.
Needles
The size of the needles you choose will determine the tension and size of your slippers. If you want a tighter, denser fabric, you should use smaller needles. On the other hand, if you prefer a looser, more breathable fabric, larger needles would be more suitable. It is recommended to check the yarn label for the recommended needle size and adjust accordingly to achieve the desired gauge. Circular needles or double-pointed needles can be used depending on your preferred knitting method and the construction of the slipper pattern.
Overall, taking the time to choose the right yarn and needles for your slipper project will greatly contribute to the success and satisfaction of your knitting experience. So, before you start casting on, make sure to consider these factors and select the materials that best suit your preferences and the requirements of your slipper pattern.
Gauge Swatch
Before you start knitting your easy slipper pattern, it is important to make a gauge swatch to ensure that your slippers will be the correct size. A gauge swatch is a small sample of knitting that allows you to measure the number of stitches and rows per inch. This will help you determine if you need to adjust your needle size to achieve the desired measurements.
To make a gauge swatch, start by casting on a few more stitches than the recommended number for your pattern. Use the specified needles and yarn to knit a square of fabric that is at least 4 inches by 4 inches. It is important to knit the swatch in the same stitch pattern as your pattern instructions.
Once your swatch is complete, lay it flat on a surface and use a ruler or measuring tape to count the number of stitches and rows within a 1-inch area. Compare these measurements to the gauge specified in your pattern. If you have fewer stitches and rows than the recommended gauge, this means your stitches are too big, and you should try using smaller needles. If you have more stitches and rows than the recommended gauge, your stitches are too small, and you should try using larger needles.
Remember, achieving the correct gauge is crucial for your finished slippers to fit properly. Take the time to make a gauge swatch and make adjustments as needed before starting your project. This extra step will ensure that your slippers turn out just right!
Cast On Stitches
When starting any knitting project, the first step is to cast on stitches. This creates the foundation row for your work. In this easy slipper knitting pattern, you will need to cast on a certain number of stitches to match the size of the slippers you are making.
To cast on stitches, start by making a slipknot. To do this, make a loop with your yarn so that the tail end is in front of the working end. Insert your needle through the loop from front to back, and then bring the tail end through the loop and pull it tight.
After creating the slipknot, hold the needle with the slipknot in your right hand. Take the working end of the yarn and wrap it around the thumb and forefinger of your left hand, creating a loop. Insert the needle into the loop from front to back, going under the thumb loop and over the forefinger loop.
With the needle through the loop, pull the working end of the yarn to tighten the stitch on the needle. Repeat this process until you have cast on the required number of stitches for your slipper pattern.
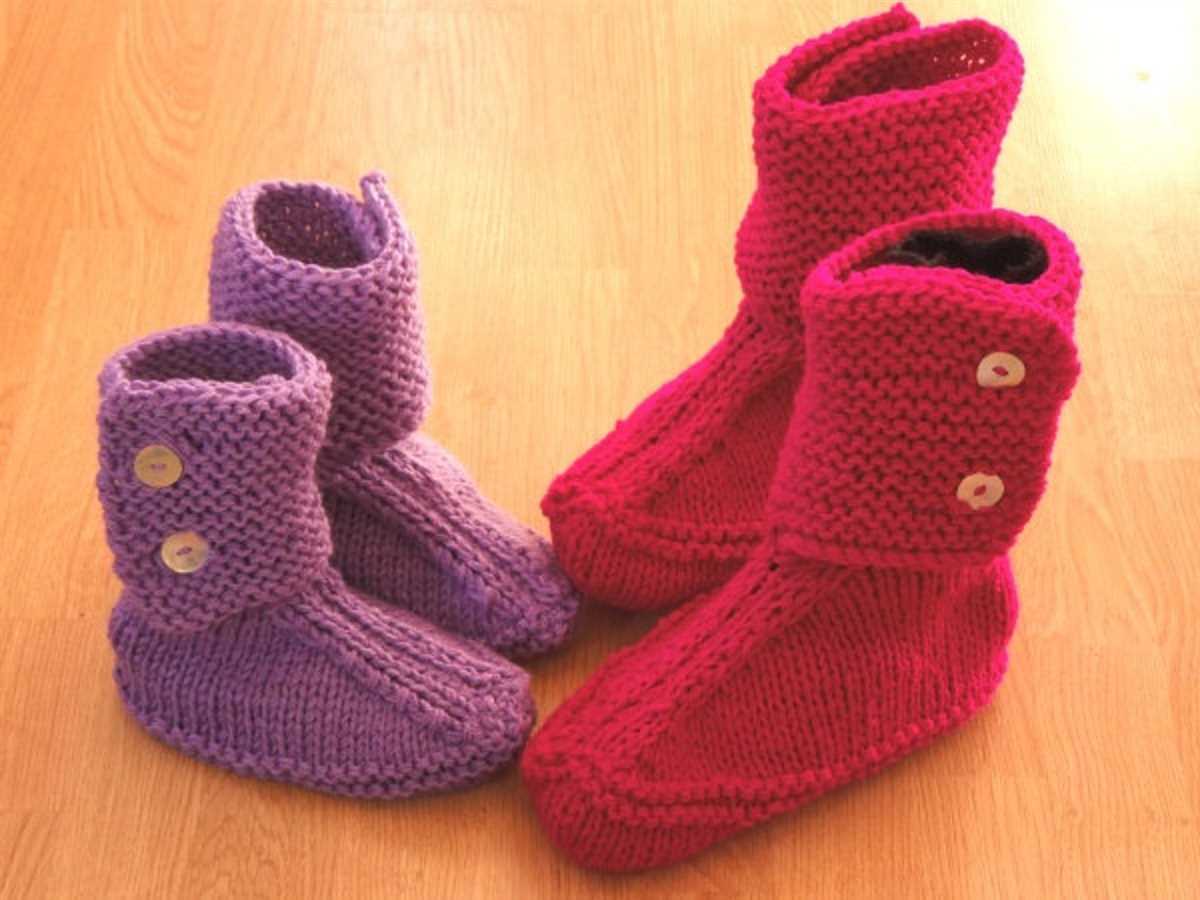
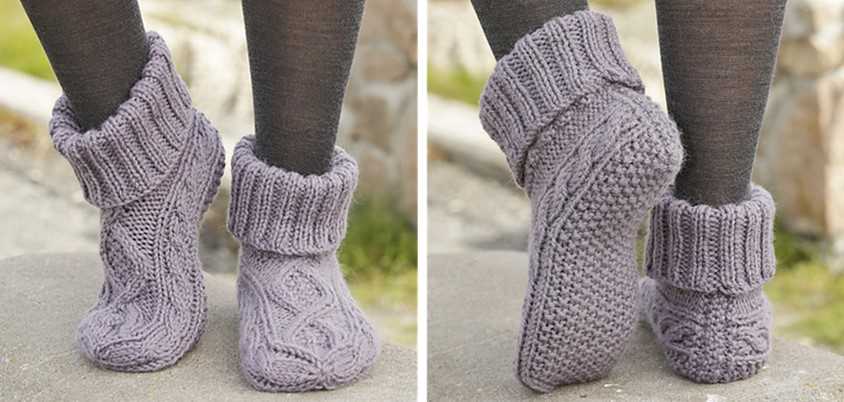
Knit the Cuff
Once you have cast on the desired number of stitches for your slipper cuff, you can begin knitting the cuff. The cuff is the part of the slipper that goes around your ankle and helps to keep the slipper in place. It is important to knit the cuff with a tight tension to ensure that it fits snugly and stays in place.
To begin knitting the cuff, you will need to follow the stitch pattern specified in the slipper knitting pattern. This could be a basic knit stitch, a rib stitch, or even a cable stitch depending on the design of the slipper. Make sure to read and understand the instructions before you start knitting.
Knit each row: If the stitch pattern calls for you to knit each row, simply knit every stitch on every row until the cuff reaches the desired length. This is the easiest stitch pattern and works well for a basic slipper cuff.
Rib stitch: A rib stitch consists of alternating knit and purl stitches to create a stretchy and flexible fabric. Follow the pattern instructions for the specific rib stitch design. The most common rib stitch is the 2×2 rib, where you knit 2 stitches, then purl 2 stitches, and repeat this pattern across the row until the end. Repeat this pattern in each row until the cuff reaches the desired length.
Cable stitch: If the pattern calls for a cable stitch, you will need to follow more complex instructions. Cable stitches create a twisted design on the fabric, which adds interest and texture to the slipper cuff. Make sure to carefully read the pattern instructions and use a cable needle if necessary to keep track of the stitches. Follow the specific cable stitch pattern for each row until the cuff reaches the desired length.
Once you have finished knitting the cuff, you can bind off the stitches to secure the edge. Make sure to bind off loosely so that the cuff remains stretchy and comfortable. The cuff is now complete, and you can move on to knitting the rest of the slipper pattern.
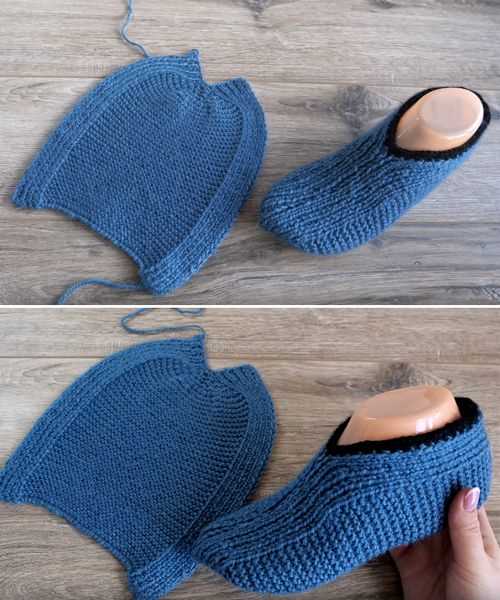
Shape the Heel
Once you have completed the foot portion of the slipper, it’s time to shape the heel. This is an important step to ensure a comfortable and snug fit for the slipper. Here’s how you can do it:
1. Divide Stitches: First, you’ll need to divide the stitches evenly on two needles. Make sure you have an equal number of stitches on each needle.
2. Begin Working: Start working on one needle, leaving the other needle unused for now. Depending on the pattern instructions, you may need to start with a certain number of knit or purl stitches.
3. Decrease Rows: Follow the pattern instructions to decrease the number of stitches on each row. This will create the shape of the heel. Typically, decreases are done by knitting two stitches together (K2Tog) or by slipping a stitch, knitting the next stitch, and then passing the slipped stitch over the knit stitch (SSK).
4. Continue Decreasing: Keep decreasing the stitches until you have reached the desired number of stitches for the heel. The pattern will specify how many stitches to decrease and how often to do it.
5. Turn the Heel: Once you have the desired number of stitches for the heel, it’s time to turn the heel. This is done by working short rows to create a bend in the fabric. The exact instructions for turning the heel will vary depending on the pattern you’re using.
6. Pick Up Stitches: After turning the heel, you’ll need to pick up stitches along the side of the heel flap. This is typically done by inserting your needle into the edge of the stitches and knitting or purling them onto your working needle.
7. Shape the Foot: Once you have picked up the stitches, you can continue working on the foot portion of the slipper according to the pattern instructions. This may involve knitting or purling across the picked up stitches and the stitches left on the unused needle.
By following these steps, you’ll be able to shape the heel of your slipper and create a comfortable and well-fitting finished product.
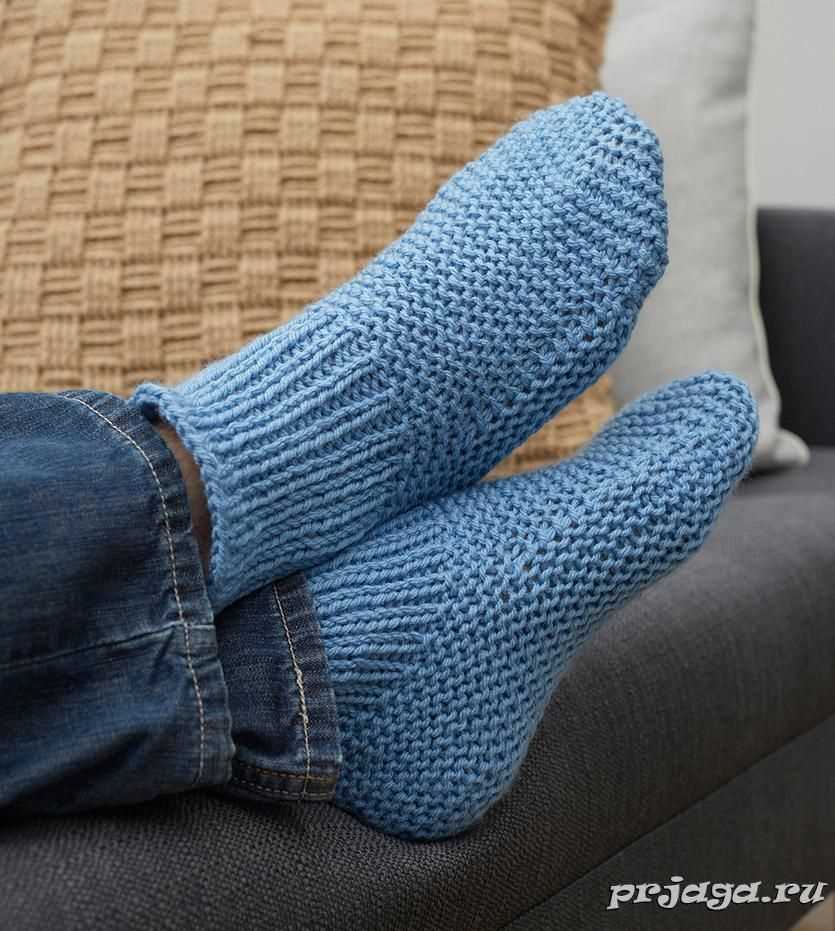
Knit the Foot
Once you have completed the cuff of the slipper, it’s time to move on to knitting the foot. This is the part of the slipper that will cover your toes and the ball of your foot.
Start by continuing with your chosen stitch pattern for the foot. If you’re using a simple stockinette stitch, knit every row until the foot measures the desired length. If you’re using a more complex stitch pattern, be sure to follow the instructions for that particular pattern.
When knitting the foot, it’s important to keep in mind the size and shape of your foot. If you have a wider foot, you may want to increase the number of stitches to accommodate. Similarly, if you have a narrower foot, you may want to decrease the number of stitches.
Continue knitting the foot until it reaches the length you want, typically about 2-3 inches shorter than the total length of your foot. Keep in mind that the slipper will stretch slightly when worn, so it’s better to err on the side of making it a little shorter rather than too long.
Once you have reached the desired length, it’s time to shape the toe of the slipper. You can do this by gradually decreasing stitches at the front of the foot. There are several different methods for decreasing, so choose the one that works best for you.
After shaping the toe, it’s just a matter of binding off the stitches and weaving in any loose ends. Once you’ve completed the foot, you’re ready to move on to knitting the heel of the slipper.
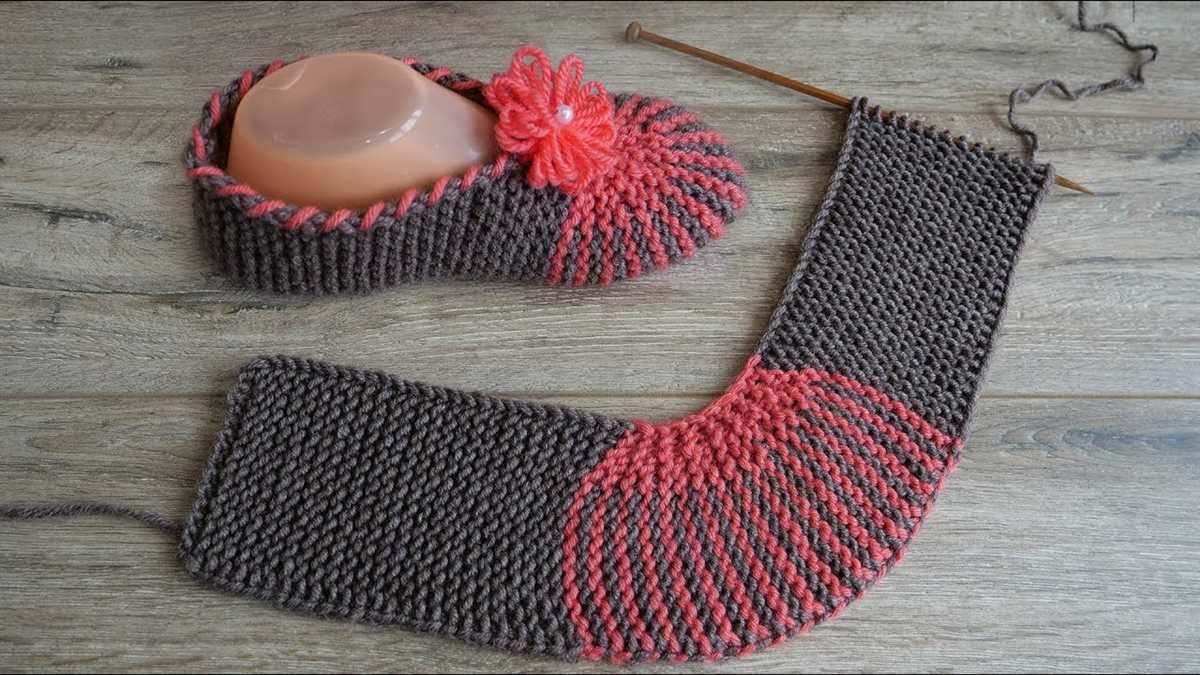
Create the Toe
Now that you have completed the cuff of your slipper, it’s time to move on to creating the toe. The toe is an important part of the slipper as it provides comfort and protection for your feet.
To create the toe, you will start by decreasing stitches. This will give the slipper its rounded shape and ensure a snug fit. You can use various decrease techniques such as knit two together (k2tog) or slip slip knit (ssk).
First, you will need to determine how many stitches to decrease. This will depend on the size of your slipper. You can refer to a knitting pattern or use a basic rule of thumb, such as decreasing 2 stitches every other row. Make sure to evenly distribute the decreases around the toe area.
Once you have determined the decrease pattern, you can start knitting. Take one needle and knit the first stitch. Then, use the next decrease technique to decrease one stitch. Continue this pattern until you have reached the desired number of decreases.
After completing the decreases, you will have a smaller number of stitches on your needle. To finish off the toe, you can either cut the yarn and thread it through the remaining stitches or use the Kitchener stitch to graft the stitches together. Both methods will create a seamless and neat finish.
Tips for creating the toe:
- Work slowly and carefully to ensure accurate decreases.
- Pay attention to the stitch count and decrease evenly.
- Try out different decrease techniques to see which one you prefer.
- Use stitch markers to keep track of the decrease pattern.
- Take your time and enjoy the process of creating the toe for your slipper.
Finishing Touches: Sewing and Weaving in Ends
After completing your easy slipper knitting pattern, it’s important to finish off your project with some key steps to ensure a polished final result. One of the most important finishing touches is sewing in any loose ends and weaving in ends to ensure your slippers are secure and durable.
To begin, take a look at your slipper and identify any loose ends that were created during the knitting process. These loose ends can be caused by changing colors or by joining additional yarn. Using a tapestry needle, carefully thread the loose end through the stitches on the wrong side of the slipper. This will ensure that the end is securely attached and won’t unravel over time.
Next, it’s time to weave in the ends of your slipper. Weaving in ends refers to hiding the loose yarn tails within the stitches of your work so that they are not visible from the outside. This not only creates a neater appearance but also adds to the overall durability of your slipper.
To weave in the ends, thread the yarn tail onto a tapestry needle and guide it through the stitches on the wrong side of the slipper, following the natural path of the knitting. Repeat this process a few times, changing direction each time, to ensure that the yarn is secure and won’t come loose with wear.
Once you have finished sewing and weaving in the ends, take a moment to admire your completed slipper. The finishing touches of sewing and weaving in ends not only enhance the overall appearance of your project, but they also ensure that your slipper will withstand regular use and keep your feet warm and cozy for years to come.
Add Pom-Poms or Tassels
Once you have completed knitting your easy slippers, you can add some fun and decorative elements to personalize them. One popular option is to add pom-poms or tassels to the slippers. These cute additions can give your slippers a playful and whimsical touch.
To make pom-poms, you will need some yarn in a contrasting color. Cut a piece of cardboard or use a pom-pom maker to create the shape of your pom-pom. Wrap the yarn around the cardboard or pom-pom maker until you achieve the desired fullness. Once done wrapping, gently slide the yarn off the cardboard or pom-pom maker and tie a tight knot in the center. Trim the ends of the yarn to create a fluffy pom-pom. Repeat the process to make multiple pom-poms and then attach them to the front or back of your slippers using a needle and thread.
If you prefer tassels, you will need some yarn in a matching or contrasting color. Start by cutting a piece of cardboard or using a tassel maker to determine the length of your tassel. Wrap the yarn around the cardboard or tassel maker several times until you reach your desired thickness. Slide the yarn off the cardboard or tassel maker and tie a tight knot at the top of the tassel. Trim the ends to create an even and neat tassel. Repeat the process to make multiple tassels and then attach them to the edges or corners of your slippers using a needle and thread.
Adding pom-poms or tassels to your easy slippers can give them a playful and stylish look. You can experiment with different colors and sizes to create a unique design. Whether you choose to add pom-poms or tassels, these embellishments are sure to make your slippers stand out and add an extra touch of charm to your cozy footwear.
Customize Your Slippers
One of the great things about knitting your own slippers is that you can customize them to fit your personal style and preferences. With a few simple modifications, you can create a pair of slippers that are unique and perfectly suited to your feet.
One way to customize your slippers is by choosing the type of yarn you want to use. You can opt for a thick and cozy wool yarn for extra warmth, or go for a lighter cotton or acrylic yarn for a more breathable and lightweight feel. The choice of yarn can also affect the appearance of your slippers, allowing you to create a solid color design or experiment with different hues and textures.
To further personalize your slippers, you can add decorative elements such as buttons, bows, or embroidery. These small details can make a big difference and add a touch of individuality to your slippers. For example, you could sew on some colorful buttons along the side of the slipper or embroider a pattern onto the toe area. Get creative and let your imagination run wild!
Another way to customize your slippers is by adjusting the size and fit. If you have wide feet, you can knit the slippers with extra width to ensure a comfortable fit. Alternatively, if you prefer a snugger fit, you can decrease the number of stitches and rows in certain areas. This way, you can create slippers that are tailored to your specific foot shape and size.
Remember, the beauty of knitting your own slippers lies in the ability to make them truly your own. So don’t be afraid to experiment, try new techniques, and make modifications to suit your style and needs. Whether you prefer simple and minimalist slippers or want to go all out with bold colors and embellishments, the choice is yours. Enjoy the process of customizing your slippers and create a one-of-a-kind pair that you’ll love to wear!
Other Variations to Try
If you’re looking to mix things up a bit, there are several other variations of slipper patterns that you can try. These variations can offer different styles and looks to your finished slippers and allow you to experiment with different techniques and stitches.
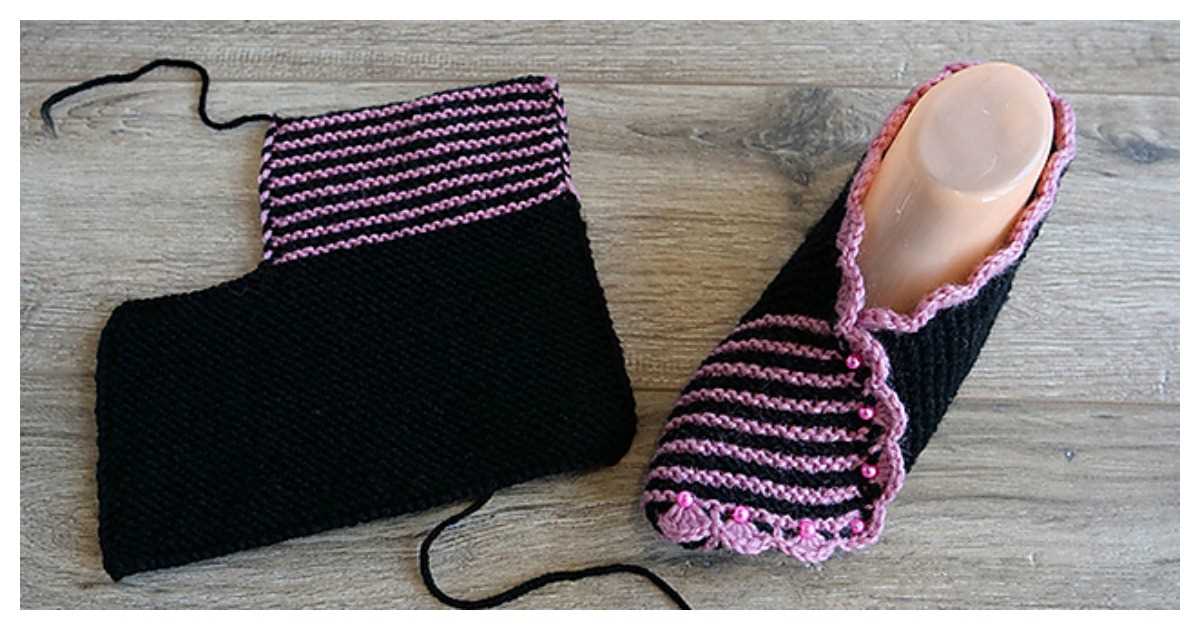
Colorful Stripes
One fun variation to try is adding colorful stripes to your slippers. You can choose two or more contrasting colors and alternate between them as you knit. This will give your slippers a playful and vibrant look. You can even use different stitch patterns for each color to add even more interest.
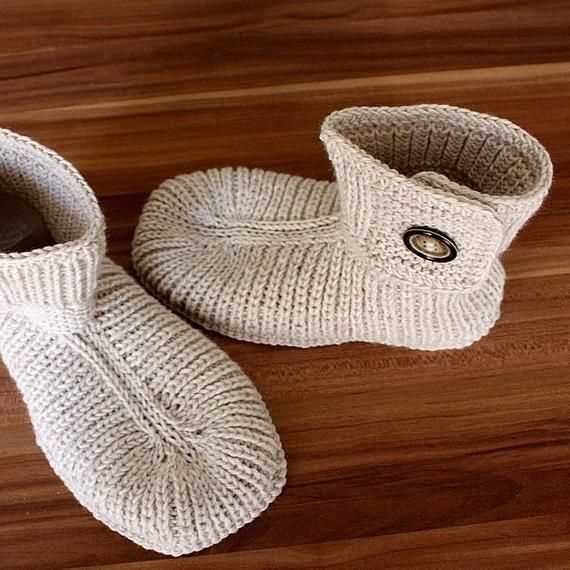
Buttoned Flap
If you want to add a decorative element to your slippers, you can try adding a buttoned flap. This can be done by knitting a separate piece that will serve as the flap and attaching it to the front of the slipper. You can then sew buttons onto the main slipper piece and create buttonholes on the flap to fasten it in place. This will not only add a stylish touch but also make your slippers adjustable for a better fit.
Pom-Pom Embellishments
Pom-poms can be a fun and fluffy addition to your slippers. You can make small pom-poms using yarn in contrasting colors and attach them to the front or sides of your slippers. They can add a whimsical touch to your slippers and make them stand out.
Cable Knit
If you’re up for a challenge, you can try knitting slippers with a cable pattern. Cable knitting involves crossing stitches to create intricate designs, and it can add a beautiful texture and depth to your slippers. There are many cable stitch patterns available, so you can choose one that suits your style and skill level.
- Colorful Stripes
- Buttoned Flap
- Pom-Pom Embellishments
- Cable Knit
Tips and Tricks for Successful Slipper Knitting
Knitting a pair of slippers can be a fun and rewarding project. Here are some tips and tricks to help you achieve success with your slipper knitting:
1. Choose the right yarn
When selecting yarn for your slippers, it’s important to choose a type that will be both comfortable and durable. Look for yarn that is soft and warm, but also strong enough to withstand everyday wear and tear. Wool or acrylic blends are popular choices for slipper knitting.
2. Use the right needle size
The needle size you use can greatly affect the finished size and texture of your slippers. Make sure to follow the recommended needle size indicated in the pattern you’re using. If you’re unsure, you can always knit a gauge swatch to determine if your needle size needs adjusting.
3. Pay attention to gauge
Gauge refers to the number of stitches and rows per inch in your knitting. It’s crucial to match the gauge indicated in the pattern, so your slippers turn out the correct size. If your gauge is too loose, try using smaller needles, and if it’s too tight, switch to larger needles.
4. Take accurate measurements
Before you start knitting, take accurate measurements of the intended recipient’s foot. This will help ensure that the slippers fit properly. Measure the length and width of the foot, as well as any specific areas such as the heel or instep that may require adjustments in the pattern.
5. Use stitch markers
When knitting slipper patterns that have multiple sections or repeated patterns, use stitch markers to keep track of your progress. This will make it easier to follow the pattern and ensure that you’re on the right track.
6. Don’t rush the finishing touches
The finishing touches can greatly enhance the appearance and durability of your slippers. Take the time to weave in any loose ends, sew seams, and block your slippers to achieve a polished look. This attention to detail will make your slippers look and feel more professional.
By following these tips and tricks, you’ll be well on your way to knitting a beautiful pair of slippers that are not only cozy but also long-lasting.
Q&A:
What is a easy slipper knitting pattern?
An easy slipper knitting pattern is a set of instructions that guide you through the process of creating a pair of slippers using knitting techniques. These patterns are designed for beginners or those with basic knitting skills and typically use simple stitches and techniques.
How can I find an easy slipper knitting pattern?
You can find easy slipper knitting patterns in various places. Online platforms and knitting websites often have a wide selection of free and paid patterns that cater to different skill levels. You can also check out knitting books or visit your local craft store for pattern books that include slipper designs.
What materials do I need for an easy slipper knitting pattern?
The materials required for an easy slipper knitting pattern will depend on the specific pattern, but generally, you will need knitting needles, yarn, and a tapestry needle for sewing up any seams. The pattern will specify the recommended yarn weight and needle size to use to achieve the desired result.
Can I modify an easy slipper knitting pattern?
Yes, you can modify an easy slipper knitting pattern to suit your preferences. You can adjust the size of the slippers, change the colors or stitch patterns used, or add embellishments if desired. Just make sure to keep track of any changes you make to the pattern so you can replicate them for the second slipper.