
Creating a knit pattern in Adobe Illustrator allows you to add a cozy and textured look to your designs. Whether you’re working on a sweater design, a digital fabric print, or simply want to incorporate a knit texture into your illustrations, this tutorial will guide you through the process.
In this article, we will explore the step-by-step process of making a knit pattern using the powerful tools and features available in Adobe Illustrator. From creating the base pattern to adding realistic texture and shading, we will cover it all. By the end of this tutorial, you’ll have the skills to create stunning and authentic knit patterns that can enhance your design projects.
Before we get started, make sure you have a basic understanding of Adobe Illustrator and its tools. This tutorial assumes you have a working knowledge of the software. So, let’s dive in and learn how to make a knit pattern in Illustrator!
How to Make a Knit Pattern in Illustrator
Creating a knit pattern in Illustrator allows you to design your own unique patterns for sweaters, scarves, and other knitwear. With the right tools and techniques, you can easily create intricate designs that mimic the look of a hand-knit piece. Here’s a step-by-step guide on how to make a knit pattern in Illustrator:
Step 1: Set up your document
Start by opening Adobe Illustrator and creating a new document. Set the document size to the dimensions you want your knit pattern to be. For example, if you’re designing a pattern for a sweater, you might choose a larger canvas size. Make sure to set the resolution to a high value for sharp and detailed patterns.
Step 2: Draw your base shape
Use the shape tools in Illustrator to draw the base shape of your knit pattern. This could be a rectangle, circle, or any other shape you prefer. Adjust the size and proportions as needed.
Step 3: Create your stitch pattern
Use the Pen Tool or other drawing tools in Illustrator to create the stitches of your knit pattern. This could include various types of knit stitches, such as garter stitch, stockinette stitch, or cable stitches. Experiment with different shapes and patterns to achieve the desired look.
Step 4: Add color and texture
Once you have your stitch pattern in place, you can add color and texture to make it look more realistic. Use the Fill and Stroke options in Illustrator to choose the colors you want for your knit pattern. You can also apply texture effects, such as gradient fills or pattern swatches, to give your design more depth.
Step 5: Arrange and repeat your pattern
Arrange your stitch pattern in a way that creates a seamless repeat. Use the Transform tools in Illustrator to duplicate and arrange the stitches in a grid or other pattern. Make sure that the edges of each tile align perfectly to create a seamless and continuous pattern.
By following these steps, you can create your own custom knit patterns in Illustrator. Don’t be afraid to experiment with different stitch patterns, colors, and textures to create unique and eye-catching designs.
Gather Your Materials

Before you start creating a knit pattern in Illustrator, you will need to gather a few materials to help you along the way. Here is a list of essential items:
- Computer: A computer with Adobe Illustrator installed.
- Illustrator Software: Make sure you have the latest version of Illustrator installed on your computer.
- Sketch Paper: Grab some sketch paper to jot down your ideas and designs. This will help you plan your pattern.
- Pencil and Eraser: You will need a pencil and eraser to sketch out your ideas on the sketch paper.
- Ruler: Use a ruler to create straight lines and precise measurements on your sketch paper.
- Knit Yarn: Choose the type and color of yarn you want to use for your pattern. This will help you visualize the final design.
- Knitting Needles: Grab a set of knitting needles suitable for the yarn you have chosen.
- Knitting Gauge: Use a knitting gauge tool to measure your knitting tension and stitch count.
- Scanner or Camera: If you want to incorporate hand-drawn elements into your pattern, you will need a scanner or camera to digitize your sketches.
With these materials ready, you’ll be well-equipped to start creating your knit pattern in Illustrator.
Set Up Your Workspace
Before you start creating your knit pattern in Illustrator, it’s important to set up your workspace to ensure smooth and efficient work. Here are a few steps to help you get started:
1. Create a New Document:
Open Adobe Illustrator and create a new document by going to File > New. Specify the dimensions and resolution according to your requirements. It’s a good idea to set your document to RGB color mode, as it provides a wider range of colors for your design.
2. Set Up Grid:
Enable the grid view by going to View > Show Grid. This will help you align your objects accurately and maintain consistency in your pattern. You can customize the grid settings such as gridline color, spacing, and subdivisions according to your preferences.
3. Arrange Panel Layout:
Organize your panels for easy access to tools and options. Go to Window > Workspace and choose a layout that suits your working style. You can also customize the panel arrangement by dragging and dropping the panels to your desired locations.
4. Customize Tools:
Take a moment to customize your tools to make them more efficient for your knit pattern design. For example, you can adjust the stroke and fill colors, define custom keyboard shortcuts for frequently used tools, and create tool presets for specific design elements.
By setting up your workspace in Illustrator, you can create a knit pattern more effectively and efficiently. It allows you to focus on the design process without any distractions, ensuring a smooth workflow from start to finish.
Create a New Document
When starting a knit pattern in Adobe Illustrator, the first step is to create a new document. This document will serve as the canvas for designing the pattern.
To create a new document, open Adobe Illustrator and go to File > New. A dialog box will appear, allowing you to customize the settings for the new document. Here, you can set the dimensions of the document, such as the width and height, as well as the orientation (landscape or portrait). You can also specify the units of measurement, such as inches or pixels, depending on your preference.
Additionally, you can choose the color mode for the document, either RGB or CMYK, depending on whether you are designing for web or print. It is recommended to select the RGB color mode for knit patterns, as it allows for a wider range of colors.
Once you have set the desired settings for the new document, click on the “Create” button to create the document. Adobe Illustrator will then open a blank canvas with the specified dimensions, ready for you to start designing your knit pattern.
Choose Your Yarn Colors
When it comes to creating a knit pattern in Illustrator, one of the first decisions you’ll need to make is choosing the colors of your yarn. The color palette you select can greatly impact the overall look and feel of your design, so it’s important to choose wisely.
To start, think about the mood or theme you want to convey with your pattern. Are you going for a bold and vibrant design, or something more subtle and muted? This will help guide your color choices.
Consider the following factors:
- Contrast: Think about how the colors you choose will contrast with each other. High contrast colors can create a bold and eye-catching design, while low contrast colors can result in a more subtle and harmonious pattern.
- Color theory: Familiarize yourself with basic color theory principles to help you create a pleasing color scheme. For example, complementary colors (those opposite each other on the color wheel) can create a vibrant and energetic pattern, while analogous colors (those next to each other on the color wheel) can produce a more harmonious and calming effect.
- Inspiration: Draw inspiration from a variety of sources, such as nature, fashion, or art. Look for interesting color combinations that catch your eye and consider how you can incorporate them into your design.
Once you have a general idea of the colors you want to use, it’s helpful to create a color palette in Illustrator. This will make it easier to experiment with different combinations and ensure consistency throughout your pattern. You can create a custom color palette by using the swatches panel in Illustrator and adding your chosen colors.
Remember, the colors you choose for your yarn can greatly impact the final look of your knit pattern. Take your time to consider the mood, contrast, color theory, and inspiration to create a color palette that enhances your design and brings your vision to life.
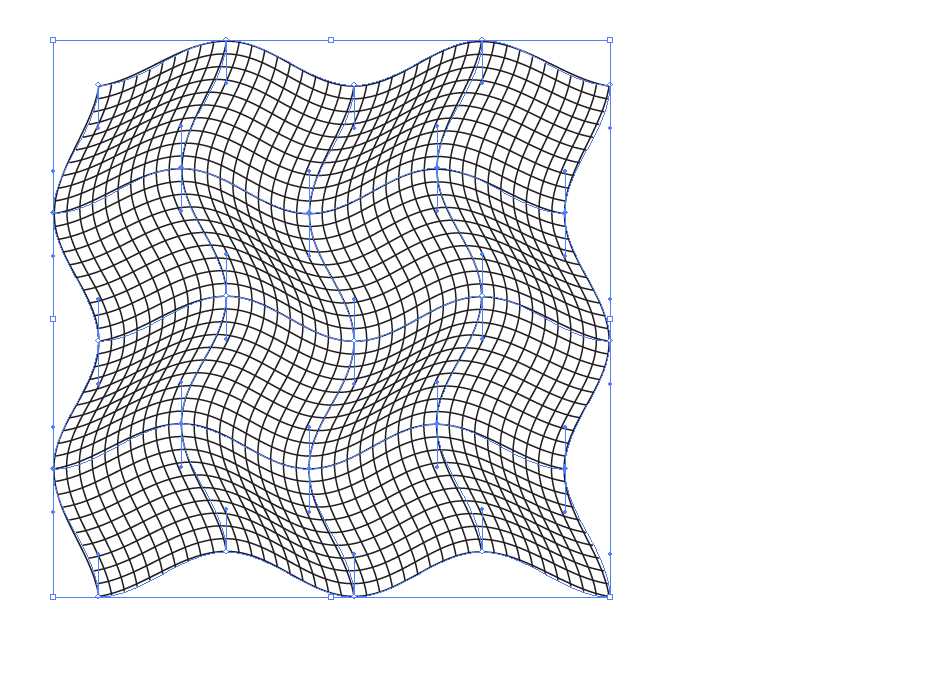
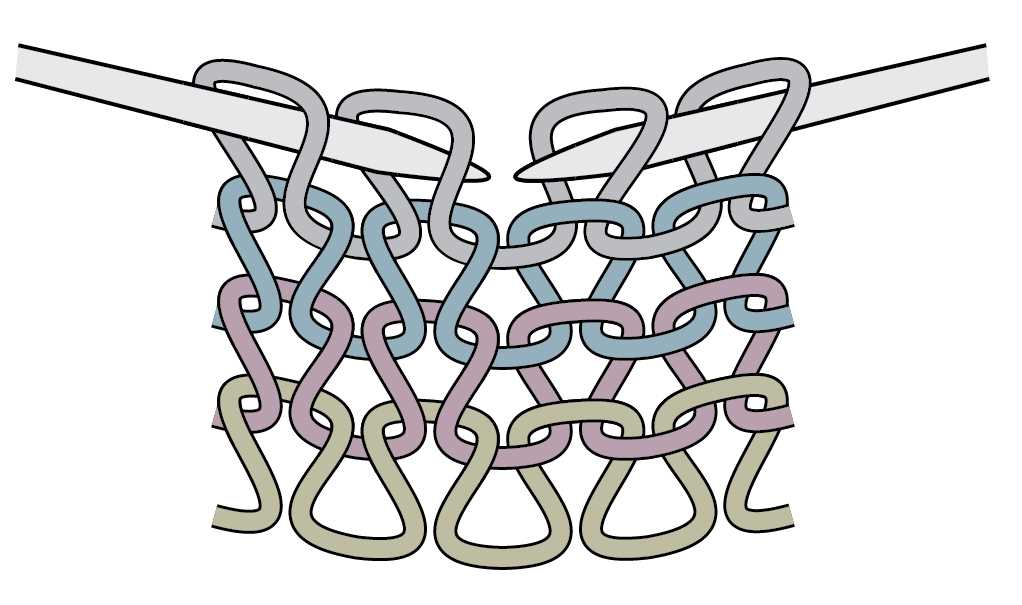
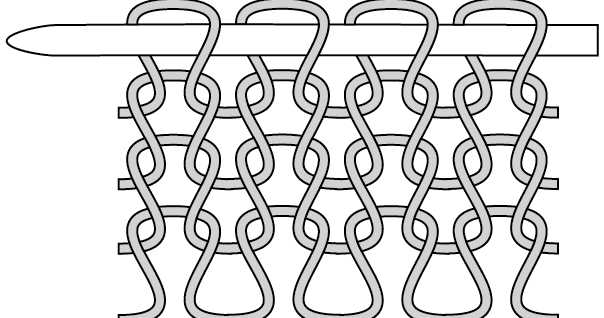
Draw the Basic Stitch Shape
When creating a knit pattern in Illustrator, it is essential to start with the basic stitch shape. This shape will be the building block for your entire pattern. To draw the basic stitch shape, follow these steps:
Step 1: Create a Rectangle
To begin, select the Rectangle Tool (M) from the toolbar and click and drag on the artboard to create a rectangle. The size of the rectangle will depend on the size of the stitch you want to create. Make sure the rectangle has a stroke color but no fill color.
Step 2: Add Rounded Corners
Next, select the Direct Selection Tool (A) from the toolbar and click on the rectangle to select it. With the rectangle still selected, navigate to the Control panel at the top of the workspace. Here, you can change the corner radius of the rectangle to make it rounded. Experiment with different corner radius values to achieve the desired shape.
Step 3: Duplicate and Arrange
After you have created your basic stitch shape, you can duplicate it and arrange the duplicates to create the desired pattern. Select the shape and press Ctrl+C to copy it. Then, press Ctrl+V to paste the duplicate. Repeat this process as many times as needed, arranging the duplicates in a desired pattern.
Step 4: Edit the Appearance
Once you have arranged the stitch shapes, you can further edit their appearance to create a more realistic knit pattern. Experiment with different stroke colors, stroke widths, and stroke styles to achieve the desired effect. You can also use gradients, textures, or other tools in Illustrator to add additional details to the stitch shapes.
By following these steps, you can create a basic stitch shape and use it as a foundation for your knit pattern in Illustrator. Remember to experiment with different variations and styles to achieve the desired look for your pattern.
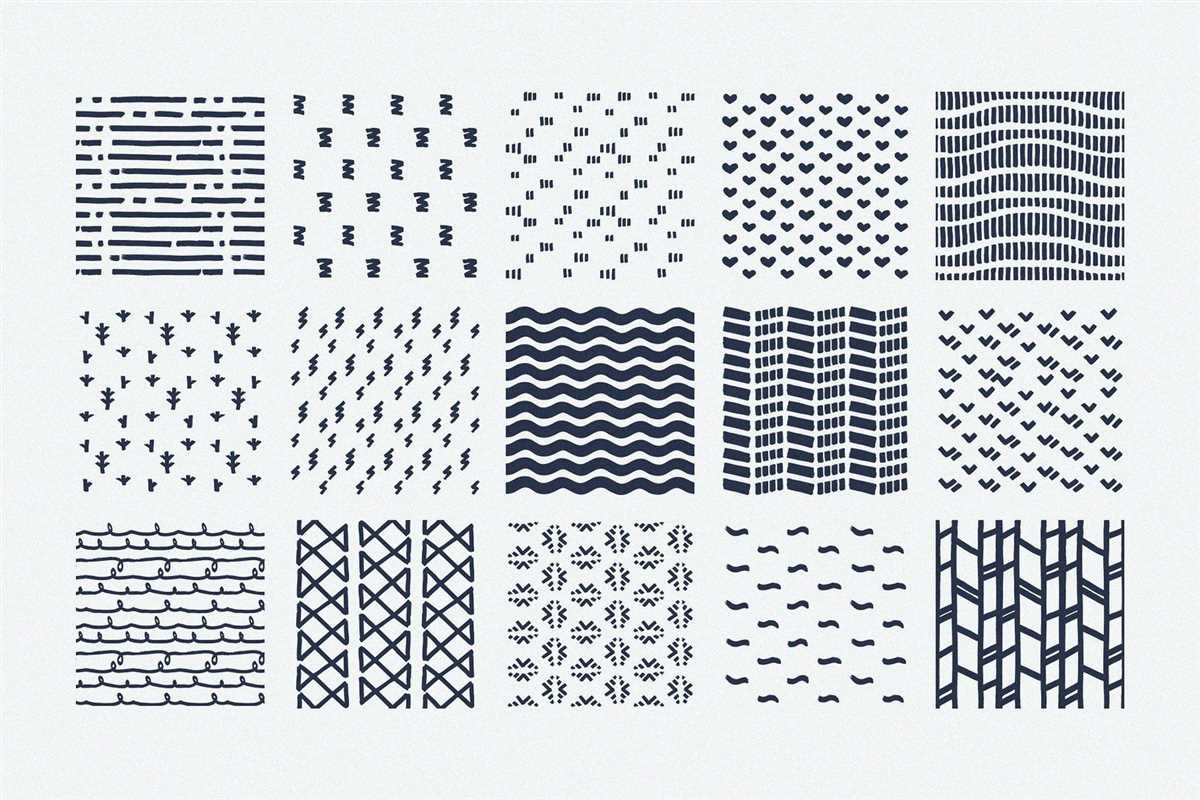
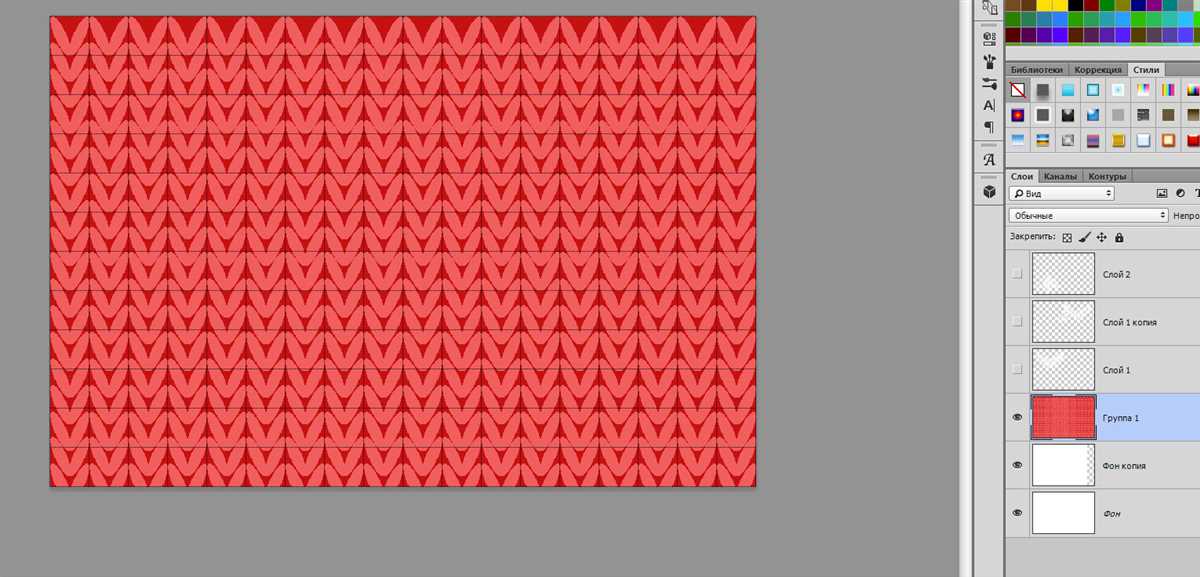
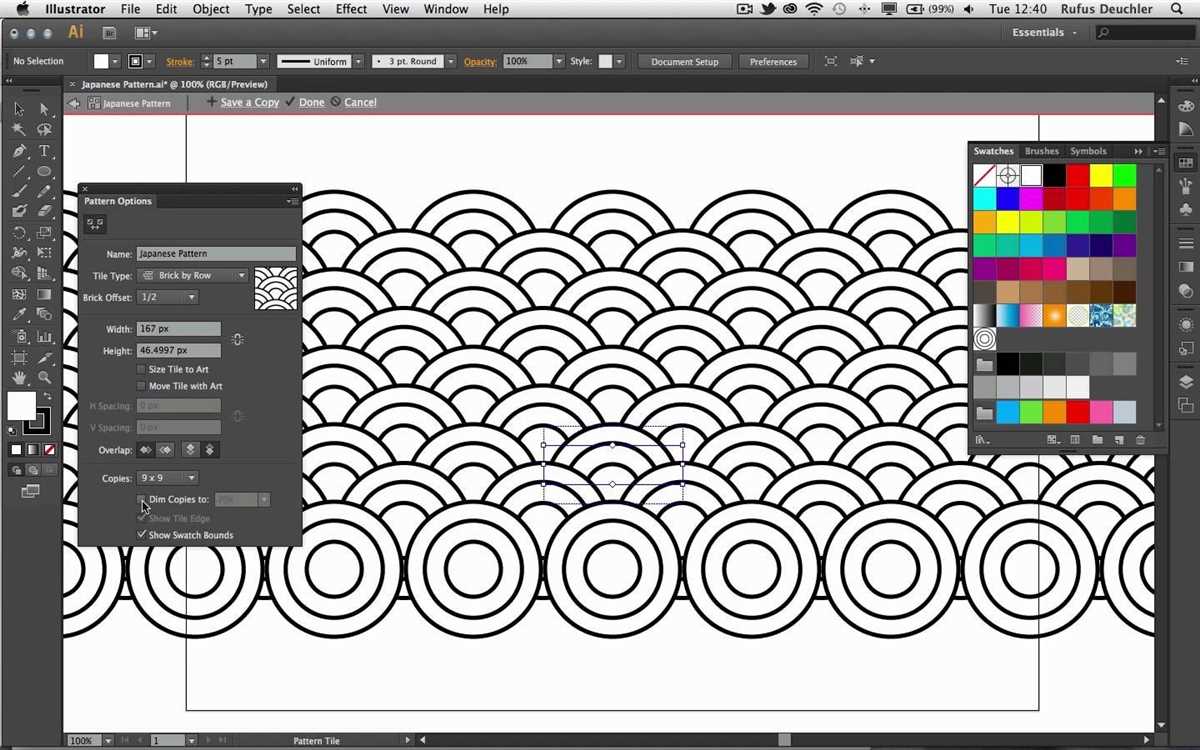
Creating a Pattern Swatch
In Illustrator, you can easily create a pattern swatch to apply a design to any shape or object. This allows you to create custom patterns and textures for your projects. Here is how you can create a pattern swatch in Illustrator.
Step 1: Open the file or create a new document in Illustrator. Draw the pattern design that you want to turn into a swatch.
Step 2: Select the design using the Selection Tool (V). Make sure that the design is grouped or combined as a single object.
Step 3: Go to the Object menu, select Pattern, and then click on Make.
Step 4: In the Pattern Options window, you can adjust the settings of the pattern swatch. You can change the name of the swatch, select the type of pattern (grid, brick, or hex), adjust the size and spacing, and even change the color mode.
Step 5: Once you are satisfied with the settings, click on Done. The pattern swatch will now appear in the Swatches panel.
Step 6: To apply the pattern swatch, select the shape or object that you want to fill, and then click on the pattern swatch in the Swatches panel. The shape or object will now be filled with your custom pattern design.
Apply the Pattern to a Shape
Once you have created your knit pattern in Illustrator, you can apply it to any shape you want. This allows you to create various designs and apply them to different objects or surfaces.
To apply the pattern, select the shape you want to fill and then go to the “Swatches” panel. In the panel, you will see a thumbnail of your pattern. Simply click on it to apply the pattern to the shape.
If you want to adjust the size or position of the pattern within the shape, you can do so by using the “Transform” options. You can access these options by going to “Object” > “Transform” > “Scale” or “Move”. Here, you can scale or move the pattern to achieve the desired effect.
If you want to create a seamless pattern, make sure to enable the “tile” option when creating the pattern swatch. This will ensure that the pattern seamlessly repeats across the shape without any visible edges or gaps.
With these steps, you can easily apply your knit pattern to any shape in Illustrator and create beautiful designs. Experiment with different shapes, sizes, and colors to unleash your creativity and bring your knit patterns to life.
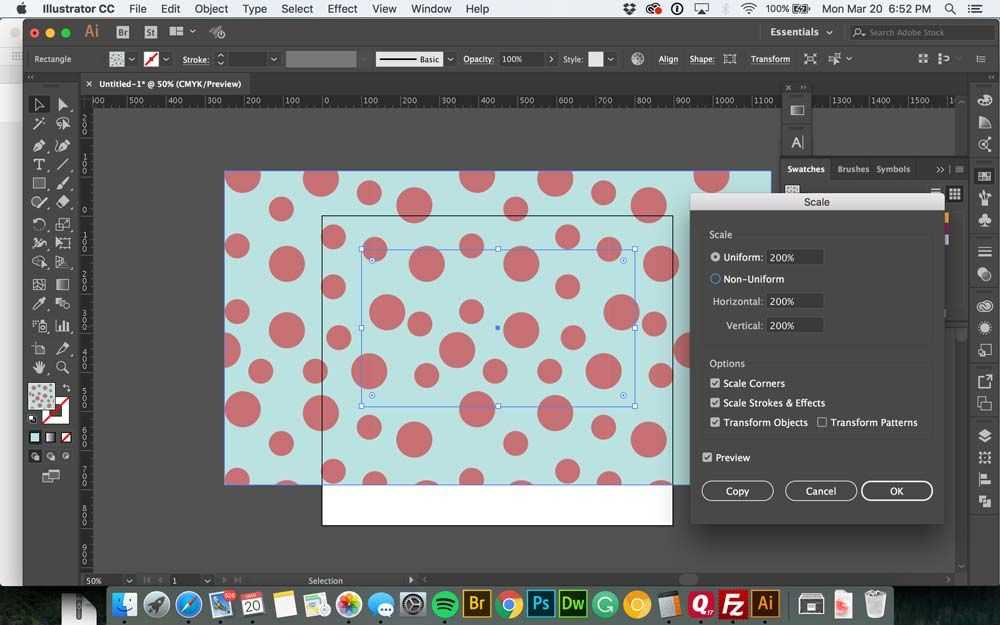
Adjust the Scale and Rotation of the Pattern
Once you have created your knit pattern in Adobe Illustrator, you may find that you need to adjust the scale or rotation of the pattern to fit your project. Fortunately, Illustrator offers tools that allow you to easily make these adjustments.
To adjust the scale of the pattern, select the pattern and go to the “Object” menu. From there, choose “Transform” and then “Scale”. In the dialog box that appears, you can enter the desired scale value or use the sliders to increase or decrease the size of the pattern. You can also choose whether to scale the pattern proportionally or independently in the horizontal and vertical directions.
If you want to rotate the pattern, select it and go to the “Object” menu once again. Choose “Transform” and then “Rotate”. In the dialog box, enter the desired rotation angle or use the slider to rotate the pattern. You can also choose the rotation point, which determines the center of rotation.
It’s important to note that adjusting the scale or rotation of a pattern may affect its appearance and how it fits together. You may need to experiment with different settings to achieve the desired result. It’s also a good idea to preview the changes before applying them to make sure they give you the desired effect.
By adjusting the scale and rotation of your knit pattern in Illustrator, you can customize it to suit your project’s needs and create a unique design. Whether you need to make it larger or smaller, or rotate it to a specific angle, Illustrator’s tools make it easy to make these adjustments and achieve the desired result.
Add Details and Texture
Once you have created the basic shape of your knit pattern in Illustrator, you can start adding details and texture to make it look more realistic. One way to do this is by using various brushes and patterns to create different stitch patterns. For example, you can use a cross-hatch brush to create the appearance of a cable knit pattern, or a dot pattern brush to create the look of a popcorn stitch.
In addition to using brushes, you can also apply different layer styles and effects to add texture to your knit pattern. This can include adding a gradient overlay to create shading and highlights, or applying a bevel and emboss effect to simulate the raised texture of certain stitches. You can also experiment with different blending modes to achieve different effects, such as a soft and fuzzy texture.
To make your knit pattern even more realistic, you can also add details such as buttons, ribbons, or other embellishments. These can be created using basic shapes or by importing images and textures from other sources. By adding these small details, you can create a more finished and polished look for your knit pattern design.
Save and Export Your Knit Pattern
Once you have finished creating your knit pattern in Illustrator, it’s important to save and export it properly to ensure that it can be used effectively. Here are some steps to follow:
1. Save your Illustrator file
First, save your work as an .ai (Adobe Illustrator) file. This will allow you to easily make changes or adjustments to the pattern in the future if needed.
2. Create a high-resolution image
To export your knit pattern as an image, go to “File” > “Export” > “Export As” and select a file format such as JPEG or PNG. Make sure to choose a high resolution (300 dpi or higher) to ensure that the pattern looks crisp and clear when printed or shared digitally.
3. Export a seamless tile
If you want to create a seamless tile that can be repeated vertically and horizontally, you can export your knit pattern as a seamless tile. To do this, go to “Object” > “Pattern” > “Make” and adjust the settings to create the desired tiling effect. Then, export the pattern as an image file using the steps mentioned above.
4. Save an editable pattern swatch
If you want to use your knit pattern as a pattern swatch within Illustrator, go to “Edit” > “Define Pattern” and give it a name. This will save the pattern as a swatch that can be applied to any shape or object within Illustrator.
By following these steps, you can save and export your knit pattern in different formats and variations, making it easy to share, print, or use within the Illustrator software itself.
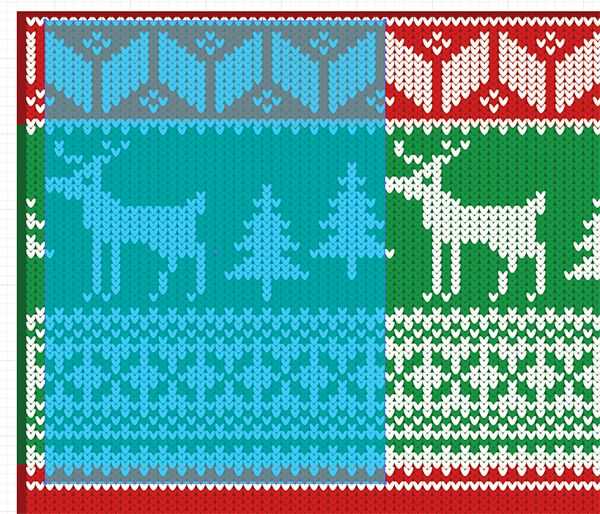
Apply the Knit Pattern to Various Projects
Once you have created a knit pattern in Illustrator, you can apply it to various projects to add a unique and textured look. Whether you are designing clothing, accessories, or even home decor items, the knit pattern can be a versatile element to incorporate into your designs.
1. Clothing Design:
The knit pattern is perfect for clothing design, as it adds a cozy and stylish touch. You can use it to create sweaters, cardigans, scarves, or even leggings. By applying the knit pattern to different shapes and sizes, you can create a wide range of garments with an attractive woven look.
2. Accessories:
Take your accessories to the next level by incorporating the knit pattern. Hats, gloves, and socks can all benefit from the added texture and visual interest that the knit pattern provides. You can experiment with different colors and stitch patterns to create unique and eye-catching designs.
3. Home Decor:
Bring the cozy vibes to your home decor with the knit pattern. You can apply it to cushions, blankets, or even curtains to create a warm and inviting atmosphere. The knit pattern adds a tactile element to your decor, making it not only visually appealing but also comfortable to touch.
4. Digital Art and Graphics:
The knit pattern is not limited to physical products. You can also use it in your digital art and graphic designs. Incorporate the knit pattern into illustrations, logos, or backgrounds to give your work a unique and handmade feel. The textured look of the knit pattern can create depth and visual interest in your digital creations.
Overall, the knit pattern can be applied to a wide range of projects, from clothing design to home decor and digital art. Its versatility and ability to add texture and visual interest make it a valuable element to incorporate into your designs.
Share Your Knit Patterns with Others
Now that you have mastered creating knit patterns in illustrator, you can share your creations with others. Sharing your patterns not only allows you to showcase your talent and creativity, but it also helps fellow knitting enthusiasts learn and create beautiful knitted items.
Here are a few ways you can share your knit patterns with others:
- Online platforms: Publish your patterns on popular knitting websites, such as Ravelry or LoveCrafts. These platforms have a large user base of knitters who are eager to discover new patterns. Make sure to include detailed instructions, clear images, and any supporting charts or diagrams.
- Social media: Share your patterns on social media platforms like Instagram or Pinterest. Create eye-catching visuals to grab attention and provide a link to download the pattern. Engage with your audience by responding to comments and questions.
- Personal website or blog: Create your own website or blog to showcase your work. Include a section dedicated to your knit patterns, where visitors can easily access and download them. You can also write blog posts sharing your knitting tips and tricks.
- Collaborate with knitting magazines or publications: Approach knitting magazines or online publications to see if they would be interested in featuring your patterns. This can help you reach a wider audience and gain recognition within the knitting community.
Remember to protect your patterns by considering copyright and licensing options. If you want to sell your patterns, explore options like selling them as digital downloads or self-publishing a book.
Sharing your knit patterns is not only a generous act but also a great way to establish yourself as a skilled knitter and inspire others to get creative. So, spread the joy of knitting by sharing your patterns and watch as fellow knitting enthusiasts bring your designs to life!
Q&A:
Can I customize the size and shape of the knit pattern in Illustrator?
Yes, you can customize the size and shape of the knit pattern in Illustrator. After splitting the shape into a grid and expanding it, you can modify the individual shapes to create different patterns. You can change the size of the shapes by selecting them and dragging the corner handles while holding the Shift key to maintain proportion. To change the shape, you can use the Direct Selection Tool (A) to select and manipulate individual anchor points, or use the Pen Tool (P) to add or remove points and create custom shapes. By experimenting with different sizes, shapes, and arrangements, you can create unique and personalized knit patterns in Illustrator.
Can I create a seamless knit pattern in Illustrator?
Yes, you can create a seamless knit pattern in Illustrator. After expanding the grid into individual shapes, you can select all the pattern elements and go to Object > Pattern > Make. In the Pattern Options dialog box, you can adjust the settings to make the pattern seamless. You can specify the Tile Type, which determines how the pattern repeats, and adjust the Width and Height values to control the size of the pattern. You can also enable or disable the option to move copies, which determines if the pattern shifts when applied. By experimenting with different settings, you can create seamless knit patterns that seamlessly repeat in any direction when applied to shapes.
Can I apply the knit pattern to any shape in Illustrator?
Yes, you can apply the knit pattern to any shape in Illustrator. Once you have created the pattern using the Pattern Options dialog box, it will be available in the Swatches panel. To apply the pattern to a shape, select the shape and choose the knit pattern from the Swatches panel. The pattern will be applied to the shape, filling it with the desired knit pattern. You can apply the pattern to any shape, including basic shapes like rectangles and circles, as well as more complex shapes or custom artwork. By applying the pattern to different shapes, you can create various designs and achieve the desired knitting effect in Illustrator.
Can I customize the knit pattern in Illustrator?
Yes, you can customize the knit pattern in Illustrator. After creating the pattern swatch, you can make adjustments to it by double-clicking the pattern swatch in the “Swatches” panel. This will open the “Pattern Options” dialog box where you can modify settings such as tile type, size, spacing, overlap, and more. You can also adjust the color, rotation, and scaling of the pattern using the Transform or Appearance panels. By experimenting with these settings, you can create unique and customized knit patterns in Illustrator.