
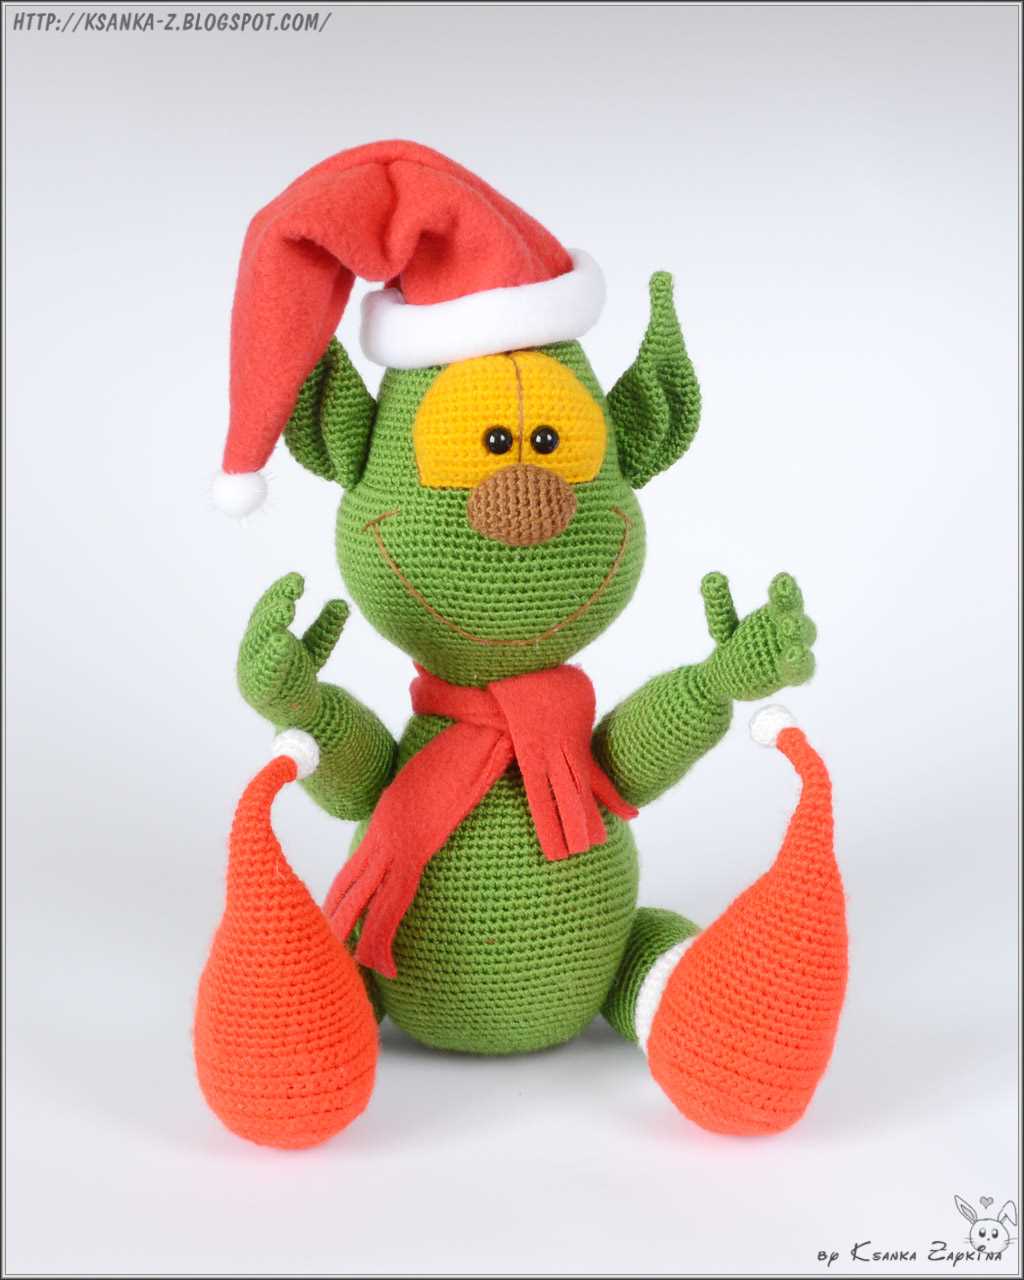
Knitting is a wonderful craft that allows you to create beautiful and unique items. One of the most popular knitting patterns is the Grinch pattern. Inspired by Dr. Seuss’ beloved character, the Grinch pattern is a fun and festive way to bring holiday cheer.
The Grinch knitting pattern is perfect for beginners and experienced knitters alike. With its simple design and easy-to-follow instructions, you can create an adorable Grinch doll or even a Grinch-inspired sweater. Whether you’re looking to add a touch of whimsy to your holiday decorations or make a memorable gift for a loved one, the Grinch pattern is a great choice.
Not only is the Grinch pattern fun to knit, but it’s also a great way to express your creativity. You can choose different colors of yarn to create a unique and personalized Grinch. Whether you opt for the traditional green or decide to mix things up with a different hue, the possibilities are endless.
So, grab your knitting needles and dive into the world of the Grinch knitting pattern. With its festive charm and endless possibilities, it’s sure to become a favorite project for knitters of all skill levels.
The Grinch Knitting Pattern
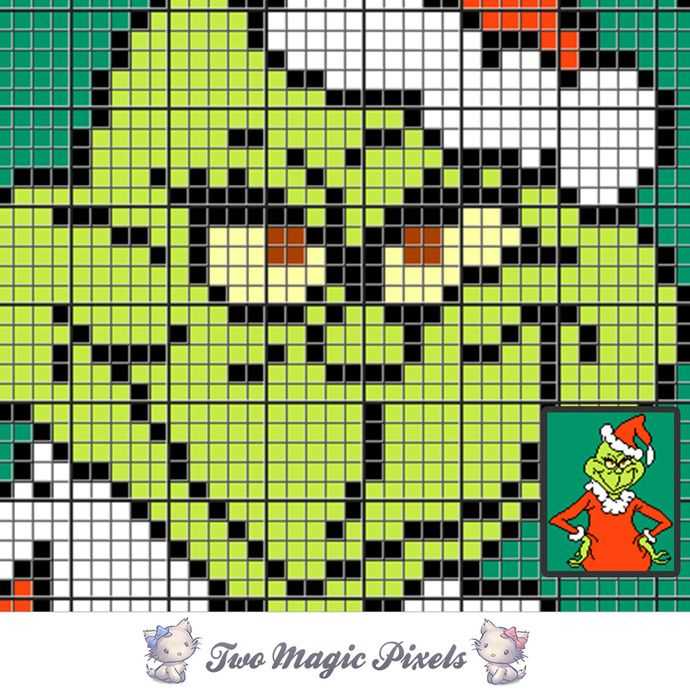
The Grinch is a beloved character from Dr. Seuss’s classic tale, “How the Grinch Stole Christmas!” Knitting enthusiasts can now bring this iconic character to life with their own hands by following the Grinch knitting pattern. With this pattern, you can create a whimsical, festive decoration or a unique gift for the holiday season.
Materials:
- Green yarn (medium weight)
- Red yarn (medium weight)
- White yarn (medium weight)
- Knitting needles (size 8)
- Tapestry needle
- Polyester fiberfill
- Scissors
Instructions:
- Start by casting on 30 stitches using the green yarn.
- Knit 10 rows in garter stitch.
- Switch to red yarn and knit 4 rows in stockinette stitch.
- Switch back to green yarn and knit 8 rows in stockinette stitch.
- Repeat steps 3 and 4 two more times.
- Switch to white yarn and knit 2 rows in stockinette stitch.
- Switch back to green yarn and knit 4 rows in stockinette stitch.
- Switch to red yarn and knit 6 rows in stockinette stitch.
- Switch back to green yarn and knit 4 rows in stockinette stitch.
- Switch to red yarn and knit 4 rows in stockinette stitch.
- Switch back to green yarn and knit 12 rows in garter stitch.
- Bind off all stitches.
- Using the tapestry needle, sew up the sides of the knitting, leaving a small opening at the top.
- Stuff the Grinch with polyester fiberfill, making sure to shape it like the character’s head.
- Close the opening by sewing it shut.
This Grinch knitting pattern is relatively simple, making it suitable for knitters of all skill levels. The finished Grinch can be used as a decoration for your Christmas tree, a centerpiece for your holiday table, or even a soft toy for children. Get creative with the facial features by embroidering eyes, a nose, and a mischievous grin. Knitting the Grinch is a fun and festive project that will bring holiday cheer into your home.
What is the Grinch knitting pattern?

The Grinch knitting pattern is a set of instructions that allows you to create your own knitted Grinch character. Inspired by the famous Dr. Seuss story “How the Grinch Stole Christmas,” this pattern is a popular choice for fans of the iconic green character.
With the Grinch knitting pattern, you can bring the mischievous and grumpy Grinch to life in your own home. The pattern typically includes detailed instructions for creating the Grinch’s body, face, and clothing using different knitting stitches and techniques. It may also include instructions on how to add additional details such as his iconic hat and mitten.
Many people enjoy knitting the Grinch as a festive holiday project, as it can be a fun and creative way to decorate your home or give a unique gift to a fellow Grinch enthusiast. Whether you’re a beginner or an experienced knitter, there are Grinch knitting patterns available for various skill levels, so you can choose a pattern that suits your abilities.
When knitting the Grinch, you can get creative with your color choices, selecting different shades of green and other colors for his clothing and accessories. Some patterns also allow for customization, allowing you to add your own personal touch to your knitted Grinch.
Materials needed for the Grinch knitting pattern
The Grinch knitting pattern requires a few specific materials to complete the project. Here is a list of the necessary items:
- Yarn: You will need green yarn to replicate the iconic color of the Grinch. Make sure to choose a soft and durable yarn for a comfortable finished product.
- Knitting Needles: Select knitting needles that are appropriate for the weight of your chosen yarn. The pattern may specify a particular size, so be sure to have the recommended needles on hand.
- Tapestry Needle: A tapestry needle is essential for weaving in loose ends and sewing any parts of the Grinch together, such as attaching the head to the body.
- Scissors: A sharp pair of scissors is necessary for cutting the yarn as you work on your knitting project.
- Stuffing: You will need stuffing material, such as polyester fiberfill, to stuff the Grinch and give it a three-dimensional shape. Make sure to have enough to fill the body, head, and any other parts accordingly.
- Stitch Markers: Stitch markers can be helpful for keeping track of specific sections or stitches in the pattern. They can be useful when working on shaping the Grinch’s body or other intricate details.
- Safety Eyes: To bring the Grinch to life, consider using safety eyes instead of embroidering them. Safety eyes can easily be attached and will provide a more realistic appearance to the knitted character.
With these materials at hand, you’ll be ready to start knitting your own adorable Grinch. Remember to read the pattern thoroughly before beginning and enjoy the process of bringing this iconic character to life with your knitting skills!
How to start knitting the Grinch
If you’re a fan of the Grinch and enjoy knitting, why not combine your two passions and create your own Grinch-inspired knitted item? Whether it’s a toy, a hat, or a sweater, knitting the Grinch can be a fun and festive project. Here are a few steps to help you get started.
Gather your materials
Before you begin knitting the Grinch, make sure you have all the necessary materials. You will need green yarn for the Grinch’s body, as well as black, white, and red yarn for the details. Additionally, gather your knitting needles, stitch markers, and a tapestry needle for sewing up any seams or attaching small parts.
Choose a pattern
There are many Grinch knitting patterns available online, so take some time to find one that suits your skill level and the item you want to knit. Some patterns may be more detailed and require advanced knitting techniques, while others may be simpler and suitable for beginners. Read through the pattern instructions carefully to ensure you understand the steps involved.
Start knitting
Once you have your materials and pattern ready, it’s time to start knitting the Grinch. Begin by casting on the required number of stitches for your chosen item and follow the pattern instructions. Pay attention to any specific stitch patterns or color changes indicated in the pattern. Use stitch markers to help you keep track of important sections or increases and decreases.
Add the details
As you progress in your knitting, you will reach the point where you need to add the Grinch’s details. This may include knit or purl stitches in different colors for his face, eyes, and mouth, as well as any additional embellishments like his hat or scarf. Follow the pattern instructions to create these details, using the different yarn colors as required.
Finish and assemble
Once you have completed all the required sections of the pattern and added the necessary details, it’s time to finish your Grinch knitting project. This may involve casting off your stitches, weaving in any loose ends, and sewing up any seams. If you’re making a toy, you may also need to stuff it with fiberfill before closing it up. Take your time to ensure everything is securely attached and neatly finished.
With these steps, you’ll be well on your way to knitting your own Grinch-inspired creation. Remember to have fun and enjoy the process as you bring the Grinch to life through your knitting skills!
Creating the Grinch’s body
When knitting the Grinch, it’s important to start with his body. To do this, you will need a set of knitting needles and green yarn. Begin by casting on the required number of stitches, typically around 40-50 stitches, to create a rectangular shape for the body.
Row 1: Knit all stitches in the row.
After completing the first row, you can then start working on the body. The body of the Grinch is typically knit in stockinette stitch, which means alternating between knitting one row and purling the next. Repeat this pattern until the body measures the desired length, usually around 10-12 inches.
Once the body is the right length, you can then begin shaping it by decreasing stitches. This can be done by knitting or purling two stitches together at regular intervals. Decrease stitches evenly across the row to maintain the rectangular shape of the body. Continue decreasing until you have a small enough number of stitches to comfortably close the body.
Finally, bind off all stitches to secure the body and create a finished edge. Weave in any loose ends of yarn and your Grinch’s body is complete! Now you’re ready to move on to knitting his other features, such as his head, arms, and legs, to bring your knitted Grinch to life.
Knitting the Grinch’s arms and legs
When knitting the Grinch’s arms and legs, it is important to follow the knitting pattern carefully to ensure that the proportions are correct and the finished pieces look like the iconic character.
For the arms, start by casting on the required number of stitches, usually around 20-25 stitches, using the specified yarn and knitting needles. Work in the chosen stitch pattern, such as stockinette stitch or ribbing, for the desired length of the arm. Remember to leave a long tail of yarn at the end for sewing the arm to the body later.
Next, shape the arm:
- Decrease stitches gradually towards the wrist to create a tapered look. This can be done by knitting two stitches together at regular intervals, depending on the desired shape.
- Once the arm reaches the desired length, bind off the stitches and cut the yarn, leaving another long tail for sewing.
- Repeat the process to knit the second arm.
For the legs, the process is similar:
- Start by casting on the required number of stitches, usually a bit more than for the arms, as the legs are slightly longer. Again, leave a long tail of yarn for sewing later.
- Work in the chosen stitch pattern, such as stockinette stitch or ribbing, for the desired length of the leg.
- Shape the leg by decreasing stitches gradually towards the ankle, just like with the arms. This will create a tapered look.
- Once the leg reaches the desired length, bind off the stitches and cut the yarn, leaving a long tail for sewing.
- Repeat the process to knit the second leg.
Once both the arms and legs are knitted and shaped, they can be sewn onto the Grinch’s body according to the pattern instructions. Use the long tails of yarn to sew the pieces securely, making sure they are evenly spaced and aligned correctly. The finished arms and legs should give the Grinch a whimsical and mischievous appearance, bringing the character to life in your knitting project.
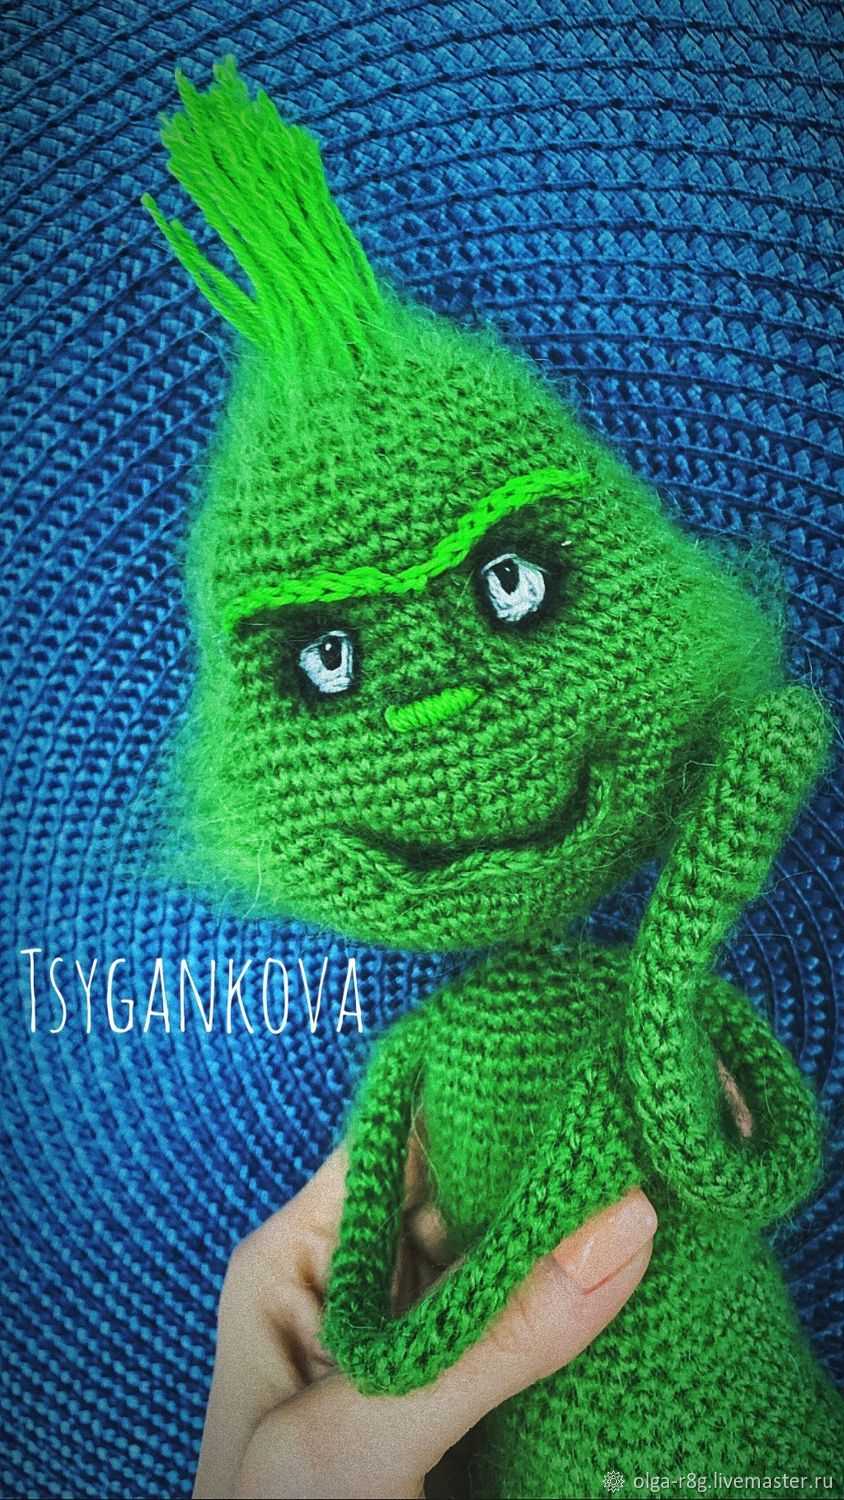
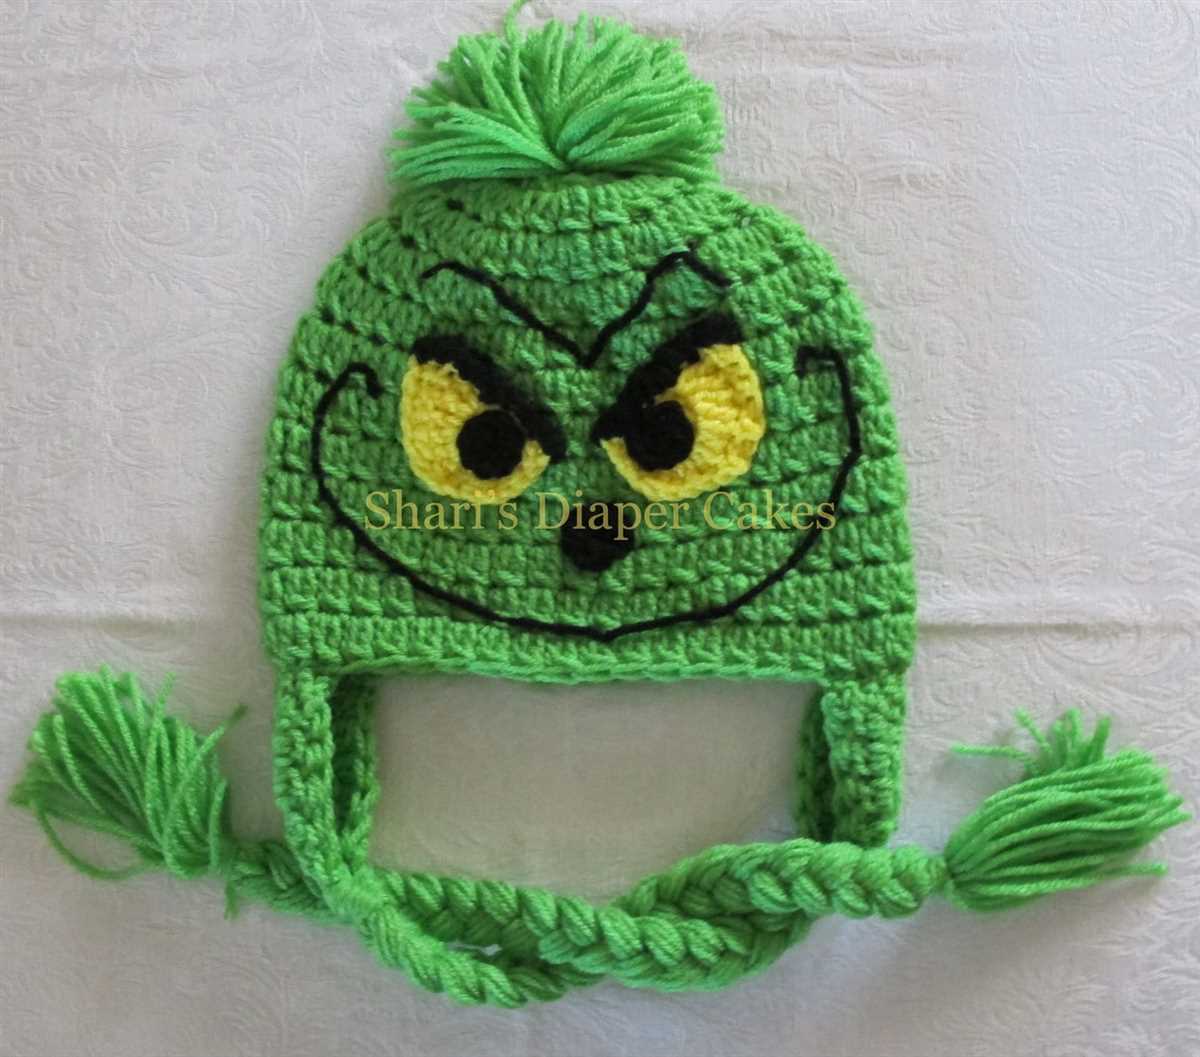
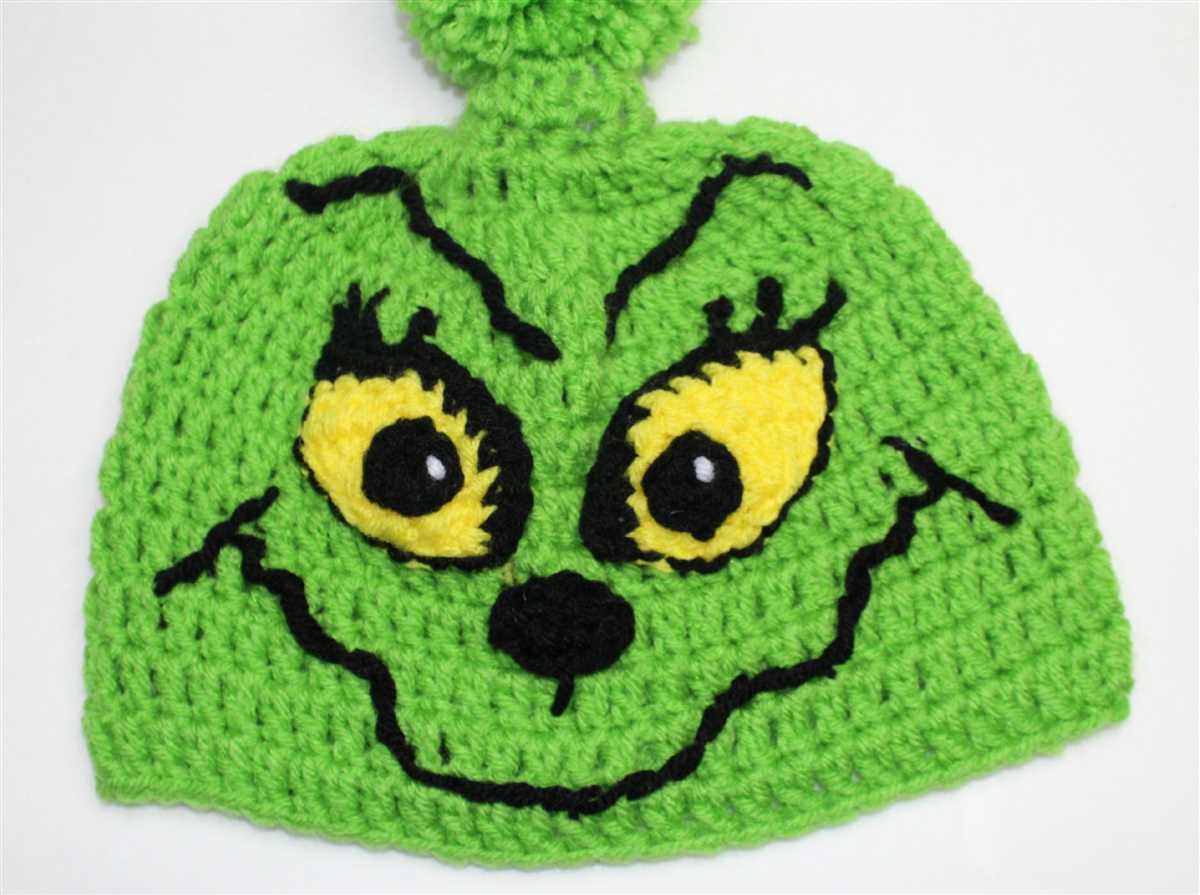
Making the Grinch’s face
When knitting a Grinch doll, one of the most important parts to focus on is his face. The face is what brings the character to life and captures the mischievous and grumpy expression that the Grinch is known for.
To create the Grinch’s face, you will need to use different knitting techniques to achieve the desired effect. Start by knitting the base of the face using green yarn, following the pattern instructions. This will serve as the canvas for adding the details that will bring the Grinch to life.
- Eyebrows: The Grinch is known for his thick and bushy eyebrows. To create them, you can use a combination of different stitches, such as purl stitches or simple increases and decreases. You can knit the eyebrows separately and sew them onto the face, or you can knit them directly onto the face using the intarsia or stranded colorwork technique.
- Eyes: The Grinch has narrow, almond-shaped eyes that convey his mischievousness. You can embroider the eyes using black or dark green yarn, or you can use safety eyes or buttons for a more three-dimensional look.
- Nose: The Grinch’s nose is small and pointy, similar to that of a heart shape. You can knit a small triangle or use a felt or fabric cutout for the nose. Sew it onto the face between the eyes, positioning it slightly upwards for a more authentic look.
- Mouth: The Grinch’s mouth is often depicted in a sly smirk or a mischievous grin. You can use red yarn or embroider the mouth using a tapestry needle and black or dark green yarn. Experiment with different stitch patterns to create the desired expression.
Once you have added all the facial features, make sure to secure any loose ends and weave in the yarn tails to ensure that your Grinch’s face is secure and well-finished. Take your time and pay attention to the details, as they can make a big difference in capturing the essence of the Grinch’s character.
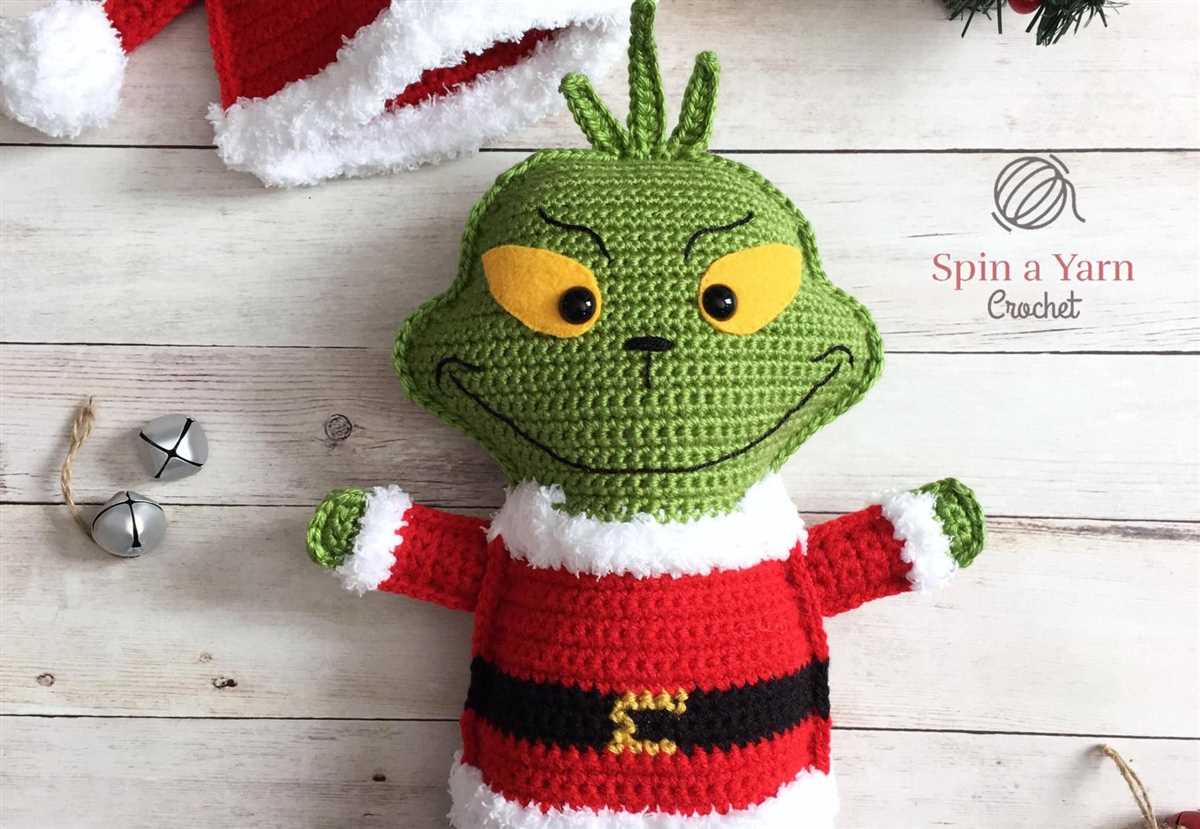
Adding details to the Grinch
When creating a knitted Grinch, it’s the small details that bring this iconic character to life. From his mischievous grin to his pointy shoes, adding these details is essential for an accurate representation.
Facial features: The Grinch’s face is known for its unique expression. To achieve this, use embroidery techniques to sew on his eyes, eyebrows, and cunning smile. Make sure to position them correctly to capture his mischievous personality.
Pointy shoes: The Grinch is notorious for his pointy shoes, so don’t forget to include them in your knitting pattern. To create his shoes, you can knit separate pieces and stitch them onto the bottom of his legs. This will provide stability and allow you to position the shoes realistically.
Crooked fingers: The Grinch has long, crooked fingers that add to his overall appearance. To create these, you can use a technique called finger knitting. Simply knit a small tube for each finger, stuff it lightly, and sew it onto the hands. This will give the Grinch’s hands their distinct shape.
Fluffy green hair: The Grinch’s wild, green hair is another crucial detail to include. You can achieve this by using a technique called loop stitch. Simply insert the needle into the work and create a loop, leaving it loose. Repeat this across the desired area until it becomes fluffy and resembles the Grinch’s iconic hairstyle.
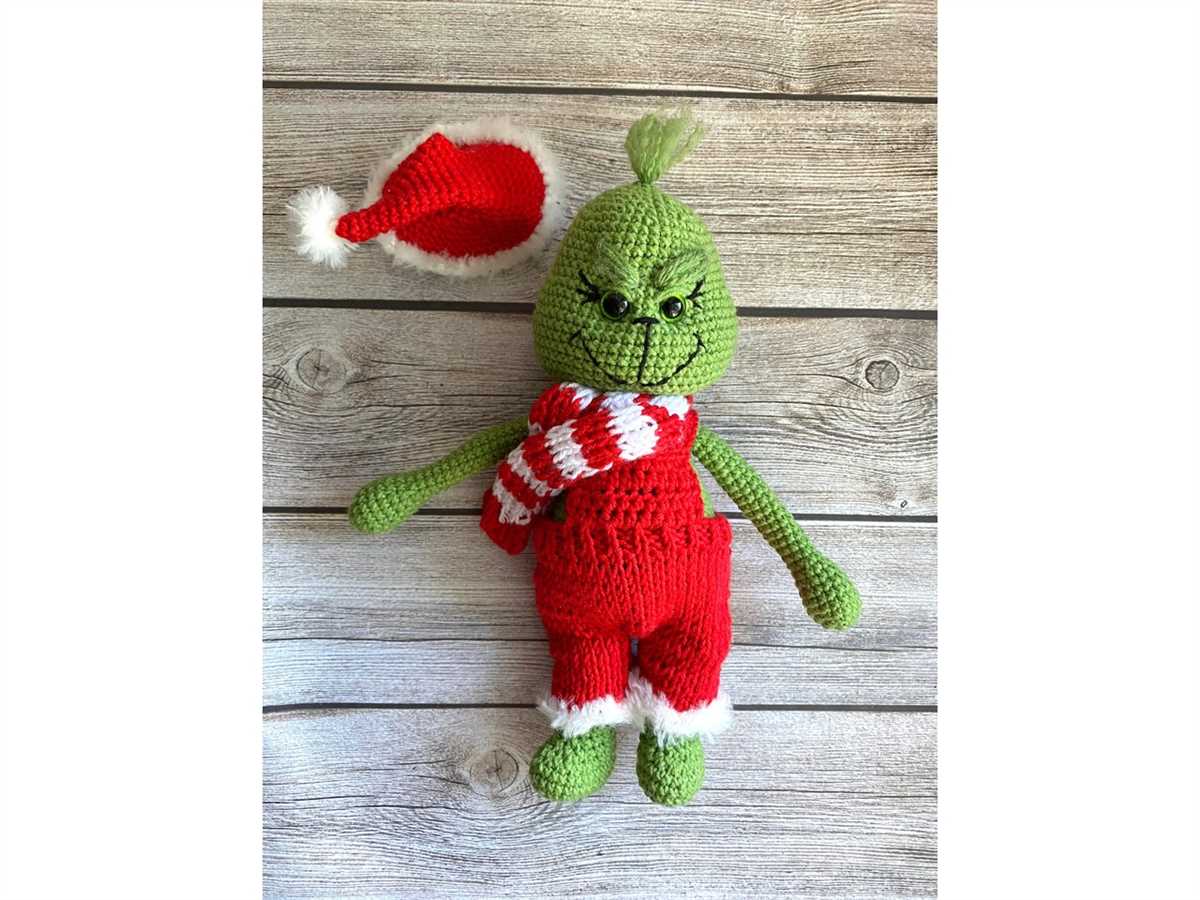
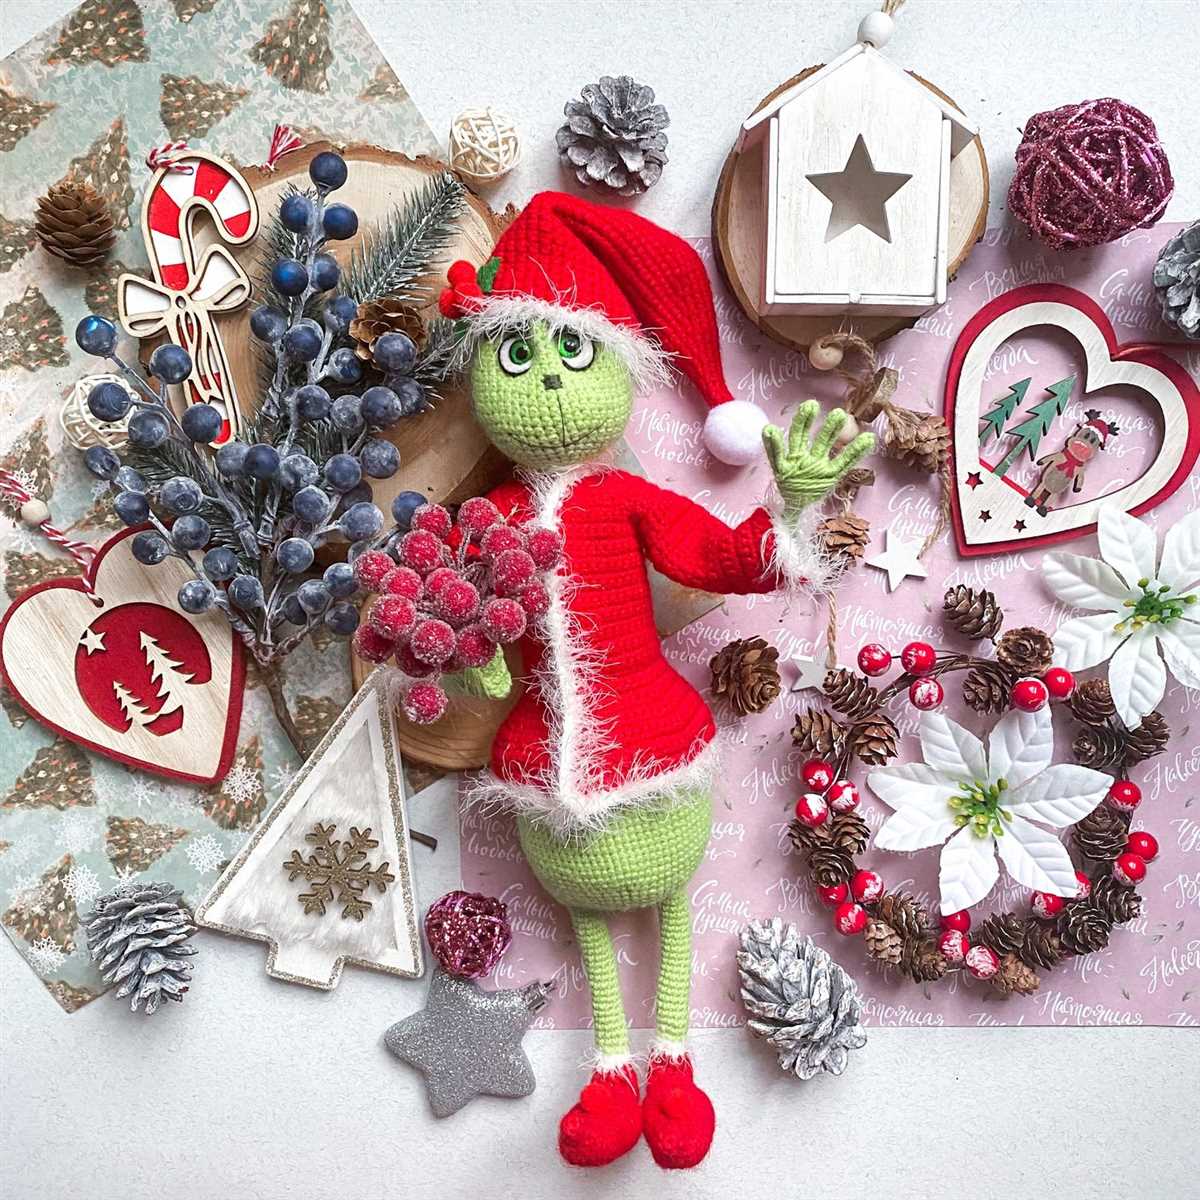
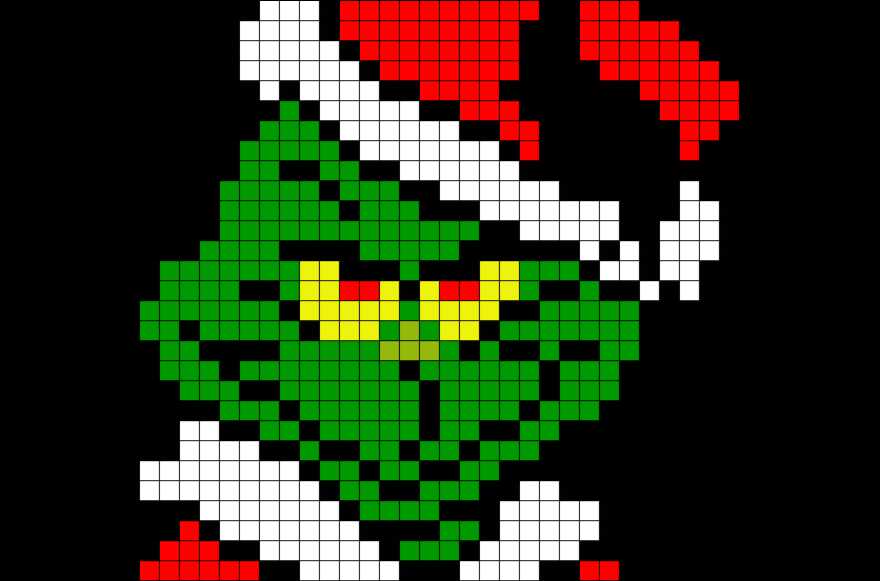
Accessories: To add even more personality to your knitted Grinch, consider adding some accessories. Perhaps a Santa hat, a candy cane, or a bag to carry stolen presents. These small additions will provide endless opportunities for customization and make your Grinch truly unique.
Making the Grinch’s clothing
The Grinch’s clothing is an iconic part of his character, and creating it for a knitting project can be a fun and challenging task. To start, you will need to gather the necessary materials, including green yarn, knitting needles, and any additional accessories you want to add to the clothing, such as buttons or pom poms.
One of the key pieces in the Grinch’s wardrobe is his hat. You can begin by casting on the required number of stitches to create the brim of the hat. Then, using the green yarn, continue knitting in rows to form the body of the hat. To give it the characteristic shape, you can decrease stitches gradually towards the top of the hat. Finally, finish off the hat by sewing up the seam and attaching any embellishments you desire.
Another important item is the Grinch’s sweater. This can be created by starting with the required number of stitches for the back panel. Knit in rows until you reach the desired length for the sweater. Next, you can divide the stitches for the front and back panels, and continue working on each piece separately. Once the front and back panels are complete, you can sew them together at the shoulders and side seams. To finish off the sweater, add ribbing to the neckline, cuffs, and hem.
Don’t forget about the Grinch’s pants! You can knit these separately, starting with the required number of stitches for each leg. Knit in rounds until you reach the desired length, then join the two legs together and continue knitting in rounds for the body. To create a waistband, switch to a smaller needle size and work a few rows of ribbing. Finally, bind off and sew up any seams.
By following these instructions and using your creativity, you can recreate the Grinch’s iconic clothing through knitting. Whether you’re making it as a gift or for yourself, this project will surely bring a festive touch to the holiday season.
Assembling the Grinch
Once you have finished knitting all the pieces of the Grinch, it’s time to assemble them and bring this iconic character to life. Follow these steps to put it all together:
1. Attach the Head
Start by attaching the Grinch’s head to the body. Take the head piece and align it with the top of the body, making sure the facial features are centered. Use a tapestry needle and the same yarn color to stitch the head firmly to the body. Make sure to secure it well so it doesn’t come loose.
2. Attach the Arms and Legs
Next, it’s time to attach the Grinch’s arms and legs. Take the arm pieces and align them with the sides of the body, just below the head. Use the same colored yarn and a tapestry needle to stitch the arms firmly to the body. Repeat the same process with the leg pieces, attaching them to the bottom of the body. Make sure all limbs are securely attached.
3. Embroider the Facial Features
The Grinch is known for his mischievous grin and expressive eyes. Take a different colored yarn, preferably black or dark green, and use it to embroider the facial features. Start with the eyes, making small stitches to create the pupils. Then, use the same yarn to embroider the Grinch’s mischievous grin. Take your time and make sure the features are aligned and look like the character.
4. Add the Final Details
Lastly, it’s time to add the final details to complete the Grinch. Use additional yarn or felt to create the Grinch’s Santa hat and any other accessories you want. Attach the hat to the top of the head using a tapestry needle and the same colored yarn. You can also add any other decorations or accessories to make your Grinch unique.
Once you have finished assembling and adding the final details to your Grinch, take a step back and admire your work. You have successfully knitted and brought to life this iconic character from Dr. Seuss’ beloved story. Whether you display it as a festive decoration or give it as a gift, your hand-knitted Grinch will surely bring a touch of whimsy and holiday spirit to any Christmas celebration.
Finishing touches for the Grinch
Knitting the Grinch is a fun and rewarding project, but the finishing touches can really bring the character to life. From his mischievous grin to his whimsical hair, these final details will make your Grinch truly stand out.
1. Facial features: The Grinch is known for his distinctive facial features, so pay close attention to his eyes, eyebrows, and mouth. Embroider his eyes using black or green yarn, and give him a mischievous sparkle with a French knot or sequin. Use a small amount of red yarn to create his sneaky smile, and add some character with raised eyebrows.
2. The Grinch’s hair: The Grinch’s wild, unkempt hair is a defining feature of his character. Use a thick, textured yarn in shades of green to create his messy locks. You can achieve this by knitting or crocheting individual strands and attaching them to the top of the head. Vary the length and thickness of the strands to add dimension and realism to the hair.
- 3. The Grinch’s Santa suit: To complete the Grinch’s transformation into Santa, knit or crochet a miniature Santa suit using red and white yarn. Add buttons, a belt, and fur trim for an authentic look. Don’t forget the little details, like a fluffy white pom-pom on the hat and a small jingle bell on the end of his pointed shoes.
- 4. The Grinch’s accessories: The Grinch is often seen with his bag full of stolen presents. Use a small drawstring pouch made of green fabric or yarn and attach it to his hand. You can also knit or crochet accessories like a candy cane or a tiny sleigh to complete the festive scene.
- 5. The Grinch’s heart: One of the most touching moments in “How the Grinch Stole Christmas” is when his heart grows three sizes. Create a small heart shape using red yarn and attach it to the Grinch’s hand or chest. This will add an extra element of emotion and bring the story to life.
By paying attention to these finishing touches, you’ll create a Grinch that captures the essence of this beloved character. Whether you display him as a holiday decoration or give him as a gift, your handmade Grinch will bring joy and festive cheer to all who see him.
Tips and Tricks for Knitting the Grinch
The Grinch is a beloved character from Dr. Seuss’s classic book “How the Grinch Stole Christmas.” Knitting your own Grinch can be a fun and festive project, but it can also be a bit challenging. Here are some tips and tricks to help you successfully bring the Grinch to life with your knitting needles.
1. Choose the Right Yarn
When knitting the Grinch, it’s important to choose the right yarn to achieve the desired effect. Opt for a green yarn that is similar to the color of the Grinch in the book or movie adaptations. A fuzzy or textured yarn can also add dimension to your knitted Grinch.
2. Use the Correct Needle Size
Using the correct needle size is crucial for achieving the right gauge and ensuring that your Grinch turns out the right size. Check the yarn label for recommended needle sizes and adjust accordingly to match the pattern instructions.
3. Pay Attention to Facial Features
The Grinch’s face is one of the most iconic parts of his character. Make sure to pay extra attention to the details of his facial features, such as his eyes, eyebrows, and signature smirk. Embroidering or using safety eyes can help bring these features to life.
4. Don’t Forget the Grinch’s Fuzzy Hair
The Grinch is known for his wild and fuzzy hair. Consider using a technique called loop stitch or attaching fuzzy yarn to create his unruly locks. This will add an extra touch of authenticity to your knitted Grinch.
5. Take Your Time with Construction
Knitting the Grinch may involve some intricate construction, especially if you’re making a stuffed toy or ornament. Take your time to carefully follow the pattern instructions and sew all the pieces together securely. This will ensure that your Grinch is sturdy and will last for years to come.
6. Add Holiday Accessories
Once you have finished knitting the Grinch, consider adding some holiday accessories to complete the look. You can knit a Santa hat, a scarf, or even a sack for him to carry to give your Grinch a festive touch.
By following these tips and tricks, you’ll be able to create your very own knitted Grinch that will bring holiday cheer to your home. Happy knitting!
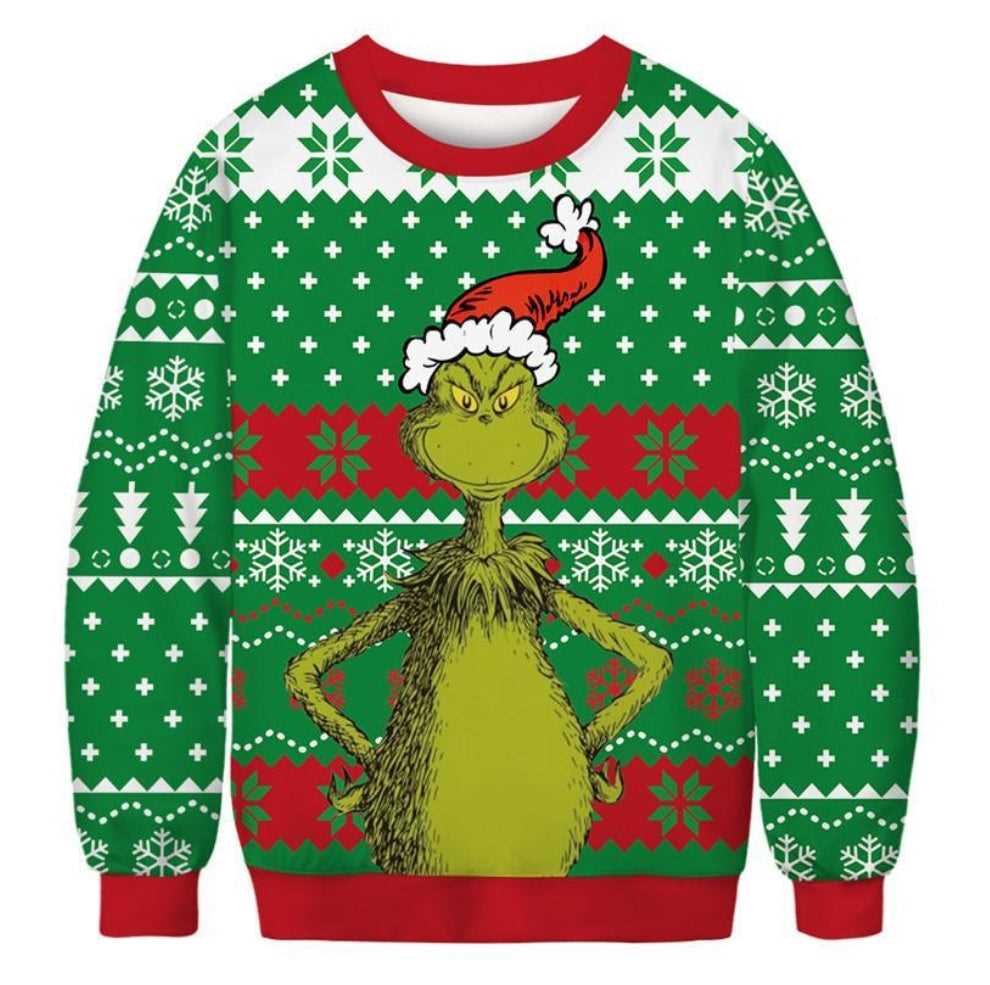
Ideas for using the Grinch knitting pattern
If you have decided to give the Grinch knitting pattern a try, there are many creative ways you can use your finished project. Whether you want to gift it to a loved one or incorporate it into your own holiday decor, the Grinch knitting pattern offers endless possibilities for festive fun.
1. Christmas ornaments
Your Grinch knitting project can easily be transformed into a cute Christmas ornament. Simply attach a loop of yarn to the top of the head, and hang it on your tree or give it as a charming handmade gift. You can also make multiple Grinch ornaments in different sizes to create a whimsical display.
2. Holiday garland
Create a festive atmosphere by stringing together a series of Grinch knitting projects to make a unique holiday garland. Hang it on your fireplace mantle, staircase railing, or around door frames for an eye-catching decoration that is sure to bring a smile to everyone’s face.
3. Christmas stockings
Add a touch of mischief to your holiday stockings by incorporating the Grinch knitting pattern into their design. Whether you use the pattern for the main body of the stocking or as an accent, it’s a fun way to personalize your stockings and add some Grinchy charm to your Christmas morning.
4. Holiday pillows

Create cozy and festive pillows for your couch or bed by using the Grinch knitting pattern to make the front panel. Mix and match different sizes and color combinations to add a touch of whimsy to your home decor during the holiday season.
5. Gifts for Grinch fans
If you know someone who is a fan of the Grinch, a knitted item made using the Grinch knitting pattern would make a thoughtful and unique gift. From hats and scarves to mittens and plush toys, the possibilities are endless for creating personalized gifts that showcase their love for this classic character.
Get creative with the Grinch knitting pattern and have fun bringing the holiday spirit to life with your handmade projects. Whether you choose to make ornaments, garlands, stockings, pillows, or gifts, your Grinch-inspired creations are sure to spread cheer and capture the hearts of those who see them.