
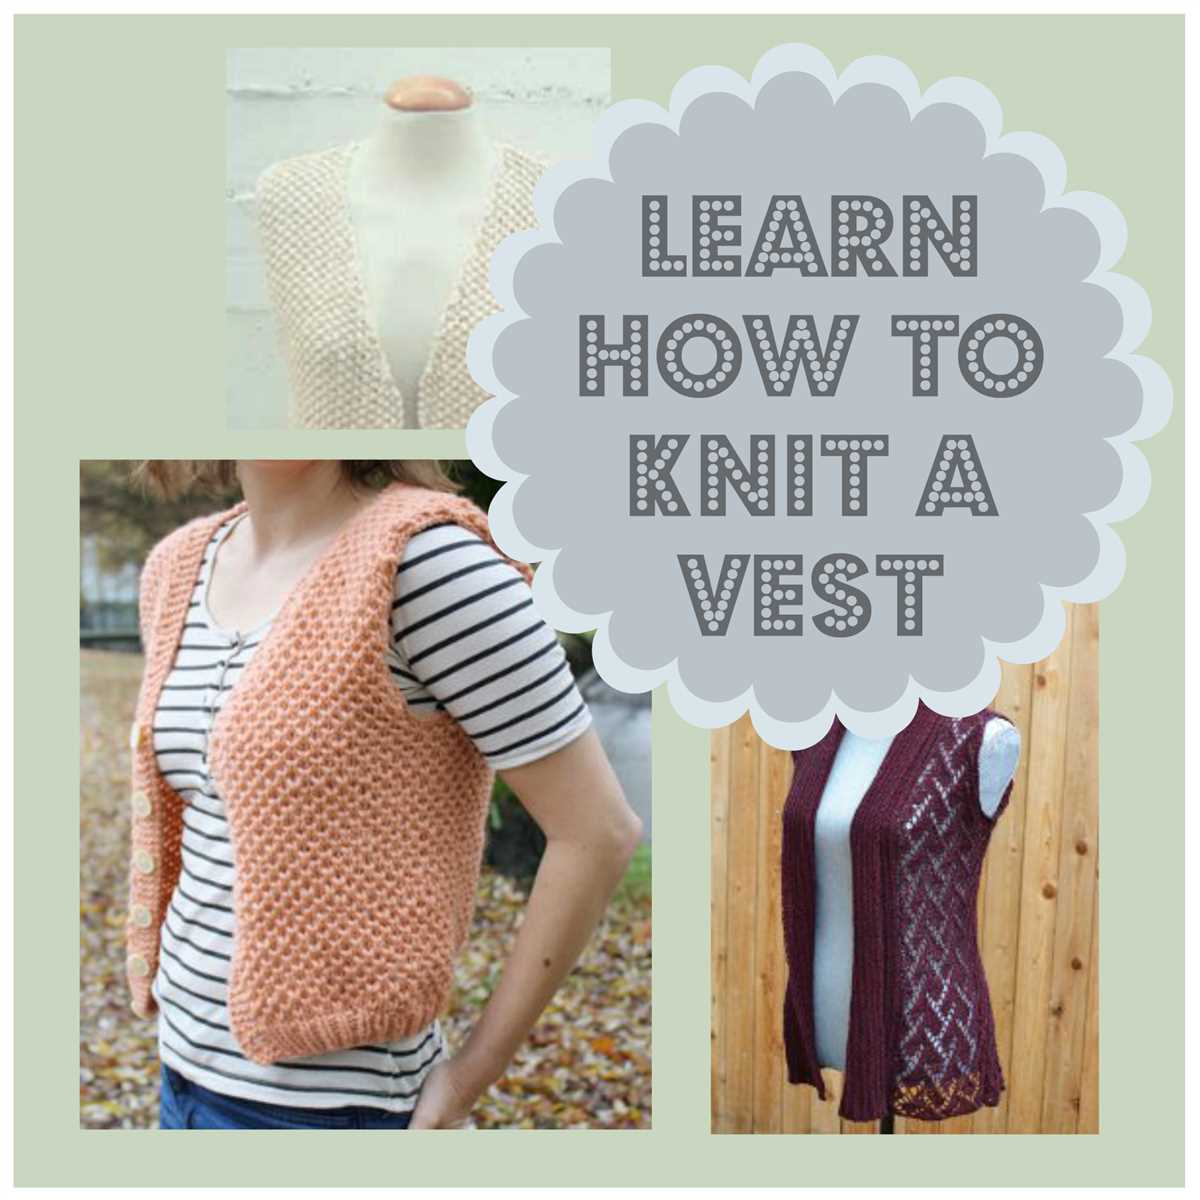
Knitting is a versatile hobby that allows you to create beautiful and functional garments. One popular knitted item is the vest. Vests are a great addition to any wardrobe, providing warmth and style without the bulk of a full sweater. If you’re looking to knit your own vest, you’re in luck! We have a knitted vest knitting pattern that is perfect for both beginner and experienced knitters.
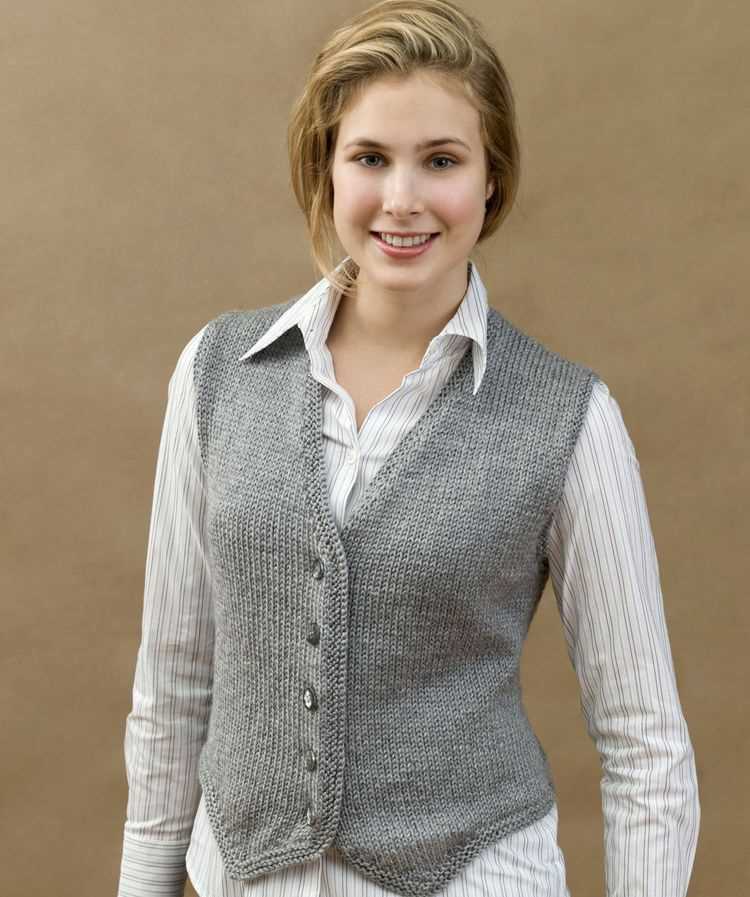
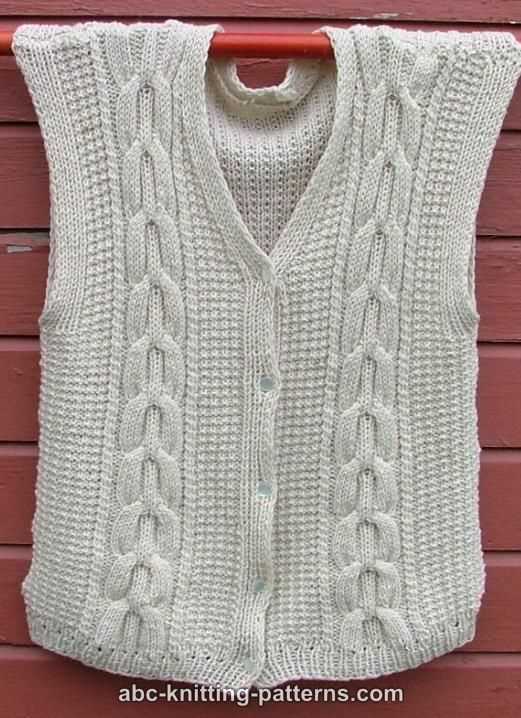
The knitted vest knitting pattern we’re sharing is simple yet stylish, making it a great project for knitters of all skill levels. The pattern features a classic V-neck design with a ribbed border, creating a polished and timeless look. The vest is knitted using a medium-weight yarn, which gives it a cozy and comfortable feel.
Whether you’re looking to expand your knitting skills or simply add a new garment to your wardrobe, this knitted vest knitting pattern is a must-try. With detailed instructions and clear stitch explanations, you’ll be able to create a beautiful vest that you’ll love to wear. So grab your knitting needles and yarn and get ready to create something amazing!
Knitted Vest Knitting Pattern
Knitted vests are a versatile and stylish addition to any wardrobe. Whether you want to add some warmth to your outfit or create a fashionable layering piece, a knitted vest is a perfect choice. With a bit of patience and some knitting skills, you can create a beautiful and unique garment that will keep you cozy during the cooler months.
When it comes to choosing a knitted vest knitting pattern, there are countless options available. You can find patterns for all skill levels, from beginner-friendly designs to more intricate and challenging ones. Whether you prefer a classic, timeless style or a trendy, modern look, there is a pattern out there that will suit your taste.
Key Features of a Knitted Vest Knitting Pattern
- Size options: Many knitted vest patterns offer multiple size options, allowing you to customize the fit to your body shape.
- Yarn suggestions: Patterns often provide suggestions for the type and weight of yarn to use, helping you achieve the desired look and feel of the vest.
- Stitch patterns: Knitted vests can feature a variety of stitch patterns, such as cables, lace, or ribbing, adding texture and visual interest to the garment.
- Construction techniques: Vests can be knitted from the bottom up, top down, or in separate pieces that are seamed together. The pattern will specify which technique to use.
- Finishing details: Some patterns include finishing details, such as button bands, collars, or pockets, that elevate the overall look of the vest.
Before starting a knitted vest project, it’s important to take accurate measurements and swatch to ensure that your gauge matches the pattern. This will help you achieve the correct sizing and fit of the final garment. Additionally, following the pattern instructions and keeping track of your progress will ensure that you stay on track and complete the project successfully.
Knitting a vest can be a rewarding and enjoyable project. Not only will you end up with a beautiful and functional garment, but you will also have the satisfaction of creating something with your own hands. So why not give it a try and start knitting your own knitted vest today?
Choosing the right yarn for your knitted vest
When it comes to knitting a vest, one of the most important decisions you’ll need to make is choosing the right yarn. The yarn you choose can greatly affect the overall look and feel of your finished project, as well as its durability and warmth.
Fiber content: One of the first considerations when selecting yarn for your knitted vest is the fiber content. There are many options available, including wool, cotton, acrylic, and blends. Each type of fiber has its own unique characteristics, so it’s important to consider factors such as warmth, breathability, and comfort when making your decision.
Warmth and insulation
If you’re looking for a warm and cozy vest, wool is an excellent choice. Wool has natural insulating properties and is known for its warmth. It’s also a great choice if you’re looking for a yarn that will keep its shape and provide structure to your vest. On the other hand, if you prefer a lightweight and breathable vest, cotton or linen yarn may be a better option. These fibers are known for their breathability and can help regulate body temperature, making them ideal for warmer weather or layering.
Durability and care
Another important factor to consider is the durability of the yarn and how easy it is to care for. If you’re knitting a vest that will be worn frequently or subjected to heavy use, you’ll want to choose a yarn that can withstand wear and tear. Wool and acrylic yarns are generally more durable and can handle frequent washing without losing their shape or color. Cotton yarn is also durable, but may require more careful handling during washing and drying to prevent shrinking or stretching. Consider the care instructions for each type of yarn and choose one that aligns with your lifestyle and maintenance preferences.
Color and texture
The color and texture of the yarn can also play a role in the overall look of your knitted vest. Consider the design and style you want to achieve. Solid colors can create a classic and versatile look, while variegated or self-striping yarns can add visual interest and complexity to your vest. Additionally, the texture of the yarn, such as smooth, fluffy, or textured, can also contribute to the overall look and feel of the finished piece.
In conclusion, when choosing yarn for your knitted vest, consider factors such as fiber content, warmth and insulation, durability and care, as well as color and texture. By carefully selecting the right yarn, you can ensure that your knitted vest is not only beautiful but also functional and enjoyable to wear.
Understanding the different types of knitted vest patterns
Knitted vests are a versatile and stylish garment that can be worn in a variety of settings. Whether you’re dressing up or down, a knitted vest can add an extra layer of warmth and texture to your outfit. However, with so many different types of knitted vest patterns available, it can be challenging to know where to start. Here, we’ll explore some of the most popular types of knitted vest patterns and what makes each one unique.
Cable knit vests
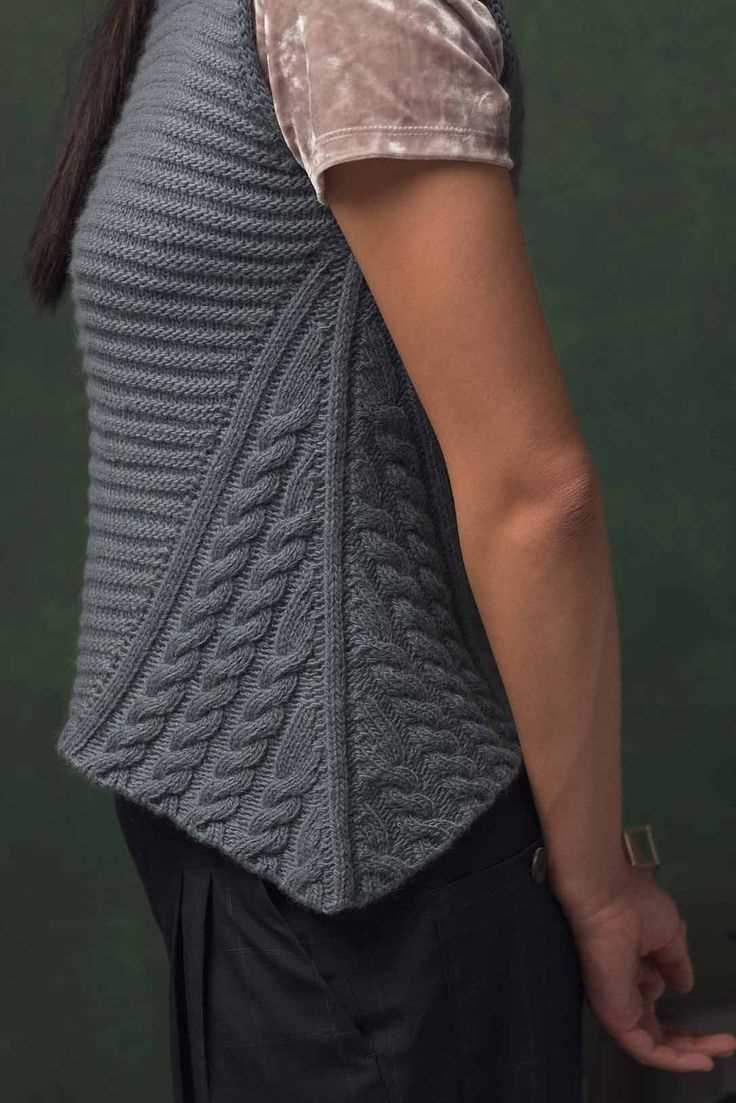
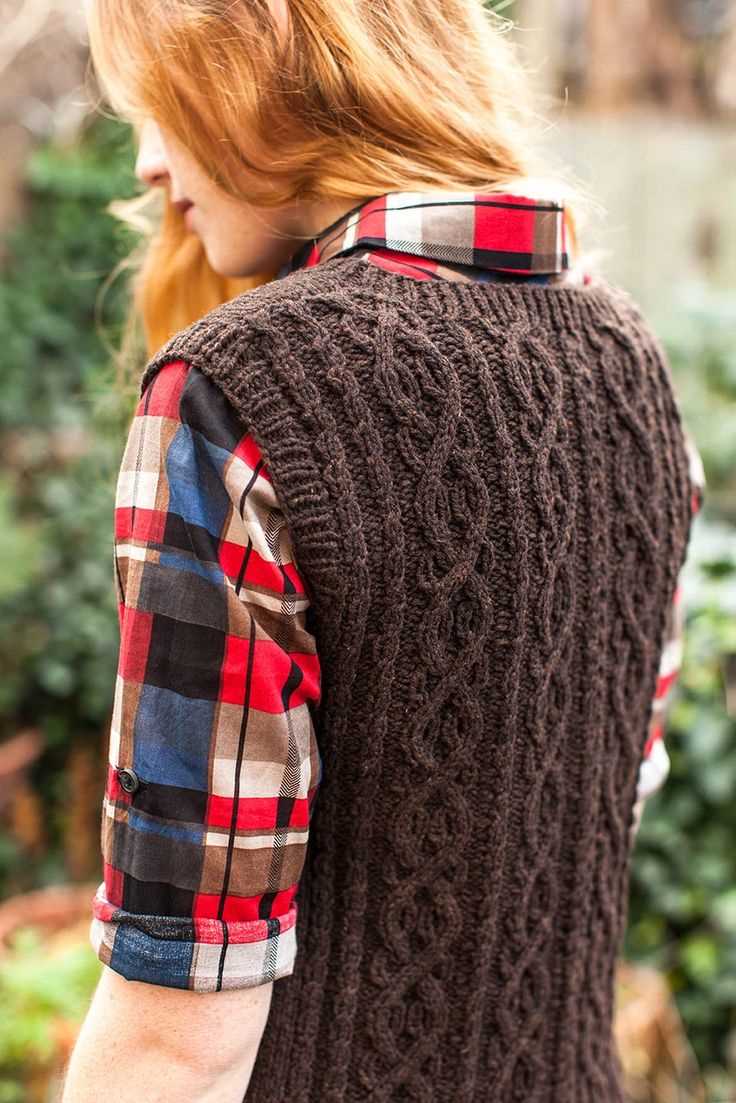
Cable knit vests are perhaps the most classic and timeless of all knitted vest patterns. These vests feature intricate cable patterns that add depth and texture to the garment. Cable knit vests are perfect for adding a touch of elegance to any outfit, whether you’re pairing it with a dress shirt and trousers or wearing it casually with jeans. The cable patterns can vary in complexity, making it a great choice for knitters of all skill levels.
Fair Isle vests
Fair Isle vests are known for their colorful and intricate patterns. This style originated in the Fair Isle, a small island in Scotland, and is characterized by the use of multiple colors and geometric designs. Fair Isle vests often feature patterns inspired by nature, such as flowers, animals, or landscapes. These vests are a great way to add a pop of color and personality to your wardrobe and are sure to turn heads wherever you go.
Lace vests
Lace vests are delicate and feminine, featuring intricate lace patterns that create an airy and lightweight garment. These vests are perfect for layering over a blouse or dress for an elegant and romantic look. Lace vests can be knitted with various stitches, such as eyelets or feather and fan patterns, creating a delicate and lacy texture. This type of vest pattern requires a bit more skill and attention to detail, but the end result is well worth the effort.
Tips for taking accurate body measurements for your knitted vest
When knitting a vest, it is important to have accurate body measurements in order to ensure a proper fit. Here are some tips to help you take precise measurements:
1. Use a flexible measuring tape
When measuring different parts of your body, it is important to use a measuring tape that can easily bend and conform to your body shape. A flexible measuring tape will provide more accurate measurements compared to a rigid one.
2. Measure against bare skin or thin clothing
To ensure accurate measurements, it is best to measure against bare skin or wear thin clothing that doesn’t add extra bulk. Thick layers or padded garments can distort the measurements and result in an ill-fitting vest.
3. Have someone assist you
It can be challenging to measure certain parts of your body by yourself, such as the bust or back. Having someone assist you in taking measurements can help ensure accuracy. They can hold the tape in place while you stand or sit in a relaxed position.
4. Take multiple measurements
For critical measurements like bust, waist, and hips, it is advisable to take multiple measurements and calculate the average. This helps minimize human error and provides a more precise measurement for your knitted vest.
5. Use proper posture
Stand or sit with good posture while taking measurements. This means keeping your back straight, shoulders relaxed, and arms hanging by your sides. Proper posture ensures consistent measurements and avoids any unnecessary alterations.
By following these tips, you can ensure that your knitted vest will fit you perfectly based on your body measurements. Remember to write down your measurements in a safe place for future reference.
Casting on and creating a ribbed hem for your knitted vest
When beginning your knitted vest, the first step is to cast on your stitches. The number of stitches you need will depend on your gauge and the size of the vest you want to make. For a ribbed hem, you can use a smaller needle size than what is recommended for the rest of the vest. This will help create a tighter, more defined ribbing.
To create the ribbed hem, you will be using a combination of knit and purl stitches. This creates a stretchy and decorative edge for your vest. The most common ribbing pattern is the 1×1 rib, where you alternate one knit stitch with one purl stitch across each row. This pattern is easy to follow and gives the fabric a nice texture.
Here are the steps to cast on and create a ribbed hem:
- Using the smaller needle size, cast on the desired number of stitches.
- Begin the first row by knitting the first stitch.
- Then, bring the yarn to the front of the work and purl the next stitch.
- Continue alternating between knitting and purling stitches across the row.
- Repeat this pattern of knitting and purling for the desired length of the ribbed hem.
- Once the ribbed hem is complete, you can switch to the larger needle size and continue knitting the body of the vest using your desired stitch pattern.
Creating a ribbed hem for your knitted vest not only adds a decorative element, but it also provides some elasticity to the edge. This can help the vest fit more snugly around the waist and prevent it from stretching out over time.
Knitting the Body of Your Knitted Vest in Stockinette Stitch
When it comes to knitting a knitted vest, one of the most important parts is the body. The body of the vest is typically knitted in stockinette stitch, which is a basic knitting pattern that creates a smooth, flat fabric with a subtle texture. This stitch pattern is created by alternating knit stitches on the right side and purl stitches on the wrong side of the fabric.
To begin knitting the body of your knitted vest, you will first need to cast on the appropriate number of stitches. This number will depend on your desired size and the gauge of your knitting. It’s important to carefully measure your gauge to ensure that the vest will fit properly.
Once you have cast on, you will continue knitting in stockinette stitch until you reach the desired length for the body of your vest. This length can vary depending on your personal preference and the style of the vest. It’s a good idea to periodically try on the vest as you knit to ensure that it is the right length for you.
To create a professional-looking finish for the body of your vest, you may want to consider adding ribbing or another decorative edge. This can be done by knitting a few rows of ribbing at the bottom edge of the vest or using a different stitch pattern to create a border. This will help give your vest a polished and finished look.
Overall, knitting the body of your knitted vest in stockinette stitch is a straightforward process that allows for customization and creativity. Whether you’re using a simple solid color or experimenting with colorwork or other design elements, the stockinette stitch creates a versatile base for your knitted vest. So grab your knitting needles and get started on creating a cozy and stylish vest that you’ll love to wear!
Shaping the Armholes and Neckline of Your Knitted Vest
When you reach a point in your knitted vest where you need to shape the armholes and neckline, it’s important to carefully follow the pattern instructions to ensure a precise and professional-looking finish. This is an essential step that will give your vest a tailored and flattering fit.
The armhole shaping is typically done by binding off a certain number of stitches at each side of the vest. This creates a curve that allows for comfortable arm movement. To achieve a smooth and even curve, it’s important to decrease stitches gradually and evenly. This can be done by knitting two stitches together at the beginning and end of each row for several rows until the desired number of stitches have been bound off.
For the neckline, you may need to knit a few rows or rounds without shaping, and then start decreasing stitches at the center of the neck. This can be done by knitting two stitches together or by working a series of decreases over a few rows or rounds. The pattern instructions will provide guidance on the number of stitches to decrease and the rate at which they should be decreased to create the desired neckline shape.
Throughout the shaping process, it’s important to keep track of your stitch count and follow the pattern instructions carefully. It’s also a good idea to use stitch markers to clearly mark the beginning and end of each section, such as the armholes and neckline. This will help you stay organized and ensure that you’re shaping the correct areas of your vest.
Remember, shaping the armholes and neckline is an important part of creating a well-fitting and visually appealing knitted vest. Taking the time to shape these areas correctly will result in a garment that looks and feels great when worn. So, follow the pattern instructions, take it step by step, and enjoy the process of creating your own beautiful knitted vest.
Adding cables or other intricate stitch patterns to your knitted vest
If you’re looking to add some extra flair to your knitted vest, incorporating cables or other intricate stitch patterns can be a great way to do so. These patterns can add texture, visual interest, and a unique touch to an otherwise simple garment. Whether you’re a beginner or an experienced knitter, you can easily incorporate these design elements into your project.
Cables: Cables are twists of stitches that create a three-dimensional texture. They are made by crossing stitches over each other, typically in a specific pattern. Adding cables to your knitted vest can create a stunning effect, making it look more elegant and sophisticated. There are various cable patterns to choose from, such as braided cables, rope cables, and twisted cables.
Intarsia: Intarsia is a technique used to create patterns or pictures using blocks of color in knitting. By using different colors of yarn and following a chart, you can incorporate intricate designs into your knitted vest. This technique is often used to create complex geometric patterns or images of animals, flowers, or other objects.
Lace patterns: Lace patterns are delicate and intricate designs that create an openwork effect in your knitting. They often feature various types of eyelets, yarn overs, and decreases, which form elegant motifs. Incorporating lace patterns into your knitted vest can give it a feminine and airy look. Popular lace patterns for vests include diamond lace, leaf lace, and floral lace.
Fair Isle: Fair Isle knitting involves using multiple colors in a single row to create beautiful stranded colorwork. By adding Fair Isle motifs to your knitted vest, you can achieve a unique and visually stunning effect. Fair Isle patterns often feature small repetitive motifs such as stars, diamonds, or geometric shapes. This technique requires working with two or more colors, so it’s important to manage your yarn tension to ensure an even and professional result.
With these different stitch patterns, you can take your knitted vest from simple to extraordinary. Experiment with different designs and techniques to find the one that best suits your style and skill level. Adding cables or other intricate stitch patterns to your knitted vest will not only showcase your knitting skills but also make your garment stand out from the crowd.
Knitting the shoulder straps and joining them to the body of your vest
When it comes to knitting a vest, one of the most important steps is knitting the shoulder straps and joining them to the body of the garment. This not only adds stability and structure to the vest, but also helps to shape the neckline and armholes. Here is a step-by-step guide on how to knit the shoulder straps and seamlessly join them to the body of your knitted vest.
1. Cast on stitches for the shoulder straps
To start, determine the number of stitches needed for each shoulder strap. This will depend on the size of your vest and the desired width of the straps. Using your preferred cast-on method, cast on the required number of stitches onto a spare needle or waste yarn.
2. Knit the shoulder straps
Next, using your main needle and working with the MC (main color) yarn, pick up the stitches from the cast-on edge of the shoulder straps. Make sure to evenly distribute the stitches along the length of the strap. Then, continue knitting in your chosen stitch pattern until the shoulder straps reach the desired length. This can be adjusted based on your personal preference or the pattern instructions.
3. Join the shoulder straps to the body
Once the shoulder straps are knitted, it’s time to join them to the body of the vest. To do this, you will need to position the straps on the front and back of the vest, aligning them with the armholes. Hold the right side of the strap against the right side of the vest and use a tapestry needle and some scrap yarn to carefully stitch the strap to the body of the vest. Repeat this process for the other shoulder strap.
By seamlessly joining the shoulder straps to the body of your knitted vest, you will create a polished and professional finish. This step is crucial for ensuring that the vest fits well and stays in place when worn. With these instructions, you can confidently knit the shoulder straps and join them to your vest, resulting in a beautiful and functional garment.
Creating buttonholes or other closures for your knitted vest
When knitting a vest, one important detail to consider is how you will fasten it. There are several options for closures, including buttons, toggles, or even a zipper. Each offers a different look and level of functionality, so you can choose the option that best suits your style and needs.
If you decide to go with buttons, you’ll need to create buttonholes in your knitting. Buttonholes can be made in several ways, depending on the desired look and the level of difficulty you’re comfortable with. One common method is to simply bind off a few stitches in one row and then cast them back on in the following row. This creates a small gap where the button can be inserted. Another option is to use yarn overs to create a buttonhole. In this technique, you will simply wrap the yarn around the needle and continue knitting as usual, creating an eyelet that will serve as the buttonhole.
If you prefer a more decorative closure, you can consider using toggles. Toggles are typically made of wood, bone, or other natural materials and provide a rustic, boho look to your vest. To attach a toggle, you’ll need to leave a gap in your knitting where the toggle can be looped through. This can be achieved by binding off a few stitches and then knitting them back on in the following row.
Finally, if you’re looking for a more practical and streamlined closure, a zipper may be the way to go. Adding a zipper to your knitted vest can be a bit more challenging, as it requires sewing skills, but it can provide a polished and professional finish. To add a zipper, you’ll need to sew it onto the edges of your knitting, ensuring that it aligns properly and lays flat. This can be achieved by using a sewing machine or hand stitching.
In conclusion, whether you choose buttons, toggles, or a zipper, adding closures to your knitted vest can be a fun and creative way to personalize your garment. Consider your style preferences and knitting skill level when deciding which closure method to use, and don’t be afraid to experiment and try new techniques to achieve the perfect finish for your vest.
Blocking and Finishing Your Knitted Vest
Once you have completed knitting your vest, it is important to block and finish it for the best results. Blocking is the process of gently stretching and shaping your knitted fabric to even out the stitches and give the garment its final shape. Here are some steps to help you block and finish your knitted vest:
1. Prepare your materials: Before you begin blocking, make sure you have all the necessary materials. You will need blocking mats or towels, rust-proof pins, a spray bottle filled with water, and a tape measure.
2. Wet blocking: The most common method of blocking involves wetting your knitted vest. Fill your sink or a basin with cold water and submerge your garment. Gently agitate the water to ensure it is evenly distributed. Let the vest soak for about 10-15 minutes.
3. Remove excess water: After soaking, gently press down on the vest to remove excess water. Avoid wringing or twisting the fabric, as this can damage the fibers. Place the garment on a clean towel and roll it up tightly to squeeze out even more water.
4. Shape and pin: Lay your damp vest flat on your blocking mats or towels, and use your tape measure to ensure it is the desired size. Pin the edges of the vest to the mats, using rust-proof pins. Pay attention to any areas that need shaping, such as the armholes or neckline.
5. Let it dry: Once your vest is pinned in place, leave it to air dry completely. This can take anywhere from 24-48 hours, depending on the thickness of your yarn and the humidity in the air. Avoid moving or disturbing the vest while it is drying.
6. Finishing touches: After your vest is dry, you can remove the pins and try it on. If there are any uneven edges or loose stitches, you can use a tapestry needle to tidy them up. Weave in any loose ends and block the vest one more time if needed.
Blocking and finishing your knitted vest is an essential part of the knitting process. It helps ensure that your garment looks its best and fits properly. By following these steps, you can achieve a beautifully finished vest that you’ll be proud to wear.
Tips for Adding Personal Touches to Your Knitted Vest
When knitting a vest, you have the opportunity to add personal touches that make the garment truly unique. Whether it’s through color choices, stitch patterns, or embellishments, here are some tips to help you customize your knitted vest.
1. Play with Color
One of the easiest ways to add a personal touch to your knitted vest is by selecting interesting color combinations. Consider using a variegated yarn to create depth and visual interest, or incorporate contrasting colors for bold pops. You can also experiment with ombré or gradient effects by choosing yarns in similar shades that gradually transition from light to dark.
2. Try Different Stitch Patterns
A simple stockinette stitch or ribbing can give your vest a clean and classic look, but don’t be afraid to try out different stitch patterns to add texture and detail. You could incorporate cables, lace, or even colorwork to create a visually striking design. Just be sure to check the gauge and make any necessary adjustments to ensure the stitch pattern fits properly.
3. Add Embellishments
If you want to take your knitted vest to the next level, consider adding some embellishments. This could be as simple as adding buttons or a decorative edging, or you could get creative with some embroidery or appliqué. Be mindful of the overall aesthetic and choose embellishments that complement the style and yarn of your vest.
4. Customize the Fit
A knitted vest can be customized not only in terms of design but also in terms of fit. Depending on your preferences, you can lengthen or shorten the body, adjust the armhole depth, or even modify the neckline. Take accurate measurements and make necessary adjustments to ensure your vest fits you perfectly.
5. Personalize Your Patterns
If you are following a knitting pattern for your vest, don’t be afraid to make it your own. Add your own modifications, such as changing the hemline, adding extra details, or adjusting the shaping. Make notes as you go along, so that you can recreate the same modifications in the future or customize other patterns you come across.
With these tips in mind, you can transform a simple knitted vest pattern into a personalized and one-of-a-kind garment. Have fun experimenting with colors, stitch patterns, and embellishments to create a vest that truly reflects your style and creativity.
Patterns for styling and wearing your knitted vest
Once you have completed knitting your beautiful vest, it’s time to start thinking about how you want to style and wear it. Here are some patterns and ideas to help inspire you:
1. Layered Look
Create a chic and cozy layered look by wearing your knitted vest over a lightweight long-sleeved shirt or turtleneck. Pair it with jeans or trousers for a casual yet stylish outfit.
2. Belted Vest
Elevate your knitted vest by adding a belt around your waist. This not only creates a more fitted and polished look but also accentuates your figure.
3. Dress it Up
For a more formal or dressy occasion, wear your knitted vest over a feminine dress or skirt. This adds a touch of warmth and texture to your outfit while still looking elegant.
4. Textured Layers
Experiment with different textures by layering your knitted vest over a patterned or textured blouse. This adds depth and visual interest to your overall look.
5. Casual Weekend Style
For a laid-back weekend look, pair your knitted vest with a basic t-shirt and your favorite jeans or leggings. This creates a cozy and effortless outfit for running errands or grabbing coffee with friends.
Whether you prefer a casual or dressy style, there are endless ways to style and wear your knitted vest. Have fun experimenting with different patterns, colors, and layering techniques to create a look that’s unique to you.