
Knitting a bucket hat is a great way to showcase your skills and create a trendy, practical accessory. Bucket hats have remained a popular fashion staple for their versatility and ability to protect your face from the sun. Whether you’re a beginner knitter or an experienced one looking for a quick and satisfying project, this free knitted bucket hat pattern is just what you need. In this article, we will provide step-by-step instructions and helpful tips to guide you through the process of creating your very own stylish bucket hat.
This pattern is suitable for knitters of all levels, as it involves basic knitting techniques such as casting on, knitting, purling, decreasing, and sewing. With the right choice of yarn and needles, you can customize your bucket hat to match your personal style and preferences. The pattern is designed to fit most head sizes, but you can easily adjust the size by adding or subtracting stitches to make it larger or smaller.
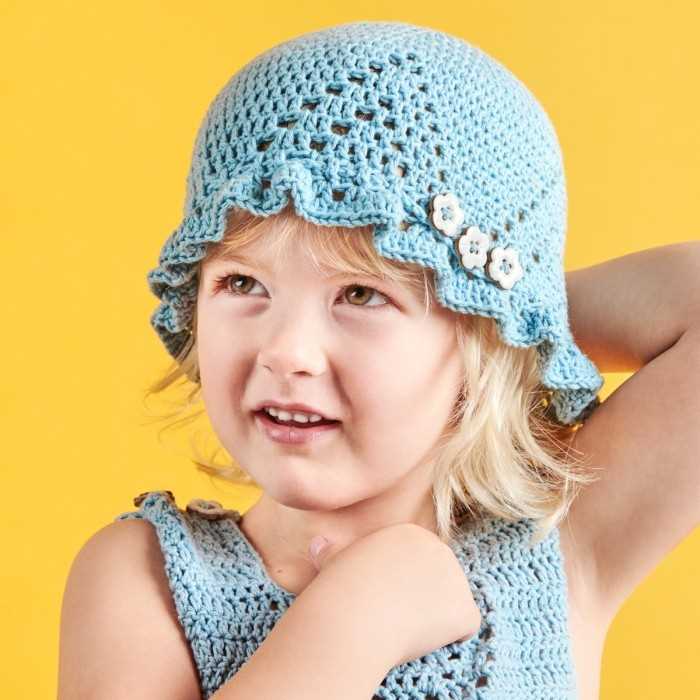
Not only is this knitted bucket hat fashionable, but it is also functional. The brim provides shade and protection from the sun, making it perfect for outdoor activities such as hiking, gardening, or simply spending a day at the beach. You can choose a lightweight yarn for a summer hat or opt for a thicker yarn for a warm and cozy hat during the colder months.
Free Knitted Bucket Hat Pattern
Looking for a stylish and practical accessory for the summer? Look no further than this free knitted bucket hat pattern! Whether you’re planning a beach trip or just want to add a touch of whimsy to your outfits, this pattern is perfect for knitters of all skill levels.
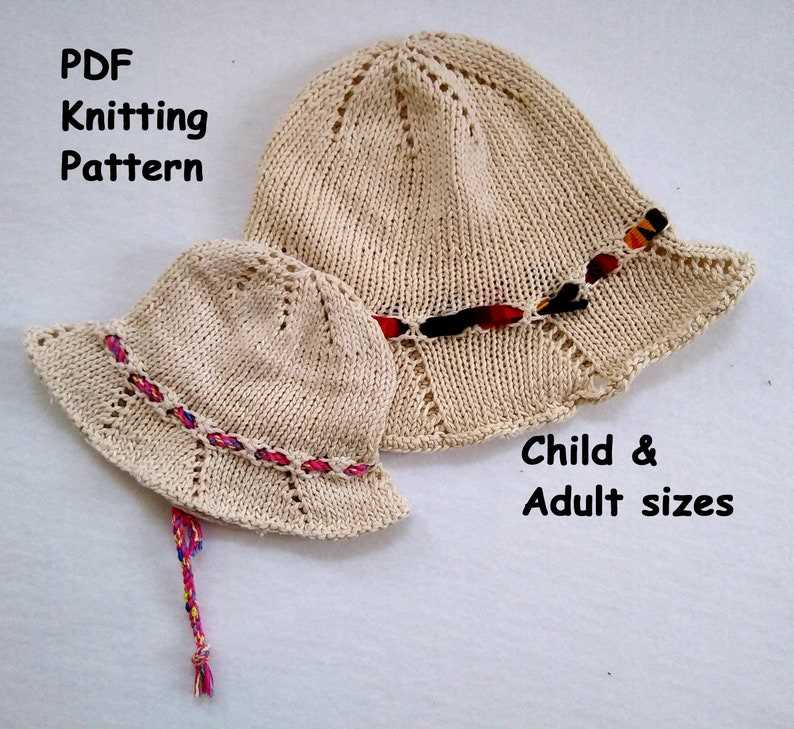
If you’re new to knitting, don’t worry – this pattern is beginner-friendly. With just a few basic stitches and some simple shaping, you’ll have a gorgeous bucket hat in no time. The pattern includes instructions for multiple sizes, so you can easily customize it to fit your head perfectly.
Materials You’ll Need:
- Worsted weight yarn
- Size 8 (5 mm) knitting needles
- Stitch markers
- Tapestry needle
- Scissors
Instructions:
- Cast on the desired number of stitches, depending on the size you want to make. Join in the round, being careful not to twist the stitches.
- Knit in the round until the hat measures approximately 2 inches from the cast-on edge.
- Begin the crown shaping by decreasing stitches evenly across the round. Continue decreasing every second round until you have the desired number of stitches left.
- Switch to double-pointed needles or a circular needle with the magic loop method when there are too few stitches to comfortably fit on your regular needles.
- Continue decreasing until you have a small opening at the top of the hat. Cut the yarn, leaving a long tail, and thread it through the remaining stitches to close the hat.
- Weave in any loose ends and block the hat to give it a nice shape.
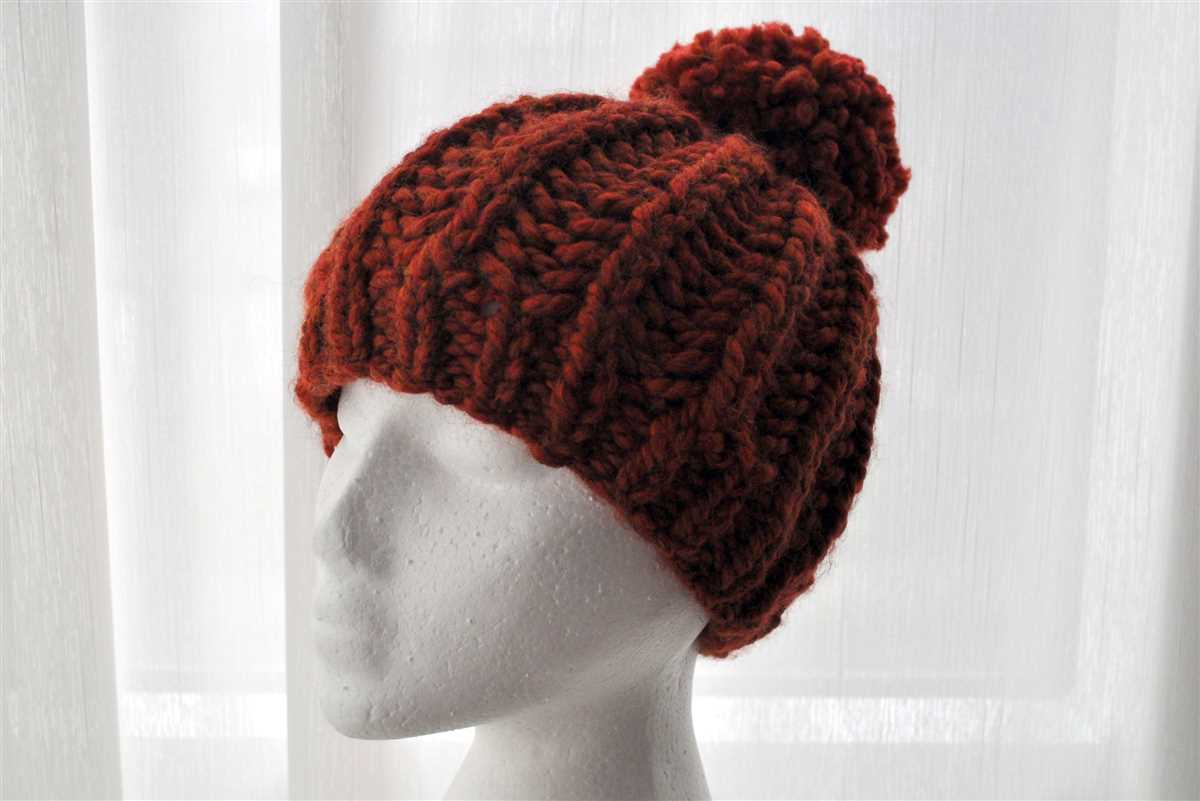
Once you’ve finished knitting your bucket hat, you can add some embellishments or customize it further to make it your own. Consider adding a colorful ribbon or a cute pom-pom to give it some extra flair. Enjoy your new knitted bucket hat and stay stylish all summer long!
Choose the Right Yarn

When making a knitted bucket hat, it’s important to choose the right yarn for the project. The yarn you choose can greatly affect the look, feel, and durability of the hat. Here are some factors to consider when selecting yarn for your bucket hat:
Fiber Content:
One of the most important things to consider when choosing yarn is the fiber content. Different fibers have different properties that can affect the overall look and feel of the hat. For a warmer and cosier hat, you might want to choose a yarn made from wool or alpaca. If you prefer a lightweight and breathable hat, cotton or linen yarns might be a better option.
Weight:
The weight of the yarn refers to its thickness, and it can impact the drape and texture of the hat. For a winter bucket hat, you might want to choose a bulky or chunky weight yarn, as it will provide more warmth and structure. If you’re making a hat for the spring or summer, a lighter weight yarn such as DK or sport weight would be more appropriate.
Color and Texture:
The color and texture of the yarn can also play a big role in the final look of your bucket hat. Do you want a solid color hat or one with variegated or speckled yarn? Do you prefer a smooth yarn or one with a bit of texture? Consider the style and aesthetic you’re going for, and choose a yarn that matches your vision.
Overall, it’s important to choose a yarn that you love working with and that will result in a hat that meets your expectations in terms of both appearance and functionality. Take your time to explore different options, read reviews, and even swatch different yarns to see how they knit up before committing to a particular yarn for your knitted bucket hat.
Gather the Necessary Tools

Before you start knitting your bucket hat, you will need to gather a few essential tools and materials. Having everything you need prepared beforehand will make the knitting process much smoother and more enjoyable.
Here is a list of the tools and materials you will need:
- Knitting needles: Choose a pair of needles that are suitable for the yarn you will be using. The pattern will usually specify the needle size required.
- Yarn: Select a yarn that is appropriate for the bucket hat pattern you are using. The pattern will often suggest a specific type and weight of yarn.
- Tape measure: This will be useful for measuring your gauge and ensuring your hat turns out the correct size.
- Darning needle: This needle will be used for sewing in the loose ends of your yarn and finishing off your hat.
- Stitch markers: These small markers are helpful for keeping track of your stitches and any pattern repeats.
- Scissors: You will need a pair of sharp scissors for cutting your yarn.
- Row counter: A row counter can be useful for keeping track of the number of rows you have knitted, especially if the pattern has a specific row count.
Make sure you have all of these tools and materials ready before you begin knitting your bucket hat. It’s also a good idea to double-check the pattern to see if any additional tools or materials are required. Once everything is gathered, you’ll be ready to start knitting!
Gauge Swatch
Before starting any knitting project, it’s important to make a gauge swatch to ensure that your finished item will be the correct size. The gauge swatch is a small sample of knitting that allows you to determine how many stitches and rows you should be getting per inch using your chosen yarn and needles. This information is crucial because it will help you to adjust your knitting as needed to achieve the correct gauge for your project.
To make a gauge swatch, you will need the yarn and needles that you plan to use for your project. Start by casting on a few more stitches than the pattern specifies for a 4-inch square. Knit a few rows in the pattern stitch, then switch to plain knitting for a few rows. Repeat this pattern until your swatch is around 4 inches square. Remember to use the same tension and style of knitting that you will be using for your project to ensure accurate results.
Measuring Your Gauge
Once your gauge swatch is complete, it’s time to measure your stitch and row count per inch. Lay your swatch flat on a table and use a ruler or measuring tape to count how many stitches and rows are in a 1-inch section. Take the average of several measurements to get the most accurate gauge count.
If your stitch count is too large and you are getting fewer stitches per inch than the pattern specifies, you will need to use smaller needles. Conversely, if your stitch count is too small and you are getting more stitches per inch, you will need to use larger needles. The same applies to row count – adjust your needle size as necessary until you achieve the specified gauge.
Remember, taking the time to make a gauge swatch and adjust your knitting if necessary will ensure that your finished item is the correct size and fits properly. It may seem like an extra step, but it is well worth the effort for a successful knitting project.
Cast On
When starting a knitting project, the first step is to cast on. This is the process of creating the foundation row of stitches on the needle. There are various methods to cast on, but for the free knitted bucket hat pattern, the long-tail cast on method is recommended.
The long-tail cast on method is a versatile technique that creates a neat and stretchy edge. To begin, you will need to estimate the amount of yarn required for the cast on. It is advised to leave a tail that is approximately three times the width of the finished project. This allows for enough yarn to work with while casting on.
To perform the long-tail cast on, follow these steps:
- Hold the working yarn in your right hand and create a slipknot by making a loop.
- Place the slipknot on the left-hand needle, holding the needle in your left hand.
- Hold the tail of the yarn with your left thumb and forefinger.
- Insert the right-hand needle into the slipknot from left to right.
- Bring the working yarn over the right-hand needle and under the left-hand needle.
- With the right-hand needle, pull the working yarn through the slipknot, creating a new stitch on the left-hand needle.
- Repeat steps 4-6 until you have cast on the desired number of stitches.
This method may take some practice to get the tension right, but once mastered, it is a quick and efficient way to cast on for your free knitted bucket hat. Once you have completed the cast on, you are ready to move on to the next step in the pattern.
Start Knitting the Brim
Once you have finished knitting the crown of your bucket hat, it’s time to move on to the brim. The brim is what gives the hat its shape and helps to keep the sun off your face. You will need to cast on stitches for the brim, and the number of stitches will depend on the size of your hat and the desired width of the brim.
To begin, you will need to choose your yarn and needles for the brim. It’s a good idea to use a smaller needle size for the brim compared to the crown, as this will help to create a tighter, more structured fabric. You may also choose to use a different color yarn for the brim to add some visual interest to your hat.
Once you have your yarn and needles ready, you can start knitting the brim. First, you will need to cast on the required number of stitches onto your needle. You can use any cast-on method you prefer, such as the long-tail cast-on or the knitted cast-on.
Next, you will work the brim in the stitch pattern specified in the pattern instructions. This may involve knitting or purling across the row, or working a specific stitch pattern such as ribbing or moss stitch. Follow the pattern instructions carefully to ensure you are working the correct stitches in the correct order.
If the pattern does not specify a stitch pattern for the brim, you can simply knit every stitch (known as garter stitch) or work a basic ribbing pattern, such as knitting one stitch and purling one stitch across the row.
Continue working the brim in the specified stitch pattern or ribbing pattern for the desired length. The length of the brim will depend on personal preference and the style of hat you are making. Once you have reached the desired length, you can bind off the stitches and weave in any loose ends.
To make the brim even more sturdy and structured, you can insert a flexible wire or plastic boning into the brim. This will help the brim to hold its shape and prevent it from flopping or collapsing. Simply insert the wire or boning into the edge of the brim before binding off the stitches, and secure it in place with a few stitches or by sewing it in place.
Knit the Body of the Hat
Now that you have completed the brim of the hat, it’s time to move on to knitting the body. This is where your hat will start to take shape and become recognizable as a bucket hat. Here’s how to do it:
1. Continue in the Same Stitch Pattern
To maintain the same texture and pattern as the brim, you’ll want to continue knitting in the same stitch pattern for the body of the hat. If you were using a ribbed stitch for the brim, continue knitting in ribbing. If you were using a seed stitch, keep going with seed stitch. This will ensure that your hat has a cohesive and polished appearance.
2. Increase Stitches
Depending on the size of the hat and the desired fit, you may need to increase stitches as you knit the body. This will give your hat a bit more room and allow it to comfortably fit around the head. There are various methods for increasing stitches, such as knitting into the front and back of stitches or make-one increases. Be sure to consult your knitting pattern for specific instructions on when and how to increase stitches.
3. Knit in the Round
To create a seamless hat with no visible seams, it’s best to knit the body in the round. This means that you will be continuously knitting in a circular motion without turning your work. You can use either double-pointed needles or a circular needle, depending on your preference. Make sure to adjust your stitch markers and keep track of your rounds as you go along.
Follow these steps to knit the body of your bucket hat, and soon enough, you’ll have a stylish and cozy accessory to wear during the colder months!
Shape the Crown
Once you have completed the brim of the bucket hat, it is time to shape the crown. This is where the hat starts to take its characteristic rounded shape. Start by decreasing the number of stitches in each row to achieve a tapered effect.
Continue working in the round, following the established pattern, but remember to decrease the number of stitches evenly throughout each row. This can be done by knitting two stitches together or using other decrease techniques like slip, slip, knit (ssk). Follow the specific instructions for decreasing provided in the pattern you are using.
Decreasing in a specific pattern:
- If the pattern specifies a specific decrease pattern for shaping the crown, be sure to follow it closely to achieve the desired shape.
- This may involve decreasing stitches every few rows or following a specific stitch pattern to create texture as you shape the crown.
Using a stitch marker:
- To help keep track of your decreases, it can be helpful to place a stitch marker at the beginning of each round.
- This allows you to easily see when you have completed a full round and make any necessary adjustments to ensure your decreases are evenly spaced.
Continue shaping the crown until you have reached the desired depth for your bucket hat. This will vary depending on the pattern and personal preference. Once you have finished shaping the crown, you can proceed to any additional finishing details, such as adding a decorative band or adding embellishments.
Finish the Hat
Once you have finished knitting your bucket hat, there are a few final steps to complete before you can proudly wear your new accessory. Follow these instructions to complete the finishing touches on your hat.
Weaving in Ends
Start by weaving in all the loose ends of yarn that are left from the cast on and bind off. Use a darning needle to carefully thread the ends through the stitches on the wrong side of the hat. Make sure to secure the ends by weaving them in a zigzag pattern, so they won’t come loose after wearing or washing the hat.
Tip: It’s best to weave in the ends as you go, after completing each section, to avoid dealing with a bunch of loose ends at the end.
Blocking the Hat

Next, you’ll want to block your hat to give it a nice shape and ensure that it fits properly. Fill a sink or basin with lukewarm water and add a small amount of mild detergent. Gently submerge your hat in the water and swish it around to thoroughly saturate it. Let it soak for about 10-15 minutes.
After soaking, carefully remove the hat from the water and gently squeeze out excess water. Place the hat on a clean towel and roll it up, pressing to remove even more moisture. Unroll the towel and shape the hat to the desired size and shape. You can use a balloon or a hat block to help maintain the shape while the hat dries.
Note: If your hat is made from a delicate or specialty yarn, make sure to check the washing instructions or consult the yarn manufacturer before blocking.
Finishing Touches

Once your hat is dry and blocked, it’s time to add any final embellishments or details. You can sew on a decorative button, attach a pom-pom, or even add a personalized label. Get creative and make your hat truly unique.
After completing these finishing touches, your knitted bucket hat is ready to be worn and enjoyed. Show off your knitting skills and stay stylish and warm with your handmade accessory.
Blocking
After completing your knitted bucket hat, it’s time to block it. Blocking is a technique used to shape and stretch your knitwear to give it a professional look. It can help to even out stitches, open up lace patterns, and ensure that the finished project fits properly.
To block your bucket hat, you will need to soak it in cold water for about 15-20 minutes. Gently squeeze out the excess water, making sure not to wring or twist the hat. Lay a clean towel on a flat surface and place the hat on top, shaping it to the desired size and form. Secure the hat with pins, stretching and shaping it as necessary. Leave it to air dry completely.
Note: Check the label of your yarn for specific blocking instructions, as some yarns may require a different method or temperature.
Blocking can be a time-consuming process, but the results are worth it. It can make a significant difference in the final appearance of your knitted bucket hat. It helps to shape and define the stitches, giving your project a polished and professional finish.
Remember, blocking is an essential step for any knitted garment, and it’s especially important for hats, as it ensures a proper fit and shape. So don’t skip this important step and enjoy your beautifully blocked bucket hat!