
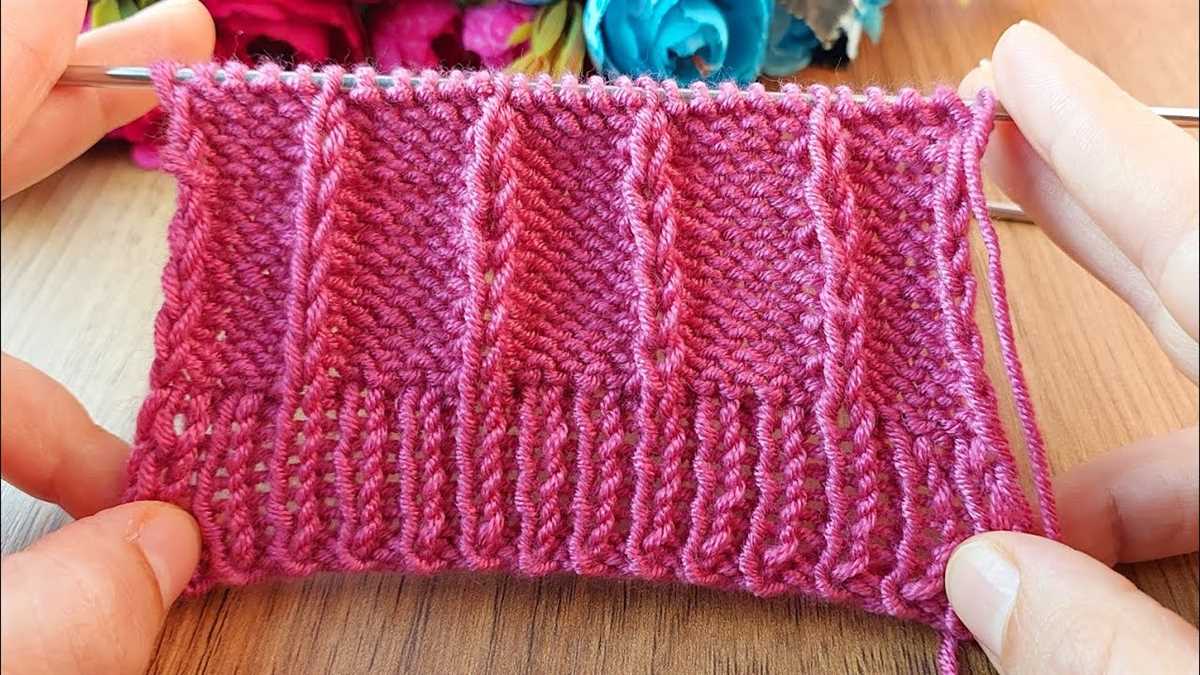
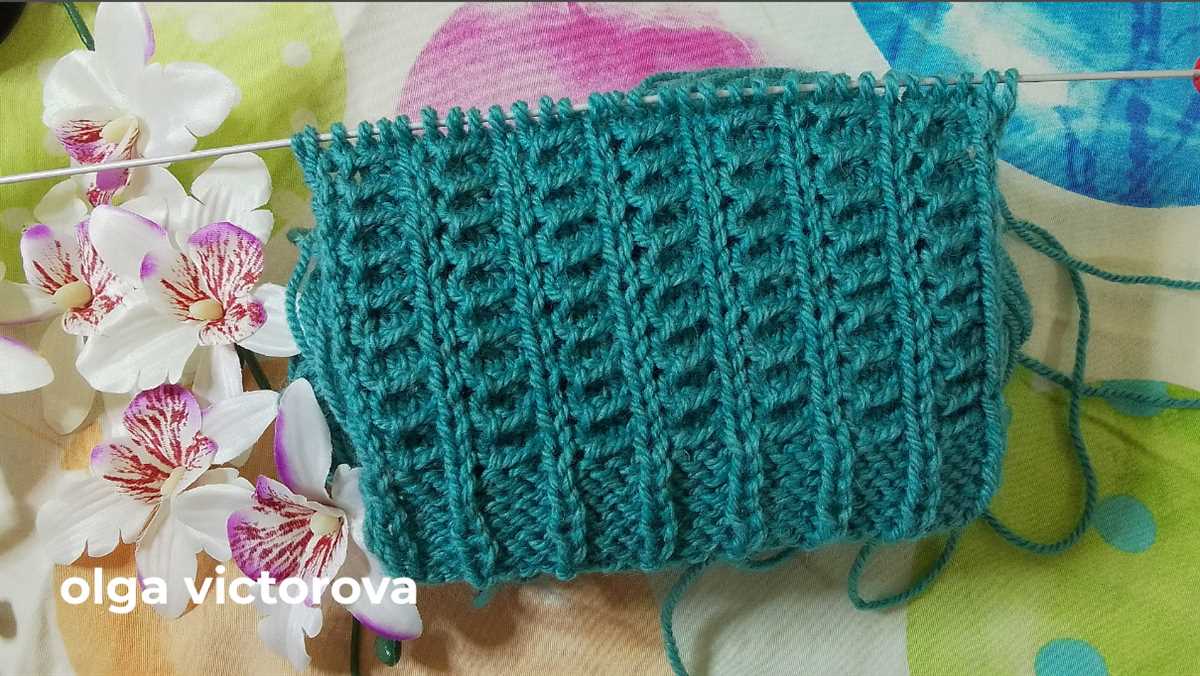
Knitting is an art form that allows for endless possibilities, from cozy scarves and blankets to intricate sweaters and accessories. One popular technique that knit enthusiasts love to explore is the creation of hexagon patterns. These mesmerizing designs add a unique touch to any project and can be used in a variety of ways, whether you are making a decorative pillow or a stylish garment.
Hexagons are six-sided polygonal shapes that are often found in nature, such as in honeycombs or turtle shells. Their symmetrical and geometric structure lends itself well to knit patterns and creates a visually appealing design. Knitting a hexagon pattern requires a basic understanding of knitting techniques, such as casting on, knitting, purling, and decreasing stitches.
In this guide, we will delve into the world of knitted hexagon patterns, exploring various stitch combinations, colorwork options, and finishing techniques. Whether you are a beginner knitter looking to expand your skills or an experienced crafter wanting to try something new, this article will help you create stunning hexagon designs that will impress everyone who sees them.
How to Knit a Hexagon Pattern: Step-by-Step Guide
If you’re looking to add some variety to your knitting projects, why not try your hand at knitting a hexagon pattern? Hexagons can be used to create beautiful blankets, pillows, or even clothing items. In this step-by-step guide, we’ll walk you through the process of knitting a hexagon pattern, from casting on to binding off.
Materials Needed:
- Knitting needles (size will depend on your yarn weight)
- Yarn in your chosen color
- Tapestry needle
- Scissors
Step 1: Cast On
To begin knitting your hexagon pattern, start by casting on the required number of stitches. The number of stitches will vary depending on your chosen hexagon size and the yarn weight you are using. Make sure to leave a long tail for later weaving in.
Step 2: Knit the Center
Work a few rows of knitting in a simple stitch, such as garter stitch or stockinette stitch, to create the center of your hexagon. This will be the starting point for increasing the number of stitches to form the hexagon shape.
Step 3: Increase Stitches
Once you’ve established the center of your hexagon, it’s time to start increasing the number of stitches to create the hexagon shape. You can do this by working an increase stitch, such as a yarn over or a knit front and back, at regular intervals across each row. The number of increase stitches will depend on the desired size of your hexagon.
Step 4: Continue Knitting
Continue knitting and increasing stitches until your hexagon has reached the desired size. Remember to keep track of your stitches and increase evenly to maintain the shape of the hexagon.
Step 5: Bind Off
Once your hexagon has reached the desired size, it’s time to bind off. To bind off, knit the first two stitches, then pass the first stitch over the second stitch. Continue knitting and passing stitches over until you have only one stitch remaining. Cut the yarn, leaving a long tail, and thread it through the last stitch to secure it. Weave in any remaining ends.
With this step-by-step guide, you’ll be able to knit a hexagon pattern with ease. Experiment with different yarns and color combinations to create unique hexagon designs for your knitting projects.
Getting Started: Tools and Materials You’ll Need
Before you begin knitting your hexagon pattern, it’s important to gather all the necessary tools and materials. Having everything ready will make the process much smoother and more enjoyable. Here are some essential items you’ll need:
Knitting Needles:
Choose a set of knitting needles suitable for the yarn you’ll be using. The size will depend on the thickness of your yarn and your desired tension. Circular or straight needles can both work for this project, depending on your preference.
Yarn:
Choose a yarn in the color or colors of your choice. It’s recommended to use a medium-weight yarn for your hexagon pattern. Make sure you have enough yarn to complete the project, keeping in mind that each hexagon will require a certain amount of yarn.
Tape Measure:
A tape measure or ruler will come in handy for measuring your gauge and ensuring your hexagons are consistent in size. This will help you achieve a more uniform final result.
Scissors:
A good pair of scissors is essential for cutting your yarn and finishing off your hexagons. Make sure they are sharp and suitable for cutting through yarn smoothly.
Tapestry Needle:
A tapestry needle, or a large-eyed blunt-end needle, will be used for weaving in your yarn ends and joining your hexagons together. This tool will help you achieve a neat and seamless finish.
In addition to these main tools, you might also need stitch markers or safety pins to keep track of your stitches, and a pattern or guide to follow. Once you have all these tools and materials ready, you’re all set to start knitting your beautiful hexagon pattern!
Choosing Yarn and Needles for Your Knitted Hexagon
When it comes to knitting a hexagon, choosing the right yarn and needles is essential to create a beautifully finished project. The choice of yarn will determine the texture and appearance of your hexagon, while the needles will affect the size and tension of your stitches. Here are some tips to help you make the best choices.
Yarn:
Fiber: Consider the fiber content of your yarn. Natural fibers like wool, cotton, and alpaca are popular choices for knitting as they provide warmth, breathability, and a lovely drape. Acrylic yarn is an affordable and easy-care option that also comes in a wide range of colors and textures.
Weight: The weight of your yarn will determine the thickness of your hexagon. Lace weight yarn will create a delicate and lightweight hexagon, while bulky weight yarn will result in a thicker and heavier hexagon. Choose a weight that matches the desired outcome and the level of warmth you want.
Color: Consider the color palette you want for your project. Solid colored yarn will showcase the stitch pattern of your hexagon, while variegated yarn will add visual interest and dimension. Experiment with different colors to create unique and eye-catching hexagons.
Needles:
Size: Choose needles that are appropriate for the weight of your yarn. The label on your yarn ball will typically suggest a recommended needle size. However, keep in mind that everyone’s knitting tension is different, so you may need to adjust the needle size to achieve the desired gauge.
Type: There are different types of knitting needles to choose from, including straight needles, circular needles, and double-pointed needles. The type of needle you choose will depend on your personal preference and the size of your hexagon. Circular needles are versatile and great for larger projects, while straight needles are more traditional and suitable for smaller hexagons.
By carefully considering the yarn and needles you use for your knitted hexagon, you can ensure that your finished project will be both aesthetically pleasing and functional. Experiment with different combinations to discover your favorite materials and create unique hexagon designs that you’ll be proud of.
Casting On: Starting Your Hexagon
When it comes to knitting a hexagon pattern, casting on is the first step you need to take. The cast on is the foundation of your hexagon and it determines the size and shape of your finished piece. There are various methods of casting on, but for a hexagon, the long tail cast on is commonly used. This cast on method provides a sturdy and flexible edge, making it perfect for creating the six sides of your hexagon.
To start your hexagon, you will need to estimate the amount of yarn you will need for the cast on. As a general rule of thumb, you can calculate the length of your yarn by multiplying the width of your hexagon by the number of stitches you want to cast on per inch. This will give you an approximate length of yarn needed. Make sure to leave a long tail at the beginning, as it will be used later for seaming.
To begin the long tail cast on, hold the yarn in your right hand and make a slipknot. Insert the needle through the loop of the slipknot, placing it on your left hand. Hold the needle with the slipknot in your left hand, and use your right thumb and index finger to hold the tail of the yarn. With your left hand, hold the working yarn that leads to the ball.
Now, bring the needle up and under the working yarn, catching it with the tip of the needle. Pull it through the loop on the needle, creating a new stitch. Repeat this process for the desired number of stitches. Remember to keep the tension even and consistent throughout the cast on.
Once you have cast on the required number of stitches, your hexagon is ready to be knitted. Begin following the pattern instructions for the specific stitch pattern of your hexagon. With each row, you will gradually shape your hexagon, creating six equal sides. The long tail cast on will provide a neatly finished edge that is ready for seaming or further knitting.
The Basic Knit Stitch: Creating the Foundation
The knit stitch is one of the most fundamental and versatile stitches in knitting. It forms the foundation of many knitting projects, including the knitted hexagon pattern. Understanding how to create this stitch is essential for anyone interested in knitting and can be easily learned by beginners.
Materials Needed:
- Knitting needles
- Yarn
- Tapestry needle
Step-by-Step Instructions:
- Begin by holding the knitting needle with your dominant hand and the working yarn in your other hand.
- Make a slipknot with the yarn and place it on the needle, leaving a long tail.
- Insert the needle into the slipknot from front to back, with the yarn in the back of the work.
- Wrap the yarn counterclockwise around the needle.
- Using the needle, pull the wrapped yarn through the slipknot, creating a new loop on the needle.
- Slide the new loop onto the needle, dropping the old loop off the needle.
- Repeat steps 3-6 until the desired number of stitches is reached.
- Continue knitting subsequent rows following the same steps.
With these basic instructions, you can create the foundation of any knitted project. Practice the knit stitch until you feel comfortable with the technique. Once mastered, you can explore more complex stitches and patterns, such as the knitted hexagon pattern, to expand your knitting skills. Remember to have patience and enjoy the process of creating something beautiful with your own hands.
Increasing Stitches: Shaping Your Hexagon
When knitting a hexagon pattern, it is important to understand how to increase stitches in order to shape your hexagon. By increasing stitches, you can create the angles and curves that give the hexagon its distinctive shape.
1. Increase at the Beginning and End: One common method of increasing stitches is to add stitches at the beginning and end of each row. This can be done by knitting or purling into the same stitch twice, effectively creating two stitches where there was only one before. By consistently increasing stitches at these points, you will gradually shape the edges of your hexagon.
2. Increase at the Corners: Another way to shape your hexagon is to increase stitches at the corners. This can be done by knitting or purling multiple times into the same stitch, effectively creating more stitches in a single location. By increasing stitches at the corners, you will create sharper angles and more distinct corners in your hexagon.
3. Follow a Pattern: If you are following a specific hexagon pattern, be sure to carefully read and follow the instructions for increasing stitches. Different patterns may use different methods or techniques for shaping the hexagon, so it is important to follow the pattern’s instructions to achieve the desired shape.
4. Maintain Consistency: When increasing stitches, it is important to maintain a consistent tension and stitch size. Inconsistent tension can lead to uneven edges and an asymmetrical shape. Take care to knit or purl the increased stitches with the same tension as the rest of your work to ensure a uniform appearance.
5. Practice and Experiment: Increasing stitches to shape a hexagon may take some practice, especially if you are new to knitting. Don’t be afraid to experiment with different methods and techniques to find what works best for you. With time and practice, you will become more comfortable and confident in shaping your hexagon.
By understanding and implementing these techniques for increasing stitches, you will be able to shape your hexagon and create a beautifully patterned knitted piece.
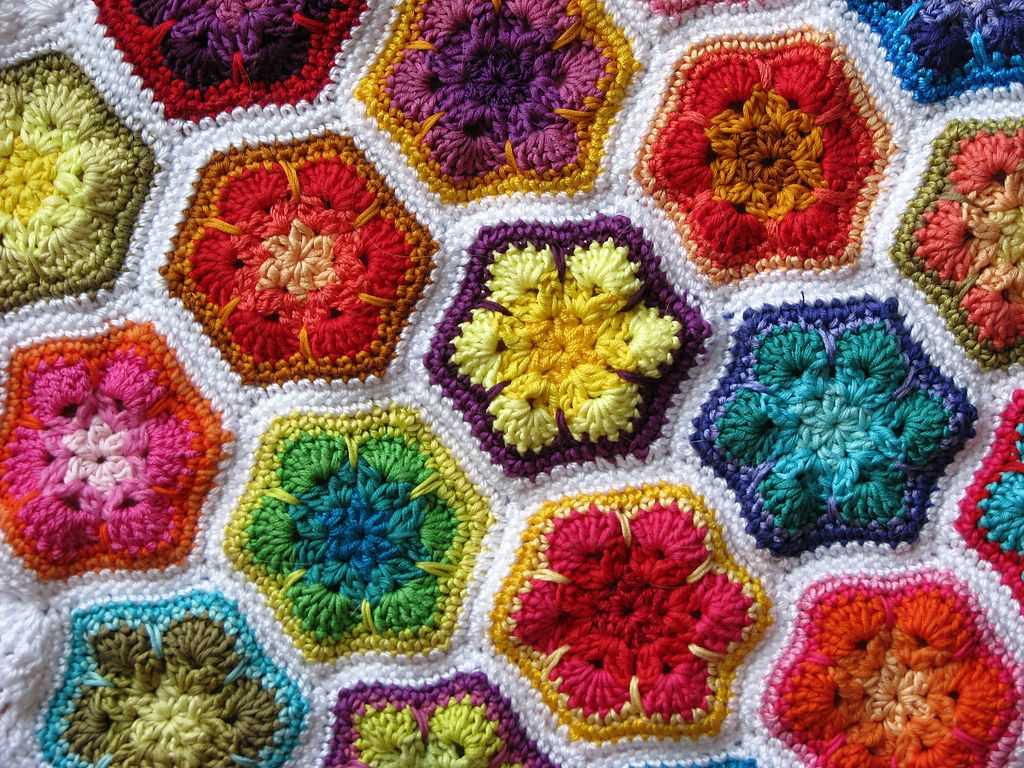
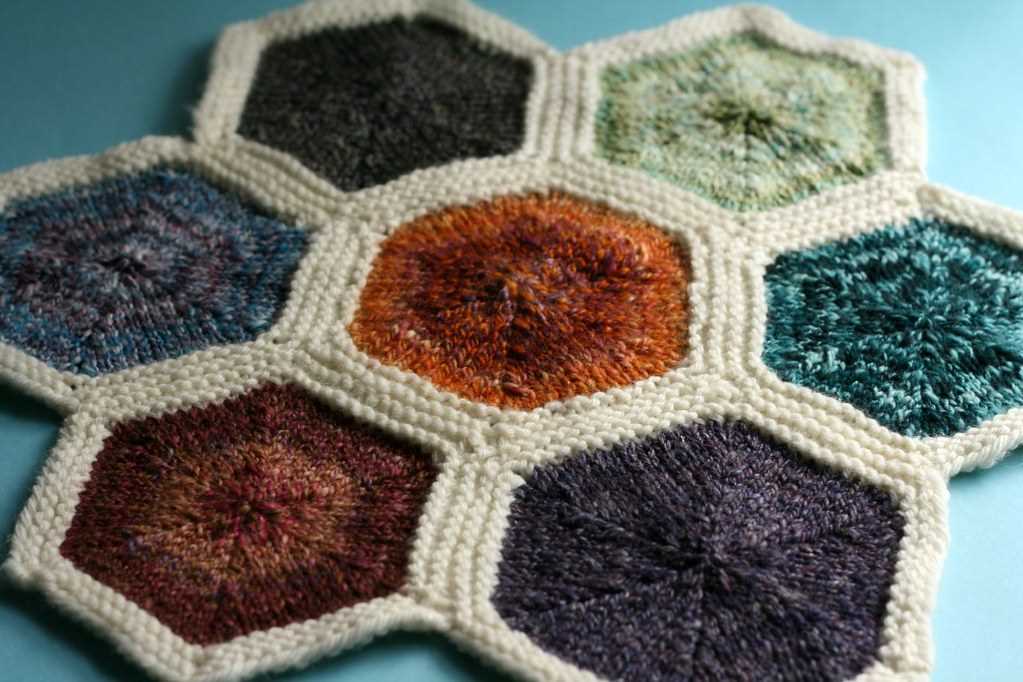
Changing Colors: Adding Interest to Your Hexagon
One of the great ways to add visual interest to your knitted hexagons is by changing colors. With a simple change in yarn color, you can create stunning and eye-catching patterns that will make your hexagons stand out.
There are several techniques you can use to change colors in your hexagon pattern. One common method is called “striping.” This involves knitting a certain number of rows in one color, then switching to a new color for a set number of rows, and so on. This creates a striped effect that can be bold or subtle, depending on the colors chosen.
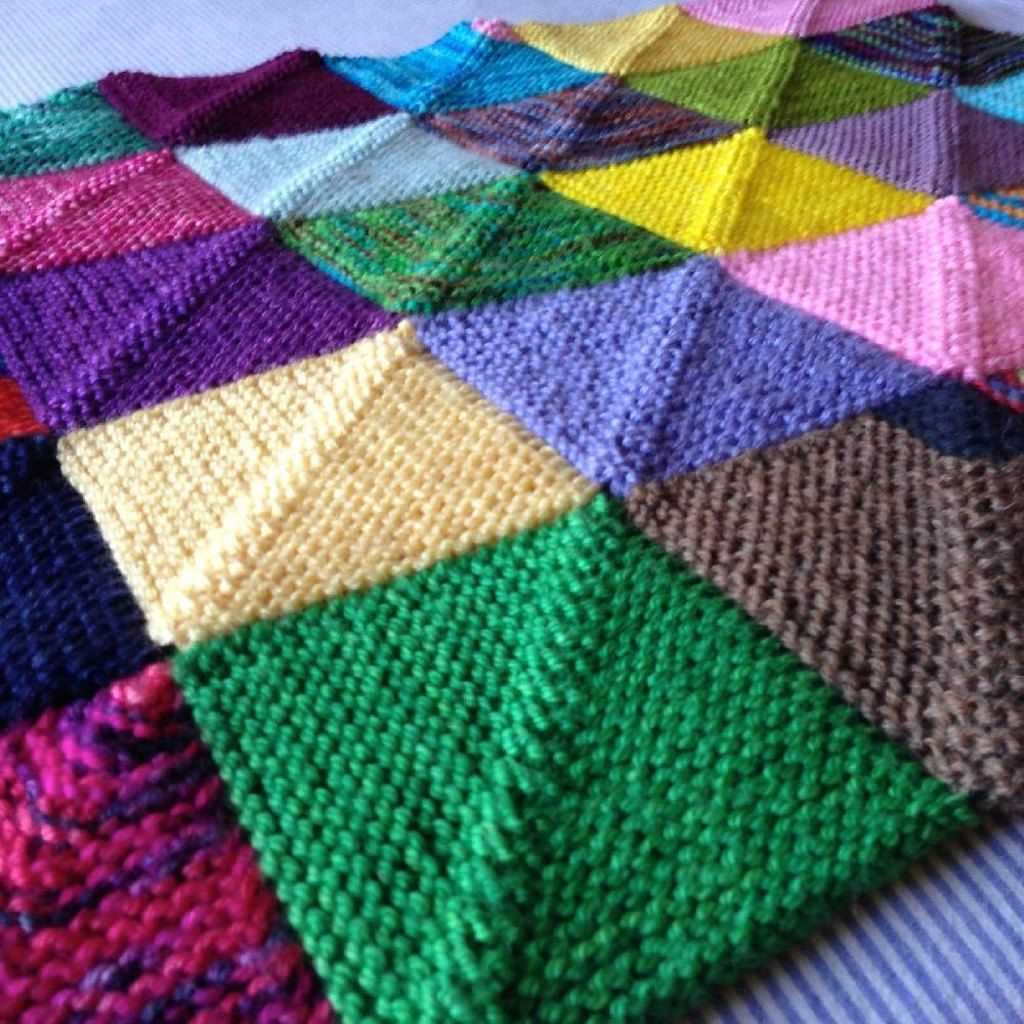
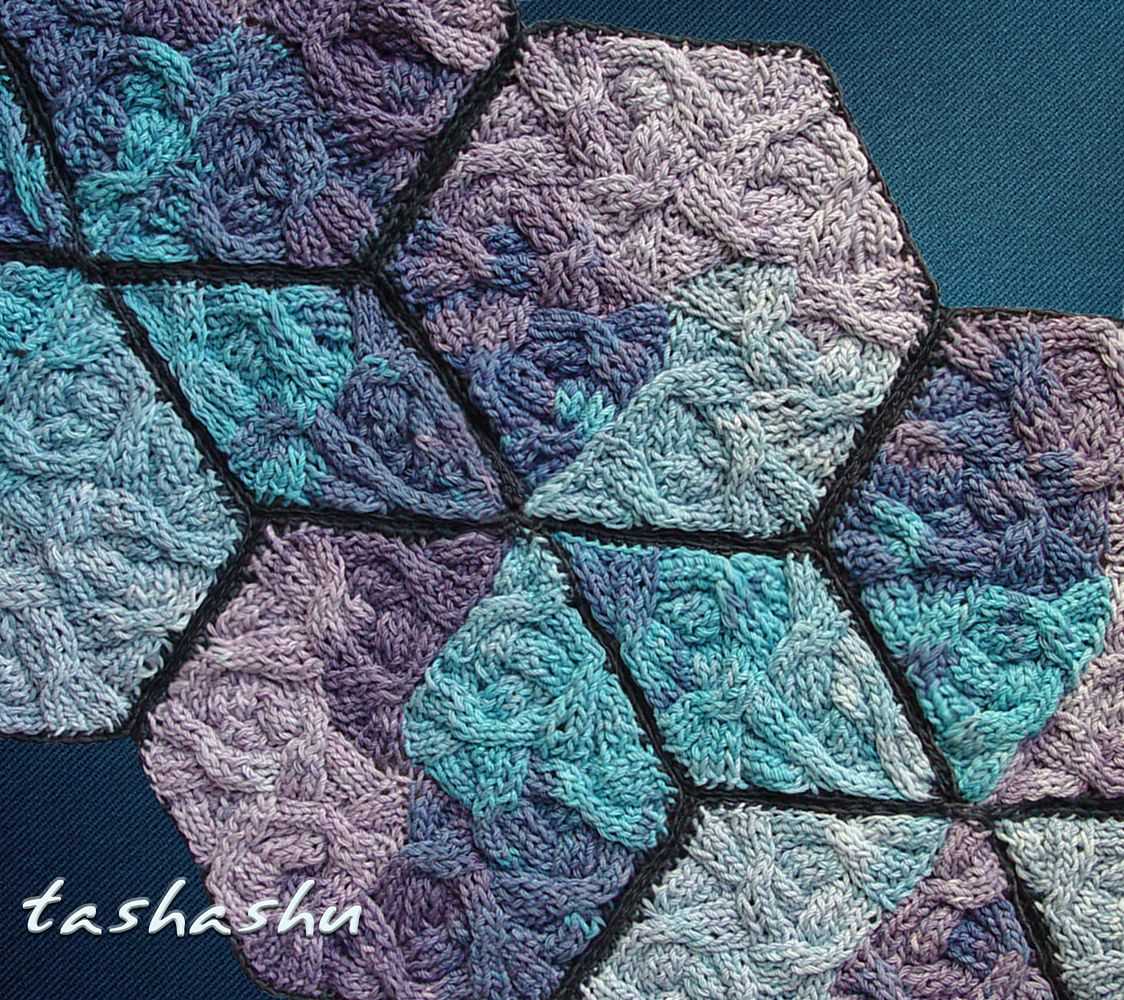
Another technique is called “color blocking.” Instead of striping, color blocking involves knitting entire sections of your hexagon in one color, then switching to a new color for the next section. This creates a more defined and geometric look, and can be used to create interesting shapes and patterns within your hexagons.
For a more complex and intricate look, you can also try “colorwork” or “fair isle” techniques. These involve knitting with multiple colors at once to create intricate designs and patterns. This technique requires some practice and attention to detail, but the results can be truly stunning.
Whether you choose to stripe, color block, or try your hand at colorwork, changing colors in your knitted hexagon pattern is a great way to add visual interest and make your project truly unique. Experiment with different color combinations and techniques to create your own personalized hexagon designs.
Adding Texture: Incorporating Different Knit Patterns
One of the joys of knitting is the ability to create different patterns and textures using various stitch techniques. By incorporating different knit patterns into your projects, you can add depth, interest, and visual appeal to your finished piece.
Knit and Purl Stitches: The most basic knit pattern is the combination of knit and purl stitches. By alternating between these two stitches in different sequences, you can create a wide range of textures. The smooth and raised surface created by knitting stitches contrasts with the bumpy surface of purl stitches, allowing you to create patterns like ribbing, seed stitch, and moss stitch.
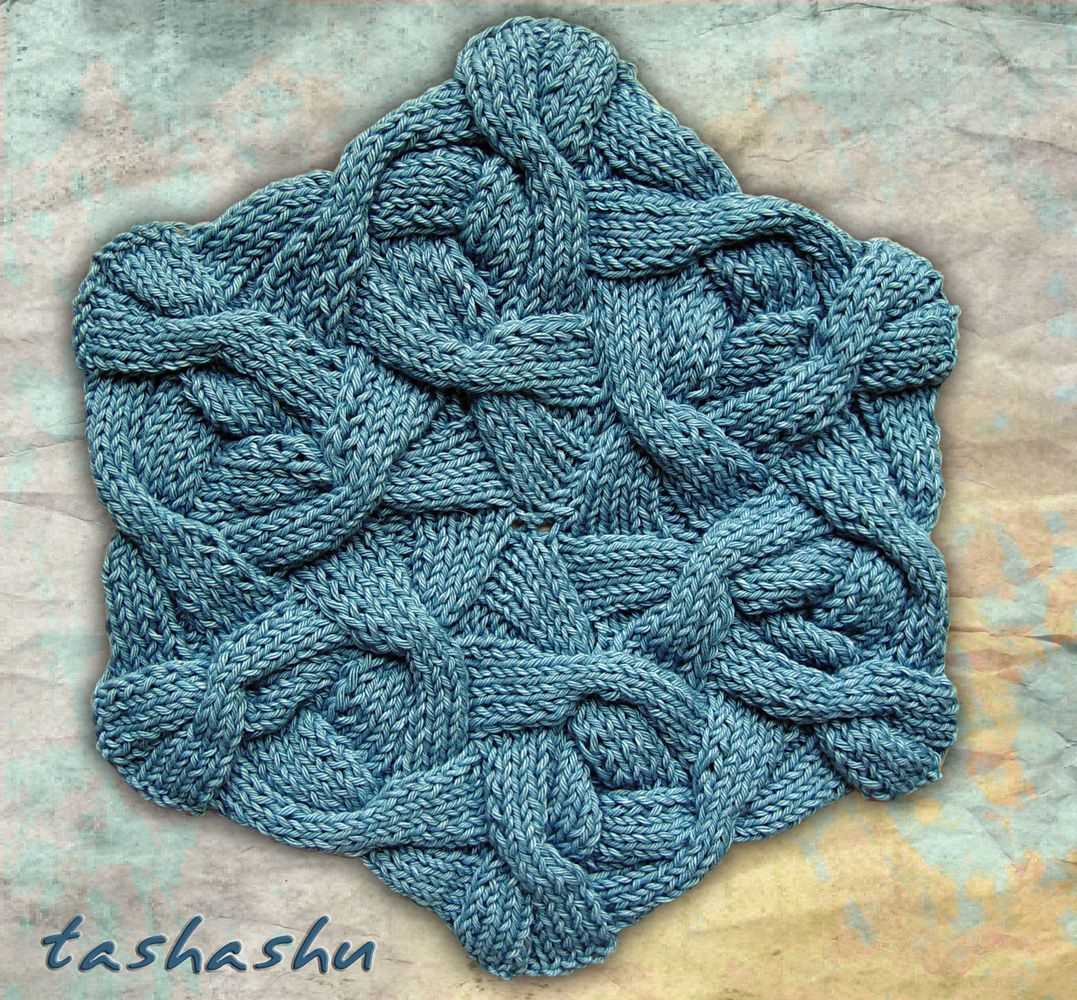
Cable Knitting: Cable knitting is another technique that can add texture and complexity to your knitted pieces. By crossing stitches over each other, you can create intricate braided or twisted patterns that resemble cables. This technique is often used to create beautiful sweaters, scarves, and blankets with a classic and timeless look.
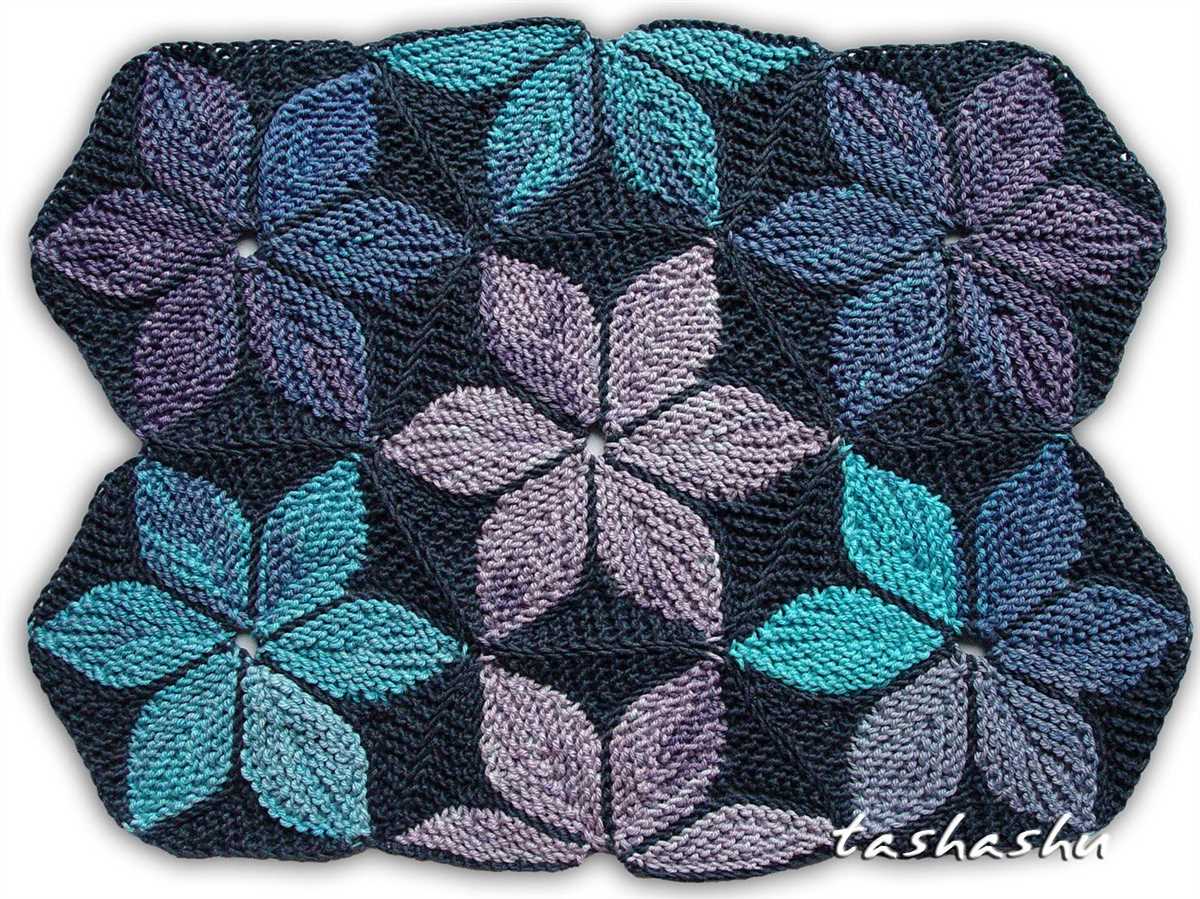
- Lace Knitting: Lace knitting involves creating intricate, delicate patterns by strategically placing yarn-overs and decreases. The resulting fabric has an airy, openwork quality that is perfect for lightweight garments, shawls, and accessories. Lace patterns often feature repetitive motifs like leaves, flowers, or geometric shapes.
- Fair Isle Knitting: Fair Isle knitting is a traditional technique that involves using multiple colors in a single row to create patterns and motifs. Typically, two colors are used at a time, with stitches carried across the back of the work when not in use. This technique enables you to create stunning colorwork patterns, such as stripes, checks, and intricate designs.
- Intarsia: Intarsia is a colorwork technique that allows you to create large, solid blocks of color within your knitting. By using separate balls of yarn for each color section, you can knit with one color at a time and avoid carrying yarn across the back of the work. This technique is often used for creating images, logos, or geometric patterns.
By incorporating different knit patterns into your projects, you can elevate your knitting skills and create unique and personalized pieces. Whether you choose to explore cable knitting, lace knitting, Fair Isle, or Intarsia, each technique offers its own set of challenges and rewards. Experimenting with different patterns will not only expand your knitting repertoire but also result in beautifully textured and visually stunning creations.
Finishing Techniques: Binding Off and Weaving in Ends
When you have completed your knitted hexagon pattern, it’s important to finish it off neatly and securely. This involves binding off and weaving in the loose ends. Binding off is the process of creating a finished edge, while weaving in ends ensures that all the loose yarn tails are hidden and secure.
To bind off, you will need to have a small amount of yarn left. Start by knitting the first two stitches as normal. Then, insert the left needle into the first stitch on the right needle and lift it over the second stitch and off the needle. Repeat this process for each stitch until only one stitch remains. Cut the yarn, leaving a tail, and pull it through the last stitch to secure it.
Once you have bound off your stitches, you will have several loose ends from where you started and finished different colors or sections. To weave in these ends, thread them onto a yarn needle and carefully thread the needle through the stitches on the back of your work. Make sure to go in different directions to ensure that the ends are secure. Once you have woven in the ends, trim any excess yarn.
Finished hexagons can be joined together to create a variety of projects, such as blankets, scarves, or even garments. By using these finishing techniques, you can ensure that your hexagons are secure and tidy, giving your project a polished and professional finish.
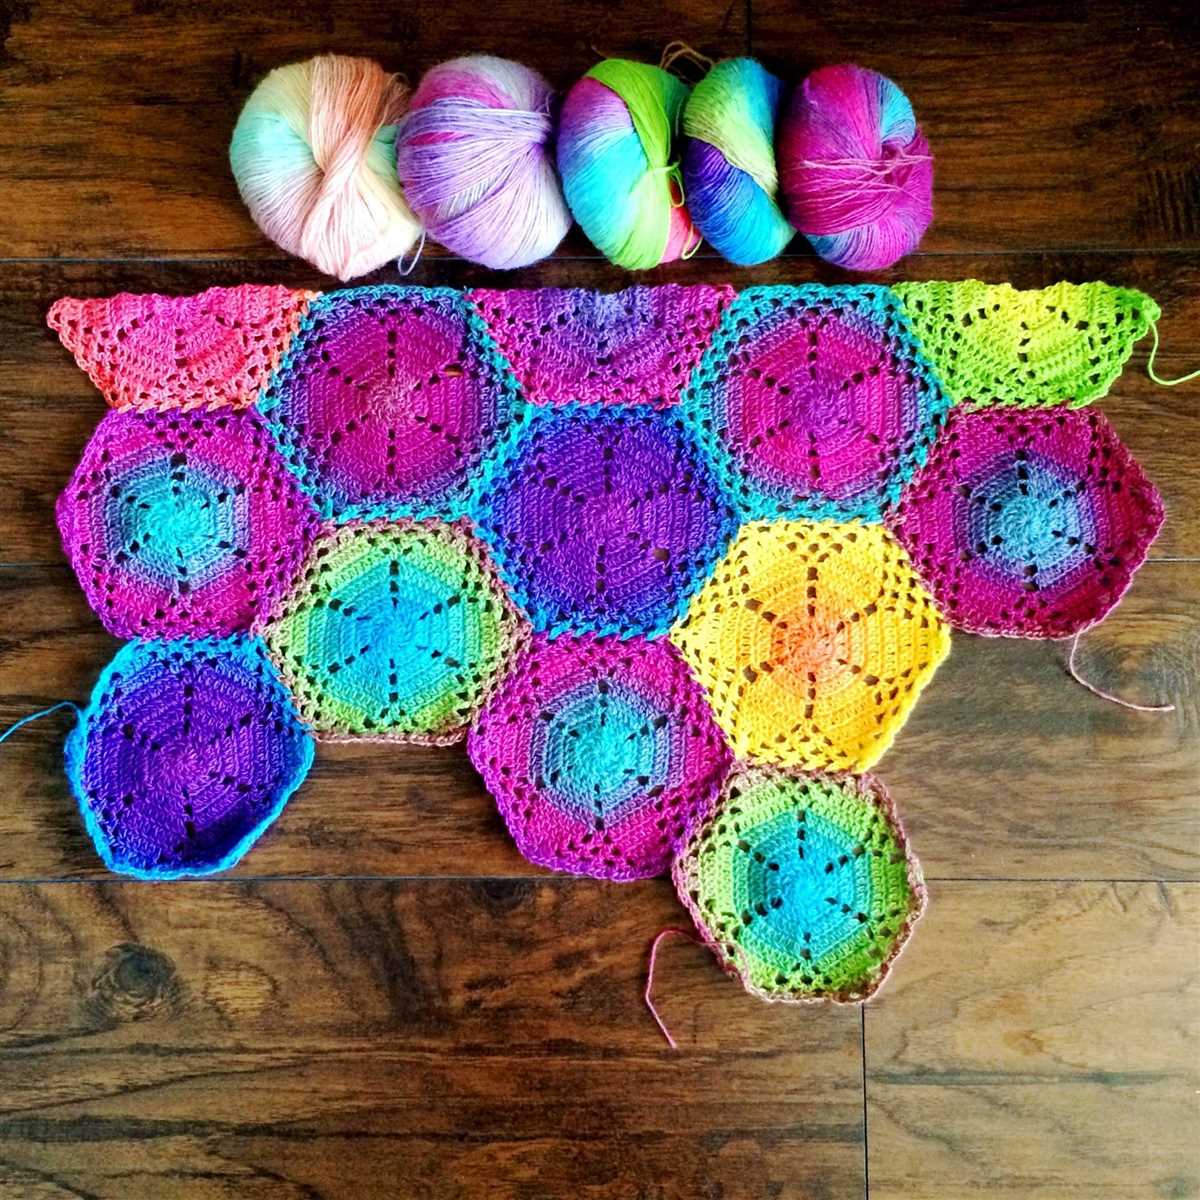
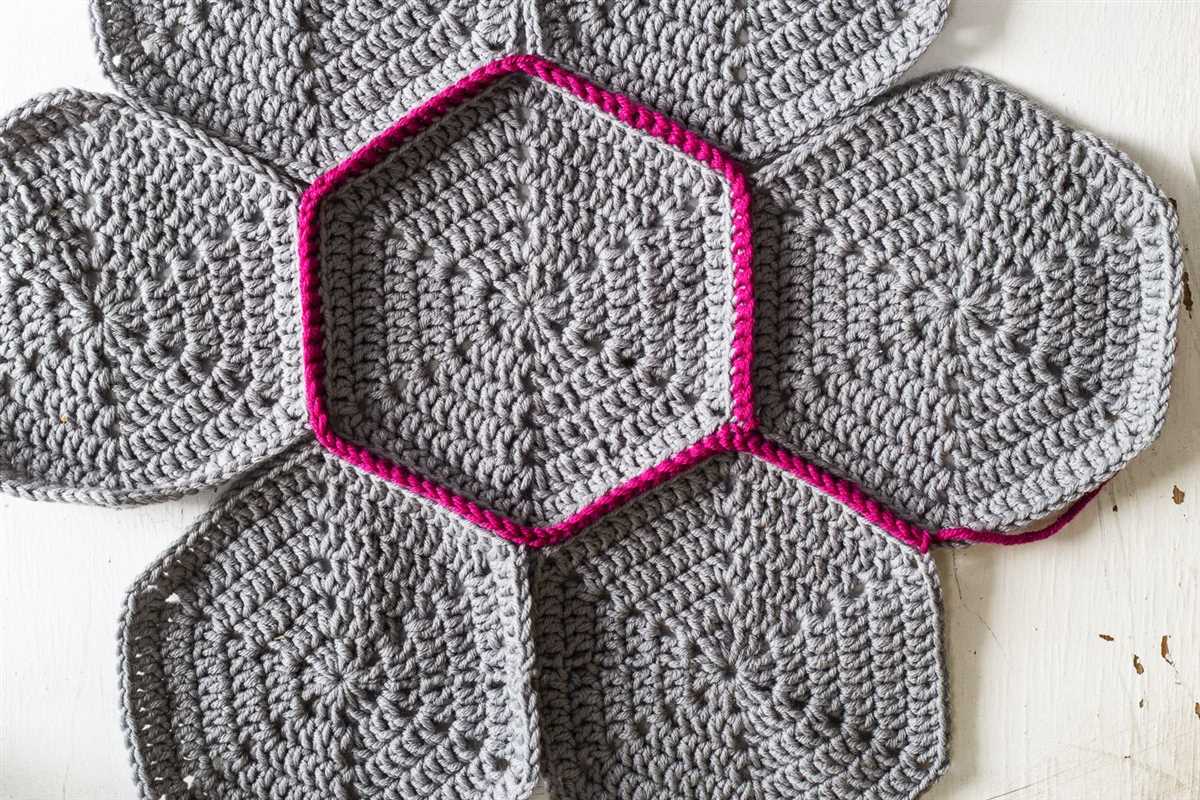
Joining Hexagons: Creating Larger Projects
When creating larger projects with knitted hexagons, it is important to know how to join them together effectively to achieve the desired outcome. There are several methods you can use to join your hexagons, depending on the look you want to achieve and the level of difficulty you are comfortable with. Here are some popular techniques:
1. Whipstitching
Whipstitching is one of the simplest and most common methods for joining hexagons. With this technique, you use a tapestry needle and a length of yarn to sew the edges of the hexagons together. To begin, align the edges of two hexagons you want to join and start whipstitching along one side. Work your way around the edges, stitching through both loops of the knitting stitches, until the two hexagons are securely attached. Repeat this process for each pair of hexagons you want to join.
2. Slip Stitch Join
The slip stitch join method creates a neater and more seamless look compared to whipstitching. To use this technique, place two hexagons wrong sides together, aligning the edges you want to join. With a crochet hook, insert it into both loops of the first stitch on the right side of one hexagon and into the corresponding stitch on the other hexagon. Then, yarn over and pull through both loops on the hook to complete a slip stitch. Continue working slip stitches in this manner along the edge, joining the hexagons together.
3. Three-Needle Bind Off

If you prefer a stronger and more finished join, you can use the three-needle bind off method. This technique involves holding two hexagons with right sides together and using a third knitting needle to bind off the stitches from both hexagons at the same time. To begin, knit the first stitch from the front needle together with the first stitch from the back needle. Then, pass the second stitch on the back needle over the stitch just worked. Continue this process, alternating between the front and back needles, until all stitches are bound off and the hexagons are securely joined.
When joining hexagons, it is important to maintain consistent tension and keep your stitches even for a professional-looking finish. You can also experiment with different yarn colors and textures to create interesting patterns and designs within your larger project. With these joining techniques, you can create beautiful and durable knitted hexagon projects to enjoy or gift to others.
Knitting Tips: Troubleshooting and Common Mistakes to Avoid
In the process of knitting hexagons, you may encounter some common mistakes or face troubleshooting issues. Here are a few tips to help you avoid these problems:
1. Gauge Issues
One of the most common mistakes in knitting is not achieving the correct gauge. Make sure to swatch and measure your gauge before starting your project. Adjust your needle size if necessary to match the recommended gauge in the pattern. This will help ensure that your hexagons will be the right size and fit together properly.
2. Uneven Tension
Uneven tension can result in uneven stitches, which can affect the overall look of your hexagons. Practice maintaining consistent tension as you knit, making sure not to pull too tightly or leave your stitches too loose. This will help create clean, uniform hexagons.
3. Dropped Stitches
Dropped stitches can cause holes in your knitting or result in unraveled sections. To prevent this, check your work regularly and fix any dropped stitches immediately. Use a crochet hook or knitting needle to pick up the dropped stitch and secure it back onto the needle.
4. Miscounting Stitches
Miscounting stitches can throw off the pattern and result in asymmetrical or misshapen hexagons. Double-check your stitch count at the end of each row or round to ensure accuracy.
5. Incorrect Increases or Decreases
Properly executed increases and decreases are crucial for creating hexagons with smooth edges. Pay attention to the instructions and make sure you understand the type of increase or decrease used in the pattern. Take your time and follow the directions carefully to achieve the desired shape.
6. Joining Hexagons
When joining hexagons, make sure the edges align properly and that you’re using the correct method of joining. Seam your hexagons using mattress stitch, slip stitch crochet, or any other preferred method. Take care to match the pattern and stitch placement when connecting the hexagons to maintain a consistent design.
By keeping these tips in mind, you can troubleshoot and avoid common mistakes when knitting hexagons. Take your time, practice, and don’t be afraid to seek guidance or ask for help if needed. Happy knitting!
Q&A:
What is a knitted hexagon pattern?
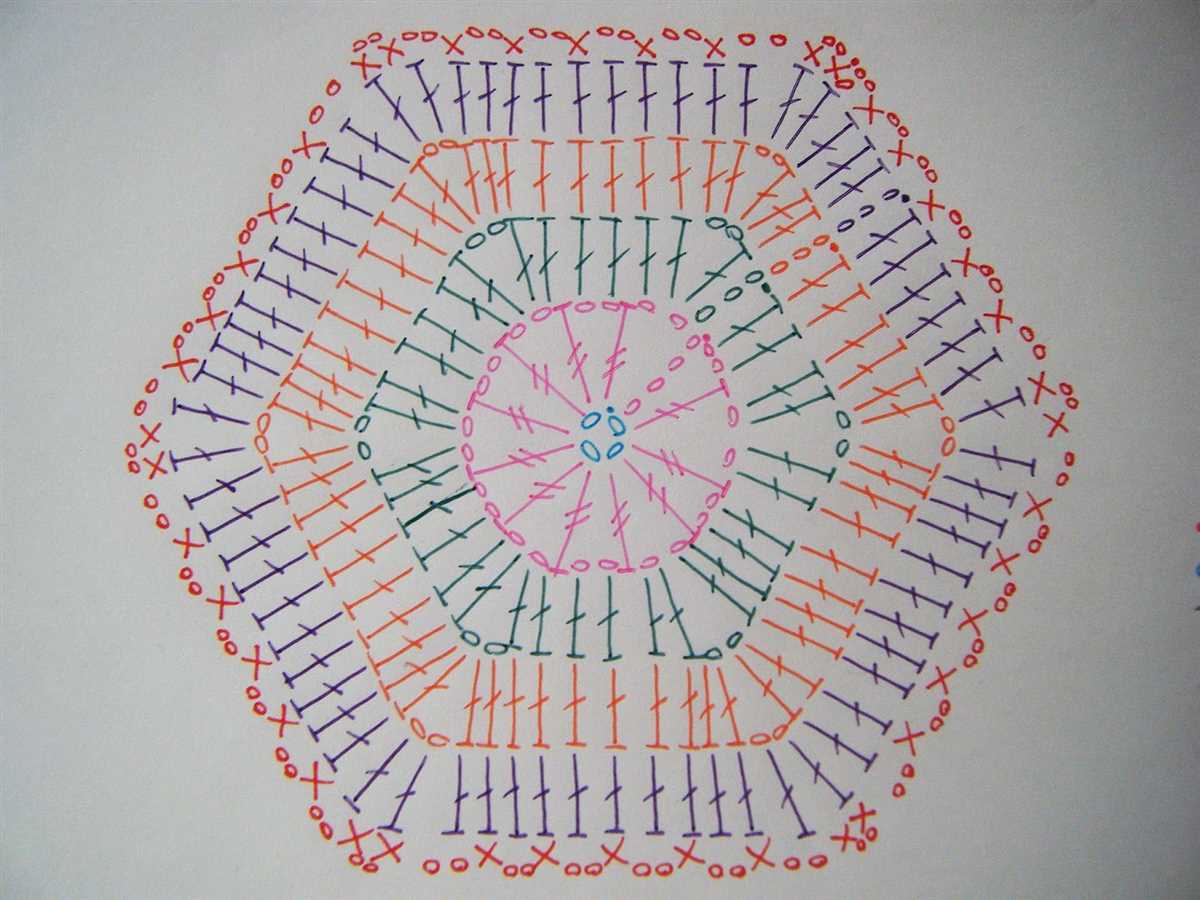
A knitted hexagon pattern is a design that creates a hexagonal shape using knitting techniques. It usually involves a repeating pattern of stitches and rows to form the six sides of the hexagon.
How do I knit a hexagon?
To knit a hexagon, you can start by casting on the desired number of stitches and knitting in the round. You can then follow a hexagon pattern that involves increasing and decreasing stitches to create the six sides. There are many different hexagon knitting patterns available online or in knitting books.
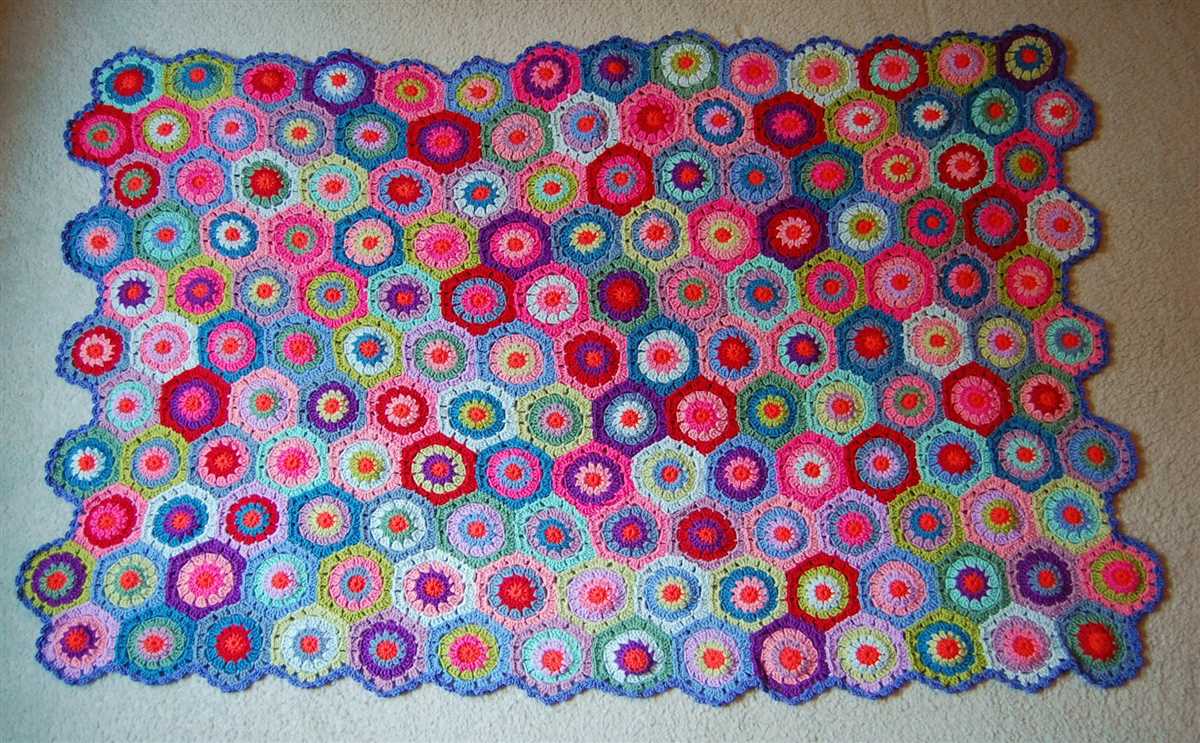
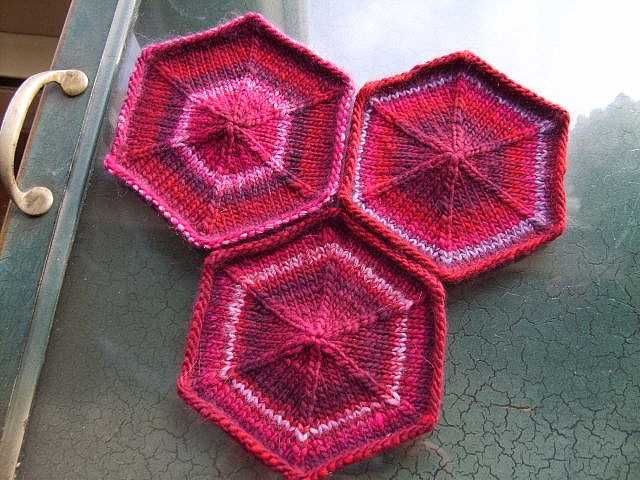
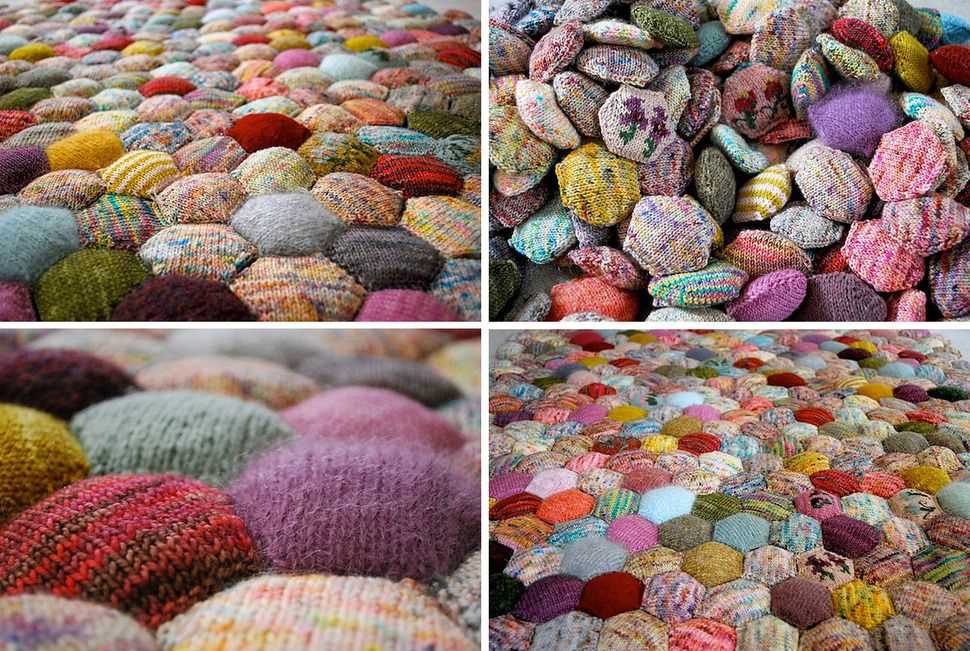
What can I make with knitted hexagons?
There are many things you can make with knitted hexagons. Some common projects include blankets, pillows, coasters, and even garments like sweaters or shawls. You can also join multiple hexagons together to create larger geometric designs.
Are there any specific stitches or techniques used in knitting hexagons?
There are various stitches and techniques that can be used when knitting hexagons. Common techniques include increases and decreases to shape the hexagon, as well as different types of stitch patterns to add texture or color to the design. It’s helpful to have some experience with basic knitting techniques before attempting to knit a hexagon.
Can I create my own knitted hexagon pattern?
Yes, you can create your own knitted hexagon pattern! You can experiment with different stitch patterns, colors, and sizes to create your own unique design. Just make sure to keep track of your stitches and rows to maintain the hexagonal shape. It can be a fun and creative way to express your knitting skills.
What is a knitted hexagon pattern?
A knitted hexagon pattern is a design or instruction for creating a hexagon shape using knitting techniques and stitches. It typically includes instructions for casting on, knitting stitches in various patterns, and shaping the hexagon.