
If you’re looking for a fun and unique way to decorate your Easter festivities, why not try knitting your own Easter eggs? Knitting is a great way to relax and be creative, and knitting Easter eggs is a project that both beginners and experienced knitters can enjoy. With just a few simple materials and this easy-to-follow pattern, you’ll have a beautiful collection of knitted Easter eggs in no time.
First, gather your materials. You’ll need some colorful yarn in your favorite Easter colors, knitting needles (sizes 4-6 are recommended), a tapestry needle, and some polyester filling. You can also add embellishments like buttons, ribbon, or beads to make your Easter eggs extra special.
Next, cast on your stitches. Start by making a slip knot and placing it on your knitting needle. Then, follow the pattern instructions for the number of stitches to cast on. This will depend on the size of your Easter egg and the gauge of your yarn. If you’re unsure, start with about 20 stitches and adjust as needed.
Once you have your stitches cast on, it’s time to knit! Use your chosen stitch pattern – whether it’s garter stitch, stockinette stitch, or something more intricate – and knit each row following the pattern instructions. If you’re a beginner, garter stitch (knit every row) is a great choice.
After you’ve completed your knitting, it’s time to finish off your Easter egg. Cut the yarn, leaving a long tail, and thread it through your tapestry needle. Thread the needle through the stitches on your knitting needle, slipping them off as you go. Pull the yarn tight to close up the top of the egg.
Knit Easter Egg Pattern: a Fun DIY Project for the Holidays
If you’re looking for a fun and creative DIY project to celebrate Easter, why not try knitting your own Easter eggs? Knitting Easter eggs is a great way to showcase your knitting skills and add a personal touch to your holiday decorations. Plus, it’s a fun activity that the whole family can enjoy!
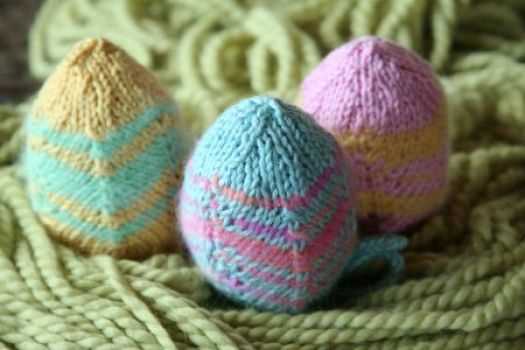
This knit Easter egg pattern is easy to follow and allows you to customize your eggs with different colors and patterns. You can choose traditional pastel shades or get creative with bold and vibrant hues. The possibilities are endless!
- Materials Needed: To get started, you’ll need some yarn in your desired colors, knitting needles (size will depend on the thickness of your yarn), a yarn needle, and some stuffing material.
- Instructions: Begin by casting on stitches to create the base of your Easter egg. Then, knit in the round to create a seamless egg shape. You can experiment with different stitch patterns to add texture and interest to your eggs.
- Decorating Your Eggs: Once you’ve completed knitting your eggs, it’s time to have fun with decorations. You can use embroidery floss to add intricate designs like flowers or polka dots. You can also sew on buttons, beads, or ribbons for a whimsical touch.
- Displaying Your Eggs: After you’ve finished decorating, you can display your knit Easter eggs in a variety of ways. You can create an Easter basket filled with your colorful creations, hang them on an Easter tree, or attach them to a garland to create a festive atmosphere.
Knitting Easter eggs is not only a fun and creative project, but it also allows you to create unique and long-lasting decorations that can be enjoyed for years to come. So grab your knitting needles and yarn, and get ready to make some beautiful and festive Easter eggs!
Materials Needed for Knitting Easter Eggs
Knitting Easter eggs is a fun and creative way to celebrate the spring season. To get started, you will need a few basic materials. Here is a list of what you will need:
Yarn:
- For knitting Easter eggs, you will need a variety of colorful yarns. Choose yarns in different shades of pastel colors like pink, blue, yellow, and green to create a festive and vibrant look.
- It’s best to use lightweight yarns such as baby or sport weight yarn for this project, as they will create a delicate and dainty texture for the eggs.
Knitting Needles:
- Choose knitting needles that are appropriate for the yarn weight you will be using. For lightweight yarns, needles in sizes US 3-5 (3.25-3.75mm) are recommended.
- Circular or double-pointed needles can be used for knitting in the round, while straight needles are suitable for knitting flat pieces that will be seamed together.
Stuffing:
- To give your knitted Easter eggs a nice shape and form, you will need some stuffing material. You can use polyester fiberfill or cotton stuffing for this purpose.
- Make sure to have enough stuffing on hand to fill all the eggs you plan to knit. The amount of stuffing needed will depend on the size of your eggs and the desired level of firmness.
Other Supplies:
- In addition to yarn, knitting needles, and stuffing, you may also need some other basic knitting supplies, such as scissors, stitch markers, and a yarn needle for seaming.
- If you want to add embellishments to your knitted eggs, you can also gather some small buttons, ribbons, or embroidery floss to use for decoration.
With these materials on hand, you will be well-equipped to start knitting your own Easter eggs. Get creative with your yarn choices, experiment with different stitch patterns, and have fun bringing your knitted eggs to life!
Choosing the Right Yarn for Knitting Easter Eggs

When it comes to knitting Easter eggs, choosing the right yarn is essential to achieve the desired results. The yarn not only determines the appearance and texture of the eggs but also affects their durability. Here are some factors to consider when selecting the perfect yarn for your Easter egg knitting project.
1. Material
One of the key considerations is the material of the yarn. Wool and cotton are popular choices as they are both versatile and provide a good texture. Wool yarns offer warmth and elasticity, making them ideal for Easter eggs that need to hold their shape. Cotton yarns, on the other hand, are soft and smooth, giving a neat and polished look to the eggs. If you prefer a more unique texture, you could also experiment with other materials like silk or bamboo.
2. Weight
The weight or thickness of the yarn is another crucial factor in knitting Easter eggs. Thicker yarns, such as bulky or chunky weights, can create larger and more substantial eggs. They also knit up quickly, which is perfect if you’re short on time. On the other hand, if you want to create delicate and intricate designs, finer yarns like lace or fingering weights are preferable. They allow for more intricate stitch patterns and a finer overall look.
3. Color
The color of the yarn is an essential aspect when it comes to knitting Easter eggs. Traditional Easter colors like pastel shades of pink, blue, yellow, and green are always popular choices. However, don’t be afraid to think outside the box and experiment with bold and vibrant colors as well. Depending on your preference, you can opt for solid colors or variegated yarns that create beautiful color transitions.
4. Washability
Considering that Easter eggs can be used as decorations or given as gifts, it’s important to choose a yarn that is easy to care for. Look for yarn that is machine washable and can withstand gentle cycles without losing its shape or color. This ensures that your knitted Easter eggs stay clean and beautiful for years to come.
By taking these factors into account when choosing your yarn, you can create beautiful and durable knitted Easter eggs that will be cherished for years to come. Whether you prefer soft pastel shades or bold and vibrant colors, the right yarn will bring your Easter egg knitting project to life.
Basic Knitting Techniques for Easter Eggs

Knitting Easter eggs is a fun and creative way to celebrate the holiday season. Whether you’re a beginner or an experienced knitter, there are several basic techniques that you can use to create beautiful and unique eggs.
1. Provisional cast on: To start your Easter egg, you can use a provisional cast on method. This technique allows you to easily remove the cast on edge later, creating a seamless finish for your egg. It involves using a waste yarn that will be removed later, and then picking up the live stitches to continue knitting.
2. Fair Isle knitting: Fair Isle, also known as stranded knitting, is a popular technique for adding patterns and designs to your Easter eggs. It involves working with multiple colors at once, carrying the yarn not in use across the back of the work. This creates a beautiful two-color pattern and can be used to create intricate motifs such as flowers, animals, or geometric shapes.
3. Duplicate stitch: If you prefer not to work with multiple colors while knitting, you can use the duplicate stitch technique to add designs to your finished Easter eggs. This technique involves embroidering over the knit stitches using a contrasting color of yarn. It allows you to easily add intricate details or personalize your eggs with names or initials.
4. I-cord: I-cord is a versatile knitting technique that can be used to create a hanging loop for your Easter eggs. It involves knitting a tube of fabric on double-pointed needles, which results in a sturdy and flexible cord. You can attach the I-cord loop to the top of your egg and hang it as a decoration.
5. Blocking: After you finish knitting your Easter eggs, it’s important to block them to give them a polished and professional look. Blocking involves wetting the knitted fabric and shaping it into the desired shape. You can use blocking mats and pins to help stretch and shape the eggs evenly. Once they are dry, they will hold their shape and be ready to display.
By mastering these basic knitting techniques, you can create beautiful and unique Easter eggs that will impress your friends and family. Whether you choose to use Fair Isle knitting, duplicate stitch, or a combination of techniques, the possibilities for creativity are endless. So grab your knitting needles and start crafting your own egg-cellent Easter decorations!
Knitting Patterns for Beginner Knitters
Learning to knit can be a fun and rewarding experience. For beginners, it’s important to start with simple patterns that allow you to practice basic stitches and techniques. These knitting patterns are perfect for those just starting out, as they are easy to follow and require minimal knitting skills.
1. Scarf Pattern: One of the best projects for beginner knitters is a scarf. A simple garter stitch scarf is an excellent choice, as it involves knitting every row. You can choose a chunky yarn to make the project quick and easy.
2. Dishcloth Pattern: Dishcloths are another great option for beginner knitters. They are small and quick to knit, making them perfect for practicing your knitting skills. You can experiment with different stitch patterns and colors to create unique and useful dishcloths.
3. Hat Pattern: Once you feel comfortable with basic stitches, you can try knitting a hat. Look for patterns that use simple stitches like knit and purl. Hats are a great way to practice shaping techniques, such as increasing and decreasing stitches.
4. Baby Blanket Pattern: Knitting a baby blanket is a wonderful project for beginner knitters. Choose a pattern that uses basic stitches and repetitive patterns. Baby blankets are larger projects that allow you to practice your knitting skills while creating a beautiful and functional item.
5. Socks Pattern: If you’re feeling more adventurous, you can try knitting a pair of socks. Look for patterns that are specifically designed for beginners, as they will guide you through the process step by step. Socks are a great way to learn new techniques, such as knitting in the round and turning a heel.
Advanced Knitting Patterns for Experienced Knitters
If you’re an experienced knitter looking for a challenge, advanced knitting patterns are the perfect way to test your skills and push yourself to new heights. These patterns often feature intricate stitch patterns, complex shaping, and unique techniques that will keep you engaged and excited throughout the entire project.
One popular advanced knitting pattern is the Fair Isle sweater. This technique involves knitting with multiple colors in a single row to create intricate and colorful patterns. Fair Isle sweaters can be quite challenging, as you’ll need to keep track of multiple yarn colors and tension while maintaining an even gauge. However, the end result is a stunning, one-of-a-kind garment that showcases your knitting skills.
Key features of advanced knitting patterns:
- Complex stitch patterns
- Intricate shaping
- Unique techniques
- Use of multiple colors
- High level of attention to detail
Another advanced knitting pattern that might pique your interest is lace knitting. Lace knitting involves creating delicate and intricate patterns using a combination of yarn overs, decreases, and increases. This technique requires precision and attention to detail, as even the slightest mistake can disrupt the lace pattern. However, the end result is a breathtakingly beautiful piece that showcases the beauty of lace.
If you’re up for a challenge, cable knitting is another advanced technique to explore. Cable knitting involves creating twisted stitch patterns that resemble ropes or cables. This technique requires the use of a cable needle or a knitting needle to hold stitches while you cross them over one another. The result is a textured and visually striking pattern that adds depth and interest to your knitted projects.
Tips and Tricks for Knitting Perfect Easter Eggs
Knitting Easter eggs can be a fun and creative way to celebrate the holiday season. Whether you are a beginner or an experienced knitter, here are some tips and tricks to ensure that your Easter eggs turn out perfect.
Choose the right yarn
When knitting Easter eggs, it is important to choose the right yarn. Opt for a lightweight yarn that is easy to work with and has a bit of stretch. This will help you achieve a nice, even tension and ensure that your stitches are not too tight or too loose.
Use small double-pointed needles
To create the shape of an Easter egg, it is best to use small double-pointed needles. These needles allow you to work in the round and create a seamless egg shape. Make sure to choose needles that are the appropriate size for your chosen yarn to achieve the desired result.
Experiment with different stitch patterns
Easter eggs offer a great opportunity to experiment with different stitch patterns. You can try simple stockinette stitch for a smooth finish, or opt for more intricate lace or cable patterns for a textured look. Be creative and have fun with your stitch choices to create unique and beautiful eggs.
Use stitch markers
When knitting in the round, it can be helpful to use stitch markers to keep track of your stitches. Place a marker at the beginning of each round to easily identify the start of each row. This will help you avoid any mistakes and ensure that your Easter eggs have a consistent shape.
Don’t forget the finishing touches
Once you have finished knitting your Easter eggs, don’t forget the finishing touches. You can add embellishments such as ribbons, buttons, or embroidery to make your eggs truly special. Get creative with different colors and textures to personalize each egg and make them stand out.
By following these tips and tricks, you can create beautiful and unique knitted Easter eggs that will be a hit with friends and family. Enjoy the process and have fun experimenting with different techniques to make each egg truly one-of-a-kind.
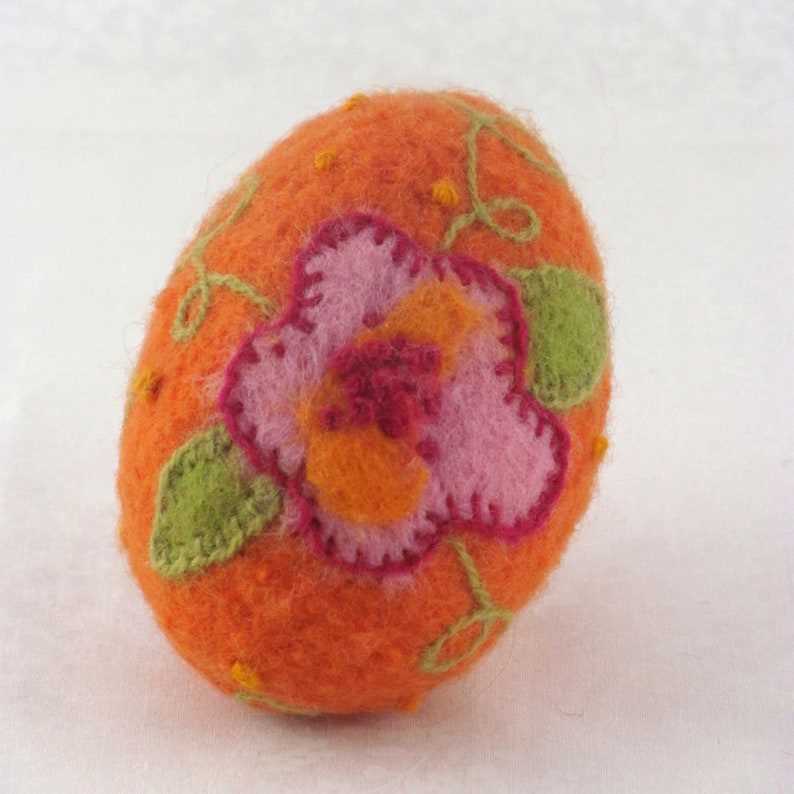
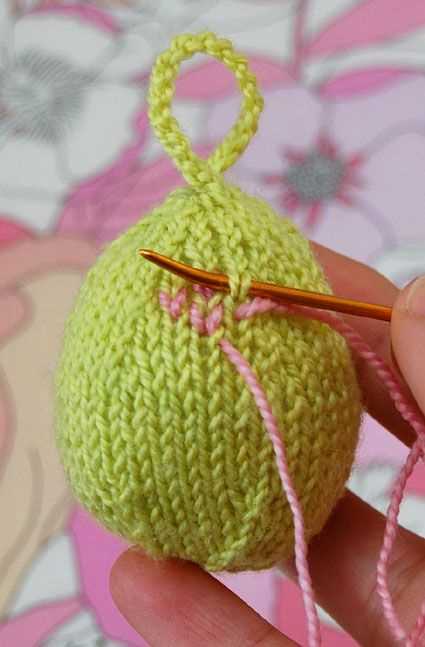
Personalizing Your Knitted Easter Eggs with Embellishments
Knitting your own Easter eggs is a fun and creative way to add a personal touch to your Easter decorations. While the basic knitted egg pattern can be beautiful on its own, you can take it to the next level by embellishing your eggs with various decorations. Here are some ideas to help you make your knitted Easter eggs truly unique:
Add Beads or Sequins
One of the easiest ways to embellish your knitted Easter eggs is by adding beads or sequins. You can use small seed beads or larger decorative beads to create intricate patterns or simply add a touch of sparkle. Sew the beads onto the knitted surface of the egg using a needle and thread, making sure they are securely attached. Alternatively, you can also use sequins to create a shimmering effect. Choose sequins in different colors and shapes and sew them onto the egg in any pattern you like.
Embroider Designs
If you enjoy embroidery, you can use this skill to personalize your knitted Easter eggs. Using colorful embroidery floss, you can stitch intricate designs directly onto the egg. Whether it’s flowers, animals, or abstract patterns, the possibilities are endless. Use a sharp embroidery needle to create fine details, and don’t be afraid to experiment with different stitches and thread colors to achieve the desired effect.
Create Pom-Poms or Tassels
Pom-poms and tassels can add a playful and whimsical touch to your knitted Easter eggs. You can make small pom-poms using yarn in coordinating or contrasting colors. Attach them to the top or bottom of the egg using a needle and thread. Tassels can be made using embroidery floss, yarn, or even ribbon. Simply tie them onto the egg and trim them to the desired length. Experiment with different colors and textures to create a unique look.
Wrap with Ribbon or Lace
For a more elegant and delicate look, you can wrap your knitted Easter eggs with ribbon or lace. Start by attaching one end of the ribbon or lace to the top of the egg using a glue gun or a small amount of fabric glue. Then, slowly wrap the ribbon or lace around the egg, making sure it is smooth and even. Secure the other end of the ribbon or lace with glue, and trim any excess. This embellishment gives your eggs a beautiful and sophisticated touch.
Incorporating these embellishments will make your knitted Easter eggs stand out and add a personal touch to your holiday decor. Don’t be afraid to get creative and experiment with different ideas. By combining the basic knitted pattern with these embellishments, you will have unique and beautiful eggs that will be cherished for years to come.
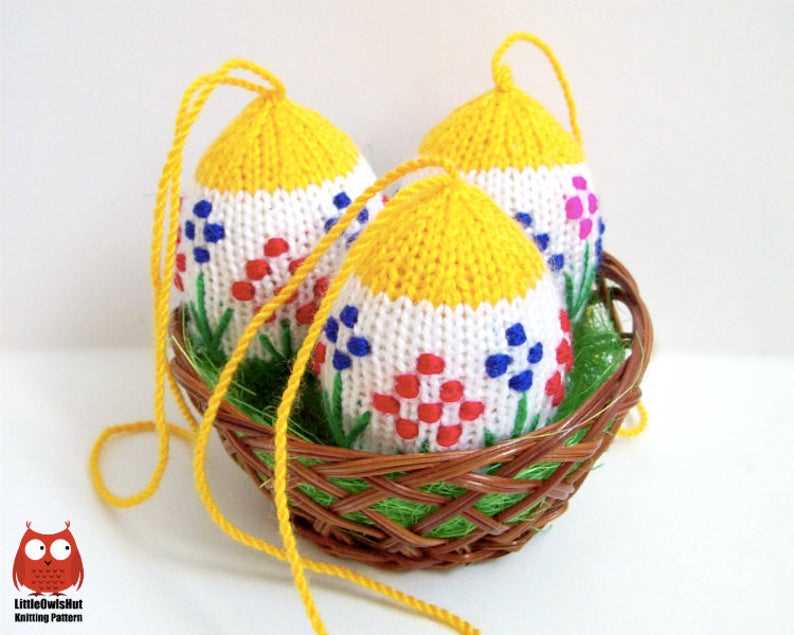
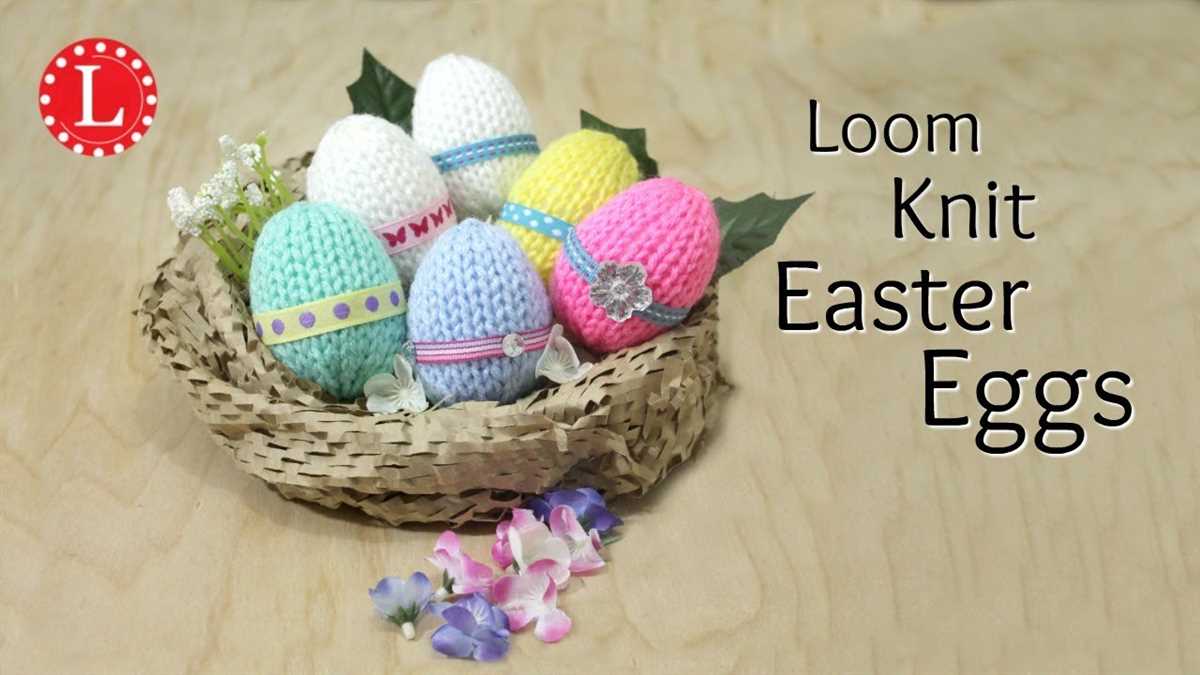
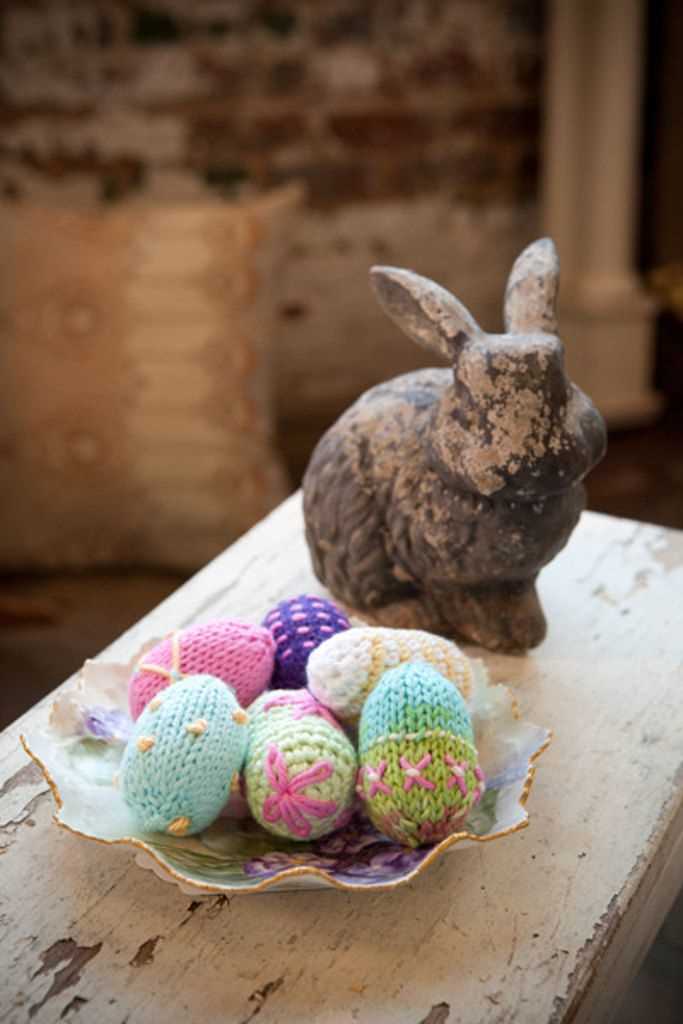
Displaying Your Knitted Easter Eggs in Creative Ways
Once you have finished knitting your Easter eggs, it’s time to think about how you can display them in creative ways. Whether you have made a few eggs or a whole basket full, there are plenty of options to help showcase your handiwork and add a festive touch to your home.
Hanging Display: One of the easiest ways to display your knitted Easter eggs is by creating a hanging display. You can string them onto a piece of twine or ribbon and hang them across a mantel, doorway, or window. For an extra touch, you can add some colorful beads or tiny bows between each egg to make it even more eye-catching.
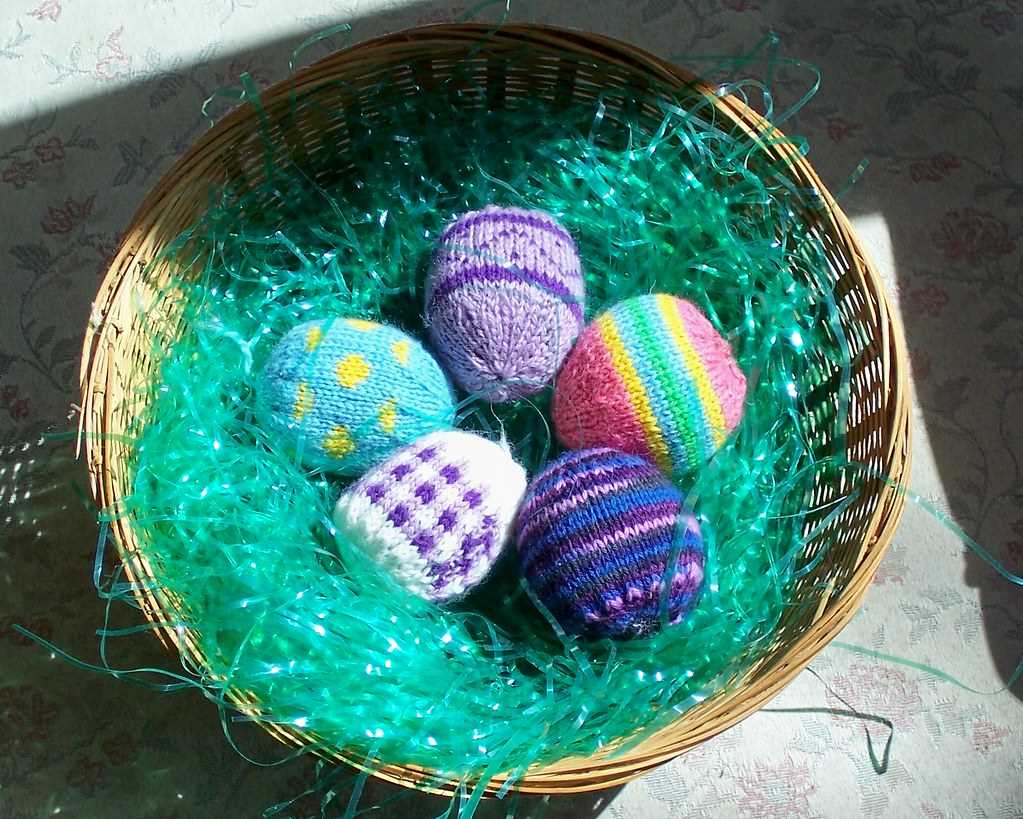
Nesting Display: Another option is to create a nesting display with your knitted Easter eggs. Find a basket or a shallow bowl and place some Easter grass or shredded paper inside. Arrange the eggs in the grass or paper, placing them at different angles and heights to create an interesting visual display. This option works especially well if you have a variety of colors and sizes of eggs to work with.
Tabletop Display: If you want to create a centerpiece for your Easter table, consider displaying your knitted eggs in a unique container. You can use a glass jar, a decorative bowl, or even a vintage teacup. Fill the container with some Easter grass or tissue paper and arrange the eggs on top. This will not only showcase your eggs but also add a festive touch to your holiday table.
Wall Display: For a more permanent display, you can create a wall display using shadow boxes or picture frames. Remove the back of the frame and arrange the knitted eggs inside, securing them with a bit of glue or wire if needed. Hang the frames on the wall in a cluster or line to show off your eggs. This option allows you to enjoy your knitted Easter eggs year after year and adds a whimsical touch to any room.
Stylized Display: If you want to get really creative, consider incorporating your knitted Easter eggs into other decorations or displays. You can place them on a wreath, attach them to a garland, or even combine them with real or plastic eggs in a centerpiece. The possibilities are endless, and it’s a fun way to show off your knitting skills while adding a personal touch to your Easter decor.
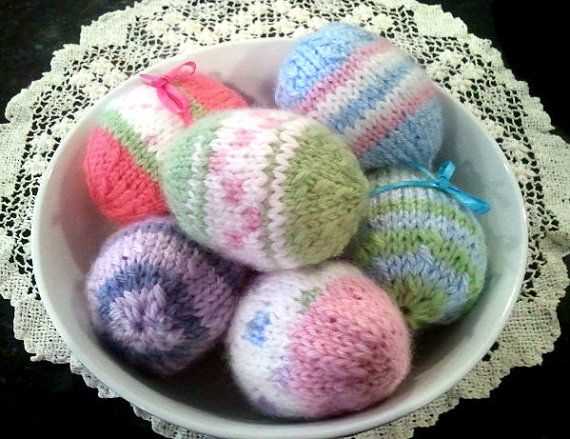
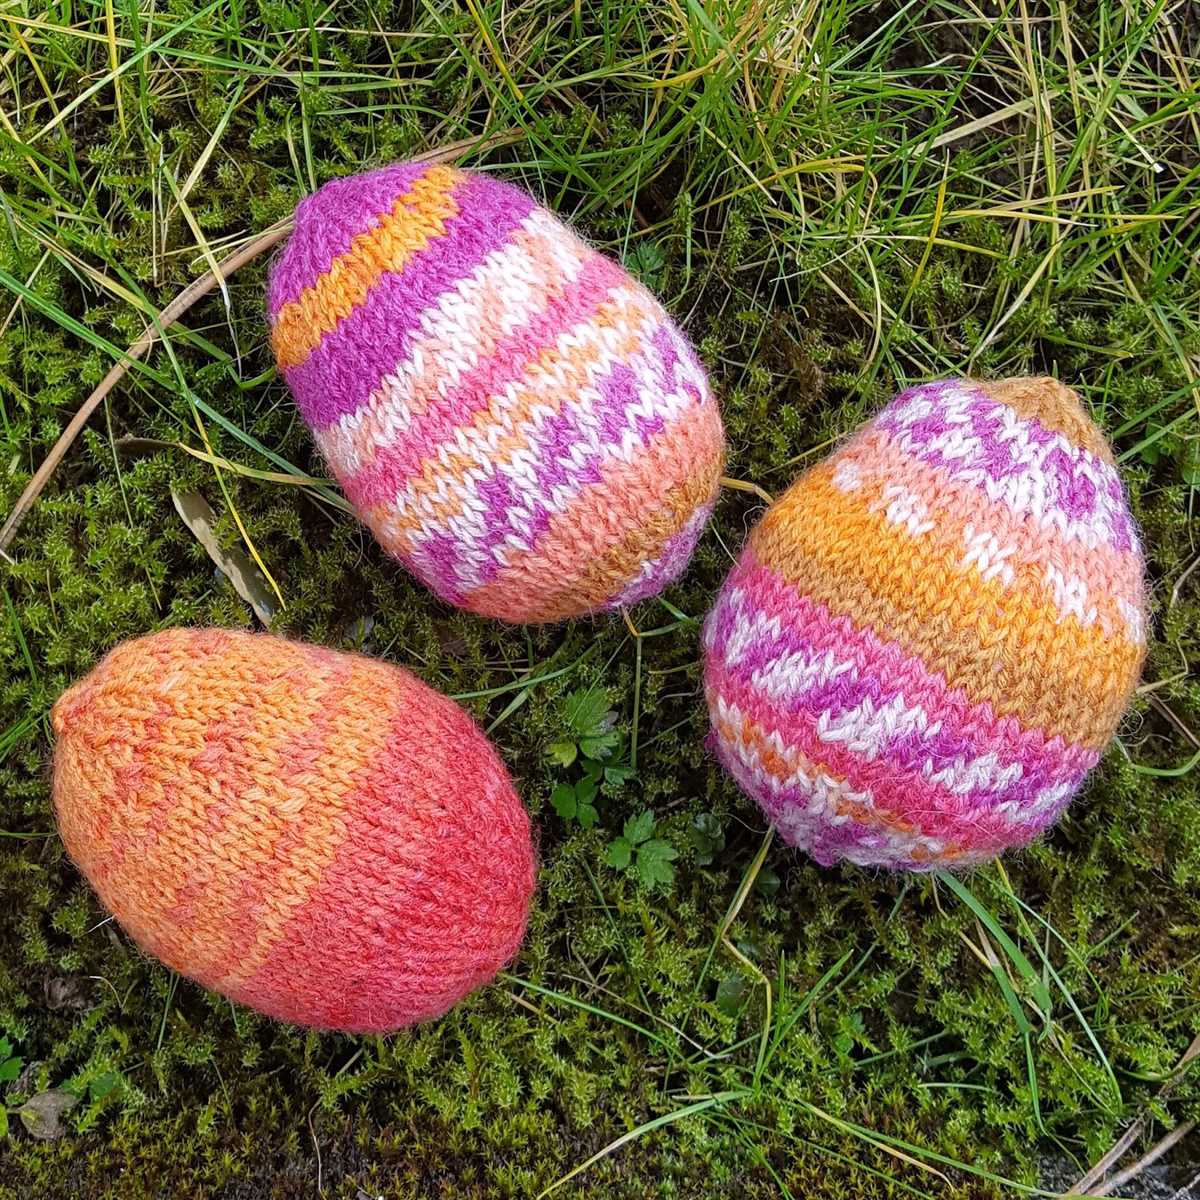
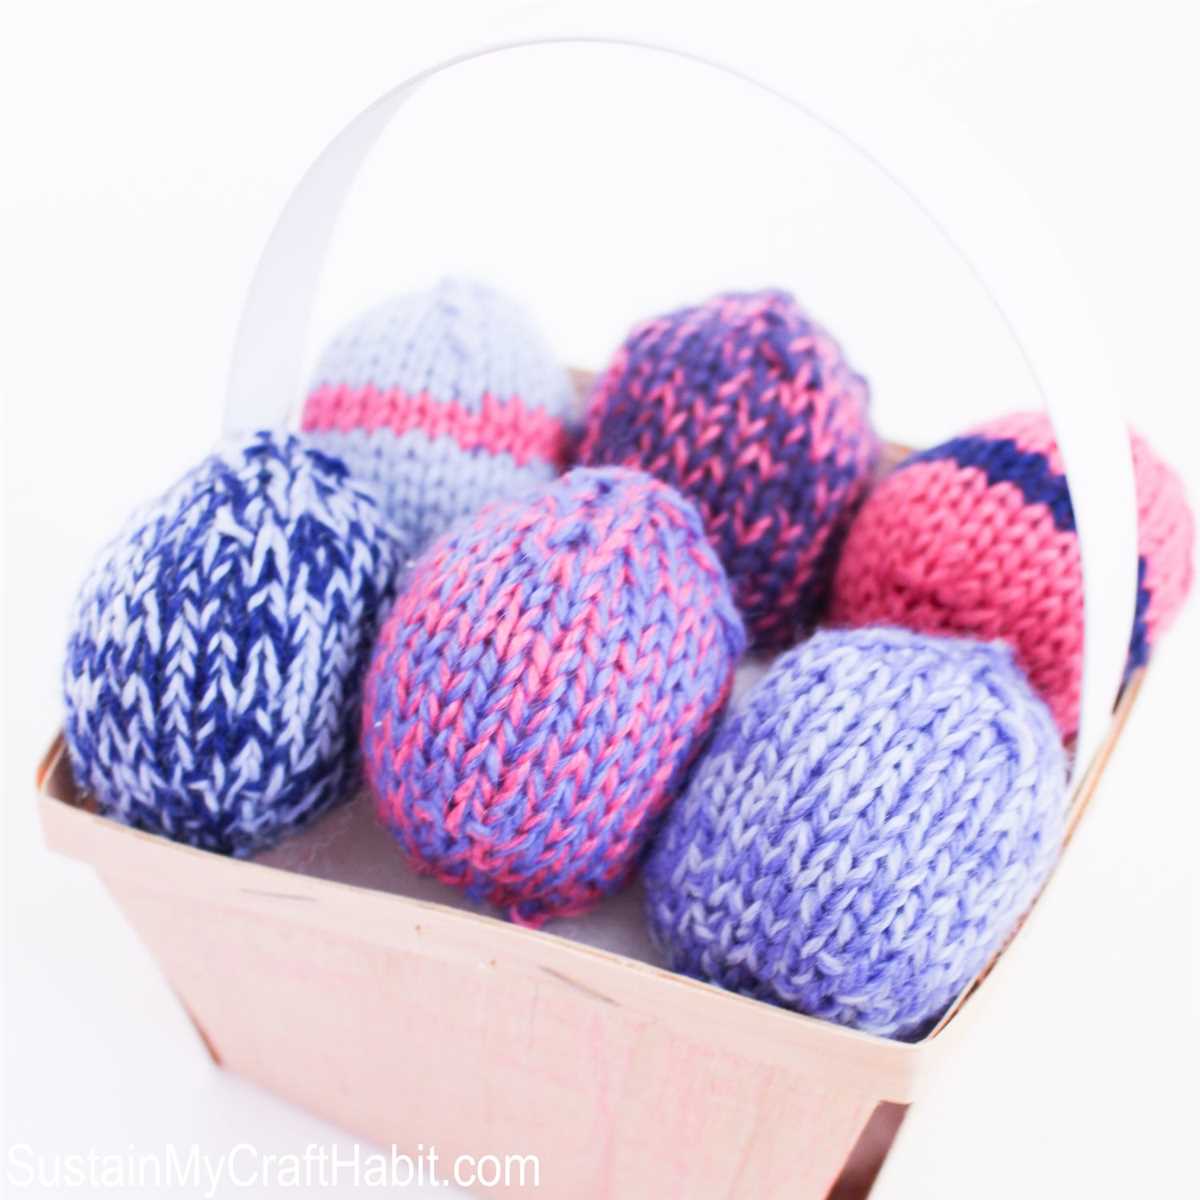
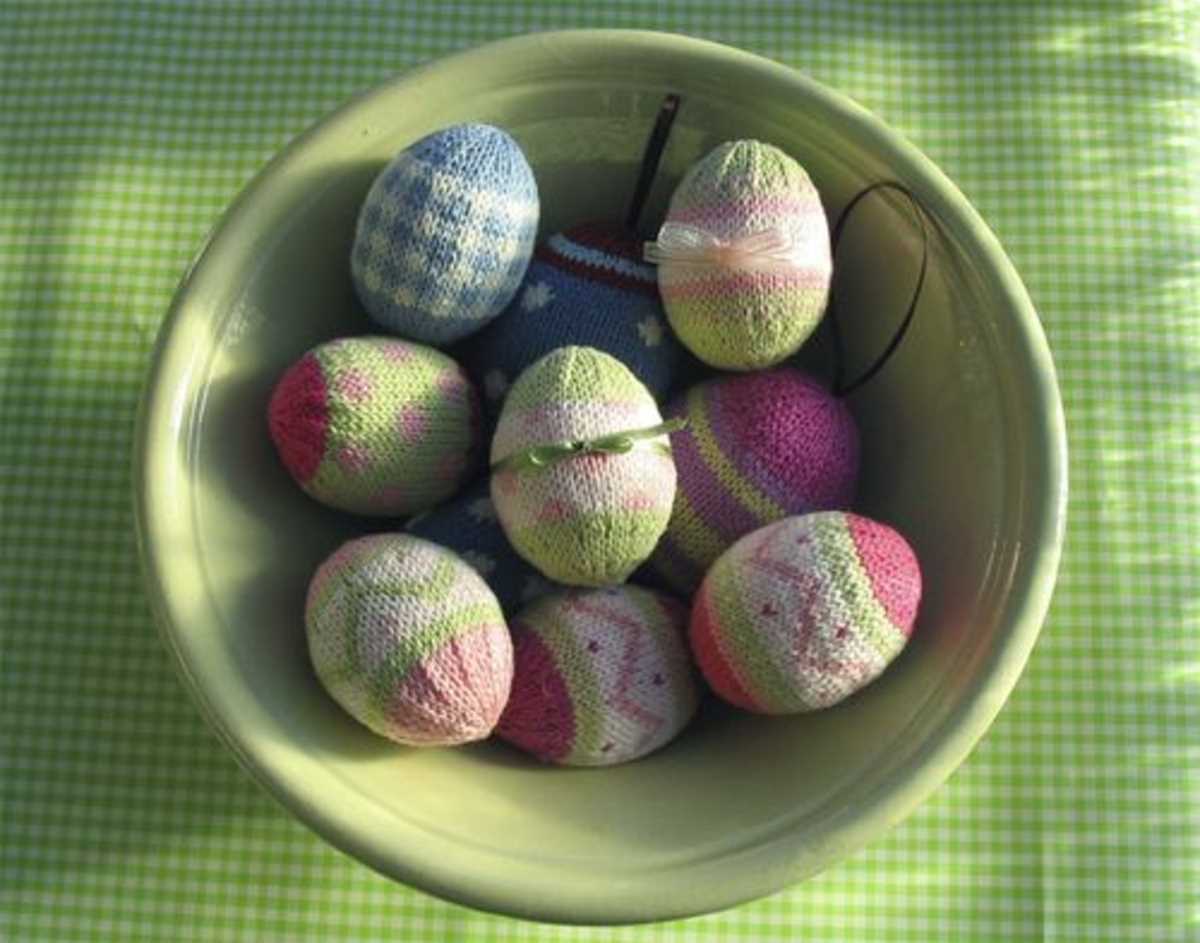
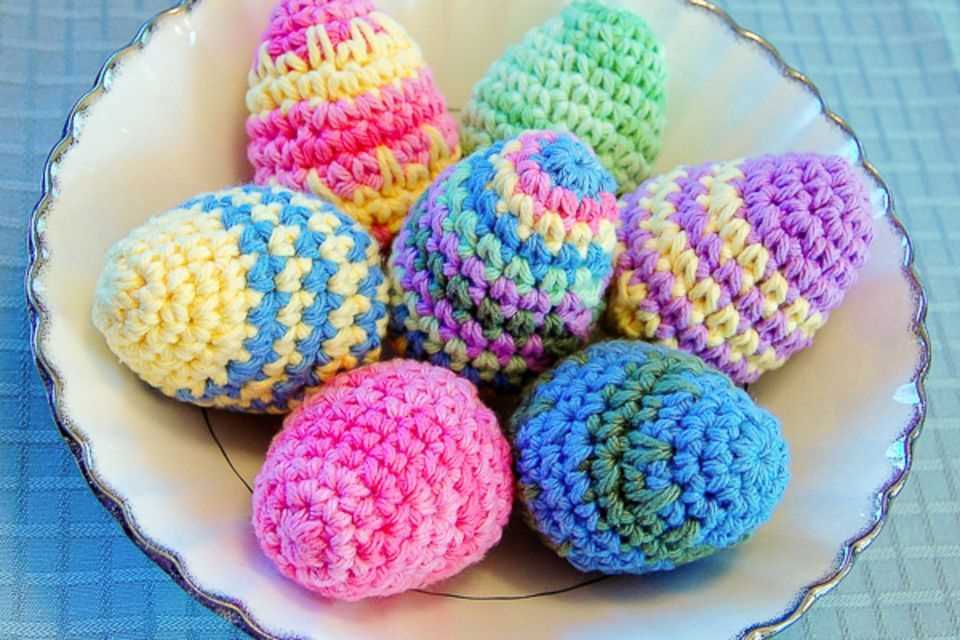
Using Knitted Easter Eggs as Decorations and Gifts
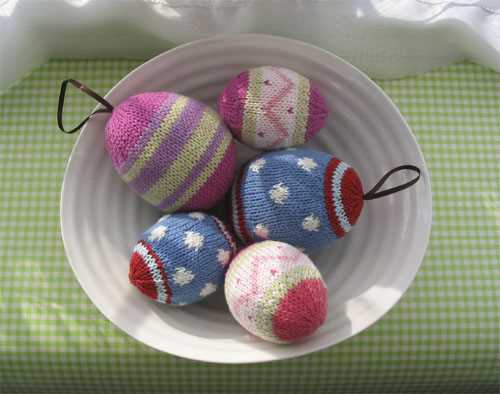
Knitted Easter eggs are a charming and unique way to add a festive touch to your home during the Easter season. These knitted eggs can be used as decorations or given as gifts to loved ones, making them a versatile and thoughtful option. The soft texture of the knitted fabric gives the eggs a cozy and inviting feel, while the vibrant colors and patterns make them visually appealing.
One of the great things about knitted Easter eggs is that they can be customized to suit any décor or personal style. Whether you prefer pastel hues and delicate lace patterns or bold and vibrant colors with geometric designs, there is a knitted egg pattern out there that will fit your taste. You can also experiment with different yarn weights and textures to create eggs with varying sizes and textures for added interest.
Knitted Easter eggs can be used in a variety of ways around your home. They can be placed in a decorative bowl or basket as a centerpiece for your dining table or coffee table. You can also hang them from a branch or Easter tree as part of your holiday decorations. Additionally, they can be used as ornaments for your Easter tree or as place settings for your holiday table.
When it comes to giving knitted Easter eggs as gifts, the possibilities are endless. You can give them as standalone gifts, or pair them with other Easter-themed items such as chocolate treats or small toys. Knitted Easter eggs also make thoughtful and unique gifts for baby showers, birthdays, or other special occasions.
In conclusion, knitted Easter eggs are a versatile and creative way to add a festive touch to your home and make thoughtful gifts. Whether used as decorations or given as gifts, these knitted eggs are sure to bring joy and warmth to your Easter celebrations.
Additional Easter Knitting Projects to Try
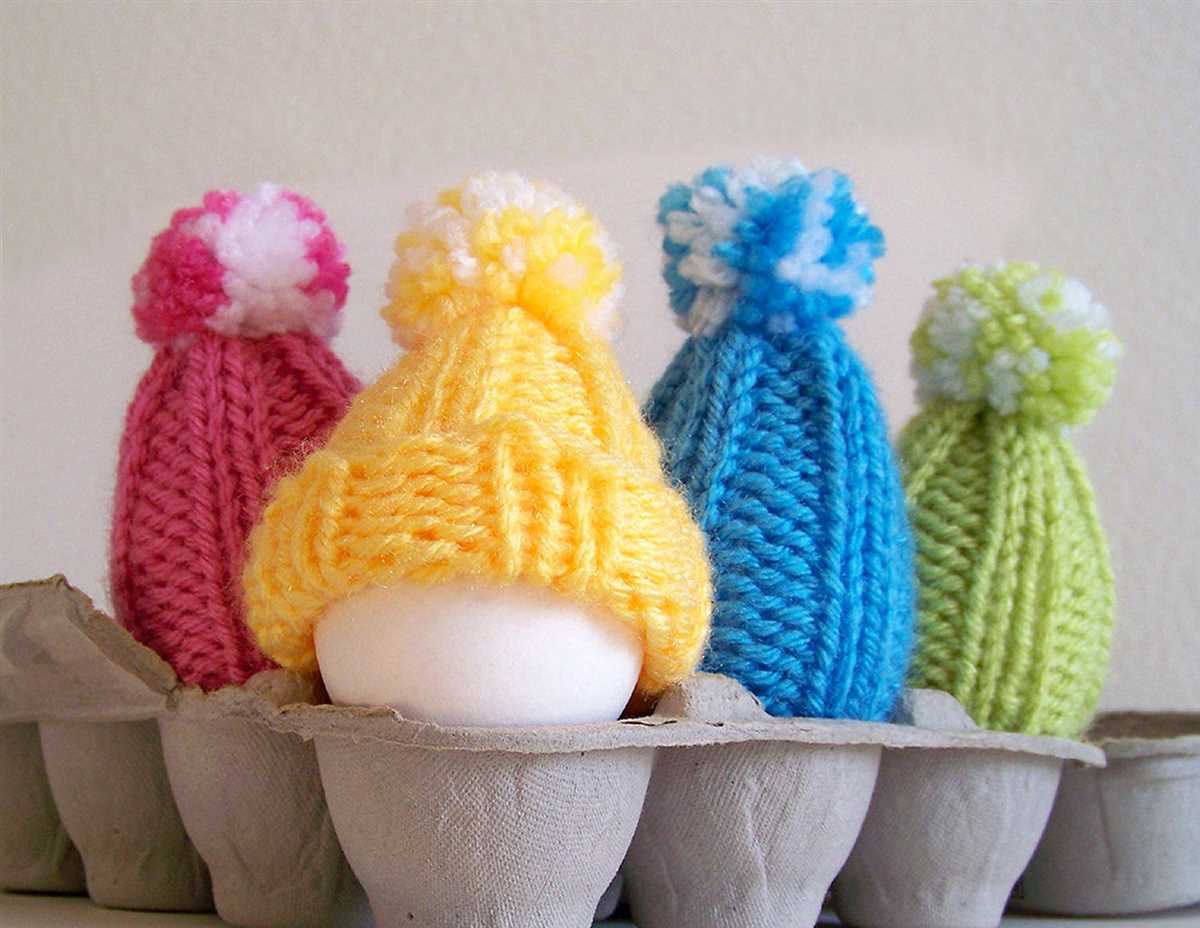
Easter is a wonderful time to embrace your creativity and try out new knitting projects. If you enjoyed making knit Easter eggs, here are a few more ideas to inspire you:
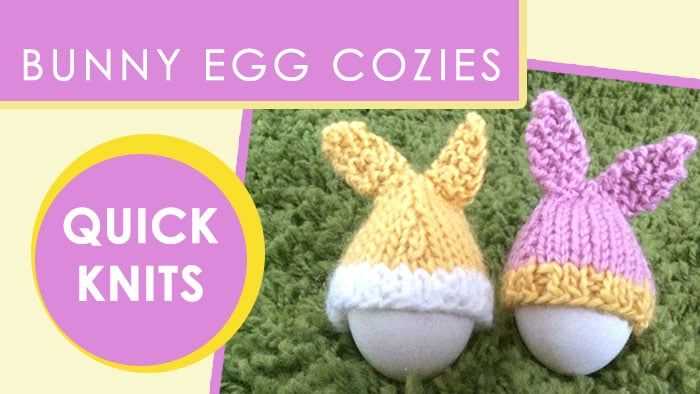
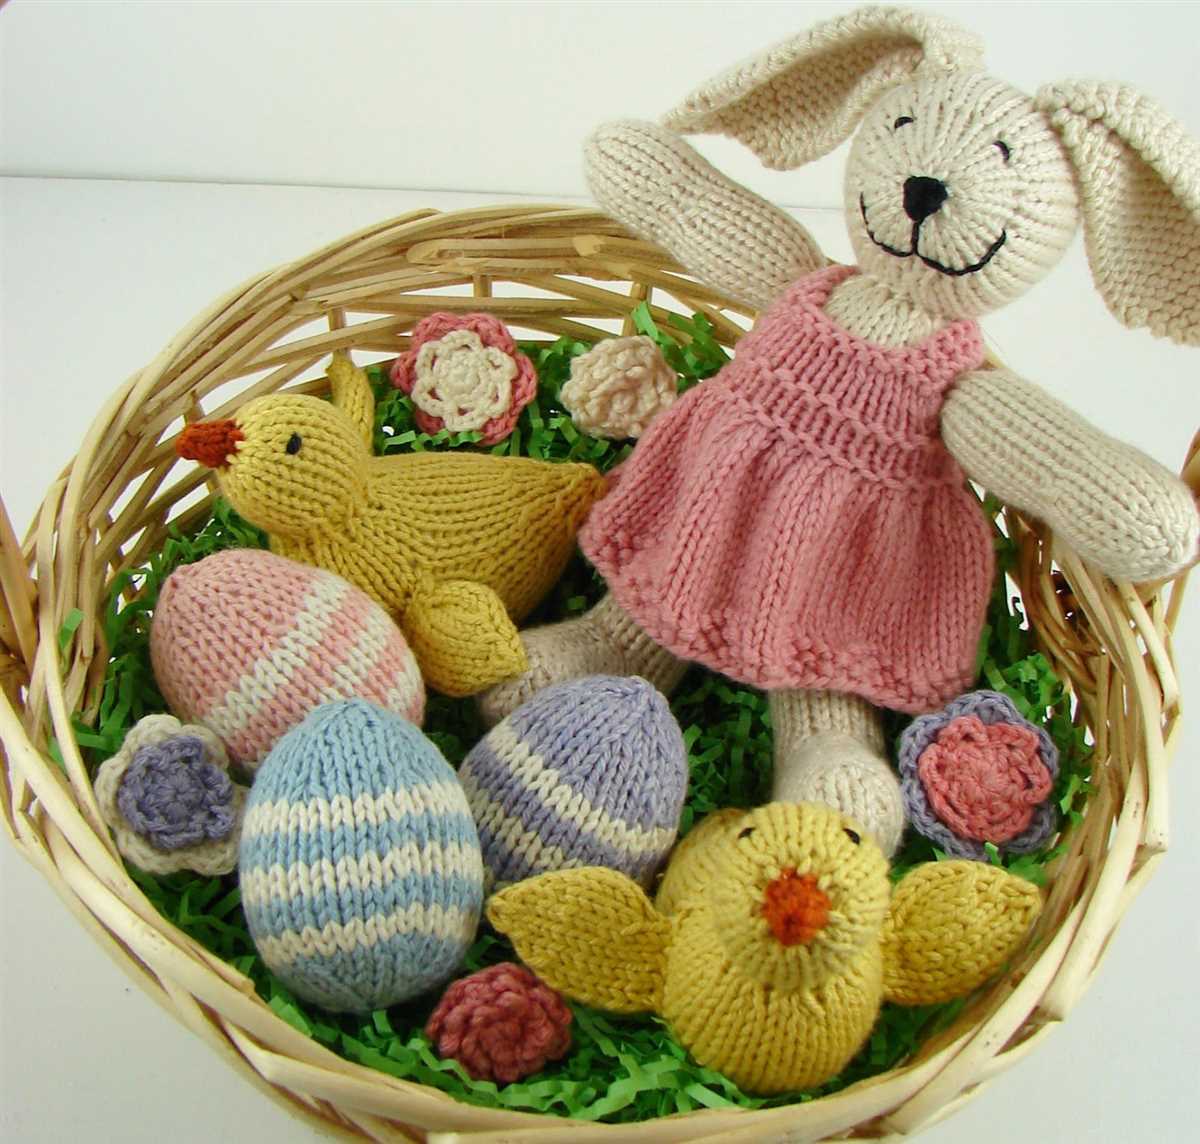
1. Knit Easter Bunnies
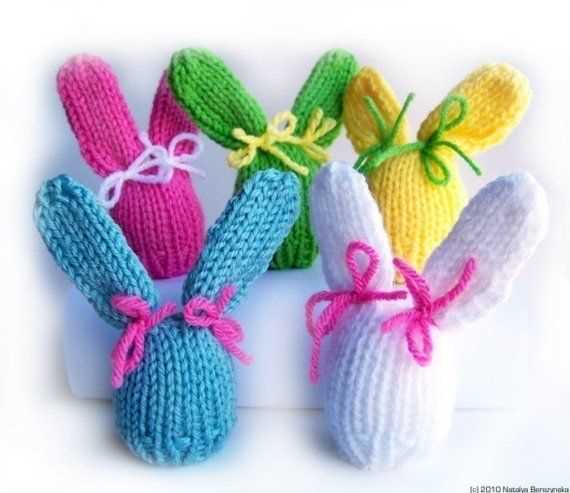
Add a touch of cuteness to your Easter decorations with knit Easter bunnies. You can create adorable bunnies in different sizes and colors, making them a fun project for all skill levels. These little bunnies can be displayed on your Easter table or given as gifts.
2. Knit Easter Basket
A knitted Easter basket is a lovely and practical project that can be used year after year. You can customize the size, shape, and color to match your personal style. Fill the basket with colorful knit eggs and other Easter treats to create a festive centerpiece.
3. Knit Easter Chickens
Add some chirpy charm to your Easter décor with knit Easter chickens. These little chickens can be knit in a variety of colors and sizes, making them perfect for cute decorations or as toys for children. Use different yarns to add texture and make each chicken unique.
4. Knit Easter Garland
If you’re looking to add a touch of Easter to your home, a knitted Easter garland is a great choice. You can knit a variety of Easter-themed shapes, such as eggs, bunnies, and flowers, and string them together to create a delightful garland. Hang it on your mantel or around doorways to bring festive cheer.
With these additional Easter knitting projects, you can continue to enjoy the creative and relaxing hobby of knitting while adding a festive touch to your Easter celebrations. Whether you’re a beginner or an experienced knitter, these projects offer something for everyone. Happy knitting and Happy Easter!