
Looking to add a touch of elegance and sophistication to your knitting projects? Look no further than the tile stitch knitting pattern. This intricate stitch creates a beautiful tiled effect, reminiscent of geometric patterns found in mosaic tiles. Whether you’re knitting a cozy blanket, a stylish scarf, or a chic sweater, the tile stitch pattern will elevate your project to the next level.
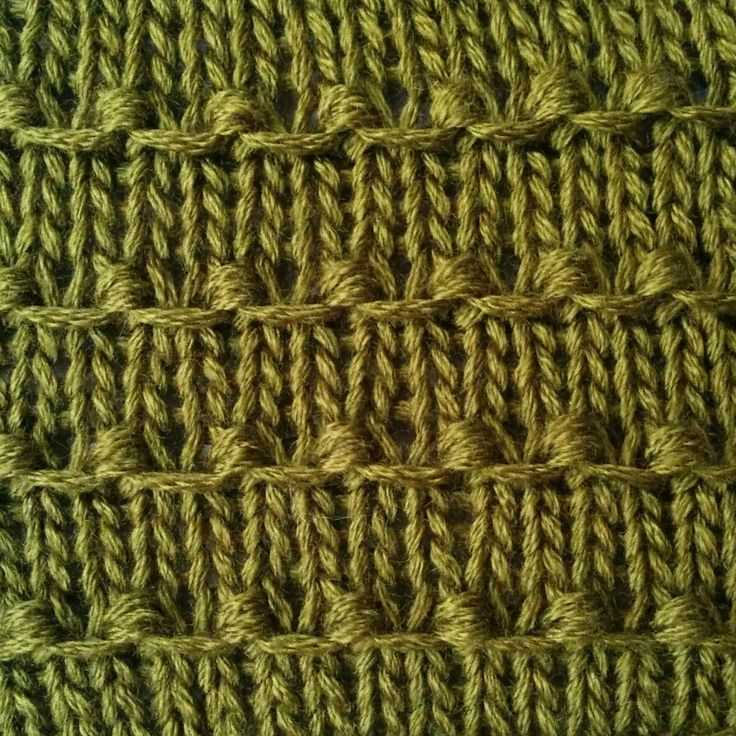
The tile stitch pattern is created by combining knits, purls, and slipped stitches in a specific sequence. The result is a stunning textured fabric that looks like a mosaic of tiles. The pattern can be created using any type of yarn and any size knitting needles, making it versatile and adaptable to any project. Plus, it’s suitable for knitters of all skill levels, from beginner to advanced.
One of the best things about the tile stitch pattern is its versatility. It can be used to create a wide range of items, from accessories like hats, gloves, and socks, to larger projects like blankets, shawls, and sweaters. The pattern can also be easily modified to suit your personal style and preferences. Add some colorwork for a vibrant and eye-catching design, or keep it simple with a monochromatic palette for an understated and sophisticated look.
So, if you’re ready to take your knitting to the next level and create beautiful, textured pieces that are sure to impress, give the tile stitch knitting pattern a try. With its versatility, elegance, and endless design possibilities, you’ll never run out of inspiration for your next knitting project.
What is a Tile Stitch Knitting Pattern?
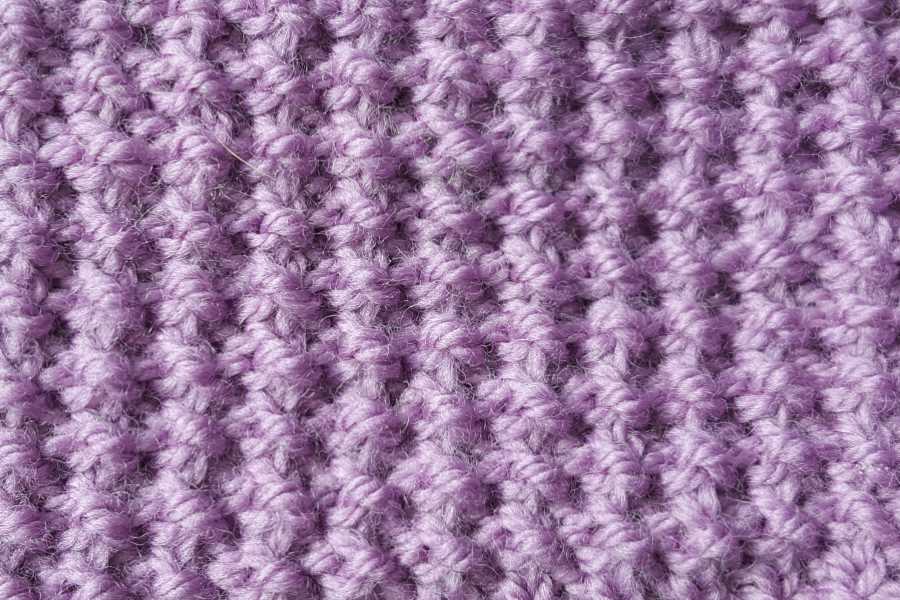
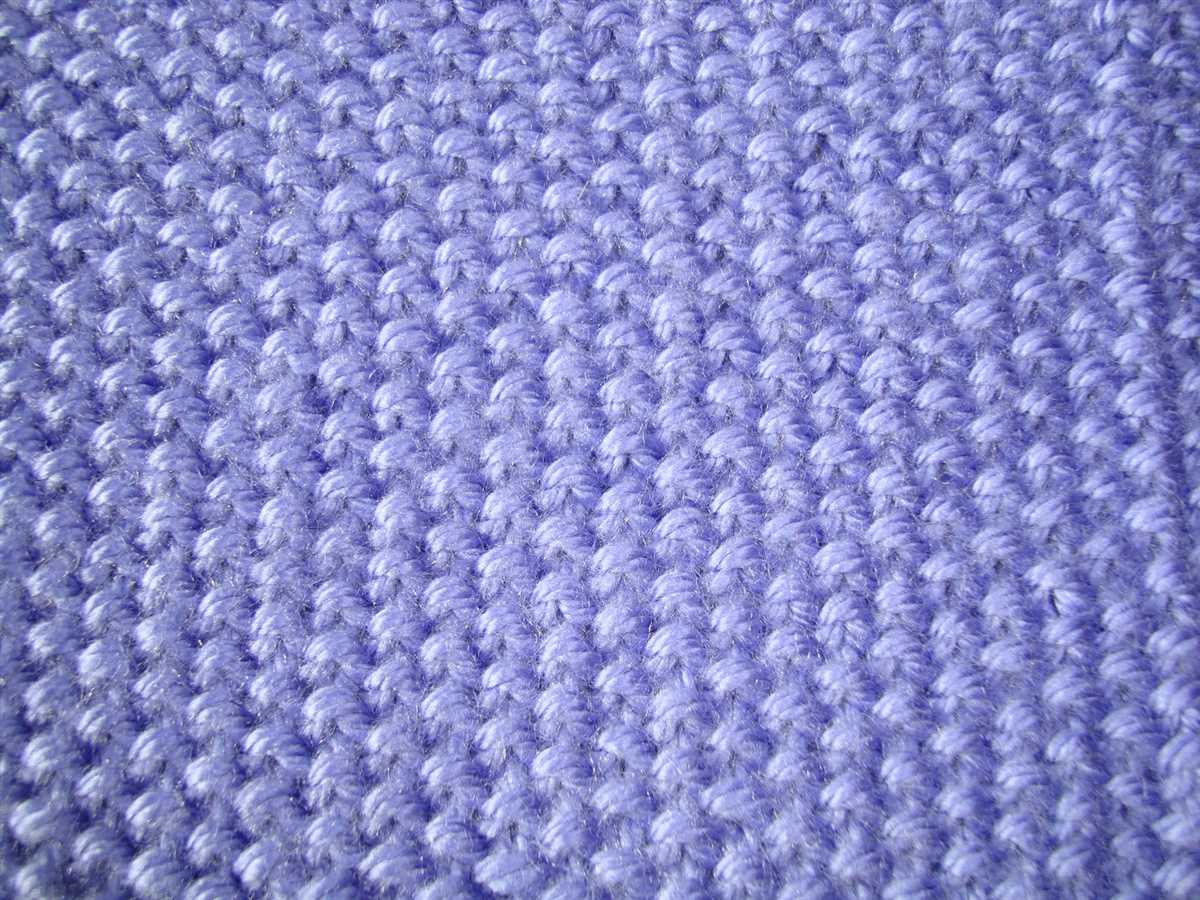
A tile stitch knitting pattern is a technique used in knitting to create a textured fabric that resembles a pattern of tiles. This pattern is achieved by using a combination of knit and purl stitches in a specific sequence, resulting in a unique and visually appealing design.
The tile stitch pattern consists of a repeating sequence of stitches, which can vary in complexity depending on the desired effect. It typically involves alternating between the knit and purl stitches to create a pattern that resembles a tiled surface. This pattern can be used to create various designs, such as geometric shapes or intricate motifs.
The tile stitch knitting pattern is versatile and can be used to make a wide range of projects, including scarves, blankets, sweaters, and more. It is especially popular for creating textured garments and accessories, as the pattern adds depth and interest to the fabric.
In addition to its aesthetic appeal, the tile stitch pattern also offers practical benefits. The textured fabric created by this technique is often denser and warmer than regular stockinette stitch fabric, making it a great choice for cozy winter items.
To knit a tile stitch pattern, you will need to follow a specific set of instructions that outline the sequence of knit and purl stitches. These instructions may be provided in a knitting pattern or chart format. With practice, you can become proficient in creating beautiful tile stitch patterns and use them to elevate your knitting projects.
In conclusion, a tile stitch knitting pattern is a technique used to create a textured fabric with a tiled pattern. It can be used to make a wide variety of knitting projects and offers both aesthetic appeal and practical benefits. By following specific instructions, you can master this technique and add an interesting element to your knitting repertoire.
Benefits of Using Tile Stitch
The tile stitch is a popular knitting pattern that offers several benefits for both beginner and experienced knitters. This versatile stitch creates a beautiful textured pattern that resembles a tiled mosaic, making it an attractive choice for a variety of projects including blankets, scarves, and sweaters. Here are some of the key benefits of using the tile stitch:
1. Unique Design
The tile stitch creates a unique and eye-catching design that stands out from traditional knitting patterns. The alternating pattern of knit and purl stitches creates a three-dimensional texture that resembles individual tiles. This distinctive design adds visual interest and depth to your knitting projects, making them look more intricate and sophisticated.
2. Versatility
The tile stitch can be used in a wide range of knitting projects, making it a versatile pattern to have in your repertoire. Whether you’re knitting a cozy blanket, a warm hat, or a trendy scarf, the tile stitch can be easily adapted to suit different sizes and styles. You can also experiment with different yarn weights and colors to create custom pieces that reflect your personal style.
3. Easy to Learn
Despite its intricate appearance, the tile stitch is actually quite easy to learn and master. The pattern consists of simple knit and purl stitches, which makes it accessible to beginners who are just starting to explore different knitting techniques. With a little practice, you can quickly get the hang of the tile stitch and create impressive projects without feeling overwhelmed.
4. Textural Warmth
One of the advantages of using the tile stitch is the textural warmth it provides. The raised pattern created by the alternating knit and purl stitches adds extra insulation to your knitted items, making them perfect for chilly weather or cozy evenings. The dense fabric created by the tile stitch also helps to trap heat, ensuring that your finished projects will keep you snug and warm.
In conclusion, the tile stitch is a versatile and visually appealing knitting pattern that offers a range of benefits. Whether you’re a beginner or an experienced knitter, incorporating the tile stitch into your projects can result in stunning and unique creations that are both attractive and functional.
How to Knit a Tile Stitch Pattern
Knitting a tile stitch pattern can add a beautiful texture to your knitting projects. This pattern is created by alternating knit and purl stitches in a specific sequence, creating a pattern that resembles a tiled design. Here’s how you can knit a tile stitch pattern:
Materials:
- Knitting needles
- Yarn of your choice
Instructions:
- Start by casting on the desired number of stitches for your project. Keep in mind that the tile stitch pattern requires a multiple of 4 stitches, so make sure your cast on number meets this requirement.
- Row 1: Knit all stitches.
- Row 2: Purl all stitches.
- Row 3: *Knit 2, purl 2*. Repeat this sequence until the end of the row.
- Row 4: *Purl 2, knit 2*. Repeat this sequence until the end of the row.
- Continue repeating Rows 3 and 4 until your project reaches the desired length.
- End your project by knitting all stitches for the final row.
- Bind off your stitches to finish the tile stitch pattern.
Remember to keep your tension even throughout your knitting to ensure a consistent tile stitch pattern. Once you’ve mastered the basic tile stitch pattern, you can experiment with different variations, such as adding additional knit or purl stitches within the sequence. Have fun and enjoy the process of creating beautiful knitted items using the tile stitch pattern!
Choosing Yarn and Needles for Tile Stitch
The tile stitch pattern is a beautiful and versatile knitting pattern that can be used for a variety of projects. When choosing yarn and needles for this pattern, there are a few factors to consider to achieve the best results.
Yarn: The choice of yarn will greatly impact the overall look and feel of the tile stitch project. For a more defined and crisp pattern, it is best to choose a yarn with good stitch definition, such as a smooth and tightly spun yarn. Yarns with a blend of natural fibers, such as wool, can also add warmth and softness to the finished project. It is important to consider the weight of the yarn as well, as it will affect the size and drape of the fabric. A thinner yarn will result in smaller tiles, while a thicker yarn will create larger tiles.
Needles: The needle size will also affect the outcome of the project. It is recommended to use needles that are appropriate for the chosen yarn weight. Typically, larger needle sizes are used for thicker yarns and smaller needle sizes for thinner yarns. This will help achieve a balanced tension and ensure that the stitches are not too tight or too loose. Circular needles are often preferred for tile stitch projects, as they can accommodate a larger number of stitches and make it easier to work on larger projects, such as blankets or shawls.
By carefully considering the yarn and needle choices, you can create a tile stitch project that is not only visually appealing but also comfortable to wear or use. Experimenting with different yarns and needle sizes can also offer unique variations and possibilities for this versatile knitting pattern.
Creating Different Tile Stitch Designs
Tile stitch knitting patterns are versatile and can be used to create various unique designs. By combining different stitches and colors, you can create beautiful patterns that can be used in a variety of knitting projects.
One way to create different tile stitch designs is to experiment with different stitch combinations. For example, you can combine seed stitch, stockinette stitch, and ribbing to create a textured pattern. By alternating between these stitches, you can create a design that is visually interesting and adds depth to your knitting.
Adding Color
Another way to create different tile stitch designs is to add color to your pattern. By using different colored yarns, you can create contrast and make your design pop. For example, you can use a variegated yarn to create a vibrant and multi-colored pattern. Alternatively, you can use solid colors to create a more subtle, but still visually striking, design.
You can also experiment with different color placement within the tile stitch pattern. For example, you can create stripes by alternating between two contrasting colors. Or you can use color blocking to create bold and graphic designs. The possibilities are endless when it comes to adding color to your tile stitch designs.
Creating Complex Patterns
If you’re looking to create more intricate and complex tile stitch designs, you can try combining multiple stitch patterns within the same design. For example, you can combine cables, lace stitches, and bobbles to create a visually stunning pattern. By carefully selecting and combining these stitches, you can create a design that is truly unique and eye-catching.
Additionally, you can also experiment with different stitch counts and pattern repeats to create more complex tile stitch designs. By varying the number of stitches and the number of rows in each repeat, you can create designs that are more intricate and detailed. This allows you to create patterns that are not only visually appealing but also challenging and rewarding to knit.
Adding Texture to Tile Stitch
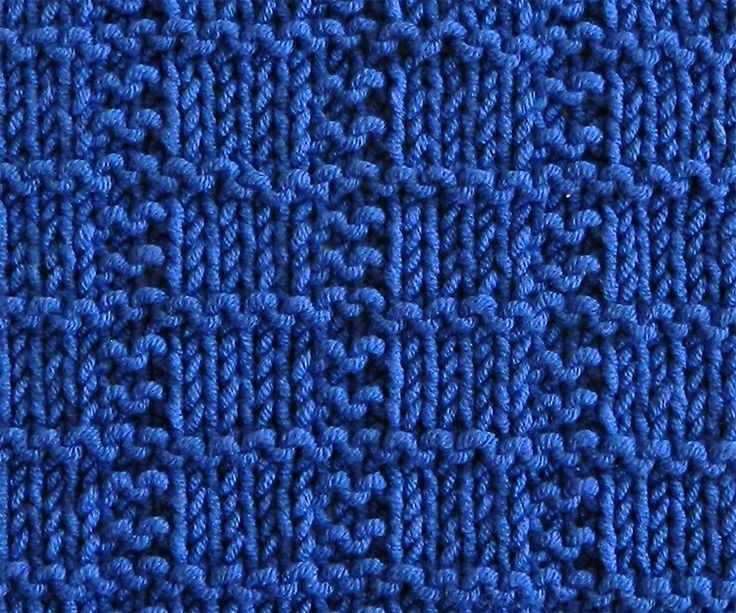
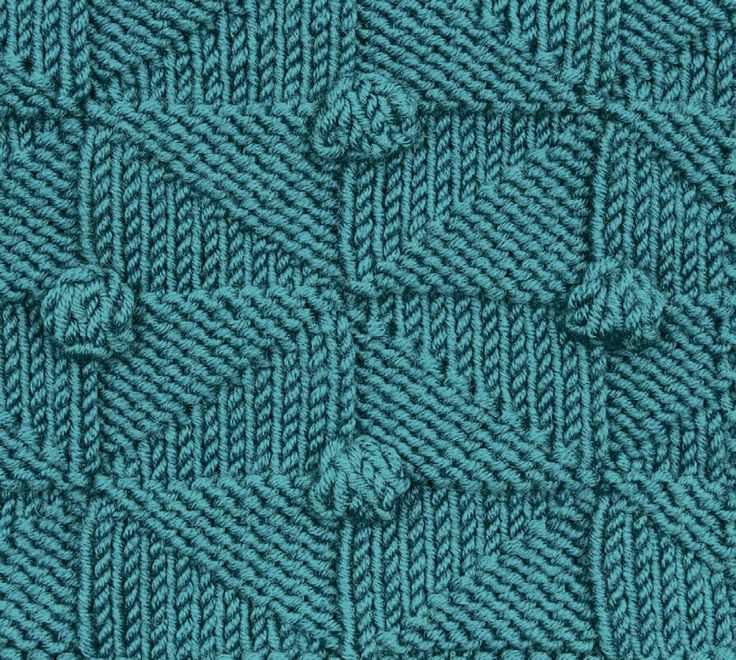
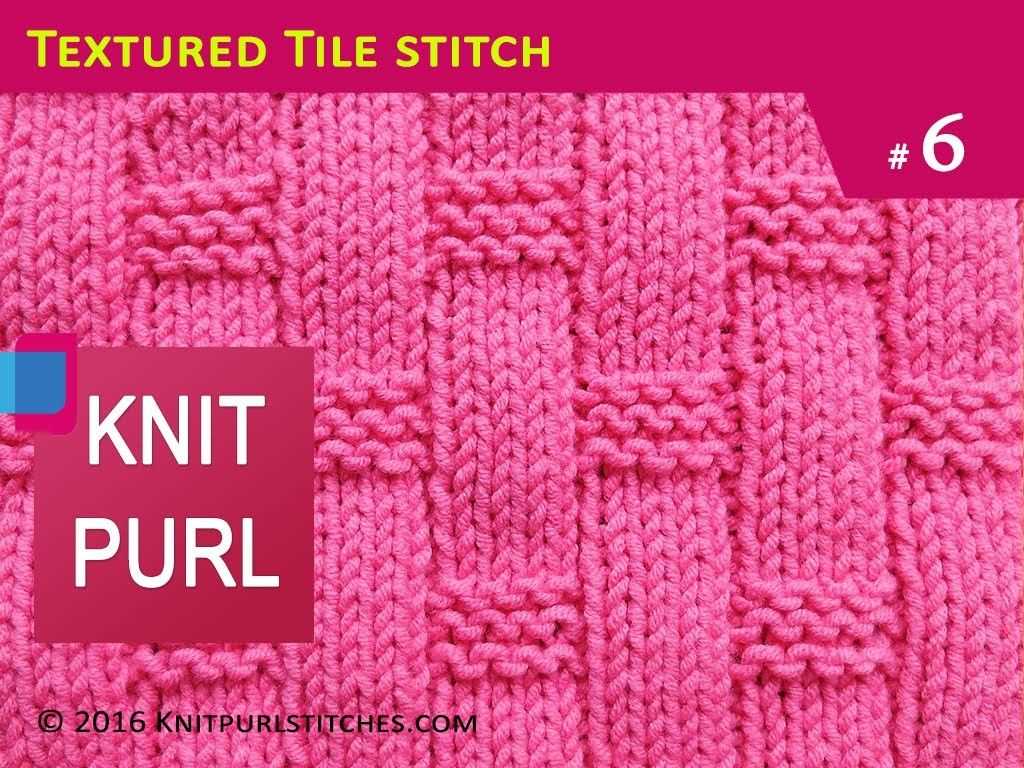
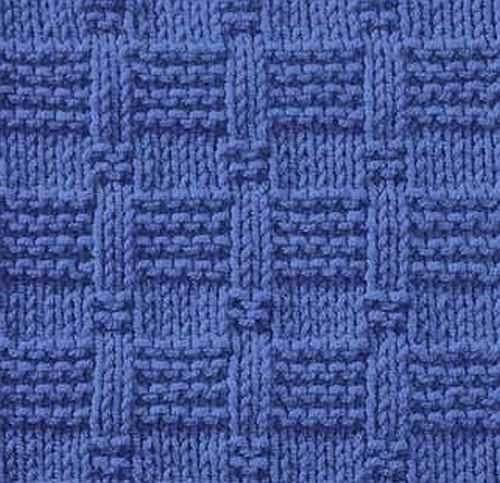
The tile stitch is a popular knitting pattern that creates a beautiful geometric design with alternating squares or rectangles. While the tile stitch on its own can be visually appealing, adding texture to it can take it to the next level. There are several techniques and stitches that can be used to introduce texture to the tile stitch, allowing for a more intricate and interesting design.
One way to add texture to the tile stitch is by incorporating different stitch patterns within the squares or rectangles. For example, instead of knitting every row in the tile stitch pattern, you can alternate between knit and purl stitches to create a ribbed texture. This variation not only adds texture but also gives the fabric more elasticity and depth.
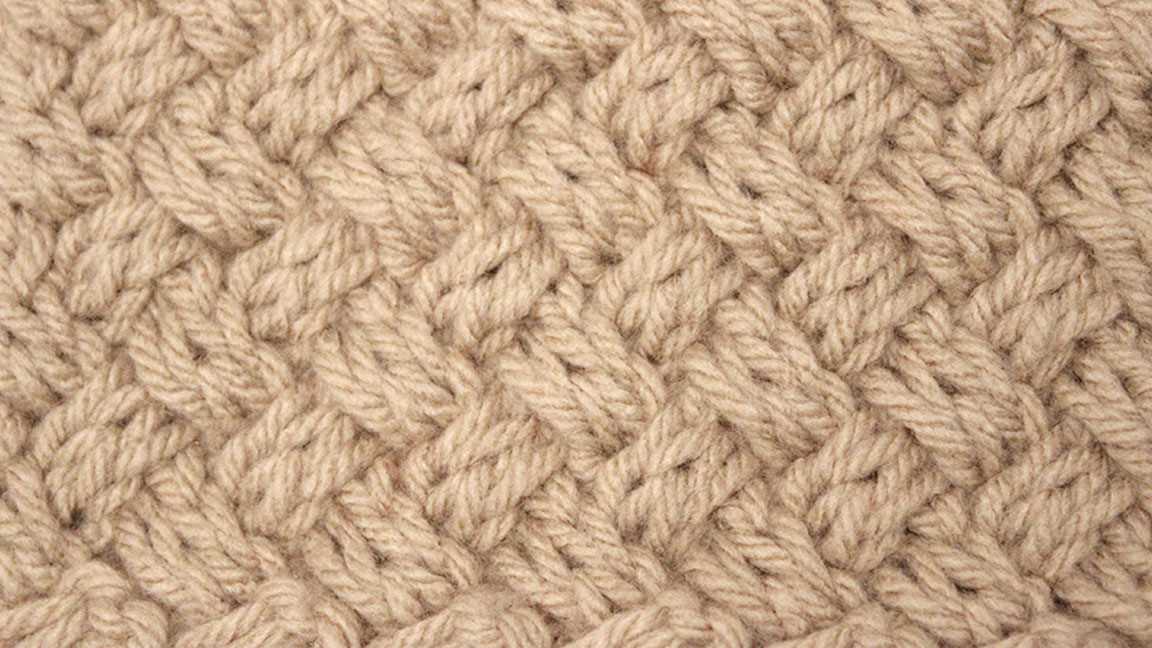
Using Cable Stitches
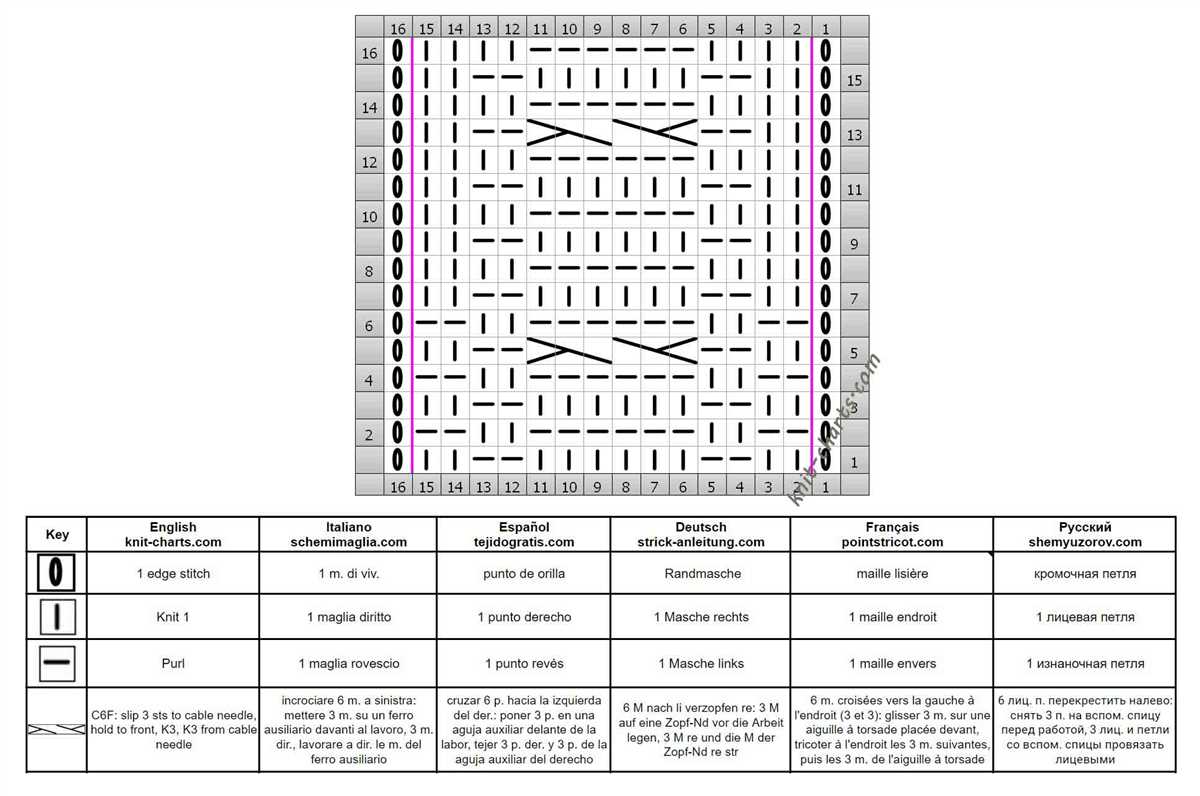
Another way to add texture to the tile stitch is by incorporating cable stitches. Cable stitches create raised twists on the fabric, giving it a three-dimensional look. By strategically placing cable stitches within the tile pattern, you can create intricate cable designs that add depth and interest to the overall texture of the fabric.
To create cable stitches within the tile stitch, you’ll need to follow a cable stitch pattern and manipulate the stitches accordingly. This may involve crossing stitches over each other or using a cable needle to hold stitches in the front or back while working on other stitches. The result is a visually appealing texture that stands out within the tile pattern.
Colorwork Techniques for Tile Stitch
Tile stitch knitting is a versatile and visually stunning technique that creates beautiful colorwork patterns. There are various colorwork techniques that can be used to create tile stitch patterns, allowing knitters to explore different ways to incorporate color into their projects.
One common colorwork technique used in tile stitch knitting is stranded knitting, also known as Fair Isle knitting. This technique involves carrying multiple colors of yarn across the back of the work, alternating between them to create the desired pattern. By using this technique, knitters can create intricate tile stitch patterns with multiple colors, resulting in a rich and textured fabric.
Intarsia
Intarsia is another colorwork technique that can be used in tile stitch knitting. Unlike stranded knitting, intarsia involves using separate bobbins or balls of yarn for each color block in the pattern. This technique is especially useful when working with large areas of color or geometric shapes in tile stitch patterns. By using intarsia, knitters can create crisp and clean lines between color blocks, resulting in a more defined and graphic look.
Slip Stitch Colorwork
Slip stitch colorwork is a colorwork technique that creates the appearance of intricate color patterns using only one color per row. This technique involves slipping stitches from the previous row without working them, which allows the color from the row below to show through. By strategically slipping stitches, knitters can create tile stitch patterns that mimic the look of stranded knitting or intarsia, but with a simpler colorwork technique.
When it comes to tile stitch knitting, the choice of colorwork technique depends on the desired outcome and personal preference of the knitter. Whether it’s stranded knitting, intarsia, or slip stitch colorwork, each technique offers a unique way to incorporate color and create stunning tile stitch patterns. With these techniques, knitters can explore endless possibilities and create beautiful and intricate designs.
Using Tile Stitch in Garment Making
Tile stitch is a popular knitting pattern that is often used in garment making. This stitch, also known as mosaic knitting, involves creating a textured fabric by alternating two colors of yarn. The result is a beautiful and intricate design that resembles a mosaic or tiled pattern.
One of the advantages of using tile stitch in garment making is its versatility. This stitch can be used to create a wide range of garments, including sweaters, cardigans, scarves, and hats. The intricate design of the stitch adds a unique and eye-catching element to the finished garment. Additionally, tile stitch can be easily customized by choosing different colors and patterns, making it a great choice for those looking to create personalized and one-of-a-kind pieces.
To use tile stitch in garment making, you will need:
- Two colors of yarn
- Knitting needles
- A tile stitch knitting pattern or chart
Begin by familiarizing yourself with the tile stitch knitting pattern or chart. This will help you understand the placement of each color and stitch. Next, cast on the desired number of stitches using one of the colors. Follow the pattern or chart, knitting the designated stitches in the corresponding color. As you continue knitting, the intricate tile stitch pattern will start to emerge.
As you work on your garment, pay attention to your tension and gauge. Tile stitch can create a dense fabric, so it’s important to ensure that your stitches are not too tight or too loose. Take your time and practice the stitch on a swatch before starting your actual garment.
Once your garment is complete, the tile stitch pattern will stand out beautifully. The textured fabric created by the alternating colors will add depth and visual interest to your finished piece. Whether you choose to incorporate tile stitch into a simple sweater or a more complex design, the result will be a stunning and unique garment that showcases your knitting skills.
Tile Stitch Patterns for Accessories
Tile stitch patterns are a popular choice for knitting accessories such as scarves, hats, and mittens. These patterns create a beautiful tiled effect that adds visual interest to your knitted items. Whether you’re a beginner or an experienced knitter, tile stitch patterns are a versatile and fun way to add texture and style to your accessories.
One popular tile stitch pattern is the diagonal tile stitch. This pattern creates a diagonal square design that is perfect for scarves and blankets. The diagonal tile stitch is created by alternating a knit stitch with a purl stitch, shifting the stitches over by one stitch on every row. This creates a pleasing diagonal pattern that is both easy to knit and visually appealing.
Another tile stitch pattern that is often used for accessories is the honeycomb tile stitch. This pattern creates a textured design that resembles a honeycomb. The honeycomb tile stitch is created by alternating knit and purl stitches in a specific pattern over multiple rows. This pattern is perfect for adding extra warmth and texture to hats and mittens.
When working with tile stitch patterns, it’s important to pay attention to your tension and gauge. Since these patterns often create a tight knit fabric, using the correct needle size and yarn weight is essential. It’s also helpful to use stitch markers to keep track of your pattern repeats and ensure accuracy in your knitting.
Overall, tile stitch patterns are a great choice for accessories. They add texture, style, and visual interest to your knitted items. Whether you choose a diagonal tile stitch or a honeycomb tile stitch, you’re sure to create beautiful and unique accessories that will keep you warm and fashionable.
Common Mistakes in Tile Stitch Knitting
Tile stitch knitting is a popular technique used to create beautiful patterns that resemble tiles. However, like any knitting technique, it is not without its challenges. Here are some common mistakes that beginners make when attempting tile stitch knitting:
1. Incorrect gauge:
One of the most common mistakes in tile stitch knitting is not achieving the correct gauge. The gauge is the number of stitches and rows per inch that the pattern requires. If your gauge is too tight, your tiles will be smaller than intended, and if your gauge is too loose, your tiles will be larger. To avoid this mistake, make sure to swatch and check your gauge before starting your project.
2. Misreading the pattern:
In tile stitch knitting, patterns can be complex with multiple stitch repeats and color changes. It is crucial to carefully read and understand the pattern instructions before you start knitting. Misreading the pattern can lead to mistakes in stitch placement and color changes, resulting in an incorrect tile pattern.
3. Not counting stitches:
Counting stitches is essential in tile stitch knitting to ensure that the pattern is symmetrical and that you haven’t missed or added any stitches. Neglecting to count stitches can result in a lopsided or irregular tile pattern. Take the time to count your stitches at the end of each row or round to catch any mistakes before they become difficult to fix.
4. Incorrect color placement:
Tile stitch patterns often involve color changes to create the tile-like effect. It is crucial to follow the pattern’s instructions for color placement, as even a small mistake can disrupt the pattern and make it difficult to see the tile design. Paying close attention to color changes and using stitch markers can help ensure that your color placement is accurate.
Avoiding these common mistakes in tile stitch knitting will help you achieve a beautiful and symmetrical tile pattern. As with any knitting technique, practice and patience are key to improving your skills and creating stunning projects.
Troubleshooting Tile Stitch Issues
In the process of knitting a tile stitch pattern, you may encounter some issues that need to be resolved. Here are a few common problems and how to troubleshoot them:
1. Uneven tension:
One of the most common issues knitters face when working on a tile stitch pattern is uneven tension. This can result in some squares or tiles appearing tighter or looser than others, which can detract from the overall appearance of the pattern. To fix this issue, make sure you are consistently applying the same tension throughout your knitting. Pay attention to your grip on the yarn and the pressure you exert when knitting. Practicing consistent tension control techniques can help you achieve a more uniform and professional-looking tile stitch pattern.
2. Incorrect stitch count:
If you notice that the stitch count in your tile stitch pattern is not matching the instructions or the desired outcome, there may be a mistake in your knitting. Check your work to ensure that you are correctly following the pattern and that you haven’t accidentally missed or added any stitches. Counting your stitches regularly can help you catch any errors early on and make the necessary adjustments. If you still can’t identify the issue, consider seeking help from a knitting instructor or an experienced knitter who may be able to assist you in troubleshooting the stitch count problem.
3. Misalignment of tiles:
Sometimes, you may find that the tiles in your pattern are not lining up properly, resulting in a skewed or uneven appearance. This can occur if you are not consistently working the increases and decreases in the correct locations. Double-check the pattern instructions and ensure that you are following the prescribed stitch placement for the tile increases and decreases. Additionally, make sure you are keeping track of your stitch markers and that they are accurately placed to mark the beginning and end of each tile. Paying attention to these details can help you achieve a tile stitch pattern with properly aligned and well-defined tiles.
- Overall, troubleshooting tile stitch issues requires careful attention to detail and an understanding of the pattern instructions. By practicing consistent tension control, double-checking stitch counts, and ensuring proper alignment of tiles, you can overcome common issues and create beautiful tile stitch patterns.
Inspiration for Tile Stitch Projects
If you are looking for some inspiration to kickstart your tile stitch knitting projects, look no further! There are endless possibilities for incorporating this beautiful stitch pattern into various items. Whether you’re a beginner or an experienced knitter, tile stitch can add a unique and eye-catching element to your creations.
One idea is to use the tile stitch pattern to create a cozy and stylish blanket. The repetitive nature of the stitch makes it ideal for larger projects, and the resulting textured design will make your blanket stand out. Choose a soft and warm yarn in your favorite colors, and create a one-of-a-kind piece that will keep you snuggled up all winter long.
Tile Stitch Sweaters and Cardigans
Another popular option is to incorporate tile stitch into your sweater or cardigan designs. This stitch pattern can add interesting texture and visual interest to any garment. You can experiment with different tile sizes and placements to create unique patterns and designs. A tile stitch sweater or cardigan will certainly become a statement piece in your wardrobe.
If you enjoy making accessories, consider incorporating tile stitch into your scarf or hat designs. The intricate pattern will make your accessories stand out, and they will be sure to draw compliments wherever you go. Whether you opt for a single-color design or experiment with multiple colors, tile stitch will add an elegant touch to your accessories.
Lastly, if you want to try something different, consider using tile stitch to create home decor items such as pillows or table runners. These items can add a touch of elegance and sophistication to any room. By using different tile sizes, colors, and placements, you can create unique patterns that complement your existing decor.
Overall, the tile stitch knitting pattern offers endless possibilities for creativity and expression. Whether you’re a beginner or an experienced knitter, there are countless ways to incorporate this stitch pattern into your projects. From cozy blankets to stylish garments and elegant home decor items, let your imagination run wild and create something truly remarkable with tile stitch.
Q&A:
What is tile stitch knitting pattern?
Tile stitch knitting pattern is a type of knitting pattern that creates a design resembling tiles. It involves alternating between knit and purl stitches in specific sequences to create a textured pattern.
How is tile stitch knitting pattern used?
Tile stitch knitting pattern can be used to create various textured designs on knitted items such as scarves, shawls, blankets, and sweaters. It adds visual interest and dimension to the finished piece.
What are some common tile stitch knitting patterns?
Some common tile stitch knitting patterns include the basketweave stitch, honeycomb stitch, herringbone stitch, and diagonal tile stitch. These patterns create different textures and designs using variations of knit and purl stitches.
Can tile stitch knitting patterns be used by beginners?
Yes, tile stitch knitting patterns can be used by beginners. While some patterns may be more complex than others, there are many beginner-friendly tile stitch patterns available. Starting with simpler patterns can help beginners practice their knitting skills and gradually progress to more complicated designs.