
Looking for a fun and easy knitting project to keep you warm during those chilly winter months? Look no further than this simple leg warmer knitting pattern! Leg warmers are not only stylish, but they are also practical, providing an extra layer of warmth and protection for your legs.
Whether you’re a beginner knitter or an experienced one looking for a quick and enjoyable project, this pattern is perfect for you. With just a few basic stitches and some cozy yarn, you can create a fabulous pair of leg warmers in no time.
This pattern is designed to be simple and straightforward, making it accessible to knitters of all skill levels. The instructions are easy to follow, and the repetitive nature of the pattern makes it a relaxing and enjoyable knitting project. Plus, the finished leg warmers can be customized to fit your style by choosing your favorite yarn colors and adding any embellishments or decorative touches.
Simple Leg Warmer Knitting Pattern
Stay warm and stylish with these simple leg warmers that are perfect for the colder months. This easy-to-follow knitting pattern will guide you through each step, allowing you to create a cozy accessory that will keep your legs toasty and add an extra layer of style to your outfit.
To begin, you will need a pair of knitting needles and your chosen yarn. This pattern is suitable for beginners, as it only requires basic knitting skills. Start by casting on the desired number of stitches, depending on the size of the leg warmers you want to create. For a snug fit, cast on fewer stitches, and for a looser fit, cast on more stitches.
Once you have cast on, you will begin the main knitting pattern. This pattern uses a combination of knit and purl stitches to create a ribbed effect, which gives the leg warmers a stretchy and comfortable fit. Knit the first stitch, then purl the next stitch, and continue alternating between knit and purl stitches until you reach the end of the row.
Repeat this pattern for each row, alternating between knit and purl stitches. As you continue knitting, you will start to see the ribbed pattern form, adding texture to your leg warmers. Continue knitting until your leg warmers reach the desired length, making sure to periodically try them on to ensure a proper fit.
Once you have reached the desired length, it’s time to cast off. This will create a clean edge and secure your stitches. Follow the standard casting off method by knitting two stitches, then passing the first stitch over the second stitch. Repeat this process until you have only one stitch left, then cut the yarn and pull it through the final stitch to secure it.
Now that you have completed one leg warmer, repeat the pattern to create a matching pair. Once both leg warmers are finished, weave in any loose ends of yarn and sew any seams if necessary. Your simple leg warmers are now ready to be worn and enjoyed!
Why Knit Leg Warmers?
There are several reasons why knitting leg warmers can be a great project for knitters of all skill levels. First and foremost, leg warmers provide an extra layer of warmth and insulation for your legs, which can be especially beneficial during the colder months.
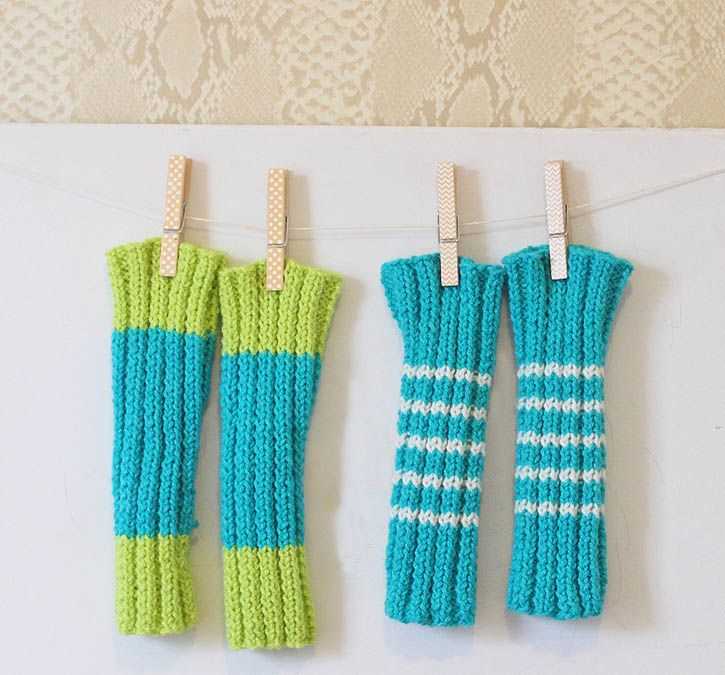
Knitting leg warmers also allows you to customize them to your own preferences and style. You can choose from a variety of yarns in different colors and textures, allowing you to create a unique and personalized accessory. Whether you prefer a bold and vibrant color or a more subtle and neutral tone, the options are endless.
Additionally, knitting leg warmers can be a quick and enjoyable project. With a simple leg warmer knitting pattern, you can create a stylish and functional accessory in a relatively short amount of time. This makes leg warmers a great option for those looking for a satisfying and gratifying knitting project.
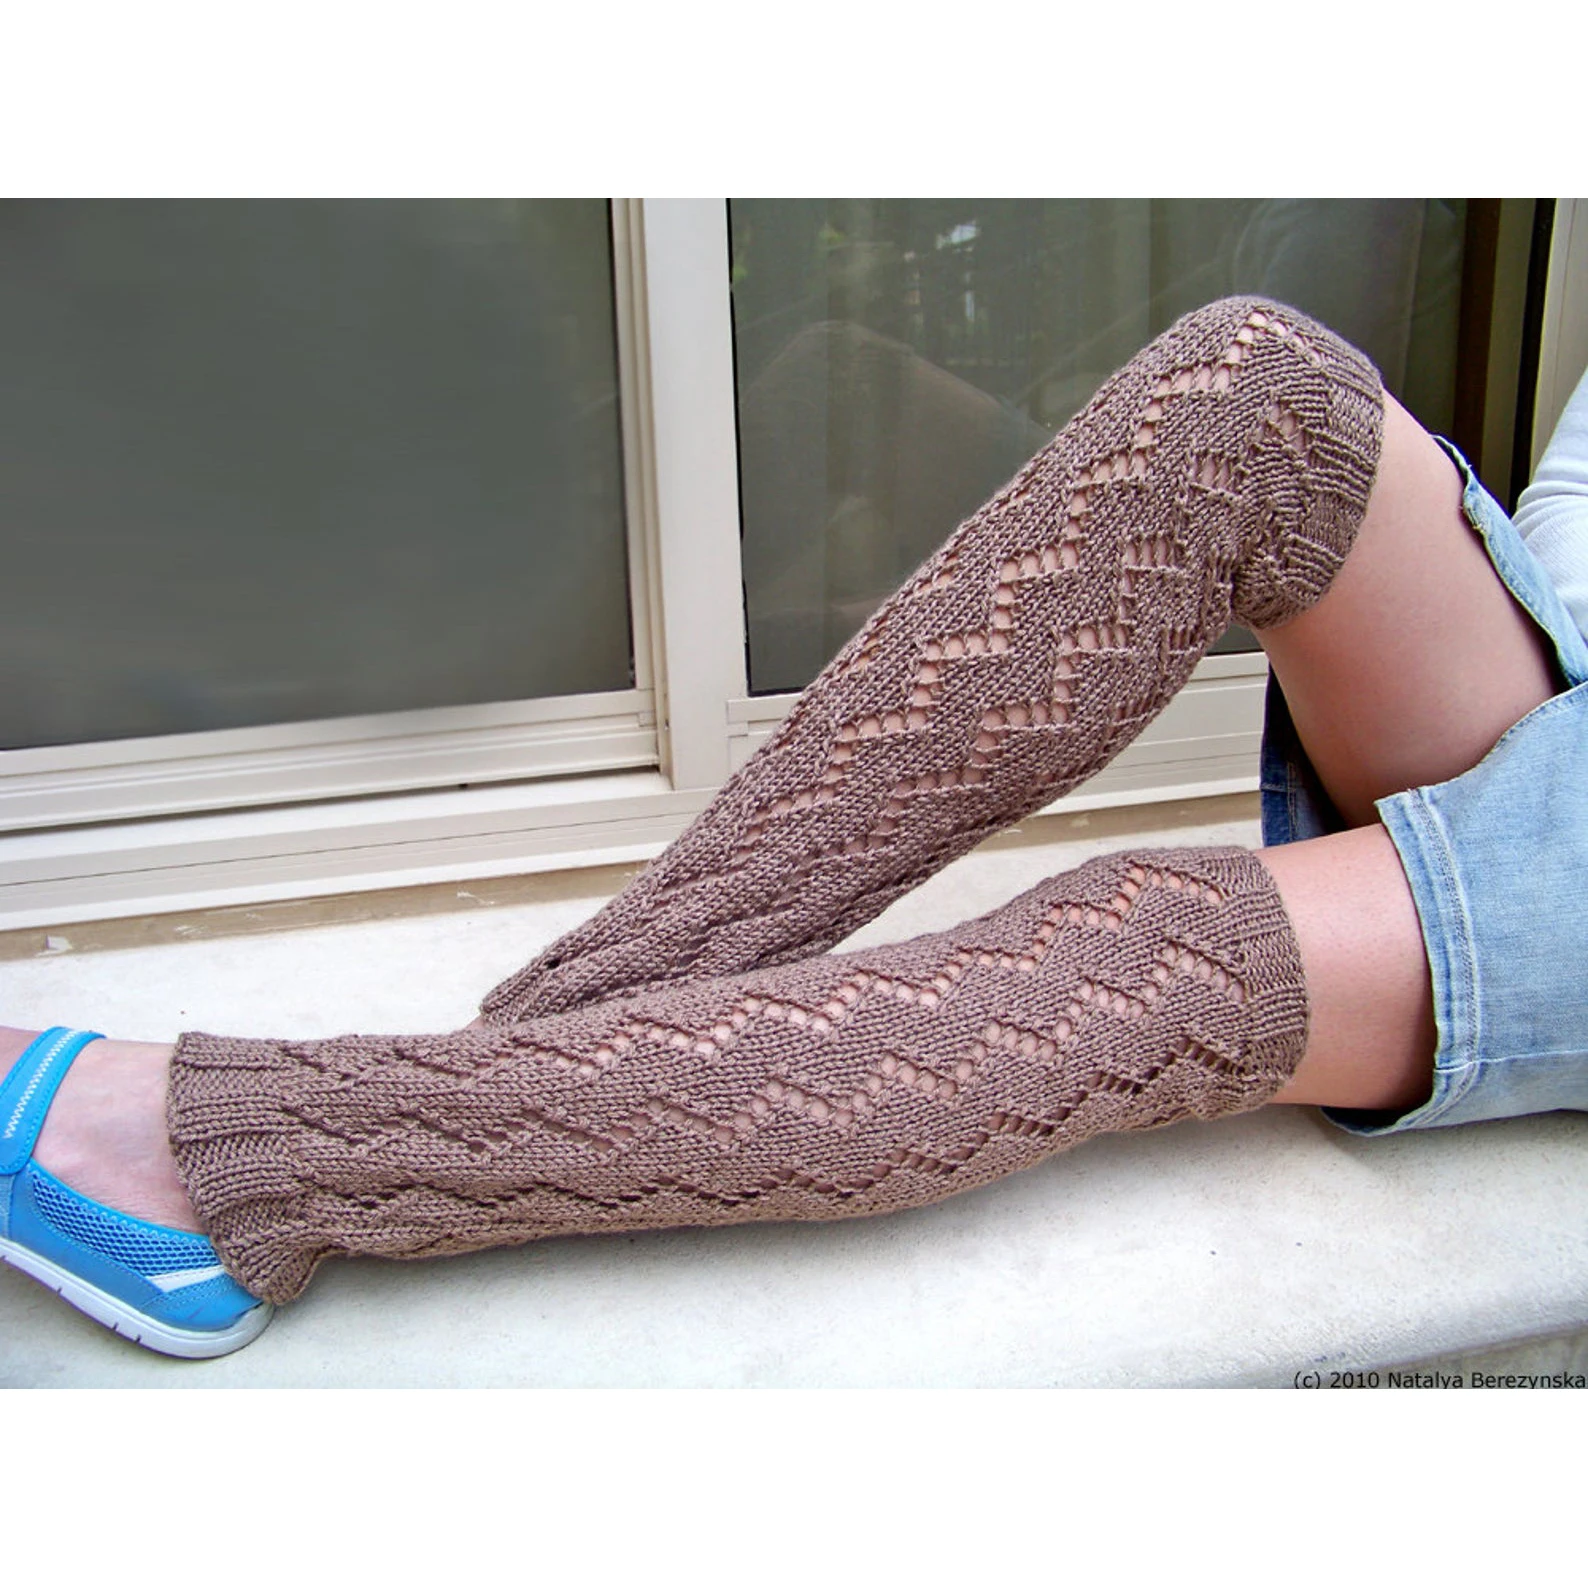
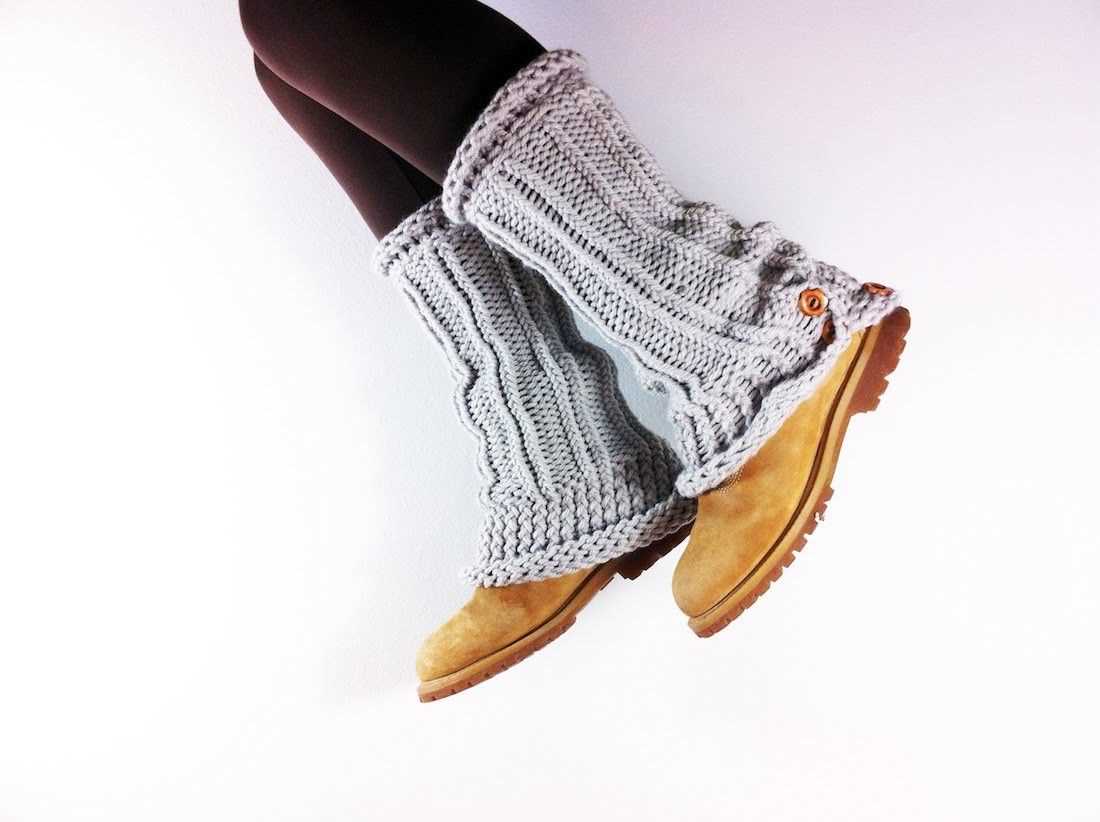
Furthermore, leg warmers are versatile in their use. They can be worn over leggings, tights, or even bare skin, making them a versatile accessory for various outfits and occasions. Whether you’re dressing up for a night out or simply cozying up at home, leg warmers can add a touch of style and comfort to your look.
In conclusion, knitting leg warmers is a practical and rewarding endeavor. It allows you to stay warm while showcasing your creativity and knitting skills. So why not grab some yarn, needles, and a simple leg warmer knitting pattern and start knitting your own pair of cozy leg warmers today?
Choosing the Right Yarn and Needles
When it comes to knitting leg warmers, the choice of yarn and needles is crucial to ensure the best results. The right yarn can make a big difference in terms of comfort, warmth, and durability. The right needles, on the other hand, can help you achieve the desired stitch pattern and size. Here are some factors to consider when choosing the yarn and needles for your leg warmers.
Yarn
When selecting yarn for your leg warmers, consider the weight and fiber content. The weight of the yarn refers to its thickness, which will determine how warm and chunky the leg warmers will be. For a simple leg warmer pattern, a medium-weight yarn, such as DK or worsted weight, is a good choice. It offers a nice balance between warmth and breathability. Additionally, consider the fiber content of the yarn. Natural fibers like wool or alpaca provide excellent insulation, while synthetic fibers like acrylic offer durability and easy care.
Needles
The choice of needles depends on the gauge of the yarn and the desired texture. If you’re using a medium-weight yarn, a set of size 7 or 8 knitting needles would be suitable. However, be sure to check the gauge recommended in the leg warmer pattern to ensure a proper fit. Additionally, consider the needle material. Wooden or bamboo needles can provide a warm and comfortable grip, while metal needles offer a smooth knitting experience. Circular needles can be a great option for leg warmers, as they allow for easy knitting in the round without the need for seam.
By carefully selecting the right yarn and needles for your leg warmers, you can create a cozy and stylish accessory that will keep your legs warm during chilly days. Take your time to consider the weight and fiber content of the yarn, as well as the gauge and needle material. With the right materials in hand, you’ll be able to knit a pair of leg warmers that are not only functional but also beautiful.
Gauge and Measurements
Before you begin knitting your leg warmers, it’s important to check your gauge. Gauge refers to the number of stitches and rows per inch in your knitting. This is important because it determines the size of your finished project. To check your gauge, you’ll need to knit a swatch using the recommended yarn and needle size.
The pattern for these leg warmers recommends using a worsted weight yarn and size 8 (5mm) needles. The gauge for this pattern is 18 stitches and 24 rows = 4 inches in stockinette stitch. To measure your gauge, cast on a few extra stitches and knit a swatch in stockinette stitch, making sure to measure the gauge when the swatch is relaxed and not stretched.
Measurement:
- Length: The leg warmers are designed to be approximately 14 inches long. You can adjust the length to your preference by knitting more or fewer rows.
- Circumference: The leg warmers are designed to fit an average adult leg with a circumference of approximately 12 inches. If you have larger or smaller legs, you can adjust the size by casting on more or fewer stitches.
Notes:
- It’s important to keep track of your gauge and measurements to ensure the leg warmers fit properly.
- Remember that the leg warmers will stretch when worn, so it’s better to err on the side of slightly smaller measurements.
- If you’re unsure about the size, you can always knit a smaller size initially and try it on before continuing with the pattern.
By paying attention to your gauge and measurements, you’ll be able to create leg warmers that fit perfectly and keep your legs warm and cozy.
Cast On and Ribbing
To begin the long tail cast on, you’ll need to estimate how much yarn you’ll need for your desired number of stitches. A general rule of thumb is to measure about an inch of tail for each stitch you plan to cast on. Once you have your yarn ready, create a slipknot and place it on your needle. Hold the needle with the slipknot in your right hand.
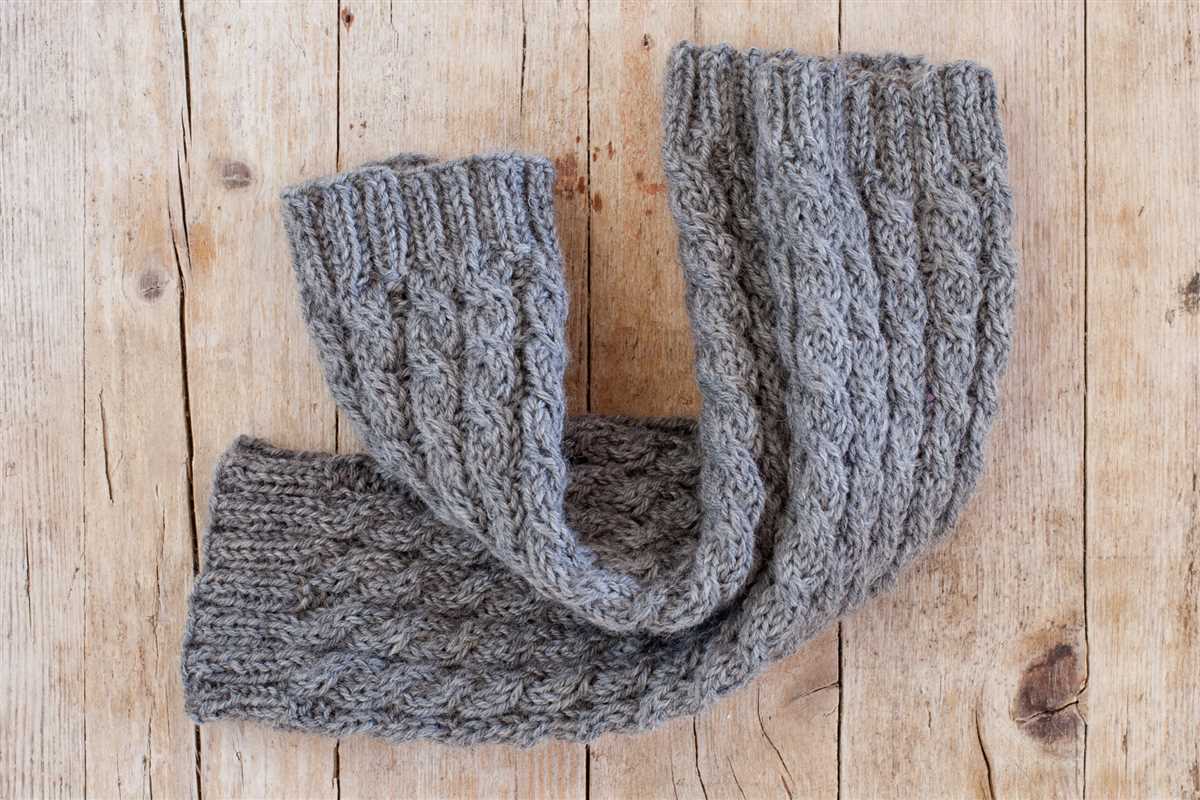
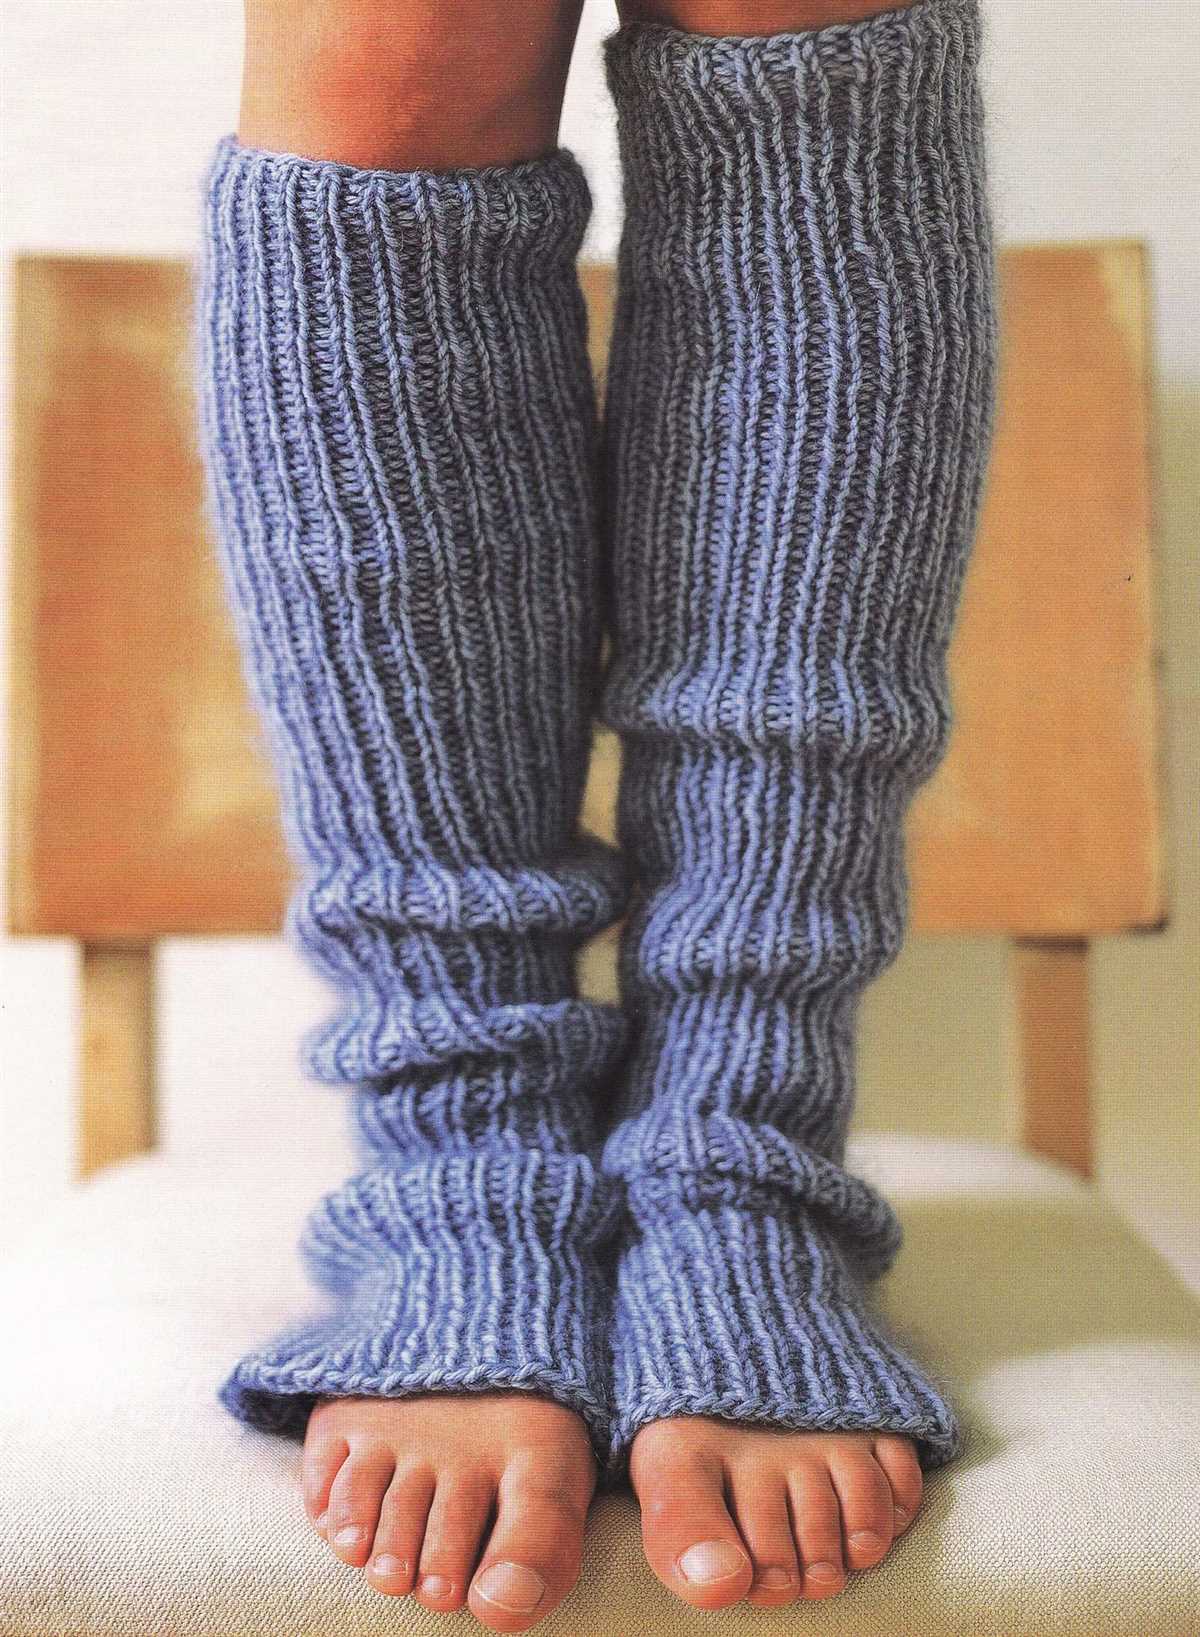
Now it’s time to start the ribbing. Ribbing is a pattern of alternating knit and purl stitches that creates a stretchy and textured fabric. For this leg warmer pattern, we’ll be using a 2×2 ribbing pattern, meaning you’ll knit two stitches and then purl two stitches.
To begin the ribbing, start with a knit stitch. Insert the right needle into the first stitch on the left needle from left to right. Wrap the yarn around the right needle counterclockwise and pull it through the stitch, sliding the stitch off the left needle. This completes the knit stitch. Now, bring the yarn to the front of the work.
Next, it’s time for a purl stitch. With the yarn in front of the work, insert the right needle into the next stitch on the left needle from right to left. Wrap the yarn counterclockwise around the right needle and pull it through the stitch, sliding the stitch off the left needle. This completes the purl stitch. Repeat these steps of knitting two stitches and then purling two stitches until you have reached your desired length of ribbing.
Knitting the Body of the Leg Warmers
After completing the ribbed cuff, it’s time to move on to knitting the body of the leg warmers. The body of the leg warmers will be knit in a simple stockinette stitch, which creates a smooth and textured appearance.
To begin, cast on the desired number of stitches using the yarn and needle size specified in the pattern. Make sure to keep the tension consistent throughout the knitting process to ensure an even and professional finish.
Once the stitches are cast on, begin knitting in the round. For this pattern, the leg warmers are knit using circular needles, but you can also use double-pointed needles if preferred. Knitting in the round allows for a seamless construction and eliminates the need for seaming at the end.
Continue knitting in stockinette stitch for the desired length, following the pattern instructions. The stockinette stitch is created by knitting all stitches in the round, creating a smooth and flat fabric on the right side and a bumpy texture on the wrong side.
If desired, you can add decorative details such as cables or lace panels to the body of the leg warmers. These details can be added by following the instructions provided in the pattern or by adding your own design elements.
Once the body of the leg warmers reaches the desired length, it’s time to begin shaping the top. This is usually done through a series of decreases to create a tapered shape that fits snugly around the calf.
Follow the pattern instructions for the specific shaping and finishing details of the leg warmers. Once completed, you can weave in any loose ends and block the leg warmers to ensure they maintain their shape.
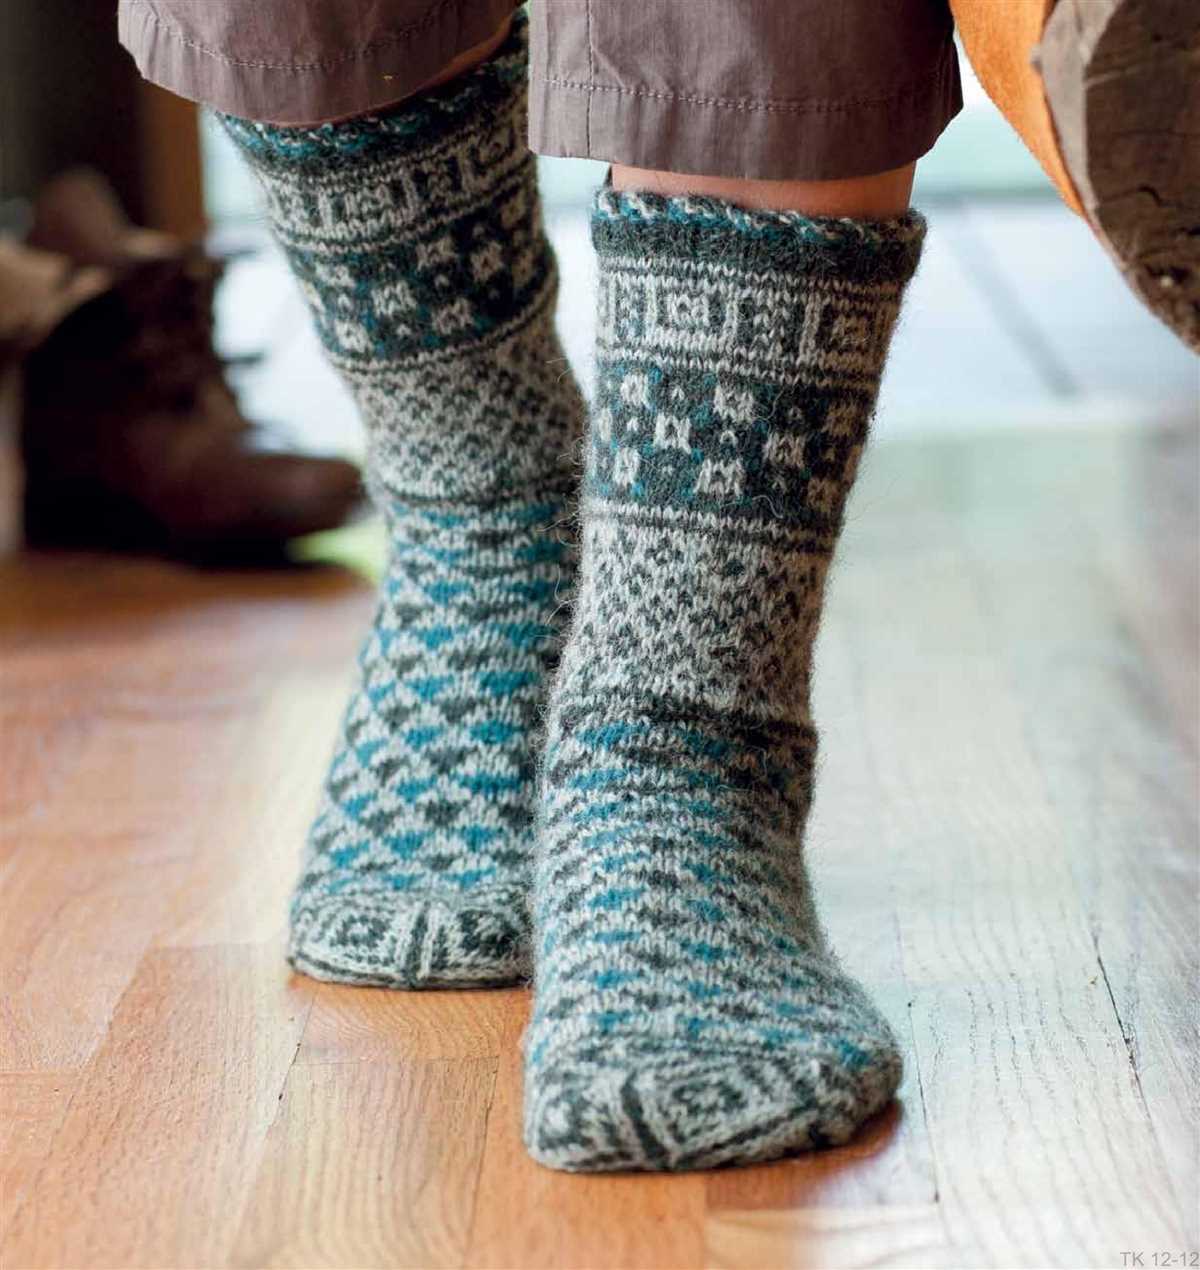
Shaping the Heel
One of the most important parts of knitting leg warmers is shaping the heel. The heel is the area of the leg warmer that covers the back of the foot and provides a comfortable fit. To achieve this, you will need to follow a specific pattern that includes decreases and increases.
Step 1: Decreases
Start shaping the heel by decreasing the number of stitches on your knitting needles. This is usually done by knitting two stitches together, or using a slip-slip-knit technique. The number of decreases required will depend on the size of the leg warmer and the desired fit. You can refer to your knitting pattern for specific instructions on how many decreases to make and at what intervals.
Step 2: Shaping the Turn
After you have completed the decreases, it’s time to shape the turn. This is the point where the leg warmer transitions from covering the back of the foot to the front. To do this, you will need to create a series of short rows. This is achieved by knitting a certain number of stitches, turning your work, and then working back in the opposite direction. The number of short rows required will depend on the size of the leg warmer and the desired fit.
Step 3: Increases
Once you have shaped the turn, you will need to increase the number of stitches to create the front portion of the leg warmer. This is usually done using the same techniques as the decreases, but in the opposite direction. Again, the number of increases required will depend on the size of the leg warmer and the desired fit. Be sure to follow your knitting pattern for specific instructions on how many increases to make and at what intervals.
By following these steps, you will be able to successfully shape the heel of your leg warmers. It’s important to take your time and carefully follow the instructions in your knitting pattern to ensure a well-fitting and comfortable end result.
Creating a Gusset
A gusset is a triangular or diamond-shaped panel of fabric that is added to a garment to widen and shape it. In the context of knitting leg warmers, creating a gusset is an important step to ensure a comfortable fit that allows for easy movement.
To create a gusset in your leg warmers, you will need to follow these steps:
- Once you have completed knitting the main body of the leg warmer, you will start by picking up stitches along the side edge of the leg opening. This will create a convenient opening for the foot to slip through.
- Using a smaller sized knitting needle, insert it into the edge of the leg warmer and pick up the required number of stitches evenly across the edge. It’s important to maintain an even tension throughout this process to avoid any puckering or stretching of the fabric.
- Continue picking up stitches until you reach the desired width for the gusset. This will depend on the size of the leg warmer and the desired fit. It’s always a good idea to measure the circumference of the leg opening before starting this step to ensure a proper fit.
- After picking up the stitches, you will then knit across the gusset using your main knitting needle and the selected stitch pattern. This will help blend the gusset seamlessly with the rest of the leg warmer.
- Continue knitting the gusset until it reaches the desired length. This will depend on the desired style and coverage of the leg warmer.
- Once the gusset is complete, you can proceed with any additional finishing touches, such as binding off or adding decorative elements.
By following these steps, you can create a gusset in your leg warmers that not only adds functionality but also enhances the overall look and fit of the garment.
Knitting the Foot
Once you have completed the leg portion of your leg warmer, it’s time to move on to knitting the foot. The foot section will be worked in a basic stockinette stitch, which means you will knit one row and purl the next.
To start the foot section, you will need to begin knitting in rounds. This means you will join the end of the leg to the beginning of the leg using a circular needle or double-pointed needles, depending on your preference. Make sure to distribute the stitches evenly across the needles so that you can knit in the round without any gaps or loose stitches.
Row 1: Knit all stitches in the round.
Row 2: Purl all stitches in the round.
Continue knitting in this manner, alternating between a knit row and a purl row, until your foot section measures the desired length. To determine the length, you can measure the distance from the back of the heel to the end of your toes.
Once you have reached the desired length, you can then proceed to knit the toe section of your leg warmer. The toe section will be shaped using decreases to create a tapered and rounded end.
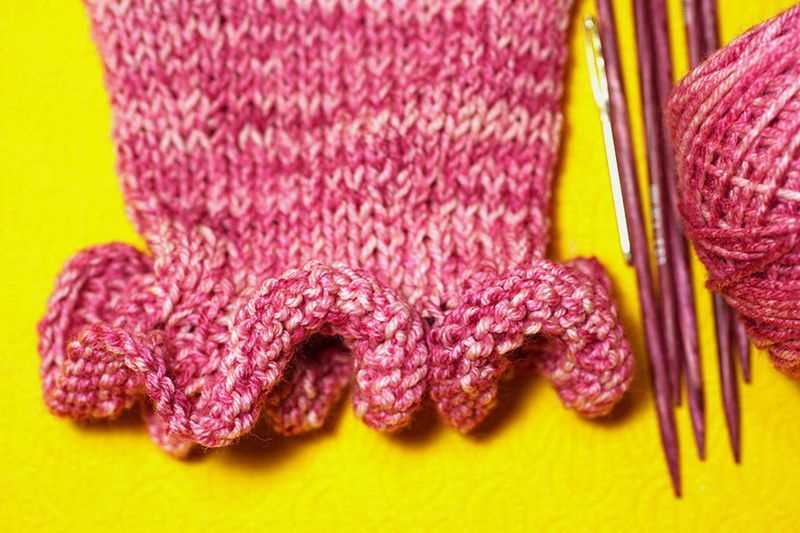
Finishing Touches: Binding Off and Sewing
After completing the last row of knitting for your leg warmers, it’s time to bind off. This is the final step in your knitting project and gives your leg warmers a neat finished edge. To bind off, knit the first two stitches as usual, then use the left needle to lift the first stitch over the second stitch and off the right needle. Repeat this process until you have only one stitch left on your right needle. Cut the yarn, leaving a long tail, and pull it through the last stitch to secure it.
Once you have bound off both leg warmers, you may want to sew any open edges together to create a tube. To do this, thread a tapestry needle with a length of matching yarn and begin by inserting the needle from the inside of one leg warmer to the outside. Then, insert the needle through the corresponding stitch on the other leg warmer, going from the outside to the inside. Continue to sew the edges together using a whipstitch or a mattress stitch until you reach the top of the leg warmers. Knot the yarn securely and weave in the ends.
It is important to take your time while binding off and sewing to ensure that your leg warmers have a professional finish. Practice the binding off technique on a scrap piece of knitting before attempting it on your leg warmers. When sewing the edges together, make sure to line up the stitches evenly and keep your tension consistent. With a little bit of patience and attention to detail, you can create beautiful leg warmers that are not only warm but also stylish.
Styling and Customization Options
Once you have mastered the basic leg warmer pattern, there are endless possibilities for customizing and styling your creations. Here are a few ideas to get you started:
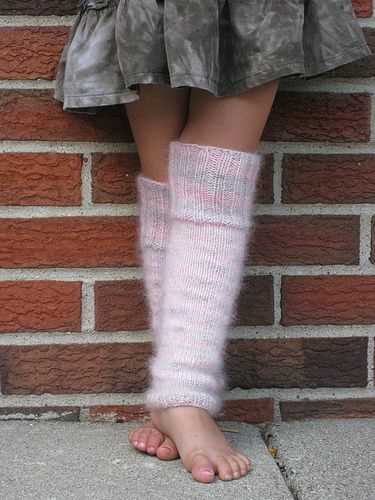
1. Yarn Choice: Experiment with different types of yarn to achieve different textures and looks. Wool or alpaca yarn will provide warmth and coziness, while cotton or linen yarns will be lighter and more breathable.
2. Color Combinations: Play with color combinations to create unique patterns and designs. You can use a gradient effect by choosing yarns in various shades of the same color, or mix contrasting colors for a bold and eye-catching look.
3. Ribbing Patterns: Instead of the traditional rib stitch, try experimenting with different ribbing patterns like twisted rib or broken rib. These variations can add visual interest and texture to your leg warmers.
4. Embellishments: Add buttons, bows, or other small accessories to your leg warmers for a touch of personality. You can also sew on decorative patches or appliques to create a more customized look.
5. Length and Fit: Adjust the length and width of your leg warmers to suit your personal preferences. You can make them longer to cover the entire calf or shorter for a more ankle-length style.
6. Cables or Lace: For more advanced knitters, add intricate cable or lace patterns to your leg warmers. These designs can create a beautiful and intricate look.
Remember, the beauty of knitting is that you can experiment and customize to your heart’s content. Have fun with your leg warmer creations and let your creativity shine!