
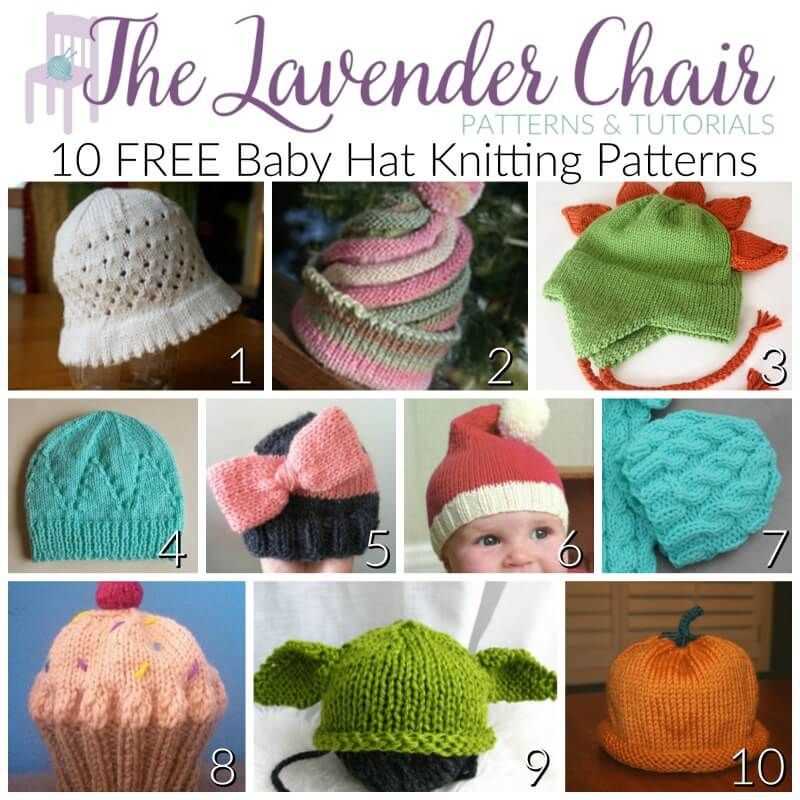
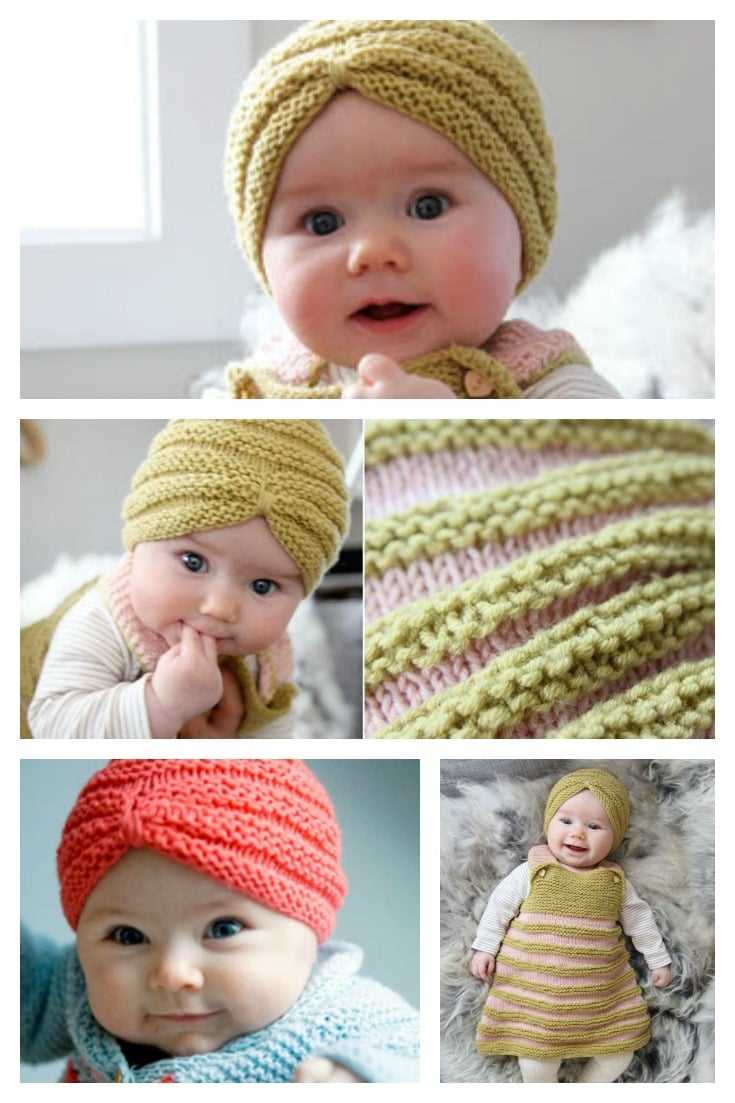
If you’re a knitter in search of a cute and practical project, look no further than a knit baby hat. Baby hats make for quick and satisfying knits, and they also make wonderful gifts for new parents. Plus, they’re a great way to use up leftover yarn from other projects. In this article, we’ll share a free pattern for a knit baby hat that is perfect for beginners.
This baby hat pattern features a simple ribbed brim and a stockinette stitch body. It is worked in the round using double-pointed needles, but you can easily modify the pattern to work on circular needles if you prefer. The finished hat has a snug fit, ensuring that it stays in place while keeping your little one’s head warm and cozy.
For this project, you’ll need a soft and lightweight yarn in a baby-friendly color. Worsted weight or DK weight yarns are recommended, as they are easy to work with and provide the right amount of warmth. You’ll also need a set of US size 7 (4.5mm) double-pointed needles, or the needle size necessary to achieve the gauge.
The joy of knitting for babies
There is something truly special about knitting for babies. Whether you are creating a cozy blanket, a soft onesie, or a cute hat, the process of knitting for these tiny humans brings so much joy and anticipation. It’s not just about the final product, but the act of creating something with love and care for a little one that is yet to come.
Knitting for babies allows us to express our creativity and show our affection in a tangible way. It’s an opportunity to craft something unique and personalized, knowing that it will be cherished by both the baby and their parents. The softness of the yarn, the intricate patterns, and the delicate stitches all come together to create a beautiful and functional piece that will keep the baby warm and cozy.
Crafting handmade heirlooms
Knitting for babies also provides us with an opportunity to create handmade heirlooms that can be passed down through generations. These special pieces become treasured keepsakes, reminding us of the love and care that went into making them. They become a connection to our past and a symbol of the bond between generations.
When we knit for babies, we are not just creating an item of clothing or an accessory. We are creating memories and traditions. The time and effort we put into each stitch carry meaning and sentiment that cannot be replicated by store-bought items.
Moreover, knitting for babies allows us to contribute to their well-being. We can make sure they are warm and comfortable, while also adding a touch of style and personality to their outfits. It’s a small way of showing our love and ensuring their happiness.
A gift from the heart
Knitting for babies is a labor of love. From selecting the perfect yarn to choosing the right pattern, each step in the process is an act of dedication and devotion. The end result is a gift from the heart that is not only functional but also filled with love and care.
And when we see that little one wearing the knitted item, their eyes light up with joy and comfort. It’s a reminder that our efforts were worth it, and that we have created something truly special. Knitting for babies is a gift that keeps on giving, both for the recipient and the knitter.
Choosing the right yarn for baby hats
When it comes to knitting baby hats, it’s important to choose the right yarn to ensure comfort, durability, and safety for the little ones. The yarn you select should be soft, hypoallergenic, and easy to care for.
Softness: Babies have sensitive skin, so it’s crucial to choose a soft yarn that won’t irritate or scratch their delicate heads. Look for yarns specifically labeled as “baby” or “soft” yarns, which are often made from materials like cotton, bamboo, or merino wool.
Hypoallergenic: Many babies have allergies or sensitivities, so it’s best to choose a hypoallergenic yarn to minimize the risk of irritation. Look for yarns that are free from harsh chemicals or dyes and have been tested for allergens.
Easy care: Baby hats can get dirty quickly, so it’s important to choose a yarn that is easy to care for. Opt for machine washable yarns that can withstand frequent washing without losing their shape or softness. This will make it easier for parents to clean the hats and keep them looking fresh.
Weight and thickness: Consider the weight and thickness of the yarn when selecting it for a baby hat. You’ll want a yarn that is lightweight and breathable to ensure that the baby doesn’t get overheated while wearing the hat. Avoid using thick or chunky yarns for baby hats, as they can be too warm and uncomfortable.
Safety: Lastly, consider the safety aspects of the yarn you choose. Make sure that the yarn doesn’t have any small parts or loose fibers that could pose a choking hazard for babies. Also, avoid using yarns that have been treated with flame retardant chemicals, as these can be harmful if the hat were to catch fire.
By considering the softness, hypoallergenic properties, easy care, weight and thickness, and safety aspects of the yarn, you can choose the perfect yarn for knitting adorable and comfortable baby hats.
Essential Knitting Supplies for Baby Hats
When it comes to knitting baby hats, having the right supplies is essential. The right tools and materials can make a big difference in the finished product, ensuring that the hat is not only cute but also comfortable for the little one. Here are some essential knitting supplies that you will need for making baby hats:
1. Yarn:
Choosing the right yarn is crucial for baby hats. It’s important to select a soft and gentle yarn that is suitable for a baby’s sensitive skin. Opt for yarn made from natural fibers such as organic cotton or bamboo, as they are breathable and hypoallergenic. Avoid using yarns that are scratchy or may irritate the baby’s skin.
2. Needles:
Investing in a good set of knitting needles is important for creating baby hats. Circular needles are recommended for knitting in the round, as they eliminate the need for seams. Choose needles that are the appropriate size for the yarn you are using, as this will ensure the correct gauge and fit of the hat.
3. Stitch Markers:
Stitch markers are useful for keeping track of stitch patterns and the beginning of rounds when knitting in the round. They can be small rings or clips that are placed on the needle to mark important points in the pattern. Using stitch markers can make knitting baby hats much easier and help prevent mistakes.
4. Tapestry Needles:
Tapestry needles are essential for weaving in loose ends and finishing off the hat. They have a large eye and blunt tip, making it easy to thread yarn through stitches. Choose tapestry needles that are the right size for the yarn you are using, ensuring that the needle can easily pass through the stitches without snagging.
5. Scissors:
A good pair of scissors is necessary for cutting the yarn and trimming any excess ends. Choose scissors with a sharp blade that can cleanly cut through the yarn. Having a dedicated pair of knitting scissors will ensure that they are always at hand when you need them.
6. Tape Measure:
A tape measure is essential for checking gauge and measuring the size of the baby’s head. Make sure to measure accurately to ensure a proper fit for the hat. A flexible tape measure is recommended for its versatility and ease of use.
By having these essential knitting supplies for baby hats, you will be well-equipped to create adorable and comfortable hats for the little ones. Remember to choose soft yarn, use the right needles, and take your time to create something special for the baby.
Understanding the basic knitting stitches
Knitting is a traditional craft that involves creating fabric by interlocking loops of yarn with knitting needles. To get started with knitting, it’s important to understand the basic stitches that form the foundation of all knitting projects. By mastering these stitches, you’ll be able to create a wide variety of beautiful and functional items, including baby hats.
The knit stitch: The knit stitch is the most basic stitch in knitting. It involves inserting the right-hand needle into the loop on the left-hand needle and pulling a new loop through, creating a new stitch. This stitch is commonly abbreviated as “K” in knitting patterns.
The purl stitch: The purl stitch is the reverse of the knit stitch. Instead of inserting the right-hand needle into the loop from the front, it is inserted from the back. This creates a different texture on the fabric. The purl stitch is commonly abbreviated as “P” in knitting patterns.
- Garter stitch: Garter stitch is created by knitting every row. This creates a fabric with a series of ridges and is often used for scarves, blankets, and baby hats.
- Stockinette stitch: Stockinette stitch is created by alternating rows of knit and purl stitches. This creates a smooth and flat fabric. It is often used for sweaters, socks, and hats.
- Rib stitch: Rib stitch is created by alternating knit and purl stitches in a pattern. This creates a stretchy fabric, making it ideal for cuffs, collars, and hems.
By understanding these basic knitting stitches, you’ll have the foundation to start your own knitting projects. Whether you’re knitting a baby hat or a cozy sweater, these stitches will be the building blocks of your work.
Getting started with the baby hat pattern
Knitting a baby hat is a fun and rewarding project that will keep your little one warm and stylish. Whether you’re a beginner or an experienced knitter, this free pattern is perfect for creating a cozy hat for your baby.
Materials needed:
- Size 6 (4 mm) double-pointed knitting needles
- Worsted weight yarn (around 100 yards)
- Yarn needle
- Stitch marker
- Tape measure or ruler
Instructions:
- Start by casting on 64 stitches using the size 6 knitting needles. Divide the stitches evenly onto three needles, with 20 stitches on each needle and 4 stitches on the fourth needle.
- Join the round, being careful not to twist the stitches, and place a stitch marker to mark the beginning of the round.
- Work in a K2, P2 ribbing pattern for approximately 1 inch.
- Next, switch to stockinette stitch (knit every round) for approximately 3 inches.
- Decrease rounds: *K6, K2tog* – repeat from * to * around.
- Continue decreasing in this manner until there are 8 stitches remaining.
- Break yarn, leaving a long tail. Thread the tail onto a yarn needle and run it through the remaining stitches, pulling tight to close the top of the hat. Secure the yarn and weave in any loose ends.
This baby hat pattern is a great project to practice your knitting skills and create a cute and functional accessory for your little one. Don’t forget to choose a soft and cozy yarn that will keep your baby comfortable. Happy knitting!
Creating a Ribbed Brim for the Baby Hat
When knitting a baby hat, one important element to consider is the brim. A ribbed brim adds both style and functionality to the hat, ensuring a snug and comfortable fit for the baby. Here, we will provide a step-by-step guide on how to create a ribbed brim for the baby hat using a knit stitch.
To begin, cast on the desired number of stitches using the knit stitch. The ribbed brim typically requires an even number of stitches. For example, you can cast on 60 stitches for a newborn-sized hat.
Next, start the ribbing pattern by working a knit stitch followed by a purl stitch. This pattern creates the classic ribbed texture. Repeat this sequence for the entire row. For example, if you have 60 stitches, your first row will consist of alternating knit and purl stitches until the end.
Continue this knitting pattern for the next rows until you reach the desired length for the ribbed brim, usually around 1 to 2 inches. Make sure to stay consistent with the knit and purl pattern to maintain the ribbed texture.
Once you’ve reached the desired length, you can switch to a different stitch pattern or continue with the ribbing pattern for the rest of the baby hat. The ribbed brim adds a nice touch and helps keep the hat in place on the baby’s head.
Knitting the body of the baby hat
Once you have completed the ribbing for the brim of the baby hat, it’s time to move on to knitting the body. This is where the hat starts to take shape and you can get creative with different stitch patterns and colors.
Before you start knitting the body, determine the desired length of the hat. This will depend on whether you want it to be a beanie-style hat or more slouchy. Once you have the length in mind, you can begin knitting in your chosen stitch pattern.
One popular stitch pattern for baby hats is the stockinette stitch. To knit this, simply knit all stitches on the right side and purl all stitches on the wrong side. This creates a smooth and even fabric that is perfect for showcasing yarn colors or adding embellishments.
If you want to add some texture to the baby hat, you can experiment with different stitch patterns such as seed stitch or ribbing. These patterns create a bumpy or ribbed texture, adding visual interest to the hat. To create seed stitch, alternate between knitting and purling stitches in a pattern of one stitch knit, one stitch purl. For ribbing, knit the knits and purl the purls to create columns of raised stitches.
As you knit the body of the baby hat, make sure to measure it frequently to ensure you are on track with the desired length. It’s also a good idea to try the hat on a baby-sized mannequin or measure it against a baby’s head to ensure the fit is snug but comfortable.
Adding adorable details to the baby hat
Making a baby hat is a fun and rewarding project. To make your baby hat even more adorable, you can add some special details. These details can be simple embellishments or unique design elements that will make the hat stand out.
1. Pom-poms
Pom-poms are a classic addition to baby hats. They add a playful and cute touch to the hat. You can create pom-poms using yarn in a contrasting color or match the pom-pom with the main color of the hat. Attach the pom-pom securely to the top of the hat, and it will instantly become a charming accessory.
2. Embroidery
Embroidery is another way to add personality to your baby hat. You can embroider the baby’s name, initials, or a cute design onto the hat. Choose embroidery floss in colors that complement the hat’s color scheme. Use simple stitches like backstitch or satin stitch to create the desired design. Embroidery adds a personalized touch to the hat and makes it unique.
3. Appliqué
Appliqués are fabric cut-outs that are sewn or glued onto the hat. You can use fabric scraps to create cute shapes like animals, flowers, or hearts. Cut out the desired shape and attach it to the hat using a needle and thread or fabric glue. Appliqués add a three-dimensional element to the hat and make it more eye-catching.
4. Ribbon or Bow
Adding a ribbon or bow to the hat can instantly transform it into an adorable accessory. Choose a ribbon in a color that complements the hat and tie it around the base of the hat. You can also attach a small bow to the front or side of the hat. This simple addition adds a touch of elegance and charm to the baby hat.
5. Button accents
Buttons can be used as decorative accents on the baby hat. You can sew them onto the brim or use them to fasten a strap or closure. Choose buttons in cute shapes, colors, or patterns to add visual interest to the hat. Make sure to secure the buttons tightly to ensure they don’t pose a choking hazard.
By incorporating these adorable details into your baby hat, you can create a unique and charming accessory that will be loved by both parents and little ones.
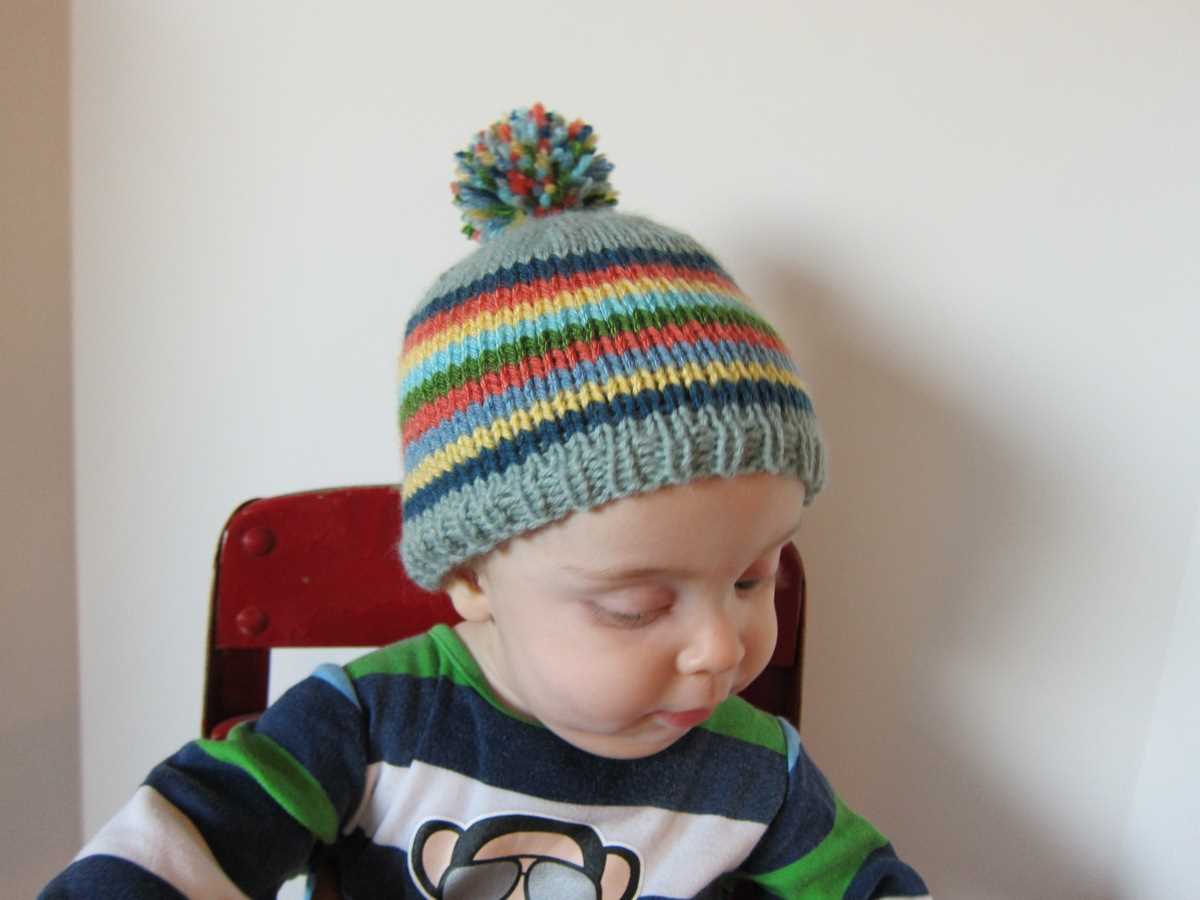
Finishing off the baby hat with a cozy pom-pom

Adding a pom-pom to the top of a baby hat is a simple and delightful way to finish off the project. Not only does it make the hat look cuter, but it also adds an extra touch of warmth and charm.
To create a pom-pom, you will need some yarn in a coordinating color. Start by cutting a piece of cardboard to the desired size of the pom-pom. Then, wrap the yarn around the cardboard several times until it becomes thick and full. The more times you wrap the yarn, the fuller the pom-pom will be.
Next, carefully slide the loops of yarn off the cardboard and tie a piece of yarn tightly around the middle of the loops. Make sure the knot is secure, as this will hold the pom-pom together. Once the knot is tight, cut through the loops on both ends of the pom-pom, creating a fluffy ball of yarn.
Now that you have your pom-pom, it’s time to attach it to the baby hat. Thread the two loose ends of yarn from the pom-pom through a large-eyed darning needle. Then, insert the needle through the top of the hat, making sure to go through a few stitches to secure it in place. Once the pom-pom is attached, tie the loose ends of yarn inside the hat to prevent them from coming undone.
With the pom-pom attached, your baby hat is now complete! The pom-pom adds a playful and cozy touch, making the hat even more adorable. It’s a fun finishing touch that will surely make any baby look even cuter and keep their head warm during the colder months.
Blocking and Washing Your Finished Baby Hat
Once you have completed knitting your baby hat using the free pattern, it is important to properly block and wash your finished project to ensure it maintains its shape and cleanliness. Blocking and washing will help the hat to fit snugly on your baby’s head and remove any dirt or oils that may have accumulated during the knitting process.
Blocking: Blocking is the process of shaping and stretching the knitted fabric to its desired dimensions. For blocking your baby hat, you will need a blocking board or a padded surface, rust-proof pins, and a measuring tape. Gently wet the hat with lukewarm water and lay it flat on the blocking board. Use the measuring tape to ensure the hat is the correct size, and use the rust-proof pins to pin it in place. Allow the hat to dry completely before removing the pins.
Washing: To wash your baby hat, fill a basin with lukewarm water and add a mild detergent specifically designed for delicate items. Gently agitate the water to create suds. Submerge the hat in the soapy water and gently squeeze it to remove any dirt or oils. Rinse the hat thoroughly with clean water until no suds remain. Avoid twisting or wringing the hat, as this can distort its shape.
Drying: After washing, remove the excess water from the hat by gently pressing it between two clean towels. Then, reshape the hat to its proper shape and size. Lay it flat on a dry towel or blocking board and allow it to air dry. Avoid placing the hat in direct sunlight or using a heat source to speed up drying, as this can cause the fibers to become weak or damaged.
By properly blocking and washing your finished baby hat, you can ensure that it will look and feel its best when worn by your little one. Regular care and maintenance will also extend the lifespan of the hat, allowing it to be passed down or used for future babies as well.
Tips for customizing your baby hat design
When it comes to knitting baby hats, there are countless ways to customize your design to make it unique and personal. Whether you’re looking to add a pop of color or a special embellishment, here are some tips to help you create the perfect baby hat:
- Choose the right yarn: Selecting the right yarn is key to achieving the desired look and feel of your baby hat. Consider the softness, warmth, and durability of the yarn, as well as the color options available.
- Add a pom-pom: Pom-poms are a fun and playful addition to any baby hat. You can choose a contrasting color for the pom-pom to make it stand out or match it to the main color of the hat for a more cohesive look.
- Experiment with different stitches: Don’t be afraid to try out different knitting stitches to add texture and visual interest to your baby hat. Cable stitches, seed stitches, and rib stitches are all great options to consider.
- Personalize with initials: Adding the baby’s initials to the hat can give it a personal touch. You can use duplicate stitch or intarsia techniques to incorporate the initials into the design.
- Include cute embellishments: Buttons, bows, and appliques can all be used to add adorable details to your baby hat. Just make sure they are securely attached and won’t pose a choking hazard.
Remember, the key to customizing your baby hat is to have fun and let your creativity shine. Don’t be afraid to experiment and make it truly one-of-a-kind.
Sharing your handmade baby hats with love
After putting so much time, effort, and creativity into knitting baby hats, it’s only natural to want to share them with others. Whether you want to give them as gifts or donate them to charities, sharing your handmade baby hats is a wonderful way to spread love and warmth.
When sharing your baby hats, remember to include a personal touch. Attach a note or tag to each hat, expressing the care and love that went into making it. This will make the recipient feel special and appreciated. You can also add your name and contact information, in case they want to thank you or ask for more.
If you’re giving the hats as gifts, consider the preferences and needs of the recipient. Choose color schemes or patterns that match their style or the baby’s nursery. Customize the size to fit the baby’s head comfortably. By tailoring the hat to their preferences, you show that you went the extra mile to create something truly special.
If you’re donating the hats, research local organizations or hospitals that accept handmade baby items. Contact them beforehand to ensure they have a need and to understand any specific requirements they may have. Donating your hats can bring joy to families in need and provide a comforting touch during a challenging time.
Remember that the act of sharing goes beyond the physical gift itself. It’s about spreading love, warmth, and kindness to those who need it most. So, as you share your handmade baby hats, know that you are making a difference in someone’s life, one stitch at a time.