
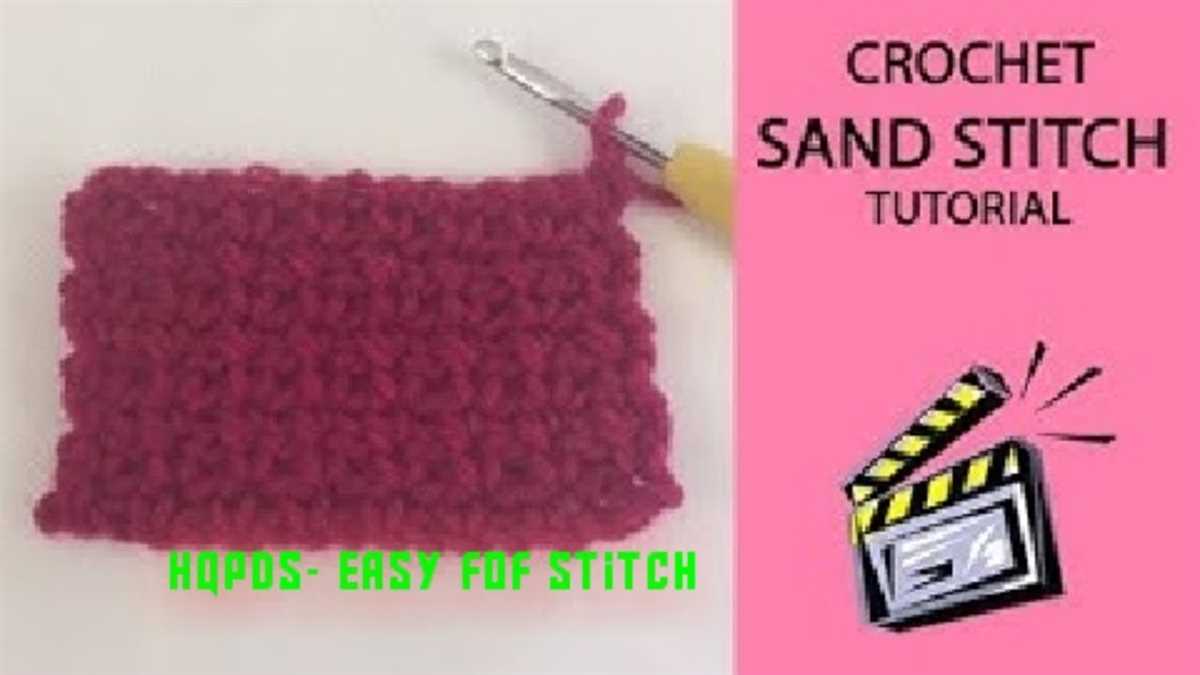
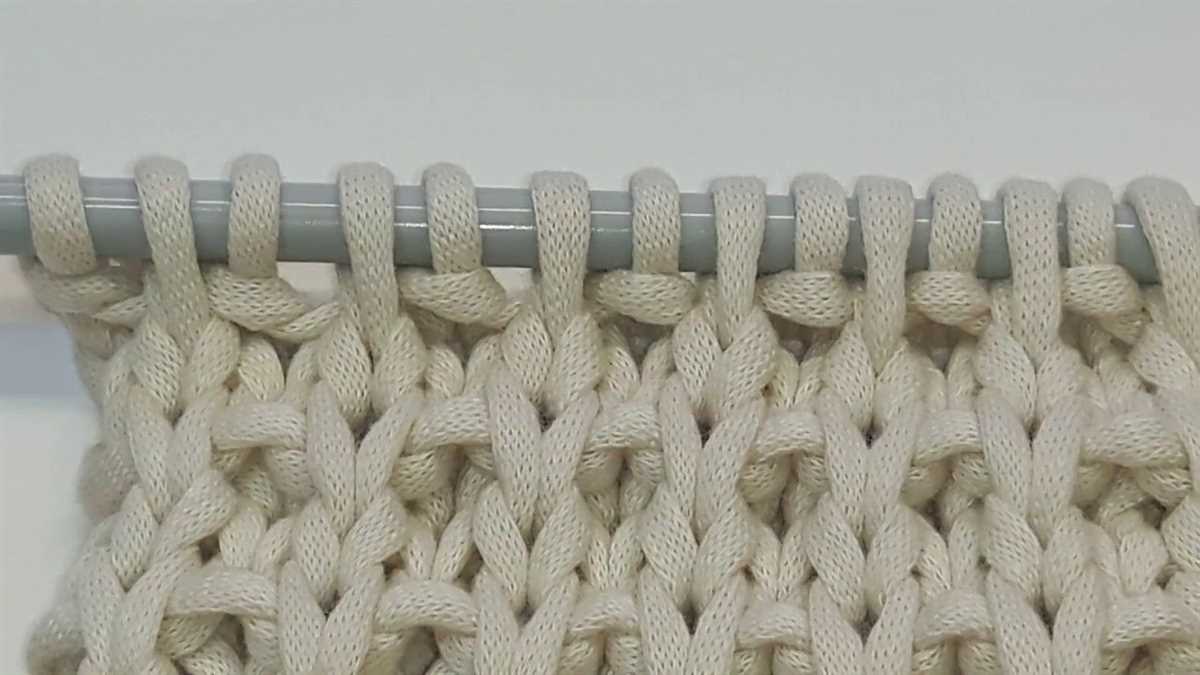
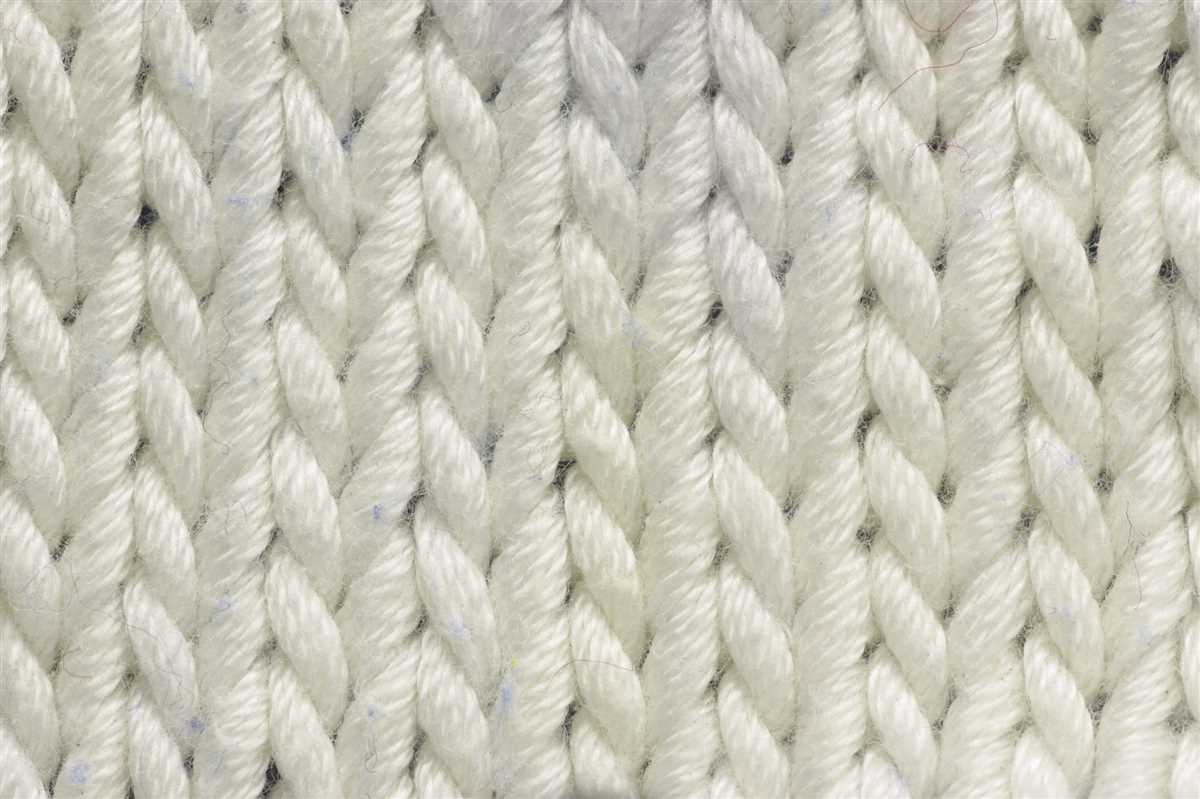
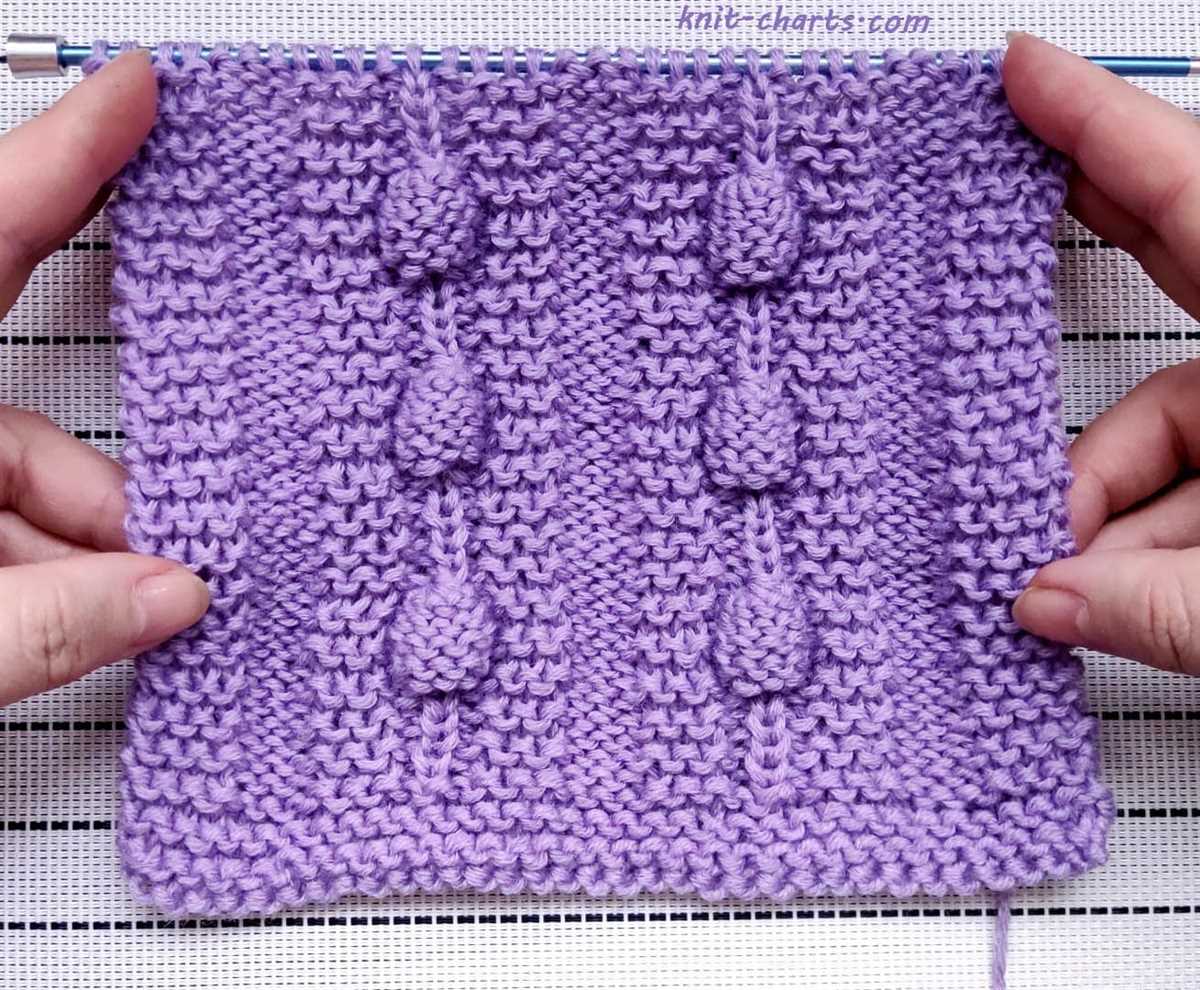
The sand stitch knit pattern is a classic design that adds texture and interest to any knit project. This stitch pattern creates a beautiful raised diamond pattern that resembles the grains of sand on a beach. It is a versatile stitch pattern that can be used for a variety of projects, including scarves, blankets, and sweaters.
The sand stitch knit pattern is created by alternating between knit and purl stitches in a specific pattern. It is a relatively easy stitch pattern to learn and is suitable for knitters of all skill levels. The pattern creates a dense, textured fabric that is great for keeping warm in colder weather.
One of the great things about the sand stitch knit pattern is its versatility. It can be used in a wide range of projects and can be easily customized by changing the number of stitches or the size of the diamond pattern. This makes it a popular choice for knitters who want to add a bit of extra interest to their projects.
Whether you are a beginner or an experienced knitter, the sand stitch knit pattern is a great stitch pattern to add to your repertoire. Its simple yet elegant design adds a touch of sophistication to any project. So why not give it a try and see how this classic stitch pattern can elevate your knitting to the next level?
Sand Stitch Knit Pattern: Your Ultimate Guide
When it comes to knitting, there are countless stitch patterns to choose from. One popular option is the sand stitch pattern, known for its unique texture and versatility. Whether you’re a beginner or an experienced knitter, this ultimate guide will take you through everything you need to know about the sand stitch knit pattern.
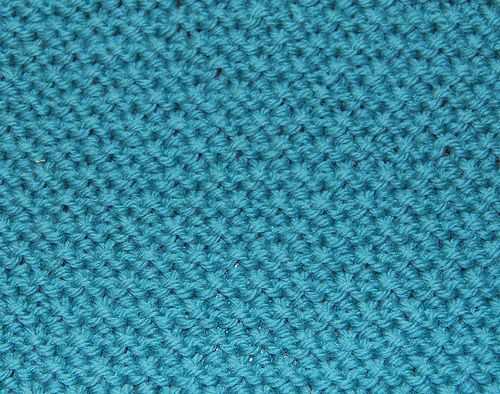
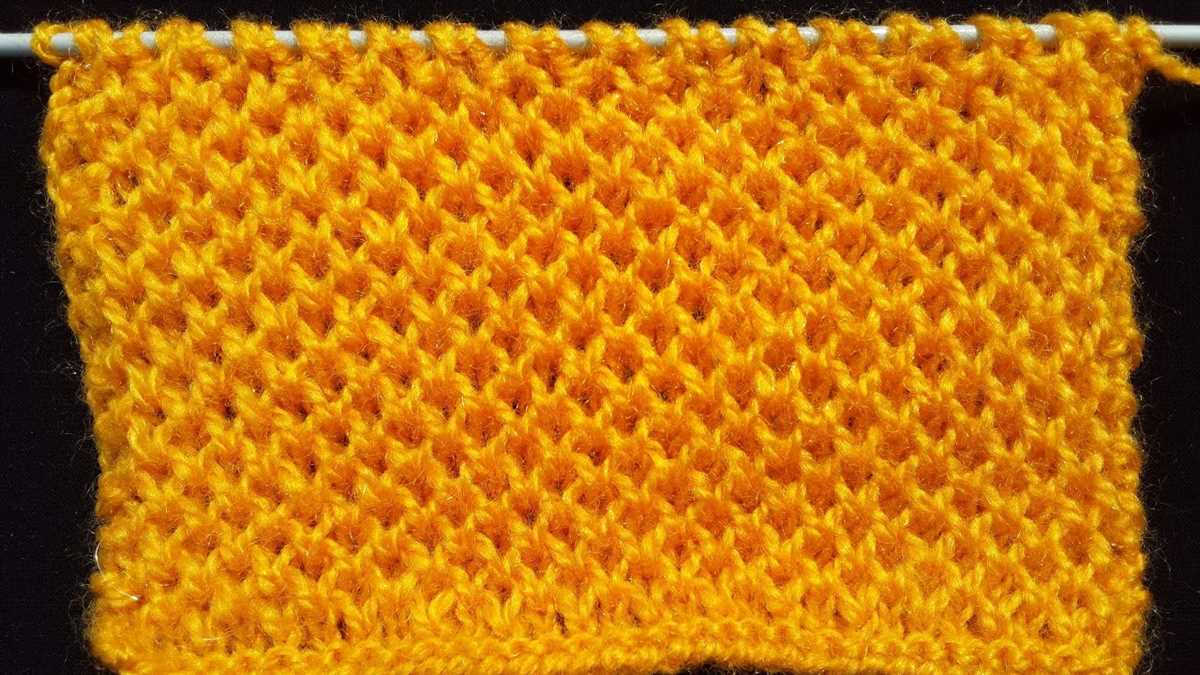
The sand stitch is a simple yet elegant pattern that creates a dense, textured fabric. It is achieved by alternating knit and purl stitches in a specific sequence. The result is a beautiful texture that resembles the pattern of sand, hence the name. This stitch pattern is perfect for a wide range of projects, from scarves and sweaters to blankets and beyond.
How to Knit the Sand Stitch Pattern
To knit the sand stitch pattern, you’ll need to follow a specific sequence of stitches. Start by casting on an even number of stitches, then follow this pattern:
- Row 1: Knit all stitches.
- Row 2: Purl all stitches.
- Row 3: *Knit 1, purl 1.* Repeat from * to * across the row.
- Row 4: Purl all stitches.
- Repeat rows 1-4 to continue the sand stitch pattern.
Keep following this sequence, and you’ll see the sand stitch pattern emerge. Remember to always knit the knits and purl the purls as indicated in each row. With practice, you’ll be able to create beautifully textured pieces using the sand stitch pattern.
Project Ideas for Sand Stitch Knitting
The sand stitch pattern is incredibly versatile, making it suitable for various knitting projects. Here are a few ideas to get you started:
- Scarves: A sand stitch scarf is both cozy and stylish, perfect for keeping warm during colder months.
- Sweaters and Cardigans: The sand stitch pattern adds a touch of elegance and texture to any knitted garment.
- Blankets and Throws: Create a cozy and textured blanket using the sand stitch pattern. It will be perfect for snuggling up on chilly evenings.
- Hats and Headbands: Add a unique touch to your winter accessories by incorporating the sand stitch pattern. It’s a great way to stand out.
These are just a few ideas to inspire you. Don’t be afraid to get creative and experiment with the sand stitch pattern. With its simple yet captivating texture, this knit pattern is sure to elevate any project.
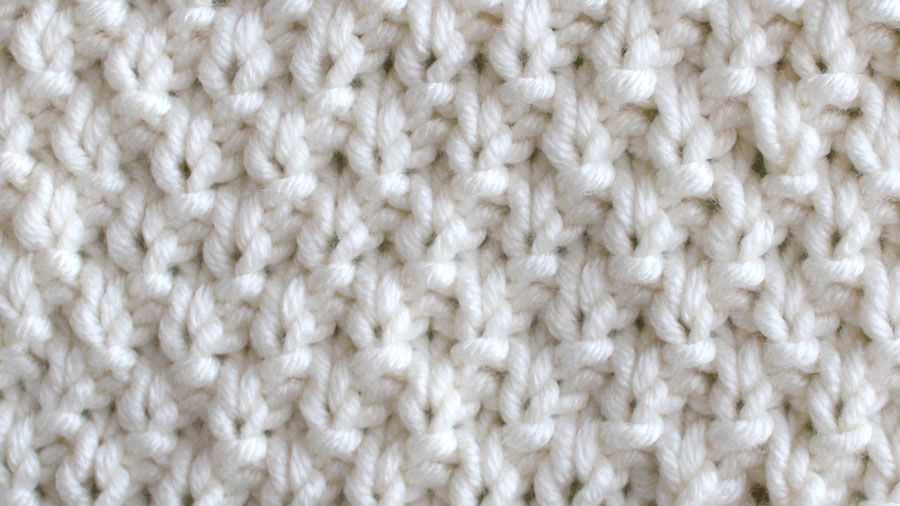
What is a Sand Stitch Knit Pattern?
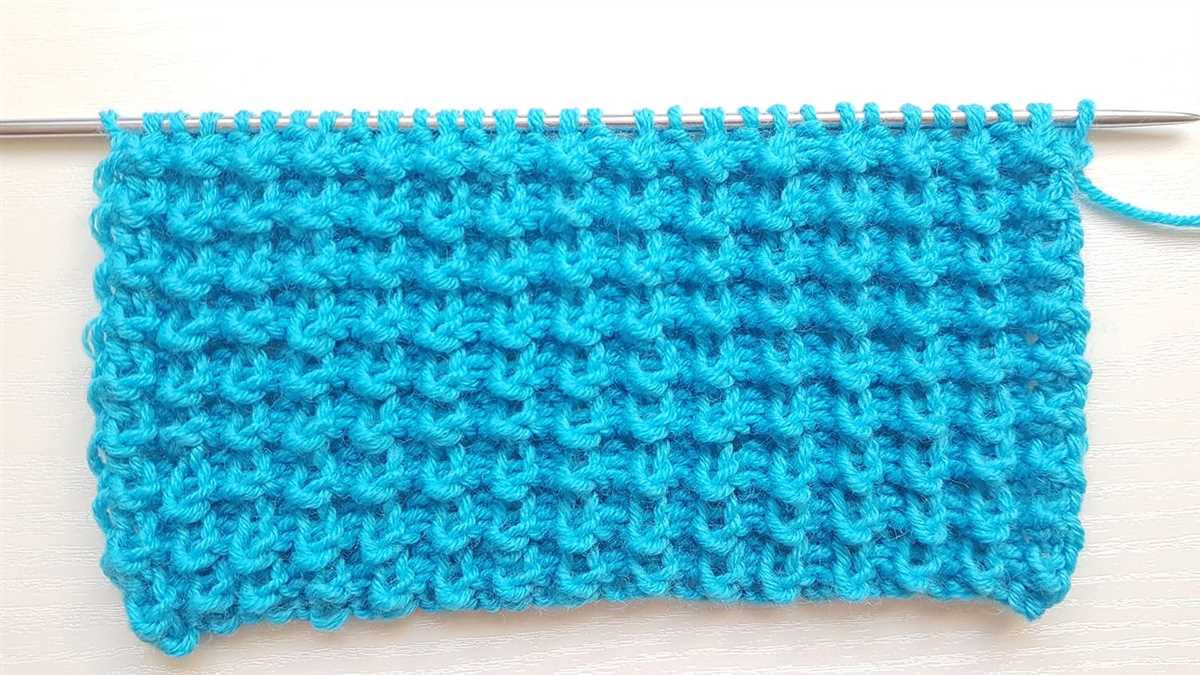
A sand stitch knit pattern is a type of knitting technique that creates a textured fabric with a beautiful woven appearance. This pattern is commonly used in various knitted garments and accessories, including sweaters, scarves, and blankets.
The sand stitch pattern is created by alternating knit and purl stitches in a specific sequence. This sequence produces a raised and recessed pattern that resembles sand or small waves. It adds depth and visual interest to the knitted fabric, making it an excellent choice for creating unique and intricate designs.
To create a sand stitch pattern, you typically start by casting on an even number of stitches. Then, you follow a repeating sequence of knit-2, purl-2 stitches across the row. On the following row, you knit the purl stitches and purl the knit stitches to maintain the alternating pattern.
This pattern is relatively easy to learn and can be customized to create different variations. For example, you can change the number of knit and purl stitches in the sequence to create a more pronounced or subtle texture. Additionally, you can combine different colors of yarn to enhance the visual effect of the sand stitch pattern.
Overall, the sand stitch knit pattern is a versatile and visually appealing technique that adds texture and dimension to knitted projects. Whether you’re a beginner or an experienced knitter, incorporating this pattern into your projects can help create stunning and unique designs.
How to Knit the Sand Stitch Pattern?
The sand stitch pattern is a simple yet elegant knitting pattern that creates a textured fabric resembling a sandy beach. It is perfect for knitting scarves, blankets, or even sweaters. This pattern is beginner-friendly and can be easily mastered with a little practice.
To knit the sand stitch pattern, you will need a pair of knitting needles and your choice of yarn. Here are the steps to follow:
- Cast on an even number of stitches: Choose the desired width of your project and cast on an even number of stitches. This will ensure that the sand stitch pattern works correctly.
- Row 1: Begin by knitting the first stitch. Then, bring the yarn to the front of the work, between the needles. Slip the next stitch purlwise, as if to purl. Repeat these two steps until you reach the end of the row.
- Row 2: Knit the first stitch, just like in Row 1. Then, bring the yarn to the back of the work, between the needles. Slip the next stitch purlwise, as if to purl. Repeat these two steps until you reach the end of the row.
- Repeat Rows 1 and 2: Continue repeating Rows 1 and 2 until you reach the desired length of your project. The sand stitch pattern will start to take shape, resembling small sand dunes.
This stitch pattern is achieved by alternating between slipping stitches and bringing the yarn to the front or back of the work. The slipped stitches create a textured effect, while the yarn placement creates the sand dune-like appearance.
Once you have mastered the basic sand stitch pattern, you can experiment with different variations. For example, you can try using different colors of yarn to create stripes or combining the sand stitch with other stitch patterns for added complexity. The possibilities are endless!
Materials Needed for Sand Stitch Knitting
The sand stitch is a popular knitting pattern that creates a textured fabric with a beautiful diamond-shaped design. To start knitting the sand stitch, you will need a few essential materials. Here is a list of what you will need to get started:
- Yarn: Choose a yarn that is suitable for your project and desired finished look. The sand stitch can be knitted with a variety of yarn weights, so consider the thickness and texture that you want for your fabric.
- Knitting Needles: Select knitting needles that are compatible with the yarn you have chosen. The size of the needles will depend on the gauge you want to achieve and the yarn weight. It is recommended to use straight or circular needles, depending on your preference.
- Tapestry Needle: A tapestry needle is essential for weaving in loose ends and finishing your project. Make sure to choose a needle with a large eye that can accommodate the thickness of your yarn.
- Scissors: A pair of sharp scissors will be useful for cutting the yarn when needed. Choose a pair that is comfortable to hold and has a fine tip for precise cutting.
- Stitch Markers: Stitch markers can be helpful in keeping track of your stitches and patterns, especially when working on more complex sand stitch designs. You can use commercial stitch markers or make your own with scrap yarn or safety pins.
- Pattern Instructions: Find a sand stitch pattern that you want to follow. There are various resources available online or in knitting books that provide step-by-step instructions on how to knit the sand stitch pattern.
Once you have gathered all the necessary materials, you are ready to start knitting the sand stitch. Be sure to read through the pattern instructions carefully and understand each step before beginning. The sand stitch may require some practice, but with patience and determination, you will master this beautiful knitting pattern.
Step-by-Step Instructions for Sand Stitch Knitting
Knitting is a popular craft that allows you to create beautiful, cozy items using a variety of stitches. One stitch that adds texture and interest to your knitting is the sand stitch. This stitch creates a raised, sand-like pattern that is both visually appealing and fun to knit. In this guide, we will walk you through the step-by-step instructions for knitting the sand stitch.
Materials Needed:

- Yarn of your choice
- Knitting needles
- Tapestry needle
Instructions:
- Cast on: Start by casting on an even number of stitches. The sand stitch can be easily adjusted to any width, so choose a number that suits your project.
- First row: Knit the first row. This will serve as the base for the sand stitch pattern.
- Second row: Purl all the stitches on the second row. This will create the sand-like texture.
- Third row: Knit the third row, repeating the base row.
- Fourth row: Purl all the stitches on the fourth row, creating the raised sand stitch pattern.
- Repeat: Continue repeating the third and fourth rows until you have reached your desired length.
- Bind off: Once you have reached the desired length, bind off all stitches to finish your sand stitch knitting project.
- Weaving in ends: Use a tapestry needle to weave in any loose ends to give your project a polished look.
And there you have it! With these step-by-step instructions, you can easily master the sand stitch and incorporate it into your knitting projects. Whether you’re making a scarf, a blanket, or any other knitted item, the sand stitch adds a touch of texture and interest that will make your project stand out. Happy knitting!
Tips and Tricks for Knitting the Sand Stitch Pattern
The sand stitch pattern is a textured knitting pattern that creates a beautiful raised pattern resembling sand dunes. It is a simple pattern that can be used to add interest and texture to any knitting project, from scarves to blankets.
Choosing the right yarn: When knitting the sand stitch pattern, it is important to choose the right yarn. A yarn with good stitch definition will help to showcase the texture of the pattern. Avoid using highly textured or fuzzy yarns, as they may obscure the stitch pattern.
Blocking for crisp stitches: Blocking is an important step when knitting the sand stitch pattern. After completing your project, wet blocking can help to even out the stitches and give them a crisp and defined look. Gently wash your knitted item, lay it flat on a towel, and pin it into shape. Allow it to dry completely before removing the pins.
Paying attention to tension: As with any knitting pattern, tension is key to achieving the desired results. The sand stitch pattern can be a bit tricky to maintain an even tension due to the slipped stitches. Take the time to check your gauge and adjust as needed to ensure that your stitches are not too loose or too tight.
Using stitch markers: Stitch markers can be helpful when knitting the sand stitch pattern, especially if you are working on a large project. They can help you keep track of the pattern repeats and make it easier to identify any mistakes or dropped stitches. Simply place a stitch marker at the beginning of each repeat to help you stay on track.
Keeping an eye on your work: While the sand stitch pattern is simple, it can be easy to lose track of your rows or stitches. To avoid mistakes, make a habit of counting your stitches and rows regularly. Use a row counter or keep track on a piece of paper if needed. This will help you spot any errors early on and avoid having to rip back your work.
Exploring color variations: The sand stitch pattern can be even more visually stunning when worked in multiple colors. Consider experimenting with color changes within the pattern to create unique effects. You could alternate rows or sections of the pattern with different colors, or add contrasting stripes for added visual interest.
Adding a border: If you want to give your sand stitch project a finished look, consider adding a border. A simple garter stitch border can help prevent curling and give your project a clean edge. Alternatively, you could experiment with different stitch patterns for a more intricate border.
Have fun and get creative: The sand stitch pattern is a versatile pattern that can be adapted in many ways. Don’t be afraid to experiment and get creative with your knitting. Whether you’re adding embellishments, changing colors, or modifying the stitch pattern itself, have fun and make your project truly unique.
Uses for the Sand Stitch Knit Pattern
The sand stitch knit pattern is a versatile and popular choice among knitters. Its unique texture creates a visually appealing fabric that can be used for a variety of projects. Here are some common uses for the sand stitch knit pattern:
1. Accessories

The sand stitch knit pattern is perfect for creating stylish and cozy accessories such as scarves, hats, and gloves. The textured design adds depth and interest to these items, making them stand out from plain knit accessories. Whether you’re knitting for yourself or as a gift, using the sand stitch pattern will ensure that your accessories have a unique and fashionable look.
2. Home Decor
If you’re looking to add a touch of warmth and texture to your home, the sand stitch knit pattern is an excellent choice. You can use this pattern to create beautiful and functional items such as blankets, pillows, and even curtains. The textured fabric adds a cozy feel to any room and can complement a variety of interior design styles. Whether you prefer a minimalist or bohemian look, the sand stitch pattern can be adapted to suit your personal taste.
3. Baby Items
The sand stitch pattern is also great for knitting baby items. The soft and breathable fabric created by this pattern is perfect for delicate baby skin. You can use the sand stitch pattern to make baby blankets, sweaters, hats, and booties. The texture of the fabric will provide comfort and warmth for the little ones, while also adding a touch of style to their outfits.
4. Clothing

Another popular use for the sand stitch knit pattern is in garment knitting. It can be used to create unique sweaters, cardigans, and even dresses. The sand stitch pattern adds a subtle elegance to clothing, making it suitable for both casual and formalwear. By choosing different yarns and colors, you can customize the look of your knitted garments and create pieces that reflect your personal style.
Overall, the sand stitch knit pattern is a versatile and attractive option for a wide range of knitting projects. Whether you’re knitting accessories, home decor items, baby items, or clothing, the sand stitch pattern can add a beautiful texture and visual interest to your creations.
Frequently Asked Questions About Sand Stitch Knitting

Have questions about sand stitch knitting? Look no further! We’ve compiled a list of frequently asked questions to help you better understand this knitting pattern.
What is sand stitch knitting?
Sand stitch knitting is a popular stitch pattern that creates a textured fabric resembling the ripples formed on sand. It involves alternating knit and purl stitches in specific sequences to create a raised, textured effect.
What are the advantages of sand stitch knitting?
There are several advantages to using the sand stitch knitting pattern. Firstly, it adds an interesting texture to your knitted fabric, making it visually appealing. Additionally, sand stitch is reversible, meaning both sides of the fabric look similar, allowing for versatility in its use. Furthermore, sand stitch is relatively easy to learn and execute, making it suitable for knitters of all skill levels.
Can sand stitch be used for different projects?
Yes, absolutely! The sand stitch pattern can be used for a variety of knitting projects, including garments like sweaters, scarves, and hats. It can also be used to create accessories such as blankets, pillows, and even socks. The choice of yarn weight and needle size will determine the overall drape and thickness of the finished product.
Are there any variations of the sand stitch pattern?
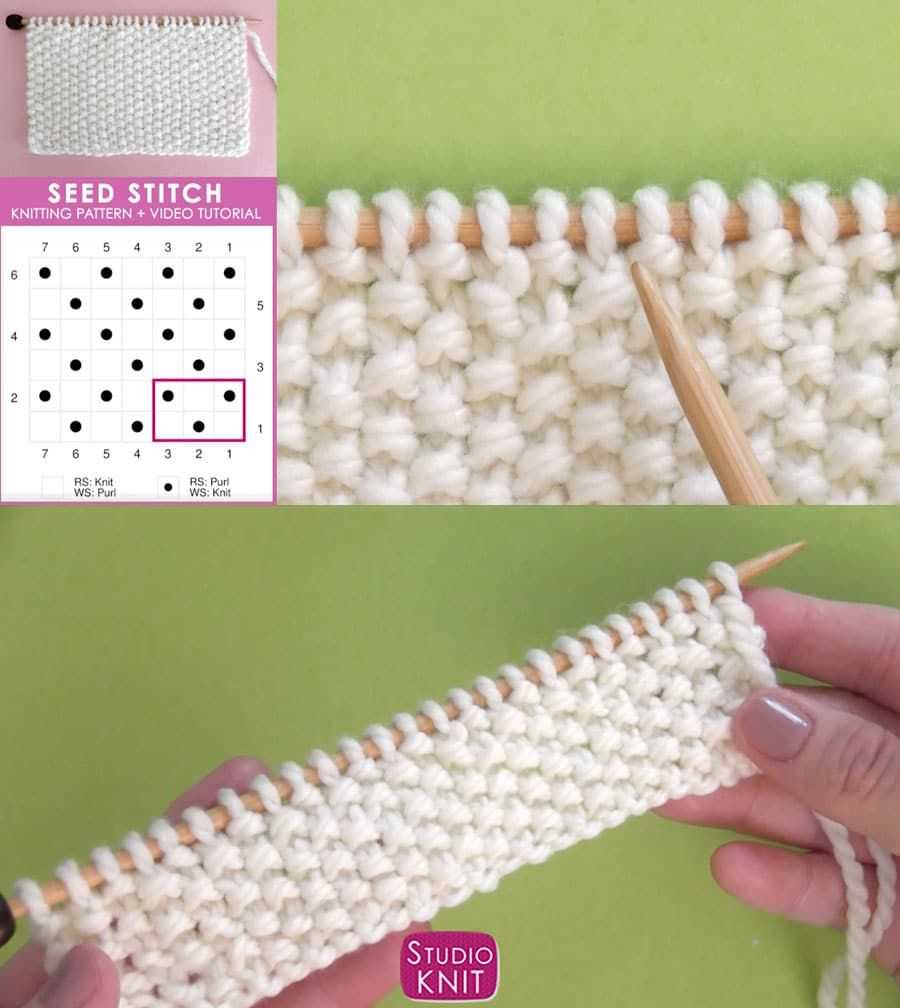
Yes, there are a few variations of the sand stitch pattern that you can explore. One variation is the seed stitch, which involves alternating between one knit stitch and one purl stitch in a continuous pattern. Another variation is the moss stitch, which combines knit and purl stitches to create a textured fabric with a more defined pattern. These variations can add more complexity and visual interest to your knitting projects.
Any tips for knitting with the sand stitch pattern?
When knitting with the sand stitch pattern, it is important to maintain an even tension throughout your work to achieve consistent results. Pay attention to the stitch count and pattern instructions to ensure you are correctly alternating between knit and purl stitches. Using stitch markers can help you keep track of your progress, especially if you are working on a large project. Finally, don’t be afraid to experiment with different yarns and needle sizes to achieve the desired effect and texture.
- Overall, sand stitch knitting is a versatile and popular stitch pattern that can be used for various knitting projects.
- It adds texture and visual interest to your fabric, and is reversible.
- Remember to maintain an even tension, follow the pattern instructions, and experiment with different variations and yarns to get the best results.
Common Mistakes to Avoid When Knitting the Sand Stitch Pattern
The sand stitch pattern is a beautiful and versatile stitch that can be used to create a variety of knitted items, from scarves and shawls to sweaters and blankets. However, like any knitting pattern, it is important to be aware of common mistakes that can occur when working with the sand stitch pattern. By avoiding these mistakes, you can ensure that your finished project looks clean and professional.
1. Miscounting stitches
One of the most common mistakes when knitting the sand stitch pattern is miscounting stitches. This can lead to an uneven pattern and an overall sloppy appearance. To avoid this mistake, it is important to carefully count your stitches at the end of each row and double-check your work before moving on to the next row.
2. Not consistently tensioning the yarn
Tensioning the yarn consistently is crucial when knitting the sand stitch pattern. Inconsistent tension can result in stitches that are too tight or too loose, which can affect the overall appearance and drape of the finished piece. To avoid this mistake, make sure to pay attention to your tension and adjust as needed throughout your knitting.
3. Not blocking the finished piece
Blocking is an important step in the knitting process that helps to even out the stitches and give the finished piece a polished look. Neglecting to block your knitting can result in a project that looks unfinished and lacks the crisp definition that the sand stitch pattern is known for. Be sure to follow the blocking instructions for your specific yarn and take the time to properly block your finished piece.
4. Not reading the pattern carefully
The sand stitch pattern can be worked in different variations, depending on the specific pattern you are following. It is important to carefully read and understand the pattern instructions before you begin knitting. This will help you avoid mistakes and ensure that you are following the correct stitch pattern for your desired project.
5. Not using the right needle size
The sand stitch pattern typically works best with a specific needle size, as specified in the pattern instructions. Using the wrong needle size can result in a fabric that is either too tight or too loose, affecting the overall look and feel of the finished project. Be sure to check the recommended needle size and adjust accordingly to achieve the desired gauge and texture.
By being aware of these common mistakes and taking the necessary precautions, you can ensure that your sand stitch knitting project turns out beautifully. With practice and attention to detail, you will be able to create stunning knitted items that showcase the intricate and textured beauty of the sand stitch pattern.
Advanced Variations of the Sand Stitch Knit Pattern
The sand stitch knit pattern is a popular choice among knitters due to its simplicity and textured appearance. However, once you’ve mastered the basics, there are several advanced variations of this pattern that can take your knitting skills to the next level.
1. Double Sand Stitch
The double sand stitch is an elevated version of the traditional sand stitch. Instead of alternating between knit and purl stitches every row, this variation introduces a second set of knit and purl stitches. This additional layer of texture creates a more intricate and visually appealing design.
2. Sand Stitch Cable
If you’re looking to add some complexity to your sand stitch knitting, try incorporating cables. By combining the sand stitch pattern with cable techniques, you can create beautiful and intricate cable designs that stand out. Whether you choose to add a single cable twist or multiple cables throughout your project, the sand stitch cable variation is sure to impress.
3. Lace Sand Stitch
For those who enjoy delicate and airy knits, the lace sand stitch is an excellent choice. This variation combines the sand stitch pattern with lace knitting techniques to create an open and lacy fabric. By increasing the number of yarn overs and decreases, you can create intricate lace patterns within the sand stitch framework.
4. Colorwork Sand Stitch
If you’re feeling adventurous, try incorporating colorwork into your sand stitch knitting. By using multiple colors of yarn, you can create beautiful and eye-catching designs within the sand stitch pattern. Whether you choose to create a simple two-color pattern or experiment with more intricate Fair Isle or intarsia techniques, the possibilities are endless.
These advanced variations of the sand stitch knit pattern offer knitters the opportunity to expand their skills and create unique and personalized projects. Whether you choose to incorporate cables, lace, or colorwork, experimenting with different variations can help you take your knitting to new heights.
Online Resources and Tutorials for Sand Stitch Knitting
Learning a new knitting stitch can be an exciting and rewarding experience. The sand stitch is a popular choice for its unique texture and versatility. If you’re interested in mastering this stitch, there are many online resources and tutorials available to help you get started. Below is a compilation of some of the best resources for sand stitch knitting.
Tutorials
1. The Spruce Crafts: This website offers a detailed step-by-step tutorial on how to knit the sand stitch. The instructions are easy to follow and include helpful photos to guide you through each stitch.
2. Knitting Stitch Patterns: This website features a wide range of knitting stitch patterns, including the sand stitch. They provide clear instructions with both written and charted formats, making it easy for knitters of all skill levels.
3. YouTube: Several knitting experts and enthusiasts have created video tutorials demonstrating the sand stitch. Watching someone knit the stitch in real-time can be extremely helpful, especially for visual learners.
Online Forums and Communities
1. Ravelry: Ravelry is an online knitting and crocheting community with a wealth of user-generated content. You can find patterns, tutorials, and forums dedicated to sand stitch knitting. It’s a great place to connect with other knitters and seek advice.
2. KnittingHelp.com: This website not only offers tutorials and videos but also features an active forum where members can ask questions and share their knitting experiences. The community is friendly and supportive, making it an excellent resource for beginners.
Conclusion
Whether you’re a beginner or an experienced knitter, learning the sand stitch can be a fun challenge. With the help of online resources and tutorials, you can quickly master this stitch and incorporate it into your knitting projects. From step-by-step instructions to video demonstrations, there are plenty of options to choose from. So grab your needles, explore these resources, and start knitting the beautiful sand stitch today!