
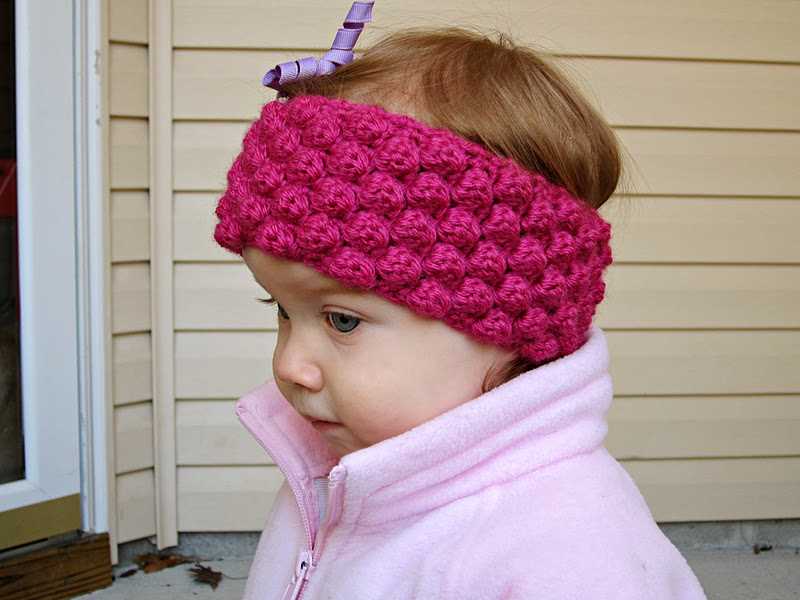
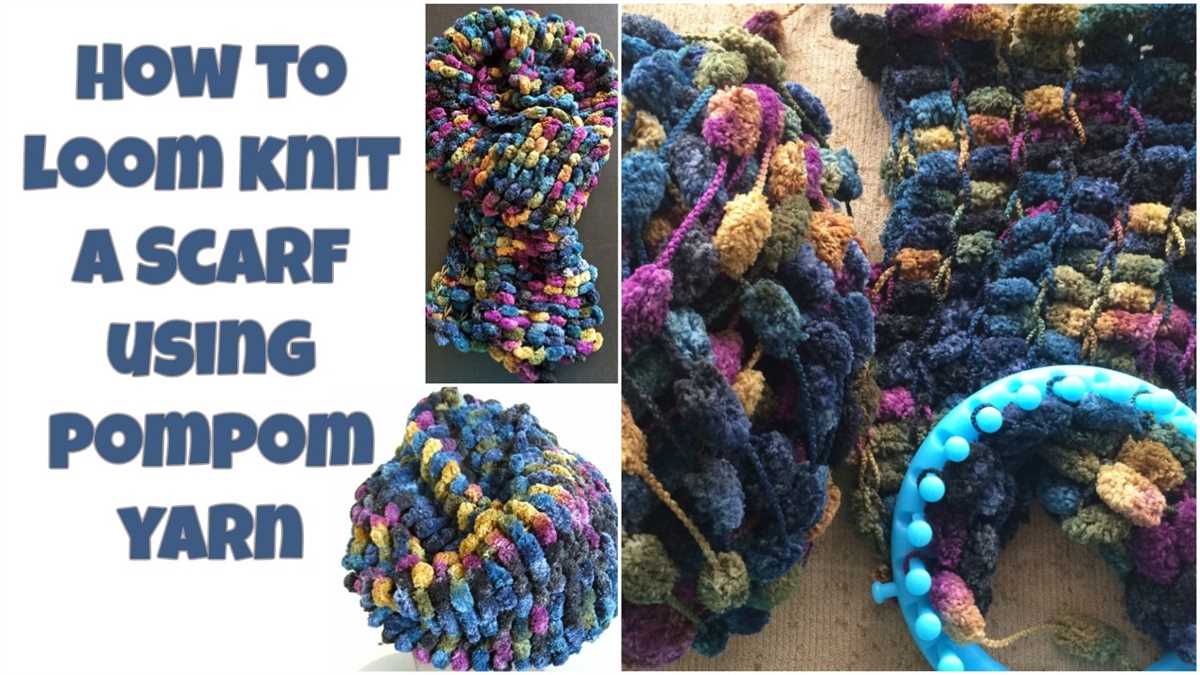
Keeping your ears warm during the cold winter months is essential. Why not do it in style with a loom knit ear warmer? Loom knitting is a great way to create beautiful and cozy accessories, and an ear warmer is a perfect project for beginners.
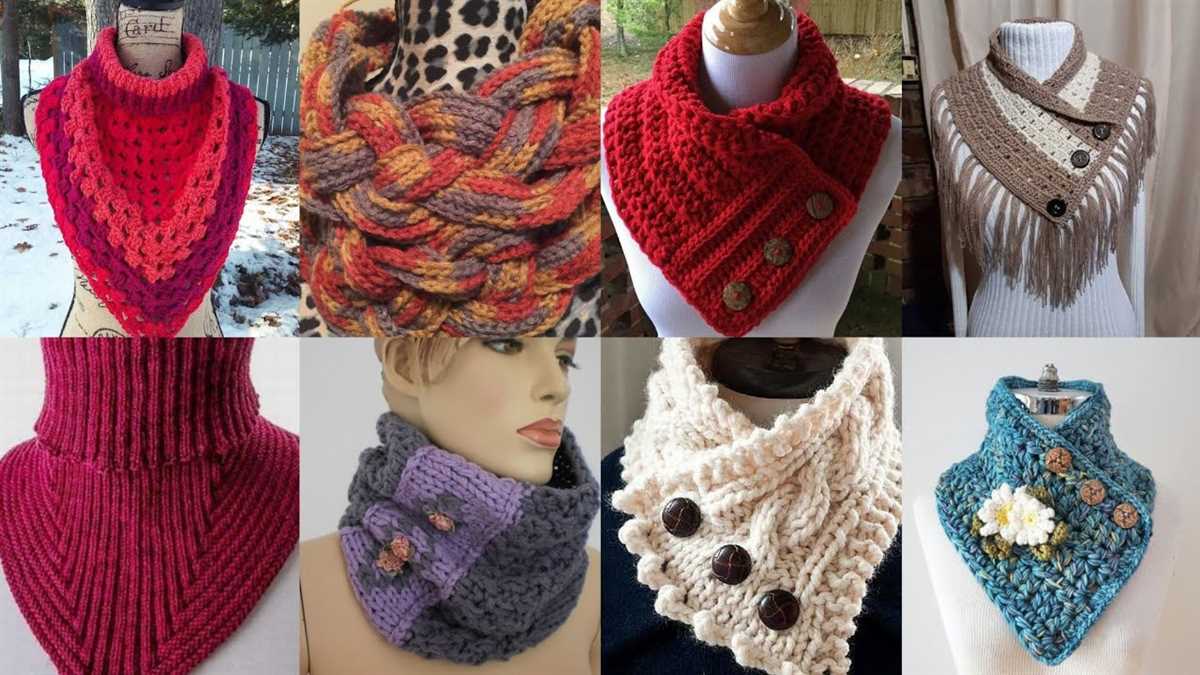
With just a few simple stitches and a loom, you can create your own ear warmer in no time. Plus, there are so many variations and patterns to choose from. Whether you prefer a sophisticated cable knit design or a cute and colorful striped pattern, there is a loom knit ear warmer pattern out there for everyone.
Not only are loom knit ear warmers stylish, but they are also incredibly practical. They are perfect for outdoor activities like hiking, skiing, or even just running errands on a chilly day. Plus, they make great gifts for friends and family, so you can spread the warmth to your loved ones as well.
So, grab your favorite loom and some soft, cozy yarn, and get ready to create a fashionable and functional accessory that will keep your ears warm all winter long. Follow along with our step-by-step loom knit ear warmer pattern, and you’ll be amazed at how quickly you can whip up your own cozy creation.
Loom Knit Ear Warmer Pattern – A Step-by-Step Guide
Looking for a stylish and cozy accessory for the colder weather? Why not try making a loom knit ear warmer! This step-by-step guide will walk you through the process of creating a beautiful and functional ear warmer using a loom knitting technique.
Materials needed:
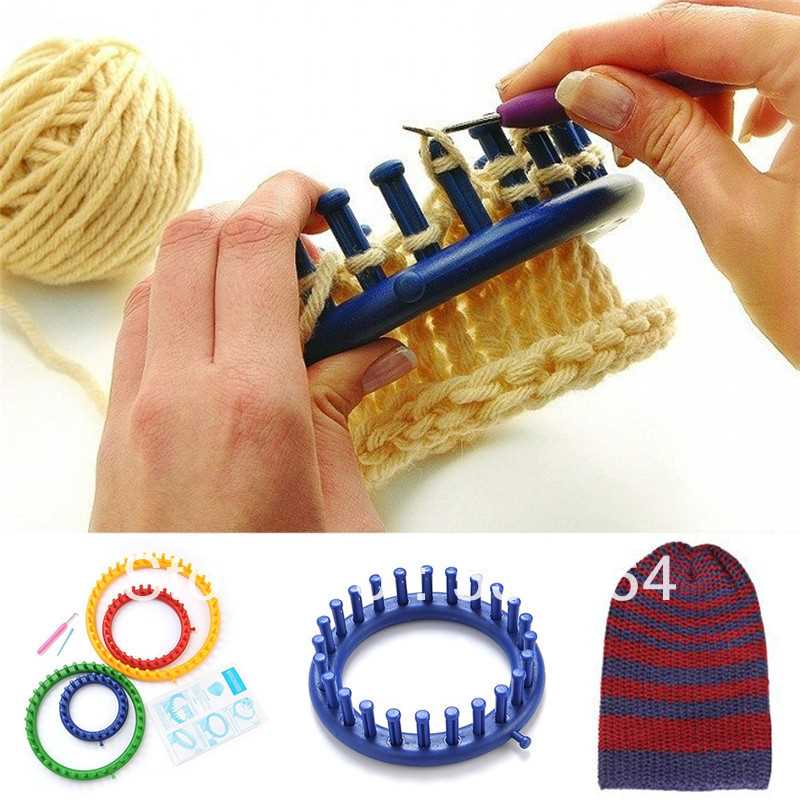
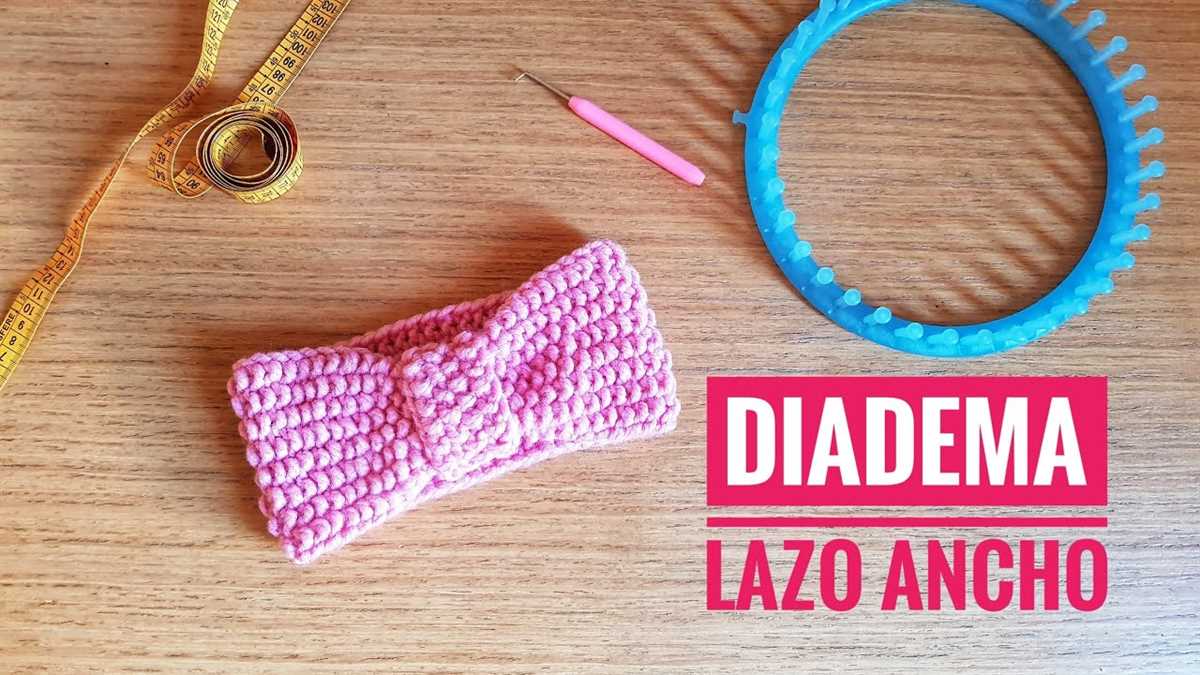
- A knitting loom
- Medium weight yarn
- A crochet hook
- A tapestry needle
Step 1: Getting started
Begin by choosing the desired color of yarn and selecting a knitting loom with the appropriate number of pegs for your desired width. Cast on the stitches by wrapping the yarn around each peg in a figure-eight motion.
Step 2: Knitting the rows
Once you have cast on, start by knitting the first row. Use the crochet hook to lift the bottom loop on each peg over the top loop. Continue this process for each peg until you have completed the row. Repeat this step for each subsequent row until the ear warmer reaches your desired length.
Step 3: Shaping the ear warmer
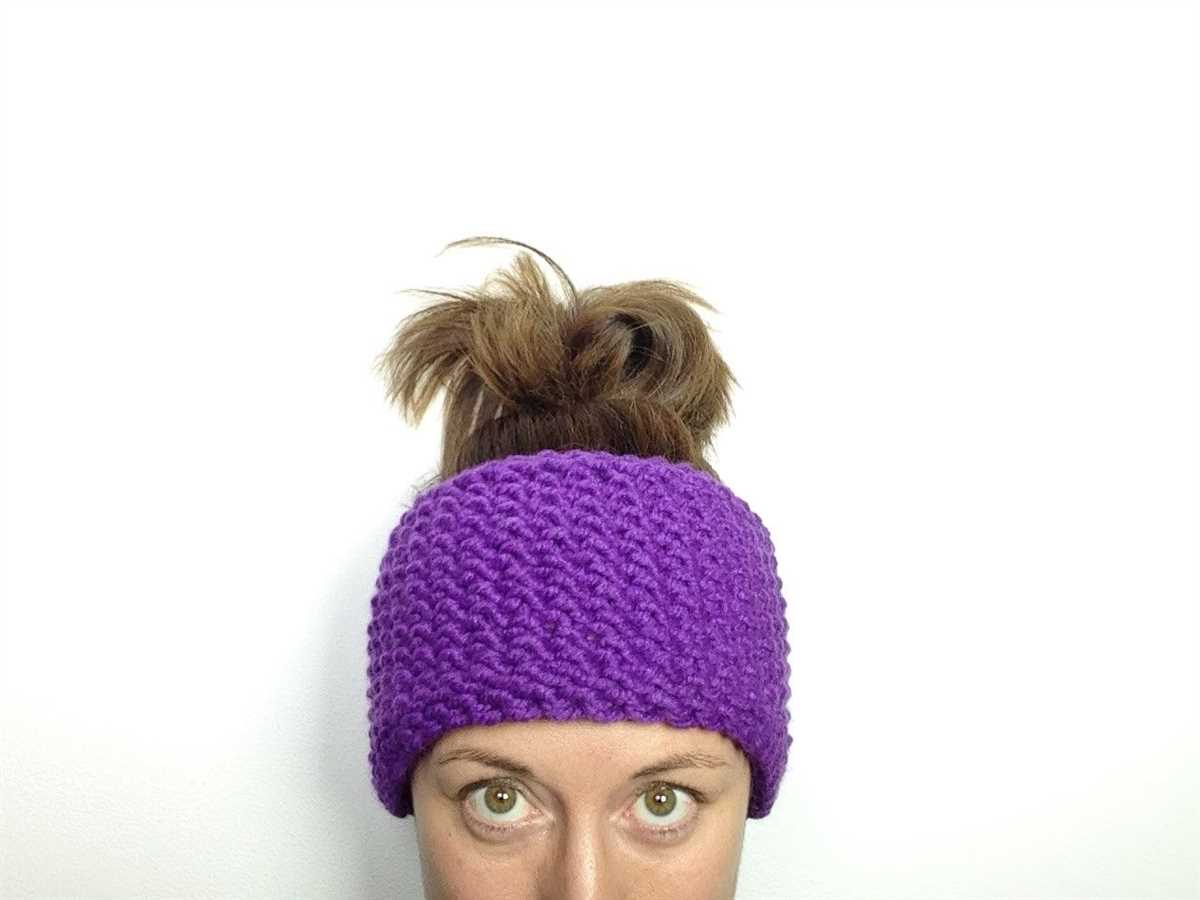
To create a tapered shape for a better fit, decrease the number of stitches gradually towards the ends. This can be done by skipping pegs during the knitting process or by using a decrease stitch technique specific to your loom.
Step 4: Finishing touches
Once you have reached the desired length and shape, cast off the stitches by knitting two stitches together and pulling the bottom loop over the top. Cut the yarn, leaving a long tail for sewing. Use the tapestry needle to weave in the loose ends and sew the ends of the ear warmer together to create a seamless finish.
With this easy-to-follow guide, you can create your own loom knit ear warmer in no time. Experiment with different colors and patterns to customize the look and style to suit your personal taste. Stay warm and fashionable all winter long with your handmade loom knit ear warmer!
Choosing the Right Loom and Yarn for Your Ear Warmer
When it comes to making a loom knit ear warmer, choosing the right loom and yarn is crucial to achieve the desired results. The loom size and yarn weight will determine the width, thickness, and texture of the ear warmer, so it’s important to consider these factors before starting your project.
Loom Size: The size of the loom will determine the width of your ear warmer. Smaller looms will create narrower ear warmers, while larger looms will give you a wider fit. If you prefer a thin and lightweight ear warmer, a smaller loom would be suitable. On the other hand, if you want a more substantial and cozy ear warmer, opt for a larger loom size.
Yarn Weight: The yarn weight will determine the thickness and warmth of your ear warmer. For a lightweight and breathable ear warmer, choose a yarn that is classified as “fingering,” “sport,” or “DK” weight. These yarns are commonly used for garments and accessories that require a finer texture. If you prefer a thicker and warmer ear warmer, opt for yarns that are classified as “worsted,” “bulky,” or “super bulky” weight.
You can get creative with yarn choices by considering different fiber blends as well. Acrylic yarns are affordable, easy to work with, and come in a wide range of colors. If you prefer natural fibers, you can explore options like wool or cotton. Ultimately, the choice of yarn will depend on your personal preferences and the intended use of the ear warmer.
To summarize, carefully consider the loom size and yarn weight when making a loom knit ear warmer. These choices will determine the width, thickness, and texture of the ear warmer, allowing you to create a personalized and functional accessory. Experiment with different loom sizes and yarn weights to find the perfect combination for your desired ear warmer.
Understanding the Basic Stitches for Loom Knitting
When it comes to loom knitting, it’s important to understand the basic stitches in order to create beautiful and functional projects. Loom knitting is a technique that uses a circular or rectangular loom made of pegs to create knit stitches. This method is great for beginners or those who have difficulty using traditional knitting needles.
The knit stitch: The most basic stitch in loom knitting is the knit stitch. It creates a smooth, V-shaped pattern and is similar to the stockinette stitch in traditional knitting. To create a knit stitch, bring the working yarn behind the first peg, then use a knitting tool to pull the working yarn through the loop on the peg. Repeat this process for each peg until you reach the end of the row.
The purl stitch: The purl stitch is another important stitch to learn in loom knitting. It creates a textured pattern and is the reverse of the knit stitch. To create a purl stitch, bring the working yarn in front of the first peg, then use a knitting tool to pull the working yarn through the loop on the peg. Repeat this process for each peg until you reach the end of the row.
The e-wrap stitch: The e-wrap stitch is a variation of the knit stitch and is great for creating ribbing or a stretchy edge. To create an e-wrap stitch, wrap the working yarn around the peg in a clockwise direction, forming a loop. Then, use a knitting tool to pull the bottom loop over the top loop and over the peg. Repeat this process for each peg until you reach the end of the row.
The garter stitch: The garter stitch is created by alternating between knit and purl stitches. It creates a fabric that has rows of ridges and is great for creating scarves or blankets. To create the garter stitch, alternate between knitting and purling each row.
The stockinette stitch: The stockinette stitch is created by knitting one row and purling the next row. It creates a smooth fabric with a V-shaped pattern on one side and a textured pattern on the other side. To create the stockinette stitch, alternate between knitting and purling each row.
Casting on and Setting up Your Loom
Before you can start knitting your ear warmer, you need to cast on and set up your loom. Following these steps will ensure that your project starts off smoothly and that your stitches are evenly spaced.
To begin, make sure you have all the necessary tools and materials, including your loom, yarn, and a loom hook. Select a loom with an appropriately sized peg spacing for your desired gauge and yarn weight.
Casting On
The first step is to cast on your stitches. Start by attaching the yarn to the anchor peg on one side of the loom. Then, bring the yarn behind the first peg on the opposite side of the loom and wrap it around the peg, moving in a clockwise direction. Repeat this process for each peg, creating a loop around each one. Once you have wrapped all the pegs, make another loop around each peg to create a second layer of yarn.
Continue wrapping and looping the yarn around the pegs until you have the desired number of stitches. Remember to keep the tension even, neither too loose nor too tight, to ensure your ear warmer is comfortable to wear. Once you have cast on all your stitches, secure the end of the yarn to the anchor peg and double-check that all the stitches are secure and evenly spaced.
Setting Up the Loom
After casting on, it’s time to set up your loom for knitting. Make sure that the working yarn is coming from the anchor peg side of the loom. Take the loom hook and insert it into the loop of the first stitch, located on the peg closest to the anchor peg. Gently lift the loop over the peg and let it hang behind the loom. Repeat this process for each stitch, working from the anchor peg to the opposite side of the loom.
Once all the stitches have been lifted off the pegs and are hanging freely behind the loom, you are ready to start knitting. Make sure that the loops are not twisted and that the working yarn is in front of the loom. Your loom is now set up and ready for you to begin working on your ear warmer.
Creating the Base Rows of Your Ear Warmer
When it comes to creating a loom knit ear warmer, the first step is to create the base rows. These base rows will serve as the foundation for the rest of your project. Depending on the pattern you’re using, the number of base rows may vary, but it’s important to follow the instructions carefully to ensure the correct size and fit.
To start, you’ll need to gather your materials. This typically includes a loom knitting tool or hook, a loom, and the yarn of your choice. Make sure you have the recommended yarn weight and color as specified in the pattern.
Once you have your materials ready, it’s time to begin creating the base rows. Start by casting on the desired number of stitches onto the loom. This can be done by wrapping the yarn around each peg, starting from the bottom and working your way up. Make sure to keep the tension consistent to ensure an even and neat finish.
After you have cast on all the stitches, you’ll start working the base rows by using the knitting tool to lift the bottom loop over the top loop on each peg. Repeat this process for each peg until you have completed the first row. Be careful not to twist or drop any stitches as you go.
Continue working the base rows following the pattern instructions. This may involve different stitch techniques or variations, so be sure to refer to the pattern for guidance. As you work, periodically try the ear warmer on for size to ensure it fits comfortably around your head.
As you complete each base row, take care to maintain the tension and consistency of your stitches. This will help give your ear warmer a polished and professional look. Once you have finished creating the base rows, you’re ready to move on to the next step of the pattern, whether that’s adding decorative stitches or finishing off the edges.
Adding Decorative Stitches or Patterns
When it comes to creating a loom knit ear warmer, there are many ways to add decorative stitches or patterns to make it unique and visually appealing.
1. Ribbing: One popular option is to incorporate ribbing into the design. Ribbing not only adds texture but also provides a stretchy and snug fit around the head. You can create ribbing by alternating knit and purl stitches in a specific pattern. For example, a common ribbing pattern is K2, P2 (knit 2 stitches, purl 2 stitches) repeated across the row.
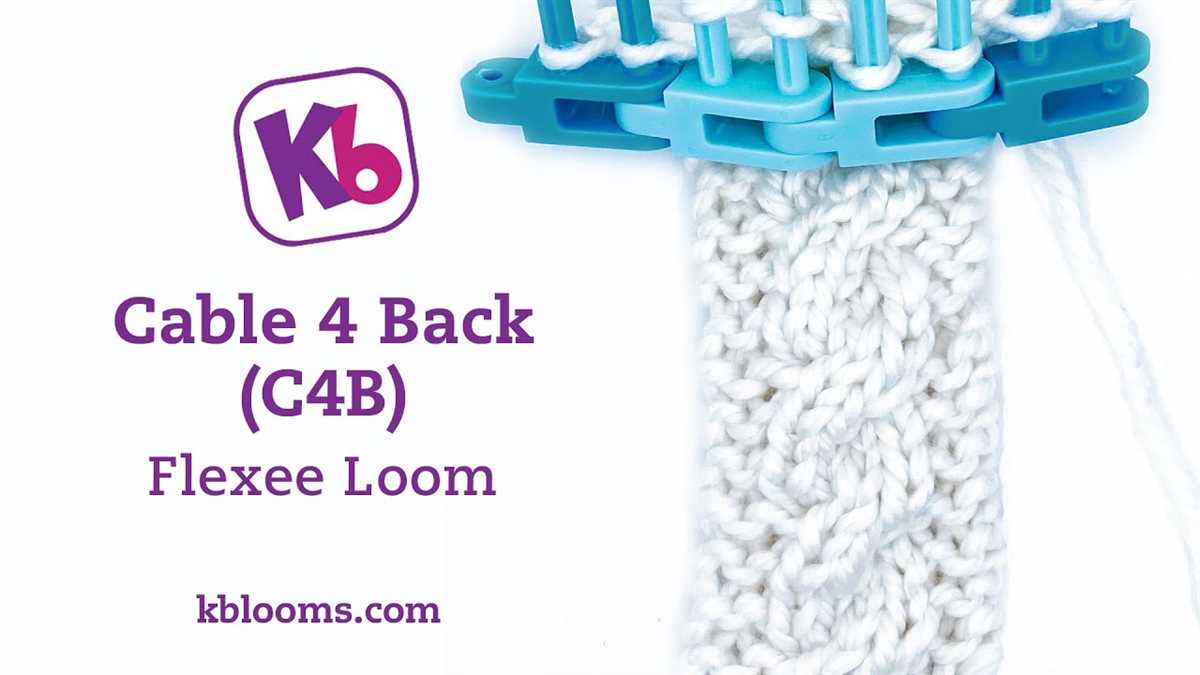
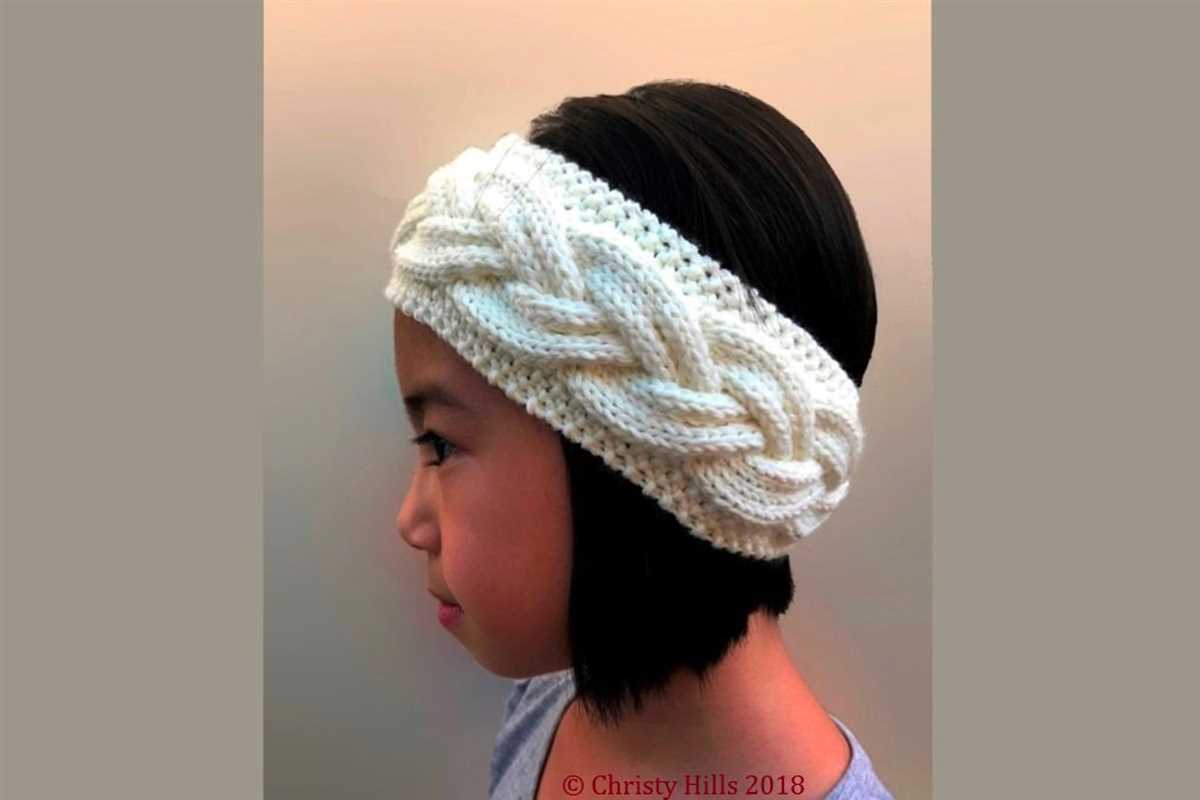
2. Cables: Another decorative option is to add cables to your ear warmer. Cables create a raised, twisted effect that adds dimension and interest to the piece. To create cables, you will need a cable needle or an additional loom hook. You will cross a set number of stitches over each other, creating the cable pattern.
3. Colorwork: If you want to add color to your ear warmer, colorwork is a great technique to use. You can create various patterns and designs by using multiple colors of yarn. Some popular colorwork techniques include fair isle, intarsia, and stranded knitting. With these techniques, you can create intricate patterns and even incorporate images or motifs into your ear warmer.
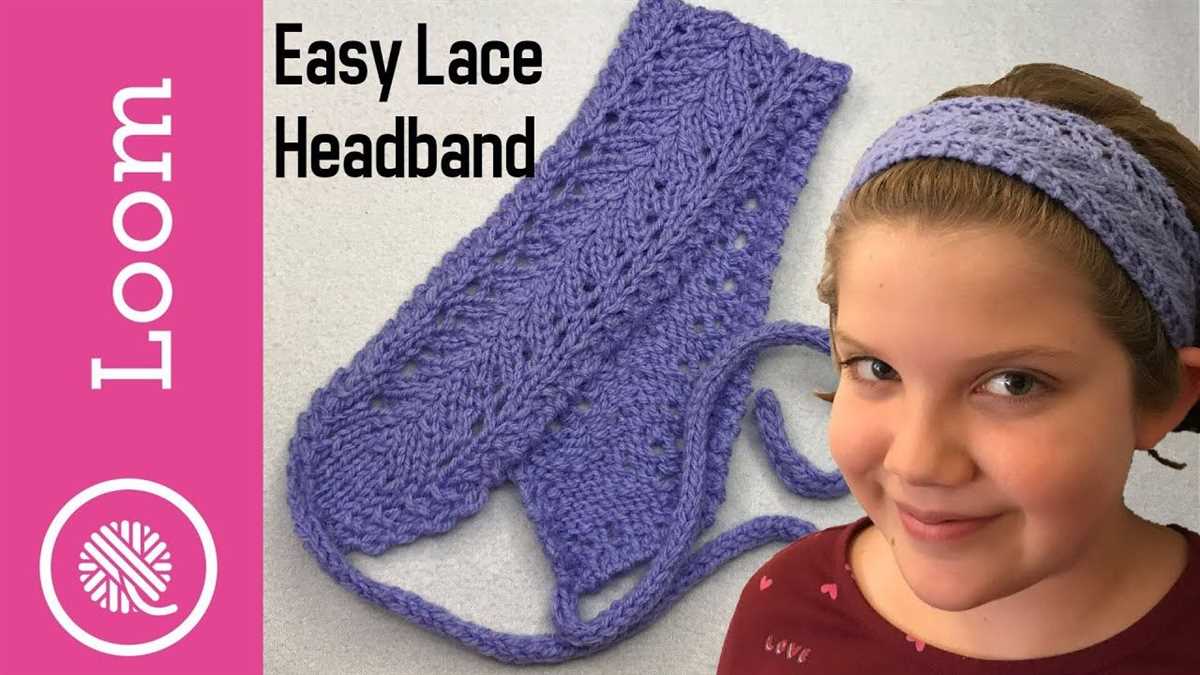
4. Lace or Eyelet Stitches: For a more delicate and feminine look, consider incorporating lace or eyelet stitches into your ear warmer. Lace stitches create open and airy designs, while eyelet stitches create small, decorative holes. These stitches can add a touch of elegance and femininity to your ear warmer.
With these options, you can experiment and get creative with your loom knit ear warmer, making it uniquely yours. Whether you choose ribbing, cables, colorwork, or lace stitches, adding decorative elements will make your ear warmer stand out and showcase your knitting skills.
Increasing or Decreasing Stitches for a Perfect Fit
When knitting an ear warmer pattern, it is important to ensure the perfect fit. One way to achieve this is by increasing or decreasing stitches. By making adjustments to the number of stitches, you can customize the ear warmer to fit your head comfortably.
Increasing Stitches: To increase stitches, you will need to create new stitches within a row. This is typically done by using the knit front and back (KFB) technique or by making yarn overs. By adding more stitches, the ear warmer will become wider and will fit more snugly around the head. You can increase the number of stitches evenly across the row or strategically place the increases to create shaping.
Decreasing Stitches: If you find that your ear warmer is too wide or loose, you can decrease stitches to achieve a better fit. There are several techniques for decreasing stitches, such as the knit two together (K2TOG) or the slip, slip, knit (SSK). These techniques will help narrow the width of the ear warmer and make it fit more securely on the head. Like with increasing stitches, you can decrease evenly across the row or strategically place the decreases to create shaping.
It is important to note that when adjusting the number of stitches, you should always consider the gauge and the desired size of the finished ear warmer. Experimenting with different stitch counts and techniques will help you achieve the perfect fit that is both comfortable and stylish.
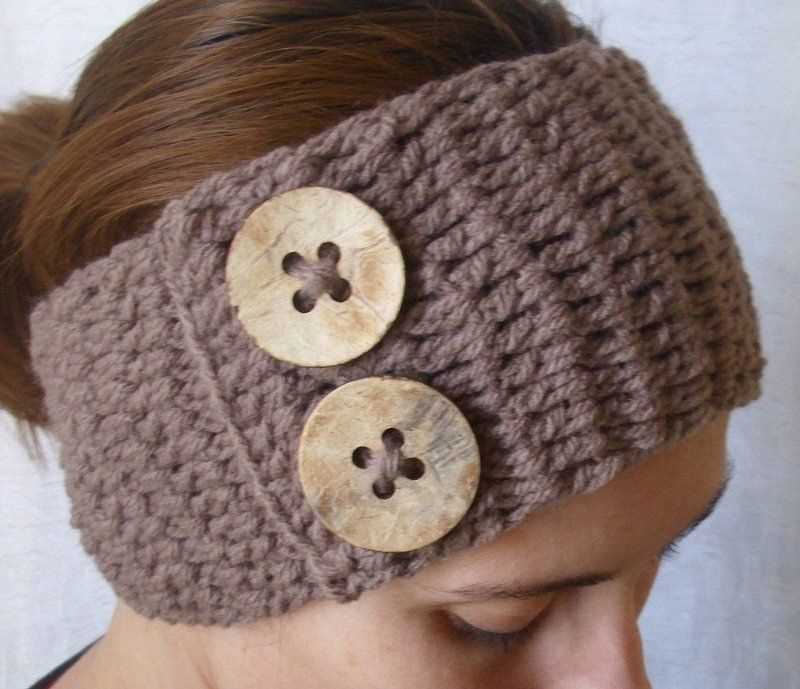
Creating the Buttonholes for Closure
When creating a loom knit ear warmer, it’s important to include buttonholes for closure. This allows the wearer to adjust the fit and secure the ear warmer in place. Fortunately, adding buttonholes to your knitting project is relatively simple and can be done at any point in the process.
Step 1: Begin by deciding where you want the buttonholes to be placed on your ear warmer. This will depend on the size and style of the buttons you plan to use. Generally, two or three evenly spaced buttonholes are sufficient for most ear warmers.
Step 2: To create a buttonhole, you will need to skip a specific number of stitches in your knitting. Determine how many stitches you want to skip and mark the spot with a stitch marker or safety pin. This will serve as a visual guide when you reach that point in your knitting.
Step 3: When you reach the marked stitch, simply skip it and continue knitting the next stitch as usual. This creates an intentional gap in your knitting where the button will eventually be attached.
Step 4: Continue knitting the rest of your ear warmer, following the pattern instructions or your desired design. When you reach the end of your buttonhole row, make sure to knit the next row without skipping any stitches. This will ensure that the buttonhole remains secure and doesn’t unravel.
Step 5: Once your knitting is complete, you can attach your buttons to the ear warmer. Line up the buttonholes with the buttons and sew them into place using a needle and thread.
By following these steps, you can easily create buttonholes for closure on your loom knit ear warmer. This allows for a customizable fit and adds a decorative element to your finished project.
Adding a Ribbed Border for a Neat Finish
When making a loom knit ear warmer, adding a ribbed border can provide a neat and finished look to the project. The ribbed border adds a bit of stretch and texture to the ear warmer, making it more comfortable to wear and helping it stay in place on your head.
To add a ribbed border, you will need to switch to a different stitch pattern. One common stitch pattern for a ribbed border is the 2×2 ribbing. To create this ribbing, you will alternate between knitting two stitches and purling two stitches. This creates a raised ribbed effect that is both visually appealing and functional.
Here’s how to add a ribbed border to your loom knit ear warmer:
- Begin by knitting the main body of the ear warmer using the desired stitch pattern.
- After reaching the desired length for the main body, switch to the 2×2 ribbing stitch pattern.
- To knit the 2×2 ribbing, knit the first two stitches and then purl the next two stitches. Repeat this pattern across the row.
- Continue knitting the 2×2 ribbing for the desired number of rows or until you reach the desired width for the ribbed border.
- Bind off your stitches using a stretchy bind off method, such as the gather bind off or the super stretchy bind off, to ensure that the ribbed border remains stretchy and comfortable to wear.
By adding a ribbed border to your loom knit ear warmer, you can give it a polished and professional look. The ribbed texture adds a touch of elegance to the ear warmer while also ensuring a snug and secure fit. Experiment with different ribbing stitch patterns and widths to create unique and stylish ear warmers that will keep you cozy all winter long.
Finishing and Securing Your Ear Warmer
Once you have finished knitting your ear warmer, it is important to properly finish and secure it to ensure that it stays in place while you wear it. Here are a few steps to follow:
1. Cast off
Start by casting off your ear warmer. This is done by knitting two stitches, then passing the first stitch over the second stitch and off the needle. Repeat this process until you have only one stitch left on your knitting needle. Cut the yarn, leaving a long tail, and thread the tail through the remaining stitch to secure it.
2. Weave in ends
Next, weave in the loose ends of yarn to prevent them from unraveling. Thread the tail of yarn onto a yarn needle and carefully weave it in and out through the stitches on the wrong side of the ear warmer. Make sure to go back and forth multiple times to secure the yarn securely. Trim any excess yarn.
3. Add buttons or embellishments
To add a decorative touch to your ear warmer, you can sew on buttons or embellishments. Choose buttons that match the color and style of your ear warmer and position them where you would like them to be. Sew them on securely using a needle and thread. If you prefer, you can also add other embellishments, such as bows or flowers, using either sewing or glue.
4. Try it on and make adjustments
Before considering your ear warmer complete, try it on and make any necessary adjustments. Ensure that it fits comfortably around your ears and head without being too tight or too loose. If needed, you can tighten or loosen the ear warmer by adding or removing stitches at the cast-on or bind-off edge.
By following these steps, you can finish and secure your loom knit ear warmer to make it ready for wear. Enjoy your cozy and fashionable accessory!
Blocking and Shaping Your Ear Warmer
Blocking and shaping your loom knit ear warmer is an important step to ensure that it fits comfortably and looks great. Here are some tips to help you achieve the perfect fit.
1. Prepare the Ear Warmer for Blocking
Before you begin blocking, make sure your ear warmer is clean and free from any dirt or debris. Fill a basin or sink with lukewarm water and add a mild detergent. Gently swish the ear warmer in the soapy water, then rinse it thoroughly with clean water. Squeeze out excess water, but do not wring or twist the fabric.
2. Stretch and Shape the Ear Warmer
To shape your ear warmer, you will need a blocking board or a clean towel. Lay the ear warmer flat on the board or towel, and gently stretch it to the desired width and length. Smooth out any wrinkles or unevenness in the fabric. Pin the edges in place using rust-proof pins, making sure the fabric stays stretched and the shape is maintained. Allow the ear warmer to dry completely in this stretched position.
3. Optional: Steam Blocking
If you want to enhance the shaping and definition of your ear warmer, you can use a steam iron with a pressing cloth. Hold the iron a few inches away from the fabric and gently steam the ear warmer. Be careful not to touch the iron directly to the fabric to avoid any damage. This step can help set the shape and remove any remaining wrinkles.
4. Final Touches
Once your ear warmer is completely dry, remove the pins and check the shape. If necessary, gently stretch or reshape the fabric again. Trim any loose threads, and your ear warmer is ready to wear or gift!
By following these steps, you can ensure that your loom knit ear warmer has a professional finish and fits snugly and comfortably around your ears. Blocking and shaping not only improves the appearance of your project but also helps the yarn relax and settle into its final shape.
Embellishing and Personalizing Your Ear Warmer
If you want to add a personal touch to your loom knit ear warmer, there are plenty of ways to embellish it and make it truly unique. One option is to use different colors of yarn to create stripes or patterns. You could also try using different stitch patterns to add texture and visual interest to your ear warmer.
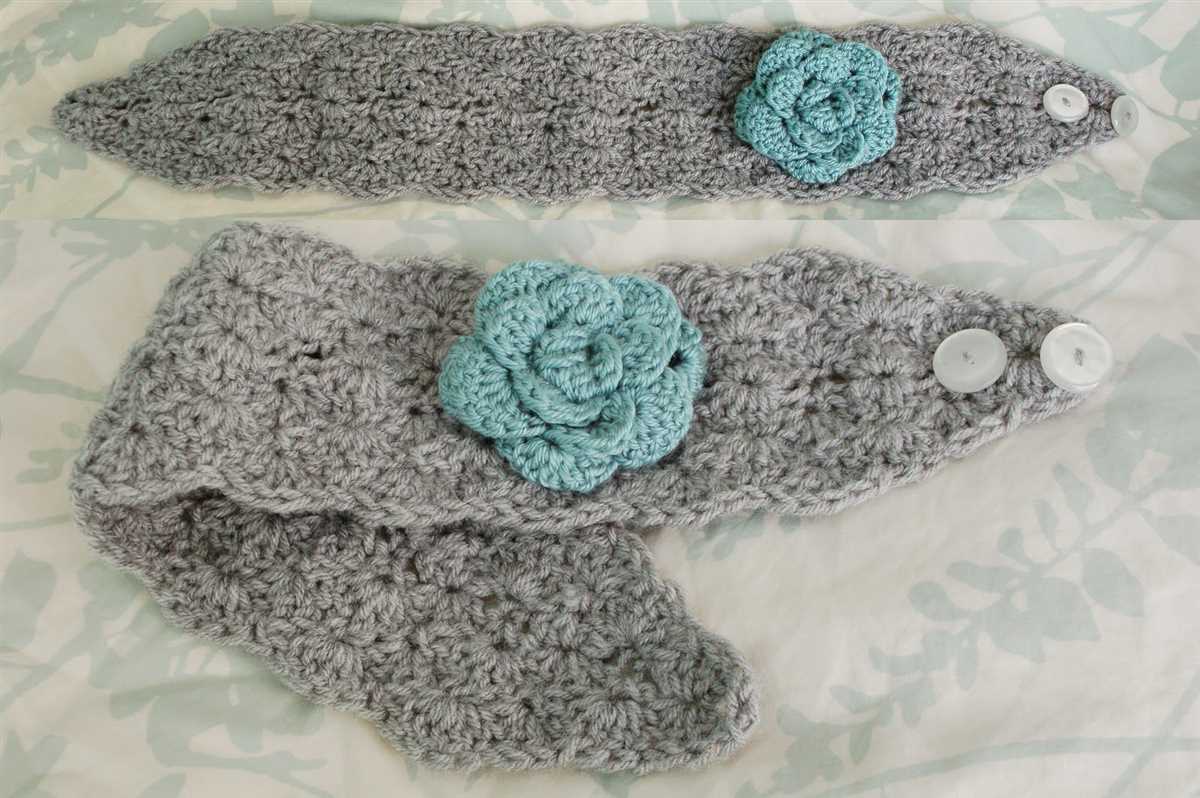
Another way to personalize your ear warmer is by adding embellishments such as buttons, beads, or appliques. You could sew on some small flowers or bows, or even attach a decorative brooch. These small details can make a big difference in the overall look of your ear warmer and make it stand out.
One fun idea is to add some embroidery to your ear warmer. You could embroider your initials or add a simple design such as flowers or stars. This can give your ear warmer a handmade and customized touch.
If you’re feeling crafty, you could also try adding some crochet or knit accents to your ear warmer. You could crochet a small flower or a border, or knit a cable or lace panel. These additional elements can make your ear warmer even more special.
Lastly, don’t forget to consider the practicality of your embellishments. Be careful not to add anything that could be uncomfortable or get in the way, especially if you plan on wearing your ear warmer for extended periods of time.
Tips for Caring and Maintaining Your Loom Knit Ear Warmer
Once you have completed your loom knit ear warmer, it’s important to properly care for it to ensure its longevity and continued use. Here are some tips to help you care for and maintain your ear warmer:
- Hand wash: It is recommended to hand wash your loom knit ear warmer using mild soap and lukewarm water. Gently agitate the ear warmer in the water and rinse it thoroughly. Avoid using harsh detergents and bleach, as they can damage the fibers.
- Dry flat: After washing, reshape the ear warmer and lay it flat on a clean towel to dry. Avoid hanging or wringing it, as this can stretch or distort the shape of the ear warmer.
- Avoid excessive heat: Do not expose your loom knit ear warmer to excessive heat, such as direct sunlight or heat from a dryer. Excessive heat can cause the fibers to shrink or become brittle.
- Store properly: When not in use, store your ear warmer in a clean, dry place to protect it from dust and moisture. You can also place it in a sealed bag or container to prevent any damage from insects or pests.
- Avoid sharp objects: Be mindful of sharp objects, such as jewelry or Velcro, that can snag or pull the fibers of your ear warmer. Avoid wearing it in situations where it may come into contact with sharp or abrasive surfaces.
By following these tips, you can ensure that your loom knit ear warmer remains in good condition and continues to provide warmth and comfort for years to come.