
Knitting is not just a hobby, it is a form of art that allows you to create beautiful and functional items with just a pair of needles and some yarn. One of the most popular knitting projects is a blanket, as it is both practical and comforting.
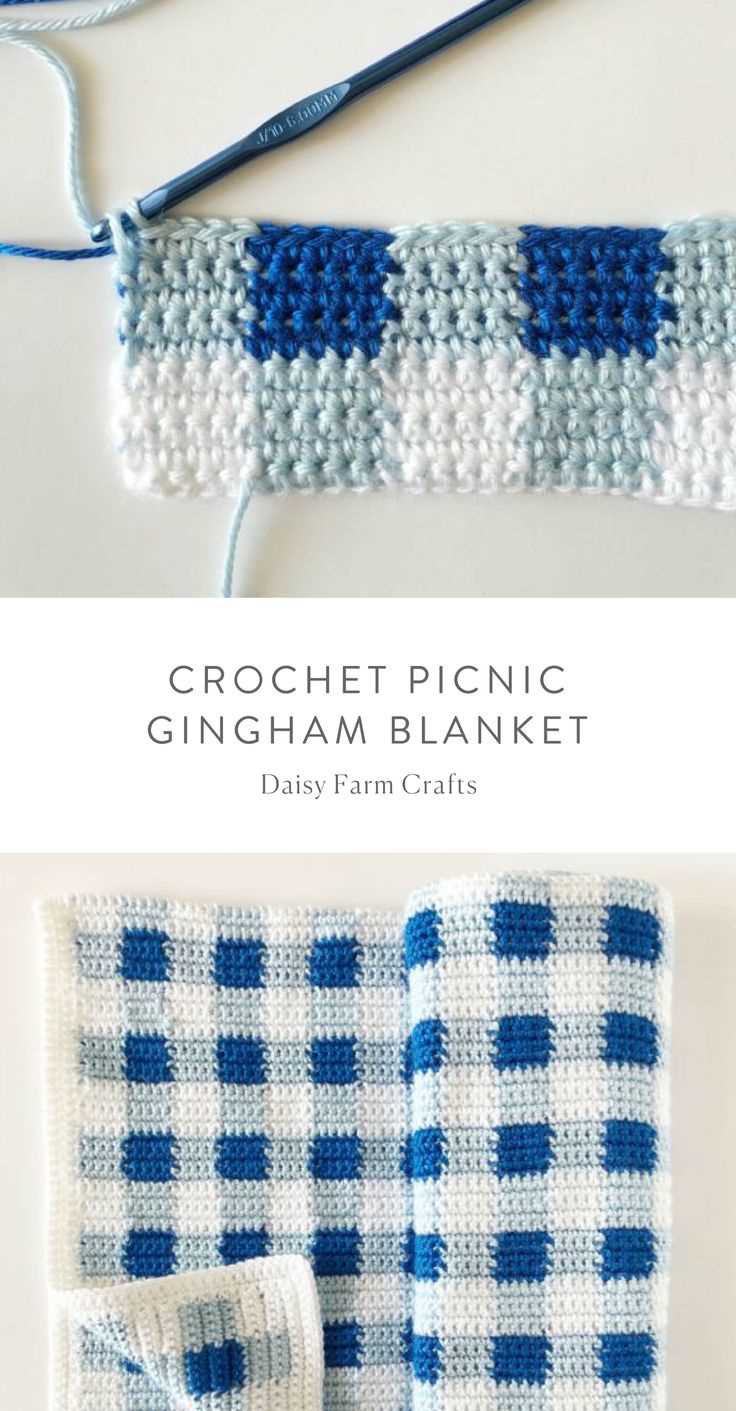
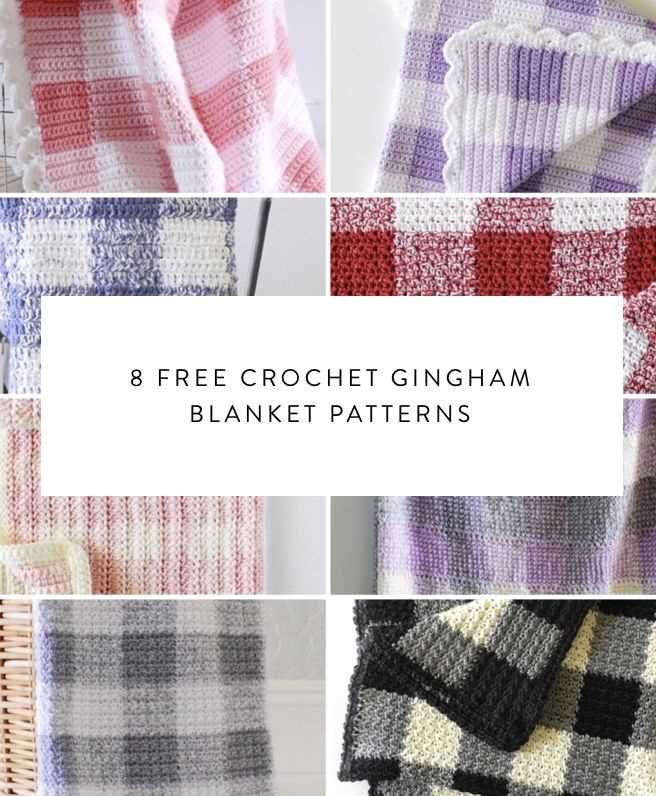
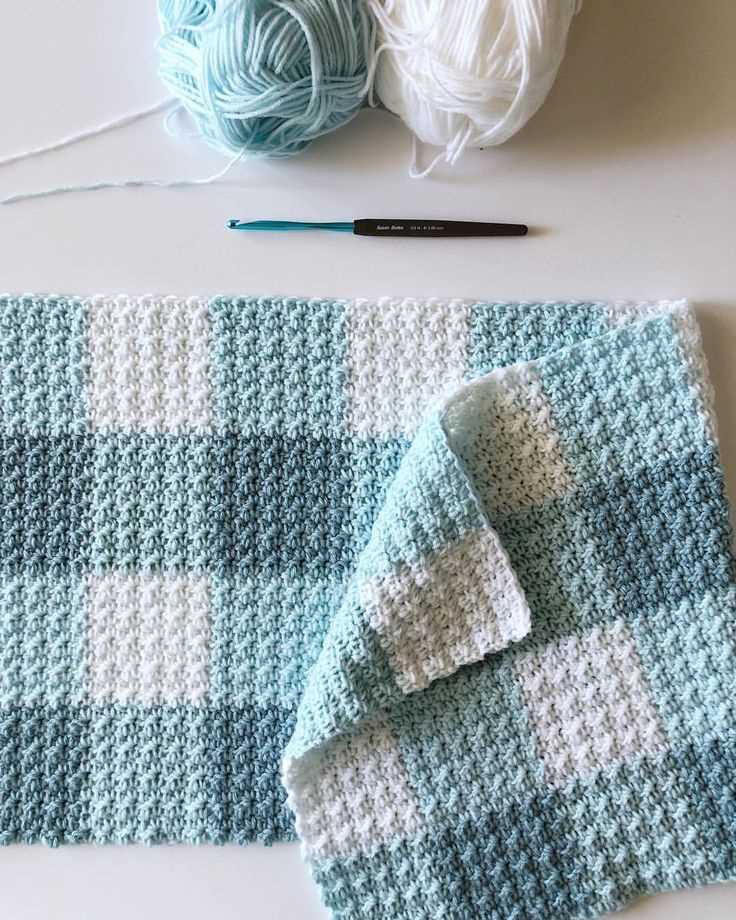
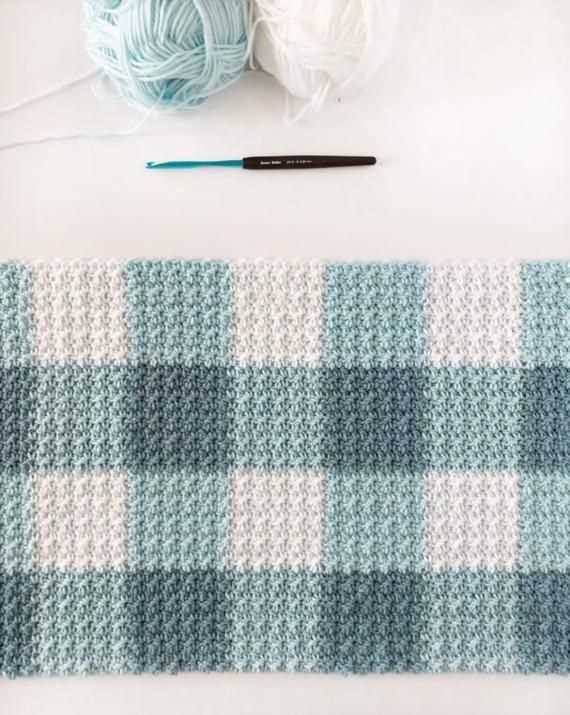
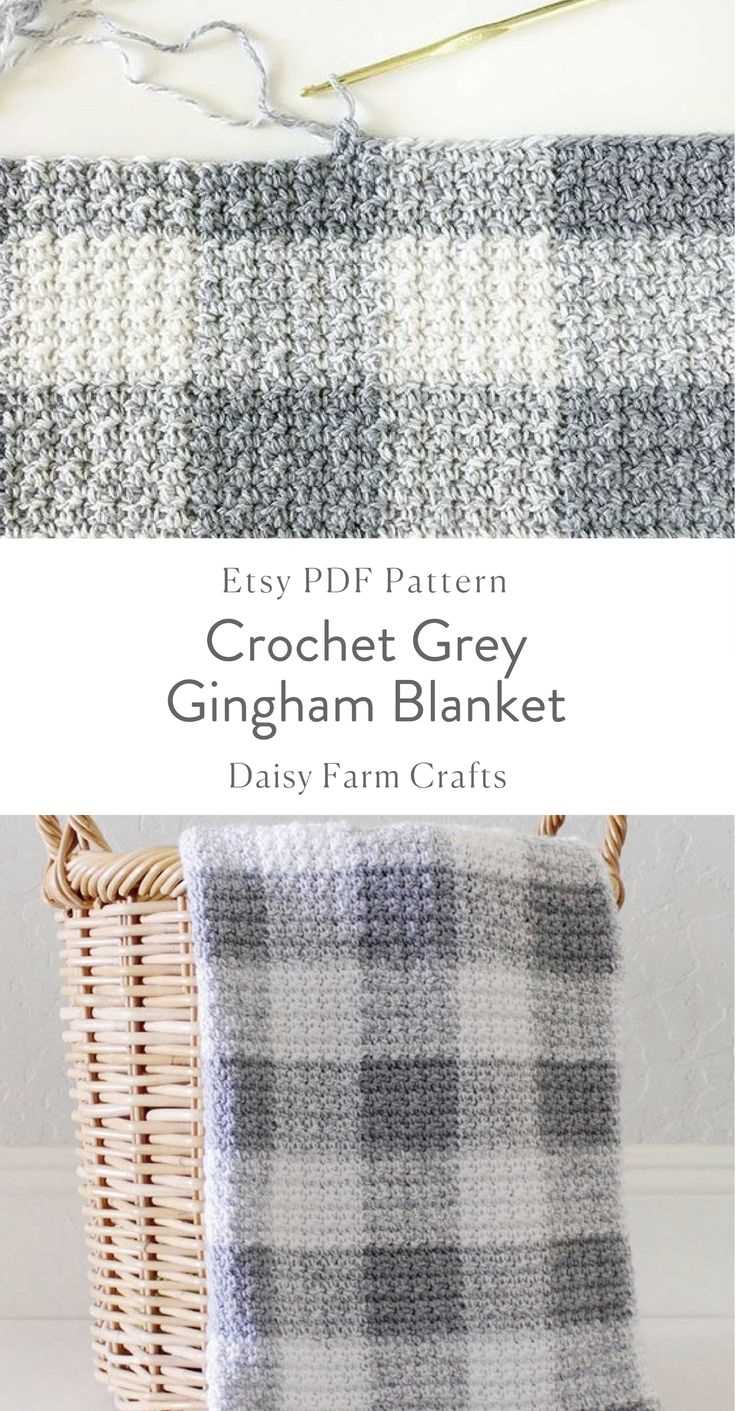
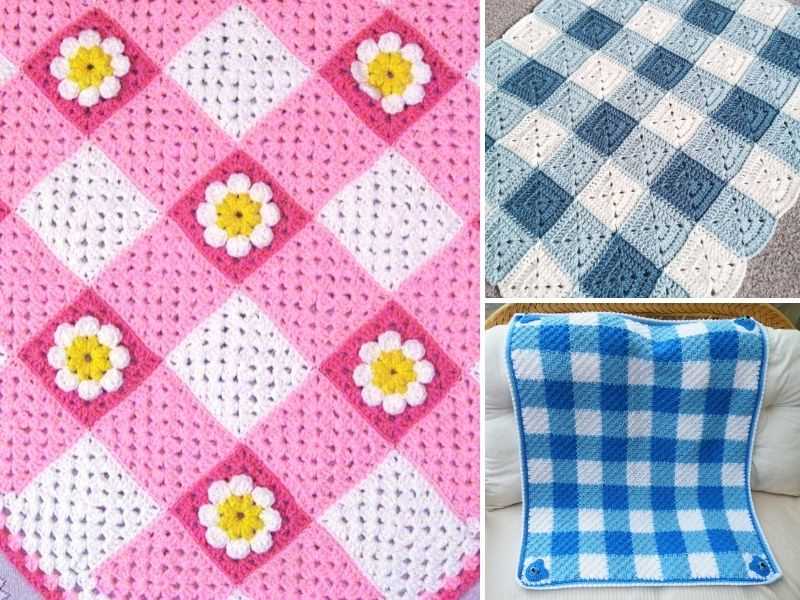
If you are looking for a knitting project to take on, why not try your hand at a gingham blanket? The gingham pattern is characterized by its checkered design, which is achieved by alternating colors in a simple grid pattern. This pattern can be used to create a wide range of items, from scarves to dishcloths, but it is particularly striking when used in a blanket.
Creating a gingham blanket requires some basic knitting skills, such as casting on, knitting, and purling. The pattern itself is quite simple and can easily be customized to suit your preferences. You can choose any colors you like, whether you want a classic black and white gingham or something more vibrant and colorful.
In this article, we will provide step-by-step instructions for knitting a gingham blanket, along with some tips and tricks to help you along the way. So grab your yarn and needles, and let’s get started on creating a beautiful gingham blanket that is sure to be treasured for years to come!
Gingham Blanket Knitting Pattern
The gingham blanket is a classic knitting pattern that creates a beautiful checkered design. With its timeless appeal, this blanket is a perfect addition to any home décor. Whether you’re a beginner or an experienced knitter, this pattern is versatile and easy to follow.
To get started, you will need two contrasting colors of yarn and a pair of knitting needles. The gingham pattern is created by alternating between the two colors every few rows. This creates a checkerboard effect that adds depth and interest to the blanket.
Materials:
- Two contrasting colors of yarn (worsted weight)
- Size 8 knitting needles
- Yarn needle for finishing
- Scissors
Instructions:
- Cast on an even number of stitches using your main color.
- Knit the first row with your main color.
- Switch to your contrast color and knit the second row.
- Continue alternating between the two colors every two rows, knitting the first row and purling the second row of each color.
- Repeat this pattern until the blanket reaches your desired length.
- Bind off all stitches and weave in any loose ends.
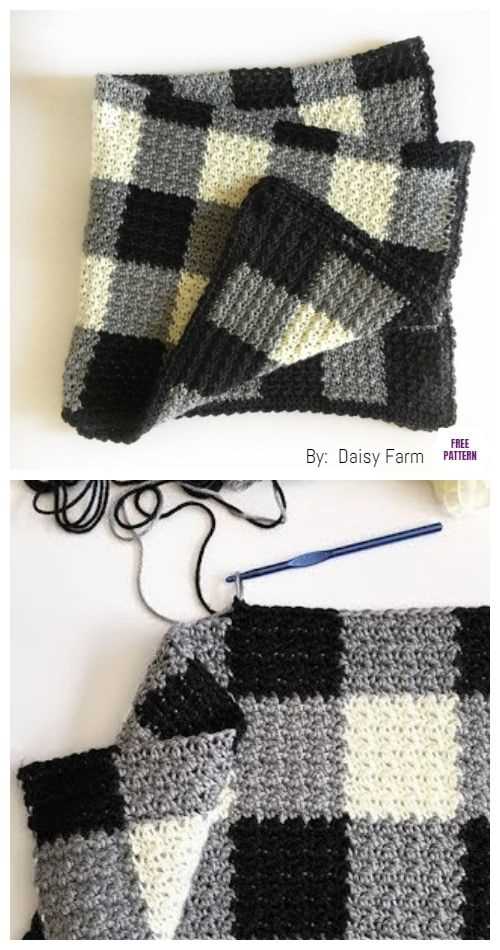
The gingham blanket knitting pattern is a relaxing and enjoyable project that will result in a cozy and stylish addition to your home. Whether you choose to use traditional colors like black and white or experiment with different color combinations, the gingham pattern is sure to impress. Get creative and customize your blanket to fit your personal style!
Choosing Yarn and Needles
Choosing the right yarn and needles for your gingham blanket knitting project is crucial to achieving the desired results. The choice of yarn will determine the overall look and feel of your blanket, while the choice of needles will determine the size and tension of your stitches.
Yarn: When selecting yarn for your gingham blanket, consider the weight, fiber content, and color. The weight of the yarn should be suitable for the blanket size you wish to create. A lighter weight yarn will result in a daintier blanket, while a heavier weight yarn will produce a chunkier, more substantial blanket. As for fiber content, wool and acrylic blends are commonly used for blankets because they offer warmth and durability. The color choice is where the gingham pattern comes into play – opt for contrasting colors that will create the iconic gingham checkered effect.
Needles: The size of your knitting needles will affect the tension and overall size of your stitches. Choose a needle size that matches the recommended gauge for the yarn you have chosen. The gauge is typically indicated on the yarn label or in the knitting pattern. Circular needles are often preferred for blankets as they allow for easier stitching of larger projects. Make sure to also consider your personal knitting style and comfort – some knitters may prefer metal needles for their smoothness, while others may prefer wooden needles for their warmth and grip.
Overall, taking the time to carefully choose the right yarn and needles for your gingham blanket knitting project will significantly impact the outcome. Experiment with different options, keeping in mind the desired size, texture, and appearance of your blanket. Remember, your choices will ultimately determine the success and satisfaction of your knitting project.
Getting Started
Knitting a gingham blanket is a fun and rewarding project for knitters of all skill levels. Whether you’re a beginner looking for a challenge or an experienced knitter wanting to try something new, this pattern is perfect for you. The gingham pattern creates a classic and timeless design that will add charm to any home.
Materials Needed:
- Yarn in two contrasting colors (e.g. white and blue)
- Knitting needles in the appropriate size for your yarn
- Scissors
- Tapestry needle
Step 1: Choosing Yarn
First, you’ll need to choose your yarn colors. The gingham pattern typically uses two contrasting colors to create the checkerboard effect. Consider using colors that complement each other and match your home decor. Worsted weight yarn is a good choice for this project, as it provides a nice balance between warmth and stitch definition.
Step 2: Casting On
To start your gingham blanket, cast on the desired number of stitches. The number of stitches will depend on your desired blanket size and gauge. You can use the long tail cast on method or any other cast on method you prefer. Make sure to leave a long enough tail for weaving in later.
Step 3: Knitting the Rows
Next, you’ll start working the gingham pattern by knitting the rows. The pattern consists of alternating blocks of color, creating a checkerboard effect. Follow the color chart or pattern instructions to determine when to switch colors. You may need to carry the unused color up the side of the work to be picked up later.
Step 4: Changing Colors
When changing colors, make sure to carry the yarn up the side of the work to avoid loose strands on the back. You can twist the two colors at the beginning of each row to secure the yarn and prevent holes in your work. Remember to weave in any loose ends at the end of each color block to keep your blanket looking neat.
Step 5: Finishing Off
Once you have completed the desired number of rows and achieved the desired size, it’s time to finish off your gingham blanket. Bind off the stitches using a stretchy bind off method to allow for easy blocking and stretching of your blanket. Weave in any remaining loose ends and trim off excess yarn.
With these steps, you’re well on your way to creating a beautiful gingham blanket. Enjoy the process of knitting and see your masterpiece come to life with each stitch.
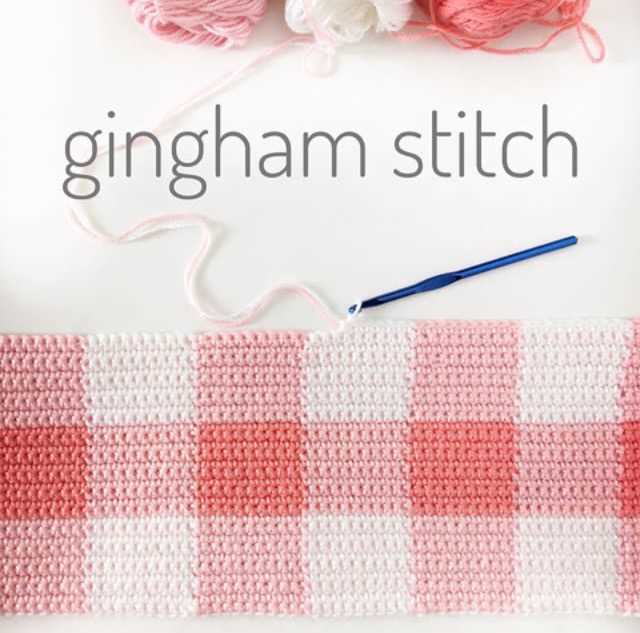
How to Create the Gingham Pattern
Creating a gingham pattern in your knitting project can add a classic and timeless touch to your finished piece. The gingham pattern involves alternating blocks of contrasting colors to mimic the look of a gingham fabric. Here’s a step-by-step guide on how to create the gingham pattern in your knitting.
Step 1: Choose your colors
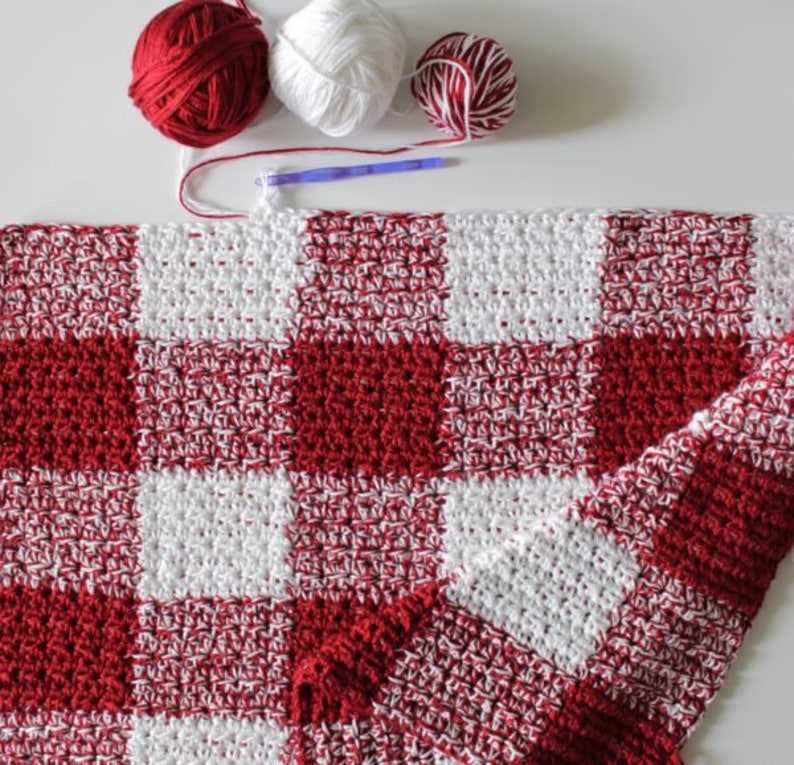
The first step in creating a gingham pattern is to choose your colors. Traditionally, gingham patterns use two contrasting colors, such as white and a bold color like red or blue. However, you can get creative and choose any colors that you prefer. Make sure they contrast well so that the pattern stands out.
Step 2: Determine your gauge and calculate stitches
Before you begin knitting, it’s important to determine your gauge by knitting a swatch. This will help you calculate the number of stitches you’ll need for each block of color in your gingham pattern. Once you have your gauge, calculate the number of stitches needed for each block based on the desired width of your project.
Step 3: Start knitting
Once you have your colors and stitches calculated, it’s time to start knitting. Begin with your first color and knit the desired number of stitches for the first block. Then, switch to your second color and knit the desired number of stitches for the second block. Repeat this process until you have completed the desired length of your project.
Step 4: Repeat the pattern
To create the gingham pattern, continue repeating the alternating blocks of color as established in Step 3. Make sure to maintain the correct stitch count for each block to ensure a consistent and even pattern throughout your project.
Step 5: Finishing touches
Once you have completed the gingham pattern in your knitting project, finish it off with any desired borders, edging, or additional decorative elements. Blocking your project can also help to enhance the appearance of the gingham pattern and ensure that it lays flat.
With these steps, you can easily create a beautiful gingham pattern in your knitting projects. Whether you’re making a cozy blanket or a trendy sweater, the gingham pattern is sure to add a touch of charm and style to your finished piece.
Adding Borders
Adding a border to your gingham blanket can be a great way to give it a finished and polished look. There are several options for borders, depending on the style and design of your blanket. One common option is to use a simple garter stitch border. This involves knitting every stitch on every row, creating a border that lies flat and adds a clean edge to your blanket.
You can also incorporate different stitch patterns into your border for added interest. For example, you could use a seed stitch border, which alternates between knit and purl stitches, creating a textured and slightly bumpy edge. Another option is a ribbed border, which involves alternating knit and purl stitches in a specific pattern. This can create a stretchy and decorative border.
If you want to add a pop of color to your blanket, consider using a contrasting yarn for the border. This can create a visually striking effect and draw attention to the edge of your blanket. You could also experiment with different color combinations for a unique and personalized look.
When adding a border, it’s important to measure your blanket accurately to determine the number of stitches needed. You may need to adjust your stitch count or gauge to ensure that the border fits properly. It’s also a good idea to swatch your chosen stitch pattern before starting the border to ensure that you’re happy with the result.
Overall, adding a border to your gingham blanket can be a fun and creative way to customize your project. Whether you choose a simple garter stitch border or experiment with different stitch patterns and colors, a well-executed border can elevate your blanket and give it a professional finish.
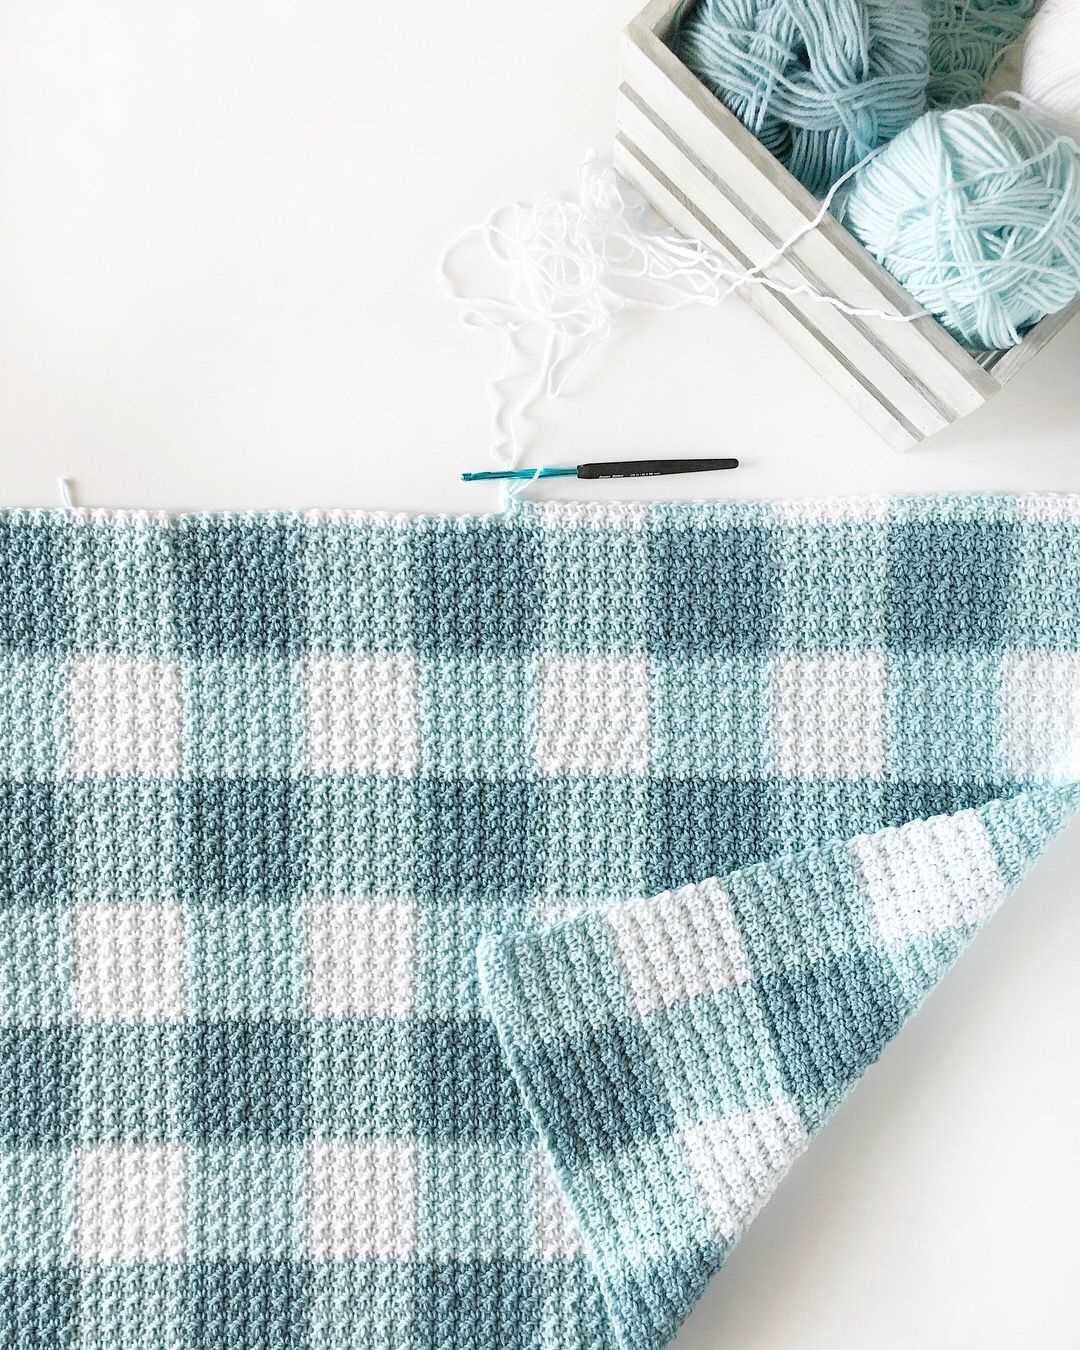
Changing Colors
When knitting a gingham blanket, changing colors is an essential element to create the classic checkered pattern. By using different colors of yarn, you can achieve a beautiful and visually interesting design.
To change colors, simply finish knitting with one color and then join the new color yarn. It is important to secure the loose ends of the yarn so that the color change is secure and doesn’t unravel. You can do this by tying a knot or weaving in the ends with a tapestry needle.
When switching to a new color, it is also important to carry the yarn not in use up the side of your work, so that it is easily accessible when you need to switch back. This will help to create a clean and neat finish on the backside of the blanket.
When working with multiple colors, it is helpful to use a color chart or write down the color changes in your pattern. This will ensure that you keep track of where each color should be used and avoid any mistakes in the pattern. Additionally, it can be useful to use stitch markers or safety pins to mark the color changes, making it easier to follow your pattern.
Experimenting with different color combinations can add a personal touch to your gingham blanket. You can choose colors that coordinate with your home decor or opt for contrasting shades to make a bold statement. The possibilities are endless when it comes to choosing colors for your gingham blanket.
Blocking and Finishing
Blocking is an important step in finishing your gingham blanket. It involves shaping and resizing the blanket to give it a polished look. To block your blanket, you will need a large flat surface, such as a clean hardwood floor or a blocking board.
First, soak your blanket in lukewarm water with a gentle soap for about 15-20 minutes. Gently squeeze out the excess water, being careful not to twist or wring the fabric. Lay the blanket flat on your blocking surface, making sure to smooth out any wrinkles or creases.
Next, use rustproof T-pins to secure the edges of the blanket to the blocking surface, stretching the fabric gently as you go to achieve the desired size and shape. Pay special attention to the corners and edges to ensure they lay flat and straight. Allow the blanket to air dry completely, which may take several days.
Once the blanket is dry, you can finish it off with some decorative touches. One option is to add a border to the edges using a coordinating color yarn. You can choose a simple garter or seed stitch border, or get creative with a lace or cable pattern. To add the border, pick up stitches along the edge of the blanket and work in your chosen stitch pattern for the desired length.
Finally, weave in any loose ends from changing colors or joining yarn. Use a blunt-ended tapestry needle to thread the yarn through the stitches on the wrong side of the fabric, being careful not to pull too tightly or leave any visible loops. Trim any excess yarn, and your gingham blanket is now ready to be enjoyed or gifted to someone special.
Tips for Beginner Knitters
If you are new to knitting, don’t worry! With a little practice and patience, you can become a skilled knitter in no time. Here are some tips to help you get started:
1. Start with simple projects: As a beginner, it’s best to start with easy knitting patterns. This will help you understand the basic techniques and build your confidence. Scarves, dishcloths, and hats are great beginner projects.
2. Choose the right yarn and needles: There are different types of yarn available, and each has its own texture and thickness. As a beginner, it’s best to choose a medium-weight yarn and a pair of size 8 or 9 knitting needles. These are easy to work with and will give you a good grip.
3. Practice the basic stitches: Knitting involves two basic stitches – the knit stitch and the purl stitch. Take the time to practice these stitches until you feel comfortable with them. They form the foundation of many knitting patterns.
4. Take it slow: Knitting requires concentration and focus, especially when you are learning. Take your time and avoid rushing through the knitting process. It’s better to go slowly and produce high-quality stitches than to hurry and make mistakes.
5. Don’t be afraid to make mistakes: Mistakes happen, even to experienced knitters. Don’t let a dropped stitch or a miscounted row discourage you. Instead, view mistakes as learning opportunities and a chance to improve your skills.
6. Join a knitting group or class: Knitting is a social activity, and learning from others can be very helpful. Consider joining a local knitting group or taking a knitting class. This will provide you with support, guidance, and inspiration from fellow knitters.
7. Have fun and enjoy the process: Knitting can be a relaxing and enjoyable hobby. Embrace the process and take pleasure in the feel of the yarn and the satisfaction of completing a project. Remember, knitting is as much about the journey as it is about the finished product.
8. Keep practicing: Knitting is a skill that improves with practice. Set aside regular time for knitting, even if it’s just a few minutes each day. The more you practice, the better you will become.
9. Experiment and try new things: Once you have mastered the basics, don’t be afraid to experiment and try new knitting techniques or patterns. This will keep your knitting experience fresh and exciting.
10. Stay patient and persistent: Knitting can be challenging at times, but don’t get discouraged. Stay patient and persistent, and remember that even the most experienced knitters started as beginners. With time and practice, you will become a skilled knitter.
Customizing Your Blanket
The gingham blanket knitting pattern provides a beautiful base for creating a personalized and unique blanket. By customizing your blanket, you can add special touches and make it truly one-of-a-kind. Here are a few ways you can customize your gingham blanket:
1. Color Selection
One of the easiest ways to customize your gingham blanket is through color selection. The pattern typically uses two colors for the gingham checks, but you can choose any combination that suits your style and preferences. Consider your color palette and experiment with different combinations to create a visually stunning blanket.
2. Size Adjustment
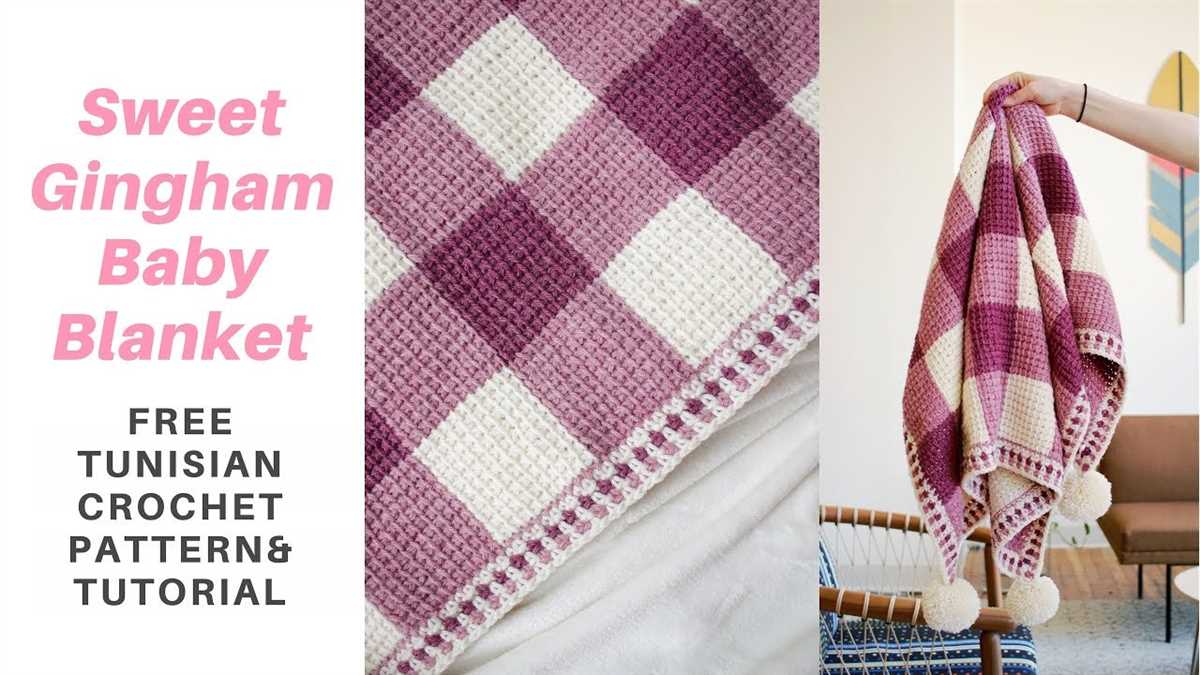
The gingham blanket knitting pattern can be easily adjusted to create a blanket of any size. Whether you want a small baby blanket or a large oversized throw, you can modify the number of stitches and rows to achieve the desired dimensions. Keep in mind that changing the size of the blanket may affect the overall look of the gingham checks, so make sure to take that into consideration.
3. Pattern Variations
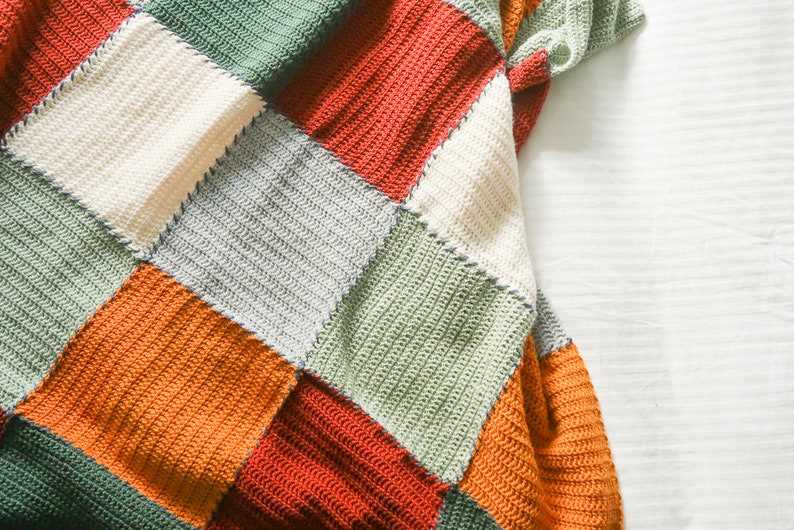
If you want to take your customization to the next level, you can experiment with different pattern variations. For example, instead of traditional gingham checks, you can try creating diagonal stripes or adding additional texture with different stitch patterns. Get creative and explore different options to make your gingham blanket truly unique.
4. Embellishments
To add an extra special touch to your gingham blanket, consider adding embellishments. This could be anything from pom-poms, tassels, or even embroidered details. These little details can make a big difference and add a personal touch to your finished project.
Remember, the gingham blanket pattern serves as a starting point for your creative journey. Feel free to experiment, make changes, and customize the design to suit your preferences. The result will be a beautiful and unique blanket that you can cherish for years to come.
Washing and Care Instructions
When it comes to washing and caring for your gingham blanket, it is important to follow these instructions to ensure its longevity and maintain its softness and appearance.
1. Hand Wash or Delicate Cycle
To protect the delicate fibers of your gingham blanket, it is recommended to either hand wash it or use the delicate cycle on your washing machine. Use a gentle detergent specifically designed for delicate fabrics or wool. Avoid using harsh chemicals or bleach as they can damage the fibers.
2. Use Cold Water
When washing your gingham blanket, always use cold water. Hot water can cause the fibers to shrink and lose their softness. Cold water will help preserve the blanket’s shape and prevent any unwanted changes in texture.
3. Avoid Aggressive Scrubbing
When washing your gingham blanket, avoid aggressive scrubbing or wringing. Instead, gently massage the blanket to remove any dirt or stains. Squeeze out excess water using a soft towel or by pressing the blanket against the edge of the sink or bathtub.
4. Dry Flat
After washing, reshape your gingham blanket and lay it flat to dry. Avoid hanging it or using a dryer, as this can stretch and distort the fabric. Ensure proper air circulation during the drying process to prevent mildew or odors.
5. Store Properly
When not in use, store your gingham blanket in a clean and dry place. Avoid exposing it to direct sunlight or extreme temperatures as this can cause fading or damage to the fibers. If possible, store it in a breathable bag or container to protect it from dust and pests.
By following these washing and care instructions, you can enjoy your gingham blanket for years to come, keeping it soft, cozy, and beautiful.
Creating Matching Accessories
When knitting a gingham blanket, it can be fun to create matching accessories to complement your finished piece. These accessories can include items such as scarves, hats, and even pillow covers. By using the same pattern and color scheme, you can create a cohesive look that ties all of your items together.
Scarves: A gingham scarf can be a stylish addition to your winter wardrobe. Knitted with the same gingham pattern as your blanket, it will create a coordinated look that is both fashionable and cozy. You can choose to make the scarf long and wide for a statement piece, or shorter and narrower for a more subtle accessory. Either way, it will keep you warm and fashionable throughout the colder months.
Hats: Knitting a matching gingham hat can be a great way to complete your ensemble. Whether you prefer a beanie or a slouchy hat, the gingham pattern will add visual interest and tie in with your blanket. A hat made from the same yarn and colors as your blanket will create a cohesive look that is sure to turn heads.
Pillow Covers: Want to give your living space a touch of gingham charm? Knitting matching gingham pillow covers can be a fun and easy way to do so. Simply measure your existing throw pillows and use your gingham blanket pattern to create covers that fit snugly. This will create a cohesive and polished look that ties in with your blanket and adds a cozy touch to your home decor.
Additional Accessories:
- Blanket Bag: Create a custom bag to store your gingham blanket and accessories. This can be a great way to keep everything organized and protected.
- Gloves or Mittens: Knit gloves or mittens to match your gingham ensemble. These will keep your hands warm while adding an extra touch of style.
- Headbands or Ear Warmers: For those chilly days when a hat is too much, a gingham headband or ear warmer can be the perfect accessory. It will keep your ears warm while adding a pop of pattern to your outfit.
By creating matching accessories for your gingham blanket, you can extend the style and versatility of your knitting project. Whether you choose to make scarves, hats, pillow covers, or other accessories, the coordinating patterns and colors will create a cohesive look that is sure to impress.
Final Thoughts

In conclusion, knitting a gingham blanket can be a fun and rewarding project. With its distinctive checkered pattern, the gingham blanket adds a touch of classic charm to any home. Whether you are a beginner or an experienced knitter, this pattern provides an opportunity to learn new techniques and create a beautiful and cozy blanket.
When knitting a gingham blanket, it is important to choose the right yarn and needles to achieve the desired texture and size. Taking the time to swatch and gauge your knitting will ensure that your finished blanket is the perfect fit.
Additionally, experimenting with different color combinations can add a unique twist to your gingham blanket. Whether you prefer traditional black and white or want to explore a more vibrant palette, the possibilities are endless.
In summary, the gingham blanket knitting pattern is a versatile and enjoyable project that allows you to showcase your knitting skills and create a timeless and cozy blanket. So, grab your needles, choose your colors, and get ready to create a beautiful gingham blanket that will be treasured for years to come.
Q&A:
What is a gingham blanket?
A gingham blanket is a type of knitted blanket that has a pattern resembling a checkered fabric.
What materials do I need to knit a gingham blanket?
To knit a gingham blanket, you will need yarn in different colors to create the checkered pattern, knitting needles, and a tapestry needle.
What knitting technique is used to create a gingham pattern?
The gingham pattern is created using the stranded knitting technique, also known as Fair Isle knitting. This technique involves working with two or more colors of yarn in each row.
Are gingham blankets suitable for beginners to knit?
Gingham blankets can be more challenging for beginners due to the stranded knitting technique used to create the checkered pattern. However, with practice and patience, beginners can learn this technique and successfully knit a gingham blanket.
Where can I find a gingham blanket knitting pattern?
You can find gingham blanket knitting patterns in knitting books, online knitting communities, and on various knitting websites. There are also many free gingham blanket patterns available for download.