
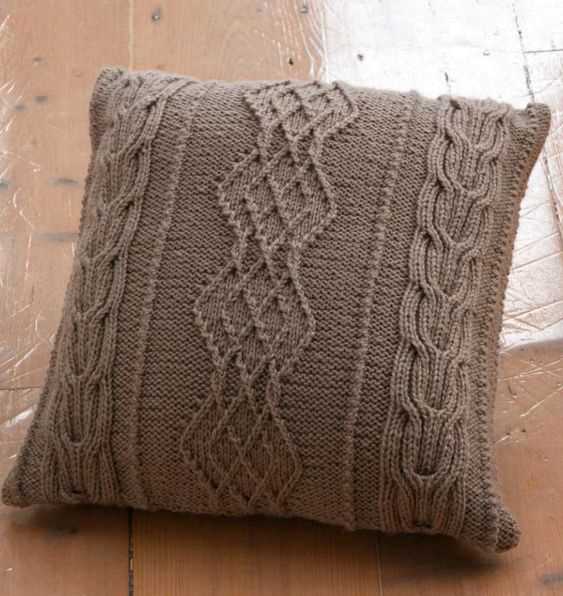
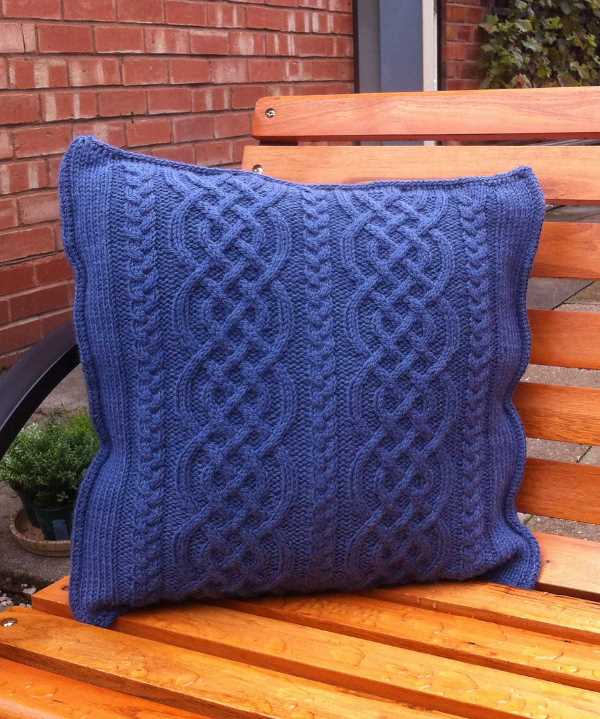
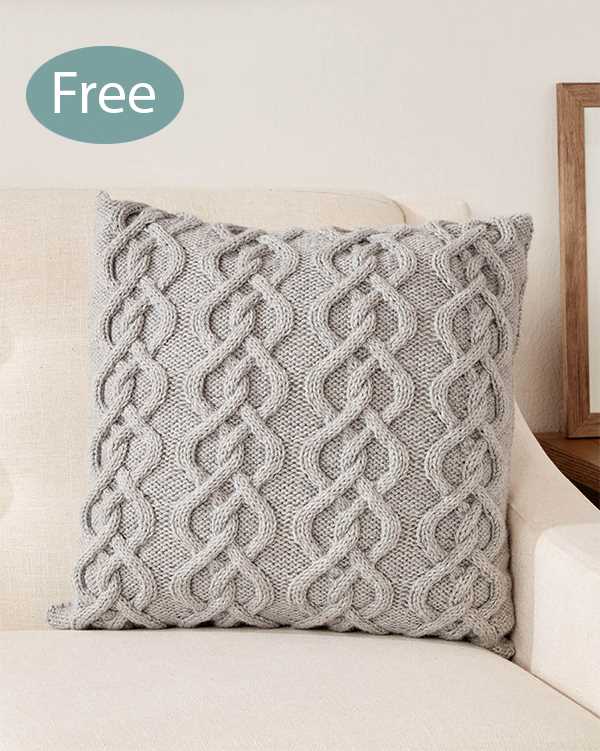
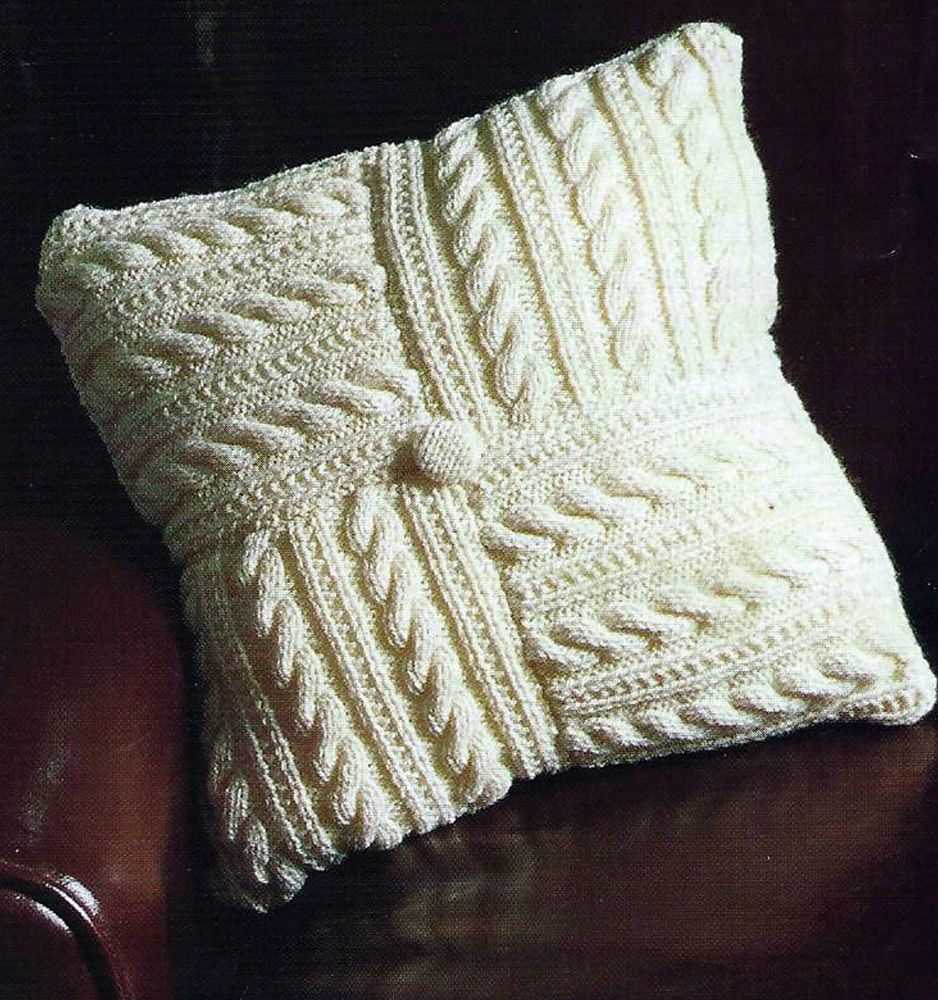
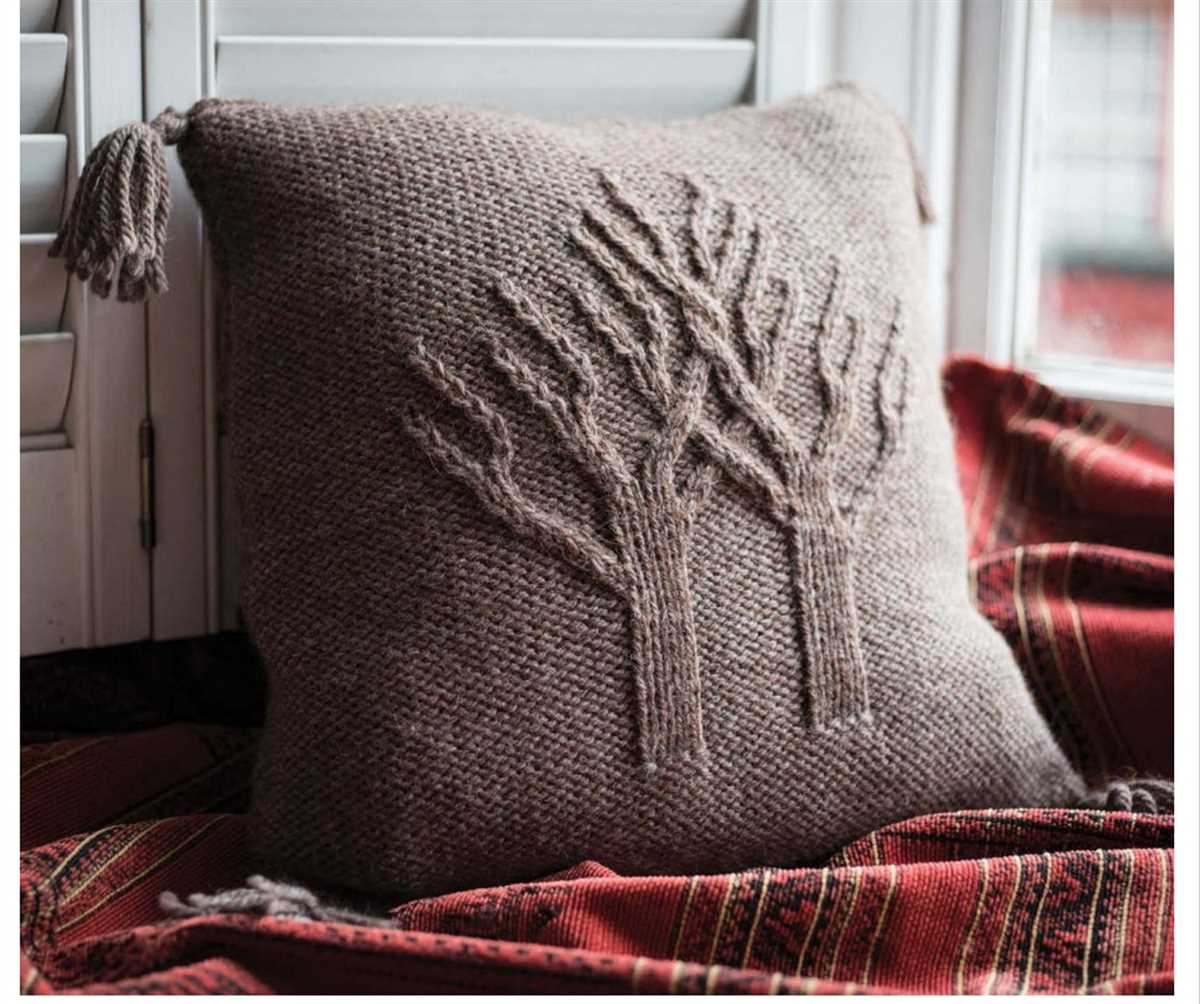
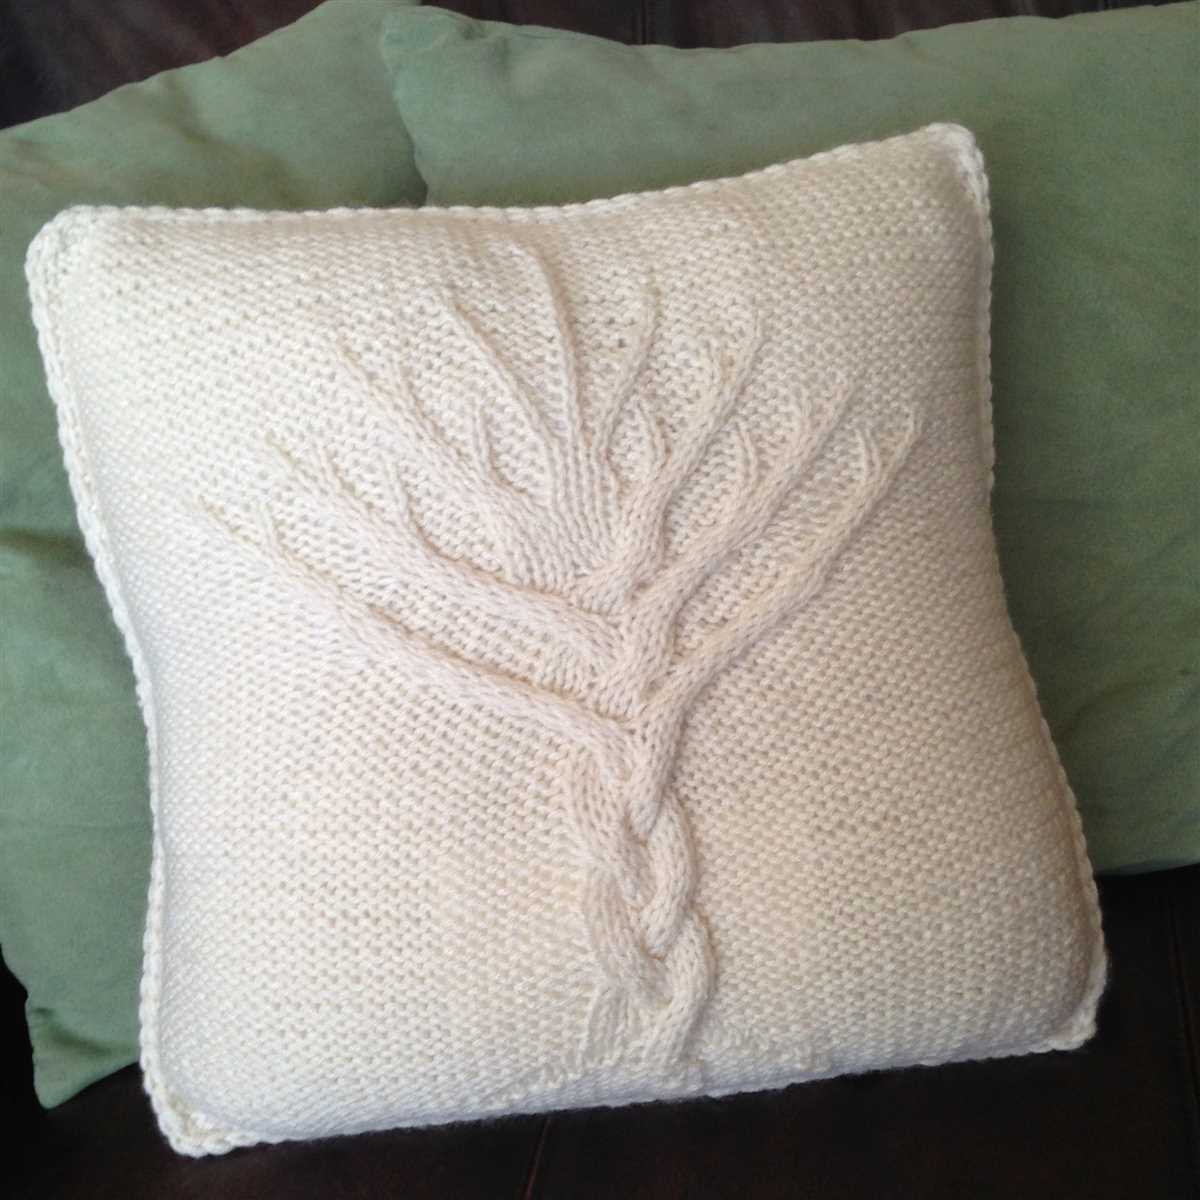
Knitting is a popular craft that allows you to create beautiful and functional items using just a pair of needles and some yarn. One of the most popular knitting patterns is the Aran cushion cover pattern. This pattern features the traditional Aran stitches, which are known for their texture and intricate designs.
The Aran cushion cover pattern is perfect for knitters of all skill levels. Whether you’re a beginner or an experienced knitter, you’ll be able to create a stunning cushion cover using this pattern. The pattern includes detailed instructions and a list of materials needed, making it easy to follow along and create a professional-looking piece.
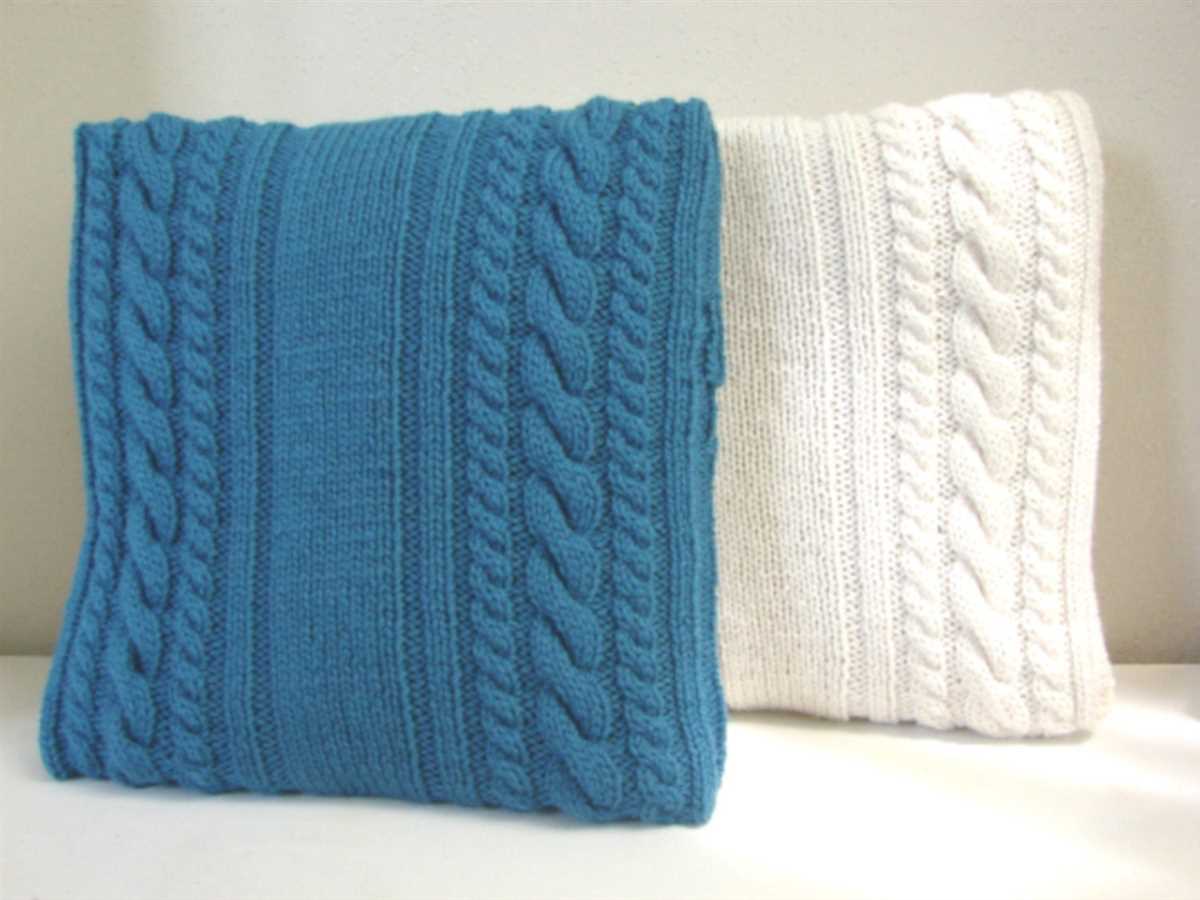
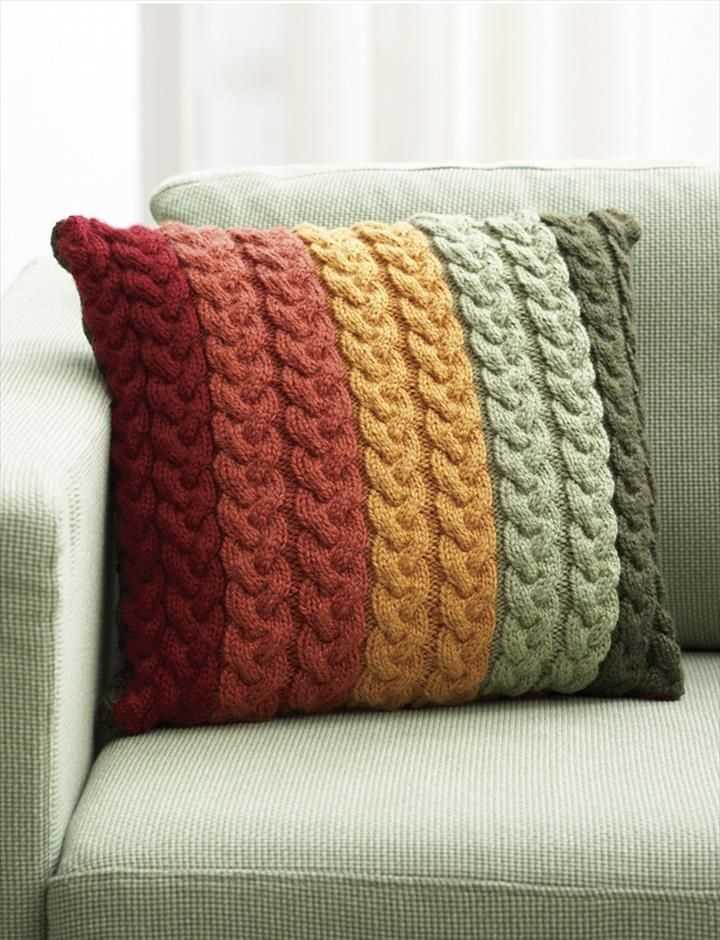
Not only is the Aran cushion cover pattern a fun and rewarding knitting project, but it also allows you to personalize your home decor. By choosing your own colors and yarn, you can create a cushion cover that matches your unique style and complements your existing decor. Whether you prefer a classic and neutral color palette or a bold and vibrant design, the Aran cushion cover pattern has endless possibilities.
So, if you’re looking for a new knitting project to tackle or want to add a touch of handmade charm to your home, give the Aran cushion cover knitting pattern a try. You’ll love the process of creating something beautiful with your own two hands, and you’ll be proud to display your finished cushion cover for years to come.
Aran Cushion Cover Knitting Pattern
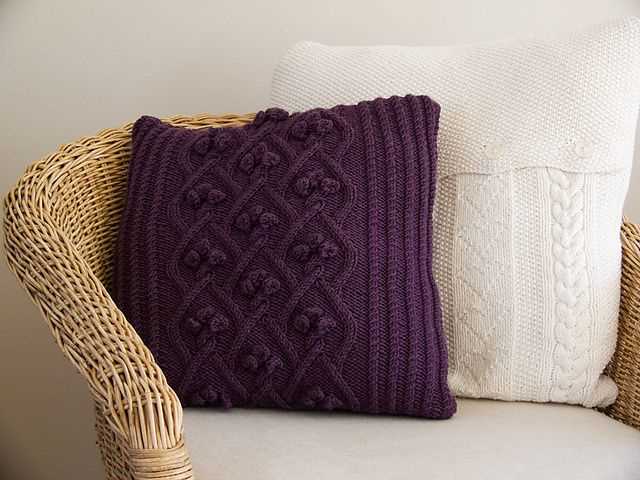
Knitting your own cushion covers can be a fun and rewarding project. With an Aran knitting pattern, you can create a beautiful and textured cushion cover that will add a cozy touch to any room in your home. The Aran knitting technique originates from the Aran Islands off the coast of Ireland and is characterized by its intricate cable patterns.
To get started, you will need a set of knitting needles, a cable needle, and some Aran weight yarn in your chosen color. The pattern may also require you to have some basic knitting skills, such as casting on, knitting, purling, and cabling. The pattern will typically provide you with instructions on how to create the cable patterns, which will involve crossing stitches over each other to create the textured look.
When following the Aran cushion cover knitting pattern, it is important to pay attention to the gauge, as this will affect the size of your finished cushion cover. Gauge refers to the number of stitches and rows per inch, and can be adjusted by changing the size of your knitting needles or the tension in your knitting. The pattern will usually provide you with a gauge to follow, so make sure to check your gauge before starting to ensure that your cushion cover will turn out the correct size.
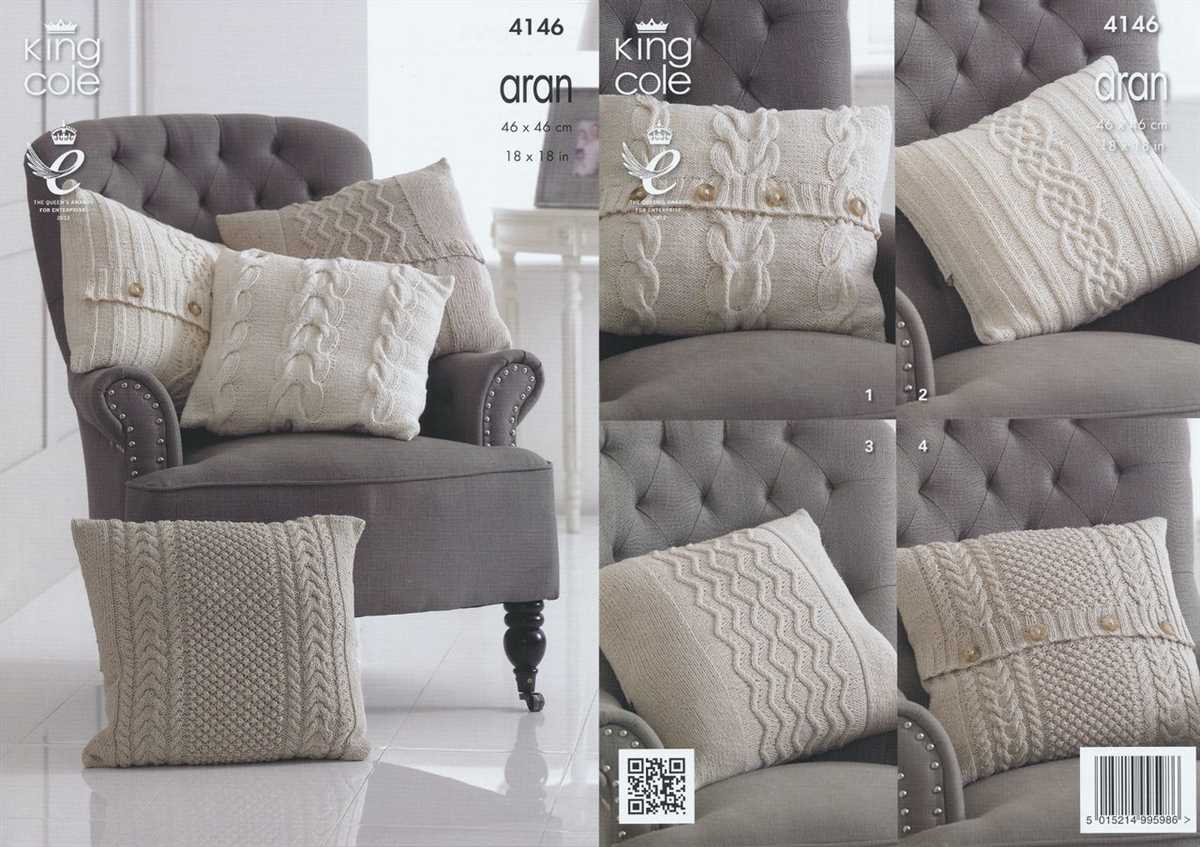
In addition to the cable patterns, the Aran cushion cover knitting pattern may also include instructions for creating a ribbed border, buttonholes, or a zipper closure, depending on your preference. This allows you to customize your cushion cover and make it your own. You can also experiment with different colors and yarns to create a unique look.
Once you have completed your Aran cushion cover according to the pattern, you can insert a pillow form or stuffing into the cover and close it up. Your finished cushion cover will be a beautiful addition to your home decor and a testament to your knitting skills.
Overview
The Aran cushion cover knitting pattern is a popular choice for knitters looking to create a cozy and traditional home accessory. Aran knitting is characterized by its intricate cable patterns and textured stitches, which add depth and visual interest to the finished piece. The cushion cover pattern typically includes instructions for creating a cover that fits a standard-size cushion, and can be customized with different colors and yarn types to suit individual preferences.
When knitting an Aran cushion cover, it is important to select the right yarn and knitting needles to achieve the desired result. Aran weight yarn is recommended for this pattern, as it provides the right thickness and drape for a cushion cover. The knitting needles should be chosen based on the gauge recommended in the pattern, ensuring that the stitches are not too tight or too loose.
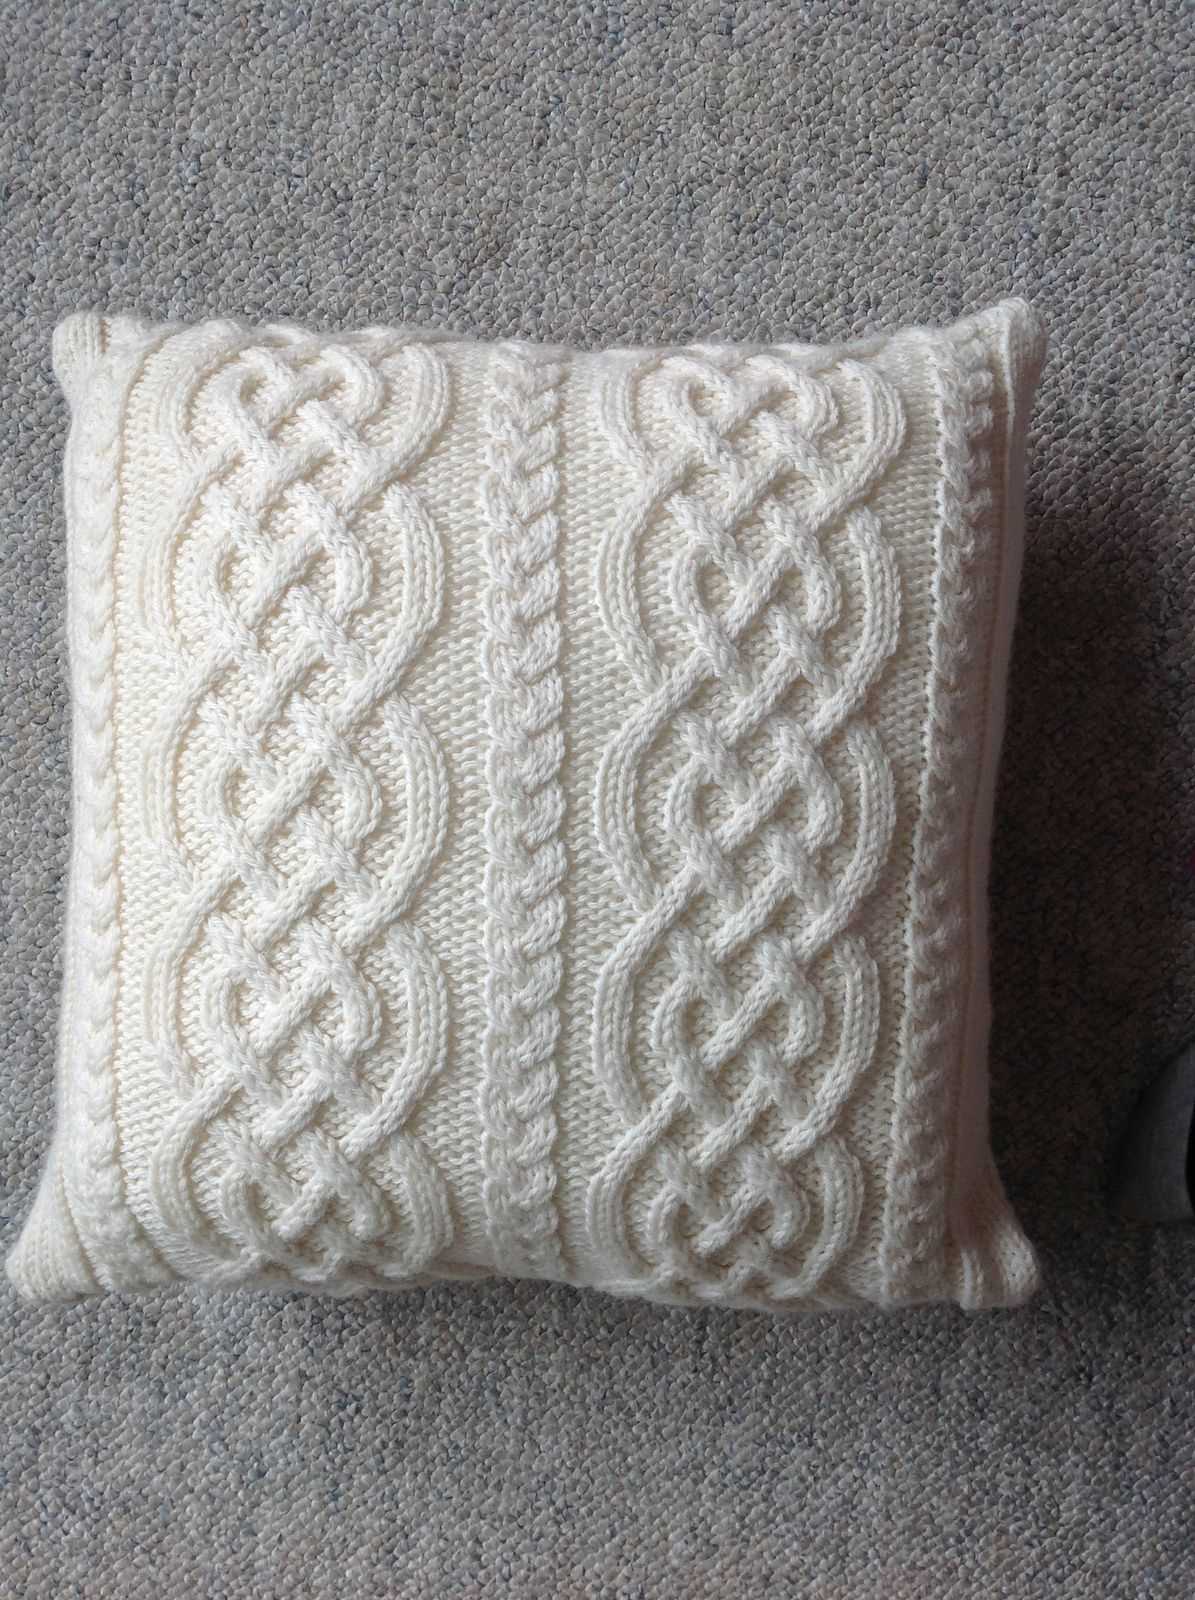
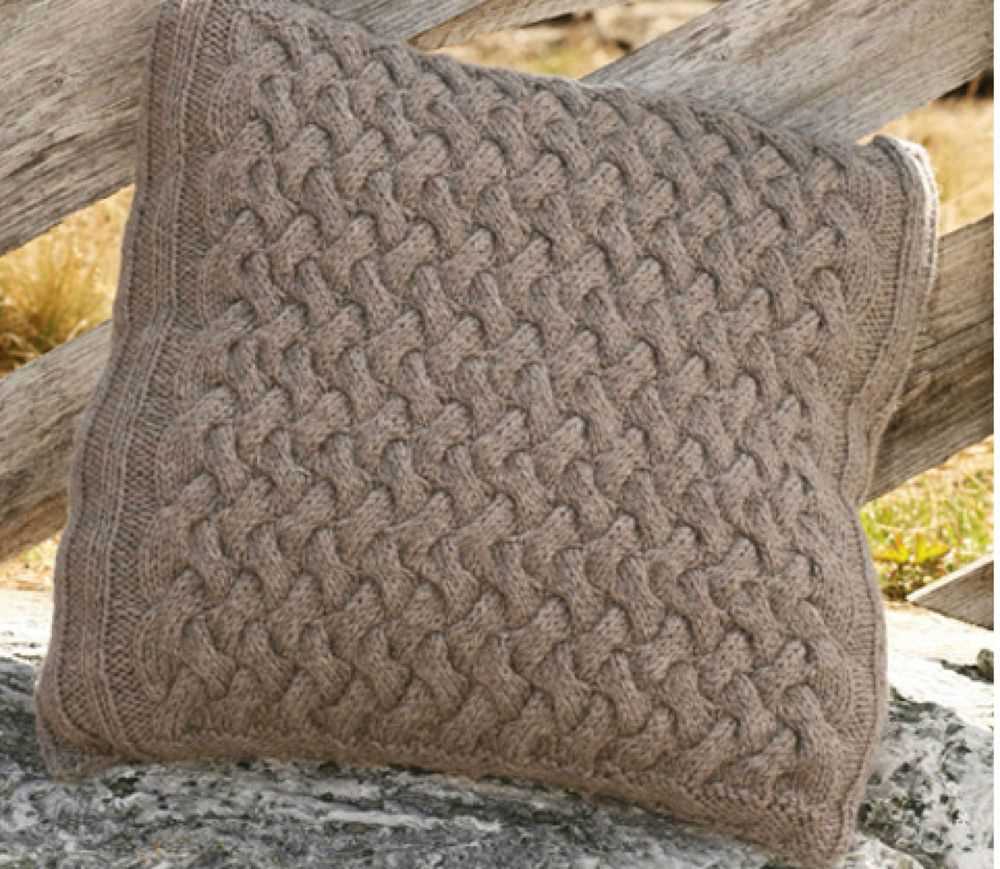
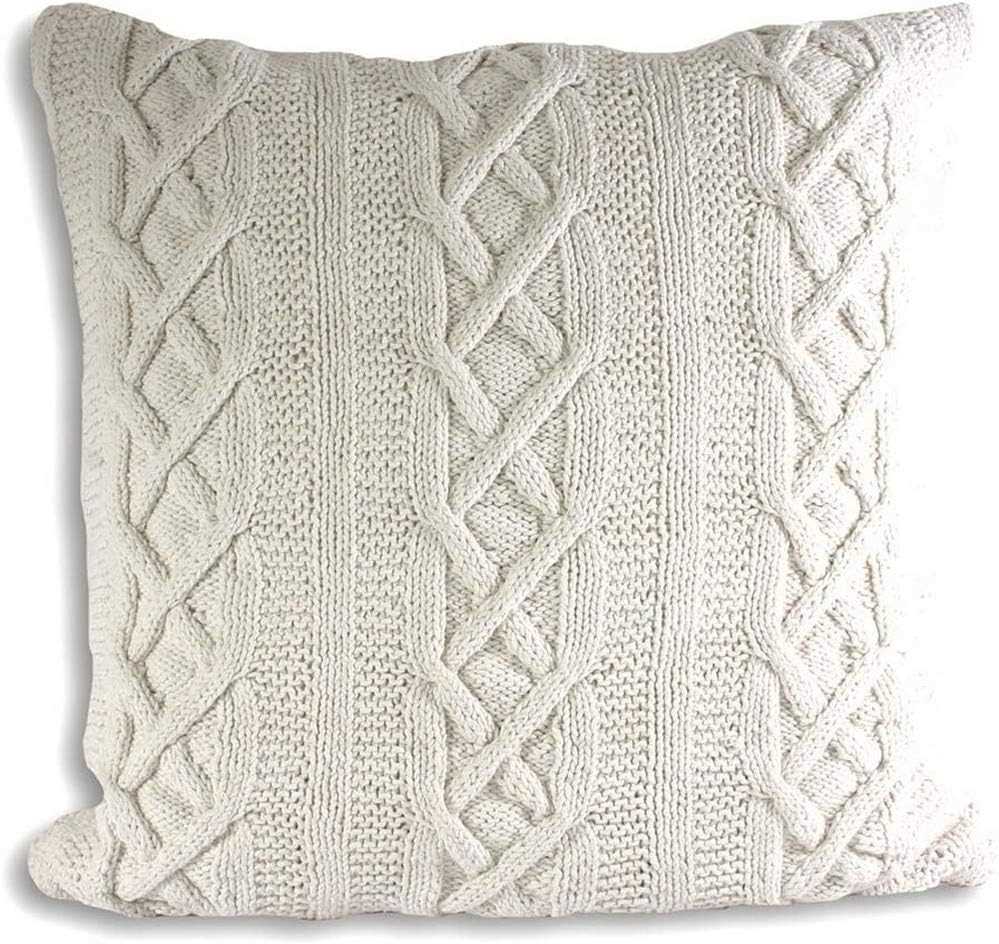
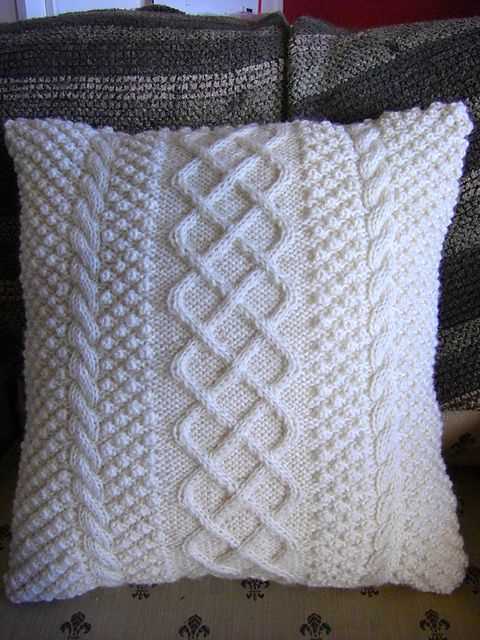
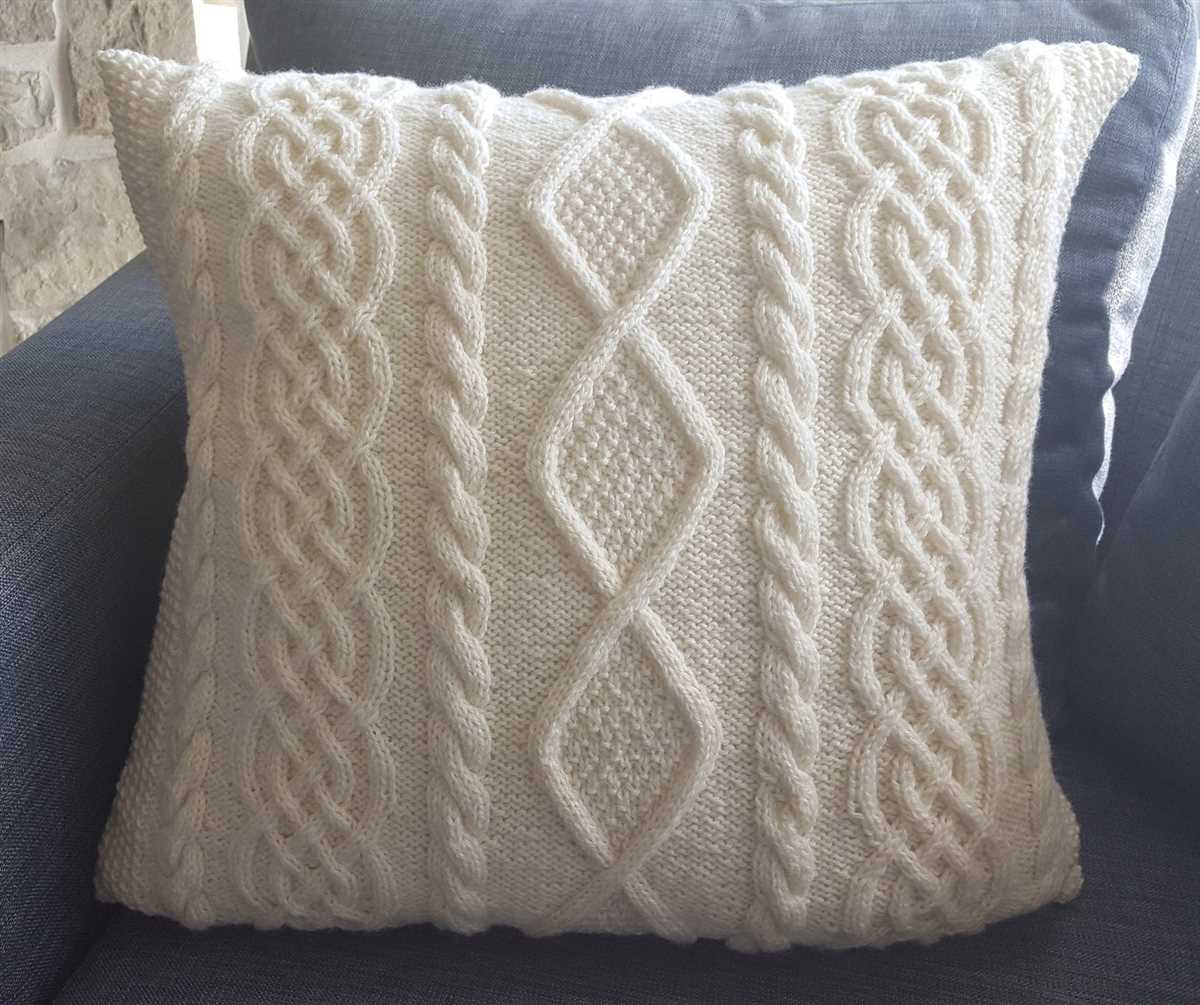
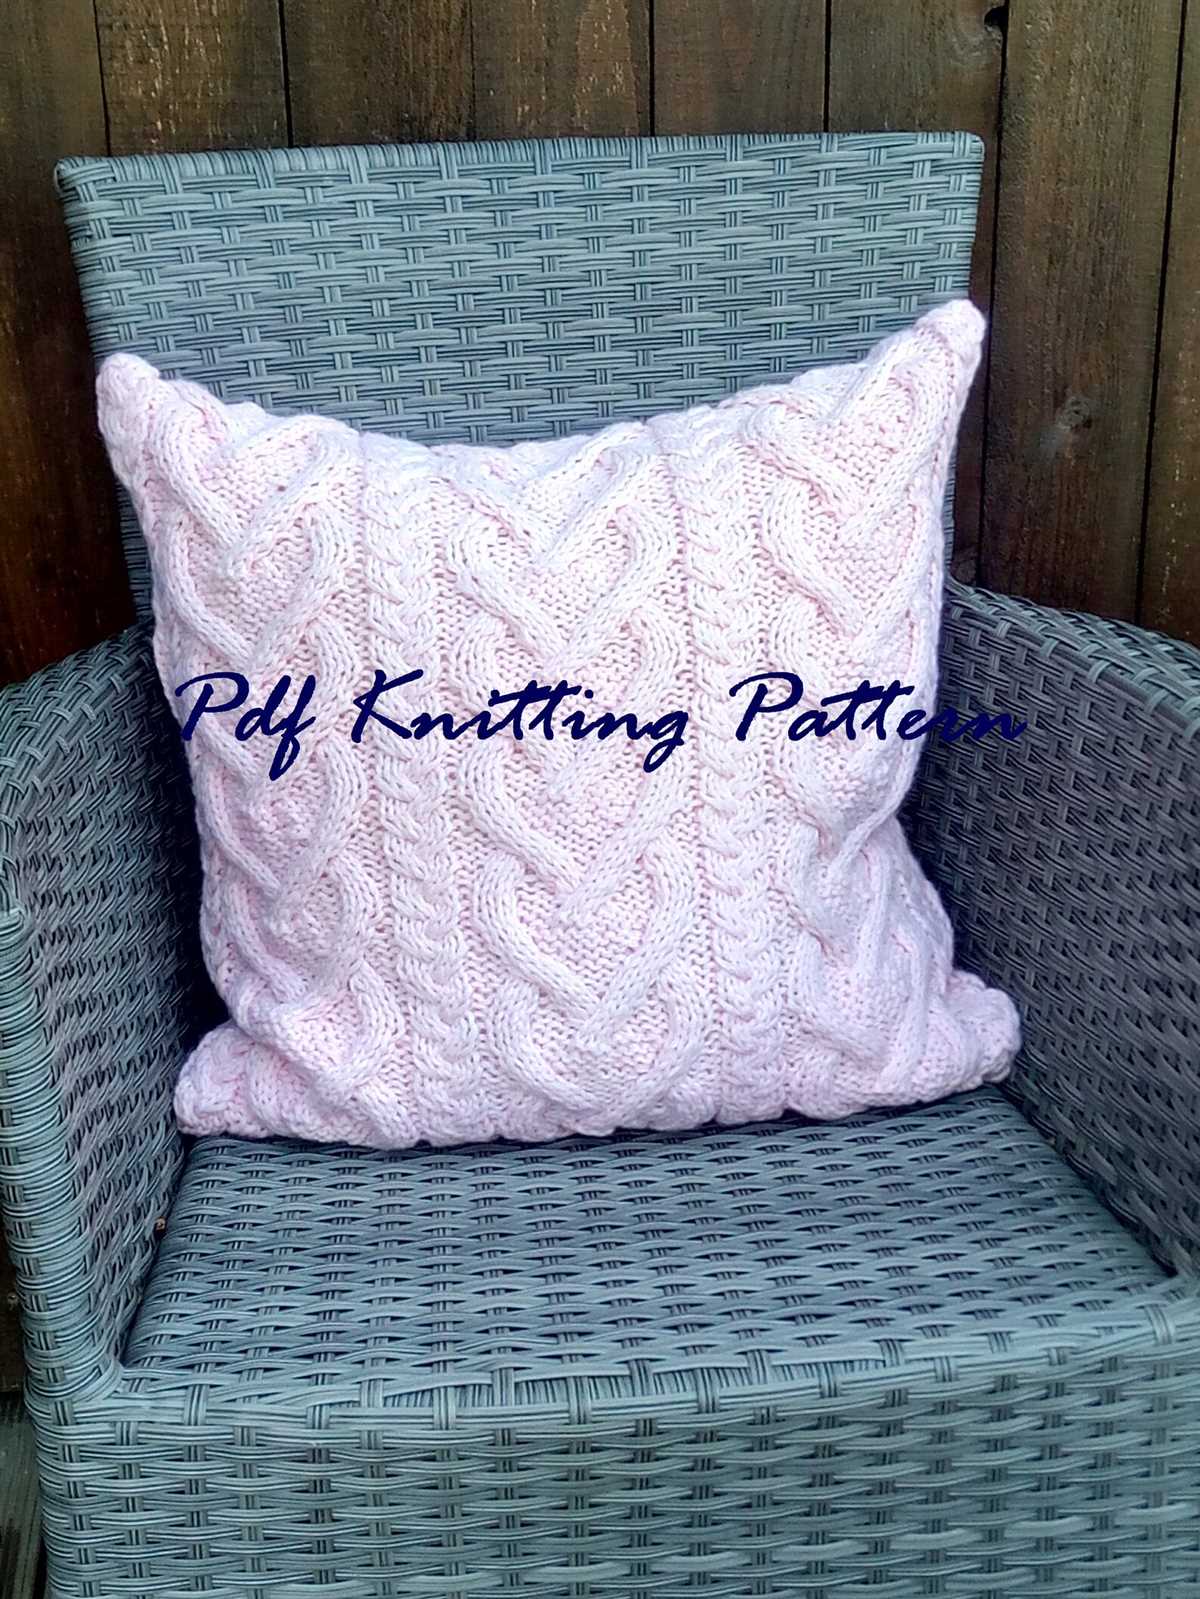
One of the key features of an Aran cushion cover is the cable pattern. Cables are created by crossing stitches over each other to form a braided effect. The pattern will typically provide instructions for knitting these cables, which may involve using a cable needle or working the stitches without a cable needle. The choice will depend on the knitter’s comfort and familiarity with cable knitting techniques.
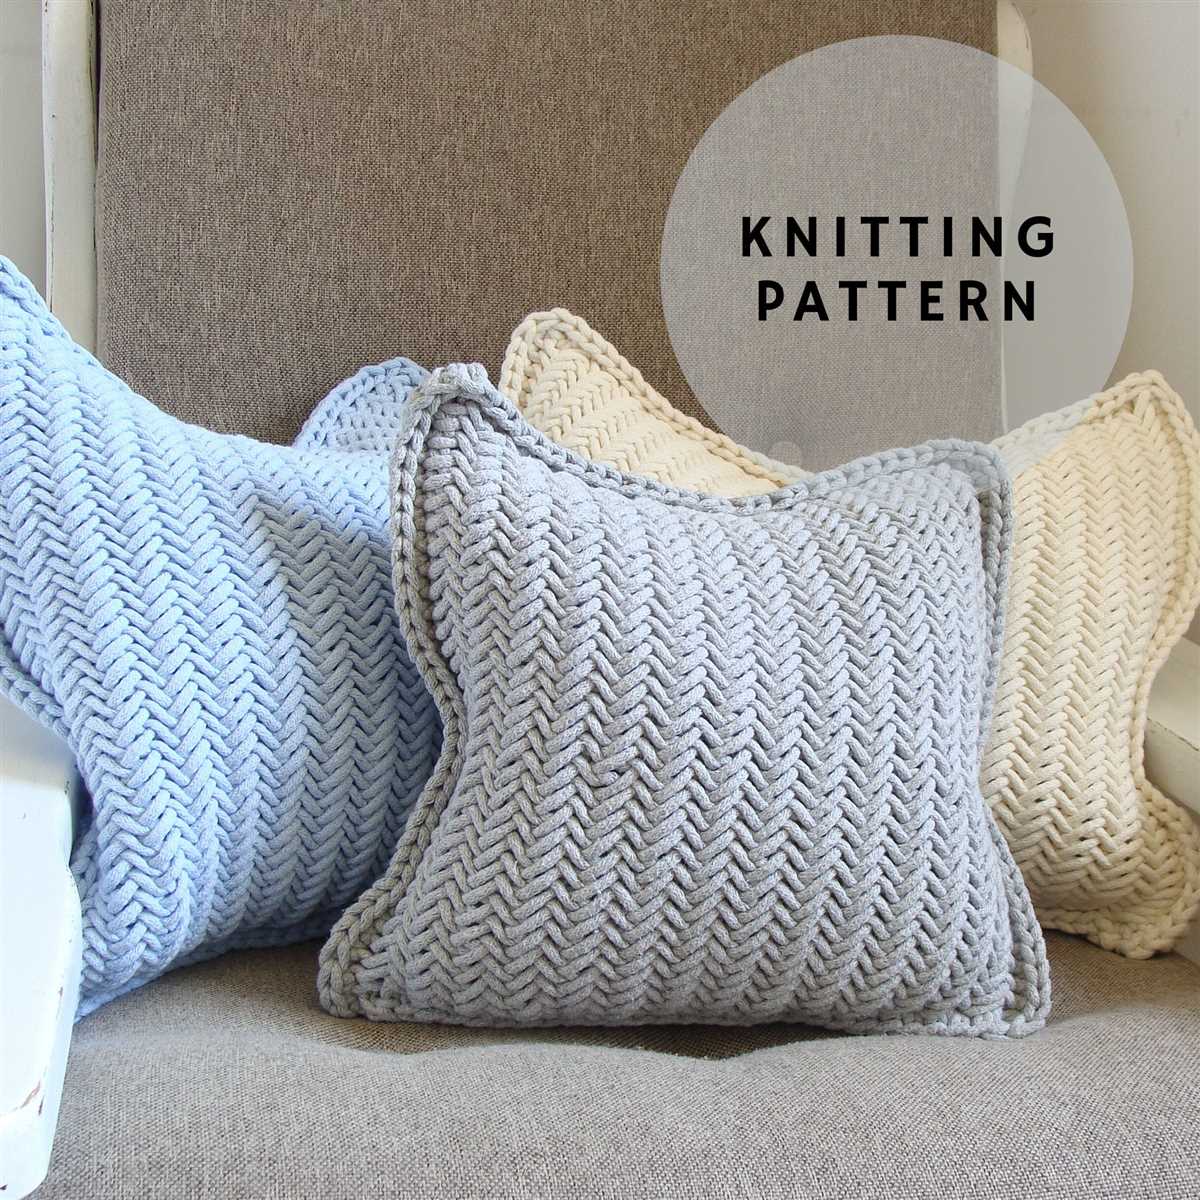
Aside from cables, the Aran cushion cover pattern may also include other textured stitches, such as bobbles, seed stitch, or honeycomb patterns. These stitches add variety and visual interest to the cushion cover, creating a unique and intricate design. Knitters should follow the pattern instructions carefully to ensure that these textured stitches are worked correctly.
Once the knitting is complete, the cushion cover will need to be assembled and finished. This may involve seaming the sides together, attaching buttons or a zipper for closure, and blocking the finished piece to ensure that it retains its shape and dimensions. The specific finishing techniques will vary depending on the pattern and the knitter’s personal preference.
The Aran cushion cover knitting pattern offers a fun and rewarding project for knitters of all skill levels. Whether you are a beginner knitter looking to expand your skills or an experienced knitter seeking a new project, the Aran cushion cover pattern provides an opportunity to create a beautiful and functional piece of home decor.
Materials Needed
To create the Aran cushion cover, you will need the following materials:
- Yarn: 4 balls of Aran weight yarn in your chosen color. Each ball should have approximately 100g of yarn.
- Knitting Needles: 1 pair of 5mm (US 8) straight knitting needles.
- Cable Needle: 1 cable needle to assist with the cable stitch pattern.
- Tapestry Needle: 1 tapestry needle for weaving in loose ends.
- Scissors: A pair of scissors to cut the yarn.
In addition to these materials, it is also helpful to have a stitch marker to keep track of your progress and a measuring tape or ruler to check your gauge.
Before starting your project, make sure you have all the necessary materials and that your yarn and needles are in good condition. This will ensure a smooth knitting process and a beautiful finished outcome.
Getting Started
Before you begin knitting the Aran cushion cover, it is important to gather all the necessary materials and familiarize yourself with the pattern. This will ensure a smooth and enjoyable knitting experience.
Materials
To knit the Aran cushion cover, you will need the following materials:
- Yarn: Choose a bulky or chunky weight yarn in your preferred color.
- Knitting Needles: Use size 8 or 9 knitting needles, or the size needed to achieve the gauge specified in the pattern.
- Cable Needle: This will be used to create the intricate cable stitches in the pattern.
- Stitch Markers: These will help you keep track of your stitches and pattern repeats.
- Tapestry Needle: This will be used to weave in loose ends.
Gauge
Before starting the project, it is important to check your gauge to ensure that your finished cushion cover will have the correct size and fit. The pattern will specify the gauge using a specific stitch pattern, typically over a 4-inch square.
To check your gauge, cast on a few stitches and knit a swatch using the specified stitch pattern. Measure the swatch over a 4-inch square and compare it to the gauge specified in the pattern. If your gauge does not match, you may need to adjust your needle size to achieve the correct gauge.
Once you have gathered all your materials and confirmed your gauge, you are ready to begin knitting the Aran cushion cover. Follow the pattern instructions step by step to create a beautiful and cozy cushion cover.
Knitting Techniques

Knitting is a popular craft that involves creating fabric by interlocking yarn loops using two or more needles. There are various knitting techniques that can be used to create different textures, patterns, and designs in knitted items. Here are some key knitting techniques:
Casting On
Casting on is the first step in starting a knitting project. It involves creating the initial row of stitches on the needle. There are different ways to cast on, such as the long tail cast on, the knitted cast on, and the cable cast on.
Knit Stitch
The knit stitch is the most basic stitch in knitting. It creates a smooth and even fabric. To knit, the working needle is inserted from left to right through the front of the first stitch on the left needle, the yarn is wrapped around the needle, and the stitch is pulled through to the right needle.
Purl Stitch
The purl stitch is the reverse of the knit stitch. It creates a raised, textured fabric. To purl, the working needle is inserted from right to left through the back of the first stitch on the left needle, the yarn is wrapped around the needle, and the stitch is pulled through to the right needle.
Increasing
Increasing is used to add stitches to the knitting work, creating a wider fabric. Common increase techniques include knitting into the front and back of a stitch, yarn overs, and make one increases.
Decreasing
Decreasing is used to remove stitches from the knitting work, creating a narrower fabric. Common decrease techniques include knit two together, slip slip knit, and purl two together.
Colorwork
Colorwork involves using multiple colors of yarn to create patterns or designs in the knitted fabric. Techniques such as intarsia, fair isle, and stranded knitting can be used to achieve different colorwork effects.
Cable Knitting
Cable knitting involves crossing stitches over each other to create twisted rope-like patterns. Cable knitting requires the use of a cable needle or a technique called cabling without a cable needle.
Finishing
Finishing techniques include binding off (or casting off) to secure the final row of stitches, weaving in ends to hide loose yarn tails, and blocking to shape and smooth the finished knitted item.
These are just a few of the many knitting techniques that can be explored to create unique and beautiful knitted items. By mastering different techniques, knitters can expand their skills and create a wide variety of projects.
Cushion Cover Instructions
In this pattern, we will be using the Aran knitting technique to create a beautiful and cozy cushion cover. Aran knitting involves working with multiple cables and textured stitches to create intricate patterns and designs.
Materials:
- Size 8 knitting needles
- Aran weight yarn in your chosen color
- Cushion insert (18 inches by 18 inches)
- Cable needle
Instructions:
- Cast on 90 stitches.
- Row 1: Knit all stitches.
- Row 2: Purl all stitches.
- Row 3: *Knit 6, purl 6*; repeat from * to * until the end of the row.
- Row 4: *Purl 6, knit 6*; repeat from * to * until the end of the row.
- Repeat rows 3 and 4 for the Aran pattern, following the chart provided.
- Continue working in pattern until your cushion cover measures 18 inches in length.
- Bind off all stitches.
- Using a yarn needle, sew the side seams together, leaving an opening for the cushion insert.
- Insert the cushion, then sew the remaining seam closed.
- Your Aran cushion cover is now complete!
With these instructions, you’ll be able to create a beautiful cushion cover using the Aran knitting technique. The intricate cable and textured stitch patterns will add a touch of elegance to any home decor. Start knitting today and bring warmth and style to your living space!
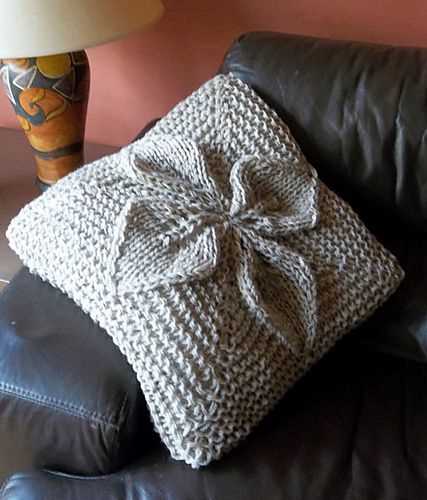
Adding Cables
Adding cables to your Aran cushion cover can create a beautiful and intricate design that adds texture and interest to the finished piece. Cables are created by crossing stitches over each other, creating a twisted or braided effect. They can be simple or complex, depending on the pattern you choose to follow.
Before adding cables to your cushion cover, it’s important to have a basic understanding of cable knitting techniques. Cables are typically worked using a cable needle, which is a short needle used to temporarily hold stitches while you work the crossing pattern. Remember to always follow the cable chart or written instructions carefully to ensure your cables are created correctly.
Types of Cables
There are several types of cables you can incorporate into your Aran cushion cover knitting pattern. The most common types include:
- Twisted Cable: This simple cable involves crossing two stitches over two stitches to the left or right. It creates a neat and compact twist.
- Braided Cable: A braided cable is more complex, involving multiple stitches crossing over each other to create a woven effect. There are various patterns for braided cables, ranging from 2-stitch to 6-stitch crossings.
- Popcorn Cable: This cable pattern creates a textured effect by twisting a group of stitches over themselves, resembling a popcorn kernel.
Adding Cables to Your Cushion Cover
When adding cables to your Aran cushion cover, consider the overall design and how you want the cables to flow. You can incorporate one or multiple cables, or even create a cable panel that runs vertically or horizontally across the cover. Experiment with different cable patterns and arrangements to achieve the desired look.
Remember to maintain an even tension throughout your knitting to ensure your cables stand out and are not distorted. Blocking your finished cushion cover will also help to enhance the cable design and give your project a polished appearance.
Finishing Touches
Once you have completed knitting the Aran cushion cover, it’s time to add the finishing touches to give it that extra special look. These final steps will help to bring your project together and give it a polished and professional finish.
Blocking: Before attaching any embellishments or closures, it’s important to block your cushion cover. This helps to even out the stitches and make the fabric lay flat. You can do this by pinning the cover to a flat surface, such as a blocking mat or towel, and misting it with water to dampen. Gently stretch and shape the cover, making sure the measurements match the pattern’s instructions. Allow it to dry completely before moving on to the next step.
Adding buttons or closures: If your cushion cover has buttonholes, now is the time to sew on the buttons. Choose buttons that complement the yarn and style of your cover. Sew them securely in place, making sure they line up with the buttonholes. If your cover doesn’t have buttonholes, you can add velcro or snaps as closures. Make sure the closures are positioned evenly and sewn on securely.
Embellishments: To add a personal touch to your cushion cover, consider adding embellishments such as embroidery, beads, or appliques. Use contrasting colors or materials to make the design stand out. You can sew on the embellishments by hand or use fabric glue for a quicker application. Just make sure they are securely attached and won’t come off with regular use.
Finishing off: Once all the finishing touches are in place, take a moment to inspect your cushion cover for any loose ends or stray threads. Use a yarn needle to weave in any loose ends and trim them close to the fabric. This will give your cover a neat and tidy appearance. Lastly, give your cover a final press with a steam iron to smooth out any wrinkles and give it a polished look.
Pattern Variations
If you’re looking to add some variety to your Aran cushion cover knitting project, there are several pattern variations you can try. These variations will give your cushion cover a unique and personalized touch, allowing you to showcase your creativity.
Cable Variations
Cables are a classic feature of Aran knitting, and you can experiment with different cable patterns to create different effects on your cushion cover. You can try simple twists, braids, or more complex cable patterns to add texture and visual interest.
Colorwork Variations
If you want to incorporate multiple colors into your cushion cover, you can try colorwork variations. Fair Isle knitting, for example, allows you to create beautiful geometric patterns by using different colored yarns. You can also experiment with stripes or intarsia to create different color effects.
Texture Variations
Adding texture to your cushion cover can make it more visually appealing and tactile. You can try different stitch patterns, such as seed stitch or moss stitch, to create a textured surface. You can also experiment with different yarn weights or fiber types to add even more texture.
Embroidery Variations
If you enjoy embroidery, you can add embroidered details to your cushion cover to enhance its design. You can choose to embroider motifs, initials, or even create your own unique designs. Embroidery can be a fun way to add a personal touch to your cushion cover.
By incorporating these pattern variations into your Aran cushion cover knitting project, you can create a one-of-a-kind piece that reflects your own style and taste. Have fun experimenting and enjoy the process of creating something truly unique.
Tips and Troubleshooting
Knitting an Aran cushion cover can be a rewarding project, but it can also present some challenges. Here are some tips and troubleshooting suggestions to help you navigate through any issues you may encounter:
1. Gauge swatch: Before you begin knitting the cushion cover, it is important to knit a gauge swatch to ensure that your tension matches the pattern. Use the recommended needle size and yarn weight to create a swatch of at least 4 inches by 4 inches. Measure your stitches and rows per inch and adjust your needle size if necessary.
2. Cable instructions: Aran patterns often feature intricate cable designs. Follow the cable instructions carefully, paying attention to the symbols and abbreviations used. If you find the cable instructions confusing, refer to online tutorials or knitting books that provide detailed explanations and diagrams for different cable stitches.
3. Stitch markers: To keep track of your progress and make it easier to follow the pattern, use stitch markers to mark the beginning and end of each cable section. This will help prevent any mistakes or confusion when it comes to shaping the cables correctly.
4. Blocking: After completing your cushion cover, blocking is essential to give it a professional finish. Wet block your knitting by soaking it in lukewarm water with a gentle wool wash, then carefully squeeze out the excess water and pin it to shape on a blocking mat or towel. Allow it to dry completely before removing the pins.
5. Troubleshooting: If you encounter any mistakes or dropped stitches while knitting, it’s important to fix them as soon as possible. Use a crochet hook or stitch marker to pick up any dropped stitches and carefully re-knit the rows, ensuring that the cables are correctly crossed.
6. Pattern adjustments: If you prefer a larger or smaller cushion cover, you can adjust the pattern by adding or subtracting stitches and rows. However, be mindful that altering the pattern may affect the appearance of the cable design, so it’s best to consult a knitting chart or seek advice from experienced knitters before making any changes.
By following these tips and troubleshooting suggestions, you can tackle any challenges that may arise while knitting an Aran cushion cover and create a beautiful and cozy addition to your home. Happy knitting!
Final Thoughts
In conclusion, knitting your own Aran cushion cover can be a rewarding and enjoyable project. Not only will you have a beautiful and unique piece to decorate your home, but you will also have the satisfaction of knowing that you created it with your own hands.
The Aran stitch patterns offer a wide range of possibilities for creating different textures and designs. Whether you prefer a classic cable design or a modern geometric pattern, there is sure to be a stitch that suits your style.
While the process of knitting an Aran cushion cover may require some skill and patience, it is well worth the effort. The end result will be a cozy and stylish addition to your home decor that you can be proud of.
Remember to choose high-quality yarn that is soft and durable to ensure that your cushion cover will stand the test of time. Take your time to carefully follow the pattern instructions and don’t hesitate to reach out to online communities or knitting groups for support and advice.
So go ahead, grab your knitting needles and get started on your Aran cushion cover project. Enjoy the process, embrace the challenges, and revel in the satisfaction of creating something beautiful by hand.