
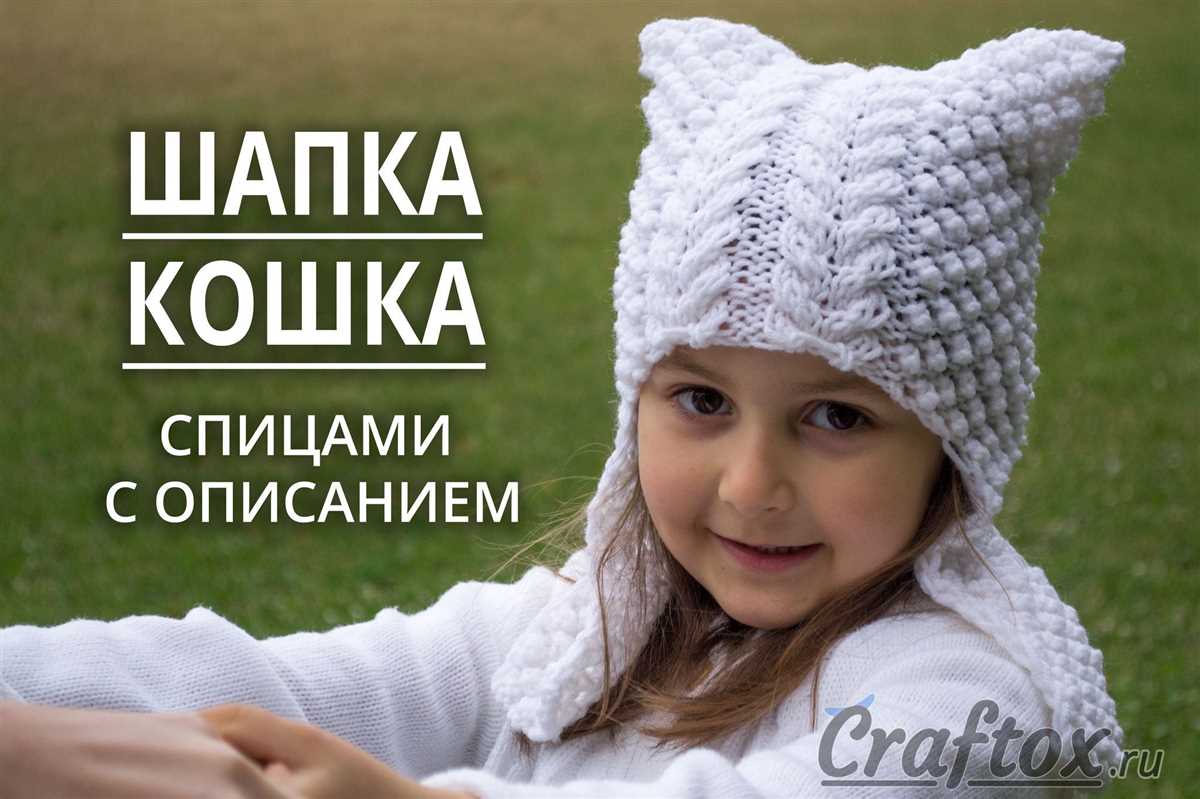
Knitting is a wonderful skill that allows you to create beautiful and cozy accessories for yourself and your loved ones. One popular item to knit is an earflap hat for children. These hats are not only adorable, but they also provide warmth and protection during cold winter days.
Creating your own earflap hat is a great way to personalize your child’s winter wardrobe. This knitting pattern will guide you through the process of making a stylish and functional hat for your little one. Whether you’re an experienced knitter or a beginner, this pattern is suitable for all skill levels.
This pattern uses basic knitting techniques such as knitting in the round, increasing and decreasing stitches, and basic colorwork. It also provides instructions for different sizes, so you can easily adjust the pattern to fit your child’s head circumference. With a wide range of yarn colors and textures available, you can let your creativity run wild and make a hat that your child will love.
Children’s Earflap Hat Knitting Pattern
If you’re looking for a fun and practical knitting project for your little one, a children’s earflap hat is the perfect choice. This cozy hat will keep their head and ears warm during the colder months, while also adding a touch of style to their outfit.
To start, you will need some basic knitting skills and materials. Grab a pair of knitting needles in the appropriate size for your desired hat. You’ll also need a soft and warm yarn, preferably in a fun color or pattern that your child will love. Additionally, you’ll need a tapestry needle for finishing touches.
To knit the earflap hat, begin by casting on the required number of stitches for the hat band. This will create a snug fit around your child’s head. Then, work in a rib stitch pattern for a few rows to give the band some stretch. Next, switch to a stockinette stitch for the main body of the hat.
To add the earflaps, you will need to create two triangles on either side of the hat. This can be done by decreasing a set number of stitches on each side. Once the earflaps are complete, continue knitting in stockinette stitch until the hat reaches the desired length. Feel free to add some decorative touches like a pom-pom or tassels.
When you’re ready to finish the hat, bind off the stitches and seam up the back using a tapestry needle. Make sure to securely attach the earflaps to the sides of the hat. Lastly, weave in any loose ends for a polished look.
With this children’s earflap hat knitting pattern, you can create a stylish and cozy accessory for your little one in no time. It’s a practical project that will keep them warm and can be customized to match their personality. So grab your knitting needles and get started on this fun project today!
Overview
Welcome to our children’s earflap hat knitting pattern! This pattern will guide you through the process of knitting a cozy and stylish hat for your little one. The earflaps provide extra warmth and protection for their ears during cold winter days.
This pattern is suitable for intermediate knitters who are comfortable with basic knitting techniques such as casting on, knitting, purling, and decreasing stitches. It is designed for children aged 3-5 years old, but can easily be adjusted to fit other sizes by changing the number of stitches cast on and the length of the earflaps.
To complete this project, you will need the following materials:
- Yarn: Worsted weight yarn in your chosen color(s).
- Needles: Size 8 (5mm) circular needles and double-pointed needles, or size needed to obtain gauge.
- Notions: Stitch markers, a yarn needle for weaving in ends, and a pom-pom maker (optional).
This pattern is written in standard abbreviations and includes detailed instructions, as well as a stitch count chart for each section. Feel free to customize the colors and embellishments to make the hat uniquely yours. Happy knitting!
Materials Needed
Before you start knitting the children’s earflap hat, make sure you have all the necessary materials. Here is a list of the items you will need:
- Yarn: Choose a soft and warm yarn that is appropriate for the season. You will need approximately 100 grams of yarn.
- Knitting Needles: Use a set of double-pointed knitting needles in the appropriate size for your yarn. You can also use circular needles if you prefer.
- Tapestry Needle: This needle will be used to weave in the loose ends of yarn when you finish knitting.
- Circular Stitch Markers: These small markers are used to mark the beginning and end of your rounds.
- Measuring Tape: A measuring tape or ruler will help you accurately measure your gauge and the size of the hat.
- Scissors: You will need a pair of scissors to cut the yarn when necessary.
- Pom-pom Maker (optional): If you want to add a pom-pom to the top of the hat, a pom-pom maker will make the process much easier.
Having all of these materials ready before you start knitting will ensure that you have a smooth and enjoyable knitting experience. Make sure to choose high-quality materials to create a hat that is not only cute but also long-lasting.
Sizing and Measurements
When it comes to knitting hats for children, getting the right size is essential for a comfortable fit. To ensure that the hat fits properly, it’s important to take accurate measurements of the child’s head.
To measure the child’s head circumference, use a soft measuring tape and wrap it around the widest part of their head, just above the ears. Make sure the tape is snug but not too tight. Take note of the measurement in inches or centimeters.
Size Chart:
Below is a size chart to help you determine the appropriate size for your child’s earflap hat:
| Age Range | Head Circumference (inches) | Head Circumference (centimeters) |
|---|---|---|
| Newborn | 12-14 inches | 30-36 centimeters |
| 3-6 months | 14-17 inches | 36-43 centimeters |
| 6-12 months | 16-19 inches | 41-48 centimeters |
| 1-2 years | 18-20 inches | 46-51 centimeters |
Keep in mind that these measurements are just a guide and may vary depending on the child’s individual head shape and personal preference for fit. It’s always a good idea to err on the slightly larger side when knitting a hat, as it can be adjusted with a cinched brim or by adding extra rows for a more snug fit.
With the right measurements and a well-fitting hat, your child will be both cozy and stylish during the colder months!
Gauge

Gauge is an important factor to consider when knitting a children’s earflap hat. It refers to the number of stitches and rows per inch of knitting. By matching the gauge specified in the knitting pattern, you can ensure that your finished hat will have the correct size and fit.
To determine the gauge, you will need to knit a swatch using the yarn and needles recommended in the pattern. The swatch should be at least 4 inches square. Measure the number of stitches and rows within that 4-inch area, and compare it to the gauge information provided in the pattern.
It is essential to achieve the same gauge as stated in the pattern, as a tighter or looser gauge will result in a hat that is either too small or too large. Adjusting your needle size can help you achieve the correct gauge. If your stitches are too tight, try using larger needles. Conversely, if your stitches are too loose, switch to smaller needles. Remember to recheck your gauge after making any adjustments.
When working with a gauge swatch, keep in mind that the type of stitches used in the pattern can also affect the overall gauge. For example, stockinette stitch may have a different gauge compared to ribbing or cables. Take note of any specific instructions in the pattern regarding gauge measurements for different stitch patterns.
By taking the time to check and adjust your gauge, you can ensure that your children’s earflap hat will fit properly and look great. It may require some extra effort, but the end result will be worth it!
Abbreviations
In knitting patterns, abbreviations are used to save space and make the instructions easier to read. By using abbreviations, the pattern can convey all the necessary information without becoming overwhelming. Understanding these abbreviations is essential for successfully following a knitting pattern.
Here is a list of abbreviations commonly used in children’s earflap hat knitting patterns:
- k: knit
- p: purl
- k2tog: knit two stitches together
- p2tog: purl two stitches together
- ssk: slip, slip, knit (slip two stitches, one at a time, knit-wise, then knit them together)
- yo: yarn over
- st(s): stitch(es)
- rep: repeat
- prev: previous
- beg: beginning
- end: end
These abbreviations are used throughout the pattern to indicate which stitches to work and how to work them. It’s important to familiarize yourself with these abbreviations before starting the project, as they will be referenced frequently throughout the instructions.
Additionally, some knitting patterns may include unique abbreviations specific to the pattern. These will typically be explained in the pattern’s introduction or glossary. It’s always a good idea to read through the entire pattern before beginning to ensure you understand all the abbreviations and instructions.
Earflap Pattern
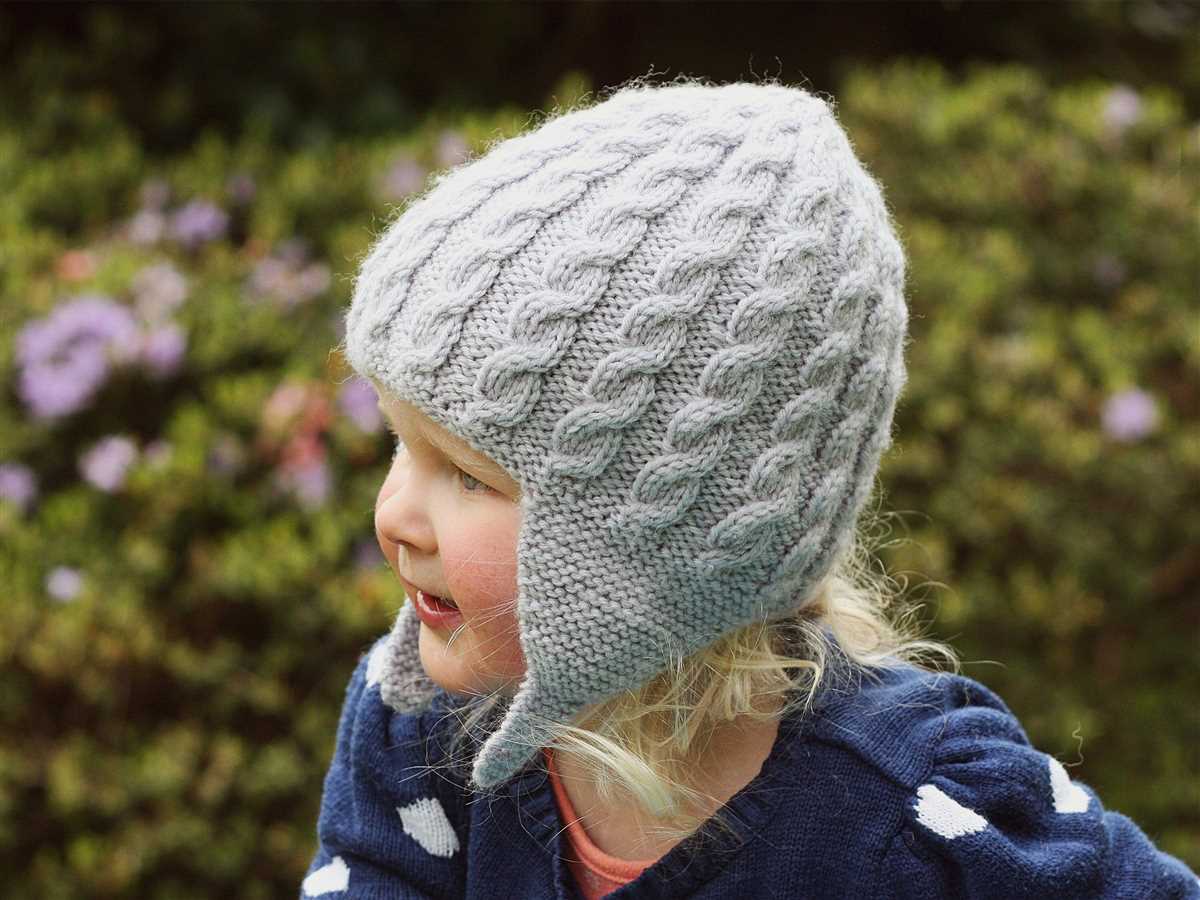
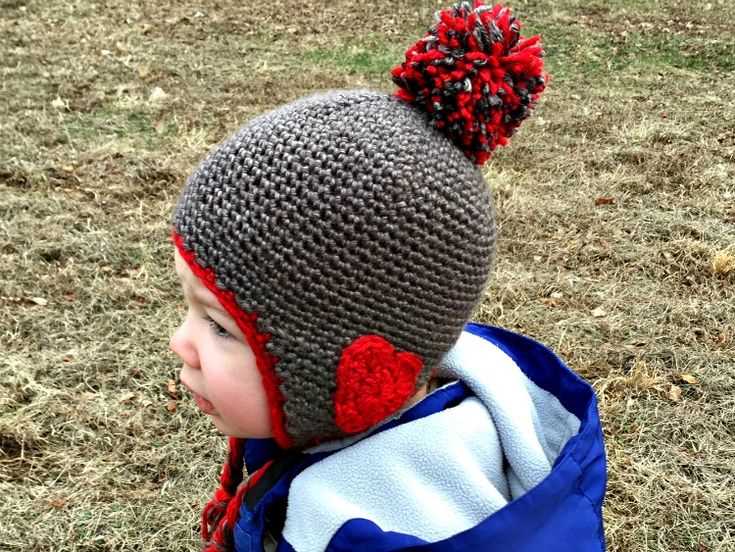
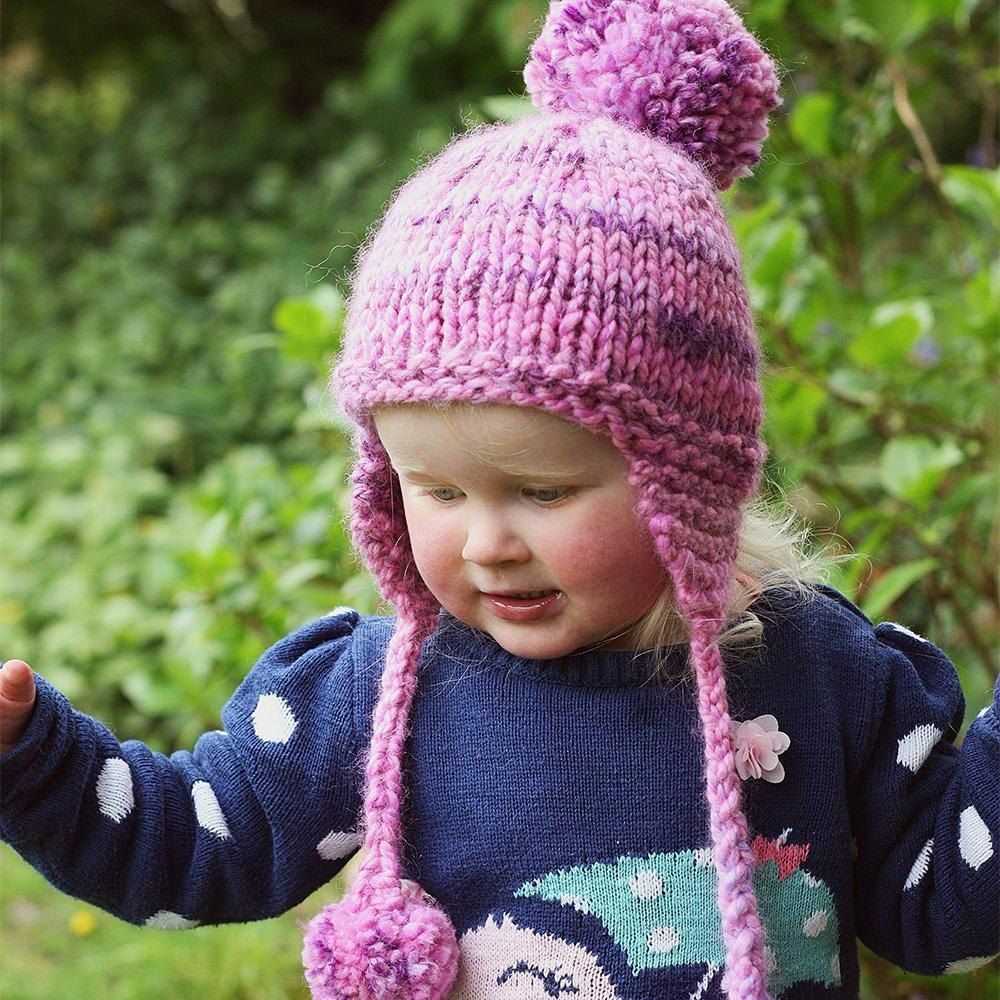
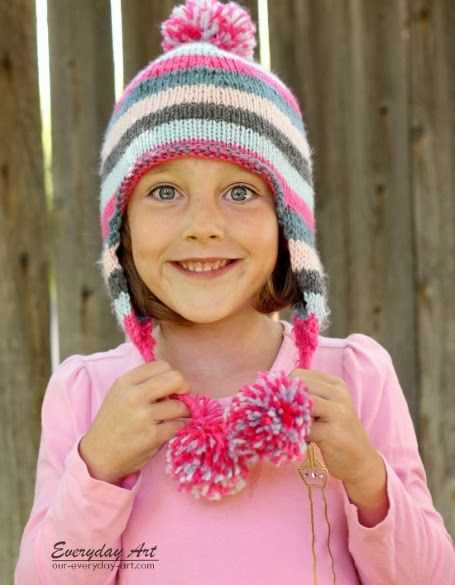
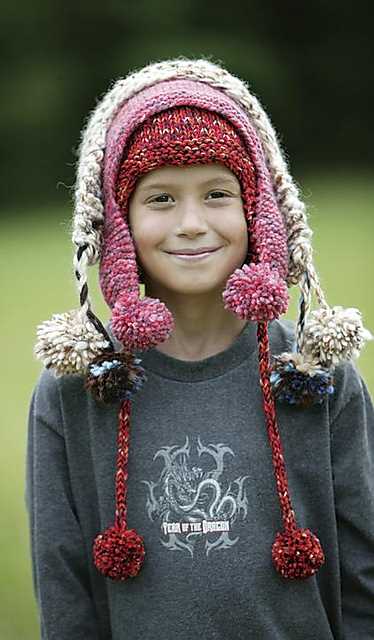
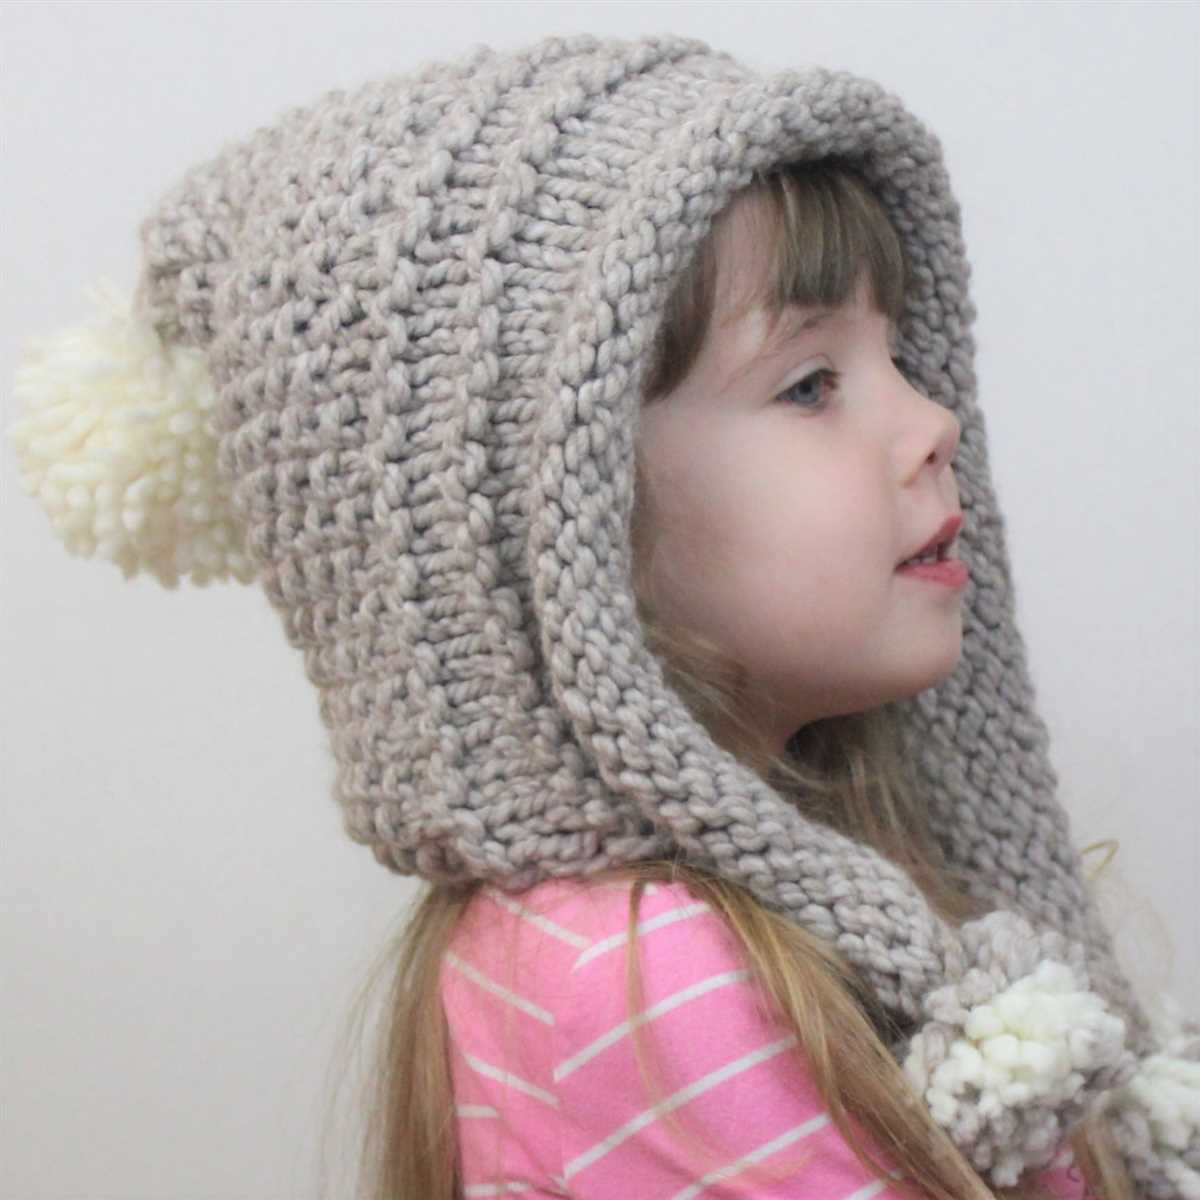
Looking for a warm and stylish hat for your child? Try knitting an earflap hat using this easy and adorable pattern. The earflaps will provide extra warmth and protection for your child’s ears during the colder months, while the cute and colorful design will make it an instant favorite.
To get started, you will need a set of double-pointed knitting needles and a soft, chunky yarn in your child’s favorite color. Begin by casting on the desired number of stitches, making sure to leave a long tail for sewing the earflaps later.
Next, knit in the round until you reach the desired length for the hat. Then, it’s time to add the earflaps! Using the same yarn, pick up stitches along the edge of the hat and knit rows back and forth to create the flaps. Once the flaps are long enough, bind off the stitches and repeat the process for the second flap.
After the earflaps are complete, it’s time to shape the crown of the hat. Decrease stitches gradually to create a snug and comfortable fit. Finally, bind off the remaining stitches and sew the earflaps to the inside of the hat using the long tail from the cast-on edge.
Finish off your hat by adding any additional embellishments, such as pom-poms or tassels. Your child will love wearing their new earflap hat, and you’ll love knowing that they are warm and cozy during the colder months. Get creative and experiment with different colors and patterns to make each hat unique and special.
Main Hat Pattern
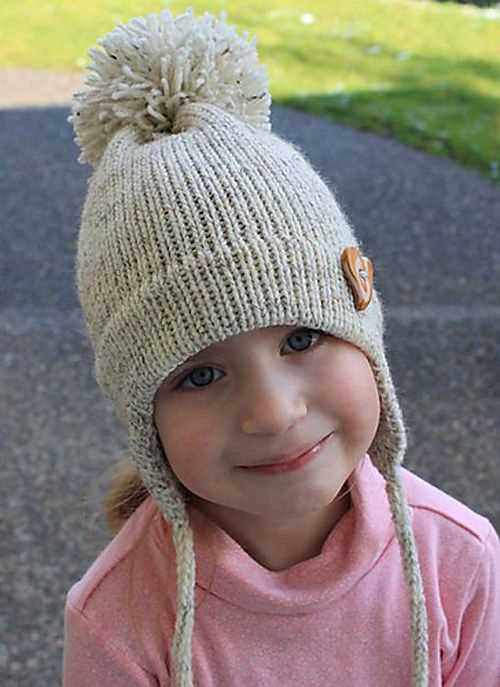
The main hat pattern is a simple and classic design, perfect for keeping children’s ears warm during the cold winter months. It features earflaps that can be tied under the chin for added warmth and security, as well as a cozy ribbed brim.
Materials:
- Worsted weight yarn
- Size US 8 (5mm) double-pointed needles
- Tapestry needle
- Stitch markers
Gauge:
18 stitches and 24 rows = 4 inches in stockinette stitch
Instructions:
- Using the double-pointed needles, cast on 72 stitches.
- Join in the round, being careful not to twist the stitches.
- Work in a K2, P2 rib pattern for 2 inches.
- Switch to stockinette stitch and continue until the hat measures 4 inches from the cast-on edge.
- Begin the decreases: (continue in stockinette stitch)
| Round | Decrease |
|---|---|
| 1 | K2tog, knit to last 2 stitches, ssk |
| 2 | Knit all stitches |
| 3 | K2tog, knit to last 2 stitches, ssk |
| 4 | Knit all stitches |
| 5 | K2tog, knit to last 2 stitches, ssk |
| 6 | Knit all stitches |
| 7 | K2tog, knit to last 2 stitches, ssk |
Continue decreasing in this manner, alternating decrease rows and knit rows, until 8 stitches remain.
Break the yarn, leaving a long tail. Thread the tail through the remaining stitches and pull tight to close the top of the hat. Weave in any loose ends and block the hat if desired. Attach earflaps to the sides of the hat, and you’re done!
Assembly

Once you have finished knitting all the pieces for the children’s earflap hat, it’s time to assemble them. Follow these steps to complete the hat:
- First, lay out all the knitted pieces, including the front and back panels, the two ear flaps, and the top pom-pom.
- Start by attaching one ear flap to each side of the front panel. Line up the edges and use a tapestry needle to sew them together. Make sure to sew securely and tightly, so the ear flaps won’t come loose.
- Next, fold the back panel in half and sew the two sides together, leaving a small opening at the bottom for the head to fit through. This forms the main body of the hat.
- Now, attach the main body of the hat to the front panel with the attached ear flaps. Line up the edges and sew them together using the same technique as before.
- Finally, sew the top pom-pom to the center of the hat. Make sure it is securely attached so it won’t come off easily.
Once you have completed all the assembly steps, your children’s earflap hat will be ready to wear. Make sure to weave in any loose ends and give the hat a final inspection to ensure everything is securely attached. Your little one will love wearing this cozy and stylish hat!
Optional Embellishments
If you’re looking to add some extra flair to your child’s earflap hat, there are several optional embellishments you can try. These decorative additions can really make the hat stand out and personalize it for your little one.
A popular embellishment option is to add a pom-pom to the top of the hat. Whether you choose a matching color or a contrasting one, a pom-pom can add a fun and playful touch to the hat. Simply attach it securely to the top after completing the main knitting.
Another option is to incorporate a simple pattern or design into the hat. For example, you could add a row of colorful stripes or create a small heart shape using a different colored yarn. This allows you to showcase your knitting skills and create a unique hat that your child will love. You can use different knitting techniques, such as stranded colorwork or intarsia, to achieve the desired effect.
If you want to add some extra warmth to the earflaps, consider sewing on some fleece or faux fur lining. This will not only make the hat cozier for your child but also add a luxurious and stylish touch. Simply cut the lining material to match the shape of the earflaps and sew it in place, ensuring that it is securely attached.
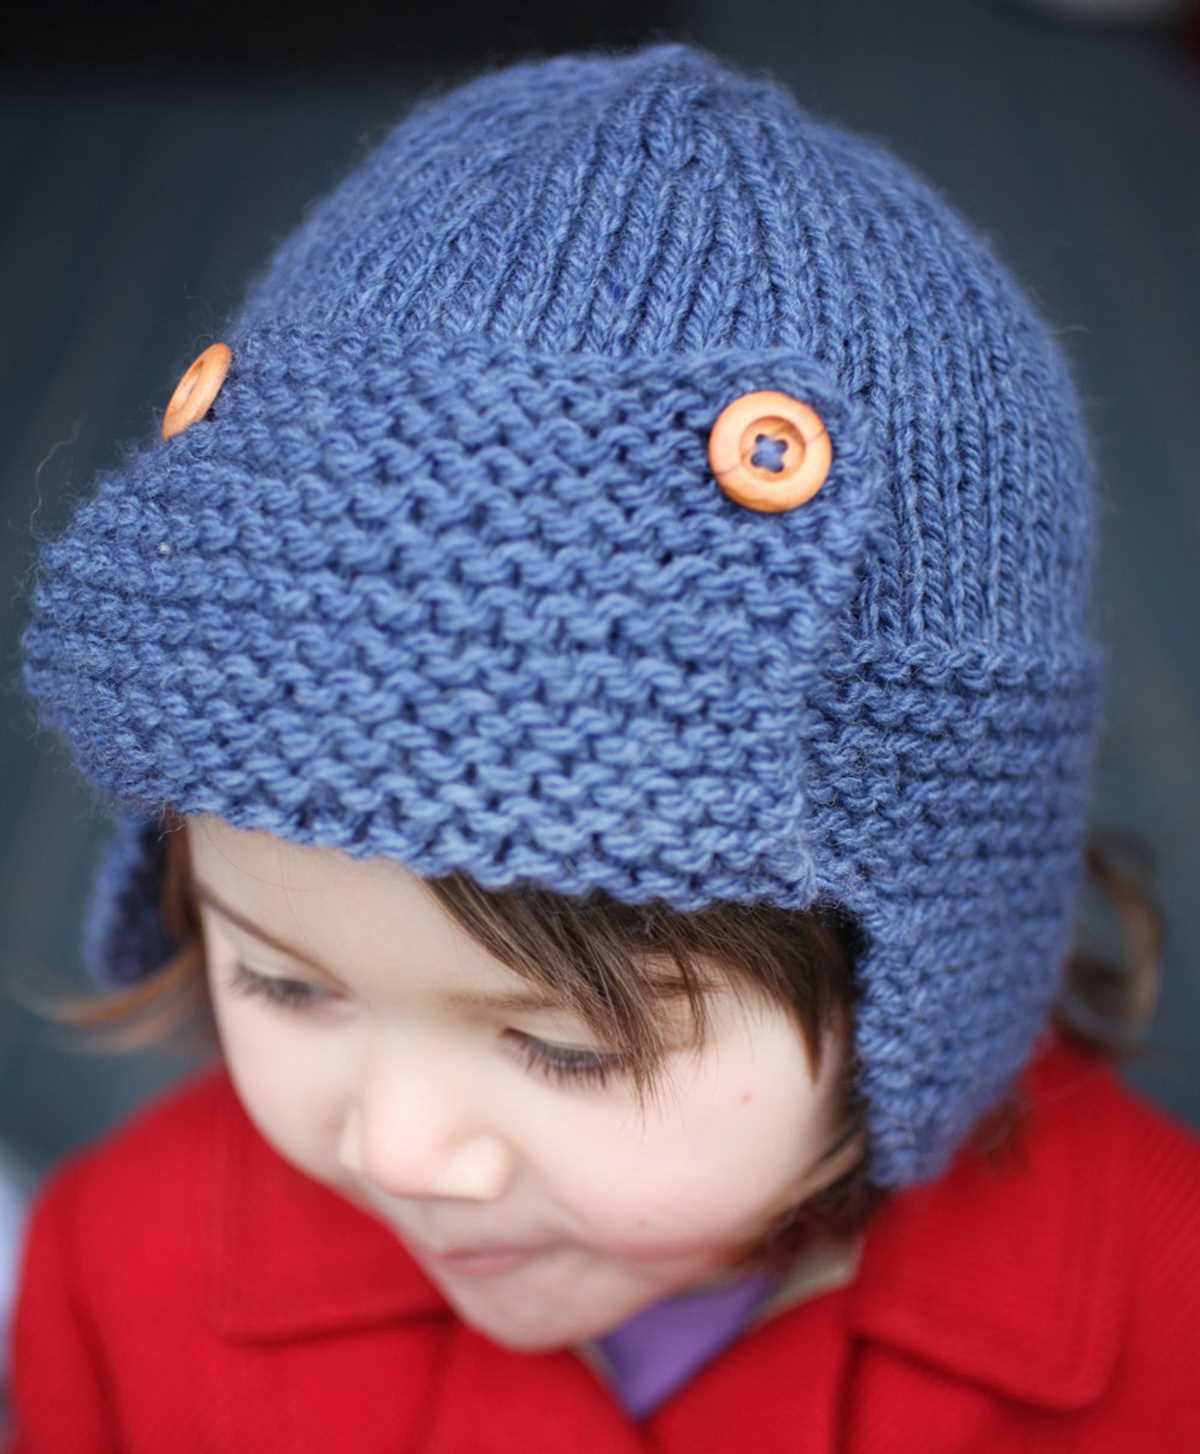
- Adding buttons or bows is another option for embellishing the hat. You can sew on a few small buttons in a coordinating color or attach a cute bow made from ribbon or fabric.
- Embroidery is yet another way to personalize the hat. Whether you want to add your child’s initials or a simple design, embroidery can give the hat a lovely finishing touch.
- If you’re feeling adventurous, you can even consider adding some small appliques, such as flowers or animals, to the hat. These can be made from fabric or yarn and sewn onto the hat to create a whimsical and unique look.
Remember, these embellishments are optional, so feel free to get creative and make the hat truly your own. Just make sure that any additional items you attach are securely fastened to ensure the hat remains safe and comfortable for your child to wear.
Tips and Tricks
Knitting a children’s earflap hat can be a fun and rewarding project. Here are some tips and tricks to help you create a beautiful and functional hat.
1. Choose the right yarn
When knitting a hat for children, it’s important to choose a soft and comfortable yarn that is suitable for sensitive skin. Look for yarns that are specifically labeled as baby or children’s yarn, as they are usually made from gentle and hypoallergenic materials.
2. Use circular needles
Using circular needles instead of straight needles can make the knitting process easier and more comfortable. Circular needles allow you to knit in the round, which eliminates the need for seaming the hat later on. They also distribute the weight of the project more evenly, reducing strain on your hands and wrists.
3. Pay attention to gauge
Checking your gauge before starting the project is essential to ensure that the hat will fit properly. Use the recommended needle size and yarn weight, and knit a gauge swatch to determine the number of stitches and rows per inch. Adjust your needle size as necessary to match the gauge specified in the pattern.
4. Add earflaps
To make your hat extra warm and cozy, consider adding earflaps. Earflaps can be knit separately and then attached to the hat, or they can be knit directly onto the hat as you go. Follow the instructions in the pattern for shaping and attaching the earflaps.
5. Embellish with fun details
A children’s hat is a great opportunity to add some fun and unique details. Consider adding a pom-pom on top, a decorative button, or a cute animal face. Get creative and make the hat personalized and special for the child who will be wearing it.
- Choose the right yarn
- Use circular needles
- Pay attention to gauge
- Add earflaps
- Embellish with fun details
Frequently Asked Questions
Here are some commonly asked questions about the children’s earflap hat knitting pattern:
1. Can I resize the pattern for a different age group?
Yes, you can easily resize the pattern to fit a different age group. Simply adjust the number of stitches and rows to achieve the desired size. Keep in mind that the gauge may also need to be adjusted accordingly.
2. Can I use a different type of yarn?
While the pattern calls for a specific type of yarn, you can certainly experiment with different yarns to achieve different textures and finishes. Just make sure to choose a yarn that is suitable for the intended recipient, considering factors such as warmth and comfort.
3. How long does it take to complete the hat?
The time it takes to complete the hat will vary depending on your knitting speed and familiarity with the pattern. On average, it may take a few hours to complete the hat.
4. Can I sell the hats I make from this pattern?
Yes, you are free to sell the hats you make from this pattern. However, please note that the pattern itself is copyrighted and should not be distributed or sold.
5. I’m a beginner knitter, is this pattern suitable for me?
While this pattern is relatively beginner-friendly, some basic knowledge of knitting techniques such as casting on, knitting, purling, and decreasing is recommended. If you are new to knitting, it may be helpful to practice these techniques before attempting the pattern.
Conclusion
The children’s earflap hat knitting pattern is a versatile and customizable pattern that allows you to create cozy and stylish hats for your little ones. With a few adjustments and personal touches, you can make each hat unique. Happy knitting!