
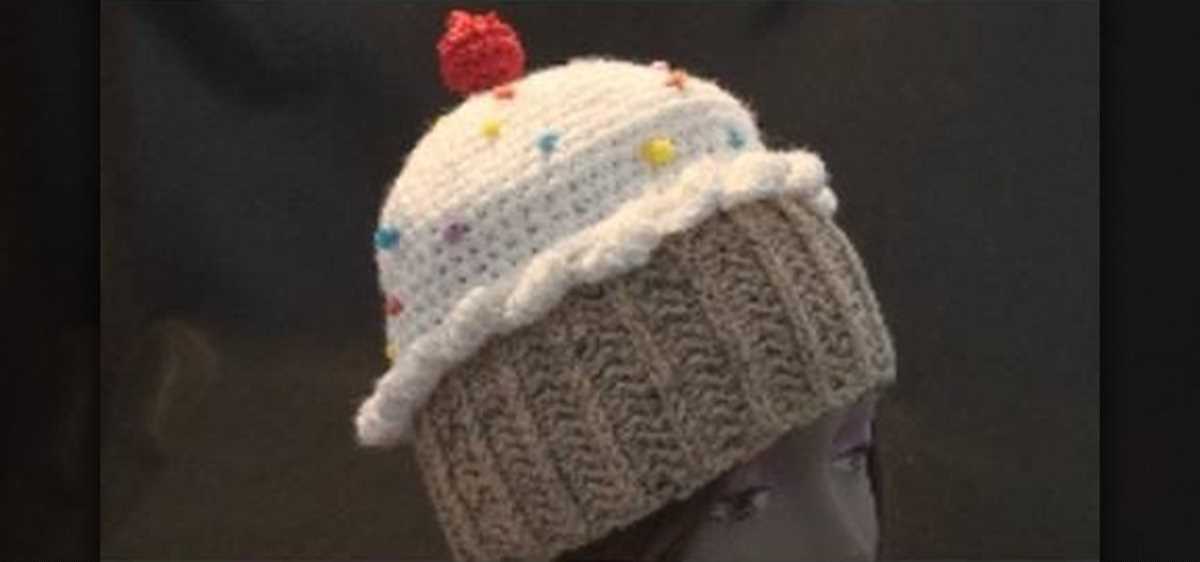
If you love cupcakes and knitting, then this free cupcake hat pattern is perfect for you!
There’s nothing quite like a warm and cozy hat to keep you stylish and comfortable during the colder months. And what better way to show off your love for cupcakes than by wearing a hat that looks like one? This adorable cupcake hat pattern is not only fun to make, but it also makes a delightful gift for anyone with a sweet tooth.
Whether you’re a beginner knitter or an experienced pro, this cupcake hat pattern is suitable for all skill levels. With clear instructions and step-by-step photos, you’ll be able to create the perfect cupcake hat in no time. Plus, the pattern is completely free, so you can have as many cupcakes on your head as you like without breaking the bank!
Free Cupcake Hat Pattern Knit
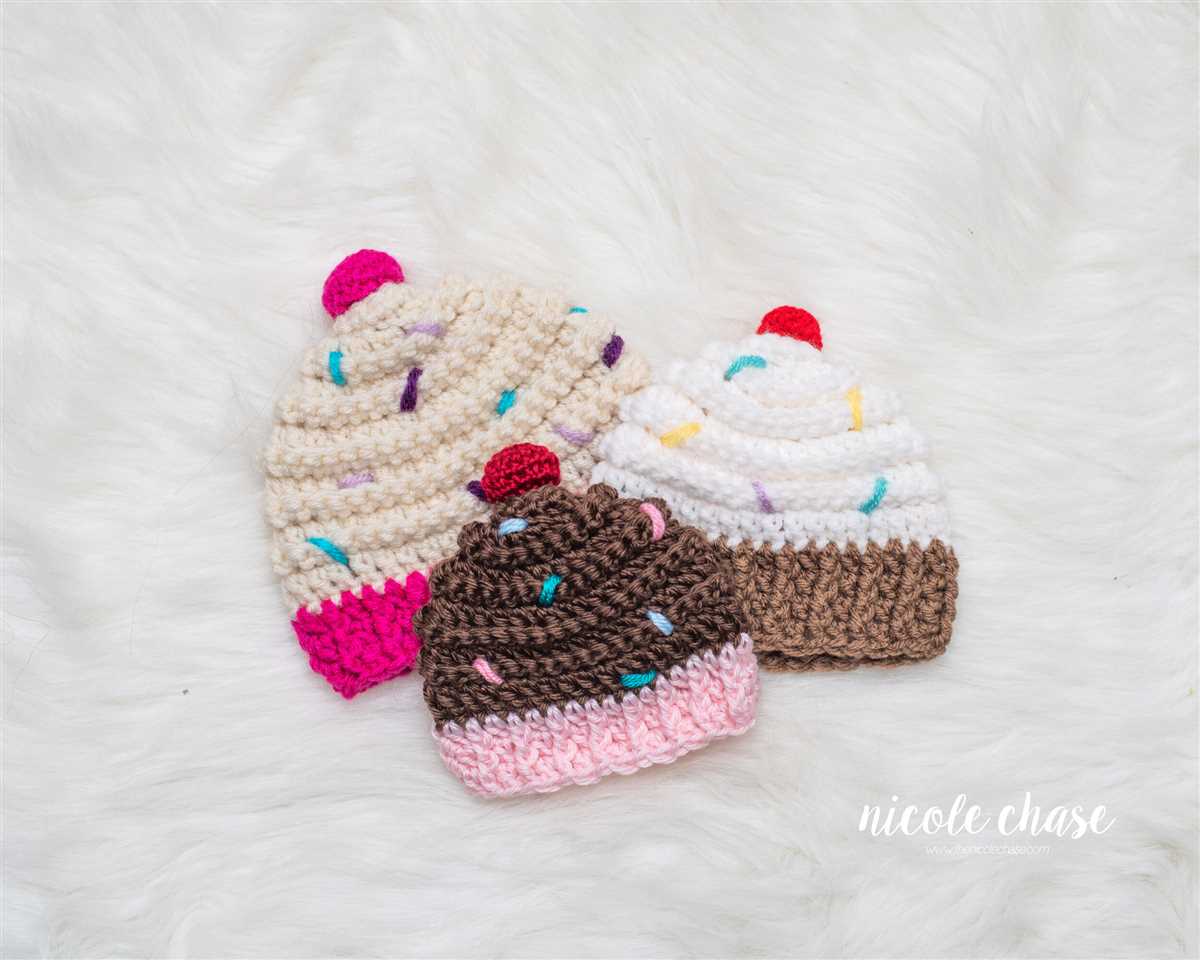
If you’re looking for a fun and adorable knitting project, look no further than the free cupcake hat pattern knit. This pattern allows you to create a cozy and cute hat that is perfect for children and adults alike. Whether you’re a beginner or an experienced knitter, this pattern is sure to bring a smile to your face as you create your very own cupcake hat.
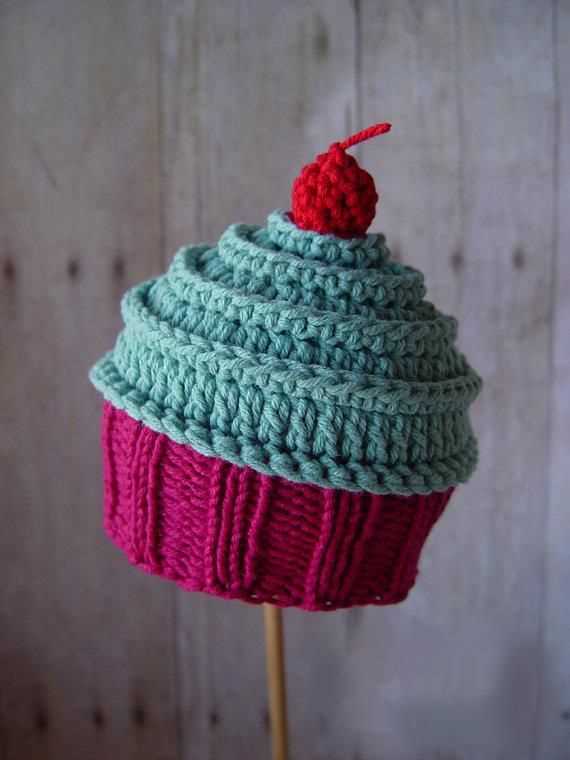
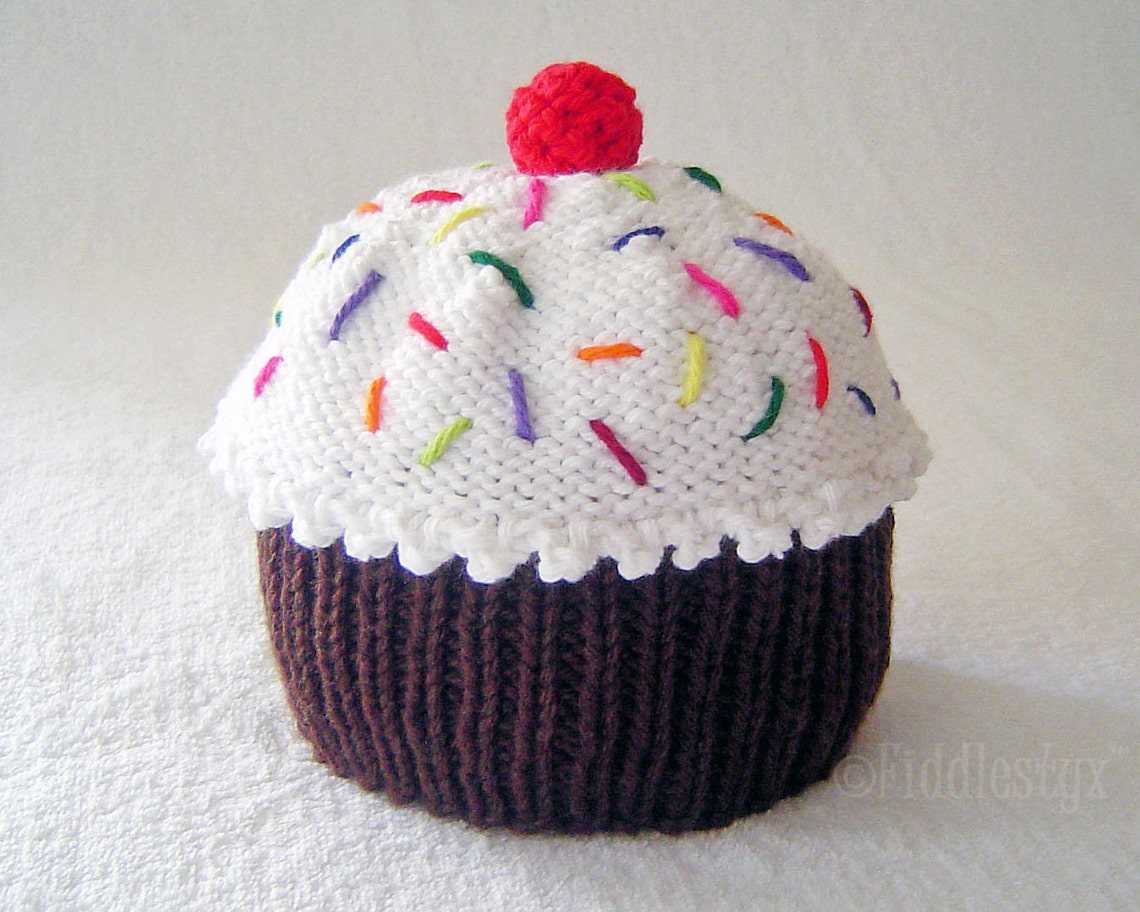
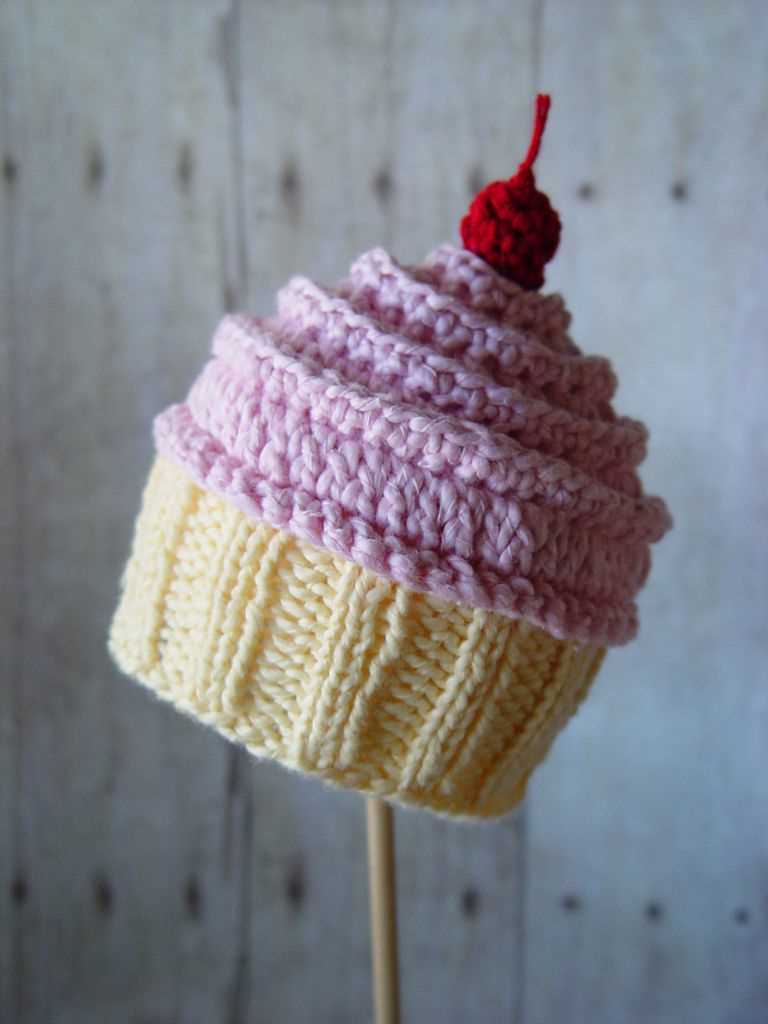
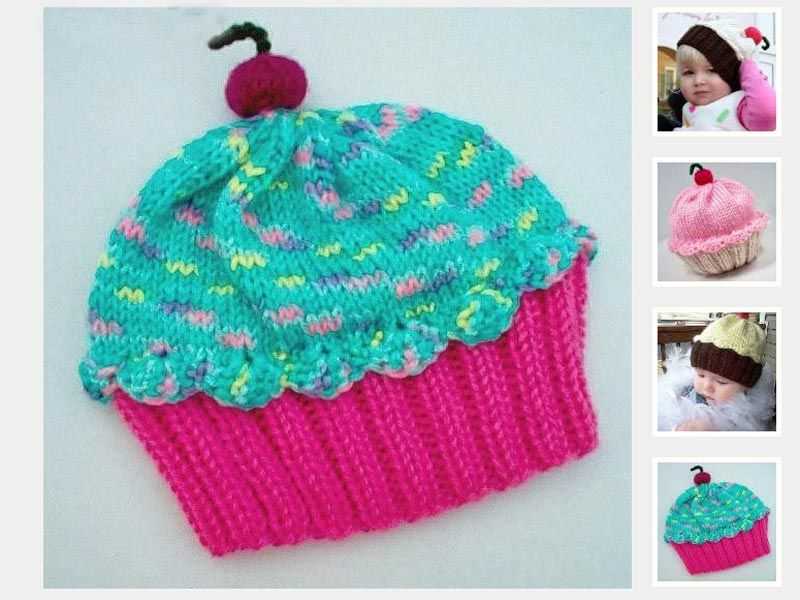
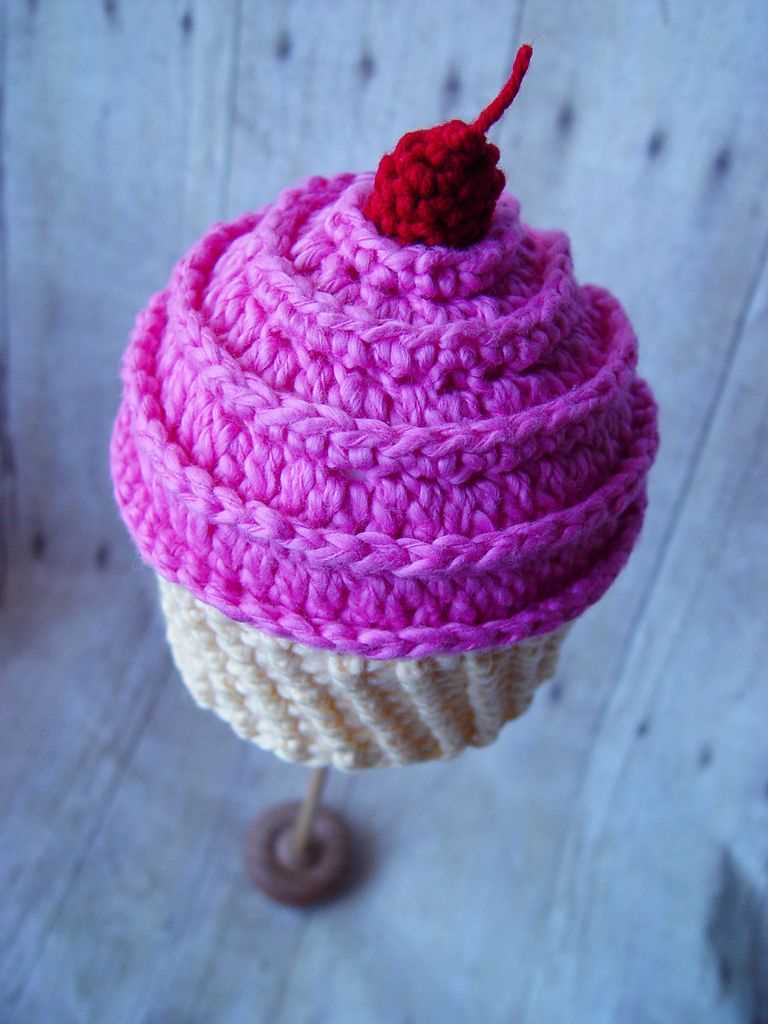
The free cupcake hat pattern knit features a unique design that resembles a delicious cupcake. The hat is knit using a combination of knit and purl stitches, as well as simple decreases to create the textured “frosting” on top. The pattern also includes instructions for knitting the cherry on top, which adds an extra touch of cuteness to the finished hat.
To knit this hat, you’ll need a few basic supplies, including yarn in your chosen colors, knitting needles, and a yarn needle for finishing. The pattern provides detailed instructions for each step, making it easy to follow along and create your own cupcake hat. Whether you’re knitting for yourself or someone special, this pattern is a great way to showcase your knitting skills and create a unique and personalized accessory.
Once you’ve finished knitting your cupcake hat, you can customize it even further by adding embellishments such as pom-poms, beads, or ribbons. This allows you to put your own creative twist on the hat and make it truly one-of-a-kind. Whether you choose to make this hat as a gift or for yourself, it’s sure to be a fun and rewarding project that will bring a touch of sweetness to your life.
Understanding the Cupcake Hat Pattern
Knitting a cupcake hat can be a fun and rewarding project, but understanding the pattern is essential before you get started. This article will guide you through the steps of the cupcake hat pattern, highlighting key phrases and techniques to help you create a cute and delicious-looking hat.
Materials Needed
- Yarn: The pattern recommends using worsted weight yarn in two colors – one for the cupcake base and one for the icing.
- Needles: You will need a set of double-pointed needles in the appropriate size for your yarn, as well as a circular needle for the brim.
- Stitch markers: These will help you keep track of your stitches throughout the pattern.
- Tapestry needle: This will be used for weaving in the ends and finishing touches.
Pattern Steps
To start, cast on the required number of stitches onto your circular needle. The pattern will specify the number of stitches based on the size of the hat you want to make. Once you have cast on, join in the round, being careful not to twist your stitches.
Next, you will work the brim of the hat using a rib stitch pattern. The pattern may call for a specific number of rows or a set length for the brim. Make sure to follow the instructions closely.
Once the brim is complete, you will begin working the body of the hat. This usually involves knitting in the round, using a combination of knit and purl stitches to create the cupcake base pattern. Pay attention to any repeats or increases specified in the pattern to achieve the desired shape.
As you continue knitting, you will eventually reach the part where you create the icing for the cupcake. This can be done using simple color changes or by knitting an additional pattern onto the existing stitches. Follow the pattern instructions carefully to achieve the desired effect.
Finally, you will finish off the hat by binding off or decreasing the stitches to close the top. This may involve shaping the top to resemble a cherry or any other decorative element. Once you have completed the final rows, cut the yarn and weave in any loose ends using a tapestry needle.
By following the cupcake hat pattern carefully and paying attention to the specific techniques and instructions provided, you will be able to create a delightful and adorable hat. Have fun knitting and enjoy the finished result!
Materials Needed
To knit the free cupcake hat pattern, you will need the following materials:
- Yarn: Choose a soft and warm yarn in the colors you desire for your cupcake hat. Worsted weight yarn is recommended for this pattern.
- Knitting Needles: Use a pair of size US 8 (5mm) circular or straight knitting needles, or the size needed to obtain the gauge.
- Double Pointed Needles: You will also need a set of size US 8 (5mm) double pointed needles for knitting the crown of the hat.
- Tapestry Needle: This needle will be used for weaving in the ends of the yarn and other finishing touches.
- Stitch Markers: Keep track of your stitches with small stitch markers. These can be simple plastic rings or decorative markers.
- Scissors: A sharp pair of scissors is essential for cutting the yarn and trimming any excess.
- Measuring Tape: Use a measuring tape to check your gauge and determine the size of your hat.
- Pom Pom Maker: Add a fun and decorative touch to your cupcake hat with a pom pom maker. Alternatively, you can make a pom pom by hand using cardboard circles.
With these materials on hand, you will be ready to start knitting your very own cupcake hat!
Casting On
When starting a knitting project, one of the first steps is to cast on the stitches. This is the process of creating the foundation row of stitches on the knitting needle. The number of stitches you cast on will depend on the pattern you are following and the size of the finished item.
There are several different methods for casting on, but one commonly used method is the long-tail cast on. To use this method, you will need to estimate the length of yarn you will need for your cast on stitches. To do this, measure out a length of yarn that is about three times the width of your finished item. Then, make a slipknot at this point and slide it onto your knitting needle.
Hold the needle with the slipknot in your dominant hand and the end of the yarn in your non-dominant hand. Use your non-dominant thumb and index finger to create tension on the yarn, while your other fingers hold the needle. Bring the needle up and over the yarn, creating a loop around the needle. Insert the needle through the loop from back to front, then bring the loop up and over the needle, creating a new stitch. Continue this process until you have cast on the desired number of stitches.
Another method for casting on is the cable cast on. This method creates a stretchy edge and is commonly used for projects that require a lot of give, such as hats or cuffs. To use this method, make a slipknot and slide it onto the needle. Insert the needle into the slipknot from front to back, then wrap the yarn around the needle once. Insert the needle through the loop and bring the loop up and over the needle, creating a new stitch. Repeat this process until you have cast on the desired number of stitches.
Once you have cast on all of your stitches, you are ready to start your knitting project. Remember to keep the tension on your yarn consistent as you work, and enjoy the process of creating something beautiful with your needles and yarn.
Knitting the Brim
When knitting a cupcake hat, one of the important components to pay attention to is the brim. The brim is what gives the hat its structure and helps it sit snugly on the head. It also adds a decorative touch to the overall design. Whether you’re a beginner or an experienced knitter, here are some tips for knitting the brim of a cupcake hat.
Selecting the Yarn
When choosing the yarn for the brim, it’s important to consider the desired thickness and stretchiness. A yarn with good elasticity, such as a blend of wool and acrylic, is ideal for the brim as it will help the hat fit comfortably on various head sizes. Also, consider the color and texture of the yarn to complement the rest of the hat design.
Choosing the Stitch Pattern
The stitch pattern used for the brim can vary depending on the desired look and level of difficulty. One common choice is the rib stitch, which creates a stretchy and flexible brim. Another option is a simple garter stitch, which creates a more structured and firm brim. Experiment with different stitch patterns and swatch before starting the actual hat to ensure the desired fit and appearance.
Working the Brim
When knitting the brim, it’s important to cast on the appropriate number of stitches to achieve the desired width. This can be determined by measuring the head circumference and adjusting the number of stitches accordingly. Work the chosen stitch pattern for the desired length, typically around 1-2 inches, to create the brim. It’s also important to maintain an even tension throughout the brim to ensure a cohesive and professional look.
Overall, the brim plays a crucial role in the design and functionality of a cupcake hat. By carefully selecting the yarn, choosing the right stitch pattern, and working with precision, you can create a beautifully finished brim that will add the perfect touch to your cupcake hat.
Creating the Cupcake Shape
When knitting the cupcake hat, one of the key elements is creating the cupcake shape. This can be achieved by using a combination of increases and decreases in specific areas of the hat.
To start, you will need to cast on the required number of stitches and join in the round. To create the base of the cupcake, you can begin by knitting in a ribbing pattern for a few rows. This will help give the hat some stretch and ensure a snug fit.
Once the ribbing is complete, you can move on to the cupcake portion. To create the increased shape, you will need to work a series of increases evenly around the hat. This can be done by knitting into the front and back of certain stitches, or by lifting the bar between stitches and knitting into it. This will gradually increase the number of stitches on the needles, creating a wider circumference for the cupcake.
Next, you can work on the decrease section to create the tapering effect of the cupcake. This can be done by knitting two stitches together or slipping stitches and passing them over one another. By decreasing the number of stitches gradually, you can achieve the desired shape of the cupcake.
Finally, you can finish off the top of the cupcake by gathering the remaining stitches and securely fastening them off. This will give the top of the hat a neat and finished look.
In summary, creating the cupcake shape for your knitted hat involves a combination of increases and decreases in specific areas. By following a pattern or using your own creativity, you can achieve a fun and unique cupcake-inspired design.
Knitting the Crown
In the world of knitting, the crown is one of the most iconic and essential components of any hat. It is the part that sits on top of the head, adding style and structure to the overall design. Knitting the crown requires skill and precision, as it is the final touch that completes the hat.
When knitting the crown, it is important to start with the correct number of stitches. This will ensure that the crown fits snugly and comfortably on the head. The number of stitches will vary depending on the size of the hat and the desired fit. It is important to follow the pattern carefully and make any necessary adjustments to achieve the desired result.
One common technique for knitting the crown is to decrease the number of stitches gradually towards the top. This creates a tapered effect that adds shape and dimension to the hat. This technique requires careful counting and attention to detail, as each decrease must be executed correctly to maintain the overall shape of the crown.
Another technique for knitting the crown is to incorporate different stitch patterns or textures. This can be done by alternating between knit and purl stitches, or by incorporating lace or cable patterns. These decorative elements add visual interest and can transform a simple hat into a stunning work of art.
In conclusion, knitting the crown is an important and rewarding step in creating a hat. It requires skill, precision, and attention to detail, but the end result is a beautiful and functional piece of clothing. Whether following a pattern or getting creative with different stitch patterns, the crown is the finishing touch that completes the hat and adds style to any outfit.
Shaping the Cupcake Top
When knitting the cupcake hat, shaping the top is an essential step to achieve the desired cupcake shape. The pattern typically includes instructions on how to decrease stitches gradually to create the rounded top of the cupcake.
Decreasing Stitches
To shape the cupcake top, you will begin decreasing stitches after reaching the desired height for the hat. This is usually done by working a series of knit or purl stitches together to reduce the total number of stitches. The specific decrease method may vary depending on the pattern, but common decrease techniques include knit two stitches together (k2tog), purl two stitches together (p2tog), slip slip knit (ssk), or slip slip purl (ssp).
As you work the decrease rows, it’s important to follow the pattern instructions carefully to ensure that the decreases are evenly spaced and maintain the overall cupcake shape. Pay attention to the stitch counts and any specific decrease instructions provided, such as working decreases every other row or decreasing every row until a certain number of stitches remain.
Creating the Cherry on Top
To finish off the cupcake hat, many patterns include instructions for adding a decorative cherry on top. This can be knitted separately and sewn onto the hat, or it can be worked directly onto the hat using a small number of stitches. The cherry is typically a small ball shape, either in a contrasting color or a textured stitch pattern to resemble a real cherry.
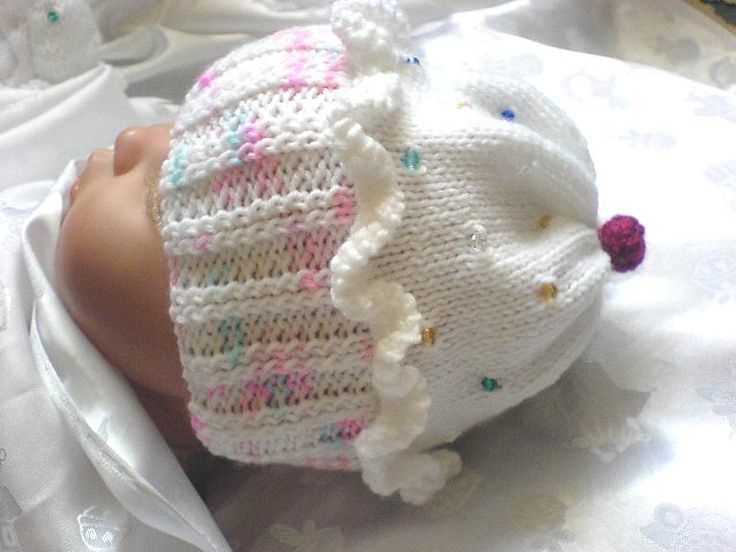
Some patterns may include additional embellishments, such as sprinkles or a frosting border, to make the cupcake hat even more cute and whimsical. These details can be added using duplicate stitch, embroidery, or other decorative techniques.
With careful attention to shaping the cupcake top and adding the cherry on top, you can create an adorable cupcake hat that is sure to delight both children and adults alike.
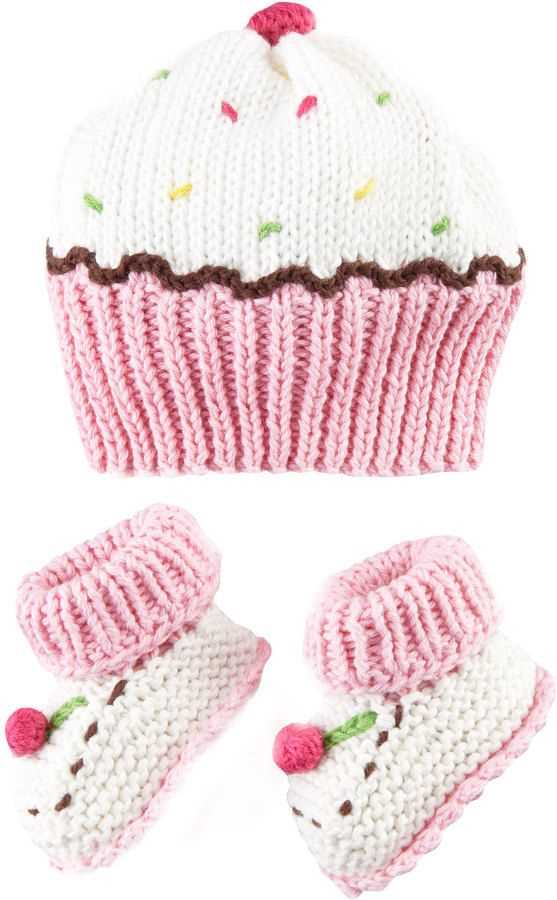
Adding the Icing
After knitting the base of the cupcake hat, it’s time to add the icing! The icing is what gives the hat its signature cupcake shape. To begin, cast on the required number of stitches to form the top of the icing. This can vary depending on the size of the hat and the desired amount of icing.
Next, start knitting in rounds, using either stockinette stitch or any other pattern of your choice. This will create the texture and appearance of frosting. It’s recommended to use a different color yarn for the icing to make it stand out.
Decorating the Icing
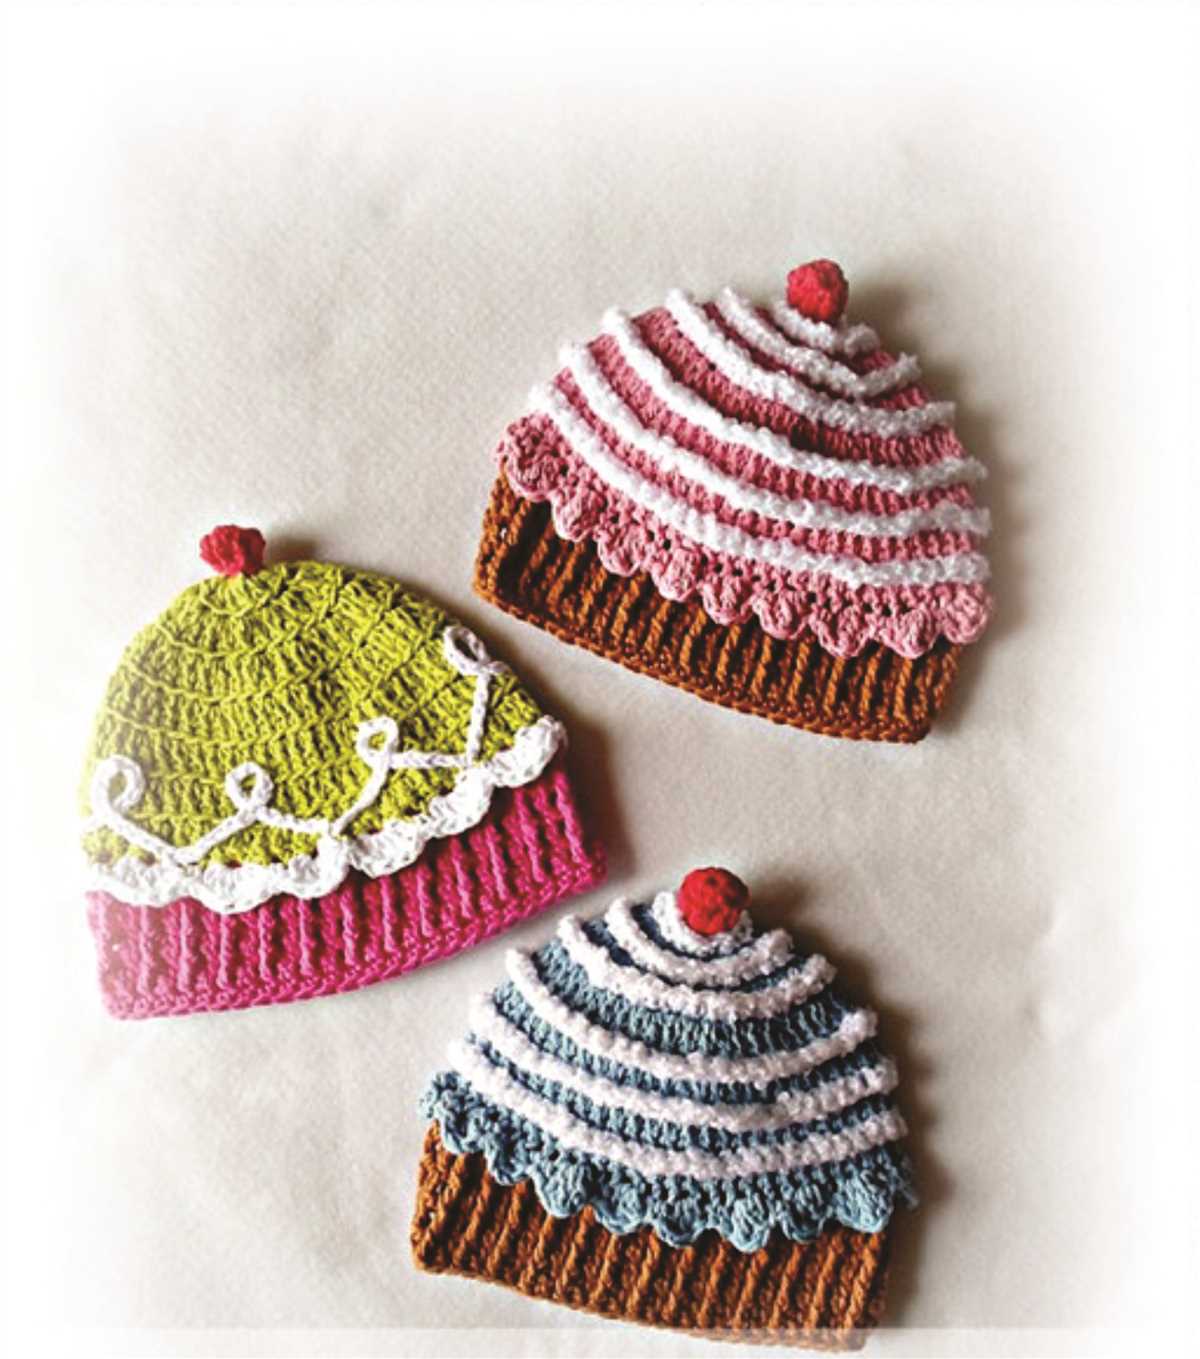
Once the icing has been knitted, it’s time to add some decorative elements to make it look more like a cupcake. One popular option is to create a ruffle effect along the bottom edge of the icing. This can be achieved by knitting a row of yarn overs, then knitting the following row together to create a gather.
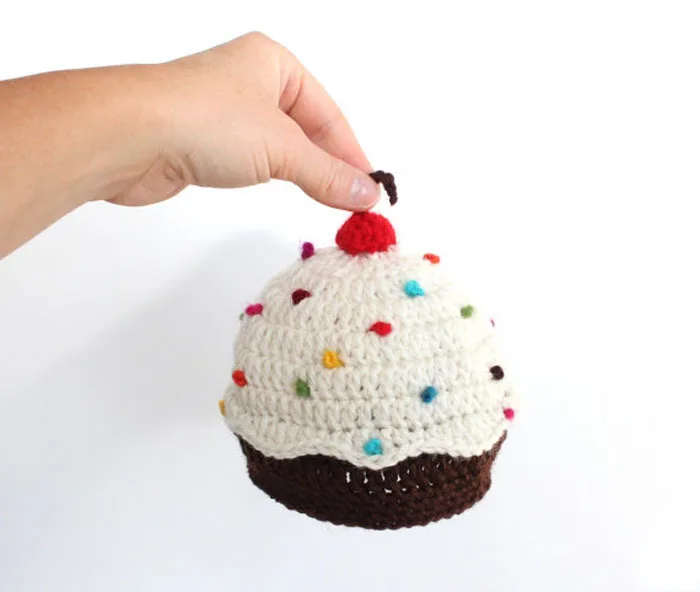
Additionally, you can add sprinkles to the icing by using small beads or thread in contrasting colors. Sew them onto the icing randomly or in a pattern to give the appearance of colorful sprinkles. Another option is to create a cherry on top of the icing by knitting a small sphere shape and sewing it to the center of the hat.
Remember to securely attach all the decorative elements to ensure they don’t come loose during wear. Once all the icing details are in place, the cupcake hat is complete and ready to be worn! Enjoy the cute and whimsical look, and don’t forget to share your creation with others.
Embellishing the Cupcake Hat

When it comes to creating the perfect cupcake hat, it’s all in the details. The free cupcake hat pattern knit provides a great base, but it’s the embellishments that really make it stand out. There are countless ways to add that extra touch of sweetness to your cupcake hat, allowing you to personalize it and make it your own.
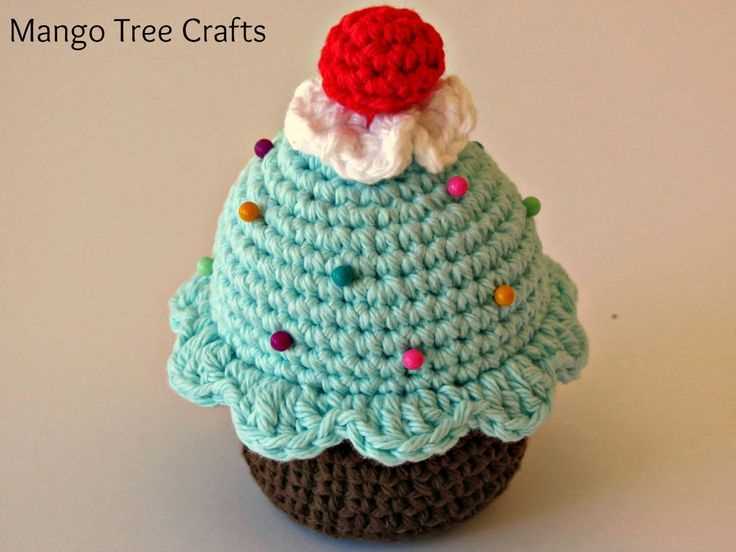
One popular option is to use embroidery or appliqué to add sprinkles to the “frosting” portion of the hat. This can be done using various colors of yarn or even small pieces of fabric. Simply sew them onto the hat in a random pattern to achieve the desired effect. Adding beads or sequins can also give the hat a touch of sparkle and visual interest.
Another fun idea is to add a “cherry” on top of the hat. This can be made using a small pom-pom or a crocheted or knitted cherry shape. You can even use a small red button or bead if you prefer a simpler look. Sew it onto the very top of the cupcake hat to complete the adorable cherry on top.
If you’re feeling particularly crafty, you can also create small knitted or crocheted cupcakes to attach to the hat. These can be made using the same pattern as the cupcake hat, just on a smaller scale. Attach them to the base of the hat using a needle and thread or by knitting them directly onto the hat. This adds a three-dimensional element to the hat and really makes it look like a delicious cupcake.
Additional Tip:
Don’t be afraid to get creative and experiment with different embellishments. You can add ribbons, bows, or even small fabric flowers to give your cupcake hat a unique and personalized touch. The key is to have fun and let your creativity shine through!
Finishing Touches
Once you have finished knitting your cupcake hat, it’s time to add some finishing touches to make it look even more adorable. Here are a few suggestions to complete your cupcake hat:
1. I-cord cherry: To add the cute cherry on top of your cupcake hat, you can knit an I-cord in a contrasting color. Simply cast on a few stitches, knit in an I-cord for a few inches, and then bind off. Attach the I-cord to the top of the cupcake hat.
2. Pom-pom sprinkles: To give your cupcake hat a sprinkle effect, you can attach small pom-poms in different colors to represent sprinkles. You can either sew them on with a needle and thread or use fabric glue to stick them in place.
3. Embroidered details: You can add some cute embroidered details to your cupcake hat, such as the ridges on the bottom of the cupcake or the icing swirl. Use a contrasting yarn color and a tapestry needle to add these details.
4. Ribbed edging: To create a neat and polished look, you can add a ribbed edging to the bottom of the cupcake hat. Knit a few rounds of ribbing using a smaller needle size to create a stretchy and snug edge.
5. Decorative buttons: If you want to add a bit of charm to your cupcake hat, you can sew on some decorative buttons. Choose buttons that match the color scheme of your hat and sew them onto the ridges or the icing swirl for an extra special touch.
By adding these finishing touches, you can customize your cupcake hat and make it truly unique. Whether you choose to knit an I-cord cherry or add pom-pom sprinkles, these small details will make your cupcake hat look even more adorable and delicious!