
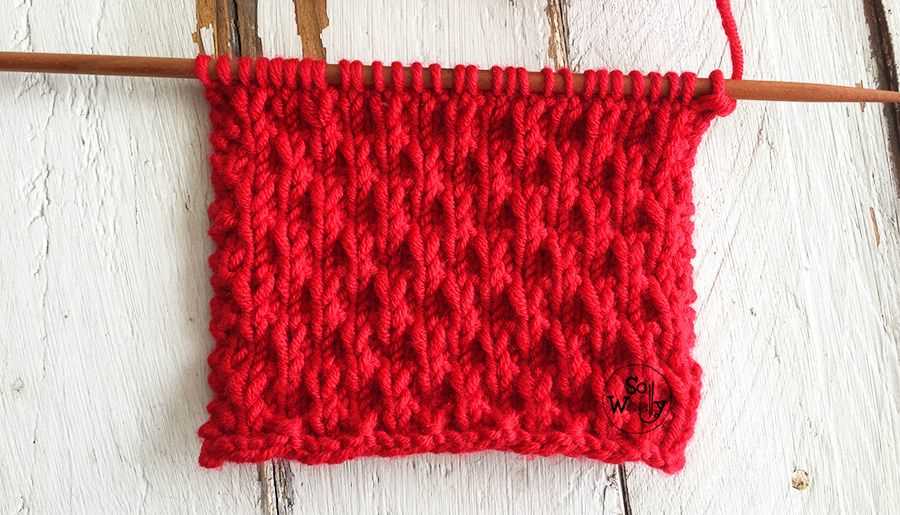
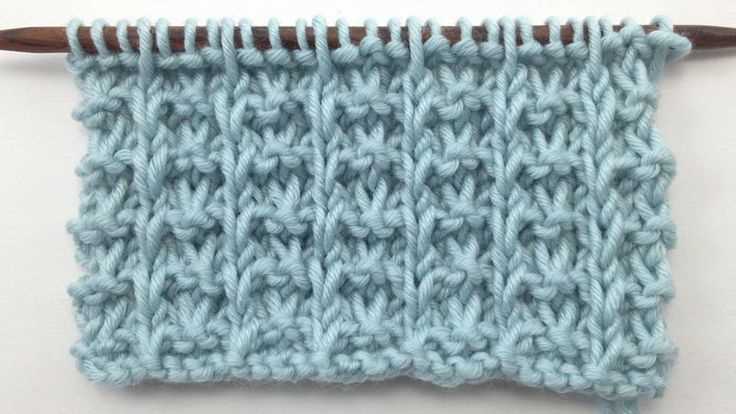
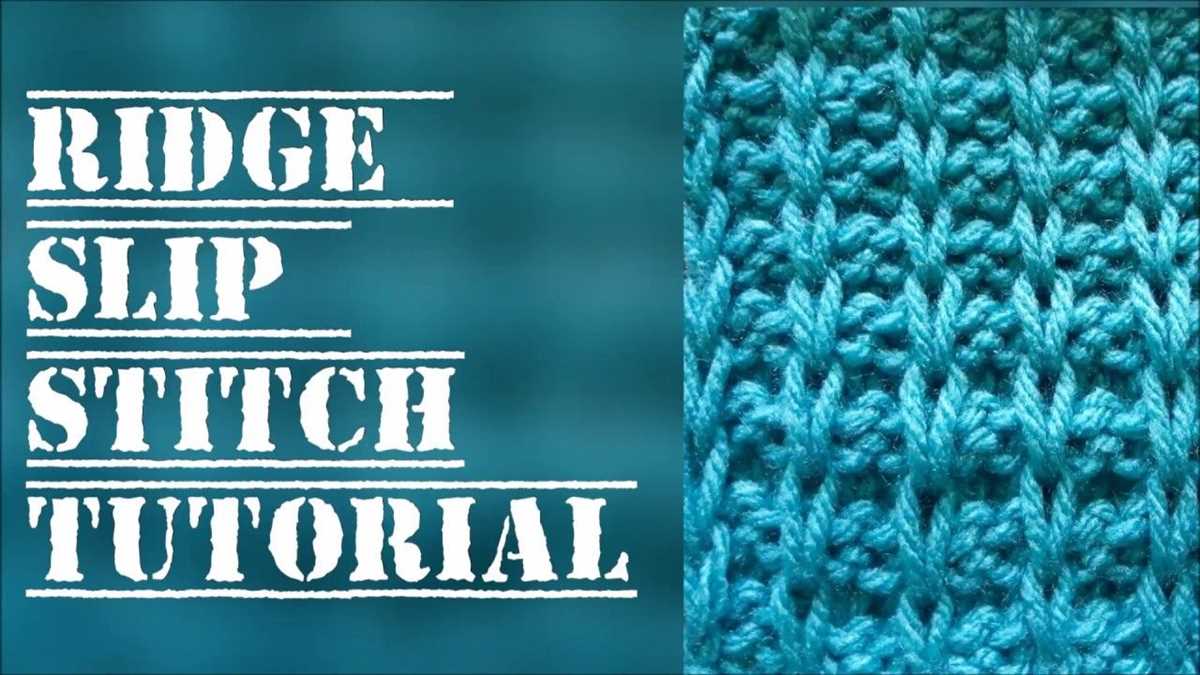
The slip stitch knit pattern is a popular technique in knitting that creates a textured fabric with an interesting look. It is simple to knit and creates a beautiful effect that can be used in a variety of knitting projects.
This pattern gets its name from the slip stitch, which is a technique where you pass a stitch from the left-hand needle to the right-hand needle without knitting or purling it. Instead, you simply slip the stitch from one needle to the other as if you were going to knit it.
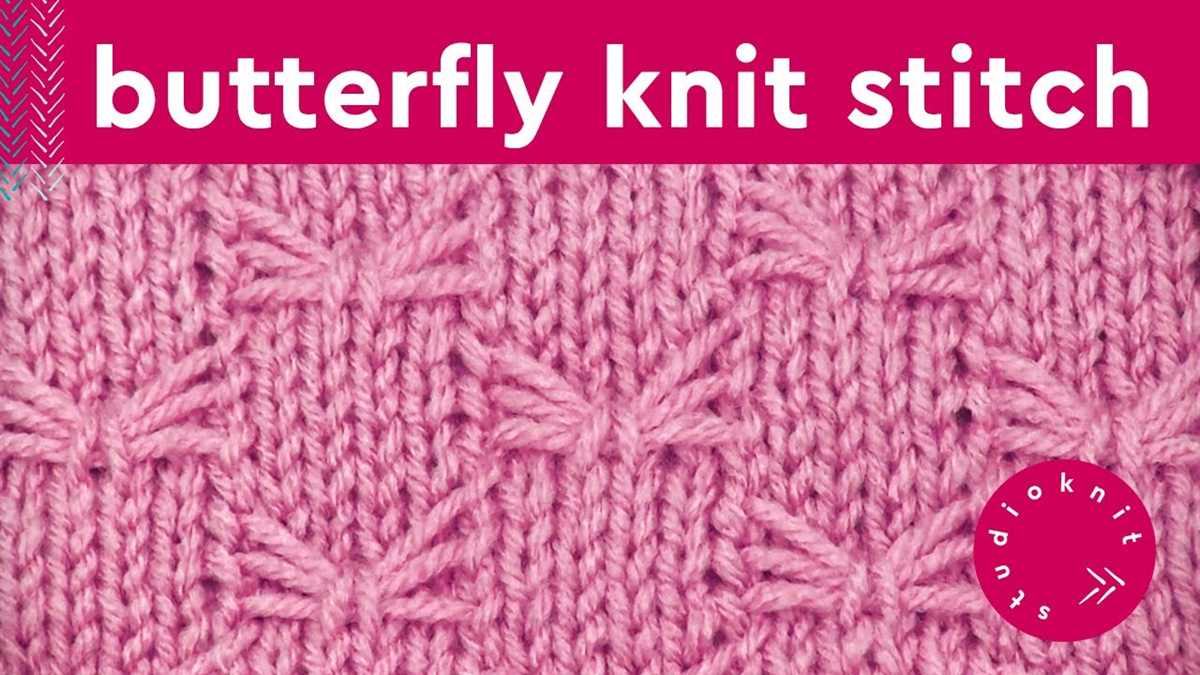
When combined with knitting or purling stitches, the slip stitch creates a pattern that can resemble cables, lace, or other complex textures. It is often used to add visual interest to plain stockinette stitch or to create decorative borders on scarves, sweaters, or blankets.
The slip stitch knit pattern is a great option for knitters of all skill levels. It is easy to learn and can be used to create a wide range of looks. Whether you are a beginner looking to try something new or an experienced knitter wanting to add some extra flair to your projects, the slip stitch knit pattern is a versatile and fun technique to explore.
What is Slip Stitch Knit Stitch?
The slip stitch knit stitch is a basic knitting technique that creates a simple yet elegant texture in knitted fabric. It is often used to add depth, contrast, and visual interest to a knitted piece. This stitch is commonly used in various knitting projects, including scarves, hats, sweaters, and blankets.
When working the slip stitch knit stitch, the knitter slips a stitch from the left-hand needle onto the right-hand needle without working it, and then knits the next stitch as usual. This creates a slipped stitch, which creates a horizontal strand of yarn across the fabric. This technique can be used to create a variety of patterns, such as cables, colorwork, and texture patterns.
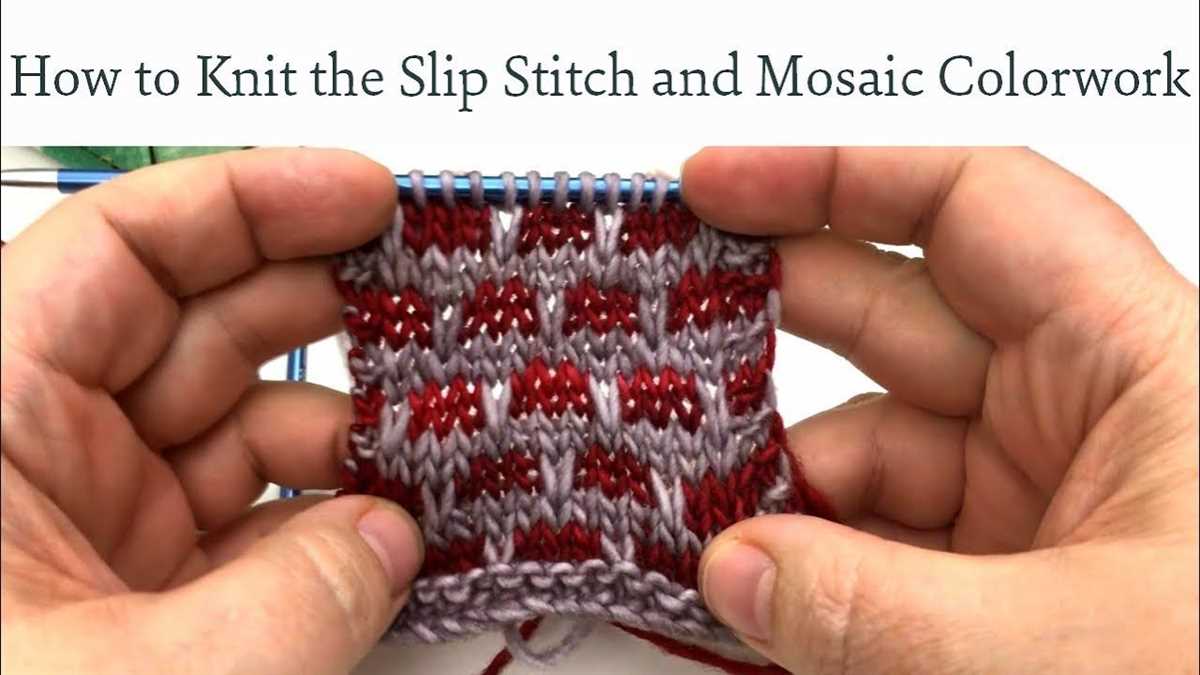
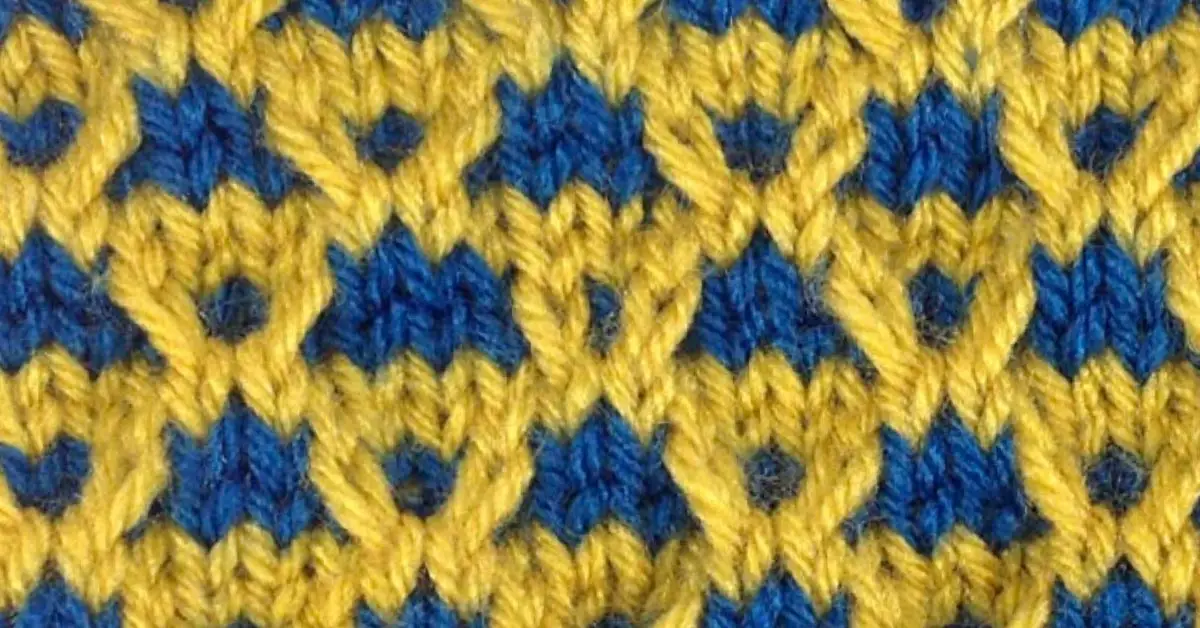
Slip stitch knitting is often used in colorwork projects, such as Fair Isle knitting, to create intricate patterns and designs. By slipping stitches and working with multiple colors, knitters can create beautiful motifs and images in their knitted fabric. This technique is also commonly used in mosaic knitting, which involves knitting with multiple colors of yarn but only working with one color per row.
The slip stitch knit stitch is a versatile technique that can be used to create unique and eye-catching designs. By incorporating this stitch into your knitting projects, you can add texture, depth, and visual interest to your finished pieces.
Understanding the Basics of Slip Stitch Knit Stitch
When it comes to knitting, there are various stitch patterns that can be used to create unique and beautiful designs. One popular stitch pattern is the slip stitch knit stitch, which involves slipping stitches rather than knitting them. By understanding the basics of this technique, you can incorporate it into your knitting projects to add texture and visual interest.
Slip Stitch Knit Stitch Technique
The slip stitch knit stitch is a simple technique that involves slipping stitches from the left needle to the right needle without knitting them. Instead of inserting the right needle into the slipped stitch, you simply move it from the left needle to the right needle. This creates a decorative and textured effect in the knitted fabric.
One of the main advantages of using the slip stitch knit stitch technique is that it is an easy way to create a fabric that looks more complex than it actually is. With just a simple combination of slipping stitches and knitting, you can create patterns and designs that appear intricate and detailed.
Uses of Slip Stitch Knit Stitch
The slip stitch knit stitch can be used in a variety of ways to add texture and interest to your knitting projects. It can be incorporated into garments such as sweaters, scarves, and hats to create unique and eye-catching patterns. It can also be used in accessories like bags and blankets to add visual interest.
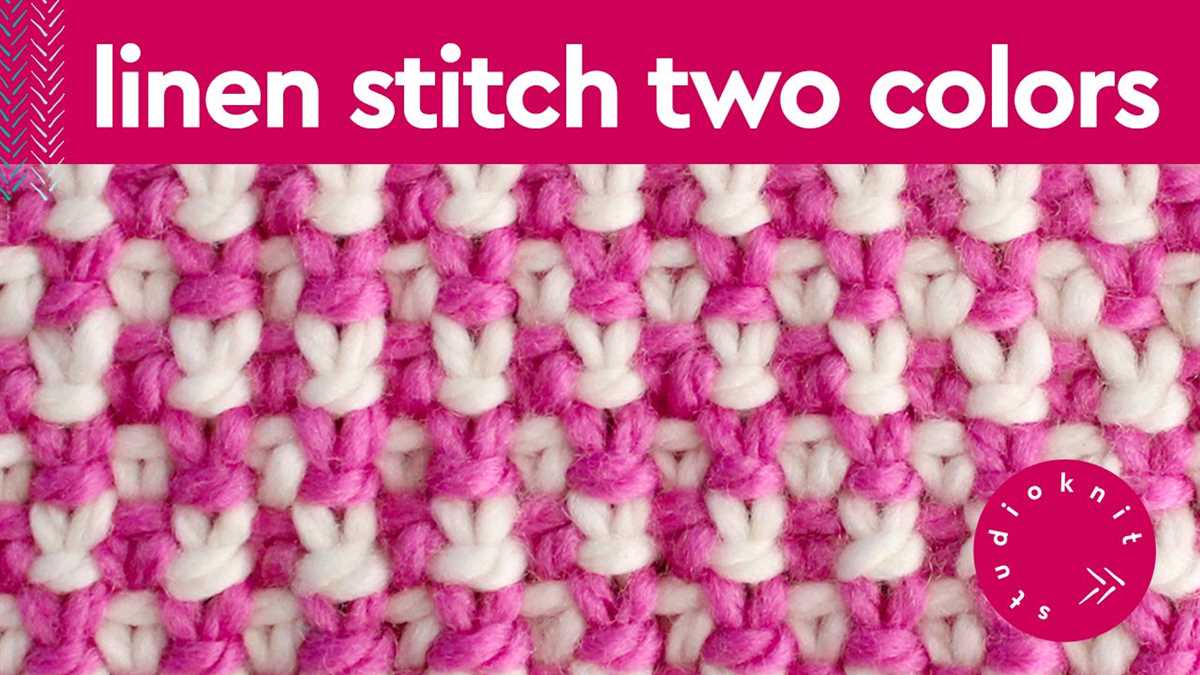
Additionally, the slip stitch knit stitch is a great technique for colorwork knitting. By using different colored yarns and slipping stitches in a specific pattern, you can create stunning colorwork designs without the need for complex techniques like intarsia or fair isle knitting.
Tips for Working Slip Stitch Knit Stitch
When working the slip stitch knit stitch, it’s important to pay attention to your tension. Since you are not actually knitting the slipped stitches, it’s easy to accidentally pull the working yarn too tight, resulting in a fabric that is stiff and puckered. To avoid this, try to maintain an even tension as you work the stitches.
Another tip is to use a slightly larger needle size than you would typically use for the yarn weight. This will help create a more open and airy fabric, allowing the slipped stitches to stand out more. You can also experiment with different stitch patterns and combinations to create your own unique designs.
Benefits of Using Slip Stitch Knit Stitch
The slip stitch knit stitch is a popular technique in knitting that offers several benefits to knitters.
- Creates texture: Slip stitch knitting creates an interesting texture on the fabric, giving it a unique look and feel. The slipped stitches create elongated loops that can add depth and dimension to the knitted piece.
- Is easy to learn: The slip stitch knit stitch is relatively easy to learn, even for beginner knitters. It involves slipping stitches from the left needle to the right needle without knitting them, which can be quickly mastered with some practice.
- Uses less yarn: Slip stitch knitting uses less yarn compared to other knitting techniques. Since not all stitches are worked in every row, the fabric stretches further, making it an economical choice for projects with limited yarn.
- Creates a dense fabric: Slip stitch knitting creates a dense fabric with excellent stitch definition. The slipped stitches help tighten the fabric, making it suitable for projects that require structure and warmth, such as hats, mittens, and scarves.
- Provides colorwork options: Slip stitch knitting is especially useful for colorwork projects. By using different colored yarns and slipping stitches, intricate patterns and designs can be created without the need for complex knitting techniques like stranded knitting or intarsia.
In conclusion, the slip stitch knit stitch is a versatile and practical technique in knitting. Its ability to create texture, ease of learning, yarn-saving properties, dense fabric, and colorwork options make it a valuable skill for knitters of all levels. Whether you’re looking to add dimension to your knitting or explore new colorwork possibilities, the slip stitch knit stitch is worth incorporating into your knitting repertoire.
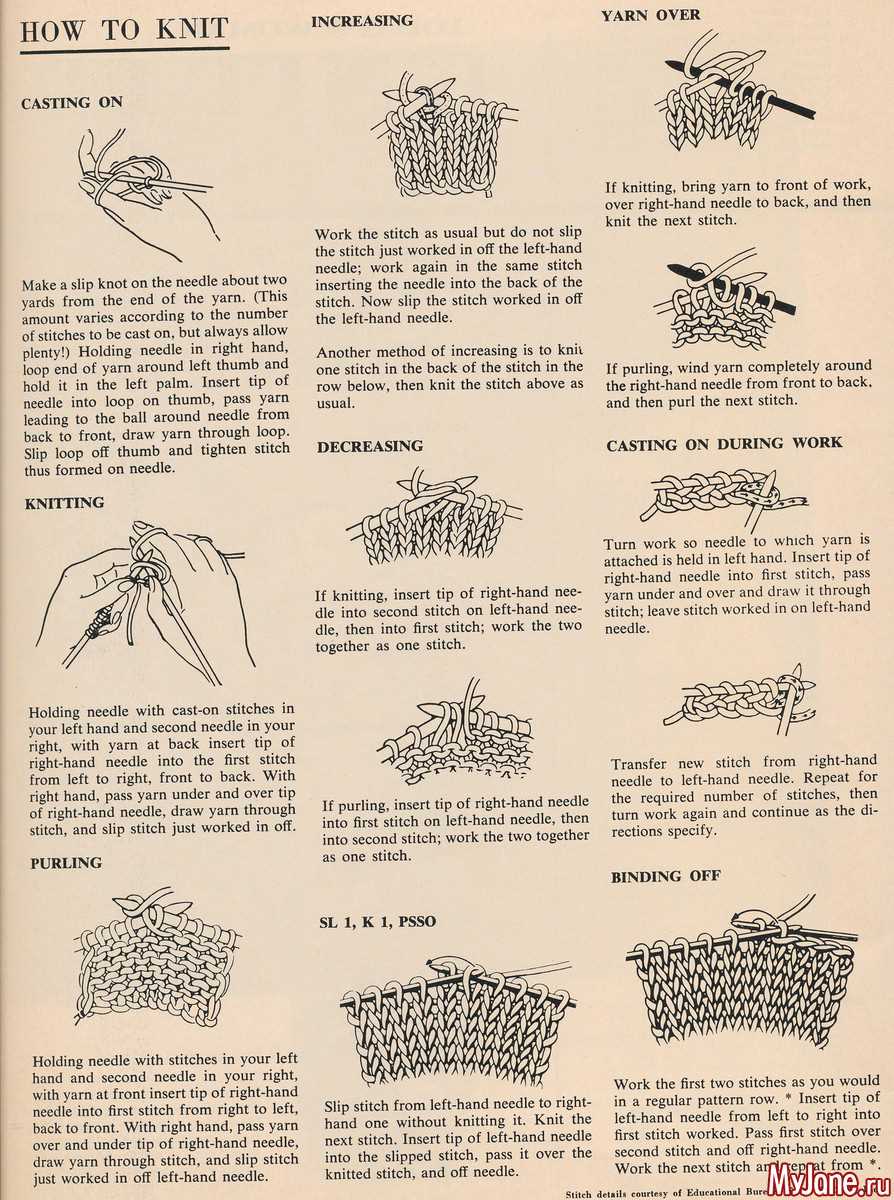
How to Knit Slip Stitch Knit Pattern
Slip stitch knit pattern is a simple yet versatile knitting technique that can be used in a variety of projects. It creates a textured fabric with a nice drape and can be used to add visual interest to any knitting project.
To knit slip stitch knit pattern, you will need a pair of knitting needles and a ball of yarn. Start by casting on the desired number of stitches, keeping in mind that slip stitch knit pattern uses a multiple of two stitches plus one extra stitch.
Once you have casted on, begin the first row by knitting one stitch. Then, slip the next stitch purlwise from the left needle to the right needle without knitting it. Repeat this pattern of knitting one stitch and slipping one stitch until you reach the end of the row.
On the second row, start by purling one stitch. Then, slip the next stitch purlwise from the left needle to the right needle without purling it. Repeat this pattern of purling one stitch and slipping one stitch until you reach the end of the row.
Continue alternating between knitting one stitch and slipping one stitch on the knit rows and purling one stitch and slipping one stitch on the purl rows. This will create the slip stitch knit pattern.
The slip stitch knit pattern can be used in a variety of knitting projects, such as scarves, hats, and sweaters. It can be combined with other stitch patterns to create unique designs and textures. Experiment with different yarns and needle sizes to achieve different levels of drape and texture in your projects.
In summary, slip stitch knit pattern is a versatile knitting technique that creates a textured fabric with a nice drape. It involves alternating between knitting one stitch and slipping one stitch on the knit rows, and purling one stitch and slipping one stitch on the purl rows. This pattern can be used in a variety of projects to add visual interest and create unique designs.
Gathering the Supplies for Slip Stitch Knitting
Slip stitch knitting is a technique that creates beautiful textures and patterns using a combination of slipped stitches and knitted stitches. To get started with slip stitch knitting, you’ll need a few essential supplies.
Yarn: Choose a yarn that is suitable for slip stitch knitting. Yarns with good stitch definition, such as worsted weight or bulky yarns, work well for this technique. Consider the color and fiber content of the yarn to achieve the desired effect in your slip stitch knitted project.
Knitting Needles: Select knitting needles that are appropriate for the yarn you have chosen. Slip stitch knitting can involve working with multiple strands of yarn, so make sure your needles are long enough to comfortably accommodate the width of your project. Circular needles are often preferred for slip stitch knitting as they can hold a large number of stitches.
Tapestry Needle: A tapestry needle is essential for weaving in loose ends and finishing your slip stitch knitted project. Choose a needle with a large eye that can easily accommodate the yarn you are using.
Stitch Markers: Slip stitch knitting often involves different stitch patterns and repeats. Stitch markers can help you keep track of stitch counts and pattern repeats, making it easier to follow the slip stitch pattern instructions accurately.
Pattern: Find a slip stitch knitting pattern that appeals to you. Slip stitch knitting can create beautiful colorwork and textured patterns, so choose a pattern that showcases the technique and suits your skill level.
With these supplies in hand, you’ll be ready to explore the world of slip stitch knitting and create stunning projects with intricate designs and captivating textures.
Step-by-Step Guide to Knitting Slip Stitch Knit Pattern
Slip stitch knit pattern is a knitting technique that creates a textured fabric with a great visual appeal. It’s a simple pattern that involves slipping stitches instead of actually knitting them, creating a woven-like effect. If you’re new to slip stitch knitting, here is a step-by-step guide to help you get started.
Gather Your Materials
Before you begin, make sure you have all the necessary materials. You will need yarn in your chosen color, knitting needles in the appropriate size, and a pair of scissors. You may also want to have a stitch marker handy to mark the beginning of each round.
Cast On Stitches
- Start by casting on an even number of stitches onto your knitting needles.
- Hold your knitting needles in your preferred hand and create a slip knot.
- Insert one knitting needle into the slip knot loop, bringing it over the other needle and pulling it tight.
- Continue to cast on stitches until you have the desired number.
Knit the First Row
- To begin the slip stitch knit pattern, knit the first stitch as usual.
- Then, instead of knitting the next stitch, insert the right needle into the next stitch as if to knit, but simply slip it off the left needle and let it drop.
- Repeat this process for every stitch in the row, alternating between knitting one stitch and slipping one stitch.
Continue the Pattern
- For the following rows, continue to knit the first stitch and then slip the second stitch.
- Make sure to maintain the pattern established in the first row, knitting and slipping stitches as necessary.
- Continue knitting in this manner until you have reached the desired length of your project.
Bind Off and Finish
- When you have completed the slip stitch pattern, it’s time to bind off your stitches.
- Knit the first two stitches, then use the left needle to lift the first stitch over the second stitch and off the right needle.
- Continue binding off in this manner until you reach the end, then cut the yarn, leaving a tail to weave in later.
- Weave in any loose ends and block your finished project to give it a neat and polished look.
With this step-by-step guide, you can confidently start knitting slip stitch knit patterns and create beautiful textured designs. Happy knitting!
Tips and Tricks for Slip Stitch Knitting
Slip stitch knitting is a versatile technique that can create beautiful, textured patterns with minimal effort. Whether you are a beginner or an experienced knitter, here are some tips and tricks to help you master slip stitch knitting.
1. Choose the Right Yarn
When it comes to slip stitch knitting, choosing the right yarn is crucial. Opt for a yarn with good stitch definition and a smooth texture to showcase the slip stitch patterns. Yarns with a high wool content, such as merino or alpaca, work particularly well for slip stitch knitting.
2. Use a Smaller Needle Size
When working slip stitch patterns, it is recommended to use a slightly smaller needle size than what is recommended for the yarn. This helps create a tighter fabric and enhances the texture of the slip stitches.
3. Mark Your Slipped Stitches
As you slip stitches, it can be easy to lose track of where you are in the pattern. To avoid confusion, consider using stitch markers to mark your slipped stitches. This way, you can easily identify them and prevent mistakes in your knitting.
4. Keep Tension Consistent
Consistent tension is important in slip stitch knitting to ensure an even and professional-looking result. Pay attention to your tension as you work, making sure not to pull the yarn too tightly or too loosely. Practice and experience will help you achieve the desired tension.
5. Experiment with Different Slip Stitch Patterns
Slip stitch knitting offers endless possibilities for creating unique and intricate patterns. Don’t be afraid to experiment with different slip stitch patterns, such as mosaic knitting or slip stitch cables. By trying out different techniques, you can discover new and captivating designs.
Slip stitch knitting can add depth and visual interest to your knitting projects. With these tips and tricks, you can confidently explore the world of slip stitch knitting and create stunning, textured garments and accessories.
Choosing the Right Yarn for Slip Stitch Knitting
When it comes to slip stitch knitting, choosing the right yarn is essential to achieve the desired results. Slip stitch patterns create beautiful textures and colorwork effects, making it important to select a yarn that complements the technique.
Fiber Content: The first consideration when choosing yarn for slip stitch knitting is the fiber content. While slip stitch patterns can be worked with a variety of yarns, certain fibers are more suitable than others. Wool and wool blends are popular choices, as they have excellent stitch definition and provide warmth. Cotton and cotton blends can also be used, but they may result in a less defined texture.
Yarn Weight: The weight of the yarn is another important factor to consider. Slip stitch patterns often rely on the contrast between stitches, so using a yarn with a significant weight difference can enhance the overall effect. For example, pairing a light fingering weight yarn with a bulky weight yarn can create a striking colorwork design.
Color Selection: Slip stitch knitting offers endless possibilities when it comes to colorwork. Choosing yarns in contrasting or complementary colors can showcase the intricate slip stitch patterns. Variegated and self-striping yarns can also create visually interesting effects when combined with slip stitch techniques.
Texture and Drape: Consider the texture and drape of the yarn, as they can affect the overall look and feel of slip stitch knitting. Smooth yarns with good stitch definition are ideal for highlighting the slip stitches, while fuzzier yarns can create a softer and more textured appearance.
Ultimately, the choice of yarn for slip stitch knitting depends on personal preference and the desired outcome. Whether it’s a cozy sweater or a delicate accessory, selecting the right yarn will ensure a successful slip stitch project.
Common Mistakes to Avoid in Slip Stitch Knitting
Slip stitch knitting is a versatile technique that can create beautiful textures and patterns in your knitting projects. However, like any other knitting technique, it is not immune to mistakes. Here are some common mistakes to avoid when working with slip stitches:
1. Forgetting to move the yarn
One important step in slip stitch knitting is to move the yarn to the front or back of your work when slipping a stitch. Forgetting to do this can result in dropped stitches or uneven tension in your fabric. Always make sure to move the yarn to the appropriate position before slipping a stitch.
2. Knitting too tightly or loosely
Tension plays a crucial role in slip stitch knitting. If you knit too tightly, the slipped stitches may become too compressed, making it difficult to work with them in future rows. On the other hand, knitting too loosely can result in loose and sloppy stitches. It is important to find the right balance and maintain even tension throughout your project.
3. Misreading the slip stitch pattern
It is easy to misread or misunderstand the slip stitch pattern, especially if it involves different stitch combinations or repeats. Before starting a slip stitch pattern, take the time to understand the instructions and symbols used. A small mistake in reading the pattern can lead to significant errors in the final design.
4. Not using a stitch marker
In slip stitch knitting, it can be challenging to keep track of where you are in the pattern, especially if it involves long repeats or multiple stitch variations. Using a stitch marker can help you mark the beginning or end of a pattern repeat, making it easier to follow along and prevent mistakes.
5. Not blocking your finished project
Blocking is an essential step in any knitting project, and slip stitch knitting is no exception. Blocking helps even out the stitches, relax the fabric, and bring out the full texture and pattern of your slip stitch design. Skipping this step can result in a finished project that looks uneven or lacks definition.
Avoiding these common mistakes in slip stitch knitting will help you achieve better results and create beautiful textured patterns in your projects. Practice, attention to detail, and patience are key to mastering this technique.
Slip Stitch Knit Patterns for Beginners
Slip stitch knit patterns are a great way for beginners to add texture and visual interest to their knitting projects. They are simple to learn and can create beautiful designs with just a few basic stitches. In slip stitch knitting, only one color is worked on each row, and the stitches are slipped rather than knitted, resulting in a raised pattern.
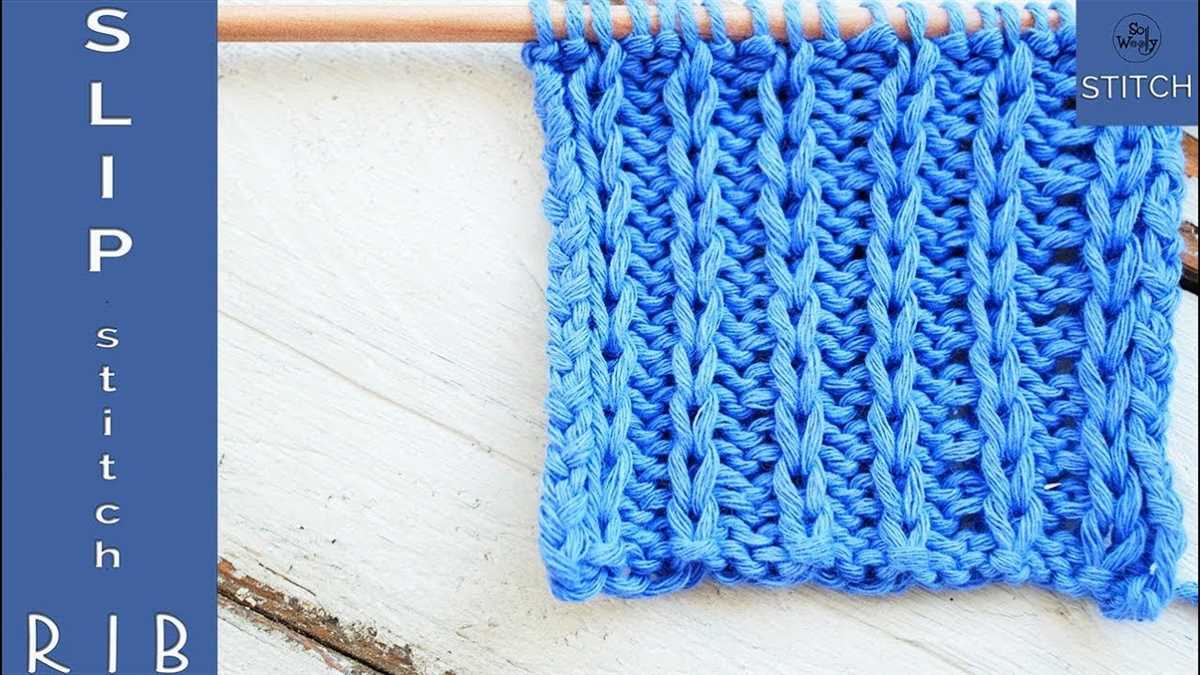
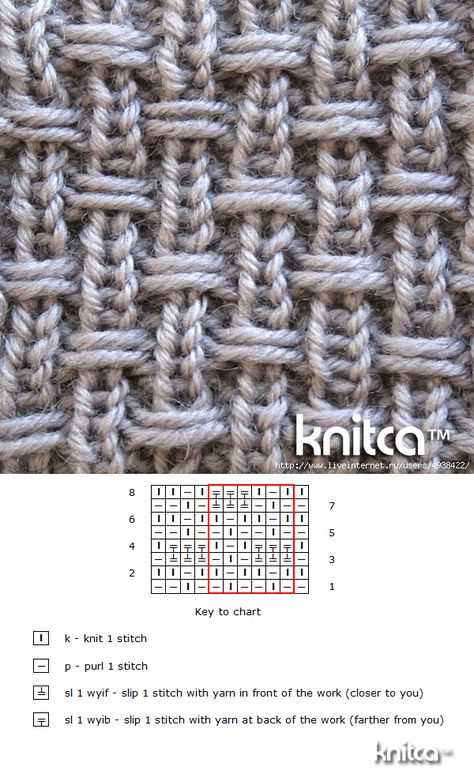
One popular slip stitch pattern for beginners is the “broken rib” pattern. To create this pattern, you would alternate between slipping the first stitch purlwise with the yarn in front, and knitting the next stitch. This creates a ribbed effect with raised lines running vertically up the fabric.
In addition to creating patterns, slip stitch knitting can also be used to add color and texture to a project. By using different colored yarns and slipping stitches, you can create unique colorwork designs without the complexity of stranded knitting. Slip stitch patterns can also be combined with other stitch patterns, such as garter stitch or stockinette stitch, to create even more interesting effects.
Another beginner-friendly slip stitch pattern is the “seed stitch” pattern. In seed stitch, you alternate between slipping the first stitch purlwise with the yarn in front, and knitting the next stitch. On subsequent rows, you would slip the knit stitches and knit the slipped stitches, creating a textured fabric that resembles scattered seeds.
Slip stitch knit patterns are a versatile technique that beginners can easily incorporate into their knitting repertoire. They offer endless possibilities for creating unique and visually appealing designs, and can be easily modified to suit your personal style. Whether you’re looking to add texture or color to your knitting projects, slip stitch patterns are a great way to enhance your skills and create beautiful, professional-looking results.
Easy Slip Stitch Knit Pattern for Scarves
A slip stitch knit pattern is a great option for beginners looking to add some texture and visual interest to their knitting projects. This easy pattern uses a combination of knit and slip stitches to create a simple yet beautiful design that can be used for scarves.
To start, you’ll need a pair of knitting needles and a skein of your favorite yarn. Choose a yarn with a smooth texture and a color that you love. Once you have your supplies ready, you can begin the slip stitch knit pattern.
Begin by casting on an even number of stitches. The number of stitches will depend on how wide you want your scarf to be. For example, you can cast on 30 stitches for a narrower scarf or 60 stitches for a wider scarf.
Once you have cast on the desired number of stitches, start the pattern by working two rows of knit stitches. This will create a border for your scarf.
Next, you’ll begin the slip stitch pattern. In this pattern, you’ll alternate between knitting and slipping stitches. To knit a stitch, insert your right needle into the stitch on the left needle, wrap the yarn around the right needle, and pull the loop through. To slip a stitch, insert the right needle into the stitch on the left needle as if to knit, but instead of knitting, simply slide the stitch onto the right needle without working it.
For the slip stitch pattern, you’ll knit one stitch and then slip the next stitch. Repeat this pattern across the entire row. On the next row, you’ll knit the slipped stitches and slip the knit stitches. This creates a lovely texture and adds depth to the fabric.
Continue working the slip stitch pattern until your scarf reaches the desired length. Finish the scarf by working two more rows of knit stitches, just like you did at the beginning.
Once you’ve finished knitting, bind off your stitches and weave in any loose ends. Your slip stitch knit scarf is now ready to be worn or gifted to a lucky recipient!
Slip Stitch Knit Pattern for Baby Blankets

When it comes to knitting baby blankets, the slip stitch pattern is a popular choice among knitters. This pattern creates a beautifully textured fabric that is both soft and warm, perfect for wrapping up a baby. The slip stitch pattern is also relatively easy to knit, making it suitable for knitters of all skill levels.
The slip stitch pattern involves working with two colors of yarn: a main color and a contrasting color. The contrasting color is used to create slip stitches, which are slipped from the left needle to the right needle without being knitted. This creates the textured effect in the fabric.
Here is a step-by-step guide on how to knit a slip stitch pattern for a baby blanket:
- Choose your yarn and needle size. It’s best to choose a soft and washable yarn for baby blankets, such as cotton or a soft acrylic blend. Use the recommended needle size for your chosen yarn.
- Cast on the desired number of stitches for your blanket. The slip stitch pattern works best with an odd number of stitches.
- Row 1: Using the main color, knit every stitch.
- Row 2: Switch to the contrasting color. *Slip the first stitch from the left needle to the right needle without knitting it, knit the next stitch.* Repeat from * to * across the row.
- Row 3: Switch back to the main color. Knit every stitch.
- Row 4: Switch to the contrasting color. *Knit the first stitch, slip the next stitch from the left needle to the right needle without knitting it.* Repeat from * to * across the row.
- Repeat rows 1-4 until your blanket reaches the desired length. You can choose to end with a row of the main color for a clean finish.
- Bind off all stitches and weave in any loose ends.
The slip stitch knit pattern for baby blankets is a versatile pattern that can be customized to fit any color scheme or design preference. It creates a beautiful textured fabric that is sure to keep any baby cozy and comfortable. Whether you are a beginner or an experienced knitter, the slip stitch pattern is a great choice for your next baby blanket project.
Advanced Slip Stitch Knitting Techniques
In this article, we have explored the basics of slip stitch knitting and how to create slip stitch patterns. While slip stitch patterns can create beautiful designs, there are also several advanced techniques that can take your slip stitch knitting to the next level. These techniques involve manipulating slip stitches to create more intricate patterns and textures in your knitting.
1. Cabling with slip stitches: Combine slip stitches with cabling techniques to create complex twisted designs. By slipping stitches onto a cable needle and crossing them over each other, you can create stunning cable patterns using slip stitches.
2. Multi-color slip stitch knitting: Experiment with using multiple colors in your slip stitch patterns. This can create beautiful colorwork designs with minimal effort. By working with two or more colors and changing colors on different rows, you can create intricate color patterns using slip stitches.
3. Lace-like slip stitch patterns: Use slip stitches to create lace-like patterns in your knitting. By strategically slipping stitches and creating yarn overs, you can achieve delicate and airy designs that resemble lace even though the fabric may be denser.
4. Mosaic slip stitch knitting: Mosaic knitting is a technique that combines slip stitches with colorwork to create geometric patterns. By slipping stitches and working with two colors in a specific way, you can achieve intricate mosaic designs that appear much more complex than they actually are.
In conclusion, slip stitch knitting offers a versatile and creative way to add texture, color, and pattern to your knitting projects. Whether you’re a beginner or an experienced knitter, there are so many possibilities to explore with slip stitch knitting. By mastering these advanced techniques, you can take your slip stitch knitting to new heights and create truly unique and stunning pieces.