
If you’re a fan of the beloved Harry Potter series and have a knack for knitting, this Harry Potter beanie knitting pattern is perfect for you! This pattern allows you to create a cozy and stylish beanie adorned with iconic Harry Potter symbols.
Designed for both beginner and experienced knitters, this pattern includes detailed instructions and tips to ensure your success. Whether you’re knitting for yourself or as a gift for a fellow Harry Potter fan, this beanie is sure to be a hit.
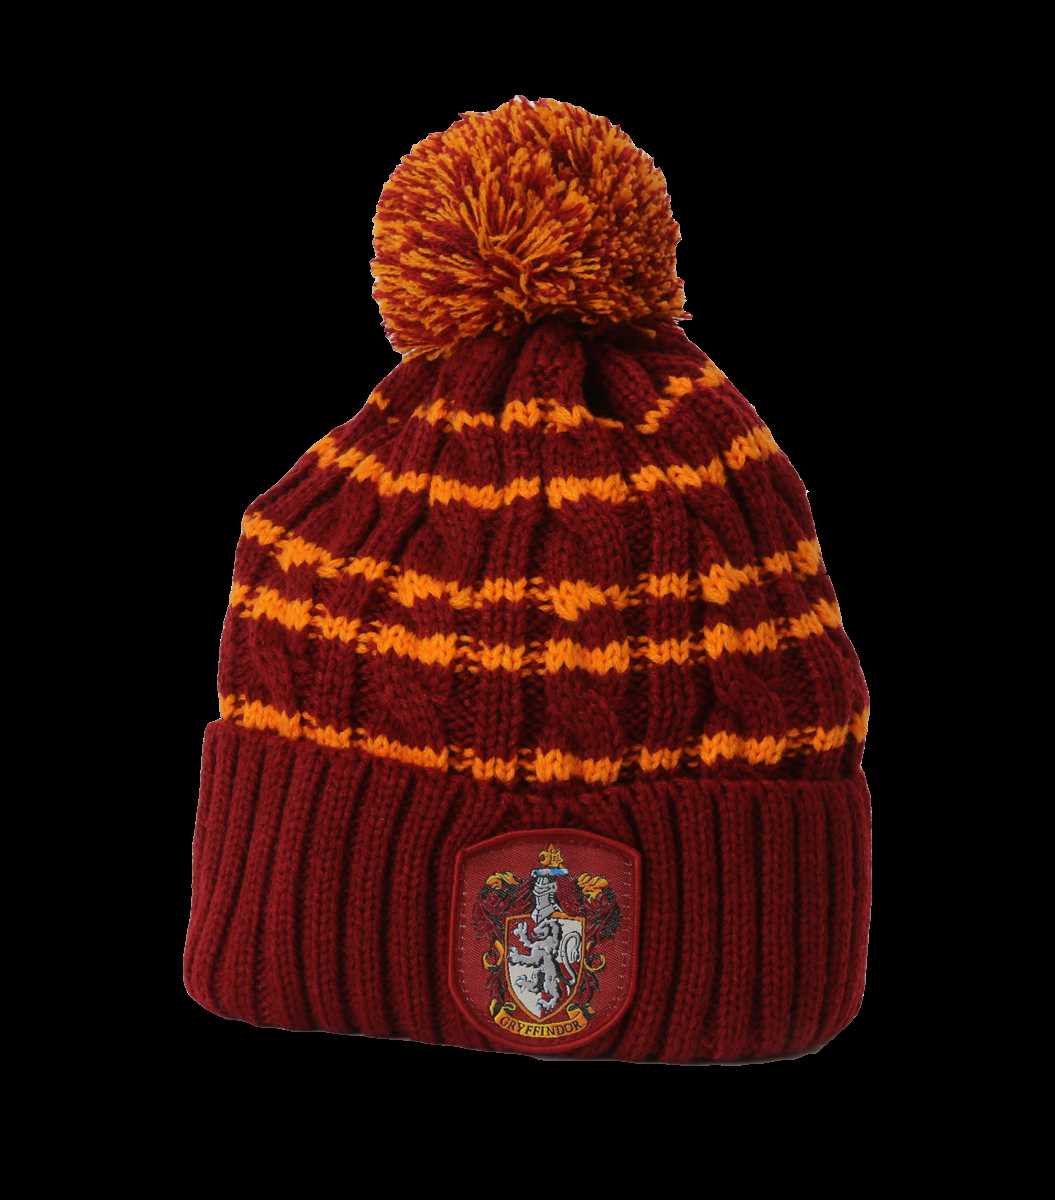
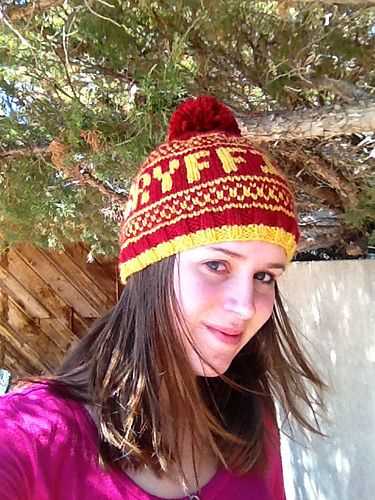
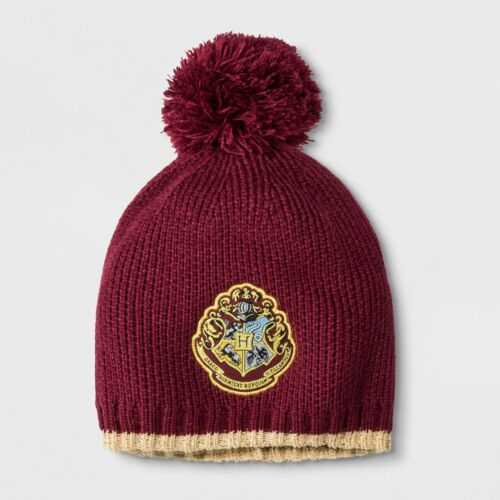
The pattern features the famous lightning bolt scar, the golden snitch, and the Hogwarts crest, making it a fantastic accessory for any Harry Potter-themed event or everyday wear. With the choice of using either the house colors or keeping it classic with the Gryffindor colors, this beanie allows you to customize it to your liking.
So, grab your knitting needles and get ready to bring a bit of magic to your winter wardrobe with this fantastic Harry Potter beanie knitting pattern!
How to Knit a Harry Potter Beanie: A Step-by-Step Guide
Are you a Harry Potter fan looking for a fun and cozy knitting project? Look no further! In this step-by-step guide, we will walk you through the process of knitting your very own Harry Potter beanie. Whether you’re a beginner knitter or an experienced crafter, this pattern is perfect for all skill levels.
Materials Needed:
- A set of knitting needles (size US 8/5 mm)
- Worsted weight yarn in the colors of your choice (e.g., black, red, gold)
- A tapestry needle
- A pair of scissors
Step 1: Cast On
To begin, cast on 88 stitches using your preferred method. This will form the brim of your beanie. Make sure to leave a long tail of yarn for weaving in later.
Step 2: Knit the Brim
Next, knit in a 2×2 rib stitch pattern (alternating between knit and purl stitches) for approximately 2 inches. This will create a stretchy and comfortable brim for your beanie.
Step 3: Choose Your House Colors
Now it’s time to choose the colors of your house! You can pick the traditional Gryffindor colors (red and gold), or you can customize the beanie with the colors of your favorite Hogwarts house. Once you’ve decided, continue to the next step.
Step 4: Knit the Body
Using your main color (e.g., black), continue knitting in a stockinette stitch (knit one row, purl one row) until the body of the beanie measures approximately 8 inches from the brim.
Step 5: Add the House Logo
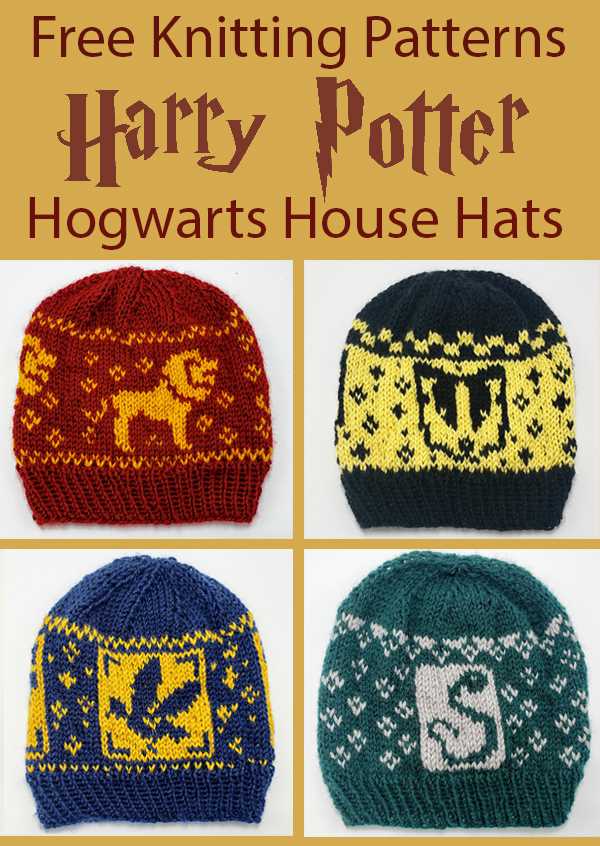
To add the house logo, consult a Harry Potter knitting chart or design your own pattern. Using the intarsia technique, knit the logo in the appropriate colors onto the body of the beanie. This will give it that signature Harry Potter touch.
Step 6: Decrease and Finish
When the logo is complete, it’s time to decrease and finish the beanie. Switch to double-pointed needles when necessary and follow a decreasing pattern (e.g., *K6, K2tog* repeat until the end of the row) until you have a small enough number of stitches to comfortably close the top of the beanie. Cut the yarn, leaving a long tail, and thread it through a tapestry needle. Pull the yarn through the remaining stitches, remove the needles, and cinch the top closed. Weave in any remaining ends.
Congratulations! You’ve just completed your very own Harry Potter beanie. Now you can proudly wear it to show off your love for the wizarding world. Accio knitting needles!
What is a Harry Potter Beanie?
A Harry Potter beanie is a knitted hat inspired by the popular Harry Potter book and film series. It typically features designs and motifs that are emblematic of the magical world of Harry Potter, such as the Hogwarts School of Witchcraft and Wizardry crest, the Golden Snitch, or the iconic lightning bolt scar that Harry Potter has on his forehead.
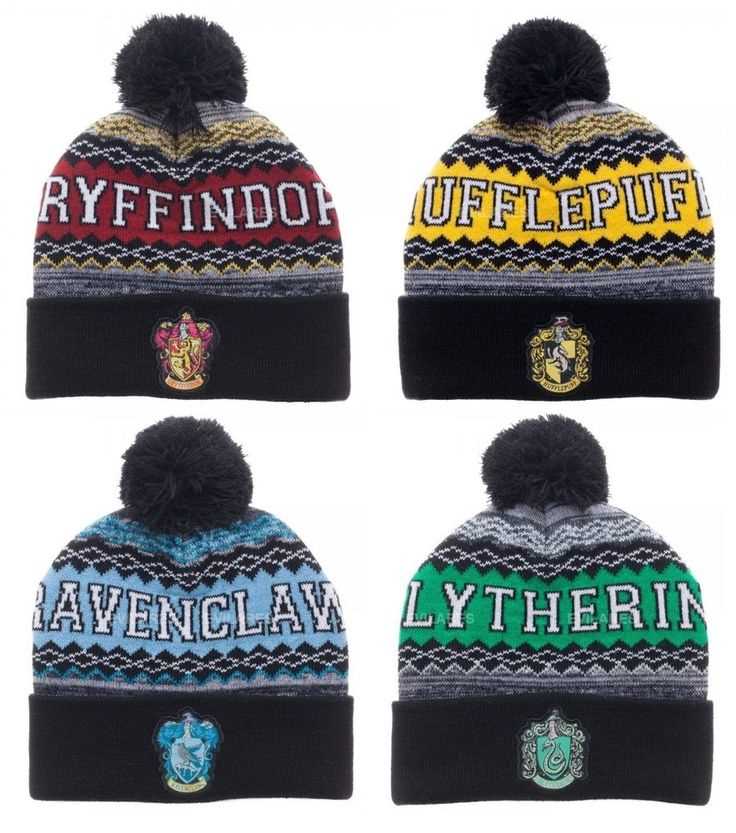
These beanies are not only fashionable accessories for fans of the Harry Potter series, but they also serve as a way to show off their love and support for the wizarding world. Whether you’re a Gryffindor, a Hufflepuff, a Ravenclaw, or a Slytherin, there is a Harry Potter beanie available to represent your Hogwarts house with pride.
Harry Potter beanies are often made with soft and warm yarns, such as acrylic or wool, to provide comfort and warmth during the colder months. They are usually designed to fit snugly on the head, providing a cozy and stylish option for fans to show off their love for the wizarding world.
These beanies can be knitted using various patterns, some of which are available for free online. Knitting a Harry Potter beanie can be a fun and rewarding project for fans of all ages and skill levels, allowing them to create a unique and personalized accessory that showcases their passion for the beloved series.
Materials Needed for Knitting a Harry Potter Beanie
Knitting a Harry Potter beanie requires a few essential materials to bring the enchanting world of Hogwarts to life. Here is a list of items you will need to create your very own magical beanie:
- Yarn: Choose a yarn in the colors of your favorite Hogwarts house or opt for the classic Gryffindor red and gold. The yarn should be worsted weight, suitable for needle size 8.
- Knitting Needles: You will need a pair of US size 8 (5mm) straight knitting needles. These will enable you to create the desired stitch pattern and shape for the beanie.
- Circular Needles: Circular needles in the same size are also recommended, as they can make knitting the rounded crown of the beanie easier. They can be interchangeable with the straight needles.
- Stitch Markers: Stitch markers are essential for keeping track of your progress and marking important points in the pattern such as decreases or color changes.
- Tapestry Needle: A tapestry needle with a large eye is essential for weaving in loose ends and sewing up any seams.
- Harry Potter-Inspired Embellishments: To truly capture the spirit of the Harry Potter series, consider adding custom embellishments such as themed buttons, patches, or embroidery designs to the finished beanie.
With these materials in hand, you will have everything you need to embark on a magical knitting journey and create your own Harry Potter beanie. Remember to follow the knitting pattern closely and let your imagination run wild with the possibilities of adding unique touches to your finished creation!
Choosing the Right Yarn for Your Harry Potter Beanie
Making a Harry Potter-themed beanie can be a fun and rewarding project for fans of the series. However, choosing the right yarn is crucial to ensure the final product not only looks great but also feels comfortable to wear on cold days. Here are some factors to consider when selecting yarn for your Harry Potter beanie:
1. Fiber Content
The fiber content of the yarn will determine its warmth, softness, and durability. For a cozy and comfortable beanie, consider using yarns made from natural fibers like wool or alpaca. These fibers have excellent insulation properties and will keep your head warm even in chilly weather. Additionally, they are soft to the touch, making the beanie comfortable to wear for extended periods.
Alternatively, if you prefer a lighter and more breathable option, you can opt for yarns made from plant-based fibers like cotton or bamboo. These fibers are great for the warmer months or if you live in a climate with mild winters.
2. Weight
The weight of the yarn refers to its thickness or thinness. It is important to choose a weight that matches the desired look and feel of your beanie. Bulky or chunky yarns will create a cozy and thicker beanie, perfect for winter. On the other hand, sport or fingering weight yarns will result in a lighter and more fitted beanie, suitable for transitional seasons.
3. Color and Design
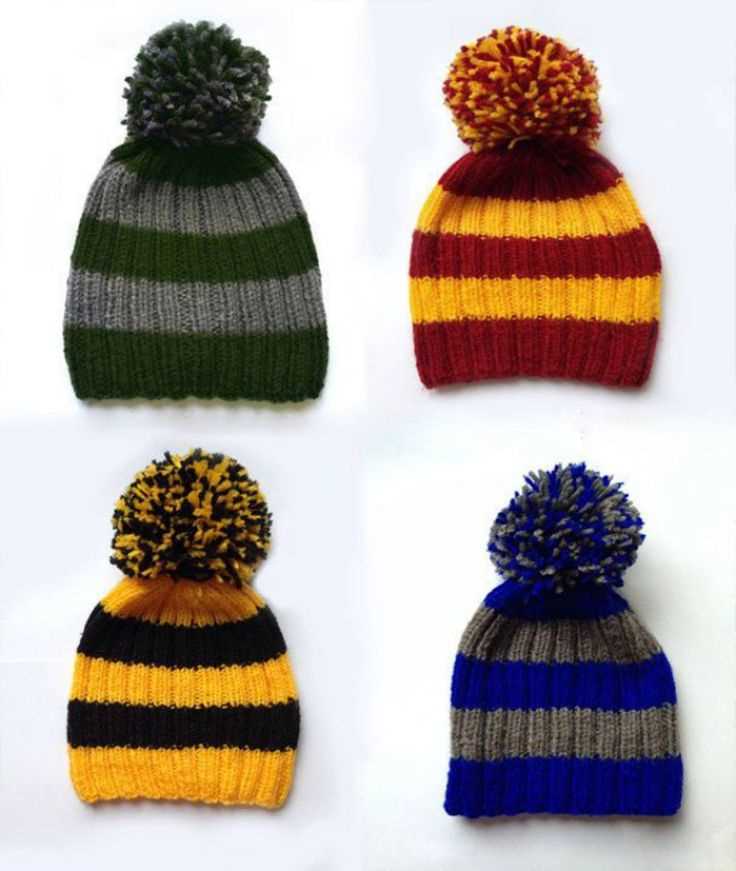
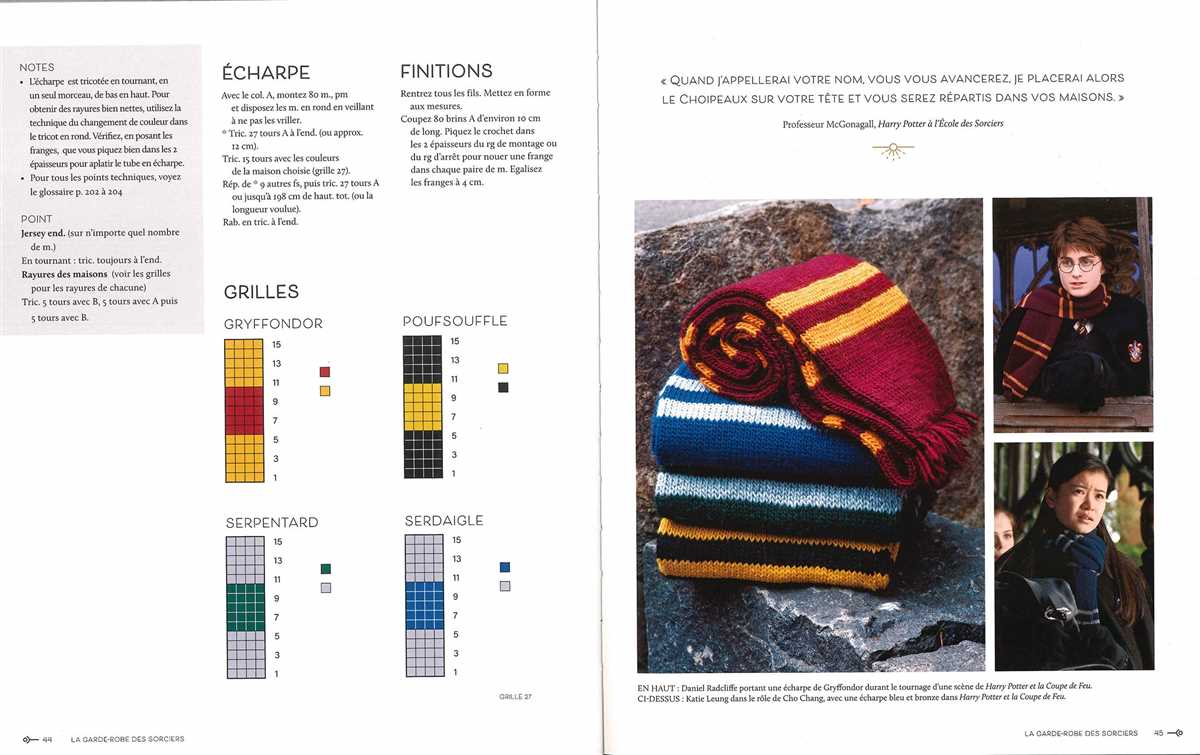
The color and design of the yarn can significantly impact the overall appearance of your Harry Potter beanie. Consider the colors associated with the different Hogwarts houses, such as red and gold for Gryffindor, green and silver for Slytherin, blue and bronze for Ravenclaw, and yellow and black for Hufflepuff. Incorporating these colors into your yarn choice can help create an authentic and recognizable Harry Potter beanie.
Furthermore, you can also choose yarns with speckles, variegations, or self-striping patterns to add visual interest and uniqueness to your beanie design.
4. Price and Availability
Lastly, consider your budget and the availability of the yarn. Some specialty yarns may be more expensive or harder to find, while others are readily available at affordable prices. It is essential to choose a yarn that fits within your budget and can be easily obtained to ensure a smooth and enjoyable knitting experience.
Remember to also check the yardage or meterage of the yarn to ensure you have enough for your project without running out halfway through.
- Consider the fiber content, such as wool or cotton, for warmth and comfort.
- Choose the appropriate weight yarn for the desired thickness of your beanie.
- Incorporate colors and designs that represent the different Hogwarts houses.
- Consider the price and availability of the yarn to stay within your budget.
Selecting the Perfect Needles for Your Harry Potter Beanie
When it comes to knitting your very own Harry Potter beanie, selecting the perfect needles is crucial to ensure your project turns out just right. The right needles can make a world of difference in the final outcome, so it’s important to consider a few factors when making your selection.
1. Needle Size: One of the first things to consider when choosing needles for your beanie is the size. The size of the needles will determine the gauge and tension of your stitches, which can affect the overall fit and appearance of the beanie. The pattern you’re following should specify the recommended needle size, so be sure to check that and choose accordingly.
2. Material: The material of the needles can also impact your knitting experience. Different materials have different characteristics, such as flexibility and smoothness, which can affect the ease of knitting. Choose a material that you’re comfortable with and that suits your knitting style. Common materials include bamboo, wood, metal, and plastic.
Once you’ve considered the needle size and material, you can then choose your preferred needle type, such as straight needles, double-pointed needles, or circular needles, based on your personal preference and the technique required by the pattern. Remember to take your time when selecting the perfect needles for your Harry Potter beanie as it can greatly contribute to the success of your knitting project.
Getting Started: Casting on Stitches for Your Harry Potter Beanie
When starting your knitting project for a Harry Potter-themed beanie, the first step is to cast on the stitches. Casting on creates a foundation row of stitches that will form the brim of the beanie. There are different methods you can use to cast on, but we will explore a basic and commonly used technique called the long tail cast on.
Step 1: To begin, measure a long tail of yarn, leaving a tail that is approximately three times the width of the finished beanie. This extra length is necessary for the cast on process.
Step 2: Hold the tail of the yarn in your right hand and the working end (connected to the yarn ball) in your left hand. Create a slip knot by making a loop with the working end over the tail end. Insert the working end through the loop, tighten the knot, and place it onto one of the knitting needles. This slip knot will count as your first cast-on stitch.
Note: You can use a knitting needle one size larger than the size you will be using for the rest of the project to make casting on easier.
Step 3: With the slip knot on the needle, hold the needle with both hands and position your fingers behind the yarn, allowing it to rest on your index finger and thumb. This will create tension in the yarn, making it easier to work with.
Step 4: Using your right hand, bring the needle over the yarn. Then, bring the needle under the yarn, creating a loop. Insert the needle into the loop from front to back, making sure to keep the loop on the needle.
Step 5: Slide the loop onto the needle, tightening it slightly to form the second cast-on stitch. Repeat steps 4 and 5 until you have cast on the desired number of stitches for your beanie project. Keep the tension of the stitches consistent to ensure an even brim.
Remember, the number of stitches you cast on will vary depending on the size of the beanie and your gauge. Be sure to check your knitting pattern for the recommended number of cast-on stitches.
Creating the Ribbing for Your Harry Potter Beanie
When knitting a Harry Potter beanie, one of the key steps is creating the ribbing. The ribbing is the band of stitches that sits at the brim of the beanie and helps it fit snugly on the head. It also adds a decorative touch to the overall design.
To get started with the ribbing, you will need to cast on the appropriate number of stitches. This number will depend on the size of the beanie you are knitting and the desired width of the ribbing. It is important to choose a stitch pattern for the ribbing that will create a nice stretchy and textured effect. The most common ribbing stitch pattern is the 1×1 rib, which alternates between knitting and purling each stitch. This creates a stretchy and reversible ribbing.
Once you have cast on the stitches and chosen your stitch pattern, you will continue working the ribbing for a certain number of rows. The number of rows will depend on the desired length of the ribbing. Typically, the ribbing is about 1-2 inches in length. Remember to keep counting your rows as you work to ensure consistency in length.
After completing the ribbing, you can then transition to the main body of the beanie, where you will continue knitting in the desired stitch pattern. The ribbing adds a nice touch to the overall design and helps create a comfortable and snug fit for the Harry Potter beanie. So make sure to take your time and create a beautiful ribbing to enhance your beanie.
Knitting the Body of Your Harry Potter Beanie
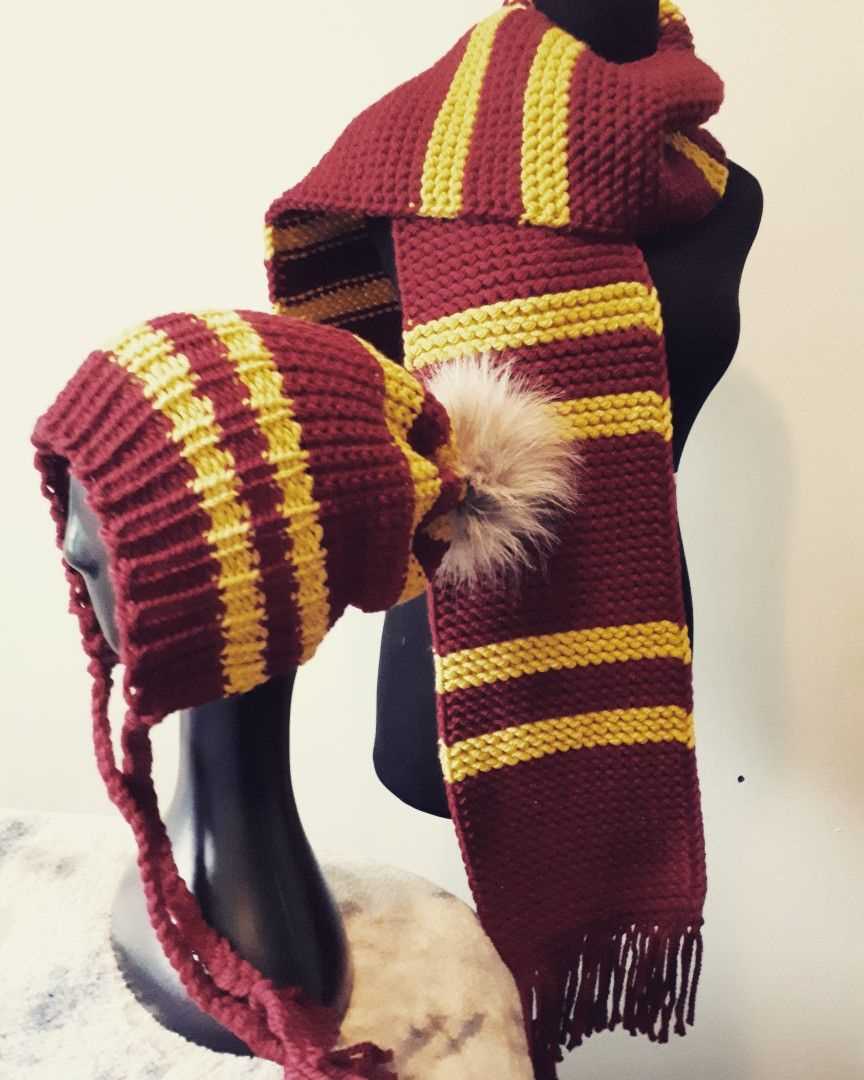
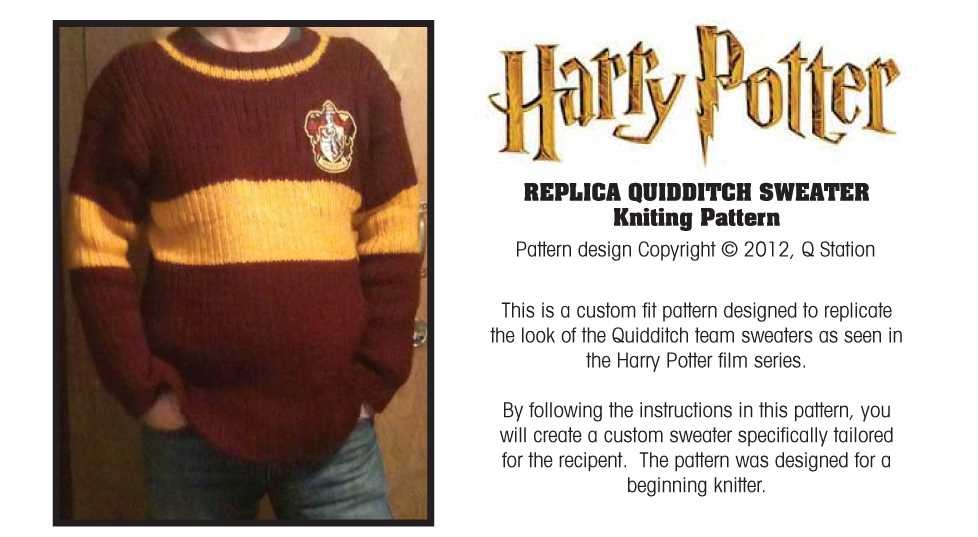
Once you have completed the ribbed brim of your Harry Potter beanie, it’s time to move on to knitting the body of the hat. This is where you will start to see the pattern of the classic Hogwarts striped design come to life.
To begin, you will need two different yarn colors, one for the main body of the hat and another for the stripes. You can choose your favorite house colors or opt for the traditional Gryffindor red and gold. Start by joining your main color yarn and knit several rows in a round until you reach your desired length for the body of the beanie.
1. Stripe Placement: To create the iconic Harry Potter striped design, you will need to strategically place your contrasting color yarn for the stripes. Decide how wide you want each stripe to be and mark the locations with stitch markers or a different color yarn. The number of rows you knit in the main color before switching to the stripes will depend on the size and design you prefer.
2. Adding the Stripes: Once you have marked the positions for your stripes, it’s time to start adding them to your beanie. Cut a length of the contrasting color yarn and join it to your work at one of the marked locations. Knit the specified number of rows in the contrasting color, making sure to weave in the loose ends later to secure them in place.
3. Continuing the Body: After knitting the specified number of rows for each stripe, switch back to your main color yarn and continue knitting in the round. As you knit, be mindful of maintaining an even tension and avoiding any gaps or loose stitches where the color changes occur.
4. Finishing Up: Once you have reached your desired length for the body of the beanie and completed all the stripes, you can start decreasing the stitches to shape the crown of the hat. Follow the pattern instructions for decreasing stitches to create a smooth and tapered shape. Finally, cut the yarn, leaving a long tail for sewing up the top of the hat, and bind off all the remaining stitches.
By following these steps, you will be able to knit the body of your Harry Potter beanie and create a hat that is both stylish and true to the iconic Hogwarts design. Enjoy the process and embrace your love for all things magical!
Adding the Harry Potter Logo to Your Beanie
If you’re a fan of Harry Potter and love to knit, why not combine your passions and add the iconic Harry Potter logo to your beanie? Whether you’re making it for yourself or as a gift for a fellow Potterhead, incorporating the logo is a great way to showcase your love for the magical series.
Materials needed:
- Harry Potter logo patch
- Yarn in your chosen beanie color
- Knitting needles in the appropriate size
- Tapestry needle
- Scissors
Instructions:
- Start by knitting your beanie using the pattern of your choice. Make sure to leave enough space on the front of the hat for the logo.
- Once your beanie is complete, position the Harry Potter logo patch where you want it to be on the front of the hat. You may need to pin it in place to ensure it doesn’t move while you’re attaching it.
- Thread your tapestry needle with a matching yarn color.
- Starting from the back of the beanie, carefully stitch around the edges of the logo patch. Make sure to secure it firmly to the hat, ensuring it won’t come loose with wear.
- Once the logo is securely attached, weave in any loose ends of yarn and trim them with your scissors.
And there you have it – your very own Harry Potter beanie with the iconic logo! Wear it proudly as a Potterhead and showcase your love for the magical world.
Shaping the Crown of Your Harry Potter Beanie
Creating the crown of your Harry Potter beanie is an important step in completing the hat. This is where you will shape the top of the beanie to fit snugly on your head. To achieve the iconic pointed shape of the beanie, follow these steps:
1. Decrease Rounds:
Start by knitting two stitches together, known as a decrease stitch, at regular intervals around the hat. This will reduce the number of stitches and create a tapered effect. Repeat this decrease round every few rows, gradually reducing the stitch count. Be sure to refer to the pattern and follow the specified stitch count and placement for your hat size.
2. Shaping the Point:
As you continue to decrease stitches, the crown of your beanie will begin to take shape. Once you have reached the desired stitch count, transition to knitting in the round without any further decreases. At this point, your beanie should have a noticeable point at the top.
Note: Different knitting patterns may vary in their instructions for shaping the crown, so be sure to carefully follow the specific pattern you are using. Some patterns may include additional shaping techniques, such as using double-pointed needles or dividing the stitches into sections for more intricate crown designs.
To enhance the accuracy and symmetry of your beanie’s crown, you can use stitch markers to help keep track of your decreases and ensure an even distribution. This can be especially helpful if your pattern includes a specific stitch count for each decrease round.
Once the crown of your Harry Potter beanie is shaped to your satisfaction, you can continue knitting the body of the hat according to the pattern instructions. Adding any finishing touches, such as ribbed edges or colorwork motifs, will further accentuate the magical appeal of your beanie.
Finishing Touches: Binding off Stitches and Weaving in Ends
Once you have completed knitting your Harry Potter beanie, the next step is to bind off the stitches and weave in the ends. Binding off is the process of securing the last row of stitches and creating a finished edge. This prevents the stitches from unraveling and adds a polished look to your project.
To bind off, you will need a tapestry needle and a pair of scissors. Start by knitting the first two stitches as normal. Then, using the left-hand needle, lift the first stitch over the second stitch and off the right-hand needle. Continue knitting one stitch and then lifting the previous stitch over the newly knitted stitch. Repeat this process until you have one stitch remaining on the right-hand needle.
Once all the stitches have been bound off, cut the yarn, leaving a tail of about 6 inches. Thread this tail onto the tapestry needle and insert it through the last stitch. Gently pull the yarn tight to secure the stitch. Now it’s time to weave in the ends. Thread the other end of the yarn onto the tapestry needle and insert it into the fabric, following the path of the stitches. Continue weaving the yarn in and out of the stitches for about an inch, taking care to avoid making the fabric pucker.
To ensure that the ends are secure and won’t come undone with wear, weave the yarn in different directions to distribute the tension. Once you’re satisfied with how the ends are woven in, trim any excess yarn close to the fabric. This will give your beanie a neat and tidy finish.
By binding off the stitches and weaving in the ends, you are completing the final steps of your Harry Potter beanie knitting project. With a little attention to detail, your beanie will have a professional look and be ready to wear or gift to a fellow Harry Potter fan!
Styling and Wearing Your Hand-Knitted Harry Potter Beanie
Once you’ve finished knitting your Harry Potter beanie, you’re ready to style and wear it with pride. Here are some tips for making the most of your handmade accessory:
1. Pair it with a Hogwarts-inspired outfit
Complete the wizarding world look by pairing your beanie with a Hogwarts-inspired outfit. Whether you’re a Gryffindor, Slytherin, Hufflepuff, or Ravenclaw, wear your house colors proudly and channel your inner wizard or witch.
2. Add a wand as an accessory
Enhance the magical vibe by adding a wand as an accessory. Whether it’s a replica from the movies or a DIY creation, a wand will complement your beanie and complete the Harry Potter-themed ensemble.
3. Use it as a cosplay accessory
If you’re a fan of cosplaying, your hand-knitted Harry Potter beanie can be a versatile accessory. Pair it with other cosplay elements and bring your favorite character from the wizarding world to life.
4. Keep warm in style

Aside from its magical aesthetic, the beanie also serves its intended purpose: keeping your head warm. Wear it during chilly days or while sipping butterbeer in a cozy café. You’ll stay comfortable and stylish all at once.
5. Gift it to a fellow Harry Potter enthusiast
If you’re feeling generous, consider gifting your beanie to a fellow Harry Potter enthusiast. Spread the magic and share the joy of having a unique and handmade accessory that celebrates the beloved wizarding world.
In conclusion, knitting your own Harry Potter-themed beanie allows you to express your love for the series while staying warm and stylish. Whether you’re embracing your favorite Hogwarts house or incorporating it into your cosplay, this accessory is a must-have for any fan. Enjoy the process of making it and wear it with pride!
Q&A:
What is a Harry Potter beanie knitting pattern?
A Harry Potter beanie knitting pattern is a set of instructions that guides you on how to knit a beanie featuring designs or motifs inspired by the Harry Potter series, such as the lightning bolt scar, the Hogwarts crest, or the house emblems.
Where can I find a Harry Potter beanie knitting pattern?
You can find Harry Potter beanie knitting patterns on various websites and online platforms that offer knitting patterns, such as Ravelry, Etsy, and knitting blogs. You can also find them in knitting books dedicated to Harry Potter-inspired patterns.
Are there different styles or variations of Harry Potter beanie knitting patterns?
Yes, there are different styles and variations of Harry Potter beanie knitting patterns. Some patterns may include colorwork to create the desired designs, while others may incorporate different stitch patterns or techniques. You can also find patterns for different sizes, from children to adults.
What materials do I need to knit a Harry Potter beanie?
The materials needed to knit a Harry Potter beanie will vary depending on the specific pattern you choose. Generally, you will need knitting needles in the appropriate size, yarn in the desired colors, and any additional materials specified in the pattern, such as a yarn needle or stitch markers.
Are Harry Potter beanie knitting patterns suitable for beginners?
Some Harry Potter beanie knitting patterns may be suitable for beginners, especially those that use basic knitting techniques and stitches. However, others may require more advanced skills, such as colorwork or working with multiple stitch patterns. It’s important to carefully read the pattern instructions and choose one that matches your skill level.