
Knitting is a timeless craft that allows for endless creativity and personal expression. One popular pattern that has been making a splash in the knitting world is the knitted fishtail pattern. This eye-catching design resembles the scales of a fish and adds a unique texture to any knitted project.
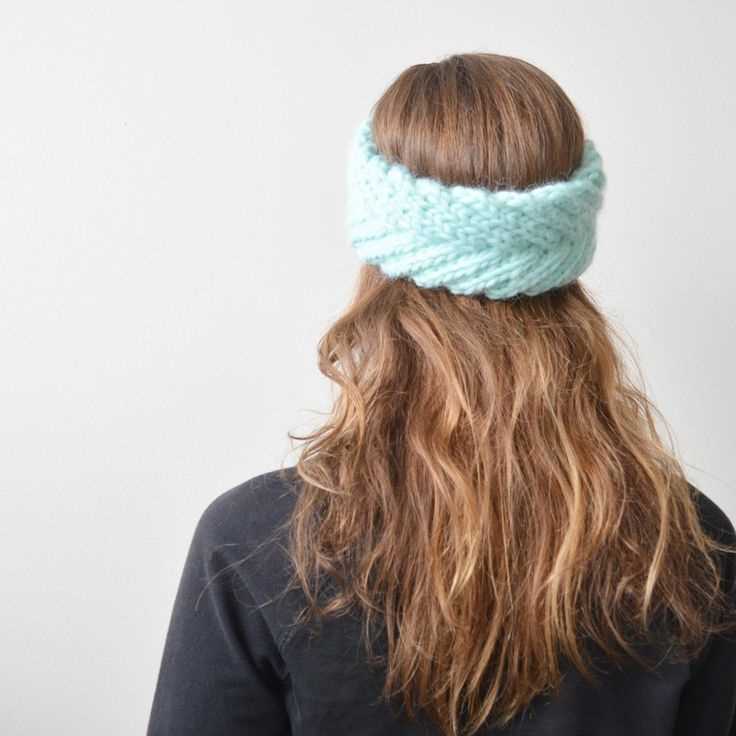
The knitted fishtail pattern is created by alternating knit and purl stitches, making it a great choice for knitters of all skill levels. With a bit of practice, even beginners can create stunning pieces using this pattern. Whether you’re knitting a cozy scarf, a stylish hat, or a warm sweater, the fishtail pattern is sure to bring a touch of elegance and sophistication to your project.
The beauty of the knitted fishtail pattern lies in its versatility. By simply adjusting the number of stitches and the size of your needles, you can create a variety of different looks and textures. This pattern is perfect for adding interest to plain garments or for creating intricate designs on accessories like gloves and socks. With so many possibilities, it’s no wonder that the knitted fishtail pattern is a favorite among knitters everywhere.
What is a Knitted Fishtail Pattern?
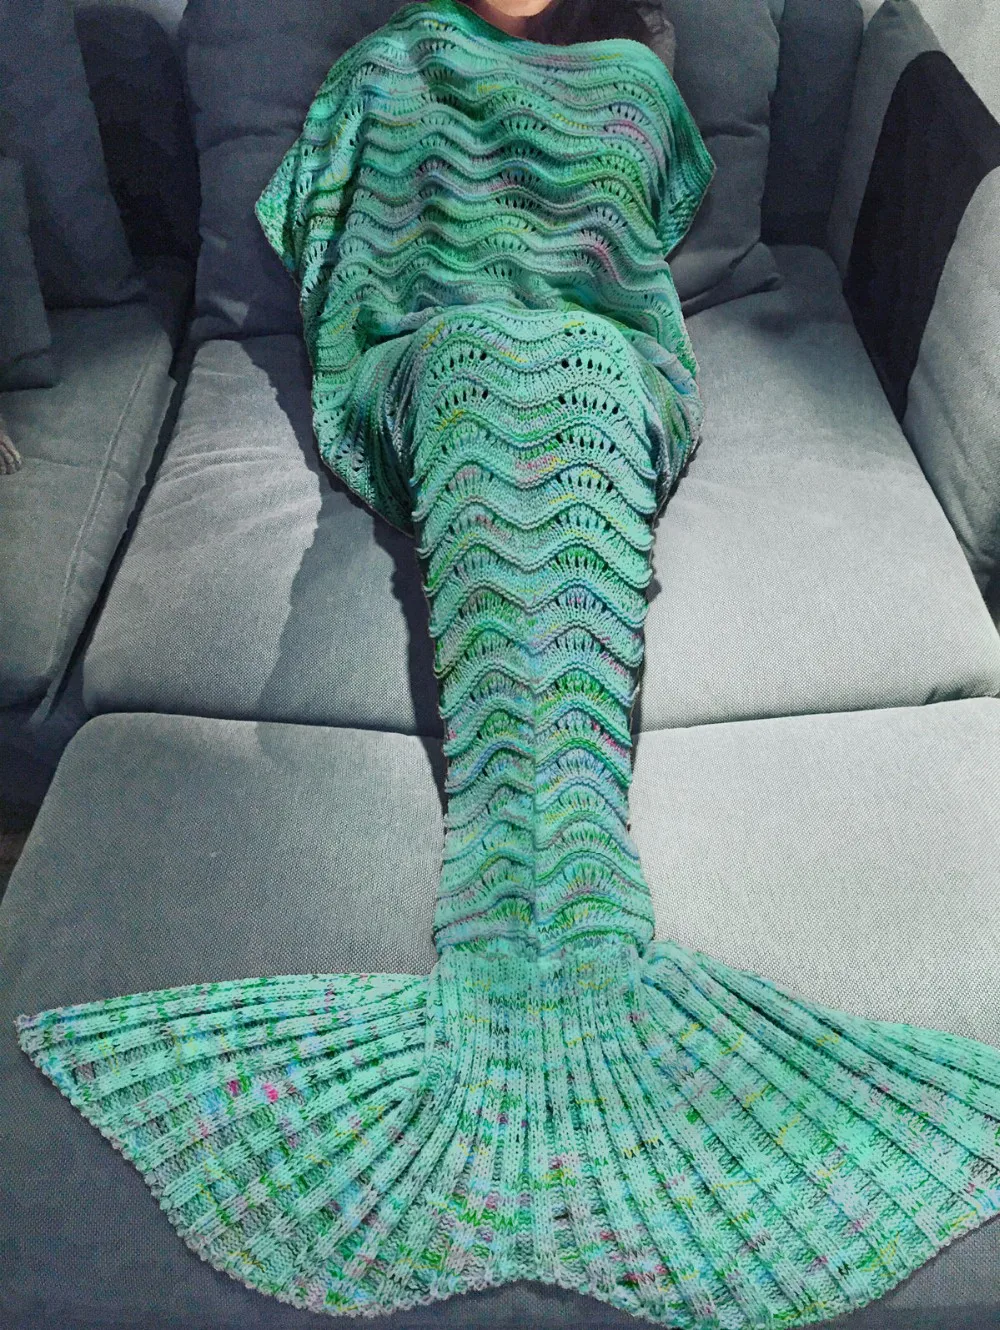
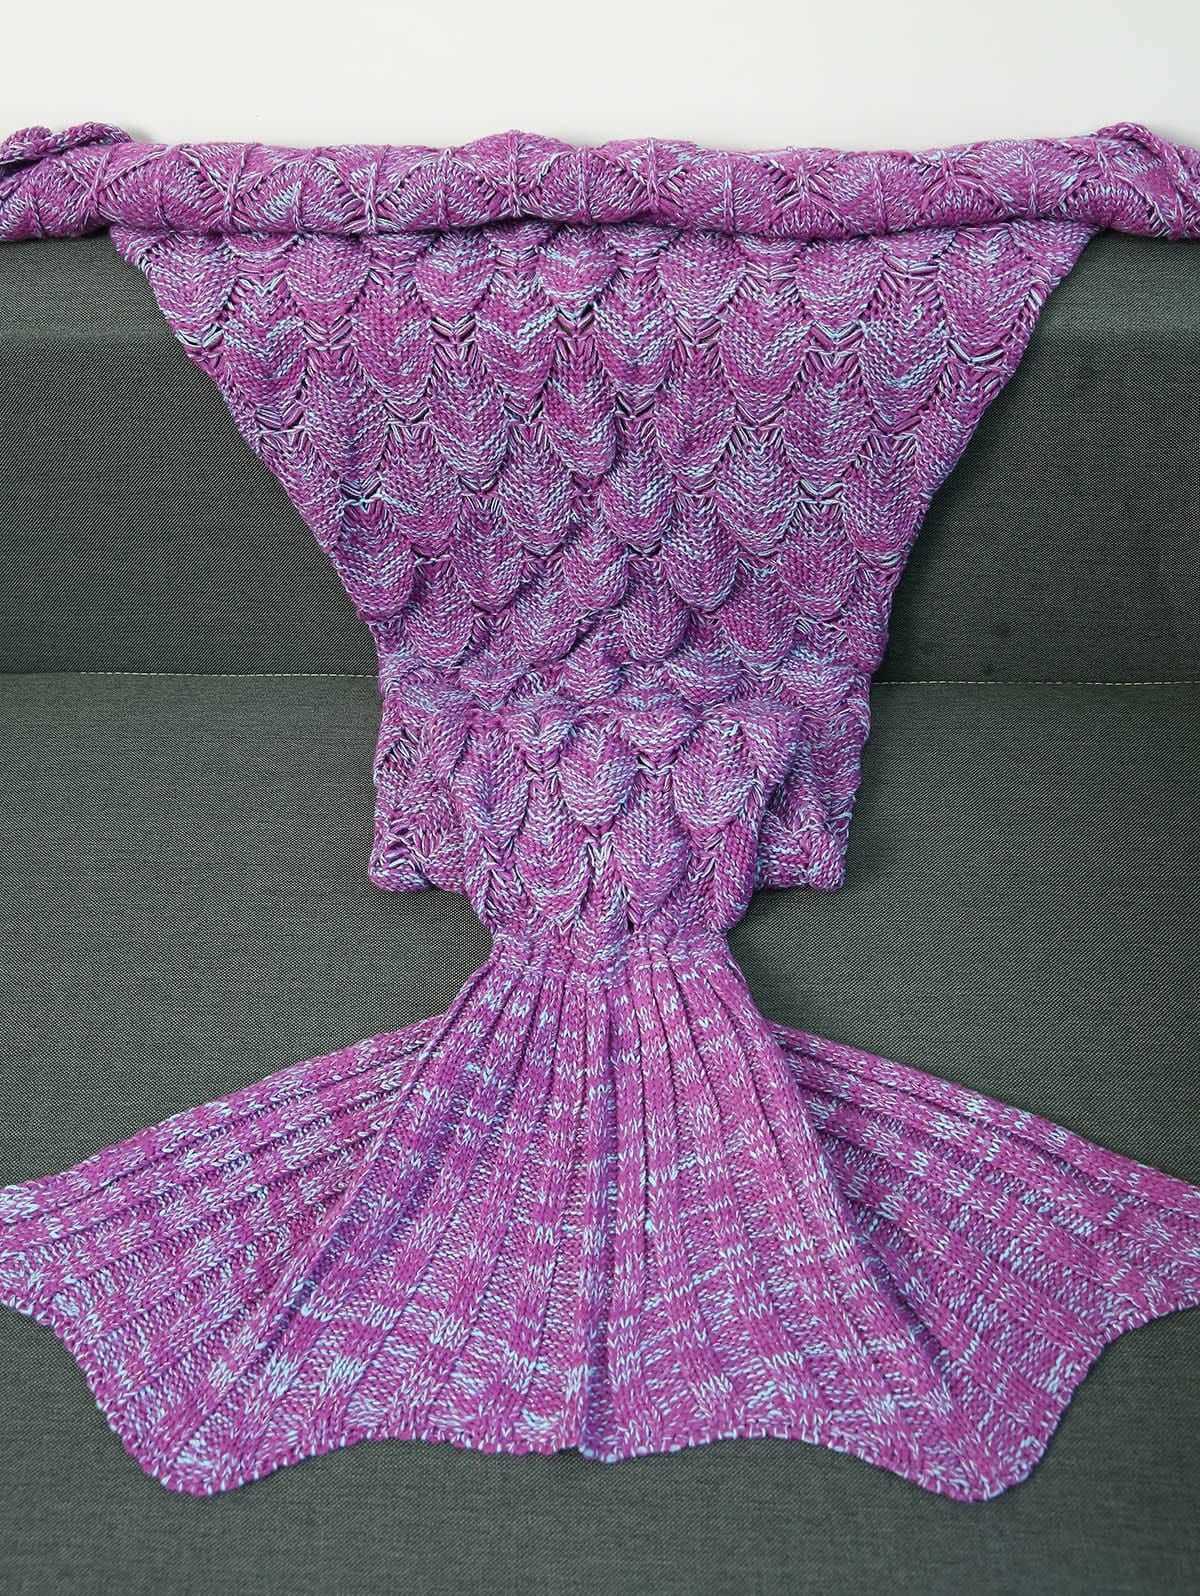
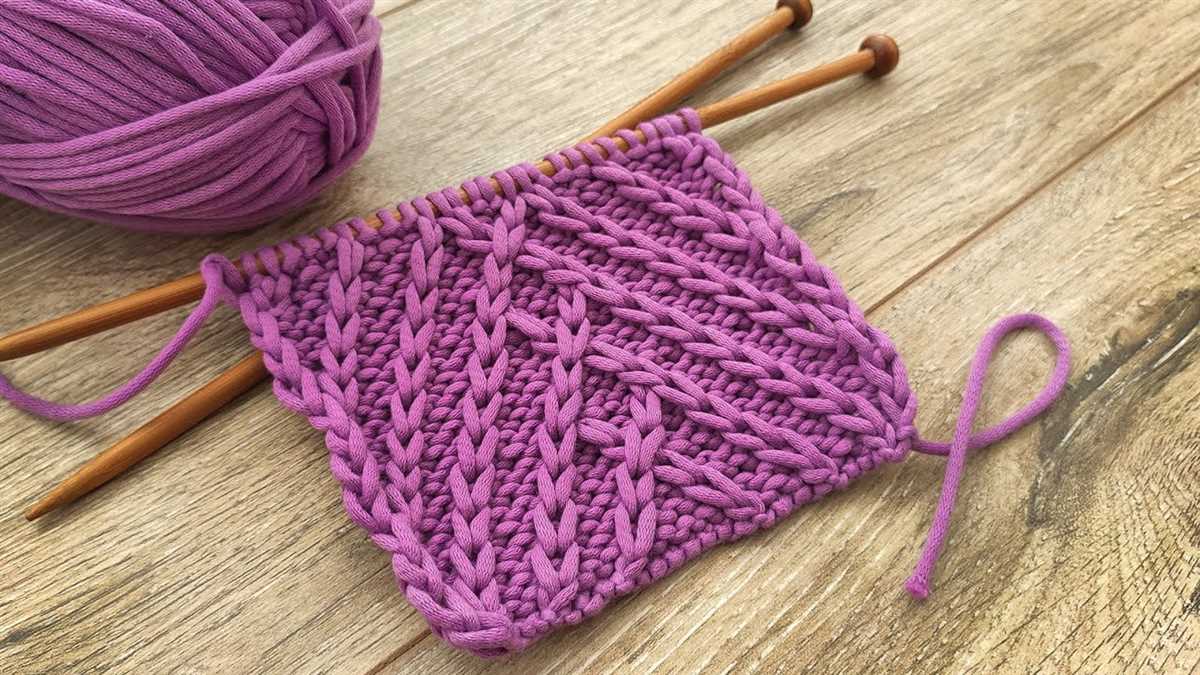
A knitted fishtail pattern is a type of knitting stitch that creates a textured and visually appealing design resembling fish scales or fishtails. It is a popular choice for various knitting projects, including scarves, hats, blankets, and sweaters. This pattern adds an interesting and unique touch to any knitted item, making it stand out and catch the eye.
The knitted fishtail pattern is achieved by using a combination of knit and purl stitches in a specific sequence. This sequence creates a series of raised lines or ridges that resemble the scales of a fish. The texture and depth of the pattern can be enhanced by using different yarn weights and colors, allowing for endless variations and customization.
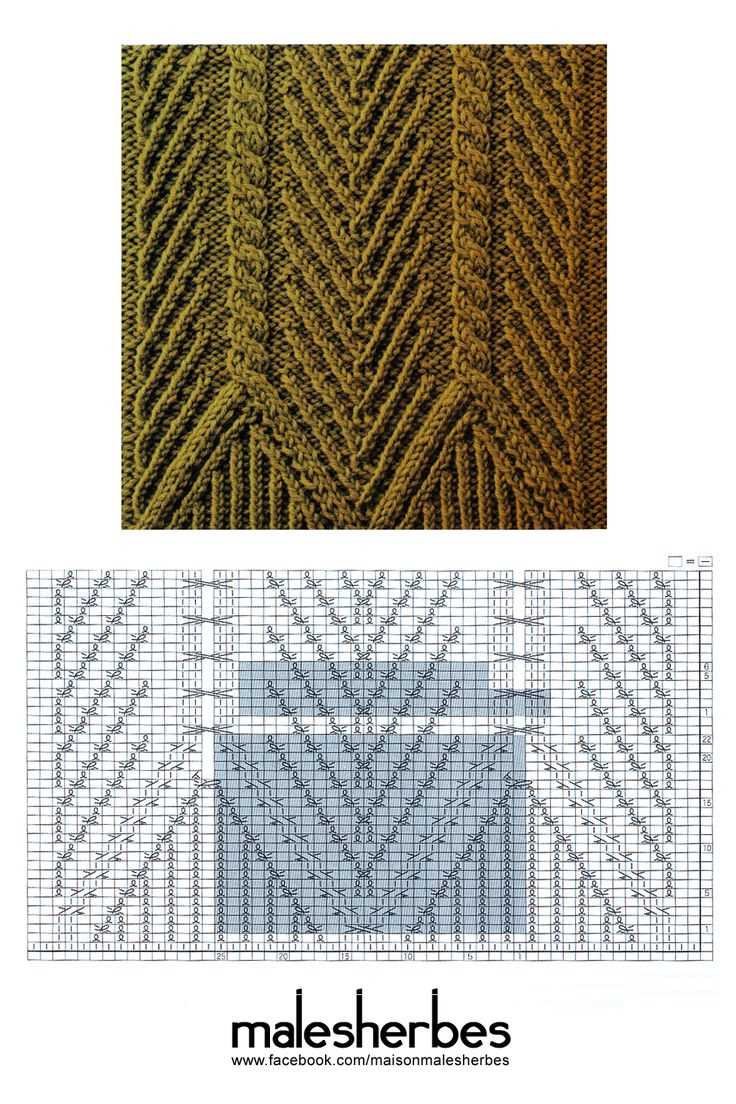
To create a knitted fishtail pattern, you will typically follow a set of instructions or a chart that outlines the sequence of stitches. The pattern may involve repeating a specific set of stitches or incorporating additional techniques such as yarn overs or decreases. It is important to pay attention to the instructions and maintain an even tension throughout your knitting to achieve a cohesive and balanced design.
Whether you are a beginner or an experienced knitter, the knitted fishtail pattern offers an exciting challenge and an opportunity to showcase your skills. With its intricate texture and beautiful end result, this pattern is sure to impress and delight both the knitter and the recipient of the finished project.
How to Create a Knitted Fishtail Pattern
If you’re looking for a fun and unique knitting project, the knitted fishtail pattern is a great option. This pattern creates a beautiful textured design that resembles the scales of a fish. Whether you’re a beginner or an experienced knitter, you can easily create this pattern with a few simple steps.
Materials:
- Knitting needles – size 8 or size needed for gauge
- Yarn – medium weight yarn in the color of your choice
- Tapestry needle
Step 1: Cast on
Start by casting on an even number of stitches on your knitting needles. This will determine the width of your project. You can choose any number depending on the size you want. For example, if you want a narrower piece, you can cast on 20 stitches, or if you want a wider piece, you can cast on 40 stitches.
Step 2: Knit the fishtail pattern
To create the fishtail pattern, you will alternate between knits and purls on each row. Start by knitting the first stitch, then purling the next stitch. Continue this pattern until the end of the row. On the next row, you will start with a purl stitch, followed by a knit stitch, and continue alternating in this manner. Repeat these two rows until your project reaches the desired length.
Step 3: Bind off

Once you have completed the desired number of rows, it’s time to bind off. Knit the first two stitches and then use your left needle to lift the first stitch you knitted over the second stitch and off the needle. Knit the next stitch and repeat the process until you have one stitch remaining. Cut the yarn, leaving a tail, and pull it through the last stitch to secure it.
And there you have it! You have successfully created a knitted fishtail pattern. This pattern can be used to make a variety of items such as scarves, blankets, or even garments. Get creative with your color choices and experiment with different yarn weights to create unique and personalized pieces. Happy knitting!
Step 1: Gather Your Materials
Before you start knitting the fishtail pattern, it is important to gather all the necessary materials. Having everything ready will make the knitting process smoother and more enjoyable. Here is a list of items you will need:
1. Yarn
Choose a yarn that is suitable for the fishtail pattern. The yarn should be soft and easy to work with. You can select a color that complements your personal style or matches the intended recipient’s preferences.
2. Knitting Needles
Select the right size of knitting needles for your yarn. The label on the yarn usually suggests the appropriate needle size. Make sure you have both a pair of straight needles and a circular needle if needed for the pattern.
3. Stitch Markers
Stitch markers are essential for keeping track of your progress and marking specific stitches or sections. They come in different shapes and sizes, so choose the type that works best for you.
4. Scissors
A pair of sharp scissors is necessary for cutting the yarn and weaving in loose ends. Make sure they are easily accessible during the knitting process.
5. Tapestry Needle
A tapestry needle, also known as a yarn needle, is used for sewing up seams and weaving in loose ends. It has a large eye that can accommodate yarn, making it easy to finish your project neatly.
6. Row Counter
A row counter is a handy tool for keeping track of the number of rows you have knitted. It can be a physical counter or a digital one on your phone or knitting app.
Once you have gathered all the necessary materials, you are ready to move on to the next step of knitting the fishtail pattern.
Step 2: Cast On Stitches
To begin creating the knitted fishtail pattern, you will need to cast on stitches. Casting on is the process of creating the foundation row of stitches on your knitting needle. There are different methods for casting on, but for this pattern, we will use the long-tail cast on method.
Long-Tail Cast On Method:
- Hold the yarn in your right hand, with the tail end of the yarn over your thumb and the working end of the yarn over your index finger.
- Take the knitting needle in your left hand and use it to create a slipknot with the yarn. To do this, insert the needle into the loop of yarn on your thumb from underneath, and pull the working end of the yarn through the loop, creating a new loop on the needle.
- Hold the needle with the slipknot in your right hand, and use your left hand to hold the tail end of the yarn tautly.
- Insert the needle under the strand of yarn that is over your index finger, from front to back, and then over the strand of yarn that is over your thumb.
- Bring the needle back under the strand of yarn that is over your index finger, going from back to front, and then under the loop of yarn that is on your thumb.
- Repeat steps 4 and 5 until you have cast on the desired number of stitches.
Once you have cast on the required number of stitches, you are ready to start the next step of the knitted fishtail pattern.
Step 3: Start the Fishtail Pattern
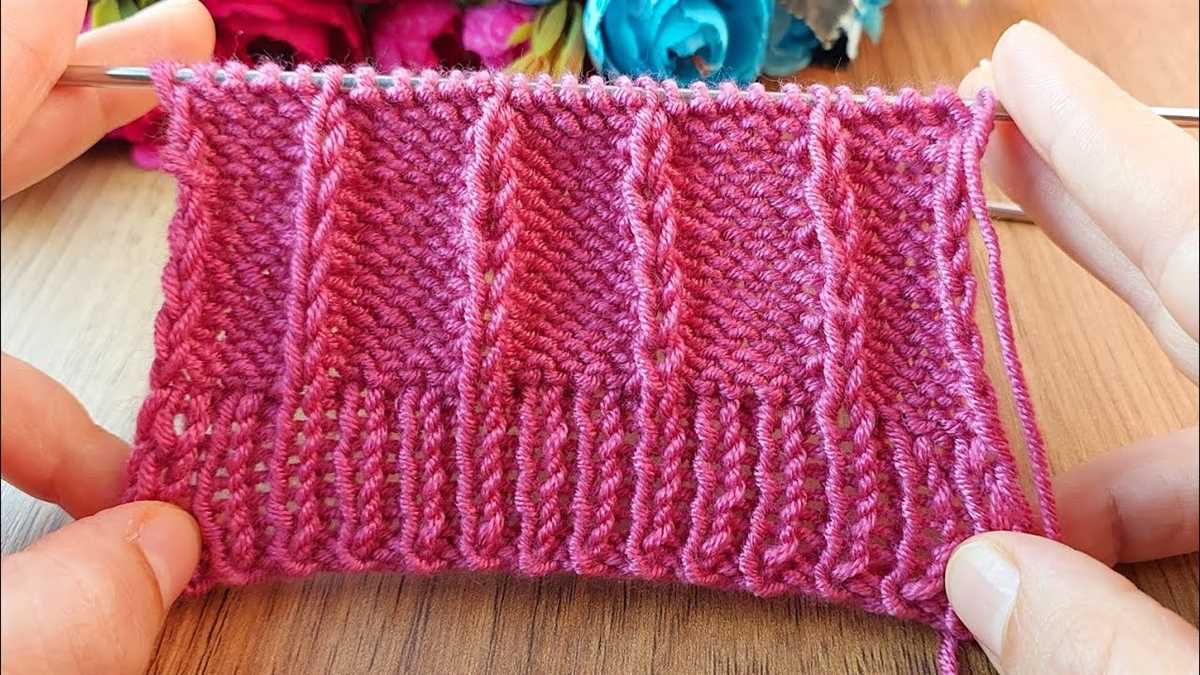
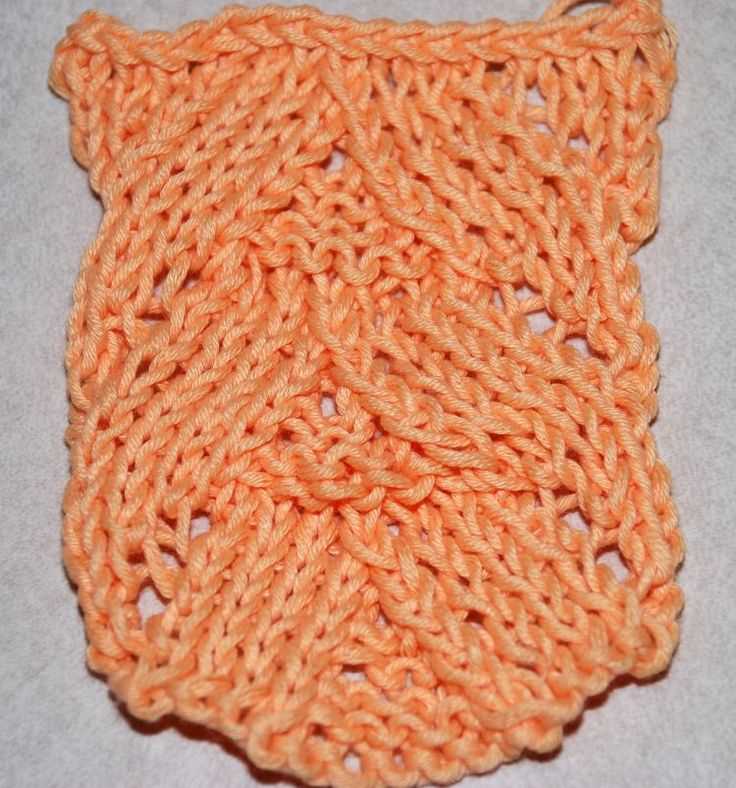
After you have cast on the desired number of stitches for your project, you are ready to start the fishtail pattern. This pattern creates a beautiful texture that resembles fish scales, hence the name. It is a simple yet stunning pattern that adds visual interest to any knitted garment.
To begin, knit the first two stitches of your row as usual. Then, instead of knitting the next stitch, you will insert your right needle into the second stitch on your left needle and slip it purlwise. This means you will insert the right needle into the stitch as if you were going to purl it, but without actually purling it.
Next, you will knit the first stitch that you slipped onto your right needle. To do this, insert the left needle into the front of the first slipped stitch from left to right, and then wrap the working yarn around the right needle, just like you would for a regular knit stitch. Knit the stitch, and the first two stitches of the fishtail pattern are complete.
Repeat these two steps for the remaining stitches in your row. Slip the next stitch purlwise, then knit the next stitch. Keep repeating these steps until you reach the end of the row. This will create a staggered pattern of slipped and knit stitches, resembling fish scales.
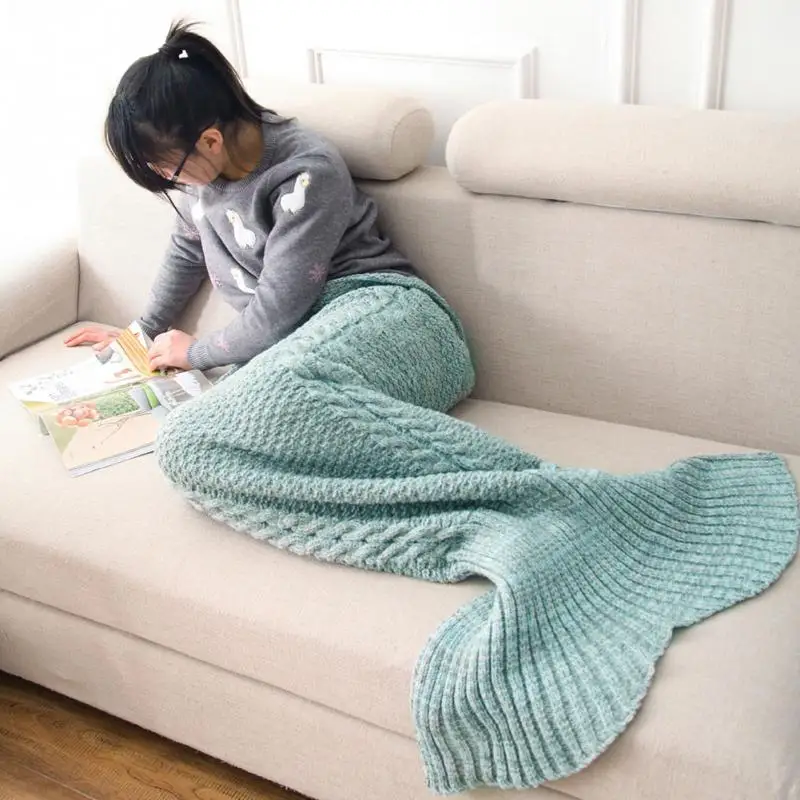
Continue working the fishtail pattern for the desired number of rows, or until your project reaches the desired length. Remember to always knit the first two stitches of each row for consistency. Once you have mastered the fishtail pattern, you can incorporate it into a variety of knitting projects, such as scarves, hats, and sweaters, to add a touch of elegance and texture.
Step 4: Continue the Fishtail Pattern
Once you have completed the first section of the knitted fishtail pattern, it is time to continue on to the next section. This step will involve repeating the previous pattern to create a beautifully intricate design.
To continue the fishtail pattern, you will need to follow the established pattern of alternating knits and purls. Start by knitting the first stitch, then purling the next stitch. Repeat this pattern throughout the row.
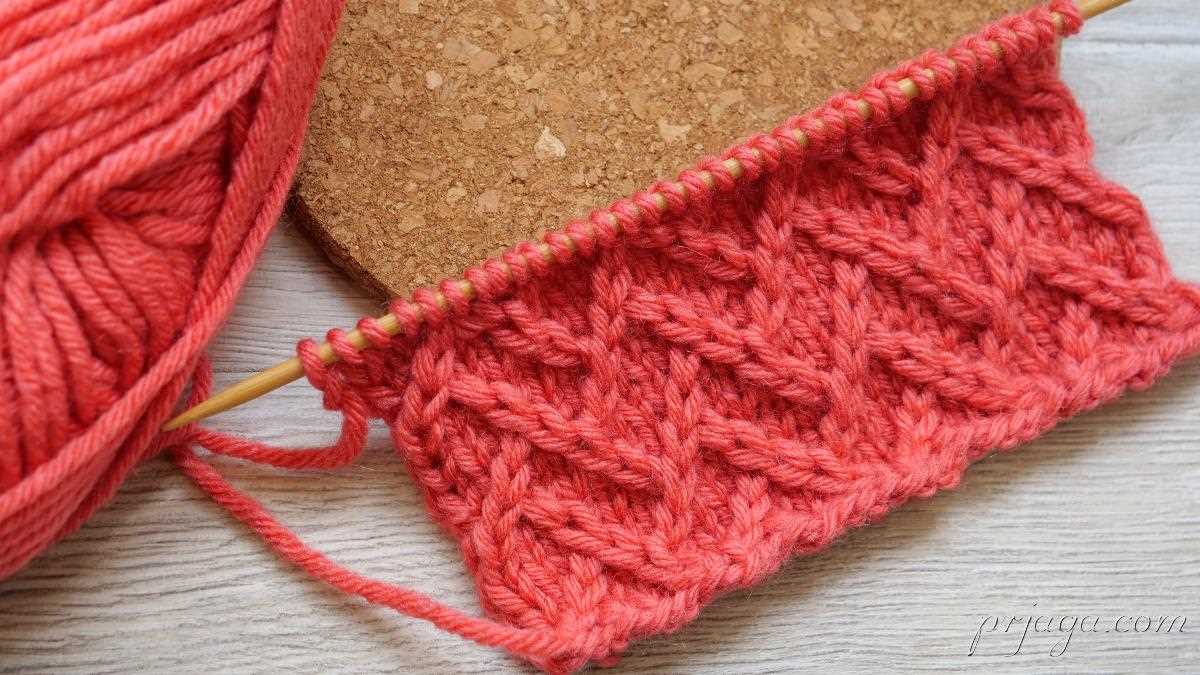
As you continue knitting the fishtail pattern, you will notice that the design begins to take shape. The alternating knits and purls create a textured pattern that resembles the scales of a fish. This intricate pattern is not only visually appealing but also adds depth and dimension to the finished project.
Continue working the fishtail pattern for as many rows as necessary to achieve the desired length or until the pattern instructions specify a different step. Remember to always follow the pattern instructions carefully, as they may include specific directions for shaping or increasing stitches.
By continuing the fishtail pattern, you are creating a unique and intricate fabric that can be used for a variety of projects. Whether you are knitting a scarf, hat, or sweater, the fishtail pattern adds a touch of elegance and sophistication to any design.
Step 5: Bind Off Stitches
After completing the desired number of fishtail pattern repeats, it’s time to bind off your stitches. This final step ensures that your project is finished off neatly and securely. Here’s how to bind off stitches in the knitted fishtail pattern:
- Start by knitting the first two stitches.
- Insert the left needle into the first stitch on the right needle.
- Pass the first stitch over the second stitch and off the right needle.
- Knit the next stitch on the left needle.
- Continue this process of passing the previous stitch over the next stitch and knitting the next stitch until only one stitch remains on the right needle.
- Cut the yarn, leaving a long tail, and thread it through the last stitch.
- Pull the tail tight to secure the final stitch.
Once you have bound off all the stitches, you can weave in any loose ends and block your project to enhance its shape and appearance. With these steps, you have successfully completed the knitted fishtail pattern and created a beautiful textured design in your knitting.
Tips for Knitting a Fishtail Pattern
If you’re looking to add an intricate and stylish touch to your knitting projects, the fishtail pattern is a great choice. This pattern creates a beautiful texture resembling fish scales, making it perfect for scarves, blankets, and other cozy items. To help you get started, here are some tips for knitting a fishtail pattern.
1. Choose the right yarn
When knitting a fishtail pattern, it’s important to choose the right yarn. A yarn with good stitch definition and a smooth texture will highlight the intricacy of the pattern. Many knitters prefer using a wool or acrylic blend yarn for this type of pattern.
2. Use a stitch marker
Since the fishtail pattern involves repeating a set of stitches, it’s helpful to use a stitch marker to keep track of your progress. Place the stitch marker at the beginning of each round or row to easily identify where each section begins and ends.
3. Pay attention to tension
When knitting a fishtail pattern, it’s important to maintain an even tension throughout your work. Uneven tension can result in distorted scales and an overall inconsistent appearance. Take your time and ensure that your stitches are evenly spaced and not too tight or loose.
4. Follow a clear pattern or chart
To successfully knit a fishtail pattern, it’s crucial to have a clear and easy-to-follow pattern or chart. Familiarize yourself with the symbols and instructions before you begin, and refer to the pattern as you work to ensure accuracy. Following a well-written pattern will make the process much smoother.
5. Block your finished project
Once you’ve completed your fishtail knitting project, don’t forget to block it. Blocking helps to even out the stitches, enhance the texture, and give the project a polished look. Follow the blocking instructions for your specific yarn and project to achieve the best results.
With these tips in mind, you’re ready to tackle a beautiful fishtail pattern. Enjoy the process of creating a unique and eye-catching knitted item!
Tip 1: Use the Right Yarn and Needle Size
When knitting a fishtail pattern, it is important to use the right yarn and needle size to achieve the desired results. The yarn and needle size can greatly affect the appearance and texture of the finished project.
It is recommended to choose a yarn that is suitable for the fishtail pattern, such as a medium weight yarn or a yarn specifically designed for textured stitches. Using the right yarn will ensure that the stitches are defined and the pattern stands out.
Additionally, the needle size should correspond to the yarn thickness. Using a needle that is too small or too large for the yarn can result in stitches that are too tight or too loose, respectively. It is important to read the yarn label and follow the recommended needle size for the best results.
Key Tip: To create a fishtail pattern with a nice drape, consider using a slightly larger needle size than recommended for the yarn. This will create a looser fabric and enhance the texture of the fishtail stitches.
By using the right yarn and needle size, you can ensure that your knitted fishtail pattern turns out both visually appealing and comfortable to wear. Take the time to select the appropriate materials and enjoy the process of creating a beautiful and unique piece of knitting.
Tip 2: Practice the Fishtail Stitch
The fishtail stitch is a stunning pattern that adds texture and visual interest to any knitted project. It involves creating a series of diagonal lines that resemble the scales of a fish. While it may seem complex at first, mastering the fishtail stitch is achievable with practice and patience.
To get started, it’s important to become familiar with the basic knitting stitches such as knit and purl. These stitches form the foundation of the fishtail stitch and will be used throughout the pattern. Once you have a solid understanding of these stitches, you can begin practicing the fishtail stitch.
- Choose a yarn and needle size that you are comfortable with. Thicker yarns and larger needles may make it easier to see and manipulate the stitches.
- Begin by casting on an even number of stitches. The fishtail stitch is worked over a multiple of two stitches.
- Row 1: *Knit 1, purl 1*. Repeat from * to * until the end of the row.
- Row 2: *Purl 1, knit 1*. Repeat from * to * until the end of the row.
- Repeat rows 1 and 2 until you have achieved your desired length.
- Practice keeping an even tension on your yarn to create uniform stitches. This will help ensure that your fishtail pattern looks clean and well-defined.
- As you become more comfortable with the fishtail stitch, you can experiment with different variations such as changing the number of knit and purl stitches in each row or adding additional rows of the pattern.
- Remember to take your time and enjoy the process. Knitting is a relaxing and creative hobby, and practicing the fishtail stitch can be a rewarding way to expand your skills.
By dedicating time to practice the fishtail stitch, you will soon be able to incorporate this beautiful pattern into your knitting projects, whether it’s a cozy scarf, a trendy hat, or a stylish sweater. Don’t be discouraged if it takes a few attempts to get the hang of it – like any new skill, it takes practice to achieve mastery. So grab your needles and yarn, and start practicing the fishtail stitch today!
Conclusion
In conclusion, experimenting with colors and variations can add a unique touch to your knitted fishtail pattern. By changing the colors of the yarn, you can create different effects and personalize your project. You can opt for a monochromatic look, where all the rows are knitted in the same color, or you can try using different colors for each row to create a bold and eye-catching design.
Additionally, you can also experiment with different variations of the fishtail pattern itself. You can try knitting shorter or longer rows, varying the number of stitches, or even adding different stitch patterns within the fishtail design. This allows you to create a variety of textures and visual interest in your knitted piece.
Remember, knitting is a creative and versatile craft, and by experimenting with colors and variations, you can truly make your fishtail pattern your own. Don’t be afraid to try different combinations and have fun with your knitting projects!